Kaco Powador 2002 Operating Manual
Hide thumbs
Also See for Powador 2002:
- Operating instructions manual (46 pages) ,
- Operating instructions manual (52 pages)

Related Manuals for Kaco Powador 2002


Summary of Contents for Kaco Powador 2002
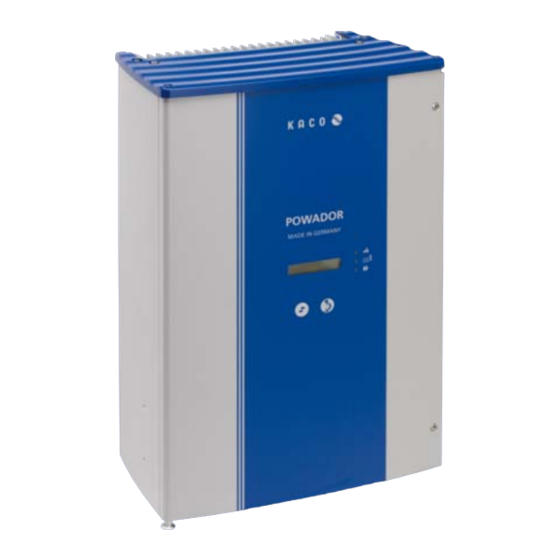
- Page 1 Powador 2002 | 3002 4202 | 5002 6002 Operating Manual English translation of German original...
-
Page 3: Table Of Contents
Installing the inverter ......21 13.1 EU Declaration of Conformity ......54 Opening the connection area ......21 Making the electrical connection ....21 Generator grounding (optional) .....26 Connecting the interfaces......... 27 Sealing the connection area ......31 Starting up the inverter........31 Operating Instructions Powador 2002-6002_EN Page 3... -
Page 4: General Notes
Failure to observe this warning may lead to serious bodily injury or death. CAUTION Low-risk hazard Failure to observe this warning will lead to minor or moderate bodily injury. CAUTION Risk of damage to property Failure to observe this warning will lead to property damage. Page 4 Operating Instructions for Powador 2002-6002_EN... - Page 5 Maximum power point (point on the current-voltage diagram for a PV generator at which the maximum amount of power can be drawn) Colour codes (in accordance with IEC 60757) Black Brown Blue GNYE Yellow-green Grey Operating Instructions for Powador 2002-6002_EN Page 5...
-
Page 6: Safety
Use in rooms where there is a risk of explosion, • Use in rooms where the humidity is higher than 95%, • Operation outside of the specifi cations intended by the manufacturer, • Standalone operation. Page 6 Operating Instructions for Powador 2002-6002_EN... -
Page 7: Protection Features
NOTE The EU declaration of conformity can be found in the appendix. For information on grid coupling, grid protection and safety parameters along with more detailed instructions see our web site at http://kaco-newenergy.de/en/site/index.xml. Operating Instructions for Powador 2002-6002_EN Page 7... -
Page 8: Description
Inverter with DC Inverter with DC disconnect disconnect Fuse Fuse Load Reference Feed-in meter counter Main switch Selective main switch Grid connection point Figure 1: Overview circuit diagram for a system with two inverters Page 8 Operating Instructions for Powador 2002-6002_EN... -
Page 9: Electrical Connection
N PE N PE Fuse Figure 2: Grid-side connection for systems with multiple inverters with single-phase grid monitoring 3.2.3 Electrical connection NOTE Note the grid-type-specifi c connection conditions (see section 7.2.1 on page 22) Operating Instructions for Powador 2002-6002_EN Page 9... - Page 10 Inverter diagram Figure 3: Inverter diagram Display Cable fi tting for interface cable LED indicators Connection board Control buttons RS232 port Fuse for generator grounding (optional) Night start button DC disconnect Mounting plate Page 10 Operating Instructions for Powador 2002-6002_EN...
- Page 11 100 kW. The power reduction is achieved using a ripple control receiver in KACO new energy GmbH inverters. If necessary, the power supply company can reduce the power of the system remotely using an addi- tional device from the Powador proLOG family.
- Page 12 Switch the DC disconnects from 1 (ON) to 0 (OFF). Connecting the inverter to the PV generator Switch the DC disconnects from 0 (OFF) to 1 (ON). Figure 5: DC disconnect Page 12 Operating Instructions for Powador 2002-6002_EN...
- Page 13 Operating status (see section 8.1 on page 13) Line current, feed-in current in A Generator voltage in V Power fed into the grid in W Generator current in A Temperature of the unit in °C Operating Instructions for Powador 2002-6002_EN Page 13...
- Page 14 Description 3.2.8.2 Software for direct monitoring Together with the Powador inverter, KACO-viso takes over the role of a data logger. It saves the data from the inverter and displays it in various diagram types as a daily or monthly representation.
-
Page 15: Technical Data
Circuit design Galvanically isolating high-frequency DC/DC converter with down- stream self-commutated inverter Clock frequency 17 kHz Grid monitoring Automatic disconnection device in accordance with DIN VDE 0126-1-1:2006-02 CE conformity Table 2: Electrical data Operating Instructions for Powador 2002-6002_EN Page 15... -
Page 16: Mechanical Data
DC connections 6 (2 x 3) MC-4 compatible solar plug connections Ambient temperature -20 °C to +60 °C (Powador 2002 / 3002) -25 °C to +60 °C (Powador 4202 / 6002) (> +40 °C Power derating at high ambient temperatures) Temperature monitoring >... -
Page 17: Transportation And Delivery
Carefully transport the inverter using the the carrying handles of the boxes. › Do not subject the inverter to shocks. For safe transportation of the inverter, use the holding openings in the carton. Figure 7: Transportation of the inverter Operating Instructions for Powador 2002-6002_EN Page 17... -
Page 18: Mounting The Inverter
Take care to ensure suffi cient ventilation of the inverter. › Immediately remove dirt, especially on vents. › Failure to observe these warnings may lead to inverter damage which is not covered by the KACO new energy GmbH manufacturer warranty. Page 18 Operating Instructions for Powador 2002-6002_EN... -
Page 19: Unpacking The Inverter
If the recommended minimum clearances are not observed, the inverter may go into power regula- tion mode due to insuffi cient ventilation and the resulting heat build-up. › Maintain minimum clearances. › Ensure suffi cient heat dissipation. Operating Instructions for Powador 2002-6002_EN Page 19... - Page 20 Clearance from the fl oor 500 mm Safety catch Safety catch Clearance from any other inverter: 700 mm (open) (closed) Figure 12: Minimum clearances/mounting plate Fixings for mounting Suspension bracket Mounting plate Safety catch Screws for mounting Page 20 Operating Instructions for Powador 2002-6002_EN...
-
Page 21: Installing The Inverter
Remove the screwdriver. The spring terminal is closed and the cable is held in place. The power section has two internal circuit board fuses. These are labelled F701 or F801 and F861 on the circuit board. Operating Instructions for Powador 2002-6002_EN Page 21... - Page 22 Overvoltage safety class DC: III, AC: III Overvoltage safety category DC: II, AC: III Figure 13: Connection area: Powador 2002-6002 6 (2 x 3) MC4-compatible DC plug connectors for Cable fi tting (M40) for AC connection PV generator DC disconnect...
- Page 23 If you have any queries, please contact your grid operator. single phase Table 5: Grid-type-specifi c connection conditions ACTIVITY Cables on the AC screw terminal must be re-tightened at regular intervals using the necessary tightening torque (see chapter 7.2 on page 21). Operating Instructions for Powador 2002-6002_EN Page 23...
- Page 24 A suitable crimping tool must be used to connect the stripped DC leads to the MC-4 coupling plug and coupling socket. Connect the MC-4 coupling plugs to the 3 DC positive and the 3 DC negative mating parts on the underside of the housing (see Figure 17 on page 25). Page 24 Operating Instructions for Powador 2002-6002_EN...
- Page 25 In addition, ensure that the PV generator has a total insulation resistance of more than 2.0 megohms, since the inverter will not feed in if the insulation resistance is too low. 4. Rectify any faults before connecting the DC generator. Operating Instructions for Powador 2002-6002_EN Page 25...
-
Page 26: Generator Grounding (Optional)
Activate grounding monitoring in the parameter menu. (See Section 8.3 on page 36) GN/YE GN/YE GN/YE BK BU GN/YE GN/YE GN/YE Figure 18: Powador 2002-3002 with generator grounding kit Figure 19: Powador 4202-5002-6002 with generator grounding kit (via PE terminal) Page 26 Operating Instructions for Powador 2002-6002_EN... -
Page 27: Connecting The Interfaces
Installing the inverter Authorised electrician GN/YE GN/YE GN/YE GN/YE Figure 20: Positive grounding on the Powador 2002-3002 Figure 21: Positive grounding on the Powador 4202- 6002 (via PE terminal) GN/YE GN/YE GN/YE GN/YE Figure 22: Negative grounding on the Powador 2002-3002... - Page 28 (Figure 24). This resistor is required for correct signal transmission. Switch "1" must be set to "ON" on the terminal unit. 2. Switch "2" must be set to "OFF". Error RS 485 Figure 25: Interface terminals Page 28 Operating Instructions for Powador 2002-6002_EN...
- Page 29 Ensure that the A and B wires are properly connected. Communication is not possible if the wires are reversed. 7.4.3.1 Wiring diagram Powador Powador Powador Powador Communication Inverters Inverters Inverters data logger 230 V AC Terminal unit Figure 26: RS485 interface wiring diagram Operating Instructions for Powador 2002-6002_EN Page 29...
- Page 30 6. Activate the terminating resistor on the terminal unit. NOTE When using the RS485 bus system, assign a unique address to every bus device (inverter, sensor) and terminate the terminal units (see the “Settings” 8.3 on page 36 menu) . Page 30 Operating Instructions for Powador 2002-6002_EN...
-
Page 31: Sealing The Connection Area
Connect the grid voltage using the external circuit breakers. 2. Connect the PV generator using the DC disconnect (0 → 1). » The inverter begins to operate. » During the initial start-up: Follow the instructions of the New Connection Wizard. Operating Instructions for Powador 2002-6002_EN Page 31... -
Page 32: Confi Guration And Operation
2. The inverter is operating in standalone mode * The waiting period ensures that the generator voltage continuously remains above the power delivery limit of 200 V. For country-specifi c waiting periods see out web site at http://kaco-newenergy.de/en/site/index.xml. Page 32 Operating Instructions for Powador 2002-6002_EN... -
Page 33: Control Buttons
Figure 29: Display (shows the unit name or menu item) 8.1.3 Control buttons Operate the inverter with the two control buttons Figure 30: Control buttons Shift button Opens menu Set button Make settings or selection Operating Instructions for Powador 2002-6002_EN Page 33... -
Page 34: Inverter Menu
The display runs through menu level "2" and returns to the start point. To return to menu level "1", press keys "1" and "2" simultaneously or wait for one minute without pressing a key. Page 34 Operating Instructions for Powador 2002-6002_EN... -
Page 35: Starting Up For The Fi Rst Time
Select the required grid type. Press key 1 and confi rm with "Yes" that you want to permanently save the country set. » You have completed the initial confi guration. The inverter begins to operate. Operating Instructions for Powador 2002-6002_EN Page 35... -
Page 36: Menu Structure
If the unit overheats, the fi rst response is automatic unit power reduction. In the second step the unit shuts down. All countries Shows the total yield back to the last reset. Yield meter Press "2" to clear the yield meter. Page 36 Operating Instructions for Powador 2002-6002_EN... - Page 37 You can set the total yield to any value, for example, when you have received a replacement unit and want to Defi ning total continue the recording from the present value. yield Select "yes" to set the total yield. Operating Instructions for Powador 2002-6002_EN Page 37...
- Page 38 If the function is disabled, the display runs through the menu level and when key "1" is pressed again it shows the software version. Page 38 Operating Instructions for Powador 2002-6002_EN...
- Page 39 Select the type of grid applicable to the use of the directive inverter. NOTE: This option infl uences the country-specifi c operat- ing settings of the inverter. Please consult KACO service for further information. Specify the shutdown threshold for fast and slow ES P.O. 12.3, overvoltage shutdown.
- Page 40 BE, DE setting Q(U) characteristic Characteristic Q=f(U) - activate 5 nodes from value pairs (Q1:U1 – Q5:U5). Characteristic Q=f(U) - activate two-state controller with 4 fi xed value pairs (Q:U). Page 40 Operating Instructions for Powador 2002-6002_EN...
- Page 41 “Character- istic invalid” appears. You then have the option of correcting the characteristic. Specify the target voltage. Specify slope. DE, BE Q(U) characteristic Specify change time. Operating Instructions for Powador 2002-6002_EN Page 41...
- Page 42 Power range set as ‰ of rated power, in which the network support process is active. Lock out power Provides the option of activating or confi guring the Activate specifi c "System Protection Interface" for Italian. SPI mode (Additional PCB required!) Page 42 Operating Instructions for Powador 2002-6002_EN...
-
Page 43: Maintenance/Troubleshooting
If the fan is only covered with loose dust, it can be cleaned with the help of a vacuum cleaner or a soft brush. If the fan is very dirty, or if it is defective, it can be removed. Figure 31: Plug for fan Figure 32: Fan cover Operating Instructions for Powador 2002-6002_EN Page 43... -
Page 44: Shutting Down For Maintenance And Troubleshooting
Destruction of the DC connection The connection terminals can be destroyed by arcing if disconnected while still live. › It is essential that the shutdown sequence is carried out in the correct order. Page 44 Operating Instructions for Powador 2002-6002_EN... -
Page 45: Faults
B = Action of the operator E = The indicated work may only be carried out by an authorised electrician. K = The indicated work may only be carried out by a service employee of KACO new energy GmbH. Fault... - Page 46 (after the start-up period is complete), the invert- hardware. er’s hardware is probably damaged. Contact KACO Service to test the hardware. Daily yields do Tolerances of The measuring elements of the inverter have been selected not correspond to the measuring to ensure maximum yields.
- Page 47 “priwatt” function, we recommend that you “priwatt” function disconnect devices from the inverter that were connected for is deactivated and this function. the inverter indi- cates an error. Table 6: Troubleshooting Operating Instructions for Powador 2002-6002_EN Page 47...
-
Page 48: Messages On The Display And The "Fault" Led
B = Action of the operator E = The indicated work may only be carried out by an authorised electrician. K = The indicated work may only be carried out by a service employee of KACO new energy GmbH. Status... - Page 49 The voltage of a grid phase is too low; the grid cannot be fed into. The phase authorised elec- undervoltage L2 experiencing failure is displayed. trician. Table 7: Operating statuses and fault messages on the display Operating Instructions for Powador 2002-6002_EN Page 49...
- Page 50 50.2 Hz. OS 64 Measured values Output current limiting: The AC current is limited once the specifi ed maximum value has been reached. Table 7: Operating statuses and fault messages on the display Page 50 Operating Instructions for Powador 2002-6002_EN...
- Page 51 / Invalid CRC EEPROM. This means that the EEPROM KACO Service data originate from a diff erent confi g. fi le. Table 7: Operating statuses and fault messages on the display Operating Instructions for Powador 2002-6002_EN Page 51...
-
Page 52: Service
More than 60 years of experience in the fi eld of power converters support us in this philosophy. However, in spite of all quality assurance measures, faults may occur in rare cases. In such cases, KACO new energy GmbH will provide you with the maximum possible support. KACO new energy GmbH will make every eff ort to remedy faults quickly and without requiring a lot of paperwork. -
Page 53: Shutdown/Disassembly
Do not dispose of faulty inverters or accessories together with household waste. Ensure that the old unit and any accessories are disposed of in a proper manner. 12.1 Packaging Ensure that the transport packaging is disposed of properly. Operating Instructions for Powador 2002-6002_EN Page 53... -
Page 54: Documents
Photovoltaic feed-in inverter Type designation Powador 2002 / 3002 / 4202 / 5002 / 6002 This is to confi rm that the units listed above comply with the safety requirements set forth in the Directive of the Council of the European Union of 15th December 2004 on the harmonisation of the laws of the member states relat- ing to electromagnetic compatibility (2004/108/EC) and the Low Voltage Directive (2006/95/EC). - Page 56 Carl-Zeiss-Straße 1 · 74172 Neckarsulm · Germany · Phone +49 7132 3818-0 · Fax +49 7132 3818-703 · info@kaco-newenergy.de · www.kaco-newenergy.com...
Need help?
Do you have a question about the Powador 2002 and is the answer not in the manual?
Questions and answers