
Subscribe to Our Youtube Channel
Related Manuals for Kaco Powador 7700


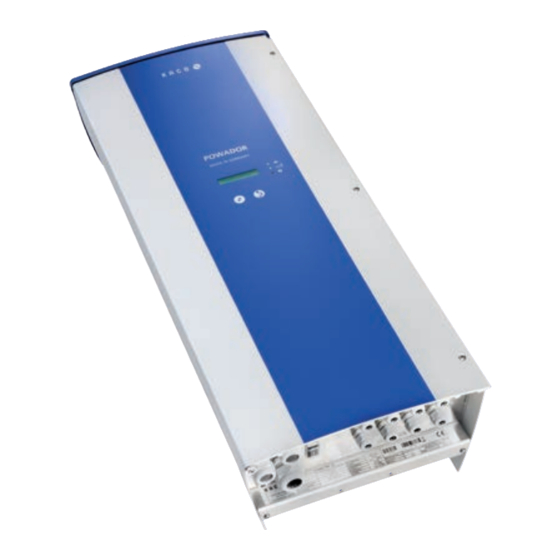
Summary of Contents for Kaco Powador 7700
- Page 1 Powador 7700 | 7900 8600 | 9600 Operating Instructions n English translation of German original...
-
Page 3: Table Of Contents
Installing the inverter ......17 Opening the connection area ......17 Making the electrical connection ....17 Connecting the interfaces.........23 Limiting during asymmetric feed to the grid ...............25 Sealing the connection area ......28 Starting up the inverter........29 Operating Instructions for Powador 7700-9600_EN Page 3... -
Page 4: General Information
Failure to observe this warning may lead to serious bodily injury or death. CAUTION Low-risk hazard Failure to observe this warning will lead to minor or moderate bodily injury. CAUTION Risk of damage to property Failure to observe this warning will lead to property damage. Page 4 Operating Instructions for Powador 7700-9600_EN... -
Page 5: Standards And Directives
NOTE The EU Declaration of Conformity can be found in the appendix. For information on grid coupling, grid protection and safety parameters along with more detailed instructions see our web site at http://www.kaconewenergy.de/. Operating Instructions for Powador 7700-9600_EN Page 5... -
Page 6: Safety
Temperature monitoring of the heat sink, • EMC filters to protect the inverter from high-frequency grid interference • Grid-side grounded varistors to protect the inverter against burst and surge pulses, • Islanding detection according to VDE 0126-1-1. Page 6 Operating Instructions for Powador 7700-9600_EN... -
Page 7: Description
Inverter with DC isolator switch isolator switch Fuse Fuse Consumer Reference counter Feed-in meter Selective Main switch main switch Grid connection point Figure 1: Overview circuit diagram for a system with two inverters Operating Instructions for Powador 7700-9600_EN Page 7... - Page 8 N PE ..Safety fuse Figure 3: Grid-side connection for systems with multiple inverters with three-phase grid monitoring 3.2.2.3 electrical connection NOTE Note the grid-type-specific connection conditions (see section 7.2.1 on page 18). Page 8 Operating Instructions for Powador 7700-9600_EN...
- Page 9 Plug connections or cable feed-throughs for DC connection LED indicators Cable fitting for AC connection Control buttons Communications connection Night start button Cable feed-through for preconfigured RJ45 patch cable DC isolator switch Vents Operating Instructions for Powador 7700-9600_EN Page 9...
- Page 10 Software for direct monitoring Together with the Powador inverter, KACO-viso takes over the role of a data logger. It saves the data from the inverter and displays it in various diagram types as a daily or monthly representation. The PC, however, must also run continuously.
-
Page 11: Technical Data
NOTE The S0 interface pulse rate can be chosen in three unit intervals (500, 1,000 and 2,000 pulses/kWh) for Powador 7700 to 9600 inverters. 3.2.6.4 Digital input If Powador protect is installed as a central grid and system protection, the fail-safe disconnection of suitable Pow- ador inverters from the public grid can be initiated by a digital signal instead of tie circuit-breakers. -
Page 12: Mechanical Data
Degree of contamination Noise emission [dB(A)] < 35 / noiseless DC isolator switch Built-in Housing Cast aluminium H x W x D [mm] 810 x 340 x 220 Total weight [kg] Table 2: Mechanical data Page 12 Operating Instructions for Powador 7700-9600_EN... -
Page 13: Transportation And Delivery
Carefully transport the inverter using the the carrying handles of the boxes. › Do not subject the inverter to shocks. For safe transportation of the inverter, use the holding openings in the carton. Figure 7: Transportation of the inverter Operating Instructions for Powador 7700-9600_EN Page 13... -
Page 14: Mounting The Inverter
Take care to ensure sufficient ventilation of the inverter. › Immediately remove dirt, especially on vents. › Failure to observe these warnings may lead to inverter damage which is not covered by the KACO new energy GmbH manufacturer warranty. Page 14 Operating Instructions for Powador 7700-9600_EN... -
Page 15: Unpacking The Inverter
If the recommended minimum clearances are not observed, the inverter may go into power regula- tion mode due to insufficient ventilation and the resulting heat build-up. › Maintain minimum clearances. › Ensure sufficient heat dissipation. Operating Instructions for Powador 7700-9600_EN Page 15... - Page 16 / 25 cm inverter and the wall • Distance in front Distance between the inverter and the ceiling / floor 50 cm vertical distance between the two inverters 70 cm Page 16 Operating Instructions for Powador 7700-9600_EN...
-
Page 17: Installing The Inverter
Remove the screwdriver. The spring terminal is closed and the cable is held in place. The power section has two internal circuit board fuses. These are labelled F0901 on the PCB. Operating Instructions for Powador 7700-9600_EN Page 17... - Page 18 SIBA Overvoltage safety class DC: III, AC: III Overvoltage safety category DC: II, AC: III Figure 13: Connection area- Powador 7700-9600 AC connection terminals DC connection terminals 7.2.1 Connecting the inverter to the power grid The grid connection cables are connected to the connection area on the right (see figure 14 on page 21).
- Page 19 A residual current circuit breaker must be used. 7.2.2 Connecting the PV generator Connect the PV generator on the right of the connection area (see Figure 13 on page 18). Use the provided cable fittings. Operating Instructions for Powador 7700-9600_EN Page 19...
- Page 20 › Avoid short circuits. CON7 CON5 CON6 LBL1 S trang 1 S trang 3 TP10 CON1 CON3 CON4 CON2 S trang 2 S trang 4 Figure 15: DC connection of the Powador 7700-9600 Page 20 Operating Instructions for Powador 7700-9600_EN...
- Page 21 4 fuse holders with string fuses. If you use the included string fuses, you must observe the maximum possible short-circuit currents. KACO new energy offers the appropriate fuses as accessories. (Table 6) CAUTION Damage to PV generator in case of faulty design of string fuses.
- Page 22 Authorised electrician NOTE The electrician is responsible for the design of the fuses. KACO new energy does not guarantee or warranty the installation. In addition, note and record the information for installation of the PV generator. Selection diagram for PV fuse...
-
Page 23: Connecting The Interfaces
2. Thread the connection cables through the cable fitting. 3. Attach the connection cables to the connection terminals. 4. Tighten the cable fitting. NOTE Ensure that the wires are properly connected. Communication is not possible if the wires are reversed. Operating Instructions for Powador 7700-9600_EN Page 23... - Page 24 Calculating efficiency by measuring the current and voltage values can lead to misleading results due to the tolerances of the measurement devices. The sole purpose of these measured values is to monitor the basic operation of the system. Page 24 Operating Instructions for Powador 7700-9600_EN...
-
Page 25: Limiting During Asymmetric Feed To The Grid
Figure 21: SYM bus wiring diagram in group of three NOTE When a patch cable with an RJ45 plug is used, an RS485 connection, which is required for a proLOG connection, is established at the same time. Operating Instructions for Powador 7700-9600_EN Page 25... - Page 26 WR 3 WR 4 WR 1 WR 2 WR 5 WR 29 WR 6 WR 28 WR 30 Group of 3 Group of 3 Group of 3 CAN (Twisted Pair) without RS485 conductor Page 26 Operating Instructions for Powador 7700-9600_EN...
- Page 27 10. If necessary, the maximum permitted asymmetry must still be entered so that symmetrisation can take place properly. In some countries (DE, IT) this value is preconfigured in accordance with the applicable directive and does not normally need to be changed. (Table 4 on page 19) Operating Instructions for Powador 7700-9600_EN Page 27...
-
Page 28: Sealing The Connection Area
Connecting "Inverter off" digital input (optional) NOTE The Powador-protect digital output can only be used with suitable KACO inverters. When using devices from other manufacturers or in combination with KACO inverters, bus coupler circuit-break- ers as a minimum must be used for shutting down devices from other manufacturers. -
Page 29: Starting Up The Inverter
Connect the grid voltage using the external circuit breakers. 2. Connect the PV generator using the DC isolator switch (0 → 1). » The inverter begins to operate. » During the initial start-up: Follow the instructions of the New Connection Wizard. Operating Instructions for Powador 7700-9600_EN Page 29... -
Page 30: Configuration And Operation
2. The inverter is operating in standalone mode Non-grid feed mode Status message The display shows the corresponding message. * The waiting period ensures that the generator voltage continuously remains above the power delivery limit of 200 V. Page 30 Operating Instructions for Powador 7700-9600_EN... - Page 31 Figure 24: Display (shows the unit name or menu item) 8.1.3 Control buttons Operate the inverter with the two control buttons Figure 25: Control buttons Navigation key Navigation to the next menu item Setting key Make settings or selection Operating Instructions for Powador 7700-9600_EN Page 31...
- Page 32 The display runs through menu level "2" and returns to the start point. " To return to menu level "1", press keys "1" and "2" simultaneously or wait for one minute without pressing a key. Page 32 Operating Instructions for Powador 7700-9600_EN...
-
Page 33: Initial Start-Up
" Select the country of operation with grid type. " Press key 1 and confirm with "Yes" that you want to permanently save the country set. » You have completed the initial configuration. The inverter begins to operate. Operating Instructions for Powador 7700-9600_EN Page 33... -
Page 34: Menu Structure
Display menu Country-specific setting Option menu DE-NSP Country and grid type-specific setting Password protected menu (password can be requested from KACO Service) Enter the four-digit password using key "2". The password is unit-specific. Coun- Menu Display/ Action in this menu/meaning try-spec. - Page 35 Displays the installed software version. Configuration All countries Displays the installed configuration version. version Serial no. Displays the serial number of the inverter. Country and grid- Displays the selected country setting and grid type. type display Operating Instructions for Powador 7700-9600_EN Page 35...
- Page 36 All countries bridge from 17 kHz to 9 kHz to improve efficiency. (except DE- Power Boost " Power Boost mode is activated by pressing "2". NOTE: MSP) The change may cause operating noise. Page 36 Operating Instructions for Powador 7700-9600_EN...
- Page 37 " Set the desired country setting. Select country NOTE: This option influences the country-specific operat- ing settings of the inverter. Please consult KACO service for further information. " Provides the option to set the grid parameters. Confirm "Yes" input using "1" key.
- Page 38 NOTE: For DE-NSP and BE, only Mode 2 is permitted. (not GB) For IT-CEI021 and DE-MSP is, only Mode 1 is permitted. P(f ) parameter for the countries/mains types shown in bold cannot be edited. Page 38 Operating Instructions for Powador 7700-9600_EN...
- Page 39 All countries Set default power " Set power in xxxx / 1000 in ‰ (promille). " Set internal fall-back time to set default power if external power reduction is not pending. Operating Instructions for Powador 7700-9600_EN Page 39...
- Page 40 (P/Pn) IT-CEI021, parameter? " Specify change time. (ms) GB-G83/2 " U_Lock In and U_Lock Out power range set as ‰ of rated power, in which the network support process is active. Page 40 Operating Instructions for Powador 7700-9600_EN...
- Page 41 On activation the specified parameters for the selected country are reset to the default values. Set default param- All countries " Reset default parameters. eters NOTE: When password protection is activated, only the grid operator can make a change. Operating Instructions for Powador 7700-9600_EN Page 41...
-
Page 42: Maintenance/Troubleshooting
Switch off the grid voltage by turning off the external circuit breakers. 2. Disconnect the PV generator using the DC isolator switch. DANGER! The DC cables are still live. " Ensure that there is no voltage present on the grid connection terminals. Page 42 Operating Instructions for Powador 7700-9600_EN... -
Page 43: Faults
B = Action of the operator E = The indicated work may only be carried out by an authorised electrician. K = The indicated work may only be carried out by a service employee of KACO new energy GmbH. Fault... - Page 44 (after the start-up period is complete), ware. the inverter’s hardware is probably damaged. " Contact KACO Service to test the hardware. The inverter displays Faults in the grid. The inverter continues to operate as normal without losses...
-
Page 45: Messages On The Display And The "Fault" Led
The following table lists the possible status and fault signals that the inverter shows on the LCD and the LEDs. For the status, consult the data that is logged via the RS485 interface. Operating Instructions for Powador 7700-9600_EN Page 45... - Page 46 B = Action of the operator E = The indicated work may only be carried out by an authorised electrician. K = The indicated work may only be carried out by a service employee of KACO new energy GmbH. Status...
- Page 47 SPI remote trip- Shutdown via digital input " Notify your author- ping Remote control for Italy CEI 0-21 ised electrician. Remote Trip-off Table 8: Operating status and fault messages on the display Operating Instructions for Powador 7700-9600_EN Page 47...
- Page 48 / KACO Invalid CRC in the EEPROM. This means that the Service EEPROM data originate from a differ- ent config. file. Table 8: Operating status and fault messages on the display Page 48 Operating Instructions for Powador 7700-9600_EN...
-
Page 49: Service
More than 60 years of experience in the field of power converters support us in this philosophy. However, in spite of all quality assurance measures, faults may occur in rare cases. In such cases, KACO new energy GmbH will provide you with the maximum possible support. KACO new energy GmbH will make every effort to remedy faults quickly and without requiring a lot of paperwork. -
Page 50: Shutdown/Disassembly
Unit: Do not dispose of faulty inverters or accessories together with household waste. Ensure that the old unit and any accessories are disposed of in a proper manner. Packaging: Ensure that the transport packaging is disposed of properly. Page 50 Operating Instructions for Powador 7700-9600_EN... -
Page 51: Documents
Photovoltaic feed-in inverter Type designation Powador 7700 / 7900 / 8600 / 9600 This is to confirm that the units listed above comply with the protection requirements set forth in the Directive of the Council of the European Union of 15th December 2004 on the harmonisation of the laws of the member states relating to Electromagnetic Compatibility (2004/108/EC) and the Low Voltage Directive (2006/95/EC). - Page 52 Carl-Zeiss-Straße 1 · 74172 Neckarsulm · Germany · Fon +49 7132 3818-0 · Fax +49 7132 3818-703 · info@kaco-newenergy.de · www.kaco-newenergy.de...
Need help?
Do you have a question about the Powador 7700 and is the answer not in the manual?
Questions and answers