Table of Contents
Advertisement
Quick Links
Advertisement
Table of Contents

Related Manuals for Olivetti OFX 520


Summary of Contents for Olivetti OFX 520
- Page 1 Facsimile OFX 520 INSTRUCTIONS...
- Page 2 Via Jervis, 77 - 10015 Ivrea (Italy) Publishing department: Olivetti Lexikon, S.p.A. Documentazione Utente Via Romano, 1 - 10010 Scarmagno (Italy) Copyright © 2000, Olivetti All rights reserved - ONLY FOR U.K. - THIS EQUIPMENT IS NOT DESIGNED FOR MAKING EMERGENCY TELEPHONY CALLS...
- Page 5 READ THESE IMPORTANT RECOMMENDATIONS FIRST ... The fax machine you have purchased is a high quality those indicated in the manual may not always be the same: it is suggested that you print them out before making any product satisfying all requirements.
- Page 6 CONSOLE Some keys may perform several functions, depending on the operational setting of the fax machine: Waiting mode, when the fax machine is not active. Programming mode (access to various menus) after pressing the FUNCTION key. Comnunication mode, during transmission or reception operation. Line mode, after pressing the HOOK key or lifting the receiver.
- Page 7 Performs the same function for numbers RX MODE programmed under one-touch dial and Selects reception methods. speed dialling. (HOLD) "ERROR" LED During a telephone conversation, puts • Signals an operating anomaly occurring the call on hold. during transmission or reception. </>...
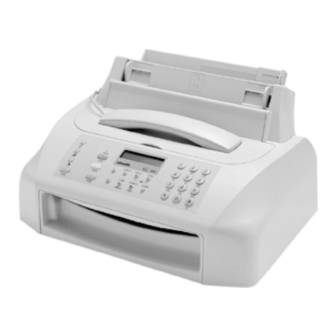
- Page 8 1. Enclosed handset. 2. Paper support extension. 3. Sheet feeder (ASF) adjustable according to the following paper formats: A4, Letter and Legal. Maximum capacity: 40 sheets (80 gr/m 4. Paper feeder adjustment lever. 5. Automatic feeder for documents to be transmitted and copied (ADF). Maximum capacity: 5 A4, A5, Letter and Legal sheets.
-
Page 9: Table Of Contents
TABLE OF CONTENTS TRANSMITTING A DOCUMENT FROM INSTALLATION MEMORY ..............16 PACKAGE CONTENTS..........1 CHANGING/RESENDING/CLEARING A PRESET MEMORY TRANSMISSION ..... 17 INSTALLING.............. 1 IF THE TRANSMISSION IS NOT CONNECTING TO THE ELECTRICAL POWER SUCCESSFUL ............17 SUPPLY AND TO THE TELEPHONE LINE... - Page 10 USING THE FAX MACHINE AS A MAINTENANCE TELEPHONE REPLACING THE PRINT HEAD ......39 CALLING WITH ONE-TOUCH DIAL ....... 28 REPLACING THE INK CARTRIDGE ...... 41 CALLING WITH SPEED DIALLING......28 PRINT HEAD CLEARING AND MANUAL NOZZLE TESTING ...
-
Page 11: Installation
INSTALLATION PACKAGE CONTENTS... 2. Insert the handset cord connector into the socket with the symbol on the fax machine. In addition to the machine, supplied with a power cord, in the package you will find: • The telephone connection cord •... -
Page 12: Connecting To The Electrical Power Supply And To The Telephone Line
CONNECTING TO THE ELECTRICAL POWER 2. Insert the extension plug at the other end of the cord into the telephone line wall socket. SUPPLY AND TO THE TELEPHONE LINE... Remove the band which blocks the print head car- riage before connecting the fax machine to the mains power supply (see the print head compartiment). -
Page 13: Loading Paper
After manually adjusting the sheet feeder, to ensure the LOADING PAPER ... proper operation of the fax machine, you also have to check whether the print format set on the fax machine The sheet feeder tray (ASF) can contain a quantity of coincides with the paper format you want to use. - Page 14 3. Insert the print head in its housing with the electri- cal contacts towards the front part of the fax ma- chine. 2. Remove the print head from its box and, holding it by its finger grip, remove the protective film from the print nozzles.
- Page 15 6. Examine the print sample as follows: If, after installing the print head, the message “CHECK • Check the numbered scale for interruptions and PRINT HEAD” is displayed again, try to remove and the black areas for horizontal white lines: if reinsert the print head pushing it harder.
-
Page 16: Changing Date And Time
CHANGING DATE AND TIME ... If in any operating phase two minutes pass with- out you entering any data, the fax machine will If the date and time on the display are not correct, you automatically go back to its initial waiting mode. can change them at any time. -
Page 17: Setting The Fax Number
Continue in the same way until your name is completed, Changing the position ... then check its correctness by scrolling the cursor (keys Press KEY DISPLAY </>) along the characters. If there is an error, position the cursor on the wrong FAX SET-UP FUNCTION until the character and overwrite the correct character;... -
Page 18: Configuring The Fax To The Telephone Line
CONFIGURING THE FAX TO THE TELEPHONE LINE ... CONNECTING TO A PUBLIC LINE ... Procedure DISPLAY 1 Make sure that the AUTOMATIC RX The fax machine is already set to be connected to a display shows the initial 02-03-99 10:48 public line. -
Page 19: Connecting To A Private Line (Pbx)
CONNECTING TO A PRIVATE LINE (PBX) ... Procedure DISPLAY 1 Make sure that the AUTOMATIC RX To connect your fax machine to a private line and to be display shows the initial 02-03-99 10:48 able to use it also on a public line, you have to: waiting mode with date •... -
Page 20: For Everyday Use
FOR EVERYDAY USE Now that your fax machine has a name and a number, Press this key once. you can use it to: • transmit documents (also in delayed mode or us- ing the polling method) Press this key X times. •... -
Page 21: Which Documents You Can Use
WHICH DOCUMENTS YOU CAN USE ... INSERTING THE DOCUMENT IN ADF ... Dimensions Insert the document face down, without forcing it, into the automatic feed slot for original documents (ADF), • Width min. 148 mm - max. 216 mm with the sheet to be transmitted facing downwards, then •... -
Page 22: Transmitting A Document
Select the type of resolution as follows: • STD (STANDARD), if the document is easily read- Procedure DISPLAY able. The upper row of display shows "DOCUMENT READY" and the lower row, an arrow in correspon- 1 Ensure that the display AUTOMATIC RX dence with the indication "STD"... -
Page 23: Particular Dialling Cases
In both cases, the fax machine will not print the transmission report (if enabled) once the trans- Procedure DISPLAY mission has been completed. See “Reports and lists” in this chapter for its interpretation. 1 Ensure that the display AUTOMATIC RX shows the initial waiting 21-03-99 10:50... -
Page 24: Transmitting A Document At A Preset
3. You want to call the remote party back without Procedure DISPLAY dialling his/her number again 1 Press the HOOK key TYPE NUMBER The fax machine always stores the last number di- on your fax, to connect alled, which can simply be called up again by press- to the line. -
Page 25: Changing/Clearing A Preset Delayed Transmission
CHANGING/CLEARING A PRESET DELAYED Procedure DISPLAY TRANSMISSION... 1 Make sure that the AUTOMATIC RX display shows the initial 22-03-99 15:10 waiting mode with date Procedure DISPLAY and time. 1 Make sure that you AUTOMATIC RX 2 Insert the document in DOCUMENT READY have set a delayed TX AT... -
Page 26: Transmitting A Document From Memory
TRANSMITTING A DOCUMENT FROM When the transmission has terminated, if it has been MEMORY ... enabled, the fax machine will automatically print out a broadcasting report (if the document was sent to The fax machine has a memory which allows you to several remote parties) or a transmission report (if send documents at a preset time (delayed transmis- the document was sent to one remote party). -
Page 27: Changing/Resending/Clearing Apreset Memory Transmission
• Status Status of transmission from If you select "CHANGE PARAM.?", continue as memory. In case of broad- i ndicated i n steps 6 and 7 of the procedure. casting transmission, the "Transmitting a document from memory". status of each single trans- If the transmission from memory has already started the mission associated with the message "TRANSMITTING..."... -
Page 28: Receiving A Document
RECEPTION MODES ... RECEIVING A DOCUMENT ... You can set up the fax machine to receive documents Manual reception ... sent by remote parties in four distinct modes, which If this diagram is not enough: you can access by pressing the RX MODE key. •... -
Page 29: Automatic Reception
If the remote party called to talk only to you, at the end of the conversation: After ringing twice (*) If your telephone installation has several sock- ets and the connected telephone is not near the fax machine, you can enable the latter for remote re- PHONE/FAX RX enabled ception, as long as the telephone works with tone dialling (multifrequency):... -
Page 30: Reception With An External Answering Machine
If you pick up the telephone receiver before the After the number of rings of the answering machine second ring and hear the fax connection tone press the START button and hang up the receiver. Your fax machine is now ready to receive. The remote party who called listens to the prerecorded If your telephone installation has several sock- message on the answering machine... - Page 31 Associating a fax number: Associating a name: The name has no effect on dialling but is useful for Procedure DISPLAY checking. 1 Make sure that the AUTOMATIC RX If a name has already been stored, it will be displayed. display shows the initial 26-03-99 17:45 Enter your remote party...
-
Page 32: Speed Dialling
Associating a telephone number: Speed dialling ... Using a series of codes (01-32) you can store more fax 10 Confirm with the TYPE ONE TOUCH and telephone numbers, and names that will be auto- START key to continue KEY: 0 - 9 matically selected by pressing the S. -
Page 33: Transmitting With One-Touch Dial
Follow the procedure "Associating a fax number" for TRANSMITTING WITH SPEED DIALLING ... one-touch dial (taking into account the changes for speed dialling) until step 6; then proceed as follows: All that is required is this diagram: Procedure DISPLAY è è... -
Page 34: Reports And Lists
When normal operating conditions are restored, the Procedure DISPLAY fax machine can behave in two different ways: 1 Make sure the display AUTOMATIC RX - If power failed while the fax machine was trans- shows the initial waiting 24-03-99 17:00 mitting or receiving, it will automatically print a mode with date and report with the data for that transmission or re-... -
Page 35: Enabling/Disabling Automatic Printing Of Transmission Report And Error Report
Enabling/disabling automatic printing of Enabling/disabling automatic printing of transmission report and error report ... broadcast report ... Procedure DISPLAY Procedure DISPLAY 1 Make sure that the AUTOMATIC RX Make sure that the AUTOMATIC RX display shows the 02-03-99 10:48 display shows the ini tial 02-03-99 10:48... -
Page 36: Printing On Request The Transmission Report, The Activity Report And The Broadcasting Report
Interpreting the reports ... 7 Press the START key to AUTOMATIC RX confirm your choice then 02-03-99 10:48 The reports contain the following information: press the STOP key to restore your fax to the • Act. n. Progressive number of transactions initial waiting mode. -
Page 37: Lists
Lists... Printing the configuration parameters list, the data stored in the speed dialling codes You can obtain, at any time, printout of the lists of the and the one-touch dial numeric keys ... setup and configuration parameters as well as a printout of data stored in the speed dialling codes and in the one-touch dial keys. -
Page 38: Using The Fax Machine As Atelephone
USING THE FAX MACHINE AS A TELEPHONE The fax machine is also a traditional telephone set. As soon as you press the S. DIAL key, followed by the When you get the line by lifting up the handset, you speed dialling code (in the example, 01), the telephone have all common telephone features found in normal number (see “Programming one-touch dial and phone sets. -
Page 39: Using The Fax Machine As A Copier
USING THE FAX MACHINE AS A COPIER DOCUMENTS YOU CAN COPY... Procedure DISPLAY 1 Make sure that the AUTOMATIC RX Before making a copy, ensure that the original com- display shows the initial 22-03-99 15:10 plies with the characteristics described in “Which docu- waiting mode with date ments you can use”, under the “For everyday use”... - Page 40 To obtain an excellent quality copy of a document con- taining shades, in addition to setting the resolution value to PHOTO, ensure that the "COPY: HIGH QUAL." set- ting on the fax is active. If not, follow this procedure: Procedure DISPLAY 1 Make sure that the AUTOMATIC RX...
-
Page 41: For A More Sophisticated Use
FOR A MORE SOPHISTICATED USE OTHER USEFUL RECEPTION SETTINGS eceiving a document longer than the paper size ... Reducing the print area of a received If you receive a document longer than the paper size in document ... the fax, you can make your fax print the remaining text on another sheet. -
Page 42: Changing The Number Of Rings
Changing the number of rings … To change ringing volume ... If the fax machine is set to automatic reception with You can also change the ringing volume as follows: call type recognition, when there is an incoming call, the fax machine will recognise automatically after ring- Procedure DISPLAY ing twice whether the call comes from another fax ma-... -
Page 43: Changing The Beeper Duration
Changing the beeper duration ... Changing the silence lapse ... When the fax machine is set to automatic reception This feature is enabled only in some countries. with call type recognition, it behaves as follows: Remember that if the silence lapse set on the answer- •... -
Page 44: Changing The Remote Control Code
Changing the remote control code... OTHER USEFUL TRANSMISSION SETTINGS... If the fax machine is connected to a secondary telephone operating in tone dialling and set for manual reception Setting automatic resolution... or for automatic reception with recognition of the call type, whenever a remote party calls to send a document, If you have not selected the resolution before transmit- you can control its reception by entering the code * * on... -
Page 45: Enabling/Disabling The Re-Transmission Of A Failed Transmission
Enabling/disabling the re-transmission of a Procedure DISPLAY failed transmission ... 1 Make sure that the AUTOMATIC RX display shows the initial 02-03-99 10:48 Procedure DISPLAY waiting mode with date and time. 1 Make sure that the AUTOMATIC RX display shows the initial 05-03-99 16:10 2 Press the FUNCTION... -
Page 46: Adjusting The Volume Of The Buzzer
Adjusting the volume of the buzzer ... 3 Press the START key. DATE AND TIME Procedure DISPLAY 4 Press the FUNCTION VARIOUS SETTINGS 1 Make sure that the AUTOMATIC RX key. display shows the initial 02-03-99 10:48 waiting mode with date 5 Press the START key TX SPEED 9.6 and time. -
Page 47: Transmitting/Receiving A Document With The Polling Facility
Follow the procedure below: TRANSMITTING/RECEIVING A DOCUMENT WITH THE POLLING FACILITY ... Procedure DISPLAY What is polling ... 1 Make sure that the AUTOMATIC RX display shows the initial 22-03-99 15:10 It is a transmission request from one fax machine to waiting mode with date another so that the latter transmits the requested doc- and time. -
Page 48: Changing/Deleting A Previously Set Polling Reception Operation
Changing/deleting a previously set polling Programming the fax machine to poll a reception operation ... document (polling in transmission) ... Procedure DISPLAY Procedure DISPLAY 1 Make sure you have AUTOMATIC RX 1 Make sure that the AUTOMATIC RX set a polling POLL RX 17:15 display shows the initial... -
Page 49: Maintenance
MAINTENANCE To ensure the correct functioning of your fax machine, 1. Lift the print head compartment cover, placing your refer to the recommendations at the beginning of this finger in the centre recess. manual. These recommendations concern the replace- ment of accessories, (ink cartridge and print head) and the periodical cleaning of the following parts: •... - Page 50 2. Release the print head (including the cartridge, if the print head has an interchangeable ink cartridge) acting on the lever, then remove it from its com- partment. 4. Insert the print head in its housing with the electri- cal contacts facing the front of the fax machine. 3.
-
Page 51: Replacing The Ink Cartridge
2. Release the ink cartridge using the lever. If the new print head is of the single-use type and you have replaced it because it ran out of ink, the fax machine automatically recognises the replacement and the display shows the following message “NEW HEAD? 1 = ON, 0 = OFF”. -
Page 52: Print Head Clearing And Manual Nozzle Testing
PRINT HEAD CLEARING AND MANUAL Avoid touching the inked area. NOZZLE TESTING ... If the printing quality deteriorates you can quickly clear the print head and test the nozzles with a printout showing their condition. Procedure DISPLAY 1 Make sure that the PHONE/FAX RX display shows the initial 10-03-99... -
Page 53: Cleaning The Electrical Contacts Of The Print Head
CLEANING THE ELECTRICAL CONTACTS OF 3. Remove the print head. THE PRINT HEAD ... 1. With the fax machine off, lift the head compartment cover, positioning your finger in the centre recess. 4. Clean the electrical contacts using a slightly damp cloth. -
Page 54: Cleaning The Print Head Pad
CLEANING THE PRINT HEAD PAD ... CLEANING THE OPTICAL READER ... 1. With the fax machine switched off, lift the print Dust accumulating on the optical reader glass may cause head compartment cover, placing your finger in the document scanning problems. To avoid this problem, you centre recess. -
Page 55: Cleaning The Casing
If the document or the sheet do not come out auto- 3. Clean the optical reader glass using a cloth damp- matically, remove them manually as described below: ened with a product specifically designed for clean- ing glass, and then carefully wipe it dry. Do not pour 1. -
Page 56: Solving Small Problems
SOLVING SMALL PROBLEMS ... The following list may be useful as a guide to solving small problems. PROBLEM SOLUTION The fax machine does Check that the power not switch on. cable is connected. The document cannot be Check that the document inserted correctly. -
Page 57: Error Codes
ERROR CODES ... The error codes are printed both on the transmision and actvity reports and are represented by two digits indicating the cause of the error. On the activity report,due to lack of space only the code is indicated without any message. CODE MESSAGE ERROR CAUSE... -
Page 58: Signals And Messages
SIGNALS AND MESSAGES ... Message: “CHECK PAPER, PRESS " Problems which may occur are normally indicated by • There is no paper in the tray: add paper and press acoustic signals (sometimes accompanied by visual STOP to clear the message from the display. signals: ERROR led on) or by error messages on the •... - Page 59 Message: “MEMORY FULL” Message: “REMOVE DOCUMENT”, “PRESS “ One or more documents received in the memory, due A document jammed while copying or transmitting: • to an anomaly during reception, have filled up the press the STOP key and, if the document is not memory: check the type of anomaly (no paper or ejected automatically, remove it manually (see “Re- jammed paper, no ink, cover open, etc.) and remove it.
-
Page 60: Appendix
APPENDIX OTHER ACOUSTIC SIGNALS ... Message: "POLL RX HH:MM" You have carried out a transmission request (Polling re- 1 second short tone ception). • Transaction was carried out correctly. Message: “PRINTING REPORT” 20 second intermittent tone The fax machine is printing a report or a list. •... -
Page 61: Technical Data
TECHNICAL DATA ... OPTICAL READER FEATURES GENERAL FEATURES • Model Desktop transceiver • Scanning method • Display LCD 16 + 16 crt. Reading resolution : • Memory capacity (*) 21 pages • horizontal 8 pixel/mm Dimensions: • vertical STANDARD 3.85 lines/mm •... -
Page 62: Example Standard Form Itu-Ts Test Sheet N°1 (Slerexe Letter)
EXAMPLE STANDARD FORM ITU-TS TEST SHEET N°1 (SLEREXE LETTER) Ap-50-52.p65 25/02/00, 9.21... -
Page 63: Index
INDEX Error codes 17, 47 Error correction mode 36 ERROR led 48 Acoustic signals 50 ADF 11 ASF 3 Fax number 7 Buzzer 36 Buzzer volume 36 Ink cartridge 4, 5, 39 replacing the ink cartridge 39 Casing 45 Cleaning 39 Clearing the print head 42 Language 2 Configuration parameters 27... - Page 64 One-touch dial 20, 23 Sender identification 6 Optical reader 44 position of the name and fax number 7 cleaning 45 setting a fax number 7 Original document 11 setting a name 6 inserting the document in ADF 11 Set-up parameters 27 removing jammed documents 45 Silence lapse 33 which documents can be used 11...
- Page 65 10015 Ivrea (TO) (Italy) declare, under our sole responsability, that the telefax products: Olivetti OFX 520 are designed tointerwork within all the networks of the EC countries and also Switzerland and Norway. The full Network compatibility in each country could depend upon the corresponding country Software Switches, to be set accordingly.
- Page 66 Monochrome print head part numbers Single-block print head: P/N 84431 W Single-block print head with pigmented ink: P/N B0042 C Rechargeable print head + 2 cartridges: P/N 52419 E Two cartridge package: P/N 84433 S Rechargeable print head + 4 cartridges: P/N 82070 A Codtes.p65 25/02/00, 9.22...
- Page 67 Part Number 237188 U P-number.p65 25/02/00, 9.22...
Need help?
Do you have a question about the OFX 520 and is the answer not in the manual?
Questions and answers