Table of Contents
Advertisement
Quick Links
Download this manual
See also:
Instruction Manual
Advertisement
Table of Contents

Related Manuals for GREAT PLANES RV-4


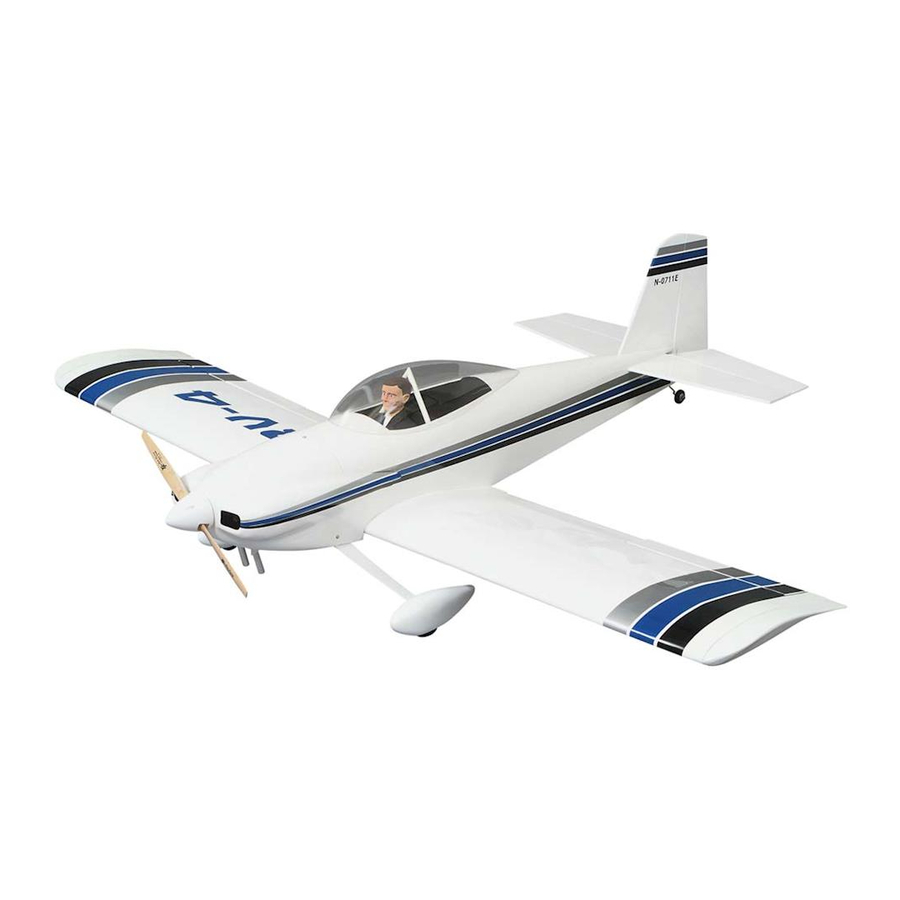
Summary of Contents for GREAT PLANES RV-4
- Page 1 ® Great Planes RV-4 Technical Notice Insert the following on page 10, after step one. Secure each wing half to the fuselage with a 1/4" x 20" nylon bolt. The bolts only need to be installed and tightened by hand. No screwdriver is required.
-
Page 2: Instruction Manual
Further, Great Planes reserves the right to change or modify this warranty without notice. In that Great Planes has no control over the final assembly or material used for final assembly, no liability shall be assumed nor accepted for any damage resulting from the use by the user of the final user-assembled product. -
Page 3: Table Of Contents
Landing ................29 Scale Competition INTRODUCTION Though the Great Planes RV-4 is an ARF and may not have For the latest technical updates or manual corrections to the the same level of detail as an “all-out” scratch-built competition RV-4 visit... -
Page 4: Safety Precautions
3. You must take time to build straight, true and strong. This is a partial list of items required to finish the RV-4 ARF that may require planning or decision making before starting 4. You must use an R/C radio system that is in first-class to build. -
Page 5: Electric Motor & Motor Mount Recommendations
❏ 3' [900mm] Standard silicone fuel tubing (GPMQ4131, for glow engine installation only!) We have flown the RV-4 ARF extensively on a variety of motors to find the best performance for this airplane. The Optional Supplies & Tools following items proved to power the plane very well, giving similar performance to the .91 glow engine. -
Page 6: Ordering Replacement Parts
This is a number four screw that is 1-1/2" [38mm] long with forty threads per inch. Replacement parts for the Great Planes RV-4 ARF are available using the order numbers in the Replacement Parts When you see the term test fit in the instructions, it •... -
Page 7: Kit Inspection
If any parts are missing or are not of acceptable quality, or if you need assistance with assembly, contact Product Support. When reporting defective or missing parts, use the part names exactly as they are written in the Kit Contents list on this page. Great Planes Product Support 3002 N. Apollo Drive, Suite 1 Champaign, IL 61822 Telephone: (217) 398-8970, ext. -
Page 8: Preparations
PREPARATIONS ❏ 1. If you have not done so already, remove the major parts of the kit from the box and inspect for damage. If any parts are damaged or missing, contact Product Support at the address or telephone number listed in the “Kit Inspection”... -
Page 9: Install The Aileron, Flap Servos & Pushrods
❏ ❏ mounting block with a 1/16" [1.6mm] drill bit. Install a #2 x 7. Test fit the right flap to the wing with three hinges. 3/8" [9.5mm] wood screw into the hole to secure the servo Using the same procedure used for the ailerons, join the block to the cover. - Page 10 ❏ ❏ ❏ ❏ 7. Place a nylon control horn in line with the last hole in 11. Install the flap servo into the flap servo opening, the aileron servo arm. When positioned properly the control mounting it using the same procedure for the aileron servo horn will rest on a hardwood plate in the aileron.
-
Page 11: Assemble The Fuselage
❏ ❏ 14. Locate a .074" x 6" [.074" x 152mm] pushrod wire threaded on one end. Screw a nylon clevis onto the ❏ threaded end of the wire 20 full turns. Install a silicone clevis 2. Measure the distance from the tip of the stab to the tip of keeper onto the clevis. -
Page 12: Install The Landing Gear & Wheel Pants
HOW TO CUT COVERING FROM BALSA Use a soldering iron to cut the covering from the fin. The tip of the soldering iron doesn’t have to be sharp, but a fine-tip does work best. Allow the iron to heat fully. ❏... - Page 13 ❏ ❏ 2. Locate the 2" [51mm] axles. Cut both axles to a length of 1-3/4" [44mm]. A high-speed rotary tool with a cut- off wheel works well for this application. Install the axle and axle nut onto the landing gear. ❏...
-
Page 14: Electric Motor / Glow Engine Installation
Electric Motor, ESC & Battery Installation Note: The recommended components for this installation can be found at the “Electric Motor and Motor Mount Recommendations” section of this instruction manual on page 4. ❏ 10. From the LE of the rudder measure back 2" [51mm] and make a mark. -
Page 15: Install The Glow Engine, Fuel Tank & Throttle Servo
the time this manual was written, changes were being made to the appearance of the ESC. Your ESC may not look the same as the one in the photo. ❏ 3. Slide two spacers over the motor shaft followed by the collar. - Page 16 The line with the fuel measures 6-1/4" [159mm]. Mark the location of the engine clunk will feed to the fuel inlet at the needle valve. The vent on the mount. The Great Planes Dead Center ™ Hole Locator will attach to the pressure tap on the muffler and the third (GPMR8130) works well for this.
- Page 17 ❏ 10. Locate a .074 x 36" [914mm] pushrod wire. Cut it to a length of 12" [305mm]. Screw a nylon clevis onto the threaded end of the wire approximately 20 turns. Slide a silicone clevis keeper onto the clevis. Slide the wire into the pushrod tube, attach the clevis to throttle and slide the clevis keeper over the clevis.
-
Page 18: Install The Radio, Servos & Pushrods
If you will be installing LiPo batteries skip ahead to, “Install Install the Radio, Servos & Pushrods the Radio, Servos, and Pushrods.” Follow the instructions as they are written. The only difference will be that you should install the battery and receiver into the rear tray that you just installed. - Page 19 you did with the ailerons. Mark the location for the screw holes. On the marks, drill through the plywood plate with a 1/16" [1.6mm] drill bit. Drill only through the plate, not through the elevator! Secure the control horn to the elevator with two #2 x 3/8"...
- Page 20 elevator pushrod wire you soldered the clevis to followed by two 5/32" [4mm] wheel collars. Then, insert the wire into the tube. Attach the clevis to the servo arm and slide the clevis keeper over the clevis. ❏ 14. Connect a nylon control horn onto the clevis. Slide the pushrod wire into the fuselage.
-
Page 21: Assemble The Canopy
❏ 23. Install a switch harness and charge jack to the fuselage. Connect the switch to the battery. Be sure to use heat-shrink tubing or tape to be sure the battery to switch connection is secure. ❏ 24. Plug the servos into the receiver following the instructions that came with your radio system. -
Page 22: Install The Cowl
❏ 5. Place the canopy onto the canopy base and trace the shape of the canopy. Cut a small strip of covering from inside the lines you have drawn. Glue the canopy to the canopy base with RC56 canopy glue. ❏... - Page 23 and through the fuselage side. Remove the cowl. Drill a 3/32" [2.4mm] clearance hole through the hole in the tip of the cowl you just made. (You may wish to consider countersinking this hole to allow the head of the #2 screw to set into the cowl.
-
Page 24: Apply The Decals
“sticky-back” and are not the water transfer type, submersing them in soap and water allows accurate positioning and reduces air bubbles underneath. Use a Great Planes AccuThrow ™ (or a ruler) to accurately measure and set the control throw of each control surface as 4. -
Page 25: Balance The Model (C.g.)
If, after you must be shifted aft or weight must be added to the tail to have become accustomed to the way the RV-4 flies, you balance. If possible, relocate the battery pack and receiver would like to change the throws to suit your taste, that is to minimize or eliminate any additional ballast required. -
Page 26: Preflight
Precision Magnetic Prop Balancer sleeves, ties, scarfs, long hair or loose objects such as (TOPQ5700) in the workshop and keep a Great Planes pencils or screwdrivers that may fall out of shirt or jacket Fingertip Prop Balancer (GPMQ5000) in our flight box. -
Page 27: Motor & Battery Safety Precautions
Use a “chicken stick” or electric starter to start the engine. AMA SAFETY CODE (excerpts) Do not use your fingers to flip the propeller. Make certain the glow plug clip or connector is secure so that it will not pop off or otherwise get into the running propeller. -
Page 28: Imaa Safety Code (Excerpts)
5.1 Magneto spark ignition engines must have a coil-grounding switch on the aircraft to stop the engine. This will also prevent Since the RV-4 qualifies as a “giant-scale” model and is accidental starting of the engine. This switch shall be readily therefore eligible to fly in IMAA events, we’ve printed... -
Page 29: Check List
Dependable, redundant and fail safe battery systems CHECK LIST are recommended. The use of anti-glitch devices for long leads is recommended. During the last few moments of preparation your mind may There is no maximum engine displacement limit, as it is the be elsewhere anticipating the excitement of the first flight. -
Page 30: Flying
(such as a wing or stab) rapidly vibrates up and down (thus causing Take it easy with the RV-4 for the first few flights, gradually the noise). In extreme cases, if not detected immediately, getting acquainted with it as you gain confidence. - Page 31 Remember to think. Have a ball! But always stay in control and fly in a safe manner. GOOD LUCK AND GREAT FLYING! ElectriFly by Great Planes RimFire 50-65-450kV ™ ™ Brushless Out-runner Motor ElectriFly RimFire brushless motors are designed and produced with high quality, power, precision and efficiency in mind.
- Page 32 A versatile mounting bracket provides horizontal and vertical mounting options for installation ease. OSMG0561 ElectriFly by Great Planes Large Motor Mount [36 mm] ElectriFly offers a complete line of accessories for electric- powered airplanes, including this motor mount for use with large brushless motors.
- Page 33 BUILDING NOTES Kit Purchased Date: _______________________ Date Construction Finished: _________________ Where Purchased:_________________________ Finished Weight: __________________________ Date Construction Started: __________________ Date of First Flight: ________________________ FLIGHT LOG...
Need help?
Do you have a question about the RV-4 and is the answer not in the manual?
Questions and answers