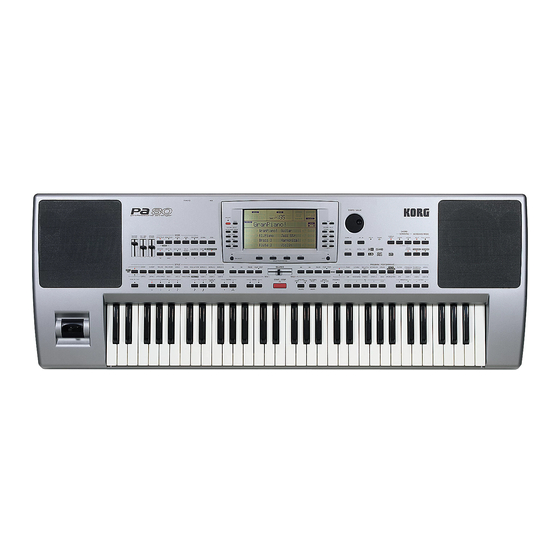
Korg PA 80 User Manual
Professional arranger
Hide thumbs
Also See for PA 80:
- Abridged service manual (20 pages) ,
- Getting started manual (17 pages) ,
- User manual (10 pages)
Table of Contents
Advertisement
Advertisement
Table of Contents
Troubleshooting

Related Manuals for Korg PA 80


Summary of Contents for Korg PA 80
- Page 1 USER'S MANUAL ENGLISH Ver. 3.06 MAN0001064...
-
Page 2: Important Safety Instructions
Instructions pertaining to a risk of fire, electric shock, or injury to persons IMPORTANT SAFETY INSTRUCTIONS KEEP THESE INSTRUCTIONS WARNING — When using electrical products, basic pre- cautions should be followed, including the following: AND CLEAN ONLY WITH A Read all the instructions before using the product. Do not use this product near water —... - Page 3 • Connect the equipment into an outlet on a circuit action. Be sure to save important data to floppy disk. KORG different from that to which the receiver is con- will not be responsible for damages caused by data loss.
- Page 4 find software and accessories for your keyboard, please contact your local Authorized KORG distributor. Copyright © 2001 KORG Italy Spa. Printed in Italy. THE BALANCE SLIDER When turning the instrument on, please be assured the BALANCE slider is set to the center.
- Page 5 HOW TO… Keyboard Song Play mode …select a Sound Program …play a Song (Standard MIDI File) …select a Performance …see the Lyrics 11-5 …play a Sound Program across the …see the Song tracks 11-4 whole keyboard, as with a piano …start both Sequencers at the same time 3-7, 11-11 …split the keyboard in two...
-
Page 6: Table Of Contents
TOC-2 TABLE OF CONTENTS Introduction The Global channel ....... . 8-1 The Chord 1 and Chord 2 channels . - Page 7 TOC-3 Fast Delete using the control panel buttons ..10-3 How to playback a Song ......12-1 Main page .
- Page 8 The Write window ....... 15-9 Setting up the KORG MIDI Driver (Windows) ..18-2 Installing the KORG MIDI Driver into the Global edit environment .
- Page 9 TOC-5 Assignable parameters ....21-1 Vocal/Guitar Processor Board (VHG1) ..25-1 List of functions assignable to the Footswitch or Assembling the board with the HD drive already EC5 pedals .
- Page 10 TOC-6...
-
Page 11: Introduction
INTRODUCTION... -
Page 13: Welcome
E-mail: info@korg.co.uk playing your instrument. Many KORG distributors also have their own web page on • Operating System updates, to load new features from the internet, where you can find infos and software. Useful disk. -
Page 14: Loading The Operating System
Your Pa80 can be constantly updated as new versions of the Press ENTER to load, or EXIT to cancel the loading pro- operating system are released by KORG. You can download cedure. If you press ENTER, wait until the loading is fin- the operating system from www.korgpa.com. -
Page 15: Start Up
Start up Connecting the AC power cord 2. START UP CONNECTING THE AC POWER CORD Note: When turning the instrument on, move this slider to the center, to avoid starting a Song at the minimum level. Connect the supplied power cord to the dedicated socket HEADPHONES on the rear of the instrument. -
Page 16: Midi Connections
Connect a Damper (Sustain) pedal to the DAMPER connec- • if it is rarely red, you have found the optimal level. tor on the back panel. Use a KORG PS1, PS2 or DS1H foot- • if it goes to red too often, you should lower the gain a switch pedal, or a compatible one. -
Page 17: Front Panel
Front panel 3. FRONT PANEL... - Page 18 Front panel of the display. You can reach the main page by MASTER VOLUME pressing EXIT from any of the Song Play edit This slider controls the overall volume of the instrument, pages. If you are in a different operating mode, both of the internal speakers, the L/MONO and RIGHT out- press SONG PLAY to recall the Song Play puts, and the HEADPHONES output.
- Page 19 Front panel (After both LEDs have turned on, press the button again to MANUAL BASS turn them off). This button turns the Manual Bass function on or off. UPPER LED ON Note: When you press the MANUAL BASS button, the Bass Upper-row Styles selected.
- Page 20 Front panel All Synchro functions are turned off. They also double as a NOTE LENGTH function for the Song mode (see chapter 13). This button doubles as a DELETE function for the Backing Sequence and Song modes (see chapters 12 and 13). COUNT IN / BREAK It is also used to delete the selected character, during text While the Style is not running, press this button, then press...
- Page 21 Front panel In addition, you can use these buttons to select a different MUTE Press both buttons in a pair to mute the corre- page in a Style Select or Program Select window. sponding track. Press both buttons again to unmute the track.
- Page 22 Front panel DISPLAY HOLD When used while pressing the SHIFT button, this control always acts as a Tempo This button turns the Display Hold function on or off. control. When you open a temporary windows (like the DOWN/- and UP/+ Program Select window), it remains in the dis- DOWN/- decreases the value or tempo;...
- Page 23 Flash Card (only if the card is inserted). BALANCE slider Just insert a (optional) Korg FMC-8MB Flash Card into the In Song Play mode, this slider balances the volume of the two rear panel socket (see “FLASH CARD slot” on page 5-1), and on-board sequencers.
- Page 24 Front panel PAUSE Pauses the Song at the current position. Press In Song Play mode, pressed while PAUSE or PLAY/STOP to start the Song play- keeping SHIFT pressed, starts both sequencers ing again. at the same time. PLAY/STOP Starts or stops the current Song. When you stop the Song, the Song Position goes back to measure 1.
-
Page 25: Display And User Interface
Display and User Interface Display controls 4. DISPLAY AND USER INTERFACE The display shows the current status of the Pa80 and its per- the last line using the F1-F4 buttons. You can vary many of formance and editing parameters. You can select each param- the parameter’s values by pressing the left (-) or right (+) eter by using the VOLUME/VALUE (A-H) buttons on the button of any VOLUME/VALUE pair. -
Page 26: Interface Structure
Display and User Interface Interface structure Backing Sequence When opening an edit environment or a selecting page, the current operating mode is still working in the background. 4 Realtime tracks, 8 Style tracks, 4 Pads. Song 16 Song tracks. You can only see up to 8 tracks in the display. So, use the TRACK SELECT button to switch to the other (hidden) tracks. -
Page 27: Message Windows
Display and User Interface Message windows Edit environment. (See diagram at the bottom of this Drum track (Style track view). page). When you press GLOBAL or DISK, an edit environ- ment overlaps the current operating mode. Press EXIT to go Percussion track (Style track view). - Page 28 Display and User Interface Grayed-out non-available parameters...
-
Page 29: Rear Panel
DAMPER If fitted, this is the video output, to connect the Pa80 to a TV Use this to connect a Damper pedal, like the KORG PS1, PS or monitor. See “Video Interface (VIF1)” on page 26-1 for or DS1H. To change its polarity, see “Damper Pol. (Damper more information. - Page 30 Rear panel Note: The MASTER VOLUME slider has no GAIN 1 and 2 effect on these outputs. Use these controls to separately adjust the input sensitivity of the INPUTS 1 and 2 INPUT 1 and 2 connectors. From one extreme to the other, Use these unbalanced connectors to input a dynamic micro- LINE MIC you can adjust the optimal sensitivity for...
-
Page 31: Basic Guide
BASIC GUIDE... -
Page 33: Basic Operations
Basic operations Playing on the keyboard 6. BASIC OPERATIONS PLAYING ON THE KEYBOARD SELECTING, MUTING/UNMUTING SOLOING A TRACK Just play on the keyboard. You will hear the Realtime tracks playing. There are four Realtime tracks: Upper 1-3 and Selecting. Use the VOLUME/VALUE (A-H) buttons to Lower. -
Page 34: Selecting A Performance
Basic operations Selecting a Performance SELECTING A PERFORMANCE 10, upper LED turned on), or the second row of ten banks (11-20, lower LED turned on). A Performance is a set of Programs and settings for the Key- Press one of the 1-0 buttons to select the PROGRAM/ board and Style tracks, that makes selecting complex combi- PERFORMANCE bank containing the Performance you nations live fast and easy. -
Page 35: Selecting A Program
Basic operations Selecting a Program SELECTING A PROGRAM Browse all the Programs in the selected bank using the PAGE buttons. There can be various pages for each You can select a different Program (i.e., sound) to be played bank, containing up to 8 Programs each. by a track. -
Page 36: Selecting A Style
Basic operations Selecting a Style Select the DIGITAL DRAWBAR bank. The Digital Use the leftmost STYLE button to select a row of Style Drawbar window appears, and the current setting is banks (upper, lower, DIRECT HD). assigned to the selected track. Select the STYLE bank containing the Style you are Drawbars looking for. -
Page 37: Selecting A Single Touch Setting (Sts)
Basic operations Selecting a Single Touch Setting (STS) SELECTING A SINGLE TOUCH SETTING (STS) Press the F1 button to select the floppy disk drive (FD). The disk content appears. A Single Touch Setting (STS) contains Realtime (Keyboard) Use the TEMPO/VALUE controls, or the VOLUME/ tracks’... - Page 38 Basic operations Shortcut to see the original bank for a Style, Performance or Program...
-
Page 39: Tutorial
Tutorial 1 - Playing in realtime 7. TUTORIAL This chapter is fully devoted to step-by-step instructions, that the pointing arrow. You will hear the Dark Pad Program play we hope may be useful to learn the basics—on-field. together with the Grand Piano. 1 - PLAYING IN REALTIME As soon as you turn your Pa80 on, it is in Style Play mode, SoftBeat... -
Page 40: Playing A Style
Tutorial 2 - Playing a Style 2 - PLAYING A STYLE Set the relative volume of the Realtime tracks. Use each E-H VOLUME/VALUE button pair to set the vol- A Style will be your virtual band in your best solos. Select one ume of the Realtime tracks. -
Page 41: Playing A Song
Tutorial 3 - Playing a Song 3 - PLAYING A SONG Select other Variations. There are four VARIATION buttons. These are four different Nothing easier than playing a Song on the Pa80. You don’t versions of the same Style. Try them all! have even to load it from disk. -
Page 42: Recording A Song
Tutorial 4 - Recording a Song Select one of the Style rows in the STYLE section, using Stop it. the leftmost button. Sure, the Song automatically stops when reaching the end. Select one of the Style Banks, by pressing one of the but- But you can stop it before the end, just by pressing PLAY/ tons of the STYLE section. -
Page 43: Editing A Song
And… if I want to delete and record again one mode. of the tracks, or the whole Song? What about changing those boring General MIDI sounds with those gorgeous original KORG sounds? You can do it— That’s easy! in Song mode. Press RECORD again to enter Record mode. - Page 44 Change the volume. Select different Programs. Yes, this is another obvious change. Press MENU to open the You can replace General MIDI Programs with KORG Pro- edit menu. grams. It will sound more rich, more lively. Press TRACK SELECT to see tracks 1-8. The LED turns Song Edit MENU Mixer/Tun.
-
Page 45: The Arabic Scale
You can program an Arabic scale in real time, by assigning a to the Song Play mode, or turn the instrument off. So, press footswitch, a KORG EC5 pedal, or a pad, the “Quarter Tone” EXIT to go back to the main page of the Song mode. - Page 46 Tutorial 6 - The Arabic Scale...
-
Page 47: Midi
MIDI What is MIDI? 8. MIDI WHAT IS MIDI? • CC10, or Pan. This one sets the channel’s position on the stereo front. Here is a brief overview of MIDI, as related to the Pa80. If • CC64, or Damper Pedal. Use this controller to simulate interested, you may find more information on the general use the Damper pedal. -
Page 48: The Chord 1 And Chord 2 Channels
MIDI The Chord 1 and Chord 2 channels Therefore, if the SPLIT button LED is lit up, the notes that bal in the memory with the Write function (see “The Write arrive to the Pa80 over this channel will be divided by the window”... -
Page 49: Connecting The Pa80 To Amidi Accordion
MIDI Connecting the Pa80 to a MIDI accordion CONNECTING PA80 MIDI Go to “Page 5 - MIDI Setup” (see page 16-3). Select the Ext.Seq Setup. ACCORDION Note: The settings can change when new data is loaded There are different types of MIDI accordion and each type from disk. -
Page 50: Playing Another Instrument With The Pa80
MIDI Playing another instrument with the Pa80 PLAYING ANOTHER INSTRUMENT WITH THE Tracks to the External status (see “Page 15 - Track: Internal/ External” on page 9-8). PA80 You can use the Pa80 as the master controller for your MIDI The Sequencer setup. -
Page 51: Reference Guide
REFERENCE GUIDE... -
Page 53: Style Play Operating Mode
Style Play operating mode What’s a Style? 9. STYLE PLAY OPERATING MODE The Style Play mode is the boot-up operating mode. When in The DIRECT HD Styles are contained in three folders to the this mode, you can play Styles (i.e. automatic accompani- hard disk. -
Page 54: The Direct Fd Bank
Style Play operating mode The DIRECT FD bank Load other Styles into the USER01-USER03 banks. Save Insert the floppy disk into the disk drive. them onto the “!789.SET” folder. Press DISK and go to the Load page. THE DIRECT FD BANK In addition to the internal memory and DIRECT HD Styles, Disk:Load you can have DIRECT FD Styles, directly accessed by the... -
Page 55: Main Page
Style Play operating mode Main page MAIN PAGE C (Acc.1-5 grouped tracks) Use these buttons to select, mute/unmute or change the vol- This is the page you see after you turn the instrument on. ume of the instrumental accompaniment tracks (tracks 1-5, To access this page from another operating mode, press the other than Bass, Drum and Percussion). -
Page 56: The Write Window
Style Play operating mode The Write window THE WRITE WINDOW When in the menu, select an edit section using the VOLUME/ VALUE (A-H) buttons, select an edit page using PAGE +, or Open this window by pressing the WRITE button. Here, you press EXIT to exit the menu. -
Page 57: Mixer: Volume
Style Play operating mode Page 1 - Mixer: Volume PAGE 1 - MIXER: VOLUME outputs; only the FX signal is heard for this track. This page lets you set the volume for each of the Realtime To program the output status for each track, (Keyboard) or Style tracks. -
Page 58: Tuning: Detune
Style Play operating mode Page 4 - Tuning: Detune PAGE 4 - TUNING: DETUNE PAGE 6 - TUNING: PITCHBEND SENSITIVITY This page is the place where you can set the fine tuning for This page lets you program the Pitch Bend range for the Real- each track. -
Page 59: Fx: A Editing
Style Play operating mode Page 9 - FX: A editing You can also change the volume for each class of Drums and C, D Percussion, if the selected track is set in Drum mode (see Effects assigned to the C and D effect processors. Usually, C is below “Page 14 - Track: Mode”). -
Page 60: Track: Mode
Style Play operating mode Page 14 - Track: Mode PAGE 15 - TRACK: INTERNAL/EXTERNAL Percus1V “Classic” percussion set volume. Percus2V “Ethnic” percussion set volume. This page lets you set the Internal or External status for each SFX V Special effects volume. track. -
Page 61: R.t. Controls: Damper
Style Play operating mode Page 16 - R.T. controls: Damper PAGE 16 - R.T. CONTROLS: DAMPER This enables/disables the front/rear movement of the Joystick This page lets you enable/disable the Damper pedal for each (Y+: Modulation, and sometimes the sound parameter’s con- of the Realtime (Keyboard) tracks. -
Page 62: Style Controls: Drum/Fill
9-10 Style Play operating mode Page 20 - Style controls: Drum/Fill PAGE 20 - STYLE CONTROLS: DRUM/FILL E(nsemble) Harmonization type. In this page you can select various general parameters for the Duet Adds a single note to the melody. Style. Close Adds a closed-position chord to the melody. -
Page 63: Style Controls: Wrap Around / Keyboard
Style Play operating mode 9-11 Page 21 - Style controls: Wrap Around / Keyboard range PAGE 21 - STYLE CONTROLS: WRAP AROUND / PAGE 22 - INPUT/PAD: INPUT SETUP KEYBOARD RANGE This page lets you select one of the available Setups for the Internal FX, Vocal/Guitar Processing Board effects, for the In this page you can program the Wrap Around function and Audio Inputs. -
Page 64: Preferences: Lock
9-12 Style Play operating mode Page 24 - Preferences: Lock (Default) The lock is engaged. When selecting D Send a Style or Performance, the Master Transpose Send level to the D Internal FX processor (usually modulat- will not change. ing effect) for each of the four Pad tracks. The lock is turned off. - Page 65 Style Play operating mode 9-13 Page 25 - Preferences: controls chord is reset when raising the hand from the Scale Mode keyboard, and the Lower track is not sustained. This parameter determines which tracks will use the selected Lower When its LED is on, the MEMORY button alternative scale (see “Scale”...
- Page 66 9-14 Style Play operating mode Page 25 - Preferences: controls...
-
Page 67: Style Record Mode
Style Record mode 10-1 The Style’s structure 10. STYLE RECORD MODE By entering the Style Record mode, you can create your own Each Style Element is made up of smaller units, called Chord Styles, or edit an existing Style. Variations (CV), but not all of them have the same number of CVs. -
Page 68: Style Import/Export
LISTENING TO THE STYLE WHILE IN RECORD/ STYLE IMPORT/EXPORT EDIT MODE You can use Korg’s Style To Midi application to exchange While you are in Record/Edit mode, you can listen to the Styles between your computer and the Pa80, through the selected Chord Variation or to the whole Style, depending Standard MIDI File (SMF) format. -
Page 69: The Write Window
Style Record mode 10-3 The Write window THE WRITE WINDOW Control function CC# (Control Change Number) This page appears when you press the WRITE or RECORD Note Off* button while in Record mode. Here you can save the recorded Pitch Bend or edited Style in memory. -
Page 70: Main Page
10-4 Style Record mode Main page MAIN PAGE Note: When this parameter and the assigned value is in small letters (cv:cv1), the Chord Variation is empty; when it is in cap- After pressing the RECORD button, and selected the Style to itals (CV:CV1), it is already recorded record/edit, the Main page of the Style Record mode appears. -
Page 71: Style Tracks Page
7th. Grid resolution, in musical values. For exam- Note: To conform to Korg specifications, it is advisable to set the ple, when you select 1/16, all notes are moved NTT to “No Transpose” on the Intro 1 and Ending 1. -
Page 72: Step Record Page
10-6 Style Record mode Step Record page allow you to play back louder any reference track, or the track mode, before actually starting recording (see step 6 on you are recording. page 10-7 for more information). Track status key? When in the Style Tracks page, each track can be in one of This is a prompt, asking for a note or chord to be played on three status. -
Page 73: Style Record Procedure
Style Record mode 10-7 Style Record procedure STYLE RECORD PROCEDURE wise, if you prefer to do a Step Record, jump to “Step Record procedure” on page 10-8. There are two different methods for recording a Style: Real- time and Step. Realtime Record procedure •... - Page 74 10-8 Style Record mode Style Record procedure on page 16-3) is also automatically set to On, to allow Assign a Program to each track, by using the PRO- playing on the keyboard. GRAM/PERFORMANCE section. You can’t select Digi- tal Drawbars Programs. When finished recording, press START/STOP to stop the arranger.
- Page 75 Style Record mode 10-9 Style Record procedure length, inserted at its end, will be reduced to fit the total Edit the Velocity value of the third note. length of the pattern. Press the third note, then release all notes. At this point, you may go on, inserting new events in Inserting a second voice.
-
Page 76: Menu
10-10 Style Record mode Menu MENU All edit pages share the same structure. Style Play icon Page header Page number From any page of the Style Record mode, press MENU to open the Style Record edit menu. This menu gives access to the various Style Record edit sections. -
Page 77: Edit: Transpose
Style Record mode 10-11 Page 1 - Edit: Quantize PAGE 1 - EDIT: QUANTIZE Bottom and Top parameters, you can select a single percus- sive instrument in a Drum or Percussion track. The quantize function may be used to correct any rhythm Note: These parameters are available only when a Drum or error after recording, or to give the pattern a “groovy”... -
Page 78: Edit: Velocity
10-12 Style Record mode Page 3 - Edit: Velocity PAGE 3 - EDIT: VELOCITY Trk (Track) Track in edit. To select a different track, press one of the A In this page you can change the velocity (dynamics) value of VOLUME/VALUE buttons to open the Go To Track window. -
Page 79: Event Filter
Style Record mode 10-13 Page 5 - Event Filter F3 and F4 buttons Control function CC# (Control Change Number) After selecting the parameter value area with the G VOL- Damper UME/VALUE buttons, use these buttons to select, respec- Filter Resonance tively, the first and second value of the event in edit. - Page 80 10-14 Style Record mode Event Edit procedure display (see “Page 5 - Event Filter” on page 10-13 for buttons or the TEMPO/VALUE controls to modify the more information). selected value. Ev: Note Event Type First value Second value Edit: Ev. Filter Note: Off Aftt: Off If a Note event is selected, use the D VOLUME/VALUE...
-
Page 81: Edit: Delete
Style Record mode 10-15 Page 6 - Edit: Delete the “Are you sure?” message appears, press ENTER to Note: Some CC data are automatically removed confirm, or EXIT to go back to the Write Style page. during recording. See the table on page 10-3 for more information on the allowed data. -
Page 82: Edit: Copy
10-16 Style Record mode Page 8 - Edit: Copy PAGE 8 - EDIT: COPY measures long, and the target 8-measures, the source will be copied two times. Here you can copy a track, Chord Variation or Style Element inside the same Style, or from a different one. Furthermore, 1 2 3 4 you can copy a whole Style. -
Page 83: Style Element Controls: Keyboard Range
Style Record mode 10-17 Page 11 - Style Element Controls: Keyboard Range PAGE 12 - STYLE ELEMENT CONTROLS: CHORD This is a very useful control, when you have different Pro- grams assigned to the same track in different Style Elements, VARIATION TABLE and the internal level of these Programs is different. -
Page 84: Import Grv
10-18 Style Record mode Page 14 - Import GRV T (Tension) Note: The parameters of this page are “ghosted”, and are not Tension adds notes (a 9th, 11th and/or 13th) that have actu- accessible when no card is inserted. The <empty> remark is ally been played to the accompaniment, even if they haven't given as the “From”... -
Page 85: Song Play Operating Mode
If you used Select the disk and open the folder containing the Song KORG native programs, you cannot reproduce the same to be selected. This folder will be used also in the Main sounds on instruments from other brands. -
Page 86: Master Volume, Sequencer Volume, Balance
11-2 Song Play operating mode Master Volume, Sequencer Volume, BALANCE When you enter Song Play mode from the Style Play mode, Press EXIT to exit this window. the Realtime tracks are the same as the Style Play mode. A Enable quick way to select Programs and Effects for the Realtime Enables/disable the quantize. -
Page 87: The Write Window
Song Play operating mode 11-3 The Write window The quantize window extends to the nearest Press EXIT/NO to access this page from the Menu or any of window; all events are quantized. the Song Play edit pages. To see the Song’s tracks, use the TRACK SELECT button to Win=0 switch from the main page (showing the Realtime tracks), to the other tracks. -
Page 88: Tracks 1-8 Page
11-4 Song Play operating mode Tracks 1-8 page Select page” on page 11-4), allowing for selection of a single Press the TRACK SELECT button again, to go back to the Song or a Jukebox file for Sequencer 1. main page. If you select another Song, while a Song is in play within the same Sequencer, the new Song will start playing. -
Page 89: The Lyrics Page
Song Play operating mode 11-5 The Lyrics page F2 (Select) Lyrics display on an external monitor Selects the item on the first line in the display (Song or Juke- As soon as you enter the Song Play mode, lyrics included in box file). -
Page 90: Menu
11-6 Song Play operating mode Menu PLAY/STOP Starts or stops the current Song. When you Song Play icon stop the Song, the sequencer goes back to mea- When on, this icon indicates that the instrument is in Song sure 1 of the current Song. Play mode. -
Page 91: Mixer: Pan
Song Play operating mode 11-7 Page 2 - Mixer: Pan PAGE 2 - MIXER: PAN PAGE 3 - MIXER: FX SEND A/B Here you can adjust the pan for each Song track. This page lets you set the level of the track’s direct (unef- fected) signal going to the A and B Internal FX processors Use the TRACK SELECT button to switch between Song (usually assigned to Sequencer 1). -
Page 92: Mixer: Fx Send C/D
11-8 Song Play operating mode Page 3 - Mixer: FX send C/D PAGE 3 - MIXER: FX SEND C/D Note: When playing back a Song that makes use of all four effects (A-D), you can’t edit any effect parameter. These param- This page lets you set the level of the track’s direct (unef- eters appear greyed out in the display. -
Page 93: Fx: A Editing
Song Play operating mode 11-9 Page 5 - FX: A editing PAGE 5 - FX: A EDITING PAGE 7 - TRACK: MODE This page contains the editing parameters for the A effect This page lets you set the polyphony mode for each Song (usually, reverb for Sequencer 1). -
Page 94: Jukebox
11-10 Song Play operating mode Page 9 - Jukebox Parameters F1 (Save) Internal The track plays the sounds generated by the Press this button to save the Jukebox file on disk. The Jukebox internal sound engine. It does not play an Save page appears, allowing you to save your file on disk. -
Page 95: Preferences
Song Play operating mode 11-11 Page 10 - Preferences PAGE 10 - PREFERENCES Performance FX Mode This parameter selects the effects mode for the Performance. In this page, you can set various general parameters. When selecting a Performance, no effect is selected. - Page 96 11-12 Song Play operating mode Saving a list of Songs When saved, the text file will be named after the selected folder. Move the folders and files to select to the first line of the For example, a folder named “Dummy” will generate a display.
-
Page 97: Backing Sequence Operating Mode
Backing Sequence operating mode 12-1 Transport controls 12. BACKING SEQUENCE OPERATING MODE REALTIME RECORDING MODE The Backing Sequence mode lets you record a live perfor- mance with the Styles. The front panel controls work mostly While in Backing Sequence mode, you can record a new Song as in Style Play mode, but here you are recording what you in realtime mode (i.e., recording exactly what you play). -
Page 98: Chord/Acc Step Recording
12-2 Backing Sequence operating mode Chord/Acc Step recording precount. Otherwise, the Style will start playing from Step mode page appears (see “Chord/Acc Step Record- the next bar, following the one where you pressed ing page” on page 12-4). START/STOP. Since you can use any Style control, you could start with the usual combinations (INTRO, ENDING, FILL…... -
Page 99: Load Song Page
Backing Sequence operating mode 12-3 Load Song page After pressing this command, the Save Song page appears Device Type (see “Save Song page” on page 12-3). Flash Card D (Select Tempo) Select this parameter to use the TEMPO/VALUE section to F2 (Load) select the Tempo. -
Page 100: Record Page
12-4 Backing Sequence operating mode Record page RECORD PAGE The metronome plays during recording. Recording begins with a 2-bar precount. Start While you are in Backing Sequence mode, press RECORD to recording after bar -1. access the Record mode. The RECORD LED turns on. RT/Pads Ch/Acc These parameters let you decide the track status during... - Page 101 Backing Sequence operating mode 12-5 Chord/Acc Step Recording page VOLUME/VALUE buttons, or the < > buttons (while the << Note: All events on the very first tick >> buttons let you move to the previous or following mea- (M001.01.000), like Perf, Style, Tempo, Chord, sure).
-
Page 102: How To Delete A Whole Song
12-6 Backing Sequence operating mode How to delete a whole Song SHIFT + DELETE “No chord” means that the accompaniment will not play at the current position (apart for the Drum and Percussion When the Perf parameter is selected, press tracks). -
Page 103: Song Operating Mode
Song operating mode 13-1 Transport controls 13. SONG OPERATING MODE MAIN PAGE The Song operating mode is the full-featured onboard sequencer, where you can create from scratch or edit a Song. Press SONG to access this page from another operating You can also use this mode to edit the initial parameters of a mode. -
Page 104: Tracks 1-8 Page
13-2 Song operating mode Tracks 1-8 page SONG SELECT PAGE Man(ual) When the cursor is on the “D (Select Tempo)” parameter, you can change the Tempo using This page appears when you press PAGE+ or either the B the TEMPO/VALUE section controls. The (Load Song) buttons while you are in the main page. -
Page 105: Save Song Page
Song operating mode 13-3 Save Song page SAVE SONG PAGE Move the cursor using the DOWN/- and UP/+ buttons. Select a character using the DIAL. Insert a character at The new or edited Song is contained in RAM, and is lost the cursor position by pressing the INSERT button. -
Page 106: Realtime Record Procedure
13-4 Song operating mode Realtime Record procedure REALTIME RECORD PROCEDURE While the status icon is flashing, press PLAY/STOP to begin recording. Depending on the Metro option you Here is the general procedure to follow for the Realtime selected, a 1- or 2-bars precount may play before the Recording. - Page 107 Song operating mode 13-5 Step Record procedure page 13-7 for more information on each parameter of editing the V (Velocity) and D (Duration) parameters. this page). See “V (Velocity)” and “D (Duration)” on page 13-7. • To insert a rest, just press the REST button. Its length Previous event Event to be inserted will match the step value.
-
Page 108: Song Record Page
13-6 Song operating mode Song Record page SONG RECORD PAGE Metronome on, with a one-bar precount before starting recording. While in the Song mode, press RECORD to enter the Song Metronome on, with a two-bar precount Record mode. The Song Record page appears. before starting recording. -
Page 109: Step Record Page
Song operating mode 13-7 Step Record page STEP RECORD PAGE … Note value. Dot (.) Augments the selected note by one half of its Access this page from the Main page of the Song Record value. mode, by selecting the “StepDub” or “StepOwr” recording Triplet (3) Makes the selected note a triplet note. -
Page 110: Menu
13-8 Song operating mode Menu MENU Track status icons A series of icons near each track show the track’s status. While in any page, press MENU to open the Song edit menu. This menu gives access to the various Song edit sections. Selected track or parameter. -
Page 111: Mixer: Fx Block
Song operating mode 13-9 Page 3 - Mixer: FX Block PAGE 4 - MIXER: FX SEND A/B (OR C/D) Hard Left. This page lets you set the level of the track’s direct (unef- Center. fected) signal going to the A and B, or C and D Internal FX Hard Right. -
Page 112: Tuning: Detune
13-10 Song operating mode Page 5 - Tuning: Detune PAGE 5 - TUNING: DETUNE Parameter required for some Scales, when you should set a This page is where you can set the fine tuning for each track. preferred key. Use the TRACK SELECT button to switch between Song Note tracks 1-8, Song tracks 9-16, and back again. -
Page 113: Fx: A/B Select
Song operating mode 13-11 Page 8 - FX: A/B Select PAGE 8 - FX: A/B SELECT C, D Effects assigned to the C and D effect processors. Usually, C is This page lets you select the A and B effects. Usually, the A the reverb, while D is the modulating effect (chorus, flanger, effect is a reverb, while the B effect is a modulating effect. -
Page 114: Track: Easy Edit
13-12 Song operating mode Page 14 - Track: Easy edit PAGE 14 - TRACK: EASY EDIT Decay Decay time. Time to go from the final Attack level to the beginning of the Release. In this page you can edit the main parameters of the Pro- Release Release time. -
Page 115: Track: Mode
Song operating mode 13-13 Page 15 - Track: Mode PAGE 15 - TRACK: MODE PAGE 16 - TRACK: INTERNAL/EXTERNAL This page lets you set the polyphony mode for each track. This page lets you set the Internal or External status for each track. -
Page 116: Edit: Quantize
13-14 Song operating mode Page 17 - Edit: Quantize PAGE 17 - EDIT: QUANTIZE PAGE 18 - EDIT: TRANSPOSE The quantize function corrects any rhythm error after Here you can transpose the Song, a track or a part of a track. recording. -
Page 117: Edit: Delete
Song operating mode 13-15 Page 20 - Edit: Delete If you wish to select a four-measure sequence starting at the Bottom / Top beginning of the Song, the Start will be positioned at Use these parameters to set the bottom and top of the key- 1.01.000, and the End at 5.01.000. -
Page 118: Edit: Copy
13-16 Song operating mode Page 23 - Edit: Copy PAGE 23 - EDIT: COPY PAGE 24 - EVENT EDIT Here you can copy tracks or phrases. Enter this page from the Menu of the Song mode. The Event Edit page allows you to edit each event in a single track. See “Event Edit procedure”... -
Page 119: Event Filter
Song operating mode 13-17 Page 25 - Event Filter And here are the events contained in the Master track. SEQ1 PLAY/STOP button Press PLAY/STOP to listen to the Song in edit. Press PLAY/ STOP again to stop it. Event First value Second value SHIFT + <<... -
Page 120: Event Edit Procedure
13-18 Song operating mode Event Edit procedure EVENT EDIT PROCEDURE For more information on the event types and their val- ues, see “Page 24 - Event Edit” below. The Event Edit is the page where you can edit each single Use the B VOLUME/VALUE buttons to select the Posi- MIDI event of the selected track. -
Page 121: Program Operating Mode
Program operating mode 14-1 Main page 14. PROGRAM OPERATING MODE C (CC32) The Program operating mode is where you can listen to This non-editable parameter shows the value of the Control individual Programs, and edit them. Change (CC) 32 message (a.k.a. Bank Select LSB) for the To select a Program, see the “Basic operations”... -
Page 122: Sound Programs And Drum Programs
14-2 Program operating mode Sound Programs and Drum Programs MENU Editing a Digital Drawbars Program When the Drawbars page is open, press PAGE+ to see the While in any other page of the Program operative mode, Drawbar Setting page. press MENU to open the Program edit menu. This menu gives access to the various Program edit sections. -
Page 123: The Compare Function
Program operating mode 14-3 The Compare function Parameter value Name Use the A-D VOLUME/VALUE buttons, or the TEMPO/ Use this parameter to change the Program’s name. Press the VALUE controls, to change the parameter value. right A VOLUME/VALUE button to enter editing. Modify the name using the UP/DOWN buttons to move the cursor, and the DIAL to select a character. -
Page 124: Sample (Sound Programs)
14-4 Program operating mode Page 2 - Sample (Sound Programs) When legato is on, multiple note-on’s will not velocity switching, set the switch to a value of 001, and select retrigger the voice. If one note is already on only the High multisample. and another note is turned on, the first voice Select a preset multisample. -
Page 125: Dk Samples (Drum Programs)
Program operating mode 14-5 Page 2 - DK Samples (Drum Programs) Delay (ms) [H/L] Cutoff This parameter sets a delay time from the note-on to the real These parameters set the cutoff frequency for the filter beginning of the sound. With a setting of KeyOff, the sound applied to the selected sample. -
Page 126: Pitch Modulation
14-6 Program operating mode Page 3 - Pitch JS (–X) This parameter sets the position in the stereo panorama of This parameter specifies how the pitch will change when the the selected key. joystick is moved all the way to the left. A setting of 12 pro- duces 1 octave of change. -
Page 127: Pitch Lfo1
Program operating mode 14-7 Page 4 - Pitch LFO1 Portamento be applied. With a setting of 12.00, the LFO1 will apply a maximum of ±1 octave of pitch modulation. Negative (–) Portamento settings will invert the LFO waveform. This parameter turns the portamento effect (smooth change For example if “AMS”... - Page 128 14-8 Program operating mode Page 6 - Pitch EG would raise the pitch one octave, and a “Level” setting of –99 Start Level Swing would lower the pitch one octave. This parameter specifies the direction of change in “Start Level” caused by “AMS1/2”. If “Intensity” is a positive (+) -99…+99 Parameter value.
-
Page 129: Filter
Program operating mode 14-9 Page 7 - Filter PAGE 7 - FILTER Resonance modulation The effect of resonance Here you can make settings for the filters that will be used by Low Pass the oscillators. You can select either a 24 dB/octave low pass Level filter with resonance, or a series connection of a 12 dB/octave low pass filter and a 12 dB/octave high pass filter. - Page 130 14-10 Program operating mode Page 8 - Filter Modulation Filter keyboard tracking Filter EG modulation Tracking Low/High Changes in cutoff frequency These settings specify keyboard tracking for the cutoff fre- Note-on Note-on Note-on Note-off Note-off Note-off quency of the filter for the selected oscillator. The way in which the cutoff frequency is affected by the keyboard loca- tion you play can be specified by the “Tracking Low”, “Track- ing High”, “Ramp Low”...
-
Page 131: Filter Lfo1
Program operating mode 14-11 Page 9 - Filter LFO1 Note: The sum of the settings for “Velocity to A/B”, “Intensity to Intensity to B A/B”, and “(AMS) Intensity to A/B” will determine the depth Specify the depth and direction of the modulation that LFO1 and direction of the effect produced by the filter EG. -
Page 132: Filter Eg
14-12 Program operating mode Page 11 - Filter EG PAGE 11 - FILTER EG Attack Time This parameter specifies the time over which the level will Here you can make settings for the EG that will produce change from note-on until the attack level is reached. time-varying changes in the cutoff frequency of filters A and Decay Time B for the selected oscillator. -
Page 133: Amp
Program operating mode 14-13 Page 12 - Amp PAGE 12 - AMP Filter EG ‘Time’ modulation Filter 1 EG changes (Time) (AMS = Velocity, Intensity = a positive (+) value) These parameters control the volume and pan of the selected Note-on Note-on Note-on... -
Page 134: Amp Modulation
14-14 Program operating mode Page 13 - Amp Modulation PAGE 13 - AMP MODULATION Amplifier Modulation These parameters specify how the volume of the selected These settings allow you to apply modulation to amp (for oscillator will be affected by velocity. each oscillator) to modulate the volume. -
Page 135: Amp Lfo2
Program operating mode 14-15 Page 15 - Amp LFO2 Amplifier LFO1 modulation Start Level This parameter specifies the volume level at note-on. If you AMS (Alternate Modulation Source) want the note to begin at a loud level, set this to a high value. Use this parameter to select a source that will control the Attack Level depth by which “LFO1”... -
Page 136: Lfo1
14-16 Program operating mode Page 17 - LFO1 Start Level Swing (Ramp Setting)” will cause EG times to be shortened. The This parameter specifies the direction in which “AMS” will direction of the change is specified by “Attack Time Swing”, change “Start Level”. -
Page 137: Frequency Modulation
Program operating mode 14-17 Page 17 - LFO1 Wave Here is how “Fade In” affects the LFO (when “Key Sync” is This parameter selects the LFO waveform. The numbers that On): appear at the right of some of the LFO waveforms indicate Note-on Note-off the phase at which the waveform will begin. -
Page 138: Lfo2
14-18 Program operating mode Page 18 - LFO2 If “AMS1(F)” is set to JS +Y, raising the value of this parame- FX1/2 ter will cause the oscillator LFO1 speed to increase as the joy- Use these parameters to select the effect type for effect 1/2. stick is moved away from yourself. -
Page 139: Ams (Alternate Modulation Source) List
Program operating mode 14-19 AMS (Alternate Modulation Source) list AMS (ALTERNATE MODULATION SOURCE) LIST Do not use Alternate Modulation Pitch EG Pitch EG Filter EG Filter EG within the same oscillator Amp EG Amp EG within the same oscillator LFO1 LFO1 within the same oscillator LFO2 LFO2 within the same oscillator... - Page 140 14-20 Program operating mode AMS (Alternate Modulation Source) list The sign of the “Ramp Low” setting will deter- JS +Y & AT/2 (Joy Stick +Y & After Touch/2) mine the direction of its effect. “Ramp High” The effect will be controlled by the joystick +Y (vertically will have no AMS effect.
-
Page 141: Sampling Operating Mode
(“.KSF”) and multisamples (“.KMP”). Input 2 Only the Input 2 is selected. A mono sample Note: Some demo audio grooves can be found on the Korg Pa80 will be produced. web site (www.korgpa.com). Input 1&2 Both inputs will be selected. A stereo sample will be produced. - Page 142 Here is a short overview of a typical sampling procedure. your groove (see “Page 3 - Extend” on page 15-5). Insert a RAM Flash Card (Korg PCM-8MB), with After saving, press RECORD to exit the Sampling mode. enough free space to save the samples, into the FLASH The Write Sound page will appear.
-
Page 143: Time Slice
Sampling operating mode 15-3 Page 2 - Time Slice PAGE 2 - TIME SLICE Ex.2 - Varying the groove’s tempo The Time Slice function detects the attacks (e.g., kick and 150BPM snare) within a rhythm loop sample (a sample that loops a drum pattern), and automatically divides the sample into individual percussive instruments. - Page 144 15-4 Sampling operating mode Page 2 - Time Slice Meter Slices Use this parameter to specify the Meter of the original sam- This non-editable parameter shows the number of generated ple. slices, i.e. generated samples and notes in the MIDI Groove file.
-
Page 145: Extend
Sampling operating mode 15-5 Page 3 - Extend PAGE 3 - EXTEND A MIDI Groove with the original pattern will also be generated. The screen will change. When using a sliced groove with a slow tempo, an annoying gap may appear between a sample and the following one. The Extend function allows you to fix this problem by adding a “tail”... -
Page 146: Load Sample
Flash Card before leaving the Sampling mode. • KSF is Korg’s native sample format, used by the Trinity and Triton series of workstations. The file name must have the “.KSF” extension. -
Page 147: Import Pcg
Use the Import PCG command to import Program data from Note: You cannot import Drum Kits. a Triton “.PCG” file. PCG is Korg’s native Program format, as • At any time, you may abort the Write operation by used by the Triton series of high-end workstations. -
Page 148: Export Kmp
Using this function, you may export from the Flash Card any multisample and the linked samples. The Export operation generates a “.KMP” file (Korg’s proprietary file format for Use F1 to select the target device. multisamples), and a folder containing a series of “.KSF” files Move the folder where you want to save the multisam- (Korg’s proprietary file format for samples)) into the same... -
Page 149: The Write Window
Sampling operating mode 15-9 The Write window THE WRITE WINDOW them using the Card Backup operation (see “Page 10 - Card Backup” on page 17-17), or export a multisample This window opens when you press the WRITE or RECORD (see “Page 7 - Export KMP” on page 15-8). You cannot button from the Record, Time Slice or Extend page of the delete single samples from a card Sampling mode (see “Page 1 - Record/Edit”... - Page 150 15-10 Sampling operating mode The Write window...
-
Page 151: Global Edit Environment
Global edit environment 16-1 The Write window 16. GLOBAL EDIT ENVIRONMENT The Global edit environment is the place where you can set Move the cursor using the DOWN/- and UP/+ buttons. most of the Pa80 global functions, i.e. functions overriding Select a character using the DIAL. -
Page 152: General Controls
16-2 Global edit environment Page 1 - General controls PAGE 1 - GENERAL CONTROLS PAGE 2 - MASTER TRANSPOSE This page contains various general parameters, setting the This page is where you can turn the Master Transpose on or status of the keyboard, the speakers and the metronome. off. -
Page 153: Video Interface
Therefore, the Scale EC5-A…E will be applied before transposition. For exam- Each of the switches of a KORG EC5 multiswitch. ple, if you altered an E, and then set the Master Damper Pol. (Damper Polarity) Transpose to +1, the altered key will still be E Polarity of the Damper pedal. -
Page 154: Midi In Channels
16-4 Global edit environment Page 7 - MIDI IN Channels PAGE 7 - MIDI IN CHANNELS Note: The Local parameter is always turned on again each time you turn the instrument on. In this page, you can assign the Pa80 tracks to any of the When you play on the keyboard, MIDI data is MIDI IN channels. -
Page 155: Midi In Controls (2)
Global edit environment 16-5 Page 9 - MIDI IN Controls (2) Chord2 channel Harm(ony) Oct(ave) Notes entering this channel are sent to the Chord Recogni- Octave transposition for the MIDI notes received by the Har- tion engine. mony effect (if the Vocal/Guitar Processor Board VHG1 is installed). -
Page 156: Midi Out Filters
16-6 Global edit environment Page 12 - MIDI OUT Filters S2 T1…16 One of Sequencer 2 tracks. Virtual output SQ Tr01…16 Use these channels to send data generated by a Select this parameter and use the TEMPO/VALUE controls to track with the same name on either or both select a virtual output. -
Page 157: Audio Input Configuration
Global edit environment 16-7 Page 14 - Audio Input Configuration 1/2 Int.FX The signal is sent to the C and D Internal FX Physical output processors. Select a physical output (OUTPUT section, on the back of 1/2 Vocal/Gtr the instrument) using these parameters. L(eft) &... -
Page 158: Internal Fx Controls
16-8 Global edit environment Page 16 - Internal FX controls Note: With some effect types, sending the Audio Inputs to the C AssignSw1 (Assignable Switch 1 and D Internal FX processors may cause some residual noise to AssignSw2 (Assignable Switch 2 become evident. - Page 159 Global edit environment 16-9 Page 17 - Vocal/Guitar Mode AssignPdl (Assignable Pedal) (Vocal mode) Parameter Meaning Vocal/Guitar FX parameter assigned to the Assignable Pedal, Dist Gain Saturation of the Distortion. when the Mode = Vocal. Dist Level Level of the Distortion. Comp Sens Sensitivity of the Compressor.
-
Page 160: Vocal Setup 1
16-10 Global edit environment Page 18 - Vocal Setup 1 PAGE 18 - VOCAL SETUP 1 PAGE 19 - VOCAL SETUP 2 Note: This page appears only if you selected Mode = Vocal on Note: This page appears only if you selected Mode = Vocal on “Page 17 - Vocal/Guitar Mode”. -
Page 161: Vocal Setup 3
Global edit environment 16-11 Page 20 - Vocal Setup 3 PAGE 20 - VOCAL SETUP 3 PAGE 18 - GUITAR SETUP 1 Note: This page appears only if you selected Mode = Vocal on Note: This page appears only if you selected Mode = Guitar on “Page 17 - Vocal/Guitar Mode”. -
Page 162: Guitar Setup 2
16-12 Global edit environment Page 19 - Guitar Setup 2 PAGE 19 - GUITAR SETUP 2 Phaser While the Chorus and Flanger modulate the delay length, the Phaser modulates the signal’s Note: This page appears only if you selected Mode = Guitar on phase. -
Page 163: Disk Edit Environment
Disk edit environment 17-1 The WRITE/DISK IN USE LED 17. DISK EDIT ENVIRONMENT Inserting a disk The Disk edit environment is the place where you can man- age files. This edit environment overlaps the current operat- Insert the disk delicately into the disk drive, with the label ing mode (Style Play, Song Play, Backing Sequence, Song, facing upwards and the metal part to the front. -
Page 164: Hard Disk Partition Size
Note: Only Korg cards are certified for use with the Pa80. contents of the disks. Note: Since it is a RAM Flash Card, you can use the Korg FMC- • Do not keep disks in very hot or wet places, do not PCM01 (Real Drums) card to save your data. -
Page 165: Loading Older I-Series Data
Disk edit environment 17-3 Loading older i-Series data Some notes about the card structure At this point, you can load the whole “.STY” folder, or open it and select a single Style. After formatting (see “Card” on page 17-14), the card will be •... -
Page 166: Disk Structure
(a) To read AIFF and WAVE files, a RAM Flash Card must be BANK01.STY inserted in the FLASH CARD slot. 1-1 8 Beat 1 … 1-16 8 Beat 16 In addition to the above, it can read the following Korg pro- BANK….STY prietary data types: BANK16.STY Extension File type 16-1 Traditional 1 …... -
Page 167: File And Folder Size Display
Disk edit environment 17-5 File and folder size display FILE AND FOLDER SIZE DISPLAY Use the Page commands (F1-F4) on the last line to execute an operation on the selected file or folder. The size of any file and folder in the disk can be seen in the The “... -
Page 168: Load
17-6 Disk edit environment Page 1 - Load PAGE 1 - LOAD Loading all data of a specified type You can load all User data of a specified type (User Programs, In this page you can load files from a disk to the internal User Styles, Performances) with a single operation. - Page 169 Disk edit environment 17-7 Page 1 - Load Loading a single bank Press F2 (Load) to confirm the file selection. The list of User banks in memory appears. You can load a single bank of User data (User Programs, User Styles, Performances) with a single operation.
- Page 170 17-8 Disk edit environment Page 1 - Load Press F3 (Open) to open the “.SET” folder. A list of User Use the E-H (Scroll) buttons (or the TEMPO/VALUE data appears (Global, Performance, Program, Style). controls) to move the desired item to the first line of the display.
-
Page 171: Save
Disk edit environment 17-9 Page 2 - Save PAGE 2 - SAVE Select the target device, using the F1 button. You can select a device in this order: HD ➛ FD ➛ CRD ➛ HD… In this page, you can save User data from the internal mem- ory to a disk. - Page 172 17-10 Disk edit environment Page 2 - Save Once you have selected the type of data required, press folder. A list of User data types appear (each type is a F2 (Save) to confirm the selection. You are prompted to separate folder).
- Page 173 Disk edit environment 17-11 Page 2 - Save At this point, you can: Use the E-H (Scroll) buttons (or the TEMPO/VALUE controls) to move the bank containing the file to save to • Create a new “.SET” folder (see “Creating a new “.SET” the first line of the display.
-
Page 174: Copy
17-12 Disk edit environment Page 3 - Copy PAGE 3 - COPY Press F2 (Save) to confirm. A list of files on the target device appears. Only files of the selected type are shown. In this page you can copy single files (i.e., midifiles of Jukebox files), whole folders (generic or “.SET”... - Page 175 Disk edit environment 17-13 Page 3 - Copy Select the target device, using the F1 button. You can Select the source device, using the F1 button. You can select a disk device in this order: HD ➛ FD ➛ HD… select a disk device in this order: HD ➛...
-
Page 176: Erase
The “Please press F4 to continue” message appears in the display; press F4 to confirm, EXIT to abort. Card Use this command to format a Flash Card (the optional Korg FMC-8MB). Please ask your Korg Authorized Reseller for more information on available Flash Cards. -
Page 177: New Dir
Disk edit environment 17-15 Page 6 - New Dir Insert the card to be formatted. the cursor position by pressing the INSERT button. Delete a character at the cursor position by pressing the Move the Card option to the first line of the display. DELETE button. -
Page 178: Utilities 1
HD info ask your local KORG dealer. Select this command to see the name of the hard disk (if If you are making a backup on floppy disks, prepare 5 installed), and the free space on it. -
Page 179: Utilities 2
• If you selected the hard disk, the restore will start Note: Should your accidentally delete some Factory Data, immediately. reload the Backup data, contact your KORG dealer or service • If you selected the floppy disk, the “Insert backup disk center, or download the data from www.korgpa.com. -
Page 180: Card Restore
17-18 Disk edit environment Page 11 - Card Restore ENTER/YES to confirm overwriting of existing data, or Warning: When restoring data, all existing data on the Flash EXIT/NO to abort, and repeat the folder naming. Card will be deleted! If you selected the floppy disk drive as the backup device, insert the various disks as required by the instru- Restore procedure ment., and press ENTER to continue:... -
Page 181: Appendix
APPENDIX... -
Page 183: Korg Midi Driver Installation And Setup
MIDI device. If the application (sequencer) you are using on your Apple Macintosh is compatible with the Apple MIDI Manager, using the KORG MIDI driver will allow the Pa80 connected to the serial port to exchange data with the Macin- tosh. -
Page 184: Modifying The Korg Midi Driver Setup For Windows
Modifying the KORG MIDI Driver setup for Windows Click the [OK] button and then click [Finish]. Click [+] for [MIDI Devices and Instruments] (the dis- play will change to [–]), and click [KORG PC I/F MIDI Port]. Click the [Properties] button. -
Page 185: Setting Up The Korg Midi Driver (Macintosh)
Check Port Enabled for the port to which the Pa80 is connected, and select [1 MHz] as the Interface Type. (Since the Pa80 does not contain a KORG PC IF, do not select [KORG PC IF].) Click the [Out Port Setting] button. -
Page 186: Using Pc Exchange To Convert Smf Data
18-4 KORG MIDI Driver installation and setup Using PC Exchange to convert SMF data USING PC EXCHANGE TO CONVERT SMF DATA From the list that appears in the lower part of the dialog box, select a MIDI application (sequencer) that can use Most commercially available Standard MIDI File (SMF) song SMF data. -
Page 187: Factory Data
Factory Data 19-1 Styles 19. FACTORY DATA STYLES Note: You can remotely select Styles on the Pa80, by sending it Bank Select MSB (CC#0), Bank Select LSB (CC#32) and Program Change messages on the Control channel (see page 16-4). CC#0 CC#32 Bank: 8/16 Beat 1 CC#0... - Page 188 19-2 Factory Data Styles CC#0 CC#32 Bank: World 3 CC#0 CC#32 Bank: Latin 1 CC#0 CC#32 Bank: Latin 2 Hora UnplugBossa EnglishTango Sevillana 1 Basic Bossa Orch. Tango Sevillana 2 L.A. Bossa Tango.it Jota New Bossa Habanera 1 Copla Miss Bossa Habanera 2 Classic 3/4 Lite Bossa...
-
Page 189: Style Elements
Factory Data 19-3 Style Elements Bank: Direct FD Bank: Direct FD Bank: Direct FD CC#0 CC#32 CC#0 CC#32 CC#0 CC#32 Page 1-2 Page 3-4 Page 5-6 0-15 *.SET 0-15 *.SET 0-15 *.SET Bank: Card Bank: Card Bank: Card CC#0 CC#32 CC#0 CC#32 CC#0... -
Page 190: Programs (Bank Order)
Pno&Strings TubularBell PianoLayers Church Bell Piano&Vibes Carillon Harpsichord KrystalBell Harpsi Oct. ChurchBell2 Harpsi Wide Tinkle Bell HarpsiK.Off Dulcimer Harpsi Korg Santur Clav Kalimba Pulse Clav VeloKalimba Clav Wah MalletClock Clav Snap Gamelan Sticky Clav BaliGamelan Bank: E. Piano GarbageMall ClubElPiano... - Page 191 Factory Data 19-5 Programs (bank order) Name CC00 CC32 Name CC00 CC32 Accordion 2 Nylon Bossa Arab.Accord NylonKeyOff Steel Gtr 2 Bank: Organ AcGtrKeyOff Jimmy Organ Club J.Gtr2 BX3 Velo Sw Vintage S. ClassiClick CleanMutGtr M1 Organ Stereo Dist Jazz Organ Nylon Gtr 2 Dist.
- Page 192 19-6 Factory Data Programs (bank order) Name CC00 CC32 Name CC00 CC32 Sitar Grand Choir Sitar 2 Slow Choir SitarTambou Symph. Bows IndianStars Cyber Choir Choir Light Kanun Vocalesque Kanun Trem. Synth Voice Kanun Mix Voice Lead Shamisen Choir Pad Koto Halo Pad Taisho Koto...
- Page 193 Factory Data 19-7 Programs (bank order) Name CC00 CC32 Name CC00 CC32 Fat Brass Bank: Woodwind Trumpet Ens Jazz Flute Glen & Boys Old Shaku MutEnsembl2 FluteSwitch French Horn FluteDyn5th Syn Brass Flute Frull Brass Hit Pan Flute AttackBrass Jazz Clarin BrassSect.2 Flute 2 TromboneEns...
- Page 194 19-8 Factory Data Programs (bank order) Name CC00 CC32 Name CC00 CC32 Super Sweep Mega Synth Wave Sweep TecnoPhonic Cross Sweep DarkElement Digi IcePad Band Passed Crimson5ths Cat Lead Freedom Pad Pan Reso Noble Pad Square Rez Mellow Pad Rezbo Lonely Spin Auto Pilot Cinema Pad...
- Page 195 Factory Data 19-9 Programs (bank order) Name CC00 CC32 Name CC00 CC32 Fretless Sw SFX Kit Thumb Bass Percus.Kit1 Finger Slap Latin P.Kit Attack Bass TRI-Per.KIT Rubber Bass ArabianKit1 FingElBass3 ArabianKit2 DarkR&BBass Timpani Sweet Fret Agogo Dyna Bass Log Drum Stick Bass Woodblock Gtr Bass...
- Page 196 19-10 Factory Data Programs (bank order) Name CC00 CC32 Jetplane Starship Burst Noise Laughing Screaming Punch Heart Beat Footsteps Machine Gun Lasergun Explosion Ice Rain Jaw Harp HitInIndia Stadium...
-
Page 197: Programs (Program Change Order)
CC00 CC32 Name Pa80 Bank √ HarpsiK.Off Piano The following table enlists all Pa80 Factory Programs in order Harpsi Korg Piano of Bank Select-Program Change number. √ Clav Piano Legend: The table also includes MIDI data used to remotely √... - Page 198 19-12 Factory Data Programs (Program Change order) CC00 CC32 Name Pa80 Bank CC00 CC32 Name Pa80 Bank PercShorDec Organ Chorus Gtr Guitar Perc.Wheels Organ Vintage S. Guitar Jimmy Organ Organ ProcesElGtr Guitar √ ChurchOrg.1 Organ SingleCoil Guitar √ ChurchOcMix Organ NewStra.Gtr Guitar √...
- Page 199 Factory Data 19-13 Programs (Program Change order) CC00 CC32 Name Pa80 Bank CC00 CC32 Name Pa80 Bank √ SynthBass 1 Bass AnalogVelve Strings & Vocals √ SynBassWarm Bass Odissey Strings & Vocals √ √ SynBassReso Bass SynStrings2 Strings & Vocals √...
- Page 200 19-14 Factory Data Programs (Program Change order) CC00 CC32 Name Pa80 Bank CC00 CC32 Name Pa80 Bank √ French Horn Brass Double Reed Woodwind √ √ FrenchHorn2 Brass EnglishHorn Woodwind French Sect Brass EnglisHorn2 Woodwind √ ClassicHorn Brass Bassoon Woodwind √...
- Page 201 Factory Data 19-15 Programs (Program Change order) CC00 CC32 Name Pa80 Bank CC00 CC32 Name Pa80 Bank Syn Pianoid Synth 2 Dance ReMix Synth 1 √ √ Calliope Synth 2 BowedGlass Synth 1 √ √ Chiff Synth 2 MetallicPad Synth 1 √...
- Page 202 19-16 Factory Data Programs (Program Change order) CC00 CC32 Name Pa80 Bank CC00 CC32 Name Pa80 Bank √ 107 Kanun Mix Guitar 125 Burst Noise √ √ 108 Kalimba Mallet & Bell 126 Applause √ 108 VeloKalimba Mallet & Bell 126 Laughing √...
-
Page 203: Drum Kits
Factory Data 19-17 Drum Kits DRUM KITS CC00 CC32 Name House Kit2 The following table enlists all Pa80 Factory Drum Kit Pro- House Kit3 grams in order of Bank Select-Program Change number. House Kit4 Legend: The table also includes MIDI data used to remotely 30-31: (remap to 24) select the Programs. -
Page 204: Drum Kit Instruments
19-18 Factory Data Drum Kit instruments DRUM KIT INSTRUMENTS Legend: In the Drum Kit 120-0-0: Std. Kit1 120-0-1: Std. Kit2 120-0-2: Std. Kit3 Note Sample Excl. Sample Excl. Sample Excl. tables, the numer 120-x-x G#-1 BD-Dry 1 before each Drum Kit BD-House 1 BD-House 1 BD-House 1... - Page 205 Factory Data 19-19 Drum Kit instruments 120-0-3: AcousticKit 120-0-4: Std. Kit4 120-0-8: Room Kit1 120-0-9: HipHop Kit1 Note Sample Excl. Sample Excl. Sample Excl. Sample Excl. BD-House 1 BD-House 1 BD-Squash BD-Squash A#-1 99-SD 99-SD SD-Hip 6 SD-Hip 6 88-BD 88-BD 88-BD 88-BD...
- Page 206 19-20 Factory Data Drum Kit instruments 120-0-10: Jungle Kit 120-0-11: Techno Kit1 120-0-12: Room Kit2 120-0-13: HipHop Kit2 Note Sample Excl. Sample Excl. Sample Excl. Sample Excl. BD-Squash BD-Hip 3 BD-Squash BD-Squash A#-1 SD-Hip 6 SD-Hip 6 SD-Hip 6 SD-Hip 6 88-BD 88-BD 88-BD...
- Page 207 Factory Data 19-21 Drum Kit instruments 120-0-14: Techno Kit2 120-0-15: Techno Kit3 120-0-16: Power Kit1 120-0-17: Power Kit2 Note Sample Excl. Sample Excl. Sample Excl. Sample Excl. BD-Squash BD-Squash BD-Dance 99 BD-Dance 99 A#-1 SD-Hip 6 SD-Hip 6 99-SD 99-SD 88-BD 88-BD 88-BD...
- Page 208 19-22 Factory Data Drum Kit instruments 120-0-24: Electro Kit 120-0-25: Analog Kit 120-0-26: House Kit1 120-0-27: House Kit2 Note Sample Excl. Sample Excl. Sample Excl. Sample Excl. BD-Hip 1 Explosion BD-Pop Kick BD-Pop Kick A#-1 99-SD SD-Hip 6 SD-Vintage6 99-SD 88-BD BD-Normal BD-Deep 88...
- Page 209 Factory Data 19-23 Drum Kit instruments 120-0-28: House Kit3 120-0-29: House Kit4 120-0-32: Jazz Kit 120-0-40: Brush Kit1 Note Sample Excl. Sample Excl. Sample Excl. Sample Excl. BD-Pop Kick BD-Pop Kick BD-House 1 Tom 2-Floor A#-1 99-SD 99-SD 99-SD Tom 2-Floor BD-Deep 88 BD-Deep 88 BD-Deep 88...
- Page 210 19-24 Factory Data Drum Kit instruments 120-0-41: Brush V.S.2 120-0-48: OrchestraK 120-0-116: Arabian Kit 1 120-0-117: Arabian Kit 2 Note Sample Excl. Sample Excl. Sample Excl. Sample Excl. Tom 2-Floor BD-House 1 BD-House 1 A#-1 Tom 2-Floor 99-SD 99-SD Tom 2-Floor 88-BD 88-BD Tom 2-Lo...
- Page 211 Factory Data 19-25 Drum Kit instruments (continued) 120-0-41: Brush V.S.2 120-0-48: OrchestraK 120-0-116: Arabian Kit 1 120-0-117: Arabian Kit 2 Note Sample Excl. Sample Excl. Sample Excl. Sample Excl. Ramazan DVL1 Djembe-Open Ramazan DVL3 Dbk-Tky-Open Kup 2 Bells Open Tom Jazz Hi Sagat-HalfOpen Kup 2 Sagat-Close...
- Page 212 19-26 Factory Data Drum Kit instruments 120-0-50: Bdrum & Sdrum 120-0-56: SFX Kit 120-0-64: Percus.Kit1 120-0-65: Latin P.Kit Note Sample Excl. Sample Excl. Sample Excl. Sample Excl. Tribe C#-1 Zap1 88-Tom D#-1 88-BD 88-BD BD-Hip 4 F#-1 BD-Pop Kick BD-Hip 1 G#-1 BD-House 2 BD-Pop 99...
- Page 213 Factory Data 19-27 Drum Kit instruments (continued) 120-0-50: Bdrum & Sdrum 120-0-56: SFX Kit 120-0-64: Percus.Kit1 120-0-65: Latin P.Kit Note Sample Excl. Sample Excl. Sample Excl. Sample Excl. 88-SD Wind Taiko Open Cabasa-Down 99-SD Noise White Zap2 Tambourin-Mute2 SD-Hip 2 Stream SD-Orch.Roll Tambourin-Open...
- Page 214 19-28 Factory Data Drum Kit instruments 120-0-66: TRI-Per.KIT 120-0-67: i30 Perc.Kit Note Sample Excl. Sample Excl. C#-1 D#-1 F#-1 G#-1 A#-1 Rik3 Rik2 Rik1 Rek-Jingle Rek-dom-ak Djembe-Bass Taiko Open Pand-Pattern4 Pand-Pattern3 Pand-Pattern2 Tambourin-Push Pand-Pattern1 Tambourin-Acc2 Pand-Open Tabla-Na 196→195 Taiko Rim→Taiko Open Flexatone Tsuzumi→Tsuzumi Finger Cymbal...
- Page 215 Factory Data 19-29 Drum Kit instruments (continued) 120-0-66: TRI-Per.KIT 120-0-67: i30 Perc.Kit Note Sample Excl. Sample Excl. Agogo-Bell SD-Orch.Roll 183→182 MaracasPull→MaracasPush SD-Orch. 217→217 Shaker1→Shaker1 Orch Cymb 218→218 Shaker2→Shaker2 Orch Cymb 221→220 Cabasa-Tap→Cabasa-Down Udu-f-open 219→221 Cabasa-Up→Cabasa-Tap Orchestra Hit 222→223 Caxixi-Hard→Caxixi-Soft Orchestra Hit Tambourin-Push Orchestra Hit 211→211 Tambourin-Acc1→Tambourin-Acc1...
-
Page 216: Performances
19-30 Factory Data Performances PERFORMANCES All Performances are user-editable. Use the following table as a model for your own Perfomance lists. Note: You can remotely select Performances on the Pa80, by sending it Bank Select MSB (CC#0), Bank Select LSB (CC#32) and Pro- gram Change messages on the Control channel (see page 16-4). -
Page 217: Midi Setup
Factory Data 19-31 MIDI Setup MIDI SETUP DEFAULT Master Kbd Sequencer1 Sequencer 2 Accordion 1 Accordion 2 Accordion 3 Ext. Seq S1_Tr 1 Global S1_Tr 1 S2_Tr 1 Global Upp1 Upp1 S1_Tr 1 S1_Tr 2 S1_Tr 2 S2_Tr 2 Lower Lower Lower S1_Tr 2... - Page 218 19-32 Factory Data MIDI Setup...
-
Page 219: Effects
Effects 20-1 Diagrams 20. EFFECTS Pa80 is equipped with four powerful Effect Processors. You Modulation source Note can send them the internal tracks, or any signal entering the Audio Inputs. MIDI(CC#20) MIDI(CC#21) DIAGRAMS Damper: #64 The following instructions show the signal path diagram for Prta.SW: #65 Portamento Switch each of the effect types. - Page 220 20-2 Effects Filter/Dynamic 002: Compressor 003: Limiter (Stereo Compressor) (Stereo Limiter) This effect compresses the input signal to regulate the level The Limiter regulates the input signal level. It is similar to the and give a “punchy” effect. It is useful for guitar, piano, and Compressor, except that the Limiter compresses only signals drum sounds.
- Page 221 Effects 20-3 Filter/Dynamic Adjust the output level using the “Gain Adjust” parame- 004: MBandLimit ter, since compression causes the entire level to be (Multiband Limiter) reduced. This effect applies the Limiter to the low range, mid range, Limiter - Threshold / Ratio and high range of the input signal.
- Page 222 20-4 Effects Filter/Dynamic 005: Gate The Attack and Release parameters set the Gate attack time and release time. (Stereo Gate) Gate - Threshold This effect mutes the input signal if its level is lower than the Output Level specified level. It also reverses the on and off operation of the Threshold gate, and uses Note On and Off messages to turn the gate on and off.
- Page 223 Effects 20-5 Filter/Dynamic 007: Param.4B Eq Low Cutoff [Hz] 20...1.0kHz Sets the center frequency for Low EQ (shelving type) (Stereo Parametric 4-Band EQ) Gain [dB] –18...+18dB This is a stereo 4-band parametric equalizer. You can select Table , “Sets the gain of Low EQ,” on page 2 peaking type or shelving type for Band 1 and 4.
- Page 224 20-6 Effects Filter/Dynamic d: Band2 Dynamic Gain Src, d: Amt [dB], f: Gain [dB] You can configure a 21-Band Graphic EQ ranging from You can control the gain of Band 2 using the modulation 80Hz to 18kHz if you route three Graphic 7Band EQ source.
- Page 225 Effects 20-7 Filter/Dynamic a: Frequency Bottom, a: Frequency Top 010: Random Filt The sweep width and direction of the wah filter are deter- (Stereo Random Filter) mined by the “Frequency Top” and “Frequency Bottom” This stereo band pass filter uses a step-shape waveform and settings.
- Page 226 20-8 Effects Filter/Dynamic When “LFO Waveform” is set to Random, the “LFO Step 011: Excit/Enhan Freq” parameter uses a random LFO cycle. (Stereo Exciter/Enhancer) Random Filter LFO This effect is a combination of the Exciter, which adds a LFO Frequency punch to the sound and the Enhancer, which adds spread and presence.
- Page 227 Effects 20-9 Filter/Dynamic 012: Sub Oscill 013: Talking Mod (Stereo Sub Oscillator) (Talking Modulator) This effect adds very low frequencies to the input signal. It is This effect adds an unusual character, like a human voice, to very useful when simulating a roaring drum sound or the input signal.
- Page 228 20-10 Effects Filter/Dynamic If Sweep Mode is set to LFO, the sound will change cycli- 014: Decimator cally from “a” to “i,” “u,” “i,” then “a.” (Stereo Decimator) Talking Modulator Control This effect creates a rough sound like a cheap sampler by low- Voice Bottom Voice Center Voice Top...
-
Page 229: Pitch/Phase Mod
Effects 20-11 Pitch/Phase Mod. 015: Analog Rec PITCH/PHASE MOD. (Stereo Analog Record) This effect simulates the noise caused by scratches and dust Pitch/phase modulation effects on analog records. It also reproduces some of the modulation caused by a warped turntable. 016: Chorus (Stereo Chorus) Stereo In - Stereo Out... - Page 230 20-12 Effects Pitch/Phase Mod. 017: Harm.Chorus h: Feedback Sets the feedback amount of the chorus block. Increasing (Stereo Harmonic Chorus) the feedback will allow you to use the effect as a flanger. This effect applies chorus only to higher frequencies. This can be used to apply a chorus effect to a bass sound without 018: MTap Ch/Dly making the sound thinner.
- Page 231 Effects 20-13 Pitch/Phase Mod. 019: Ensemble 020: Flanger (Stereo Flanger) This Ensemble effect has three chorus blocks that use LFO to create subtle shimmering, and gives three dimensional depth This effect gives a significant swell and movement of pitch to and spread to the sound, because the signal is output from the sound.
- Page 232 20-14 Effects Pitch/Phase Mod. b: LFO Shape Feedback –100...+100 ☞ Changing the LFO waveform shape controls the peak Sets the feedback amount Fx:020 sweep of flanging effects. High Damp [%] 0...100% ☞ Sets the feedback damping amount in the high range Fx:020 LFO Shape Wet/Dry...
- Page 233 Effects 20-15 Pitch/Phase Mod. The “Src” parameter selects the source that starts the BPM/MIDI Sync Off, On envelope generator. If you select, for example, Gate, the Switches between using the frequency of the LFO speed and using the ☞ tempo and notes Fx:009, envelope generator will start when the note-on message MIDI, 40...240...
- Page 234 20-16 Effects Pitch/Phase Mod. 024: RandomPhser 025: Envel.Phser (Stereo Random Phaser) (Stereo Envelope Phaser) This is a stereo phaser. The effect uses a step-shape waveform This stereo phaser uses an envelope generator for modula- and random LFO for modulation, creating a unique phasing tion.
- Page 235 Effects 20-17 Pitch/Phase Mod. 026: BiphaseMod. 027: Vibrato (Stereo Biphase Modulation) (Stereo Vibrato) This stereo chorus effect adds two different LFOs together. This effect causes the pitch of the input signal to shimmer. You can set the Frequency and Depth parameters for each Using the AutoFade allows you to increase or decrease the LFO individually.
- Page 236 20-18 Effects Pitch/Phase Mod. The following is an example of fade-in where the LFO Wet/Dry Mod D-mod, AUTOFADE speed is increased from “1.0Hz” to “4.0Hz” when a note- Switches between D-mod and AUTOFADE for the effect balance modulation ☞ Fx:027 on message is received.
- Page 237 Effects 20-19 Pitch/Phase Mod. Wet/Dry Dry, 1:99...99:1, Wet LFO Frequency [Hz] 0.02...20.00Hz ☞ Table , “Sets the balance between the effect and dry sounds,” on page 1 Sets the LFO speed Fx:009, Off...Tempo Off...Tempo Selects the modulation source of LFO speed Table , “Selects the modulation source of the effect balance,”...
- Page 238 20-20 Effects Pitch/Phase Mod. 031: Scratch a: Scratch Source, b: Response The Scratch Source parameter enables you to select the This effect is applied by recording the input signal and mov- modulation source that controls simulation. The value of ing the modulation source. It simulates the sound of the modulation source corresponds to the playback posi- scratches you can make using a turntable.
-
Page 239: Mod./P.shift
Effects 20-21 Mod./P.Shift b: LFO Phase [degree] MOD./P.SHIFT This parameter determines the difference between the left and right LFO phases. A higher value will simulate the Other modulation and pitch shift effects auto-pan effect in which the sound is panned between left and right. - Page 240 20-22 Effects Mod./P.Shift “Depth”=100, “Envelope Amount”=–100 Depth 0...100 Sets the depth of LFO modulation Shimmer Level Dry Envelope LFO Frequency[Hz]=8.0 Off...Tempo Envelope Amount[Hz]= –7.0Hz Selects the modulation source of the depth of modulation Depth=100 Envelope Amount= –100 –100...+100 Sets the modulation amount of the depth of modula- tion Time Wet/Dry...
- Page 241 Effects 20-23 Mod./P.Shift 035: Phaser/Trem enables you to offset the timing of the phaser peak and control a subtle movement and rotation of the sound. (Stereo Phaser + Tremolo) f: Phaser WetDry, i: Wet/Dry This effect has a stereo phaser and tremolo LFOs linked The “Phaser Wet/Dry”...
- Page 242 20-24 Effects Mod./P.Shift 037: Detune Wet/Dry Dry, 1:99...99:1, Wet Table , “Sets the balance between the effect and dry sounds,” on page 1 Using this effect, you can obtain a detune effect that offsets the pitch of the effect sound slightly from the pitch of the Off...Tempo Table , “Selects the modulation source of the effect balance,”...
- Page 243 Effects 20-25 Mod./P.Shift 038: PitchShift Input Level Dmod [%] –100...+100 ☞ Sets the modulation amount of the input level Fx:037, (Pitch Shifter) Off...Tempo ☞ This effect changes the pitch of the input signal. You can Selects the modulation source for the input level Fx:037 select from three types: Fast (quick response), Medium, and Wet/Dry...
- Page 244 20-26 Effects Mod./P.Shift 039: PitShiftMod. 040: RotarySpeak (Pitch Shift Modulation) (Rotary Speaker) This effect modulates the detuned pitch shift amount using This effect simulates a rotary speaker, and obtains a more an LFO, adding a clear spread and width to the sound by pan- realistic sound by simulating the rotor in the low range and ning the effect sound and dry sound to the left and right.
- Page 245 Effects 20-27 Mod./P.Shift When “Sw” = Moment, the speaker is rotating. It stops c: Manual Speed Ctrl only when you press the pedal or operate the joystick. If you wish to control the speaker rotation speed manu- ally, not switching between Slow and Fast, select the mod- Rotation will occur when the value of the modulation source is ulation source in the “Manual Speed Ctrl”...
-
Page 246: Er/Delay
20-28 Effects ER/Delay 042: AutoReverse ER/DELAY (Auto Reverse) This effect records the input signal and automatically plays it Early reflection and delay effects in reverse (the effect is similar to a tape reverse sound). 041: Early Refl Wet: Mono In - Mono Out / Dry: Stereo In - Stereo Out Left (Early Reflections) Wet / Dry... - Page 247 Effects 20-29 ER/Delay c: Envelope Select, c: Src, d: Threshold e: High Damp [%], e: Low Damp [%] These parameters select the source to control the start These parameters set the damping amount of high range and end of recording. and low range.
- Page 248 20-30 Effects ER/Delay 045: M.Tap Delay 046: Modul.Delay (Stereo Multitap Delay) (Stereo Modulation Delay) The left and right Multitap Delays have two taps respectively. This stereo delay uses an LFO to sweep the delay time. The Changing the routing of feedback and tap output allows you pitch also varies.
- Page 249 Effects 20-31 ER/Delay The “Src” parameter sets the modulation source that High Damp [%] 0...100% ☞ resets the LFO. For example, you can assign Gate as a mod- Sets the damping amount in the high range Fx:043 ulation source so that the sweep always starts from the Low Damp [%] 0...100% ☞...
- Page 250 20-32 Effects ER/Delay 048: AutoPan Dly L Delay Time [msec] 0.0...680.0msec Sets the delay time for the left channel (Stereo Auto Panning Delay) L Feedback –100...+100 This stereo delay effect pans the delay sound left and right Sets the feedback amount for the left channel using the LFO.
- Page 251 Effects 20-33 ER/Delay 049: LCR BPM Dly a: BPM, b: L Delay Base Note, b: Times, c: C Delay Base Note, The L/C/R delay enables you to match the delay time with the c: Times, d: R Delay Base Note, d: Times song tempo.
-
Page 252: Reverb
20-34 Effects Reverb 051: Seq. Delay REVERB (Sequential Delay) This four-tap delay enables you to select a tempo and rhythm Reverb effects pattern to set up each tap. These effects simulate the ambience of reverberation in con- cert halls. Wet: Mono In - Stereo Out / Dry: Stereo In -Stereo Out Left Wet / Dry 052: Rev. - Page 253 Effects 20-35 Reverb b: Pre Delay [msec], b: Pre Delay Thru [%] 057: R.BriteRoom The “Pre Delay” sets the delay time to the reverb input, This room-type reverb emphasizes the early reflections that allowing you to control spaciousness. make the sound brighter. See 056: Reverb Room. Using the “Pre Delay Thru”...
-
Page 254: Mono - Mono Chain
20-36 Effects Mono – Mono Chain 059: Par4Eq-Wah MONO – MONO CHAIN (Parametric 4-Band EQ – Wah/Auto Wah) This effect combines a mono-type four-band parametric Effects that combine two mono effects connected in series equalizer and a wah. You can change the order of the connec- tion. - Page 255 Effects 20-37 Mono – Mono Chain 060: 4EqPhsrChFl However, if a mono-input type effect is connected after this effect, the left and right sounds may cancel each (Parametric 4-Band EQ – Chorus/Flanger) other, eliminating the chorus/flanger effects. This effect combines a mono-type four-band parametric equalizer and a chorus/flanger.
- Page 256 20-38 Effects Mono – Mono Chain 062: P4Eq-TapDly 063: Cmp-AutoWah (Parametric 4-Band EQ – Multitap Delay) (Compressor – Wah/Auto Wah) This effect combines a mono-type four-band parametric This effect combines a mono-type compressor and a wah. equalizer and a multitap delay. You can change the order of the connection.
- Page 257 Effects 20-39 Mono – Mono Chain 064: Cmp-AmpSim 065: Cmp-OD/HiG (Compressor – Amp Simulation) (Compressor – Overdrive/Hi.Gain) This effect combines a mono-type compressor and an amp This effect combines a mono-type compressor and an over- simulation. You can change the order of the effect connec- drive/high-gain distortion.
- Page 258 20-40 Effects Mono – Mono Chain 066: Cmp-Par.4Eq 067: Cmp-ChorFlg (Compressor – Parametric 4-Band EQ) (Compressor – Chorus/Flanger) This effect combines a mono-type compressor and a four- This effect combines a mono-type compressor and a chorus/ band parametric equalizer. You can change the order of the flanger.
- Page 259 Effects 20-41 Mono – Mono Chain 068: Cmp-Phaser 069: Cmp-MTapDly (Compressor – Phaser) (Compressor – Multitap Delay) This effect combines a mono-type compressor and a phaser. This effect combines a mono-type compressor and a multi- You can change the order of the effect connection. tap delay.
- Page 260 20-42 Effects Mono – Mono Chain 070: Lim-Par.4Eq 071: Lim-ChorFlg (Limiter – Parametric 4-Band EQ) (Limiter – Chorus/Flanger) This effect combines a mono-type limiter and a four-band This effect combines a mono-type limiter and a chorus/ parametric equalizer. You can change the order of the effect flanger.
- Page 261 Effects 20-43 Mono – Mono Chain 072: Lim-Phaser [L] Attack 1...100 ☞ Sets the attack time Fx:003 This effect combines a mono-type limiter and a phaser. You Release 1...100 ☞ can change the order of the effect connection. Sets the release time Fx:003 [L] Gain Adjust [dB] –Inf, –38...+24dB...
- Page 262 20-44 Effects Mono – Mono Chain 075: Exc-Limiter 076: Exc-ChorFlg (Exciter – Limiter) (Exciter – Chorus/Flanger) This effect combines a mono-type exciter and a limiter. You This effect combines a mono-type limiter and a chorus/ can change the order of the effect connection. flanger.
- Page 263 Effects 20-45 Mono – Mono Chain 077: Exc-Phaser 078: Exc-MTapDly (Exciter – Phaser) (Exciter – Multitap Delay) This effect combines a mono-type limiter and a phaser. This effect combines a mono-type exciter and a multitap delay. Wet: Mono In - Stereo Out / Dry: Stereo In - Stereo Out Left Wet / Dry Wet: Mono In - Mono Out / Dry: Stereo In - Stereo Out...
- Page 264 20-46 Effects Mono – Mono Chain [O] Output Level 0...50 [O] Output Level 0...50 ☞ ☞ Sets the overdrive output level Fx:006, Sets the overdrive output level Fx:006, Off...Tempo Off...Tempo Selects the modulation source for the overdrive output level Selects the modulation source for the overdrive output level –50...+50 –50...+50 Sets the modulation amount of the overdrive output level...
- Page 265 Effects 20-47 Mono – Mono Chain 081: OD/HG-Phser 082: OD/HG-MTDly (Overdrive/Hi.Gain – Phaser) (Overdrive/Hi.Gain – Multitap Delay) This effect combines a mono-type overdrive/high-gain dis- This effect combines a mono-type overdrive/high-gain dis- tortion and a phaser. You can change the order of the effect tortion and a multitap delay.
- Page 266 20-48 Effects Mono – Mono Chain 083: Wah-AmpSim 084: Decim-Amp S (Wah/Auto Wah – Amp Simulation) (Decimator – Amp Simulation) This effect combines a mono-type wah and an amp simula- This effect combines a mono-type decimator and an amp tion. You can change the order of the effect connection. simulation.
- Page 267 Effects 20-49 Mono – Mono Chain 087: Ch/Fl-MTDly Wet/Dry Dry, 1:99...99:1, Wet Table , “Sets the balance between the effect and dry sounds,” on page 1 (Chorus/Flanger – Multitap Delay) This effect combines a mono-type chorus/flanger and a mul- Off...Tempo Table , “Selects the modulation source of the effect balance,”...
- Page 268 20-50 Effects Mono – Mono Chain 088: Phser-ChoFl 089: Rev-Gate (Phaser – Chorus/Flanger) (Reverb – Gate) This effect combines a mono-type phaser and a chorus/ This effect combines a mono-type reverb and a gate. flanger. Wet: Mono In - Mono Out / Dry: Stereo In - Stereo Out Left Wet / Dry Wet: Mono In - Stereo Out / Dry: Stereo In - Stereo Out...
- Page 269 Effects 20-51 Mono – Mono Chain gate time, set the “Input Reverb Mix” value higher and Wet/Dry Dry, 1:99...99:1, Wet adjust the “Threshold” value. Sets the balance between the effect and dry sounds Off...Tempo Selects the modulation source of the effect balance 090: Vocoder –100...+100 Sets the modulation amount of the effect balance...
- Page 270 20-52 Effects Mono – Mono Chain...
-
Page 271: Assignable Parameters
Same functions of the control panel buttons with the same name The following functions can be assigned to a footswitch or to Single Touch one of the Korg EC5’s pedals. Style Up Selects the next Style Style Down Selects the previous Style... -
Page 272: List Of Functions Assignable To The Pedal Or Assignable Slider
21-2 Assignable parameters List of functions assignable to the Pedal or Assignable Slider LIST OF FUNCTIONS ASSIGNABLE TO THE Function Meaning PEDAL OR ASSIGNABLE SLIDER Joystick +Y Joystick forward Joystick -Y Joystick backward The following functions can be assigned to a continuous pedal or to the Assignable Slider. -
Page 273: List Of Functions Assignable To The Pads
Assignable parameters 21-3 List of functions assignable to the Pads LIST OF FUNCTIONS ASSIGNABLE TO THE SCALES PADS The following is a list of scales (or tunings) you can select in Style Play (“Scale” on page 9-6) and Global (“Scale” on You can assign the following functions to the Pads, and use page 16-2) modes. - Page 274 21-4 Assignable parameters Scales...
-
Page 275: Midi Controllers
MIDI Controllers 22-1 22. MIDI CONTROLLERS The following is a table including all Control Change mes- CC Name Pa80 Function sages, and their effect on various Pa80 functions. Attack Attack time F.CutOff Filter cutoff (Brilliance) CC Name Pa80 Function Decay T. Decay time Bank Select Program selection... -
Page 276: Midi Implementation Chart
22-2 MIDI Controllers MIDI Implementation Chart KORG Pa80 MIDI IMPLEMENTATION CHART OS Version 1.0 - Dec. 12, 2000 Function Transmitted Recognized Remarks Default 1–16 1–16 Memorized Basic Channel Changed 1–16 1–16 Default Messages Mode Altered **************** 0–127 0–127 Note Number:... -
Page 277: Parameters
Parameters 23-1 23. PARAMETERS Control panel and operating modes parameters The following table shows the parameters you can save to memory when pressing the WRITE button in the various operating modes and edit environments. Please note the “Seq1+Seq2 Setup” is only available starting from OS version 3.0. Single Touch Style Internal FX... - Page 278 23-2 Parameters Single Touch Style Internal FX Vocal/Guitar Seq1+Seq2 Page Parameter Performance Global Note Setting (STS) Performance Setup Setup Setup Input 1/2 (non editable) √ √ Internal FX Setup Number – – – – – General parameters √ √ – –...
- Page 279 Parameters 23-3 Single Touch Style Internal FX Vocal/Guitar Seq1+Seq2 Page Parameter Performance Global Note Setting (STS) Performance Setup Setup Setup √ Audio Output – – – – – – Separate tracks √ Drum Mode – – – – – – General parameters √...
- Page 280 23-4 Parameters...
-
Page 281: Recognized Chords
24. RECOGNIZED CHORDS The following pages show the most important chords recognized by the Korg Pa80, when the selected Chord Recognition mode is Fingered 2 (see “Chord Recognition Mode” on page 9-12). Recognized chords may vary with a different Chord Recognition modes. - Page 282 24-2 Recognized chords Minor Minor 6th 3-note 2-note 4-note Minor 7th Minor-Major 7th 3-note 4-note 3-note 4-note Diminished Diminished Major 7th 3-note 4-note Minor 7th 5 4-note Augmented Augmented 7th Augmented Major 7th 3-note 4-note 4-note No 3rd No 3rd, no 5th 2-note 1-note = constituent notes of the chord...
-
Page 283: Vocal/Guitar Processor Board (Vhg1)
Vocal/Guitar Processor Board (VHG1) 25-1 Assembling the board with the HD drive already installed 25. VOCAL/GUITAR PROCESSOR BOARD (VHG1) Warning: Be sure to disconnect the Pa80 from the AC plug, Note: To use the VHG1, your Pa80 must be fitted with the before opening the instrument. - Page 284 25-2 Vocal/Guitar Processor Board (VHG1) Assembling the board with the HD drive already installed Remove the four HDD fixing screws (E), and unfasten the supports (F, G) from the hard disk (H). You will no longer need these supports. Slide away the cables (I, L) from under the tab (metallized film) screwed to the hard disk drive.
- Page 285 Vocal/Guitar Processor Board (VHG1) 25-3 Assembling the board with the HD drive already installed Fit the assembled Vocal/Guitar Processor Board + Hard Disk assembly into the instrument. Fix it into its socket using the previously removed four screws (D). Finish the assembling fixing the plate (C) with the four screws (B).
-
Page 286: Assembling The Board Without A Hd Drive Installed
25-4 Vocal/Guitar Processor Board (VHG1) Assembling the board without a HD drive installed ASSEMBLING THE BOARD WITHOUT A HD DRIVE INSTALLED Please check all the following parts are included with your kit. In addition, you will need a cross-point screwdriver. Disconnect the instrument from the power plug, then turn it upside down, and locate the HDD slot. - Page 287 Vocal/Guitar Processor Board (VHG1) 25-5 Assembling the board without a HD drive installed Slide away the cables (G, H) from under the tab (metallized film). After repositioning the hard disk cable under the screen, connect them to the VHG1 board (A), lining the pin #1 of the flat cable with pin #1 on the VHG1 board connec- tor.
- Page 288 25-6 Vocal/Guitar Processor Board (VHG1) Assembling the board without a HD drive installed...
-
Page 289: Video Interface (Vif1)
Video Interface (VIF1) 26-1 Installing the board 26. VIDEO INTERFACE (VIF1) Warning: Be sure to disconnect the Pa80 from the AC plug, Note: The following instruction refer both to the VIF1-PAL before opening the instrument. and VIF1-NTSC versions of the board. When connecting the VIF1-PAL to a SECAM-compliant TV, the image will be Warning: To avoid that your body’s static electricity can shown in black and white. - Page 290 26-2 Video Interface (VIF1) Installing the board Fasten the screw (H) at its original position, using it to fix the terminal lug of the cable (E). Place the cable so that it can’t damage the video board (A) components. During this work, be sure not to let the cable slide inside the instrument.
-
Page 291: Connections And Setup
Video Interface (VIF1) 26-3 Connections and setup Finally, fix the video board (A) to the instrument using the two screws (B) previously removed. CONNECTIONS AND SETUP Connect the instrument’s video output to the video input of the television set. Depending on the type of television set, you can use a cable of the type “RCA-to-RCA”... - Page 292 26-4 Video Interface (VIF1) Connections and setup...
-
Page 293: Hard Disk Kit
KORG dealer for a list of compatible drives. access to the slot inside the instrument. Warning: Install the hard disk drive at your own risk. KORG will not be held responsible for any damage or injury resulting from its improper installation or use. - Page 294 27-2 Hard Disk Kit a “1” or an arrow. If there is no indication for the pin #1, positions using the four screws (E). Fix the plate (D) at please refer to the diagram. the original position using the four screws (C). Formatting the hard disk When the installation is finished, connect the power plug and turn the instrument on.
-
Page 295: Error Messages & Troubleshooting
Error messages & Troubleshooting 28-1 Error messages 28. ERROR MESSAGES & TROUBLESHOOTING ERROR MESSAGES Backing Sequence Mode Too Many Styles! (Press Exit) Your Pa80 can communicate with you using various mes- You have recorded the maximum number of Styles allowed sages. - Page 296 Can’t Erase Old Korg Resource (Press Exit) While trying to load Korg i-series data, some errors occurred. You can’t erase a single Style from a Korg i-series disk. You The original file is probably corrupted, or its structure is too can only delete a whole file.
- Page 297 Error messages & Troubleshooting 28-3 Error messages File Is Protected (Press Exit) Not Enough Space on Media You were trying to overwrite a protected file. There is no more space to load, save or copy data. The disk operation will be aborted. Replace the disk, and use an empty File Not Found (Press Exit) disk to save your data.
-
Page 298: Troubleshooting
(3) and is not damaged, (4) there are no problems with the mains. Is the power switch turned ON? If the power still does not turn on, contact your dealer or the nearest KORG Service Cen- ter. No sound Is a jack connected to the HEADPHONES connector? This would disable the internal speakers. - Page 299 Error messages & Troubleshooting 28-5 Troubleshooting Problem Solution Page Disk related problems Cannot format a floppy disk Are you using a 3.5 inch 2DD or 2HD floppy disk? You must use one of these types. Is the disk inserted correctly? 17-1 Is the write protect tab of the disk in the protect position? 17-1...
- Page 300 28-6 Error messages & Troubleshooting Troubleshooting...
-
Page 301: Technical Specifications
29. TECHNICAL SPECIFICATIONS Model: KORG Pa80 Keyboard 61 keys, with velocity and mono aftertouch. Operating System KORG OPOS (Objective Portable Operating System). Multitasking, Load-While-Play feature. SSD (Solid State Disk)-resident. Upgradable from floppy disk. Display Backlit custom LCD Data storage 8MB (>20MB equivalent) Internal Solid State Disk (SSD), 1.44MB Floppy Disk Driver (MS-DOS® com-... - Page 302 29-2 Technical specifications...
-
Page 303: Alphabetical Index
Alphabetical Index 30-1 30. ALPHABETICAL INDEX 6-5, 11-1 Double Sequencer 11-9 Drum mode 2-1, 3-2 Acc/Seq Volume 9-7, 13-12, 16-6 Drum tracks 16-2 Aftertouch Curve AMS(Alternate Modulation Source) 14-9 Resonance Arabic Scale 16-3 16-3 Assignable Slider Edit Environment 14-16 Attack Effects Attack Level 16-7... - Page 304 30-2 Alphabetical Index 3-7, 9-11 Keyboard Mode Pads 9-12 Lock Keyboard settings 3-4, 4-1 Page 5-1, 16-4 PC To Host 16-3 Pedal Level Performance Program 3-6, 6-2 Selecting Trim 14-9 9-6, 13-10 Pitch Bend Portamento 14-17 Waveform, LFO waveform 14-19 8-3, 16-3 Local Off Program...
- Page 305 Alphabetical Index 30-3 Variation Operating Modes Selecting Windows Style Change 9-1–9-13 Style Play mode Sync. 14-17 Key Sync., LFO VALUE slider 14-17 MIDI/Tempo, LFO 14-19 Synchro Start/Stop Variation Velocity 14-19 14-14 Velocity Intensity, Amp Mod. Tap Tempo 14-10 Velocity, Filter EG Tempo 16-2 Velocity Curve...
- Page 306 30-4 Alphabetical Index...
- Page 308 KORG ITALY S.p.A. Via Cagiata, 85 I-60027 Osimo (An) Italy Web servers www.korg.co.jp .korg.com www.korg.co.uk www.jam-ind.com www.korgfr.net www.korg.de www.korg.it PART NUMBER: MAN0001064 © KORG Italy 2002-2005. All rights reserved...
Need help?
Do you have a question about the PA 80 and is the answer not in the manual?
Questions and answers