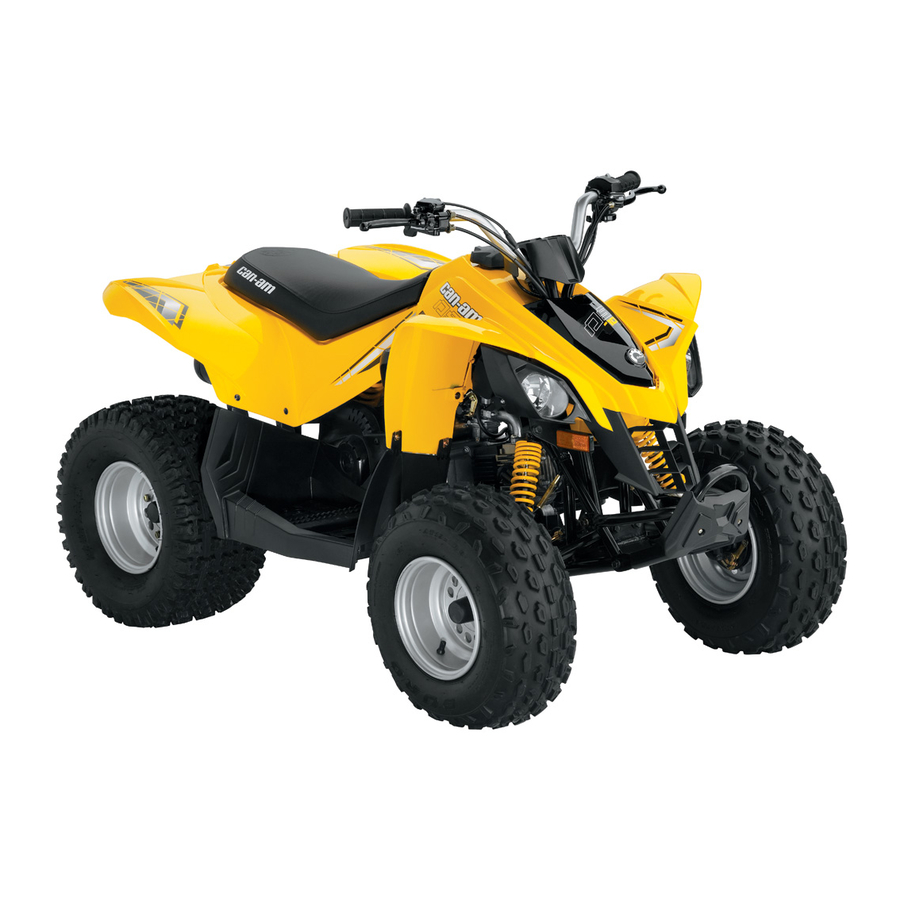
Can-Am DS 70 Operator's Manual

Can-Am DS 70 Operator's Manual

Safety, vehicle and maintenance information
Hide thumbs Also See for DS 70:
Table of Contents

Advertisement

Advertisement

Table of Contents
loading

Summary of Contents for Can-Am DS 70

  • Page 2 The following trademarks are the property of Bombardier Recreational Products Inc.: Can-Am™ DS 70™ DS 90™ XPS™ vmo2011-004 en JL ®™ and the BRP logo are trademarks of Bombardier Recreational Products Inc. or its affiliates. ©2010 Bombardier Recreational Products Inc. and BRP US Inc. All rights reserved.
  • Page 3: Foreword

    – DS 70™ vehicle is a category Y-6+ operating instructions. It is indispens- and should be used by children age able for the proper use of the product.
  • Page 4: Notice To Parents

    ATV without adult su- the descriptions and/or specifications pervision at all times. in this guide may occur. BRP reserves – Never allow continued use the right at any time to discontinue or of the vehicle by a child if he...
  • Page 5: Table Of Contents

    TABLE OF CONTENTS FOREWORD ................1 Know Before You Go .
  • Page 6 TABLE OF CONTENTS CONTROLS/INSTRUMENTS/EQUIPMENT (cont’d) 6) Multifunction Switch ............63 7) Indicator Lamps .
  • Page 7 Mechanical Brakes (DS 70 and DS 90) ........
  • Page 8 TABLE OF CONTENTS _______________...
  • Page 9: Safety Information

    SAFETY INFORMATION ________ ________ SAFETY INFORMATION...
  • Page 10: General Precautions

    Even if you try to ventilate engine sories that are not approved by BRP. exhaust with fans or open windows Since these changes have not been and doors, carbon monoxide can tested by BRP, they may increase the rapidly reach dangerous levels.
  • Page 11: Special Safety Messages

    – Always follow this age recommen- sure it is in a safe operating condi- dation: DS 70 vehicle should be tion. Always follow the inspection used by children age 6 or older un-...
  • Page 12 SPECIAL SAFETY MESSAGES – Never operate this vehicle on hills – Always use proper procedures if you stall or roll backwards when too steep for the vehicle or for your abilities. Practice on smaller hills climbing a hill. To avoid stalling, use before attempting larger hills.
  • Page 13 SPECIAL SAFETY MESSAGES – BRP recommends sitting on your ATV when operating in reverse. Avoid standing up. Your weight could shift forward against the throt- tle lever causing an unexpected ac- celeration and loss of control. – Always use the size and type tires specified further in this Operator’s...
  • Page 14: Operation Warnings

    OPERATION WARNINGS The following warning and their format have been requested by the United States Consumer Product Safety Commission and are required to be in the Operator’s Guide for all ATVs. NOTE: The following illustrations are general representations only. Your model may differ.
  • Page 15 HOW TO AVOID THE HAZARD DS 70 vehicle should be used by children age 6 or older under adult supervi- sion, or by an operator age 16 or older.
  • Page 16 OPERATION WARNINGS WARNING POTENTIAL HAZARD Carrying a passenger on this vehicle. WHAT CAN HAPPEN Greatly reduces your ability to balance and control this vehicle. Could cause an accident, resulting in harm to you and/or your passenger. HOW TO AVOID THE HAZARD Never carry passenger.
  • Page 17 OPERATION WARNINGS WARNING POTENTIAL HAZARD Operating this vehicle on paved surfaces. WHAT CAN HAPPEN The tires are designed for off-road use only, not for use on pavement. Paved surfaces may seriously affect handling and control of this vehicle, and may cause the vehicle to go out of control.
  • Page 18 OPERATION WARNINGS WARNING POTENTIAL HAZARD Operating this vehicle on public streets, roads or highways. WHAT CAN HAPPEN You can collide with another vehicle. HOW TO AVOID THE HAZARD Never operate this vehicle on any public street, road or highway, even a dirt or gravel one.
  • Page 19 OPERATION WARNINGS WARNING POTENTIAL HAZARD Riding this vehicle without wearing an approved helmet, eye protection and protective clothing. WHAT CAN HAPPEN The following items concern all ATV's operator: – Riding without an approved helmet increases the chances of a severe head injury or death in the event of an accident.
  • Page 20 OPERATION WARNINGS WARNING POTENTIAL HAZARD Riding this vehicle after consuming alcohol or drugs. WHAT CAN HAPPEN Could seriously affect your judgment. Could cause you to react more slowly. Could affect your balance and perception. Could result in an accident or death. HOW TO AVOID THE HAZARD Never consume alcohol or drugs before or while riding this vehicle.
  • Page 21 OPERATION WARNINGS WARNING POTENTIAL HAZARD Operating this vehicle at excessive speeds. WHAT CAN HAPPEN Increases your chances of losing control of the vehicle, which can result in an accident. HOW TO AVOID THE HAZARD Always travel at a speed which is apropriate for the terrain, visibility and op- erating conditions, and your experience.
  • Page 22 OPERATION WARNINGS WARNING POTENTIAL HAZARD Attempting wheelies, jumps and other stunts. WHAT CAN HAPPEN Increases the chance of an accident, including an overturn. HOW TO AVOID THE HAZARD Never attempt stunts, such as wheelies or jumps. Do not try to show off. WARNING POTENTIAL HAZARD Failure to inspect the vehicle before operating.
  • Page 23 OPERATION WARNINGS WARNING POTENTIAL HAZARD Riding on frozen waterways. WHAT CAN HAPPEN Breaking through the ice can lead to severe injury or death. HOW TO AVOID THE HAZARD Never ride this vehicle on a frozen surface before you are sure the ice is thick enough and sound enough to support the vehicle and its load, as well as the force that is created by a moving vehicle.
  • Page 24 OPERATION WARNINGS WARNING POTENTIAL HAZARD Failure to use extra care when operating this vehicle on unfamiliar terrain. WHAT CAN HAPPEN You can come upon hidden rocks, bumps, or holes without enough time to react. Could result in the vehicle overturning or loss of control. HOW TO AVOID THE HAZARD Go slowly and be extra careful when operating on unfamiliar terrain.
  • Page 25 OPERATION WARNINGS WARNING POTENTIAL HAZARD Failure to use extra care when operating on excessively rough, slippery or loose terrain. WHAT CAN HAPPEN Could cause loss of traction or vehicle control, which could result in an acci- dent, including an overturn. HOW TO AVOID THE HAZARD Do not operate on excessively rough, slippery or loose terrain until you have learned and practiced the skills necessary to control this vehicle on...
  • Page 26 OPERATION WARNINGS WARNING POTENTIAL HAZARD Turning improperly. WHAT CAN HAPPEN Vehicle could go out of control, causing a collision or overturn. HOW TO AVOID THE HAZARD Always follow proper procedures for turning as described further in this Op- erator’s Guide. Practice turning at low speeds before attempting to turn at faster speeds.
  • Page 27 OPERATION WARNINGS WARNING POTENTIAL HAZARD Operating on excessively steep hills. WHAT CAN HAPPEN The vehicle can overturn more easily on extremely steep hills than on level surfaces or small hills. HOW TO AVOID THE HAZARD Never operate this vehicle on hills too steep for the vehicle or for your abili- ties.
  • Page 28 OPERATION WARNINGS WARNING POTENTIAL HAZARD Climbing hills improperly. WHAT CAN HAPPEN Could cause loss of control or cause vehicle to overturn. HOW TO AVOID THE HAZARD Always follow proper procedures for climbing hills as described further in this Operator’s Guide. Always check the terrain carefully before you start up any hill.
  • Page 29 OPERATION WARNINGS WARNING POTENTIAL HAZARD Going down a hill improperly. WHAT CAN HAPPEN Could cause loss of control or cause vehicle to overturn. HOW TO AVOID THE HAZARD Always follow proper procedures for going down hills as described further in this Operator’s Guide. NOTE: A special technique is required when braking as you go down a hill.
  • Page 30 OPERATION WARNINGS WARNING POTENTIAL HAZARD Improperly crossing hills or turning on hills. WHAT CAN HAPPEN Could cause loss of control or cause vehicle to overturn. HOW TO AVOID THE HAZARD Never attempt to turn the vehicle around on any hill until you have mastered the turning technique as described further in this Operator’s Guide on level ground.
  • Page 31 OPERATION WARNINGS WARNING POTENTIAL HAZARD Stalling, rolling backwards or improperly dismounting while climbing a hill. WHAT CAN HAPPEN Could result in vehicle overturning. HOW TO AVOID THE HAZARD Use proper gear and maintain steady speed when climbing a hill. If you lose all forward speed: Keep your weight uphill.
  • Page 32 OPERATION WARNINGS WARNING POTENTIAL HAZARD Improperly operating over obstacles. WHAT CAN HAPPEN Could cause loss of control or a collision. Could cause the vehicle to overturn. HOW TO AVOID THE HAZARD Before operating in a new area, check for obstacles. Never attempt to ride over large obstacles, such as large rocks or fallen trees.
  • Page 33 OPERATION WARNINGS WARNING POTENTIAL HAZARD Skidding or sliding improperly. WHAT CAN HAPPEN You may lose control of this vehicle. You may also regain traction unexpectedly, which may cause the vehicle to overturn. HOW TO AVOID THE HAZARD Learn to safely control skidding or sliding by practicing at low speeds and on level smooth terrain.
  • Page 34 OPERATION WARNINGS WARNING POTENTIAL HAZARD Operating this vehicle through deep or fast flowing water. WHAT CAN HAPPEN Tires may float, causing loss of traction and loss of control, which could lead to an accident. HOW TO AVOID THE HAZARD Never operate this vehicle in fast flowing water or in water deeper than that specified further in this Operator’s Guide.
  • Page 35 OPERATION WARNINGS WARNING POTENTIAL HAZARD Improperly operating in reverse. WHAT CAN HAPPEN You could hit an obstacle or person behind the vehicle, resulting in serious injury. HOW TO AVOID THE HAZARD When you select reverse gear, make sure there are no obstacles or people behind the vehicle.
  • Page 36 OPERATION WARNINGS WARNING POTENTIAL HAZARD Operating this vehicle with improper tires, or with improper or uneven tire pressure. WHAT CAN HAPPEN Use of improper tires on this vehicle, or operation of this vehicle with improper or uneven tire pressure, may cause loss of control, tire blow outs, tire to move around on its rim, and increases the risk of an accident.
  • Page 37 Never modify this vehicle through improper installation or use of acces- sories. All parts and accessories added to this vehicle should be approved by BRP and should be installed and used according to instructions. If you have questions, consult an authorized Can-Am dealer.
  • Page 38 OPERATION WARNINGS WARNING POTENTIAL HAZARD Overloading this vehicle, carrying or towing cargo improperly. WHAT CAN HAPPEN Could cause changes in vehicle handling which could lead to an accident. HOW TO AVOID THE HAZARD Never load cargo on this vehicle. Never tow cargo or another vehicle with this vehicle. _______ ________ SAFETY INFORMATION...
  • Page 39 OPERATION WARNINGS WARNING POTENTIAL HAZARD Transporting flammable or dangerous material can lead to explosions. WHAT CAN HAPPEN This can cause serious injury or death. HOW TO AVOID THE HAZARD Never transport flammable or dangerous material. ________ ________ SAFETY INFORMATION...
  • Page 40: Riding The Vehicle

    RIDING THE VEHICLE While reading this Operator’s Guide, remember that: WARNING Indicates a potential hazard that, if not avoided, could result in serious injury or death. To fully appreciate the pleasures and excitement of riding this vehicle, there are some basic rules and tips that you MUST follow. Some may be new to you while others may be common sense or obvious.
  • Page 41: Pre-Ride Inspection

    RIDING THE VEHICLE Pre-Ride Inspection WARNING Perform a pre-ride inspection before each ride to detect any potential prob- lem that could occur during operation. The pre-ride inspection can help you monitor wear and deterioration before they become a problem. Correct any problem that you discover to reduce the risk of a breakdown or crash.
  • Page 42 RIDING THE VEHICLE ITEMS TO BE ✔ INSPECTION TO PERFORM INSPECTED Seat Ensure operator seat is properly installed and latched. Service and storage Check if service and storage compartments are properly compartments latched. Chassis and Check underneath vehicle for any debris on chassis or suspension suspension, properly clean chassis and suspension.
  • Page 43: Clothing

    RIDING THE VEHICLE Clothing Actual weather conditions should help you decide how to dress. Always dress for the coldest weather expected. Thermal underwear next to the skin provides good insulation. It is important that the operator always wears the appropriate protective clothing and apparel, including an approved helmet, eye protection, boots, gloves, a long sleeved shirt and pants.
  • Page 44: Carrying A Passenger

    RIDING THE VEHICLE Carrying a Passenger This vehicle is designed specifically to carry an operator only. Even with a long seat, this vehicle is not designed nor intended to carry passenger(s). Carrying passenger(s) may affect the stability and your control of the vehicle. Carrying Loads Never load cargo on this vehicle.
  • Page 45: Design Limitation

    RIDING THE VEHICLE Chasing wildlife is in many areas illegal. Wildlife can die of exhaustion after being chased by a motorized vehicle. If you encounter animals on the trail, stop and ob- serve quietly and with caution. It will be one of the better memories of your life. Observe the rule...
  • Page 46 When operating in reverse, check that the path behind the vehicle is free of people or obstacles. Proceed slowly and avoid sharp turns. BRP recommends that you remain seated on your ATV when operating in reverse. Avoid standing up. Your weight could shift forward against the throttle lever caus- ing an unexpected acceleration and loss of control.
  • Page 47 RIDING THE VEHICLE WARNING Avoid negotiating drop-offs. Reverse and select an alternate route. Riding on Snow Covered Surfaces When performing the pre-ride inspection, pay special attention to locations on the vehicle where snow and/or ice accumulations may obstruct visibility of the lights and reflectors, clog ventilation openings, or interfere with the movement of the control levers and switches.
  • Page 48: Riding Techniques

    RIDING THE VEHICLE At the end of each ride it is a good practice to clean the vehicle body and all moving components (brakes, steering components, drive lines, controls, etc.) from any snow or ice accumulations. Wet snow will turn to ice during the shut down period and become more difficult to remove at the next pre-ride inspection.
  • Page 49 RIDING THE VEHICLE The tires of this vehicle are not suited for paved road use. Also, this vehicle is not equipped with a rear differential (rear wheels are always turning at the same speed). For these reasons, pavement may seriously affect the handling and control of the vehicle.
  • Page 50 RIDING THE VEHICLE Ice will also affect the control of the vehicle. Slow down and do not “gun“ the throttle. This will only result in spinning of the tires and the vehicle may possibly tip over. Avoid rapid braking. This again can result in an uncontrolled slide and the vehicle may possibly tip over.
  • Page 51 RIDING THE VEHICLE Respect and follow all posted trail signs. They are there to help you and others. Obstacles in the “trail“ should be traversed with caution. This includes loose rocks, fallen trees, slippery surfaces, fences, posts, and embankments and depressions.
  • Page 52 RIDING THE VEHICLE Downhill Keep your body weight rearwards. Apply the brake gradually to prevent skidding. Do not “coast“ down the slope using solely engine compression or in neutral gear. _______ ________ SAFETY INFORMATION...
  • Page 53 RIDING THE VEHICLE Side Hilling This is one of the most risky types of riding since it may drastically change the bal- ance of the vehicle. It should be avoided wherever possible. However, if it is nec- essary to do so, it is important that you ALWAYS keep your body weight on the up- side of the slope...
  • Page 54: Important On Product Labels

    IMPORTANT ON PRODUCT LABELS Hang Tag This vehicle comes with a hang tag containing important information. Any person who rides this vehicle should read and understand this information be- fore riding. vmo2010-003-003_en TYPICAL vmo2006-005-009_en _______ ________ SAFETY INFORMATION...
  • Page 55: Vehicle Safety Labels

    IMPORTANT ON PRODUCT LABELS Vehicle Safety Labels Read and understand all the safety labels on your vehicle. The safety labels on your vehicle should be considered permanent parts of the ve- hicle. If missing or damaged, they can be replaced free of charge. See an autho- rized Can-Am dealer.
  • Page 56 IMPORTANT ON PRODUCT LABELS vmo2009-004-002_en LABEL 3: DS 70 vmo2009-003-004_en LABEL 1 vmo2010-003-004_en LABEL 3: DS 90 AND DS 90 X LABEL 2 _______ ________ SAFETY INFORMATION...
  • Page 57: Compliance Labels

    IMPORTANT ON PRODUCT LABELS V00m03y2 LOCATION: LOWER RIGHT FRONT TUBE OF THE FRAME vmo2008-008-002_aen LABEL 4: TYPICAL - REFER TO SPECIFICATIONS FOR EXACT PRESSURES vmo2010-001-302_a LOCATION: UNDERNEATH REAR FENDER vmo2010-001-102 LABEL 5 vmo2010-004-001_en LOCATION: FRONT FENDER Technical Information Label vmo2008-011-090 LABEL 6 Compliance Labels vmo2011-004-001_a...
  • Page 58 IMPORTANT ON PRODUCT LABELS vmo2011-004-002_a 1. Chain adjustment label location _______ ________ SAFETY INFORMATION...
  • Page 59: Vehicle Information

    VEHICLE INFORMATION _______________...
  • Page 60: Controls/Instruments/Equipment

    CONTROLS/INSTRUMENTS/EQUIPMENT vmo2010-003-101_b TYPICAL ______________...
  • Page 61: Throttle Lever

    1. Throttle lever limiter screw. 2. To accelerate 3. To decelerate BRP recommends that all beginners WARNING start off with the speed limiter screw turned in while they learn. Check throttle lever operation be- Adults can adjust the speed limiter fore you start the engine.
  • Page 62: Rh Brake Lever

    CONTROLS/INSTRUMENTS/EQUIPMENT SPEED DS 90 AND DS 70 SETTING DS 90 X Factory 16 km/h 24 km/h limited (10 MPH) (15 MPH) speed Maximum 24 km/h 48 km/h unrestricted (15 MPH) (30 MPH) speed vmo2008-020-004_b WARNING 1. Lock nut 2. Speed limiter screw...
  • Page 63: Lh Brake Lever

    The brake lever is now held in applying the rear brake(s). DS 70 and DS 90 vmo2008-020-006_a TYPICAL 1. Brake lever 2. To apply brake vmo2008-008-008_b TYPICAL —...
  • Page 64: Transmission Lever

    CONTROLS/INSTRUMENTS/EQUIPMENT DS 90 X Only vmo2008-008-018_a TRANSMISSION LEVER PATTERN vmo2008-020-014_a 1. Transmission lever LH BRAKE LEVER 2. Forward (F) Step 1: Squeeze brake lever and maintain 3. Neutral (N) Step 2: Push lever lock 4. Reverse (R) All Models To change the transmission position, completely stop vehicle, apply brakes, To release the parking brake mech- then move lever to the desired posi-...
  • Page 65: Multifunction Switch

    BRP recommends that you remain STOP position. seated. Avoid standing up. Your To stop engine, fully release throttle...
  • Page 66: Indicator Lamps

    CONTROLS/INSTRUMENTS/EQUIPMENT vmo2009-004-005_c vmo2009-004-006_a 1. Engine start button FULL CHOKE POSITION Choke Lever The other positions between OFF and FULL will be used depending on the This device features a variable position engine temperature. lever used to ease starting a cold en- gine.
  • Page 67: Ignition Switch

    CONTROLS/INSTRUMENTS/EQUIPMENT 9) Fuel Valve Reverse Lamp (RED) The fuel valve is located on the LH side When lit, it indicates the of the vehicle near the engine. transmission reverse position. This is a 3 position rotary valve: OFF, ON, RES (reserve). Rotate the valve to align its pointer to the desired position.
  • Page 68: 10) Seat Latch

    CONTROLS/INSTRUMENTS/EQUIPMENT RES (Reserve) When the normal supply of fuel in the tank is used up (ON position), an emer- gency supply of fuel is available by turn- ing the valve to RES. Use the RES posi- tion only when the ON supply is empty. When in reserve, refuel as soon as pos- sible.
  • Page 69: Front Storage Compartment

    CONTROLS/INSTRUMENTS/EQUIPMENT vmo2008-008-020_a 1. Tool kit 12) Front Storage vmo2008-008-023_a TYPICAL Compartment A convenient area to carry personal ar- WARNING ticles. When engine is running, always engage the NEUTRAL position on the transmission lever and ap- ply parking brake before opening cover.
  • Page 70: Fuel

    FUEL Recommended Fuel Fueling Procedure Use unleaded gasoline available from WARNING most service stations, or oxygenated fuel containing a maximum of 10% – Do not allow children to put fuel of ethanol or methanol. The gasoline in the vehicle. used must have the following recom- –...
  • Page 71 FUEL vmo2008-008-013_b TYPICAL — FUEL TANK CAP 4. Insert the spout in the filler neck. 5. Pour fuel slowly to allow time for the air in the tank to escape and prevent fuel flow back. Be careful not to spill fuel.
  • Page 72: Break-In Period

    BREAK-IN PERIOD Operating During Break-In A break-in period of 10 operating hours is required before running the vehicle at sustained full throttle. After the break-in period, the vehicle should be inspected by an authorized MAINTE- Can-Am dealer. Refer to NANCE INFORMATION Engine During the break-in period: –...
  • Page 73: Operating Instructions

    OPERATING INSTRUCTIONS Starting the Engine WARNING Always proceed with the pre-ride inspection as described in the SAFETY INFORMATION section prior to operating the vehicle. Al- ways check for proper operation of critical controls, safety features and mechanical components be- fore starting. vmo2009-004-005_b Transmission lever must be set to 1.
  • Page 74 OPERATING INSTRUCTIONS After a few seconds, adjust choke lever until the best engine RPM is achieved. NOTE: Overusing the choke may flood the engine and make it hard to start. TROUBLESHOOTING Refer to if this occurs. When the engine is warm, set the choke lever to OFF position and re- lease brakes.
  • Page 75: Stopping The Engine

    OPERATING INSTRUCTIONS To start engine, gently press pedal down until the kick starter mechanism engagement is felt, then kick down with a rapid follow through motion. mmo2008-008-051_a TYPICAL 1. Kick start pedal Repeat this procedure completely if necessary. Stopping the Engine WARNING Avoid parking on a slope.
  • Page 76: Tune Your Ride

    WARNING Left and right front shock adjust- vmo2008-008-029_a ment must always be set to the DS 70 AND DS 90 — FRONT SUSPENSION 1. Front spring same position. Never adjust one 2. Turn adjusting cam shock only. Uneven adjustment...
  • Page 77 TUNE YOUR RIDE vmo2008-008-030_a DS 70 AND DS 90 — REAR SUSPENSION 1. Rear spring 2. Turn adjusting cam vmo2008-020-011_a DS 90 X — REAR SUSPENSION 1. Rear spring 2. Loosen locking ring 3. Turn adjustment ring While reading this Operator’s Guide, remember that:...
  • Page 78: Vehicle Transportation

    Securing vehicle at other – Secure the front of the vehicle by locations may damage the vehicle. the front bumper, and the rear of the vehicle by the rear bumper. vmo2008-008-025_a DS 70 AND DS 90 — FRONT TIE-DOWN POINT LOCATION ______________...
  • Page 79 MAINTENANCE _______________...
  • Page 80: Break-In Inspection

    BREAK-IN INSPECTION BRP suggests that after the first 10 hours or 200 km (125 mi) of operation, whichever comes first, your vehicle be inspected by an authorized Can-Am dealer. The break-in inspection is very important and must not be neglected.
  • Page 81 BREAK-IN INSPECTION REPLACE ADJUST TIGHTEN BREAK-IN INSPECTION CHART LUBRICATE CLEAN INSPECT ENGINE Engine oil Valve clearance FUEL SYSTEM Fuel lines and connections Throttle cable/housing Carburetor Idle speed ELECTRICAL SYSTEM Spark plug Battery Battery voltage CVT TRANSMISSION CVT air inlet/outlet ducts GEARBOX Gearbox oil WHEEL/TIRES...
  • Page 82: Maintenance Schedule

    MAINTENANCE SCHEDULE Maintenance is very important for keeping your vehicle in safe operating condition. Proper maintenance is the owner's responsibility. The vehicle should be serviced as per maintenance schedule. The maintenance schedule does not exempt the pre-ride inspection. WARNING Failure to properly maintain the vehicle according to the maintenance schedule and procedures can make it unsafe to operate.
  • Page 83: Fuel System

    MAINTENANCE SCHEDULE MAINTENANCE SCHEDULE WEEKLY A: Adjust MONTHLY C: Clean ONCE A YEAR OR EVERY 100 HOURS I: Inspect L: Lubricate EVERY 2 YEARS OR 200 HOURS R: Replace TO BE PERFORMED BY PART/TASK LEGEND FUEL SYSTEM Fuel lines and Dealer connections Fuel filter...
  • Page 84 TO BE PERFORMED BY PART/TASK LEGEND GEARBOX — Gearbox oil Dealer STEERING SYSTEM Handlebar fasteners Dealer Steering knuckles Customer (DS 70 and DS 90) (6) Lubricate every 6 months. Steering shaft Dealer Steering system Dealer SUSPENSION — Suspension system Customer BRAKES Dealer/...
  • Page 85: Maintenance Procedures

    MAINTENANCE PROCEDURES This section includes instructions for basic maintenance procedures. If you have the necessary mechanical skills and the required tools, you can per- form these procedures. If not, see your authorized Can-Am dealer. Other important items in the mainte- nance schedule that are more difficult and require special tools are best per- formed by your authorized Can-Am...
  • Page 86 MAINTENANCE PROCEDURES Properly tighten dipstick. Engine Oil Viscosity Chart Recommended Engine Oil SAE 0W30 For the summer season, use XPS SYNTHETIC BLEND OIL (SUMMER GRADE) (P/N 293 600 121). SAE 5W30 For the winter season, use XPS SYNTHETIC OIL (WINTER GRADE) (P/N 293 600 112).
  • Page 87: Oil Strainer

    MAINTENANCE PROCEDURES Remove dipstick. Install and torque strainer cover to 42 N•m ± 4 N•m (31 lbf•ft ± 3 lbf•ft). Clean drain plug washer and check it's condition, replace it if necessary. Clean engine and drain plug contact surfaces, then reinstall drain plug and torque it to 22.0 N•m ±...
  • Page 88: Air Filter

    MAINTENANCE PROCEDURES To clean oil strainer, use a solvent, then NOTE: Riding in a group in these con- dry using compressed air. ditions increases even more the air filter maintenance and replacement requirement. CAUTION Always wear propriate skin and eye protection. Air Filter Location Chemicals can cause skin rash and eye injury.
  • Page 89 MAINTENANCE PROCEDURES vbs2009-012-015_a mmo2008-008-054_a TYPICAL - SPRAY FOAM ELEMENT INSIDE 1. Air filter AND OUT Air Filter Cleaning 2. Let stand for 3 minutes. 1. Spray the foam filter element inside 3. As stated on air filter cleaner (UNI) and out with AIR FILTER CLEANER container, rinse with plain water.
  • Page 90: Air Filter Housing

    MAINTENANCE PROCEDURES mmo2008-008-055_a 219700340 AIR FILTER OIL (P/N 219 700 340) FILTER POSITION 1. Cover side 2. Housing side Air Filter Housing Air Filter Housing Draining Periodically inspect air filter housing drain tube for liquids or deposits. vbs2009-012-014 TYPICAL - OIL FOAM FILTER ELEMENT NOTICE Engine performance...
  • Page 91: Air Injection Valve

    MAINTENANCE PROCEDURES mmo2008-008-061_a 1. Drain tube vmo2008-020-001_a 2. Clamp 1. Remove screws 3. Plug NOTICE Do not start engine when Remove filter from air injection valve. liquids/deposits are found in the drain tube. When liquids or deposits are found, air filter and housing must be inspected, dried or replaced depending on its con- dition.
  • Page 92: Cvt Cover

    MAINTENANCE PROCEDURES WARNING Never perform this operation im- mediately after the engine has been run because exhaust system is very hot. Wear eye protection and gloves. Respect all applicable laws and regulations. Remove muffler cover (if applicable). vmo2008-008-041_a 1. Spark arrester 2.
  • Page 93: Gearbox Oil

    MAINTENANCE PROCEDURES mmo2008-008-060_a LH SIDE OF VEHICLE vmo2008-008-036_a 1. Drain tube 1. Air filter housing 2. Clamp 3. Plug 4. Engine drain plug Gearbox Oil Recommended Gearbox Oil Use 165 ml (6 U.S. oz) of XPS CHAIN- CASE OIL (P/N 415 129 500) or an equivalent SAE 75W90 chaincase oil).
  • Page 94: Throttle Cable

    MAINTENANCE PROCEDURES NOTICE Do not use other types of oil when servicing the gearbox. Reinstall oil filler plug. Reinstall all other removed parts. Throttle Cable Throttle Cable Inspection Inspect throttle cable for excessive wear, kinking or fraying. Ensure cable mmo2008-008-056_a moves freely.
  • Page 95: Spark Plug

    MAINTENANCE PROCEDURES vmo2008-020-003_b vmo2008-008-027_a TYPICAL — NORMAL FREE-PLAY 1. Lock nut 1. Throttle lever 2. Adjuster A. 5 mm to 10 mm (.197 in to .394 in) With the transmission lever set to To adjust cable, slide rubber protector NEUTRAL position, start the engine. back to expose throttle cable adjuster.
  • Page 96: Battery

    MAINTENANCE PROCEDURES Spark Plug Removal Spark Plug Installation Disconnect spark plug cable from Prior to installation, make sure the con- spark plug. tact surface of the cylinder head and spark plug is free of grime. Using a feeler gauge, set the spark plug gap between 0.7 mm to 0.8 mm (.028 in to .031 in).
  • Page 97: Fuse

    Apply DIELECTRIC GREASE (P/N 293 Replacement 550 004) or an equivalent on battery posts to protect against oxidation. DS 70 and DS 90 Battery Installation CAUTION Always turn the ig- Reinstall battery in vehicle. nition switch to the OFF position before replacing a defective bulb.
  • Page 98: Drive Chain And Sprockets

    MAINTENANCE PROCEDURES vmo2008-008-038_a vmo2008-008-040_a REMOVE RUBBER PROTECTOR PULL ON BULB TO REMOVE THEN REPLACE 1. Rubber protector BULB 1. Bulb Drive Chain and Sprockets Drive Chain and Sprocket Inspection NOTICE Replace chain sprockets together to prevent rapid wear of these components. NOTICE Never operate this vehi- cle with the drive chain too loose or...
  • Page 99 MAINTENANCE PROCEDURES NOTICE Never adjust the drive chain with the driver seated on the vehicle. Remove any load on the ve- hicle. 1. Place vehicle on a level surface and set transmission to NEUTRAL. 2. Check drive chain condition. 3. Loosen drive axle locking bolts. vmo2008-008-048_a 1.
  • Page 100: Tires And Wheels

    MAINTENANCE PROCEDURES Tires and Wheels Tire Pressure WARNING Tire pressure greatly affects ve- hicle handling and stability. Low pressure may cause tire to deflate and rotate on wheel. Overpres- sure may burst the tire. Always follow recommended pressure. Since tires are low-pressure types, vmo2008-008-047_a a manual pump should be used.
  • Page 101: Steering System

    Push and pull on the top of each wheel Front Knuckle Lubrication to check for free play. See an autho- rized Can-Am dealer if any free play is DS 70 and DS 90 felt. Lubricate front knuckles. Use SUS- PENSION GREASE (P/N 293 550 033) or an equivalent.
  • Page 102: Mechanical Brakes (Ds 70 And Ds 90)

    MAINTENANCE PROCEDURES Mechanical Brakes (DS 70 BRAKE SHOE MINIMUM THICKNESS and DS 90) FRONT AND 1.5 mm (.06 in) REAR Mechanical Brake Inspection See your authorized Can-Am dealer if WARNING a problem is detected concerning the Any brake system repair should brake system.
  • Page 103: Hydraulic Brakes (Ds 90 X)

    MAINTENANCE PROCEDURES To adjust rear brake lever, turn the brake cable adjuster at the end of brake cable until proper adjustment is ob- tained. vmr2008-106-011_a 1. Cable link 2. Cable support Using adjustment screws on lever, ad- just cable free-play. BRAKE CABLE ADJUSTMENT 10 mm to 12 mm FREE-PLAY...
  • Page 104 MAINTENANCE PROCEDURES – Brake cleanliness – Brake discs for excessive wear and surface condition – Brake pads for wear, damage or looseness. Have your authorized Can-Am dealer inspect brake pads for wear or dam- age. vmr2008-101-004 RH FRONT BRAKE FLUID RESERVOIR BRAKE PAD MINIMUM 1 mm (.039 in)
  • Page 105: Frame

    MAINTENANCE PROCEDURES Repeat the same procedure for the other reservoir. Frame Frame Fasteners Check fastener condition and tight- ness on the vehicle. Retighten as re- quired. ______________...
  • Page 106: Vehicle Care

    VEHICLE CARE Post-Operation Care When required, wash the body parts using warm water and a mild deter- When the vehicle is used in a salt-wa- gent. Apply a non-abrasive wax. ter environment, rinsing the vehicle with fresh water is necessary to pre- serve the vehicle and its components.
  • Page 107: Storage And Preseason Preparation

    STORAGE AND PRESEASON PREPARATION WARNING Have an authorized Can-Am dealer inspect the fuel system integrity MAINTENANCE as specified in SCHEDULE When a vehicle is not in use for a period of four months, proper storage is a ne- cessity. See an authorized Can-Am dealer for proper procedures.
  • Page 108 STORAGE AND PRESEASON PREPARATION This page is intentionally blank ______________...
  • Page 109: Technical Information

    TECHNICAL INFORMATION ______________...
  • Page 110: Vehicle Identification

    These numbers are also required by the authorized Can-Am dealer to complete warranty claims properly. No warranty will be allowed by BRP if the engine identification number (EIN) or vehicle identification number (VIN) is removed, mutilated or altered in any way.
  • Page 111: Noise Emission Control System Regulation

    NOISE EMISSION CONTROL SYSTEM REGULATION USA and Canada Only Tampering with a Noise Control System Is Prohibited! U.S. Federal law and Canadian provin- cial laws may prohibit the following acts or the causing there of: 1. The removal or rendering inoper- ative by any person other than for purposes of maintenance, repair or replacement of any device or ele-...
  • Page 112: Specifications

    SPECIFICATIONS DS 90 MODEL DS 70 DS 90 X ENGINE Type 4-stroke, forced air cooled Number of Single horizontal cylinder cylinders Displacement 69.36 cm³ (4.2 in³) 89.53 cm³ (5.5 in³) Electric/kick start Starting For the summer season, use SYNTHETIC BLEND OIL (SUMMER...
  • Page 113 SPECIFICATIONS DS 90 MODEL DS 70 DS 90 X ELECTRICAL Ignition type CDI (Capacitor Discharge Ignition) Make Type CR7HSA Spark plug 0.6 mm to 0.7 mm (.024 in to .028 in) Quantity Type Maintenance free Battery Volt 12 volts, 4 A•h...
  • Page 114 SPECIFICATIONS DS 90 MODEL DS 70 DS 90 X WHEELS 8 x 5.5 Front DS 90 X: 10 x 5.5 Size 8 x 7 Rear DS 90 X: 8 x 8.5 Front and Wheel nut torque 40 N•m ± 4 N•m (30 lbf•ft ± 3 lbf•ft)
  • Page 115: Troubleshooting

    TROUBLESHOOTING ______________...
  • Page 116: Troubleshooting Guidelines

    TROUBLESHOOTING GUIDELINES ENGINE DOES NOT CRANK 1. Ignition switch is in the OFF position. – Place switch to the ON position. 2. Burnt fuse. – Check main supply fuse. 3. Weak battery or loose connections. – Check connections and condition of terminals. –...
  • Page 117 TROUBLESHOOTING GUIDELINES ENGINE TURNS OVER BUT FAILS TO START (cont’d) 5. Spark plug/ignition (no spark). – Remove spark plug from engine and reconnect it to spark plug cap. – Ensure the ignition switch is set to ON, and the emergency engine stop switch is set to the RUN position.
  • Page 118 TROUBLESHOOTING GUIDELINES ENGINE BACKFIRE 1. Exhaust system leakage. – Contact an authorized Can-Am dealer. 2. Engine is running too hot. – See ENGINE LACKS ACCELERATION OR POWER. 3. Ignition timing is incorrect or there is an ignition system failure. – Contact an authorized Can-Am dealer. 4.
  • Page 119 WARRANTY ______________...
  • Page 120: Brp Limited Warranty Usa And Canada: 2011 Can-Am

    BRP. BRP reserves the right to modify this warranty at any time, being understood that such modification will not alter the warranty conditions applicable to the products sold while this warranty is in effect.
  • Page 121 – Damage resulting from removal of parts, improper repairs, service, mainte- nance, modifications or use of parts not manufactured or approved by BRP or resulting from repairs done by a person that is not an authorized servicing Can-Am ATV dealer;...
  • Page 122 BRP will not honor this limited warranty to any private use owner or commercial use owner if the preceding conditions have not been met. Such limitations are necessary in order to allow BRP to preserve both the safety of its products, and also that of its consumers and the general public.
  • Page 123 BRP dealer and gives the coordinates of the new owner; or 2. BRP or an authorized BRP dealer receives a proof that the former owner agreed to the transfer of ownership, in addition to the coordinates of the new owner.
  • Page 124 In the event of a controversy or a dispute in connection with this limited warranty, BRP suggests that you try to resolve the issue at the dealership level. We recom- mend discussing the issue with the authorized dealer's service manager or owner.
  • Page 125: Brp International Limited Warranty: 2011 Can-Am Tm Atv

    BRP. BRP reserves the right to modify this warranty at any time, being understood that such modification will not alter the warranty conditions applicable to the products sold while this warranty is in effect.
  • Page 126 – The 2011 Can-Am ATV must be purchased in the country or union of countries in which the purchaser resides; and – Routine maintenance outlined in the Operator’s Guide must be timely per- formed in order to maintain warranty coverage. BRP reserves the right to make warranty coverage contingent upon proof of proper maintenance. ______________...
  • Page 127 BRP will not honor this limited warranty to any private use owner or commercial use owner if the preceding conditions have not been met. Such limitations are necessary in order to allow BRP to preserve both the safety of its products, and also that of its consumers and the general public.
  • Page 128 2. If further assistance is required, the Can-Am ATV Distributor service depart- ment should be contacted in order to resolve the matter. 3. If the matter still remains unresolved then contact BRP by writing to us at the address listed below.
  • Page 129: Brp Limited Warranty For The European Economic Area: 2011 Can-Am Tm Atv

    BRP. BRP reserves the right to modify this warranty at any time, being understood that such modification will not alter the warranty conditions applicable to the products sold while this warranty is in effect.
  • Page 130 Operator's Guide; – Damage resulting from removal of parts, improper repairs, service, mainte- nance, modifications or use of parts not manufactured or approved by BRP or resulting from repairs done by a person that is not an authorized servicing Can-Am ATV Distributor/Dealer;...
  • Page 131 BRP will not honor this limited warranty to any private use owner or commercial use owner if the preceding conditions have not been met. Such limitations are necessary in order to allow BRP to preserve both the safety of its products, and also that of its consumers and the general public.
  • Page 132 2. If further assistance is required, the Can-Am ATV Distributor's service depart- ment should be contacted in order to resolve the matter. 3. If the matter still remains unresolved then contact BRP at the address listed be- low. For countries within Europe, Middle East, Africa, Russia & CIS, please contact our European office: BRP EUROPE N.V.
  • Page 133 For all other countries, please contact your local Can-Am ATV Distributor/ Dealer (visit our website at www.brp.com for contact information), or contact our North America office at: BOMBARDIER RECREATIONAL PRODUCTS INC. Customer Assistance Center 75 J.-A. Bombardier Street Sherbrooke QC J1L 1W3 Tel.: 819 566-3366...
  • Page 134: Additional Terms And Conditions For France Only

    ADDITIONAL TERMS AND CONDITIONS FOR FRANCE ONLY The following terms and conditions are applicable to products sold in France only: The seller shall deliver goods that are complying with the contract and shall be re- sponsible for defects existing upon delivery. The seller shall also be responsible for defects resulting from packaging, assembling instructions or the installation when it is its responsibility per the contract or if accomplished under its responsibility.
  • Page 135: Customer Information

    CUSTOMER INFORMATION ______________...
  • Page 136: Privacy Information

    PRIVACY INFORMATION BRP wishes to inform you that your coordinates will be used for safety and war- ranty related purposes. Furthermore, BRP and its affiliates may use its customer list to distribute marketing and promotional information about BRP and related products.
  • Page 137: Change Of Address/Ownership

    Notifying BRP, even after the expiration of the limited warranty, is very important as it enables BRP to reach the ATV owner if necessary, like when safety recalls are initiated. It is the owner’s responsibility to notify BRP.
  • Page 138 CHANGE OF ADDRESS/OWNERSHIP This page is intentionally blank ______________...
  • Page 139 CHANGE OF ADDRESS/OWNERSHIP ______________...
  • Page 140 CHANGE OF ADDRESS/OWNERSHIP This page is intentionally blank ______________...
  • Page 141 CHANGE OF ADDRESS/OWNERSHIP ______________...
  • Page 142 CHANGE OF ADDRESS/OWNERSHIP This page is intentionally blank ______________...
  • Page 143 Please verify with your dealer to ensure your vehicle has been registered with BRP. While reading this Operator’s Guide, remember that: WARNING Indicates a potential hazard that, if not avoided, could result in serious injury or death.

This manual is also suitable for:

Ds 90Ds 90x2011 ds 702011 ds 90x

Table of Contents