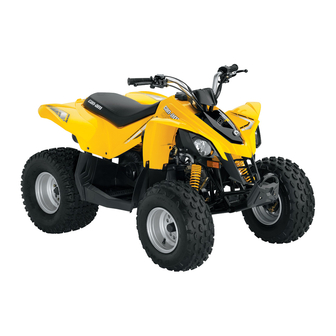
Congratulations on your purchase of WARNING a new Can-Am™ ATV, category “Y” Indicates a hazardous situation (youth model). It is backed by the BRP which, if not avoided, could result warranty and a network of authorized in death or serious injury.
ATV with an engine size safely. 50 cc or higher. – BRP recommends that all ATV A child under 12 years old should nev- riders take a training course. er operate an ATV with an engine size For safety and training infor- 70 cc or higher.
GENERAL PRECAUTIONS Avoid Carbon Monoxide Poisoning All engine exhaust contains carbon monoxide, a deadly gas. Breathing carbon monoxide can cause headaches, dizziness, drowsiness, nausea, confusion and eventually death. Carbon monoxide is a colorless, odorless, tasteless gas that may be present even if you do not see or smell any engine exhaust.
Do not make unauthorized modifications, or use attachments or accessories that are not approved by BRP. Since these changes have not been tested by BRP, they may increase the risk of crashes injuries, and they can make the vehicle illegal.
SPECIAL SAFETY MESSAGES WARNING THIS VEHICLE IS NOT A TOY AND CAN BE HAZARDOUS TO OPERATE. This vehicle handles differently from other vehicles. A collision or rollover can occur quickly, even during routine maneuvers such as turning and driving on hills or over obstacles, if you fail to take proper precautions. WARNING SEVERE INJURY OR DEATH can result if you do not follow these instruc- tions:...
Page 13
SPECIAL SAFETY MESSAGES WARNING – Always go slowly and be extra careful when operating on unfamiliar ter- rain. Always be alert to changing terrain conditions when operating this vehicle. – Never operate on excessively rough, slippery or loose terrain until you have learned and practiced the skills necessary to control this vehicle on such terrain.
Page 14
SPECIAL SAFETY MESSAGES WARNING – Never operate this vehicle in fast flowing water or in water deeper than that specified in this Operator’s Guide. Remember that wet brakes may have reduced stopping ability. Test your brakes after leaving water. If necessary, apply them several times to let friction dry out the pads.
OPERATION WARNINGS While reading this Operator’s Guide, reminder that: WARNING Indicates a potential hazard that, if not avoided, could result in serious injury or death. The following warning and their format have been requested by the United States Consumer Product Safety Commission and are required to be in the Operator’s Guide for all ATVs.
Page 16
OPERATION WARNINGS WARNING POTENTIAL HAZARD Failure to follow the age recommendations for this vehicle. WHAT CAN HAPPEN Use by children of ATVs that are not recommended for their age can lead to severe injury or death of the child. Even though a child may be within the age group for which this vehicle is recommended, he may not have the skills, abilities, or judgment needed to operate this vehicle safely and may be involved in a serious accident.
Page 17
OPERATION WARNINGS WARNING POTENTIAL HAZARD Carrying a passenger on this vehicle. WHAT CAN HAPPEN Greatly reduces your ability to balance and control this vehicle. Could cause an accident, resulting in harm to you and/or your passenger. HOW TO AVOID THE HAZARD Never carry passenger.
Page 18
OPERATION WARNINGS WARNING POTENTIAL HAZARD Operating this vehicle on paved surfaces. WHAT CAN HAPPEN The tires are designed for off-road use only, not for use on pavement. Paved surfaces may seriously affect handling and control of this vehicle, and may cause the vehicle to go out of control.
Page 19
OPERATION WARNINGS WARNING POTENTIAL HAZARD Operating this vehicle on public streets, roads or highways. WHAT CAN HAPPEN You can collide with another vehicle. HOW TO AVOID THE HAZARD Never operate this vehicle on any public street, road or highway, even a dirt or gravel one.
Page 20
OPERATION WARNINGS WARNING POTENTIAL HAZARD Riding this vehicle without wearing an approved helmet, eye protection and protective clothing. WHAT CAN HAPPEN The following items concern all ATV's operator: – Riding without an approved helmet increases the chances of a severe head injury or death in the event of an accident.
Page 21
OPERATION WARNINGS WARNING POTENTIAL HAZARD Riding this vehicle after consuming alcohol or drugs. WHAT CAN HAPPEN Could seriously affect your judgment. Could cause you to react more slowly. Could affect your balance and perception. Could result in an accident or death. HOW TO AVOID THE HAZARD Never consume alcohol or drugs before or while riding this vehicle.
Page 22
OPERATION WARNINGS WARNING POTENTIAL HAZARD Operating this vehicle at excessive speeds. WHAT CAN HAPPEN Increases your chances of losing control of the vehicle, which can result in an accident. HOW TO AVOID THE HAZARD Always travel at a speed which is proper for the terrain, visibility and oper- ating conditions, and your experience.
Page 23
OPERATION WARNINGS WARNING POTENTIAL HAZARD Attempting wheelies, jumps and other stunts. WHAT CAN HAPPEN Increases the chance of an accident, including an overturn. HOW TO AVOID THE HAZARD Never attempt stunts, such as wheelies or jumps. Do not try to show off. WARNING POTENTIAL HAZARD Failure to inspect the vehicle before operating.
Page 24
OPERATION WARNINGS WARNING POTENTIAL HAZARD Riding on frozen waterways. WHAT CAN HAPPEN Breaking through the ice can lead to severe injury or death. HOW TO AVOID THE HAZARD Never ride this vehicle on a frozen surface before you are sure the ice is thick enough and sound enough to support the vehicle and its load, as well as the force that is created by a moving vehicle.
Page 25
OPERATION WARNINGS WARNING POTENTIAL HAZARD Failure to use extra care when operating this vehicle on unfamiliar terrain. WHAT CAN HAPPEN You can come upon hidden rocks, bumps, or holes, without enough time to react. Could result in the vehicle overturning or loss of control. HOW TO AVOID THE HAZARD Go slowly and be extra careful when operating on unfamiliar terrain.
Page 26
OPERATION WARNINGS WARNING POTENTIAL HAZARD Failure to use extra care when operating on excessively rough, slippery or loose terrain. WHAT CAN HAPPEN Could cause loss of traction or vehicle control, which could result in an acci- dent, including an overturn. HOW TO AVOID THE HAZARD Do not operate on excessively rough, slippery or loose terrain until you have learned and practiced the skills necessary to control this vehicle on...
Page 27
OPERATION WARNINGS WARNING POTENTIAL HAZARD Turning improperly. WHAT CAN HAPPEN Vehicle could go out of control, causing a collision or overturn. HOW TO AVOID THE HAZARD Always follow proper procedures for turning as described further in this Op- erator’s Guide. Practice turning at low speeds before attempting to turn at faster speeds.
Page 28
OPERATION WARNINGS WARNING POTENTIAL HAZARD Operating on excessively steep hills. WHAT CAN HAPPEN The vehicle can overturn more easily on extremely steep hills than on level surfaces or small hills. HOW TO AVOID THE HAZARD Never operate this vehicle on hills too steep for the vehicle or for your abili- ties.
Page 29
OPERATION WARNINGS WARNING POTENTIAL HAZARD Climbing hills improperly. WHAT CAN HAPPEN Could cause loss of control or cause vehicle to overturn. HOW TO AVOID THE HAZARD Always follow proper procedures for climbing hills as described further in this Operator’s Guide. Always check the terrain carefully before you start up any hill.
Page 30
OPERATION WARNINGS WARNING POTENTIAL HAZARD Going down a hill improperly. WHAT CAN HAPPEN Could cause loss of control or cause vehicle to overturn. HOW TO AVOID THE HAZARD Always follow proper procedures for going down hills as described further in this Operator’s Guide. NOTE: A special technique is required when braking as you go down a hill.
Page 31
OPERATION WARNINGS WARNING POTENTIAL HAZARD Improperly crossing hills or turning on hills. WHAT CAN HAPPEN Could cause loss of control or cause vehicle to overturn. HOW TO AVOID THE HAZARD Never attempt to turn the vehicle around on any hill until you have mastered the turning technique as described further in this Operator’s Guide on level ground.
Page 32
OPERATION WARNINGS WARNING POTENTIAL HAZARD Stalling, rolling backwards or improperly dismounting while climbing a hill. WHAT CAN HAPPEN Could result in vehicle overturning. HOW TO AVOID THE HAZARD Use proper gear and maintain steady speed when climbing a hill. If you lose all forward speed: Keep your weight uphill.
Page 33
OPERATION WARNINGS WARNING POTENTIAL HAZARD Improperly operating over obstacles. WHAT CAN HAPPEN Could cause loss of control or a collision. Could cause the vehicle to overturn. HOW TO AVOID THE HAZARD Before operating in a new area, check for obstacles. Never attempt to ride over large obstacles, such as large rocks or fallen trees.
Page 34
OPERATION WARNINGS WARNING POTENTIAL HAZARD Skidding or sliding improperly. WHAT CAN HAPPEN You may lose control of this vehicle. You may also regain traction unexpectedly, which may cause the vehicle to overturn. HOW TO AVOID THE HAZARD Learn to safely control skidding or sliding by practicing at low speeds and on level smooth terrain.
Page 35
OPERATION WARNINGS WARNING POTENTIAL HAZARD Operating this vehicle through deep or fast flowing water. WHAT CAN HAPPEN Tires may float, causing loss of traction and loss of control, which could lead to an accident. HOW TO AVOID THE HAZARD Never operate this vehicle in fast flowing water or in water deeper than that specified further in this Operator’s Guide.
Page 36
OPERATION WARNINGS WARNING POTENTIAL HAZARD Operating this vehicle with improper tires, or with improper or uneven tire pressure. WHAT CAN HAPPEN Use of improper tires on this vehicle, or operation of this vehicle with improper or uneven tire pressure, may cause loss of control, tire blow outs, tire to move around on its rim, and increases the risk of an accident.
Page 37
Never modify this vehicle through improper installation or use of acces- sories. All parts and accessories added to this vehicle should be approved by BRP and should be installed and used according to instructions. If you have questions, consult an authorized Can-Am dealer.
Page 38
OPERATION WARNINGS WARNING POTENTIAL HAZARD Overloading this vehicle or carrying or towing cargo improperly. WHAT CAN HAPPEN Could cause changes in vehicle handling which could lead to an accident. HOW TO AVOID THE HAZARD Never load cargo on this vehicle. Never tow cargo or another vehicle with this vehicle.
Page 39
OPERATION WARNINGS WARNING POTENTIAL HAZARD Transporting flammable or dangerous material can lead to explosions. WHAT CAN HAPPEN This can cause serious injury or death. HOW TO AVOID THE HAZARD Never transport flammable or dangerous material. While reading this Operator’s Guide, reminder that: WARNING Indicates a potential hazard that, if not avoided, could result in serious injury or death.
RIDING THE VEHICLE To fully appreciate the pleasures and excitement of riding this vehicle, there are some basic rules and tips that you MUST follow. Some may be new to you while others may be common sense or obvious. Please take the time to study this Operator's Guide and all on-product warning la- SAFETY VIDEO bels as well as the that came with this vehicle.
RIDING THE VEHICLE Pre-Ride Inspection WARNING Perform a pre-ride inspection before each ride to detect potential problems during operation. The pre-ride inspection can help you monitor wear and deterioration before they become a problem. Correct any problems that you discover to reduce the risk of a breakdown or crash. See an authorized Can-Am dealer if necessary.
RIDING THE VEHICLE Clothing Actual weather conditions should help you decide how to dress. However, it is im- portant that the operator always wears the appropriate protective clothing and ap- parel, including an approved helmet, eye protection, boots, gloves, a long sleeved shirt and pants.
RIDING THE VEHICLE Carrying Loads This vehicle is designed specifically to carry an operator only. Even with a long seat that provides unrestricted operator movements, it is not designed nor intended to carry passenger(s). NEVER install passenger's seat or use the racks or their loca- tion to carry passenger(s).
RIDING THE VEHICLE Finally, do not pollute streams, lakes or rivers and do not modify the engine or muf- fling system, or remove any of its components. Design Limitation Although the vehicle is exceptionally rugged for its class, it is still a light vehicle by definition and its operation must be restricted to its proper purpose.
RIDING THE VEHICLE rises very sharply. The vehicle can readily negotiate such a condition, however, in doing so, when the front of the vehicle is driven to a point that the vehicle's balance changes rearward tipover can occur. The same situation may apply if an embedded object causes the front of the vehi- cle to climb more than desired.
Page 46
RIDING THE VEHICLE at all times. Do not direct your toes outwards nor place your foot out to assist turning as they can be hit or snagged by passing obstacles or may contact the wheels. Even though there is an adequate suspensions system on this vehicle there are “washboard”...
Page 47
RIDING THE VEHICLE Water will affect the braking ability of your vehicle. Make sure you dry the brakes by applying them several times after the vehicle leaves the water. Mud or marsh lands may be encountered near water. Be prepared for sudden “holes“...
Page 48
RIDING THE VEHICLE When riding in sand dunes it is advisable to equip the vehicle with an antenna type safety flag. This will help make your location more visible to others over the next sand dune. Proceed carefully should you see another safety flag ahead. Since the antenna type safety flag can snag and rebound on your body if caught, do not use it in areas where there are low hanging branches or obstacles.
Page 49
RIDING THE VEHICLE Uphill Keep your body weight forward towards the top of the hill. Keep your feet on the footpegs and shift into low gear then accelerate and when necessary, change gear quickly as you climb. Do not over-speed since this may cause the front of the vehi- cle to lift from the ground and fall back on you.
Page 50
RIDING THE VEHICLE Downhill Keep your body weight rearwards. Apply the brake gradually to prevent skidding. Do not “coast“ down the slope using solely engine compression or in neutral gear. Side Hilling This is one of the most risky types of riding since it may drastically change the bal- ance of the vehicle.
RIDING THE VEHICLE Routine Maintenance Once your ride completed, it is wise to remove any build up of snow, ice, mud and grime. Not only will this help you keep your vehicle longer and in good condition for resale but will eliminate potential hazards the next time you use the vehicle. Wash your vehicle in warm soapy water then allow it to dry.
HANG TAG This vehicle comes with a hang tag containing important information. vmo2009-004-001_en TYPICAL vmo2006-005-009_en ___________ ____________ SAFETY INFORMATION...
IMPORTANT ON-PRODUCT LABELS The following labels are on your vehicle and they should be considered permanent parts of the vehicle. If missing or damaged, they can be replaced free of charge. See an authorized Can-Am dealer. NOTE: The following illustrations used in this Operator’s Guide are a general rep- resentation only.
CONTROLS/INSTRUMENTS/EQUIPMENT vmo2009-004-004_a TYPICAL While reading this Operator’s Guide, reminder that: WARNING Indicates a potential hazard that, if not avoided, could result in serious injury or death. ______________________...
CONTROLS/INSTRUMENTS/EQUIPMENT vmo2008-008-064_b TYPICAL NOTE: This section gives basic func- tions of the various controls of your vehicle. For more details on how to operate one control in conjunction with OPERATING IN- some others, refer to STRUCTIONS further in this section. 1) Throttle Lever When pushed, it increases the engine speed that allows the engagement of...
16 km/h (10 MPH) and DS 90/ DS 90 X with a restricted speed setting of 24 km/h (15 MPH). BRP recommend that all beginners start off with the speed limiter screw turned in while they learn. ______________________...
CONTROLS/INSTRUMENTS/EQUIPMENT WARNING Always use the parking brake when the vehicle is not in opera- tion. WARNING Make sure parking brake is fully disengaged before operating the vehicle. When you ride the vehi- cle, brakes that are caused to drag vmo2008-020-005_a by a continuous pressure on the TYPICAL lever may cause damage to the...
CONTROLS/INSTRUMENTS/EQUIPMENT DS 90 X Only vmo2008-008-018_a TRANSMISSION LEVER PATTERN vmo2008-020-014_a 1. Transmission lever REAR BRAKE LEVER 2. Forward (F) Step 1: Squeeze brake lever and maintain 3. Neutral (N) Step 2: Push lever lock 4. Reverse (R) All Models To change the transmission position, completely stop vehicle, apply brakes To release mechanism: Squeeze then move lever to the desired position...
Page 63
CONTROLS/INSTRUMENTS/EQUIPMENT Engine Start Button To start engine, place the engine stop switch to ON position. Press and hold LH brake lever. Press and hold the engine start button. Release immediately after engine is started. vmo2009-004-005_a 1. Engine stop switch 2. Engine start button 3.
CONTROLS/INSTRUMENTS/EQUIPMENT 8) Indicator Lamps vmo2009-004-005_d OFF POSITION vmo2008-008-019_a The full choke position is used for low- TYPICAL 1. Neutral (N) er engine temperature. 2. Reverse (R) 3. Ignition switch Neutral Lamp (GREEN) When lit, it indicates the trans- mission is in neutral position. Reverse Lamp (RED) When lit, it indicates the trans- mission is in reverse position.
CONTROLS/INSTRUMENTS/EQUIPMENT CAUTION Improper opening of fuel valve will restrict the flow of fuel. Make sure valve is fully opened while running. Stops fuel supply to carburetor. CAUTION Turn valve to OFF position when vehicle is not being operated or when transporting. vmo2008-008-012_a IGNITION SWITCH 1.
CONTROLS/INSTRUMENTS/EQUIPMENT vmo2008-008-043_a vmo2008-008-016_a 1. Hooks TYPICAL 1. Seat release knob WARNING Seat Removal Make sure seat is securely latched Pull latch while gently lifting rear of before riding. seat. Pull seat rearward then remove 12) Tool Kit Seat Installation Located underneath the seat in engine compartment, the tool kit contains Insert front tabs of seat into frame tools for basic maintenance.
CONTROLS/INSTRUMENTS/EQUIPMENT 14) Tether Cut-Out Switch DS 90 X Only When tether cord clip is removed from switch, it shuts the engine off to pre- vent the ATV from running away if the operator accidently falls off. To allow engine to start, install teth- er cord clip between knob and switch housing as shown.
FUEL Recommended Fuel Use unleaded gasoline available from most service stations or oxygenated fuel containing a maximum total of 10% of ethanol or methanol or both. The gasoline used must have the fol- lowing recommended minimum oc- tane number. OCTANE NUMBER vmo2008-008-013_b Inside North America (87 (R + M)/2)
OPERATING INSTRUCTIONS Operating During Break-In Transmission lever must be on NEU- TRAL to allow engine starting. Engine Insert key in ignition switch and turn to A break-in period of 10 operating hours ON position. is required before running the vehicle at sustained full throttle.
Page 70
OPERATING INSTRUCTIONS All Models NOTE: Throttle assist may be used to help starting the engine faster. Press In cold weather, colder than 0°C (32°F), the throttle lever slightly; if it is pressed place choke lever in full choke position. too much, the choke system will not be activated.
OPERATING INSTRUCTIONS mmo2008-008-051_a TYPICAL 1. Kick start pedal vmo2009-004-005_d Repeat this procedure completely if OFF POSITION necessary. Warm Engine Starting Stopping the Engine Start the engine as explained above but without any choke. If the engine will not start after two 5-second at- WARNING tempts with the electric starter, adjust Avoid parking on a slope.
Page 72
OPERATING INSTRUCTIONS vehicle and its components. Metallic parts lubrication is highly recommend- ed. Use XP-S Lube. This must be performed at the end of each operating day. When vehicle is operated in muddy conditions, rinsing the vehicle is rec- ommended to preserve vehicle and its components and to keep lights clean.
TUNE YOUR RIDE Suspension Adjustment WARNING Suspension adjustment could af- fect vehicle handling. Always take time to familiarize yourself with the vehicle's behavior after any suspension adjustment has been made. WARNING Left and right front shock adjust- vmo2008-008-029_a ment must always be set at the DS 70/DS 90 —...
Page 74
TUNE YOUR RIDE vmo2008-008-030_a DS 70/DS 90 — REAR SUSPENSION 1. Rear spring 2. Turn adjusting cam vmo2008-020-011_a DS 90 X — REAR SUSPENSION 1. Rear spring 2. Loosen locking ring 3. Turn adjustment ring ______________________...
VEHICLE TRANSPORTATION While reading this Operator’s Guide, reminder that: WARNING Indicates a potential hazard that, if not avoided, could result in serious injury or death. When transporting a vehicle, se- cure vehicle to trailer with suitable tie-downs. Using ordinary ropes is not recommended.
Page 76
VEHICLE TRANSPORTATION vmo2008-008-026_a ALL MODELS — REAR ATTACHMENT LOCATION CAUTION Attaching vehicle at other locations may damage the ve- hicle. WARNING Do not tow this vehicle behind a car or other vehicle. Use a trailer. ______________________...
MAINTENANCE SCHEDULE Maintenance is very important for keeping your vehicle in safe operating condi- tion. Proper maintenance is the owner's responsibility. Perform periodic checks and follow the maintenance schedule. WARNING Failure to properly maintain the vehicle according to the maintenance schedule and procedures can make it unsafe to operate.
Page 79
MAINTENANCE SCHEDULE PERIODIC MAINTENANCE CHART INITIAL INSPECTION 10 HOURS OR 30 DAYS (To be performed by an authorized Can-Am dealer. The initial maintenance is very important and must not be neglected.) A: ADJUST C: CLEAN WEEKLY I: INSPECT L: LUBRICATE MONTHLY R: REPLACE ONCE A YEAR OR EVERY 100 HOURS...
Page 80
MAINTENANCE SCHEDULE PERIODIC MAINTENANCE CHART INITIAL INSPECTION 10 HOURS OR 30 DAYS (To be performed by an authorized Can-Am dealer. The initial maintenance is very important and must not be neglected.) A: ADJUST C: CLEAN WEEKLY I: INSPECT L: LUBRICATE MONTHLY R: REPLACE ONCE A YEAR OR EVERY 100 HOURS...
Page 81
MAINTENANCE SCHEDULE PERIODIC MAINTENANCE CHART INITIAL INSPECTION 10 HOURS OR 30 DAYS (To be performed by an authorized Can-Am dealer. The initial maintenance is very important and must not be neglected.) A: ADJUST C: CLEAN WEEKLY I: INSPECT L: LUBRICATE MONTHLY R: REPLACE ONCE A YEAR OR EVERY 100 HOURS...
10-HOUR INSPECTION NOTE: The 10-hour inspection is at the expense of the vehicle owner. We suggest that after the first 10 hours or 30 days of operation, whichever comes first, your vehicle be inspected by an authorized Can-Am dealer. Date of 10-hour inspection Authorized dealer signature Dealer name ______________________...
MAINTENANCE PROCEDURES WARNING The following procedures should be done by an adult only. Engine Oil vmo2008-020-007_a Engine Oil Level 1. Full 2. Add 3. Operating range CAUTION Check level fre- quently and refill if necessary. Do To add oil, remove dipstick. Place a not overfill.
MAINTENANCE PROCEDURES Verify drain plug washer condition and replace it if necessary. Clean washer area on engine and drain plug, then reinstall plug and torque it to 22 N•m (16 lbf•ft). Refill engine at the proper level with SPEC- the recommended oil. Refer to IFICATIONS for capacity.
MAINTENANCE PROCEDURES Removal Installation Installation is the reverse of removal procedure. mmo2008-008-053_a REMOVE AIR FILTER BOX COVER 1. Screws mmo2008-008-055_a FILTER POSITION 1. Cover side 2. Housing side Air Filter Housing Air Filter Housing Draining Periodically inspect air filter housing drain tube for liquids water or deposits.
MAINTENANCE PROCEDURES If liquids/deposits are found, squeeze Clean air injection valve cover before and remove the clamp. Pull drain tube removing. plug out. and empty it. Remove cover to gain access to air fil- ter. mmo2008-008-061_a 1. Drain tube 2. Clamp 3.
MAINTENANCE PROCEDURES Spark Arrester Spark Arrester Cleaning The muffler must be periodically purged of accumulated carbon. WARNING Never perform this operation im- mediately after the engine has been run because exhaust system is very hot. Wear eye protection vmo2008-008-041_a and gloves. Respect all applicable 1.
MAINTENANCE PROCEDURES Gearbox Oil Gearbox Oil Change Place the vehicle on a level surface. Remove the air filter housing from the vehicle. vmo2008-008-062_a REMOVE AIR FILTER HOUSING Clean drain plug and oil filling plug area then remove the gearbox drain plug. vmo2008-008-036_a 1.
MAINTENANCE PROCEDURES Throttle Lever Reinstall drain plug and torque to 16 N•m (142 lbf•in). Throttle Lever Adjustment Refill gearbox using 165 ml (6 U.S. oz) of XP-S chaincase oil (P/N 413 801 900) The normal throttle free-play is 5 to or an equivalent.
Page 91
MAINTENANCE PROCEDURES vmo2008-020-004_b 1. Lock nut vmo2008-008-027_a 2. Speed limiter screw 1. Lock nut 2. Adjuster The maximum throttle lever move- ment adjustment to obtain vehicle ma- Speed Limiter Adjustment ximum speed is 20 mm (0.8 in). This vehicle is equipped with an ad- justable speed limiter.
MAINTENANCE PROCEDURES Spark Plug Spark Plug Removal/ Installation vmo2008-008-035_a UNSCREW SPARK PLUG ONE TURN 1. Spark plug Clean spark plug and cylinder head with pressurized air if possible. vmo2008-008-033_a TYPICAL — RH SIDE OF VEHICLE 1. Spark plug location WARNING Removal Always wear safety goggles when using pressurized air.
MAINTENANCE PROCEDURES Battery WARNING Always respect this order for dis- Battery Removal/Installation assembly; disconnect BLACK (-) cable first. Fuel vapors can be WARNING present in engine compartment Never charge a battery while in- and a spark may ignite them and stalled in vehicle.
MAINTENANCE PROCEDURES vmo2008-008-039_a vmo2008-008-017_a PUSH AND TURN BULB HOLDER 1. Fuse holder COUNTERCLOCKWISE 1. Bulb holder Lights Daytime Running Lights Bulbs Replacement DS 70/DS 90 WARNING Always turn the ignition switch to OFF position before replacing a de- fective bulb. Always check light operation after re- placement.
Page 95
MAINTENANCE PROCEDURES Check the free-play of drive chain and Turn chain adjuster nut until proper ad- adjust if necessary. justment is obtained. Drive Chain Cleaning and Lubrication Clean chain by soaking and agitating in solvent. Wipe it dry. Lubricate using commercial chain lubri- MAINTENANCE SCHED- cant, refer to for more details.
MAINTENANCE PROCEDURES Wheels and Tires Tire Pressure WARNING Tire pressure greatly affects ve- hicle handling and stability. Low pressure may cause tire to deflate and rotate on wheel. Overpres- sure may burst the tire. Always follow recommended pressure. vmo2008-008-048_a Since tires are low-pressure types, 1.
MAINTENANCE PROCEDURES Steering System Wheels Removal/Installation Loosen bolts then lift vehicle. Place a Front Knuckles Lubrication support under vehicle. Remove bolts then remove wheel. DS 70/DS 90 At installation, it is recommended Lubricate front knuckles. Use syn- to apply anti-seize lubricant on bolts thetic grease (P/N 293 550 033) or an threads.
Page 98
MAINTENANCE PROCEDURES Inspect cables for excessive wear, kinking or fraying. Replace any cable that show signs of wear, fraying or other damage. Lubricate cables using silicone lubri- cant (P/N 293 600 041) to reduce pre- vmr2008-102-009_a mature wear and to ensure proper 1.
Page 99
MAINTENANCE PROCEDURES Rear Brake Lever Adjustment CAUTION To avoid serious damage to the braking system, do DS 70/DS 90 not use fluids other than the recom- The normal free-play of at the end of mended one, nor mix different fluids brake lever is between 15 and 25 mm for topping up.
MAINTENANCE PROCEDURES Turn steering in the straight-ahead po- – Brake discs for excessive wear and sition to ensure reservoirs are levelled. surface condition – Brake pads for wear, damage or Check fluid level, the reservoir is full looseness. when the fluid reaches of the top of window.
STORAGE AND PRESEASON PREPARATION WARNING Have an authorized Can-Am deal- er to inspect fuel system integrity MAINTENANCE as specified in SCHEDULE When a vehicle is not in use for more than four months, proper storage is a necessity. See an authorized Can-Am dealer for proper procedures.
Page 102
STORAGE AND PRESEASON PREPARATION _____________________...
These numbers are required by the authorized Can-Am dealer to complete warranty claims properly. No warranty will be allowed by BRP if the engine identification number (EIN) or vehicle identification number (VIN) is removed or mutilated in any way.
NOISE EMISSION CONTROL SYSTEM REGULATION USA and Canada Only Tampering with Noise Control Sys- tem is Prohibited! U.S. Federal law and Canadian provin- cial laws may prohibit the following acts or the causing there of: 1. The removal or rendering inoper- ative by any person other than for purposes of maintenance, repair or replacement of any device or ele-...
SPECIFICATIONS MODEL DS 70 DS 90/DS 90 X ENGINE Type 4-stroke, forced air cooled Number of cylinder Single horizontal cylinder Displacement 69.36 cc (4.23 cu. in) 89.53 cc (5.46 cu. in) Electric/kick start Starting SAE10W 40 API classification SM, SL or SJ, Type XP-S 5W 40 synthetic oil is recommended Engine oil...
Page 107
SPECIFICATIONS MODEL DS 70 DS 90/DS 90 X ELECTRICAL Ignition type CDI (Capacitor Discharge Ignition) Make Type Spark plug CR7HSA 0.6 to 0.7 mm (.024 to .027 in) Number of spark plug Type Maintenance free Battery Volt 12 volts, 4 A•h Starting system Electric start/kick start Daytime running light bulb...
Page 108
SPECIFICATIONS MODEL DS 70 DS 90/DS 90 X WHEELS 8 x 5.5 Front DS 90 X: 10 x 5.5 Size 8 x 7 Rear DS 90 X: 8.5 x 8 Front 40 N•m (30 lbf•ft) Wheel nuts torque Rear 40 N•m (30 lbf•ft) BRAKES Mechanical, drum Front...
TECHNICAL GUIDELINES ENGINE DOES NOT TURN 1. Ignition switch is in the OFF position. – Place switch to the ON position. 2. Burnt fuse. – Check main supply fuse. 3. Weak battery or loose connections. – Check connections and terminals condition. –...
Page 111
TECHNICAL GUIDELINES ENGINE TURNS OVER BUT FAILS TO START (cont’d) 6. Engine compression. – As the engine is pulled over with the kick stater, “cycles” of resistance should be felt as piston goes past top dead center. If no pulsating resistance is felt, it suggests a major loss of compression.
Page 112
TECHNICAL GUIDELINES ENGINE MISFIRE 1. Fouled/damaged/worn spark plug. – Clean/verify spark plug and heat range. Replace as required. 2. Water in fuel. – Drain fuel system and refill with fresh fuel. VEHICLE CANNOT REACH FULL SPEED 1. Engine. – See ENGINE LACKS ACCELERATION OR POWER. 2.
BRP. BRP reserves the right to modify this warranty at any time, being understood that such modification will not alter the warranty conditions applicable to the products sold while this warranty is in effect.
Page 115
– Damage resulting from removal of parts, improper repairs, service, mainte- nance, modifications or use of parts not manufactured or approved by BRP or resulting from repairs done by a person that is not an authorized servicing BRP dealer; – Damage caused by abuse, abnormal use, neglect or operation of the product in a manner inconsistent with the recommended operation described in the Can-Am ATV Operator’s Guide;...
Page 116
BRP will not honor this limited warranty to any private use owner or commercial use owner if the preceding conditions have not been met. Such limitations are necessary in order to allow BRP to preserve both the safety of its products, and also that of its consumers and the general public.
Page 117
BRP is notified of such transfer o f ownership in the following way: 1. The former owner contacts BRP (at the phone numb er provided below) or an authorized BRP dealer and gives the coordinates of the new owner;...
Page 118
In the event of a controversy or a dispute in connection with this limited warranty, BRP suggests that you try to resolve the issue at the dealership level. We recom- mend discussing the issue with the authorized dealer's service manager or owner.
BRP. BRP reserves the right to modify this warranty at any time, being understood that such modification will not alter the warranty conditions applicable to the products sold while this warranty is in effect.
Page 120
– The 2009 Can-Am ATV must be purchased in the country or union of countries in which the purchaser resides; – Routine maintenance outlined in the Operator’s Guide must be timely per- formed in order to maintain warranty coverage. BRP reserves the right to make warranty coverage contingent upon proof of proper maintenance. _____________________...
Page 121
BRP will not honour this limited warranty to any private use owner or commercial use owner if the preceding conditions have not been met. Such limitations are necessary in order to allow BRP to preserve both the safety of its products, and also that of its consumers and the general public.
Page 122
2. If further assistance is required, the distributor's service department should be contacted in order to resolve the matter. 3. If the matter still remains unresolved then contact BRP by writing to us at the address listed below. For countries within Europe, Middle East, Africa, Russia & CIS, please contact our European office: BRP EUROPE N.V.
BRP. BRP reserves the right to modify this warranty at any time, being understood that such modification will not alter the warranty conditions applicable to the products sold while this warranty is in effect.
Page 124
Operator's Guide; – Damage resulting from removal of parts, improper repairs, service, mainte- nance, modifications or use of parts not manufactured or approved by BRP or resulting from repairs done by a person that is not an authorized servicing Distributor/Dealer;...
Page 125
BRP will not honour this limited warranty to any private use owner or commercial use owner if the preceding conditions have not been met. Such limitations are necessary in order to allow BRP to preserve both the safety of its products, and also that of its consumers and the general public.
Page 126
9) CONSUMER ASSISTANCE In the event of a controversy or a dispute in connection with this limited warranty, BRP suggests that you try to resolve the issue at the dealership level. We rec- ommend discussing the issue with the authorized Distributor/Dealer's service manager or owner.
BOMBARDIER RECREATIONAL PRODUCTS INC. Warranty Department 75, J.-A. Bombardier Street Sherbrooke, Québec J1L 1W3 Fax Number: 819 566-3590 In USA BRP US INC. Warranty Department 7575 Bombardier Court Wausau WI 54401 Tel.: 715 848-4957 Other countries in the world BRP EUROPEAN DISTRIBUTION...
Notifying BRP, even after the expiration of the limited warranty, is very important as it enables BRP to reach the ATV owner if necessary, like when safety recalls are initiated. It is the owner’s responsibility to notify BRP.
Page 129
CHANGE OF ADDRESS/OWNERSHIP _____________________...
Page 130
CHANGE OF ADDRESS/OWNERSHIP _____________________...
Page 131
Please verify with your dealer to ensure your vehicle has been registered with BRP. While reading this Operator’s Guide, reminder that: WARNING Indicates a potential hazard that, if not avoided, could result in serious injury or death.
Need help?
Do you have a question about the DS70 and is the answer not in the manual?
Questions and answers
how mush engine oil does it take