Table of Contents

Related Manuals for Miele CS 1011 G


Summary of Contents for Miele CS 1011 G
-
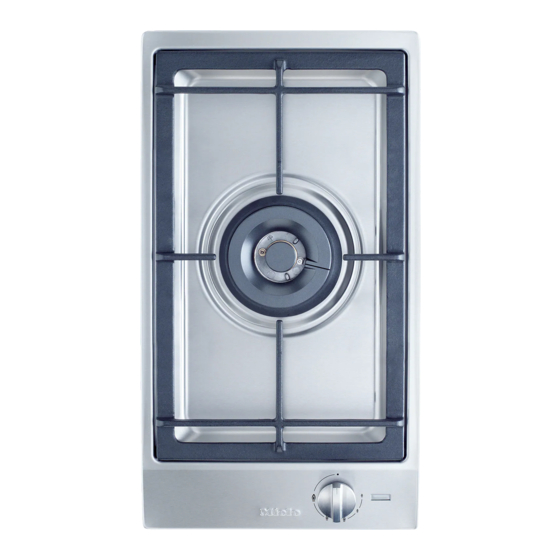
Page 1: Gas Cooktops
Operating and installation instructions Gas cooktops CS 1011 G en - AU, NZ To avoid the risk of accidents or damage to the appliance, it is essential to read these instructions before it is installed and used for the first time. - Page 2 This appliance can be used in countries other than those specified on the appliance. It is, however, set up for connection to the gas and electricity supplies in the countries specified. For use in other countries please contact Miele in your country.
-
Page 3: Table Of Contents
Contents Description of the appliance ......... 5 Warning and safety instructions . - Page 4 Contents Installation of several appliances........34 Fixing the spring clamps and spacer bars .
-
Page 5: Description Of The Appliance
Description of the appliance Cooktop a Wok burner b Pan support c Control knob d Display Display e In-operation indicator f Residual heat indicator... - Page 6 Description of the appliance Burner g Inner burner cap h Outer burner cap i Burner ring j Burner head k Ignition safety device l Ignitor m Burner base Position of the burner components The proper functioning of the burner can only be guaranteed if the burner components are positioned correctly: The lobe a on the burner cap must fit into the recess b of the burner head.
-
Page 7: Accessories Supplied
Description of the appliance Accessories supplied The accessories supplied with your appliance, as well as a range of optional ones, are available to order from Miele (see "Optional accessories"). Wok ring The Wok ring supplied with your appliance can be used in instances where extra stability is required. -
Page 8: Warning And Safety Instructions
They contain important notes on Any other usage is at the owner's risk installation, safety, use and and could be dangerous. Miele cannot maintenance. be held liable for damage resulting from incorrect or improper use or Keep these instructions in a safe operation. - Page 9 Warning and safety instructions Safety with children Packaging, e.g. cling film, polystyrene and plastic wrappings, Children should be supervised to must be kept out of the reach of babies ensure that they do not play with the and young children. Danger of appliance.
- Page 10 Repairs and other work by unqualified persons could be dangerous. Miele cannot be held liable for unauthorised work.
- Page 11 Miele. isolator. In areas which may be subject to While the appliance is under...
- Page 12 Warning and safety instructions Correct use Do not flambé under a rangehood. The flames could set the rangehood on The appliance gets hot when in use fire. and remains hot for quite a while after being switched off. Do not touch it Do not use the appliance as a whilst it could still be hot.
- Page 13 If the cooktop is used for very long units and also parts of the cooktop. periods of time, additional ventilation of Miele will not accept liability for any the room may be necessary, e.g. by damage resulting from such incorrect opening windows or doors, or running use.
- Page 14 Warning and safety instructions Avoid allowing liquids or foods Miele cannot be held liable for containing salt to spill onto the cooktop. damage caused by non-compliance If salty foods or liquids do get on the cooktop, they should be removed as with these Warning and Safety instructions.
-
Page 15: Caring For The Environment
Caring for the environment Disposal of the packing Disposal of your old appliance material or machine The transport and protective packing Electrical and electronic appliances / has been selected from materials which machines often contain materials are environmentally friendly for disposal which, if handled or disposed of and can normally be recycled. -
Page 16: Before Using For The First Time
Before using for the first time Please place the extra data plate on a Metal components have a protective surface near the cooktop, such as the coating which may give off a slight cupboard door, if the labels on the smell when heated up for the first base of the cooktop are not visible after time. -
Page 17: Operation
Operation Rapid ignition system The burner can only be switched on The appliance is supplied with a rapid by pushing in the control and turning ignition system with the following it anti-clockwise. It is switched off by features: turning the control clockwise. The –... - Page 18 Operation Switching on Regulating the flame Control the flame so that it does not Do not leave the appliance spread out beyond the sides of the unattended whilst it is being used. pan. As the outer part of the flame is much hotter than the centre, the tips of the flames should stay beneath the pan base.
-
Page 19: In-Operation Indicator And Residual Heat Indicator
Operation In-operation indicator and Residual heat indicator When the gas cooktop is switched on, the in-operation indicator lights up. Once it has reached a certain temperature, the residual heat indicator also lights up. The in-operation indicator goes out when the gas cooktop is switched off. -
Page 20: Pans
Wok ring and also parts of the cooktop. Miele will not accept liability for any Use the wok ring supplied to give damage resulting from such additional stability, especially to woks incorrect use. -
Page 21: Energy-Saving Tips
Energy-saving tips – Use a lid whenever possible to minimise heat loss. – Cook with as little water as possible. – Cooking times can be significantly reduced with a pressure cooker. – Reduce the power setting once the water has come to the boil or the oil is hot enough to fry in. -
Page 22: Safety Features
Safety features Thermo-electric ignition Safety switch-off This appliance has a thermo-electric If a burner has been used for an ignition safety device. If the flame goes unusually long period (approx. 4 out, for example if food has boiled over hours), it will switch off automatically. or if there is a sudden draught, and To use the burner again, turn the automatic re-ignition has been... -
Page 23: Cleaning And Care
Cleaning and care General notes To avoid damaging the outer surfaces of your appliance, do not Do not use a steam cleaning use: appliance to clean this appliance. – cleaning agents containing soda, The steam could reach the electrical alkalines, ammonia, acids or components and cause a short chlorides, circuit. -
Page 24: Stainless Steel Surfaces
(see "Optional accessories"). Apply with clean cloth. an even pressure following the direction of the "grain". The Original Miele care product for stainless steel can be used after cleaning to help keep your appliance looking good and to hinder resoiling (see "Optional accessories"). -
Page 25: Burner
Cleaning and care Burner Reassemble the burner Do not clean any parts of the burner in a dishwasher. The burner should be dismantled and then cleaned by hand using a solution of warm water and a little washing-up liquid applied with a soft sponge. Parts of the burner that cannot be removed should be wiped clean with a damp cloth only. -
Page 26: Problem Solving Guide
Problem solving guide ... there has been a power cut. Repairs to the gas and electrical Turn all the controls clockwise to components of this appliance must position "ß". You can then operate the only be carried out by a suitably appliance as normal. - Page 27 ..the ignitor on the burner does not spark. Check whether – the mains fuse has tripped. If it has, contact a qualified electrician or Miele. – food deposits have lodged themselves between the ignitor and the burner cap. Remove any food deposits carefully (see "Cleaning and care").
-
Page 28: Optional Accessories
These can be ordered via the internet at www.miele-shop.com (depending on country) or from Miele (see back cover). Original Miele ceramic and stainless steel cooktop cleaner 250 ml Removes heavy soiling, limescale deposits and light discolouration. -
Page 29: Safety Instructions For Installation
Safety instructions for installation The electrical cable and any flexible Fit wall units and rangehood before gas connection pipes must be installed fitting the cooktop to avoid in such a way so that they do not come damaging the surface. into contact with any moving kitchen parts (e.g. -
Page 30: Safety Clearances
Safety clearances Safety clearance above the cooktop Side / rear clearances to the cooktop Ideally the cooktop should be installed with plenty of space on either side. There may be a wall at the rear and a tall unit or wall on one side. On the other side, however, no unit or divider should stand higher than the cooktop (see illustrations). - Page 31 Safety clearances Before installing the appliance, check that the location provides the required clearances from combustible material and, if necessary, provide protection to adjacent surfaces as required by regulations. A gas appliance shall be installed such that the surface temperature of any nearby combustible surface* will not exceed 65 °C above ambient.
-
Page 32: Appliance And Building-In Dimensions
Appliance and building-in dimensions a Spring clamps b Front c Building-in depth d Building-in depth for the mains connection box with mains connection cable, L = 2,000 mm e Building-in depth for the gas connection R 1/2 - ISO 7-1... -
Page 33: Preparing The Worktop
Preparing the worktop ^ Make the worktop cut-out following the dimensions applicable. Remember to maintain a minimum safety clearance from the back wall, as well as from any tall unit or side wall to the right or left of the appliance. -
Page 34: Installation Of Several Appliances
Installation of several appliances When installing two or more appliances next to each other, a spacer bar b must be used between each one. See "Fitting the spacer bars and support brackets". Worktop cut-out Worktop cut-out - two appliances - three appliances When installing three appliances, the When installing two appliances, the width of the cut-out required (D) is... - Page 35 Installation of several appliances Worktop cut-out calculation example for three appliances Appliance width Appliance Appliance width Worktop less 8 width less 8 cut-out 1032 1424 1124 1516 1136 1320 1136 All dimensions are given in mm...
- Page 36 Installation of several appliances a Spring clamps b Spacer bars c Gap between spacer bar and worktop d Cover The illustration shows a worktop cut-out with spring clamps a and spacer bars b for 3 appliances. An additional spacer bar is required for each additional appliance. The position for securing each additional spacer bar will depend on the width of appliance B (288 mm / 380 mm / 576 mm).
-
Page 37: Fixing The Spring Clamps And Spacer Bars
Fixing the spring clamps and spacer bars Wooden worktops ^ Position the spring clamps supplied a and spacer bars b on the top edge of the cut-out in the positions marked. ^ Secure the spring clamps and spacer bars with the 3.5 x 25 mm screws supplied. - Page 38 Fixing the spring clamps and spacer bars Granite and marble worktops The screws are not required for granite or marble worktops. ^ Coat the side edges and the lower edges of the spring clamps a and the spacer bars b with silicone. ^ Then fill gap e between the spacer bars and the worktop with silicone.
-
Page 39: Installing / Removing The Appliance(S)
Installing / removing the appliance(s) ^ Place the appliance into the worktop Installing the appliance cut-out, starting with the front of the ^ Feed the connection cable down appliance. through the cut-out. ^ Connect the appliance to the mains ^ Place the appliance into the worktop (see "Electrical connection"). -
Page 40: General Installation Tips
General installation tips Seal between the appliance and the Tiled worktop worktop Grout lines a and the hatched area underneath the appliance frame must The sealing strip under the edge of the be smooth and even. If they are not, the top part of the appliance provides a appliance will not sit flush with the sufficient seal for the worktop. -
Page 41: Electrical Connection
As the colours of the wires in the mains connection cable of type H 05 V V-F lead of this appliance may not (pvc insulated), available from Miele. correspond with the coloured markings For extra safety it is advisable to install... -
Page 42: Gas Connection
If the appropriate jets have not been supplied with the appliance, you will need to contact Miele. The gas connection must be installed so that connection can be Conversion to another type of gas is made either from inside or outside described under the relevant section. - Page 43 Gas connection Gas pressure must be set by the The gas connection must be in approved gas fitter as shown on the accordance with national and local data plate: regulations. Natural gas 1.0 kPa The relevant building regulations must also be observed. ULPG (Propane/Butane) 2.75 kPa ^ Disconnect gauge and screw in the...
-
Page 44: Conversion To Another Type Of Gas
Conversion to another type of gas Screw in the new jets according to the Connection to the gas supply, or following table. conversion from one type of gas to another, should only be undertaken Jet table by an approved and registered gas Main jet Small jet installer in strict accordance with... -
Page 45: Changing The Jets
Conversion to another type of gas Changing the jets Disconnect the gas cooktop from the electricity supply by switching off at the socket and withdrawing the plug or by disconnecting the mains fuse. Also turned off the gas supply. To change the jets, the burner securing screws must first be loosened and the upper section of the appliance removed. - Page 46 Conversion to another type of gas ^ Remove screw c from fitting b with To change the jet for the inner burner an SW 8 spanner while counterholding it with an SW 12 spanner. ^ Remove screw fitting b from part a with an SW 12 spanner while counterholding it with an SW 12 spanner.
-
Page 47: To Change The Small Jets
Conversion to another type of gas Checking the first intake of air To change the small jets a Retaining screw a Small diameter jet b Air intake sleeve (e.g. for liquid gas: 0.25) Gap X must measure: b Large diameter jet For natural gas: 13 mm (e.g. -
Page 48: Checking Operation
Conversion to another type of gas Checking operation Check all gas fittings for leaks. ^ Reassemble the appliance. ^ Ignite all the burners to check that they are operating correctly. The flame must not go out on the lowest setting, even when the control is turned quickly from a high to a low setting. -
Page 49: After Sales Service, Data Plate
After sales service, data plate The address and phone number of your nearest Miele office is given on the back page. The voltage and rated load are given on the data plate. Please quote this data, together with the model description and serial number when contacting Miele. - Page 52 Alteration rights reserved/ 2512 M.-Nr. 07 235 550 / 08...
Need help?
Do you have a question about the CS 1011 G and is the answer not in the manual?
Questions and answers