Table of Contents
Advertisement
Quick Links
Advertisement
Table of Contents

Related Manuals for BONAIRE BONAIRE


Summary of Contents for BONAIRE BONAIRE
-
Page 1: General Information
3 & 4 STAR DUCTED GAS CENTRAL HEATER General Information & Installation Instructions Read general information instructions first followed by the relevant installation instructions. ABN 13 001 418 042 26 Nylex Avenue, Salisbury, South Australia 5108 AUSTRALIA Telephone No.: 61 8 8307 5100 Fax No.: 61 8 8283 0401 Part 5442225 issue E... - Page 2 General Information Name of appliance: Bonaire & Pyrox 3 & 4 Star Gas Central Heater Models: MB314iNG, MB320iNG, MB330i NG, MB330i NG X/A, MB314e NG, MB320e NG, MB330e NG, MB414i NG, MB420i NG, MB420i NG X/A, MB430i NG, MB430i NG X/A, MB414e NG, MB420e NG, MB430e NG, MB430e NG X/A.
- Page 3 General Information (cont) Items to be supplied by the Installer: - Suitable base material for heater. - Platform/Walkway for roof installation (heat resistant material not required). - Electric lighting above the central heater and switch to be placed next to the access opening.
- Page 4 General Information (cont) 6) When combustion fan reaches required pressure level, the pressure switch closes. 7) A further 20 seconds elapses as purge time. 8) Igniter function commences. 9) Gas valve is energised allowing 4 seconds for the gas to ignite. 10) If flame is detected by a sensor.
- Page 5 General Information (cont) Special Conditions: Blocked fresh air inlet or flue outlet: The unit will go to lockout. ʻWhen the restriction is removed the unit can then be reset. NOTE: If the fresh air inlet, the flue outlet is blocked or combustion fan is not operating correctly the red LED on the controller may not light-up.
- Page 6 Starting Collars Starting collars are manufactured from pre-painted or galvanised steel and supplied as a flat part Use pliers to bend the four stop tabs out. Be sure to bend them out to at least a 90 angle. Four ducting retention hooks are provided to assist with fixing...
-
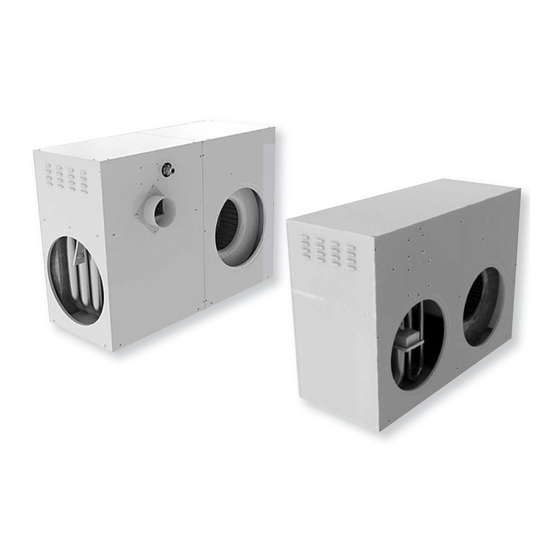
Page 7: Product Dimensions
Gas supply and manual shut-off valve All gas piping must comply with AS/NZS 5601. Piping must be correctly sized to suit product supply requirements and ensure a minimum supply pressure of 1.13kpa (natural gas). The maximum gas consumption for this product can be found on the product label affixed to the unit. - Page 8 3 Star Thermostat Connection For manual thermostat installation and wiring connection information, refer to instruction sheet supplied with the thermostat. For navigator thermostat control installation refer to the navigator user manual. Where a 2 wire manual thermostat is used the connecting wiring used must have a minimum cross sectional area of 0.75mm or greater.
- Page 9 4 Star Zone Connection and Dual Cycle cooling The control module in every 4 star heater has integrated zone outputs. This control has four relay switched outputs for connection of zone dampers. The control will manage zone outputs in accordance with commands sent by the Navigator thermostat.
- Page 10 Installation of Navigator Controller BEFORE STARTING Before attempting to use the setup instructions for the controls system, make sure the transceiver (remote control units only) or the wired low voltage cable is connected, batteries have been correctly installed in the Navigator Controller (remote control units) and the 240 volt power has been turned on to the product.
- Page 11 Do not screw the transceiver to the back of the control box; it must be run into roof space. PAIRING THE NAVIGATOR CONTROLLER (Remote Only) The BONAIRE Navigator Controller and transceiver does not have any pairing information when they are delivered from the factory.
- Page 12 Multiple Navigator Controller 9 Operation OPERATION OF MULTIPLE NAVIGATOR CONTROLLERS The Navigator control system is capable of supporting up to 4 controllers. By default, the system will allow one controller to control the appliance or multiple appliances. Certain parameter set ups must be made to configure multiple controllers.
- Page 13 Accessing Navigator Controller Installer Setups NOTE: The Navigator Controller must be in the OFF status to change the parameters. 1. Press and hold the ENTER button for 3 seconds. 2. Press & release the Ï then Ð then SETUP buttons to enter the installer set up mode. 3.
- Page 14 Navigator Controller Parameters Table th parameter Table (“th XX”) Parameter Description Default Definition Options Values Tells system if 1= common zone there is a common present. Un switched zone present 0= no common zone Zone Option (Note that a cooler is usually installed into the common zone) To display all...
- Page 15 Accessing Ducted Gas Central Heater (DGCH) Installer Setup NOTE: The Navigator Controller must be in the OFF status to change the parameters. (Except Fan Speed) 1. Press and hold the ENTER button for 3 seconds. 2. Press & release the Ï then Ð then SETUP buttons to enter the installer set up mode.
- Page 16 Ducted Gas Central Heater (DGCH) Installer Parameter Table HE Parameter Table (“HE XX”) Parameter Description Default Definition Options Values Un switched Zone To allow for a 1= Allows all zones Option common zone to be switched off. and all zones to 0= Does not allow all be switched off if zones to be...
- Page 17 Zones Setup Unswitched Zones- (Common Zone) The system is capable of operating a common (or unswitched) zone allowing all other zones to be turned off. In the unswitched zone parameter, set the parameters required according to HE parameter table. 1 – Allows all other zones to be switched off 0 –...
- Page 18 Zones Setup (cont) Navigator 1 Thermostat Installer Parameters Parameter Value Meaning Temperature Display Zone Displaying temperature in zone 1 Temperature Measurement – No measurement from common zone Common Zone Temperature Measurement – Measuring zones 1 & 2 Switched Zones Navigator 2 Thermostat Installer Parameters Parameter Value Meaning...
- Page 19 Zones Setup (cont) NOTE: There is no difference in setup between a wall mounted wired and wireless remote Navigator installation. MULTIPLE NAVIGATOR CONTROLLERS – UPSTAIRS DOWNSTAIRS CONFIGURATION This feature allows two Navigator Controllers to be used to control an installation with a common zone downstairs and one or more damper controlled zones upstairs.
- Page 20 Zones Setup (cont) ZONE WEIGHTING The Navigator controller supports 8 switched zones and 1 common zone. Each zone (switched and common) will have a “weighting” (air flow balance) associated with the zone to define the fan speed for that zone. The “weightings”...
- Page 21 Wiring Diagram 3 Star Wiring Diagram 4 Star Fault Code LED 24/240Vac Part 5442225 issue E...
- Page 22 Fault Codes 4 Star LEDʼs and Status flash codes The Red LED indicates the combustion fan is operating correctly and the pressure switches have activated which then allows the ignition sequence to commence. The Green LED will display the status of the heater controller. The LED flashes will be of different duration times &...
- Page 23 Fault Codes 4 Star (cont) Part 5442225 issue E...
- Page 24 Fault Codes 4 Star (cont) Service Access IMPORTANT: For service the nearest obstruction above the top of the unit must be 30mm or greater for internal units and 300mm or greater for external units. Part 5442225 issue E...
- Page 25 Commissioning Check List GENERAL † All equipment ordered by the customer is installed. † The unit is level and secure. † The mains and control wiring are complete, the circuit breaker and GPO are turned ON. All Controller functions for the appliance operate. †...
- Page 26 Commissioning Check List (cont) † Combustion air meets requirements (internal, under floor). † Fan speed settings are correct. † Burner pressure is correct. † Mounting pad/platform complies with requirements / codes. Internal unit access platforms & service light fitted and complies with codes. †...
- Page 27 NOTES Part 5442225 issue E...
-
Page 28: Installation Instructions
Installation must comply with the current editions of AS/NZS 5601 and AS/NZS 3000. Installation Instructions Roof Installation Read general information instructions first followed by the relevant installation instructions. Part 5442225 issue E... - Page 29 Location of heater Roof Installation Consideration should be given to the placement of heater away from sleeping and living areas of the home. Areas above the laundry, garage or bathrooms may provide the lowest noise impact to the home environment. Roof Space Roof Installation Installation in a roof space must comply with the current editions of AS/NZS 5601.
- Page 30 Lighting & Power Roof Installation Roof space must have adequate lighting so as to provide enough illumination on the walkway as well as the serviceable areas of the heater. This unit requires a 10AMP GPO power supply within 600mm of the unit. Part 5442225 issue E...
- Page 31 Splitting the unit (OPTIONAL) Roof Installation In the event that the assembled unit will not fit through a designated roof access point for installation all internal products can be split into two parts. Each half of the unit can then be passed through the roof access point.
-
Page 32: Flue Installation
Flue Installation Roof Installation All flue materials not supplied with this product and used in its installation must be AGA approved. This heater must be flued using Ø100mm (minimum) metal flue pipe. Any flue pipe sections which are not accessible for inspection shall be twin walled or stainless steel. - Page 33 Ducts & Fittings Roof Installation 4 star units install the thermistor into the discharge air duct between two and three metres from the outlet of the unit. Ductwork should be sized to suit the heater and installation to prevent excessive back pressure. Supply Air Duct to have 2-3m straight section before any bends or Y junctions.
- Page 34 Installation must comply with the current editions of AS/NZS 5601 and AS/NZS 3000. Installation Instructions Under Floor Installation Read general information instructions first followed by the relevant installation instructions. Part 5442225 issue E...
- Page 35 Water / Drainage Provisions Under Floor Installation Spacing and Clearances Under Floor Installation Part 5442225 issue E...
- Page 36 Spacing and Clearances Under Floor Installation Obstructions Under Floor Installation Part 5442225 issue E...
- Page 37 Lighting Under Floor Installation Power Outlet Under Floor Installation Part 5442225 issue E...
- Page 38 Flue Installation Under Floor Installation All flue materials not supplied with this product and used in its installation must be AGA approved. This heater must be flued using Ø100mm (minimum) metal flue pipe. Any flue pipe sections which are not accessible for inspection shall be twin walled or stainless steel.
- Page 39 Duct Configurations Under Floor Installation Suitable duct configurations to suit installation needs 4 Star units install the thermistor into the discharge air duct between two & three metres from the oulet of the unit. Part 5442225 issue E...
- Page 40 Duct & Fittings Under Floor Installation 4 star units install the thermistor into the discharge air duct between two and three metres from the outlet of the unit. Ductwork should be sized to suit the heater and installation to prevent excessive back pressure. Supply Air Duct to have 2-3m straight section before any bends or Y junctions.
- Page 41 Installation must comply with the current editions of AS/NZS 5601 and AS/NZS 3000. Installation Instructions External Installation Read general information instructions first followed by the relevant installation instructions. Part 5442225 issue E...
-
Page 42: Unit Location
Unit Location External Installation Clearances and Distances External Installation Part 5442225 issue E... - Page 43 Ground Surface Provisions External Installation Spirit level Concrete or brick base External Installation Wall Opening Clearances and Distances Part 5442225 issue E...
- Page 44 Wall Preparations External Installation Wall Preparation Distancing External Installation Part 5442225 issue E...
- Page 45 GPO and Distance External Installation GPO and all electrical wiring must comply with AS/NZS 3000. Ensure service cord is properly secured and protected from mechanical damage. Ducts and Fittings External Installation 4 Star units install the thermistor into the discharge air duct between two & three metres from the oulet of the unit.
- Page 46 Flue Spigot Assembly External Installation NOTE: THE FLUE COWL MUST BE SECURELY ATTACHED TO THE UNIT WITH THE SCREWS PROVIDED. If an alternative flue cowl is used this must be AGA approved. Combustion Fan Repositioning External Installation Part 5442225 issue E...
- Page 47 NOTES Part 5442225 issue E...
- Page 48 Victoria: vicservice@climtech.com.au South Australia: saservice@climtech.com.au New South Wales & Queensland: nswservice@climtech.com.au Western Australia: waservice@climtech.com.au “Excelling today for a better tomorrow” Manufactured by Climate Technologies ABN 13 001 418 042 26 Nylex Avenue Salisbury, SA 5108 Australia www.climatetechnologies.com.au Part 5442225 issue E...
Need help?
Do you have a question about the BONAIRE and is the answer not in the manual?
Questions and answers
How to set the remote to turn heating on in 12 hours time