Table of Contents
Advertisement
Quick Links
Advertisement
Table of Contents

Related Manuals for Grundig GUSTB160IV


Summary of Contents for Grundig GUSTB160IV
-
Page 2: Table Of Contents
INDEX IMPORTANT SAFEGUARDS....................2 INTRODUCTION........................3 Electrical Information......................4 Environmental Markings......................5 GETTING STARTED ......................5 In The Box..........................5 REMOTE CONTROL & FUNCTIONS ..................6 REMOTE CONTROL LAYOUT ....................7 REMOTE LOCATION OF CONTROLS ..................8 YOUR DTR ..........................9 FRONT PANEL ........................9 BACK PANEL ........................9 CONNECTION DIAGRAM ....................10 MENU INTERFACE ......................11 FIRST TIME INSTALLATION ....................11 MAIN MENU ........................11... -
Page 3: Important Safeguards
IMPORTANT SAFEGUARDS POWER CORD Do not place the product where a piece of furniture or other heavy object could trap the power cord (mains lead). Handle the power cord by the plug. Do not pull out the plug by tugging the cord and never touch the power cord when your hands are wet as this could cause a short circuit or electric shock. -
Page 4: Introduction
This DTR has a built in hard disk (abbreviated as HDD) for recording and playback. Beware of the following points when setting up and using the DTR. Failure to observe precautions may cause damage to the HDD itself or its content, failure of the disk to operate, or recording of noise. •... -
Page 5: Electrical Information
Cleaning • ALWAYS unplug the DTR before you clean it. • Do not use liquid or aerosol cleaners. • Clean the DTR with a soft, damp (not wet) cloth. Servicing • There are no user serviceable parts in this DTR. •... -
Page 6: Environmental Markings
W A R N IN G Environmental Markings The “Batteries marking symbol“ means used batteries must not be disposed together with your household waste. Please, inquire about the local regulations regarding disposal of used batteries. For information: the batteries supplied with your DTR remote do not contain hazardous substances such as Mercury, Cadmium, or Lead. -
Page 7: Remote Control & Functions
REMOTE CONTROL & FUNCTIONS First open the battery cover on the underside of the remote control. Insert two batteries (RO3/AAA) observing the polarities (+/-) indicated on the inside of the battery compartment and put on the battery cover again. While using the remote control, direct it towards the front of the DTR ensuring that there are no obstructions in the path between the remote and the DTR. -
Page 8: Remote Control Layout
REMOTE CONTROL LAYOUT... -
Page 9: Remote Location Of Controls
Using the Remote Control - To use the remote control, point it towards the front of the DTR. - The remote control has a range of up to 7 metres from the DTR at an angle of up to 60 degrees. - The remote control will not operate if its path is blocked. -
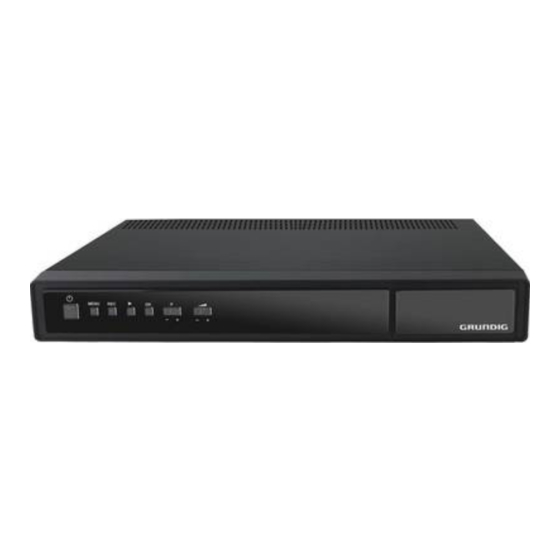
Page 10: Your Dtr
YOUR DTR FRONT PANEL BACK PANEL 1. AERIAL 2 OUT : Aerial loopthrough output - Connect to TV aerial socket. 2. AERIAL 2 IN : Loop through 3. AERIAL 1 OUT : Loop through 4. AERIAL 1 IN : Aerial input 5. -
Page 11: Connection Diagram
CONNECTION DIAGRAM The following diagram shows typical configurations only, and may differ slightly to your existing external equipment. If you are unsure on how to connect to your DTR, always consult your manufacturer's user guide supplied with your equipment. NOTE: This set top box supports Free To View only. There is no provision for a CAM or Pay To View card. -
Page 12: Menu Interface
MENU INTERFACE FIRST TIME INSTALLATION When the DTR is switched on from stand-by mode and if there is no channel stored in the database, the First Time Installation Menu window is displayed on the screen. In this window, set the TV type with the “... -
Page 13: Channel List
CHANNEL LIST The channel list gives a list of channels. where the the following operations can be performed : 1. Navigating channels 2. Deleting channels 3. Renaming channels 4. Adding parental controls to channels 5. Creating/Editing favourite list NAVIGATING CHANNELS, USING THE CHANNEL LIST Use the “... -
Page 14: Adding Parental Control To Channels
ADDING PARENTAL CONTROL TO CHANNELS Parental control provides a PIN-protected access to channels. To lock a channel, from the channel list menu highlight the channel to be locked and select the “Lock” button with the “ / ” keys and press the OK key on the remote. -
Page 15: Automatic Channel Scan
AUTOMATIC CHANNEL SCAN It is recommended to use the automatic search several channels in your channel list are no longer being broadcast or if new channels have become available. The automatic search will create a new channel list out of all available channels and replace the previous channel list. -
Page 16: First Time Installation
FIRST TIME INSTALLATION Use this option to load default settings, which had been set at the factory. To install factory settings, highlight ‘First Time Installation’ menu and press OK key, then you will be asked to confirm deleting all channels and settings. Selecting YES and pressing OK will delete the channel table. Selecting "NO" and pressing OK will cancel the operation. -
Page 17: Language
Change /Delete: Allow or do not allow any modifications of this recording. There are two possible settings as follows: "Allowed": Users will be able to edit/delete the timer (before recording) and delete the recording once made without entering PIN number. "Disallowed": Users must enter PIN before editing/deleting timer (before recording) and when deleting the recording once made. -
Page 18: Electronic Programme Guide (7-Day-Epg)
ELECTRONIC PROGRAMME GUIDE (7-DAY-EPG) Press the GUIDE button to display the EPG. The 7-day EPG able show programmes for all channels for the next 7 days (if the information being broadcast different channels). To advance the day that the information is shown for press the blue button. - Page 19 MULTIPLE TIMER RECORD It is possible to record or set reminder for two individual events at the same time. If you set more than two recordings/reminders at the same time, you will see an error message. In this case, please use the directional keys to select the recording/reminder to cancel and press the RECORD button (for recordings) or OK button for reminders.
- Page 20 With the EPG shown on screen press the TEXT button on the remote control to display the SEARCH menu. Search: Indicates the source, where the search should be done. Using the “ / ”keys, instruct the DTR where to search for the requested programme. The options are as follows: Current Channel list: Search only the channels that are listed in the current channel list.
- Page 21 MATCH ON (Genre): If genre is selected for the "Search by" option select the "Match On" option and press the OK button. The following list of Genres will be shown. Select the required Genre using the “ / ” keys and press OK. MATCH ON (Name Match): If name match is selected for the "Search by"...
-
Page 22: Messages
The DTR will then display a list of the events found that match your search criteria. This may take several minute to find all of the entries, especially if several days have selected to be searched. Select a programme from the list and press the record key on your remote control, to set a recording for that programme. - Page 23 LIB KEY: Display the recordings library (see page 23 for further information) SUBTITLE : Display/hide the subtitles for the currently viewed programme (if being broadcast). INFO KEY When the INFO key pressed (or when changing channels) the i-bar is displayed as shown below: To view a brief description of the current programme press the INFO button again.
-
Page 24: Recording & Playback
PIP (PICTURE-IN-PICTURE) When the DTR is not recording, it is possible to display the PIP (picture in picture) window. This allows a second channel to viewed in a small window in the corner of the screen however it is not possible to select the audio from this PIP window. - Page 25 Shortest: Starting with the shortest, recordings will be deleted to make space for the requested timer. Unplayed: If this option is set to "EXCLUDED" any unplayed recordings will NOT be deleted. If this option is set to "INCLUDED", unplayed recordings WILL be deleted according to the rules set in the DISCARD option described above.
-
Page 26: Time Shifting (Pause Live Recording)
TIME SHIFTING (PAUSE LIVE RECORDING) Pause Live TV is a feature that enables the live TV to be paused if, say the phone rings it is possible to pause the live TV until after the end of the phone call (or the maximum time for timeshifting has been reached). - Page 27 according to instructions broadcast with the programme (called 'pan and scan').The effect of the WIDE key on the picture display is cancelled by pressing WIDE again, changing channel or turning the DTR to standby. NOTE: Sometimes the TV will automatically try and compensate for an incorrect screen format, in this instance set the tv to the correct format whilst viewing the programme.
-
Page 28: Recordings Library
RECORDINGS LIBRARY The recordings library is a library of all the recordings that have been made. It provides information about every recording, like the name (if the recording was made via the EPG)/channel, date, time and length of programme. It also shows if playback has already been started of the selected recording. To show the list of recordings press either LIB button on the remote or access it from the main menu. -
Page 29: Setup
Red bar: indicates the used space of the recordings on the hard disk. Yellow bar: displays the approximate capacity required for the timers currently set. Green bar: shows the free space on the hard disk. SETUP The configuration, language and Installation sub-menus are accessible via the setup menu CONFIGURATION This menu contains the configuration settings for the DTR. -
Page 30: Scan Encrypted Channels
SCAN ENCRYPTED CHANNELS It is not possible to view encrypted channels using this DTR. Therefore this option will instruct the DTR to ignore these encrypted channels. Use “▲ / ▼” buttons to go to the Scan Encrypted Channels option. Use “◄ / ►” buttons to toggle YES or NO. DTR UPGRADE - OAD Over Air Download (OAD): To ensure that your STB always has the most up todate... -
Page 31: Set Pin
SET PIN Use “ / ” buttons to highlight the “Set PIN” option. Press OK to display the “Set PIN” window. Use NUMERICAL keys to enter new pin number then enter the PIN number again in the second box. If both pin numbers are four digits long and are identical, "PIN Changed"... -
Page 32: Technical Specifications
TECHNICAL SPECIFICATIONS GENERAL CHARACTERISTICS Supply Voltage 220 - 240 V AC ~ 50Hz Input Frequency 470Mhz-862Mhz Maximum Power consumption 21 W Standby Power Consumption 11.7 W Operating temperature 5ºC to +45ºC Storage temperature -15ºC to +55ºC Humidity 25 to 75 % rel Physical dimensions 360x280x48 mm Weight... - Page 33 TUNERS 2 xRF In IEC-type, female (75Ohm) 2 x RF Out (loop through) IEC-type, male (75Ohm) HARD DISK Hard Disk capacity 160 GB FRONT PANEL Display Standby, Record, Stop, Play, Pause, PR+ / PR-, Remote Control Keys V+ / V - AUDIO R / L Connector 2 x RCA (R + L)
-
Page 34: Trouble Shooting Guide
TROUBLE SHOOTING GUIDE Attention! Please avoid unnecessary risks. Never attempt to repair a defective – or seemingly defective – device on your own. Repairs should only be performed by a specialised repair facility or an equally qualified specialist. Any electronical device is possibly susceptible to errors. However not every error represents a defect. -
Page 35: Important Notice
IMPORTANT NOTICE: DIGITAL SWITCHOVER AND YOUR TV EQUIPMENT WHAT YOU NEED TO DO TO ENJOY WATCHING TV DURING AND FOLLOWING DIGITAL SWITCHOVER Starting in 2008* and ending in 2012, television services in the UK will go completely digital, TV region by TV region.
Need help?
Do you have a question about the GUSTB160IV and is the answer not in the manual?
Questions and answers