
Subscribe to Our Youtube Channel
Related Manuals for Grundig DVR


Summary of Contents for Grundig DVR
- Page 1 320GB / 500GB freesat+ HD Digital TV Recorder Instruction Manual Welcome to your new freesat+ HD digital TV recorder Now you can pause, rewind and record both HD and SD television, and so much more...
- Page 2 Welcome Thank you for choosing this Grundig HD Digital TV Recorder. Not only can it receive over 140 subscription free channels, but you can record two channels at a time, pause and rewind live TV and watch it back at a time to suit you.
-
Page 3: Table Of Contents
What’s in the box? Your new HD Digital TV Recorder Quick start guide 320GB / 500GB freesat+ HD Digital TV Recorder Quick Start Guide Welcome to your new freesat+ HD digital TV recorder Now you can pause, rewind and record both HD and SD television, and so much more Contents Your HD digital TV recorder. -
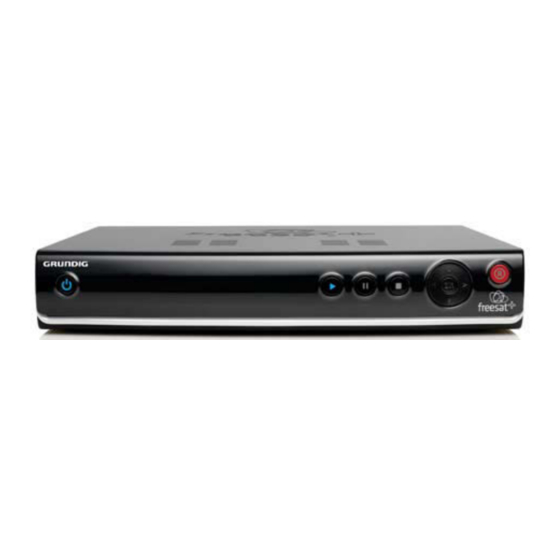
Page 4: Front View
Your HD digital TV recorder Front view Power On / STANDBY Standby. Rear view Signal In from LNB IN LNB on satellite Factory RS232 upgrade connection Stop recordings STOP and playback. Playback recorded PLAY PAUSE programmes. and playback. Please note this socket has no function and does not act as a loop through GFSDTR320HD... -
Page 5: Your Hd Digital Tv Recorder
Your HD digital TV recorder Standby Mode Standby Mode - Power button is red when in standby mode. Power button is blue when powered on. On Mode - Playback Mode (Watching a Recorded Programme) Play and Pause button will be lit. Pause Mode - Play button will be lit. -
Page 6: Recording Mode
Your HD digital TV recorder Time shift Mode (Pausing Live TV) Pause Mode - Pause button will flash continuously. Playback Mode - Recording Mode Recording Mode - Play button will be lit and the Pause button will flash continuously. Record button will be lit. -
Page 7: Your Remote Control
Your remote control Exits all menus and HOME goes back to live TV. MUTE Turns the volume On and Off. WIDE Adjust the aspect ratio of the video output. Return to the previous SWAP selected channel. Navigate left in the FAST REWIND top menu bar and fast rewind. -
Page 8: Connecting Up
Connecting up Getting connected Connecting to a HD Ready TV 2 x RG6 coaxial Cable with 2 x ‘F’ type connectors Connect two RG6 co-axial cables fitted with ‘F’ type connectors from your satellite dish to the ‘TUNER1’ and ‘TUNER2’ sockets on the back panel of your Digital TV Recorder. Connect the HDMI cable that came with your Digital TV Recorder between the ‘HDMI’... -
Page 9: Plug In And Switch On
Getting started Put batteries in the remote control Open the battery cover of the remote control and put two AAA size batteries so that the ‘+’ and ‘-’ marks on the batteries match the ‘+’ and ‘-’ marks inside the remote control. Replace the battery cover. Plug in and switch on Insert the mains lead into the ‘12V DC IN’... -
Page 10: Daily Use
Daily use We have divided this book into separate sections, so that you can find the information your looking for easier. This section covers the day to day functions that you will use most often. Choosing a programme Press the [GUIDE] button on the remote control to open the Genre front page. -
Page 11: Changing The Volume
Daily use Changing the volume You can change the volume using the [VOL+] and [VOL-] buttons on the remote control. You can turn off the volume pressing the [MUTE] button. To turn it back on press the [MUTE] button again. Audio description Audio description is an additional narration that describes all significant visual information such... -
Page 12: The Guide Window
The guide window All Channels 8:00pm - 9:00pm The Restaurant Raymond Blanc adds to the pressure - he tells the couples to start a takeaway service so they can reach their local community by offering their restaurant food to go. AD))) Fri 1 May 101 BBC One... -
Page 13: Setting A Reminder
The guide window Setting a reminder You can use the reminder function to let you know when a programme is going to start. Use the [p], [q], [t] and [u] buttons to select a programme. Press the [OK] button to set the reminder. When the reminder has been set a clock icon is shown before the programme name. -
Page 14: The Library Window
The library window Top Gear Heroes Strictly Come Dancing I’m A Celebrity Get Me Out Of Here Spooks In the Night Garden Stop GUIDE Navigation You can open the recordings library window by pressing the [LIB] button on the remote control. -
Page 15: Protecting A Recording
The library window Watching a recording Programmes that have finished recording are marked as ‘Recorded’. Use the [p], [q], buttons to select a programme that you want to watch. Press the [OK] button to start playback. DON’T FORGET! You can start to watch back a programme that is recording and don’t have to wait for it to finish. -
Page 16: The Channel List
The channel List All Channels BBC 1 London BBC 2 England ITV1 London Channel 4 Five BBC THREE BBC FOUR BBC HD BBC ALBA ITV2 ITV2+1 Record GUIDE You can open the channel list window by pressing the [CH LIST] button on the remote control or from the main menu. -
Page 17: Manual Recording
The channel List Hiding a channel Use the [p] and [q] buttons to select the channel that you want to hide. Press the [RED] button to hide it. Channel List Favourite List Manual Channels All Channels BBC 1 London BBC 2 England ITV1 London Channel 4 Five... -
Page 18: The Settings Menu
The settings menu To open the settings press the [MENU] button on the remote control and then select ‘Settings’. Press the [OK] button to confirm. Main Menu Recordings Weds 8 Oct 8:00pm Channel List Settings System Information Changing the settings Settings Language Display &... - Page 19 The settings menu Language Settings Display & Audio Language Parental Freesat + Audio Language Subtiltle Language Audio Description Audio Language - This setting is your preferred default audio language. The options are English, Welsh, Gaelic, and Irish Gaelic. Subtitle Language - This setting is your preferred default subtitle language.
- Page 20 The settings menu Allow Parental Settings Changes - This setting chooses if you want to allow access to the parental menu without entering a PIN. The default setting is that you must enter a PIN. Allow Hard Disk Drive Format - This setting chooses if you want to allow the hard disk drive to be formatted.
- Page 21 The settings menu DON’T FORGET! You can use the skip forwards and backwards function when watching a recording by pressing the [t] or [u] buttons. Auto Disk Management - This will allow the oldest recordings that have been viewed to be over written if the Digital TV Recorder is short of space.
-
Page 22: System Information
Press the [OK] button to confirm. DON’T FORGET! It is useful to have access to the system information screen when contacting the call centre Information System HDD Control Manufacturer Grundig Model Number Hardware Version V1.1 12345678 Serial Number Software Version V1.5... -
Page 23: Guidance
Guidance What is guidance? Guidance is a parental lock which gives you control against the types of programmes that can be watched and played back on your HD Digital TV Recorder. Programmes that contain guidance information are marked with a Guidance labels let you know when a programme may include content that is unsuitable for young audiences (e.g violence,... -
Page 24: Non-Freesat Channels
Non-freesat channels You can manually tune in any free to air channels on your HD Digital TV Recorder, if you have the frequency in MHz, the symbol rate and the LNB polarisation. DON’T FORGET! Adding free to air channels will not affect the stored freesat channels. Details of channel frequencies are generally available online, and are subject to change. -
Page 25: Help And Advice
Help and advice Frequently asked questions In which direction should my satellite dish be positioned? Can I connect more than one digital box to my satellite dish? Can I connect this Digital TV Recorder to my normal roof aerial? The Digital TV Recorder will not switch on. What should I do? My Digital TV Recorder can’t find the ‘Network ID’... - Page 26 Help and advice Frequently asked questions Do I have to retune my Digital TV Recorder when new channels are added? Can I use ‘red button’ interactive services with this Digital TV Recorder? Can I add ‘FTA (Free To Air)’ channels to my Digital TV Recorder? I have been asked to enter a lock code.
- Page 27 Help and advice Frequently asked questions How many programmes can I record on my freesat+ recorder? Can I record one programme whilst watching another? Can I record an entire series? Do I have to set both parts to record if for example the programme I want to record has the news in the middle of it.
-
Page 28: General Safety
Safety General Safety This equipment has been designed and manufactured to meet European safety standards, but like any electrical equipment, care must be taken if you are to obtain the best results and safety is to be assured. Do read these operating instructions before you attempt to use the equipment. -
Page 29: Electrical Safety
Electrical safety Make sure your electricity supply is the same voltage as the voltage printed on the label on the back of the main unit of your receiver. The receiver needs a 230-volt (V) 50-hertz (Hz) mains supply. Do not use any other supply. The receiver comes with a fitted plug. -
Page 30: Technical Specification
Technical Specification General Information: Model Number Hard Drive Capacity Number of Tuners Recording Time Features: Access all freesat digital channels and radio stations. Upscaling of standard definition TV when using the HDMI connection. 8 Day Electronic programme guide. Live pause and rewind. Series and split programme recording. - Page 31 Guarantee The Digital TV Recorder is guaranteed for twelve months from the date of original purchase. If any defect due to faulty materials or workmanship, contact the Grundig Helpline. Have your receipt of purchase available for reference. The guarantee is subject to the following provisions: • It is only valid within the boundaries of the country of purchase.
-
Page 32: Installation Information
Installation Information Postcode Radio Guidance PIN Revision1_20/0709...
Need help?
Do you have a question about the DVR and is the answer not in the manual?
Questions and answers