Table of Contents
Advertisement
Quick Links
Download this manual
See also:
Service Manual
Advertisement
Table of Contents

Related Manuals for Grundig XERIA GV 6263 HIFI


Summary of Contents for Grundig XERIA GV 6263 HIFI
- Page 1 VIDEORECORDER XERIA GV 6263 HiFi DEUTSCH ENGLISH FRANÇAIS...
-
Page 2: Table Of Contents
Placing batteries in the remote control Connection options Connecting the rooftop antenna or cable connection and the television Connecting the GRUNDIG satellite receiver and the television Connecting the GRUNDIG VCR-SAT module and the television Switching the video recorder on and off (energy-saving mode) - Page 3 Automatically updating the time and date Setting the time and date manually Special features Selecting special features in the »MODE« menu Selecting special features in the »SERVICE« menu Parental lock Television remote control Information Rectifying minor problems Technical data GRUNDIG Service (page 67...
-
Page 4: Gv 6263 Hifi Videorecorder
(if you do not know the ShowView number). – Delayed recording by entering the data in the TIMER menu of a Grundig television with the Megalogic function. ShowView* recording This function makes recording child’s play. Find the program in your TV guide, enter the code number and the video recorder is programmed automatically. -
Page 5: Set-Up And Safety
SET-UP AND SAFETY ___________________________________ This video recorder is designed to receive, record and play back video and audio signals. °C °C Any other use is expressly prohibited. If the video recorder is subject to sudden changes in temperatu- re, for example if it is brought in from the cold to a warm room, connect it to the mains supply and let it stand for at least two hours before you insert a video cassette. -
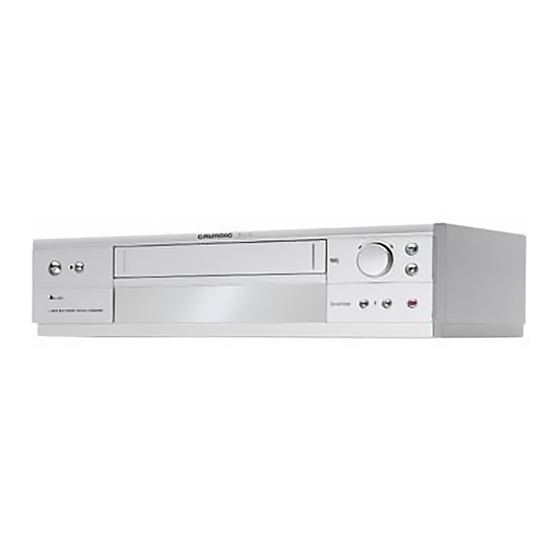
Page 6: Overview
OVERVIEW _____________________________________________________________ The front of the video recorder VIDEO IN L AUDIO IN R Switches the video recorder in and out of stand- by mode (in stand-by mode the time is display- ed; in power-saving mode there is no display). Terminates all drive functions;... -
Page 7: The Back Of The Video Recorder
(to an external device). Euro-AV (Scart) socket AV 1 (EURO AV) (to the television). Audio outputs to the HiFi system. OUT/SORTIE R/D AUDIO L/G SAT control jack for the Grundig VCR-SAT module and satellite receiver. Mains cable for wall socket. Ü... -
Page 8: The Remote Control
Timer on Deletes data, activates settings, sets the playing Clear time indicator to » 0 : 0 0 : 0 0 «. Switches off the sound on a Grundig television. Index Switches between the main menu and the TV Monitor Audio image. -
Page 9: The Remote Control
OVERVIEW _____________________________________________________________ Starts recording. Pause during recording, freeze-frame during play- back. Terminates all drive functions and switches the Digital FX video recorder to ”Stop”. Starts playback. Clear Reverse search during playback; Fast rewind in ”Stop” mode; selects the direction of the INDEX search function. Timer/SV Forward frame search during playback;... -
Page 10: The Display On The Video Recorder
OVERVIEW _____________________________________________________________ The display on the video recorder Cassette inserted. ß -8 : 88 : 88 ß Playback. VIDEO STEREO PIN-8 switch voltage activated. VIDEO Illuminates when a TIMER is programmed; flashes when a TIMER is programmed but not activated. Recording. -
Page 11: Connection And Preparation
Read the second section if you are using a Grundig satellite receiver. Here, you can also connect a rooftop antenna Skip to the third section if you are using a Grundig VCR-SAT module. Note:... -
Page 12: Connecting The Rooftop Antenna Or Cable Connection And The Television
CONNECTION AND PREPARATION ___________________ Connecting the rooftop antenna or cable connection and the television AV2 (DEC./EXT.) AV1 (EURO AV) Switch off the television. Plug the antenna cable of the rooftop antenna into the antenna socket » « on the video recorder. AV2 (DEC./EXT.) Ä... -
Page 13: Connecting The Grundig Satellite Receiver And The Television
CONNECTION AND PREPARATION ___________________ Connecting the Grundig satellite receiver and the television set Satelliten- receiver INPUT-SAT VIDEO CONTROL 220-240 V~ EURO AV VCR EURO AV DECODER EURO AV TV 50-60 Hz AV2 (DEC./EXT.) AV1 (EURO AV) Switch off the television and the satellite receiver. - Page 14 CONNECTION AND PREPARATION ___________________ Note: Alternatively, a PAY-TV decoder can be connected to the »AV2 (DEC./EXT.)« socket. If a VCR-SAT module is installed in this socket, connect the PAY-TV decoder to the decoder socket of the satellite receiver. Plug a standard cinch cable into the » «...
-
Page 15: Connecting The Grundig Vcr-Sat Module And The Television
CONNECTION AND PREPARATION ___________________ Connecting the GRUNDIG VCR-SAT module and the television VCR-SAT module S A T IN P -6 0 0- 21 / 18 0, 35 V ER E CO SAT-LINK R TS E- PA LI V AV2 (DEC./EXT.) AV1 (EURO AV) Switch off the television and the VCR-SAT module. -
Page 16: Switching The Video Recorder On And Off (Energy-Saving Mode)
CONNECTION AND PREPARATION ___________________ Connect the » « socket on the video recorder and the »SAT-LINK« (control line) socket on the VCR-SAT module AV2 (DEC./EXT.) using a standard cinch cable. AV1 (EURO AV) Plug the EURO AV (Scart) cable supplied into the »AV 1 AV)«... -
Page 17: Tuning
TUNING ______________________________________________________________ Tuning the video recorder and the television You do not need to do this if the video recorder and the televi- sion are connected via a EURO-AV (Scart) cable. Switch on the television. Select the »AV« channel position on the television set for recorder playback via the antenna cable. - Page 18 The options: – If you have a Grundig television with the Megalogic function, the video recorder takes over the television stations from the television – in the same order. If a satellite receiver is connected, this function cannot be used.
- Page 19 TUNING _________________________________________________________________ Tuning television channels with the Megalogic function The television and the video recorder must be connected with a EURO-AV (Scart) cable (PIN-10 occupied). Preparation AUTO INSTALLATION Switch on the television. PRESS OK KEY TO START. Select the channel position »AV« on the television for the video recorder.
-
Page 20: Automatic Tuning
TUNING _________________________________________________________________ Setting television channels using the automatic search Preparation Switch on the television. Select the channel position »AV« on the television for the video AUTO INSTALLATION recorder. PRESS OK KEY TO START. AUTOMATISCHE EINSTELLUNG Automatic tuning ZUM START DIE OK-TASTE When the device is first switched on, the »AUTO INSTALLA- DRÜCKEN. - Page 21 TUNING _________________________________________________________________ If no VCR-SAT module or satellite receiver with a SAT control socket is connected to the video recorder, select the »SAT CONTROL OFF« setting by pressing » « or » « and ® † continue the setting at step 8. If a VCR-SAT module or a satellite receiver with a SAT control socket is connected, press »...
-
Page 22: Playback
PLAYBACK _________________________________________________________ Preparation Switch on the television. Select the channel position »AV« on the television for the video recorder. Insert a recorded video tape into the compartment with the window facing upwards until it is automatically drawn in. – The video recorder display contains the following symbol: »... -
Page 23: Additional Playback Functions
PLAYBACK _____________________________________________________________ Additional playback functions Calling up information Press the »OSD« button to call up information. – Display on the television screen: the channel position; the date and the time; and shortly thereafter: »USED« the elapsed playing time on the tape; »REM«... - Page 24 PLAYBACK _____________________________________________________________ Improving the quality of the freezeframe/ slow motion image In freeze-frame/slow motion mode (playback/pause) press * P Ü » « on the video recorder or »+« or » – « on the remote control to adjust the image according to your taste. Press »...
-
Page 25: Selecting The Audio Track
PLAYBACK _____________________________________________________________ Selecting the audio track You can select the audio signal you want to hear when playing tapes recorded with stereo or two-channel broadcasts: During playback, call up the menu by pressing »Audio«. Select the audio signal using » «... -
Page 26: Continuous Playback
PLAYBACK _____________________________________________________________ Continuous playback This function plays back the contents of the tape up to tape posi- tion » 0:00:00 «. At that point, the video recorder automatically rewinds the cassette to the start and begins playback again. Activating continuous playback Press »... -
Page 27: Search Functions
SEARCH FUNCTIONS __________________________________ Zero setting With this search system the video recorder can automatically rewind to position » 0 : 0 0 : 0 0 « on the tape. Press » « to start playback. Press » OSD« to select the tape counter. Press »Clear«... -
Page 28: Recording
ShowView number. Delayed recording by entering the data in the TIMER menu of a Grundig television with the Megalogic function. You can find information on using this option in the opera- ting manual that came with your television set. -
Page 29: Recording - Immediate
RECORDING – IMMEDIATE _______________________ Recording television programs from the antenna or the cable connection Preparation Switch on the television. Select the channel position »AV« on the television for the video recorder. Insert a video cassette with sufficient playing time and the tab intact (i.e. -
Page 30: Recording Television Programs From The Satellite Receiver
RECORDING – IMMEDIATE __________________________________ Recording television programs from the satellite receiver Preparation Switch on the television. Select the channel position »AV« on the television for the video recorder. Insert a video cassette with sufficient playing time and the tab intact (i.e. not erase-protected) into the compartment until it is automatically drawn in. -
Page 31: Seamless Compilation Of Recordings (Assemble)
RECORDING – IMMEDIATE __________________________________ Seamless compilation of recordings- (Assemble) This function enables you to make recordings without periods of interference between them. The precondition for this is that the previous recording was made at the same tape speed (SP or LP) as the new recording. During playback, locate the end of the scene after which the new recording should start and press »II... -
Page 32: Recording - Delayed
RECORDING – DELAYED ____________________________ ... by entering the ShowView number The time and date on the video recorder must be accurate. The ShowView numbers for television programmes are prin- ted in the TV guides. If all the TIMER positions are occupied you must delete one. To do this, see the section entitled ”Deleting recording data”... - Page 33 The satellite receiver must be switched on up to the selected recording time and must remain on for the duration of the TIMER recording. (This is not necessary for the Grundig VCR-SAT module or for many Grundig satellite recievers with a SAT control line.) SHOWVIEW NO.: 12555...
-
Page 34: By Entering The Data For The Required Television Program
RECORDING – DELAYED ______________________________________ ... by entering the data for the required television program Employ this method of recording if you do not know the Show- View numbers for the television programs. Notes: The time and date on the video recorder must be accurate. If all the TIMER positions are occupied you must delete one. - Page 35 - - / - - - - - - - : - - - - : - - (This is not necessary for the Grundig VCR-SAT module or for - - / - - - - - - - : - - - - : - - - - / - - - - - - - : - - - - : - - many Grundig satellite recievers with a SAT control line.)
-
Page 36: Checking, Modifying Or Deleting Recording Information
RECORDING – DELAYED ______________________________________ Switch off VPS/PDC (if it is not required) by pressing » « † to select » « and then »+« or » – « to switch off VPS. – » « in the display denotes VPS recording. Save the recording data by pressing »... - Page 37 RECORDING – DELAYED ______________________________________ Checking recording data Highlight the » TIMER« line by pressing » «. DATE PR START STOP – The »TIMER« menu appears and you can check the recor- 02- 02 19:30 20:15 - - - - - - - : - - - - : - - ding data.
-
Page 38: Interrupting Recording Stand-By Mode
RECORDING – DELAYED ______________________________________ Deleting recording data Highlight the » TIMER« line by pressing » «. DATE PR START STOP – The » TIMER« menu appears. 02 19:30 20:15 04 21:00 22:00 - - - - - - - : - - - - : - - Select the TIMER item in question with »+«... -
Page 39: Controlled By A Satellite Receiver
RECORDING – DELAYED ______________________________________ ... controlled by a satellite receiver If a satellite receiver is connected to the »AV2 (DEC./EXT.)« socket on the video recorder, and the receiver has a switch timer, you can use it to control video recording. Insert a cassette with enough playing time and the erase- protection tab intact into the tape compartment of the video recorder. -
Page 40: Copying
COPYING... ______________________________________________________ ... from another video recorder, a DVD player or a camcorder Connection and preparation VCR 1 VCR 2 or DVD player 2 EXTERNAL / DEC. - AV 2 AUDIO VIDEO IN L AUDIO IN R 1 EXTERNAL / EURO - AV 1 AV2 (DEC./EXT.) VIDEO IN AUDIO IN... -
Page 41: Recording From External Devices
COPYING _______________________________________________________________ Recording from external devices Preparation Switch on the television. Select the channel position »AV« on the television for the video recorder. Put the DVD or video cassette that you want to copy into the DVD player, playback VCR or camcorder. Insert a cassette with enough playing time and the erase-pro- tection tab intact into the tape compartment of the recording VCR. -
Page 42: Using A Decoder
USING A DECODER _____________________________________ Decoder operation with television stations from the antenna or the cable system A decoder is necessary when the video recorder receives encoded programmes from a privately operated station. Ask for the decoder at your authorized dealer’s. Decoder PAY-TV AV2 (DEC./EXT.) -
Page 43: Recording Pay Tv Programs
USING A DECODER ______________________________________________ Highlight the »CHANNEL SELECTION« line by pressing ➔ PRESET CHANNEL C 06 » «. SOURCE C/S/E < > FINE TUNING SKIP Highlight the »CHANNEL PRESET« line by pressing » «. COLOR AUTO DECODER – The »CHANNEL PRESET« menu appears on the screen, and the »PRESET«... - Page 44 USING A DECODER ______________________________________________ Decoder operation with television sta- tions from the VCR-SAT module A decoder is necessary when the video recorder receives enco- ded programs from a privately operated station. The decoder can only be used for television stations received through the VCR-SAT module.
-
Page 45: Recording Pay Tv Programs
USING A DECODER ______________________________________________ Select the »INSTALL« line using »+« or » « and then press – » « to confirm. ➔ PRESET PREM CHANNEL SAT01 SOURCE Highlight the »CHANNEL SELECTION« line by pressing » «. SAT-MODULE MENU SKIP Highlight the »CHANNEL PRESET« line by pressing » «. -
Page 46: Audio Playback
AUDIO PLAYBACK ________________________________________ The video recorder has two different sound recording and playback systems. – The HiFi track, for stereo and two-channel recordings. – The mono track, for sound playback on mono video recor- ders and for audio dubbing. HiFi audio playback Connection Connect the »AUDIO OUT R... -
Page 47: Audio Dubbing
AUDIO PLAYBACK ________________________________________________ Audio dubbing You can provide recorded images with a new audio track. Connection Connect the »L AUDIO IN R « sockets on the front of the video recorder and the corresponding output sockets on the HiFi or Surround Sound system using a standard Cinch cable. -
Page 48: Special Settings
SPECIAL SETTINGS _______________________________________ Sorting, deleting and renaming television stations Note: If the video recorder is connected to a television with Mega- logic functions, the settings on pages 48 to 54 are not pos- sible. Preparation Switch on the television. Select the channel position »AV« on the television for the video recorder. -
Page 49: Re-Tuning Television Channels
SPECIAL SETTINGS ________________________________________________ Deleting television stations from the list Select the »CANCEL« line using »+« or » « and activate – CHANNEL SORT by pressing » «. MOVE – The »CANCEL« menu appears. CANCEL NAME Press the »+ – ® † «... -
Page 50: Skipping Television Stations
SPECIAL SETTINGS ________________________________________________ Skipping television stations When you are selecting television stations using the »+« or » « buttons, this function enables you to skip one or more sta- – tions. The channel positions can still be selected with the » 0 ... -
Page 51: Setting New Television Stations From The Antenna Or The Cable System
SPECIAL SETTINGS ________________________________________________ Setting new television stations from the antenna or the cable system Preparation Switch on the television. Select the channel position »AV« on the television for the video recorder. Setting Press »i« to call up the main menu. ➔... -
Page 52: Switching The Station On The Video Recorder On And Off
SPECIAL SETTINGS ________________________________________________ Press » « to save the setting for that station. ➔ PRESET – The cursor jumps to the »PRESET« line and the next chan- CHANNEL C 00 nel position is displayed. SOURCE C/S/E < > FINE TUNING SKIP COLOR AUTO... -
Page 53: Setting New Television Stations From The Vcr-Sat Module
SPECIAL SETTINGS ________________________________________________ Setting new television stations from the VCR-SAT module Preparation Switch on the television. Select the channel position »AV« on the television for the video recorder. Setting Press »i« to call up the main menu. MENU Select the »INSTALL« line using »+« or » –... - Page 54 SPECIAL SETTINGS ________________________________________________ POL/ANT. HOR A LOW PROGRAM LNB settings: ➔ FREQU. 10964,0 POL/ANT. HOR Polarisation HOR (horizontal) VER (vertical); AUDIO 7,02/7,20 MHZ Satellite selection A (for example, ASTRA) or B (for MODE SSTEREO AUDIO BW example, Eutelsat); DECODER LNB LO 1 9 , 750 GHZ LOW = lower frequency band;...
-
Page 55: Automatically Tuning Television Stations From The Vcr-Sat Module
SPECIAL SETTINGS ________________________________________________ Automatically tuning television stations from the VCR-SAT module Use this automatic search if you connect a VCR-SAT module some time after initial installation. For information on connecting the VCR-SAT module, see pages 15 and 16. Preparation Switch on the television. MENU Select the »AV«... -
Page 56: Setting The Date And Time
SETTING THE DATE AND TIME _______________ Automatically updating the time and date If channel number 1 on the video recorder is tuned to a station with teletext, the video recorder uses this to automatically update its internal clock. The update takes place daily between 3 A.M. and 6 A.M., thus enabling the video recorder to recognise the switches to and from daylight saving time. -
Page 57: Special Features
SPECIAL FEATURES _______________________________________ Selecting special features in the »MODE« menu Switch on the television and select the channel position »AV« on the television for the video recorder. Press » 0 ... 9 « to switch on the video recorder. Press »i« to open the main menu. ➔... - Page 58 SPECIAL FEATURES _______________________________________________ Video recorder operation level You can use your remote control to operate two GRUNDIG video recorders independently of one another. Ask your dealer which GRUNDIG video recorders are suitable. To avoid interference between the two video recorders you need to set the operation level on the GV 6263.
-
Page 59: Selecting Special Features In The »Service« Menu
For further information on these functions see the following sections, each beginning with Step 1. Activating the remote control of the GRUNDIG television set for the video recorder If your video recorder is enclosed in a cabinet unit and its remote control therefore cannot be used, the video recorder can be operated with the remote control from the television set. - Page 60 SPECIAL FEATURES _______________________________________________ Automatically switching off the satellite receiver by switching the video recorder on/off SERVICE When you make timer recordings with satellite television sta- PIN8-CONTROL CHILD-LOCK - - - - - tions, the video recorder switches off the video recorder at the TAPE-LENGTH E240 end of the timer recording.
-
Page 61: Parental Lock
PARENTAL LOCK ____________________________________________ The parental lock allows you to bar access to all functions of the video recorder. Activating the parental lock Press »i« to call up the main menu. SERVICE – The main menu appears. PIN8-CONTROL ➔ CHILD-LOCK - - - - - TAPE-LENGTH E180 Select the »... -
Page 62: Television Remote Control
TELEVISION REMOTE CONTROL ___________ You can also operate GRUNDIG televisions with the video recorder remote control. The functions available to you depend on the model of the GRUNDIG television. Point the remote control directly at the TV. Digital FX Note: Point the remote control at the television and keep pressing the »... -
Page 63: Information
INFORMATION _______________________________________________ Rectifying minor problems Problem Cause Remedy The video recorder does not The mains plug has been pulled Plug in the mains cable or use show the time or draw in the or there is a faulty contact. another socket. cassette. -
Page 64: Technical Data
INFORMATION _____________________________________________________ Technical data This video recorder complies with the safety norms DIN EN 60065 (VDE 0860) and therefore the international safety regulations IEC 60065. The product conforms to the requirements in the directives 89/336/EEC and 73/23/EEC. Playback standard: Relative humidity: up to 80% CCIR, PAL B/G, 625 lines Rewind time:... - Page 66 AC 68-01909M Grundig AG Beuthener Str. 41 • D-90471 Nürnberg http://www.grundig.com 72011 602 0500 • •...
Need help?
Do you have a question about the XERIA GV 6263 HIFI and is the answer not in the manual?
Questions and answers