Table of Contents
Advertisement
Quick Links
Download this manual
See also:
System Manual
Advertisement
Table of Contents

Related Manuals for Gateway 7400


Summary of Contents for Gateway 7400
- Page 1 7400 Server Rackmount Installation Guide...
-
Page 2: Table Of Contents
Installing the cabinet mounting brackets and mounting rails ....9 Installing Gateway mounting brackets ....... . 9 Installing the cabinet mounting rails onto Gateway brackets . - Page 3 Gateway is not responsible for inaccurate information which may appear in this manual. For the latest product updates, consult the Gateway Web site at www.gateway.com. In no event will Gateway be liable for direct, indirect, special, exemplary, incidental, or consequential damages resulting from any defect or omission in this manual, even if advised of the possibility of such damages.
-
Page 4: Preface
Preface Conventions used in this manual Throughout this manual, you will see the following conventions: Convention Description Keyboard key names are printed in small capitals. NTER A plus sign means to press the keys at the same time. Setup Commands to be entered, options to select, and messages that appear on your monitor are printed in bold. -
Page 5: Information About Your System
Information about your system Accessing the server system manual A comprehensive 7400 Server System Manual is located on the Server Companion CD, which accompanied this system. To access this document (in PDF format), place the Server Companion CD into the CD drive on a... -
Page 6: Installation
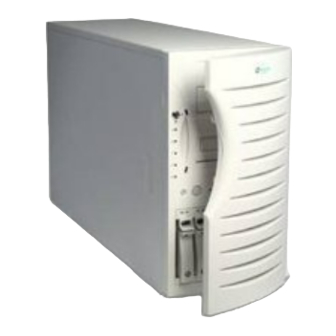
Installation This guide provides information on converting your Gateway server to a rackmount configuration and installing your Gateway server in a cabinet. The Gateway rackmount conversion accessory kit includes: Gateway front panel assembly (installed on pre-configured systems) 2 front panel side brackets... -
Page 7: Converting To Rackmount
Turn off system power, then disconnect all the peripherals. Make sure the server is on a stable surface, such as a table or counter. Warning In order to avoid injury or dropping the server, Gateway recommends that two people lift the system drawer. Installation... - Page 8 Unlock the bezel, if necessary, then depress the two tabs, one on each side of the bezel. Pull the bezel away from the server. Remove the screw located at the top of the server. Slide the top panel forward, then pull it off. Top panel Screw Converting to rackmount...
- Page 9 To remove the outriggers and the feet: Turn the server upside down. If outriggers are installed, use your fingers or a flat-bladed screwdriver to lift up on both of the retaining latches, then slide the outrigger towards the center of the bottom panel. Remove the outrigger by pulling it up and away from the server.
-
Page 10: Installing The Server Side Mounting Brackets And Front Panel
Installing the server side mounting brackets and front panel To install the side mounting brackets: Turn the server on its left side. Align one of the server side mounting brackets with the screw holes on the side (and towards the front) of the server, then attach the bracket using six screws from the accessory kit. - Page 11 To install the front panel assembly: Remove the three screws securing the bottom panel to the server. You may find it easier to remove the hinge from the front panel assembly, attach the hinge to the server, then re-attach the front panel assembly to the hinge.
-
Page 12: Installing The System Drawer Side Rails
Installing the system drawer side rails Before installing the server (system drawer) in the cabinet, you need to install the system drawer side rails on the server. To install the system drawer side rails: Remove the system drawer side rails from the cabinet mounting rails by depressing the retention clips on the inside of the system drawer side rails, then sliding the rails off. - Page 13 Mount the system drawer side rail on the server using five screws from the accessory kit. Make sure the retention clips are at the back of the server. Mount the second rail on the opposite side of the server. Retention clip System drawer side rail Installation...
-
Page 14: Installing The Cabinet Mounting Brackets And Mounting Rails
Installing the cabinet mounting brackets and mounting rails If you are installing the server in a Gateway cabinet, refer to the following section. If you are installing the server in a non-Gateway cabinet, go to “Installing generic mounting brackets” on page 12. -
Page 15: Installing The Cabinet Mounting Rails Onto Gateway Brackets
Installing the cabinet mounting rails onto Gateway brackets To install the cabinet mounting rails onto Gateway brackets: Align the back end of the cabinet mounting rail to the back mounting bracket by sliding the inner rail forward (if the spring latch locks the inner rail into place, free the rail by releasing the spring latch). - Page 16 Align the front of the cabinet mounting rail to the front mounting bracket by sliding the inner rail and inner slide until the rail screw hole opening lines up with one of the front mounting bracket screw holes. Cabinet mounting rail Back vertical Inner rail mounting rail...
-
Page 17: Installing Generic Mounting Brackets
Installing generic mounting brackets If you are installing the server in a non-Gateway cabinet, use the generic mounting brackets. These brackets allow for different cabinet depths. If generic mounting brackets are already installed in the cabinet, go to “Installing the cabinet mounting rails onto generic brackets” on page 13. -
Page 18: Installing The Cabinet Mounting Rails Onto Generic Brackets
Attach the back mounting bracket to the back vertical mounting rail using two screws from the accessory kit. If screw holes are not threaded in the back vertical mounting rail, attach the back mounting bracket by using the screws and bar nut from the accessory kit. - Page 19 Align the front of the cabinet mounting rail to the front mounting bracket by sliding the inner rail and inner slide until the rail screw hole opening lines up with the first inner rail screw hole and with the second screw hole on the front mounting bracket.
-
Page 20: Mounting The System Drawer In The Cabinet
Mounting the system drawer in the cabinet To mount the system drawer in the cabinet: Pull both of the inner rails forward until the spring latches on each side lock. Pull the inner slides all the way forward. Inner rail Inner slide Spring latch Mounting the system drawer in the cabinet... - Page 21 Lift the system drawer to the same height as the inner rails, then align the system drawer side rails with inner rails. Warning In order to avoid injury or dropping the server, Gateway recommends that two people lift the system drawer. Cabinet mounting...
- Page 22 Push the system drawer evenly into the cabinet until the latches on the system drawer side rails lock. Press the latches on both sides of the system drawer side rails, then push the system drawer back until the inner rail spring latches lock. Cabinet mounting rail System drawer...
-
Page 23: Installing The Cable Retractor
If you are installing a cable retractor in a Gateway cabinet, refer to the following section. If you are installing a cable retractor in a non-Gateway cabinet, go to “Installing a cable retractor in a non-Gateway cabinet”... -
Page 24: Installing A Cable Retractor In A Non-Gateway Cabinet
Installing a cable retractor in a non-Gateway cabinet To install a cable retractor in a non-Gateway cabinet: Remove the adapter bracket from the cable retractor straight bracket. Position the cable retractor straight bracket on the back vertical mounting rail, then align the mounting holes on both the cable retractor bracket and the back vertical mounting rail. -
Page 25: Attaching The Cables To The Retractor
Attaching the cables to the retractor To attach the cables: Route the cables from the rear of the system drawer to the cable retractor. Attach the cables to the cable retractor, making sure the cables have sufficient slack when the system drawer is pulled forward and pushed back into place. -
Page 26: Completing The Connections
Completing the connections Now that the system drawer is installed in the cabinet, it is time to make the system connections. Important A wide variety of system connections are possible. Your actual system connections may be different from the following examples. Connecting a single system drawer To connect the peripherals: Turn off all system drawers and devices in the cabinet before attaching... -
Page 27: Connecting Multiple System Drawers
Connecting multiple system drawers Multiple system drawers installed in a cabinet can share a single set of peripherals if a switch box, such as an autoswitcher, is installed. The autoswitcher gives control of the monitor and routes the keyboard and mouse inputs to the currently selected system drawer. Installation of the autoswitcher is relatively simple and covered in detail in the autoswitcher user manual. - Page 28 You must also attach the peripherals to the appropriate I/O ports on the back of the autoswitcher. Refer to the following figure for connection details. Tape storage drawer SCSI channel 1 SCSI channel 2 7400 QHSII storage To power drawer To printer Mouse...
-
Page 29: Connecting The Power
Connecting the power Gateway recommends that a licensed electrician install a dedicated 230 VAC line with sufficient amperage rating for the system drawer to a breaker box or distribution panel. The power cords must be wired directly into the breaker box. -
Page 30: Turning On The System Drawer
Turning on the system drawer To turn on the system drawer for the first time: If using a UPS, turn it on first. Turn on the monitor and any additional devices connected to the system drawer. Listen for alarms which may indicate power problems. If multiple system drawers and a switch box are installed, press the switch box button that corresponds to the system drawer being turned on. -
Page 31: Turning Off The System Drawer
Turning off the system drawer To turn off the system drawer: Close all programs. If necessary, issue a “flush” command to write the contents of any caches or buffers to disk. If necessary, issue a command to exit or quit the operating system. Press the ON/OFF switch on the system drawer. - Page 32 A MAN US 7400 RACK GDE R0 6/00...
Need help?
Do you have a question about the 7400 and is the answer not in the manual?
Questions and answers