Table of Contents
Advertisement
Quick Links
Download this manual
See also:
User Manual
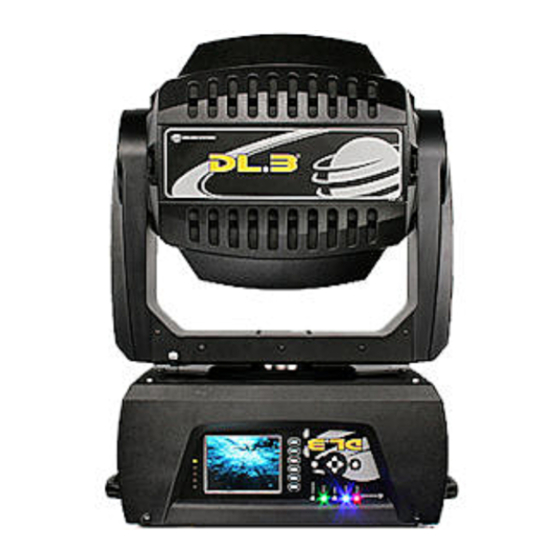
DL.3 Digital Light
with Collage™ Software
User Manual
© High End Systems, Inc. 2008, All Rights Reserved
Information and specifications in this document are subject to change without notice. High End Systems, Inc.
assumes no responsibility or liability for any errors or inaccuracies that may appear in this manual.
Trademarks used in this text: High End Systems, and WholeHog III are registered trademarks; and Collage,
Collage Generator, Hog iPC, the High End Systems globe logo and the Hog logo are trademarks of High End
Systems, Inc. or High End Systems Europe Ltd. Belden is a registered trademark of Belden, Inc. Microsoft,
DirectX, and Windows are either registered trademarks or trademarks of Microsoft Corporation in the United
States and/or other countries. Super HAD and Sony are registered trademarks or trademarks of Sony
Corporation in the United States and/or other countries. Art-Net is a registered trademark of Artistic License
Corporation. Lightwave 3-D is a registered trademark of Newtek. Mac OS is a trademark of Apple Computer,
Inc. registered in the U.S. and in other countries.
Other trademarks and trade names may be used in this document to refer to either the entities claiming the
marks and names or their products. High End Systems disclaims any proprietary interest in trademarks and
trade names owned by others.
DL.3 User Manual
Software Release Version 1.4
September, 2008
Advertisement
Table of Contents
Troubleshooting

Related Manuals for High End Systems DL.3


Summary of Contents for High End Systems DL.3
-
Page 1: User Manual
Trademarks used in this text: High End Systems, and WholeHog III are registered trademarks; and Collage, Collage Generator, Hog iPC, the High End Systems globe logo and the Hog logo are trademarks of High End Systems, Inc. or High End Systems Europe Ltd. Belden is a registered trademark of Belden, Inc. Microsoft, DirectX, and Windows are either registered trademarks or trademarks of Microsoft Corporation in the United States and/or other countries. -
Page 2: Contacting High End Systems
World Wide Web: http://www.highend.com Patents This High End Systems product is protected by patents and pending patent applications. Patents owned or licensed by High End Systems include: US 4,392,187; US 4,602,321; US 4,688,161; US 4,701,833; US 4,709,311; US 4,779,176; US 4,800,474;... -
Page 3: Declaration Of Conformity
EN 61000-4-4 EN 61000-4-5 EN 61000-4-6 EN 61000-4-11 EN 61000-3-2 EN 61000-3-3 USA, Wednesday, April 30, 2008 Kenneth Stuart Hansen, Compliance Engineer DL.3 Digital Light User Manual Declaration of Conformity Class A Class A Class A Class A Class A 4/8kV 3V/m 1kV/0.5kV... -
Page 4: Product Modification Warning
Umständen gegen die diesbezüglichen Sicherheitsnormen verstoßen. Avvertenza Sulla Modifica Del Prodotto I prodotti di High End Systems sono stati progettati e fabbricati per soddisfare i requisiti delle normative di sicurezza statunitensi ed internazionali. Qualsiasi modifica al prodotto potrebbe pregiudicare la sicurezza e rendere il prodotto non conforme agli standard di sicurezza pertinenti. -
Page 5: Symbols
• Do not situate DL.3 fixtures in areas of high fog density such as directly in front of a fog machine or mineral oil hazer. -
Page 6: Warranty Information
Any Product unit or parts returned to High End Systems must be packaged in a suitable manner to ensure the protection of such Product unit or parts, and such package shall be clearly and prominently marked to indicate that the package contains returned Product units or parts and with an RMA number. -
Page 7: What You Should Know About Copyright
No. High End Systems has worked to provide clearance for the content that is provided. Any materials you received directly from HES with the purchase of a new DL.3 have already been properly licensed for your use in shows and presentations. That does not, however, license you to sell this content separately from your unit. - Page 8 Since price is content-sensitive, the best thing to do is to contact a clearinghouse like Suzy Vaughan Associates and let them find out for you. viii DL.3 Digital Light User Manual...
-
Page 9: Table Of Contents
Setting up a Standard DMX Link ... 10 Setting up an Ethernet Fixture Link ... 11 Linking Configurations ... 11 Powering On the Fixture ... 12 Homing the Fixture ... 13 The DL.3 Menu Display Panel ... 13 DL.3 Digital Light User Manual... - Page 10 Setup Configuration Using the Menu System ... 16 Setup Configuration Using the CMA ... 17 DMX Control Setup ... 18 Patching the DL.3 Fixture to a Wholehog Console ... 18 Viewing Output ... 18 Shutting Down the Fixture ... 19 Recommended Shutdown Options ...
- Page 11 Control Channel Functions ... 42 Quick Start with a Wholehog Console ... 43 Chapter 5: Tutorials Fixture Set-up (DL.3 and DL.2 Media Servers) ... 45 Lesson 1: Cross Fading Between Graphic Objects ... 46 Define Graphic Object 1 ... 46 Add the DL.2 logo as Graphic Object 2 ...
- Page 12 Z Rotation ... 71 Scaling the Object ... 72 X Scale ... 72 Y Scale ... 73 Z Scale ... 74 Changing Object Position ... 75 X Position ... 75 Y Position ... 76 Z Position ... 77 DL.3 Digital Light User Manual...
- Page 13 Global Intensity ... 107 Global Effect Mode 1 and Effect Mode 2 ... 108 Global Control ... 112 Shutdown and Reset Options ... 112 Four-in-One Control Option ... 112 On-Screen Frame Statistics ... 113 DL.3 Digital Light User Manual xiii...
- Page 14 Creating Custom Content for the Collage Generator Effect ... 137 Collages Using Live S-Video Input ... 137 Chapter 13: Effect Mode Options Descriptions Effect Mode Color Options ... 140 All or Nothing ...140 Background Color ...140 Background Color Cycle ...140 ... 123 ... 139 DL.3 Digital Light User Manual...
- Page 15 RGB Scale ... 149 RGB Swap to BGR ... 150 RGB Swap to BRG ... 150 RGB Swap to GBR ... 150 RGB Swap to GRB ... 151 RGB Swap to RBG ... 151 Scan Line ... 151 DL.3 Digital Light User Manual...
- Page 16 Sinewave, Circular ...169 Sinewave, Circular w/X-axis Wobbulation ...169 Sinewave, Circular w/Y-axis Wobbulation ...169 Sinewave, Circular w/Z-axis Wobbulation ...169 Sinewave, Horizontal ...170 Sinewave, Horizontal w/X-axis Wobbulation ...170 Sinewave, Horizontal w/Y-axis Wobbulation ...170 Sinewave, Horizontal w/Z-axis Wobbulation ...170 DL.3 Digital Light User Manual...
- Page 17 Other Video Sources ... 183 Live Video Connection Options ... 184 Configuring the Video Input Source ... 184 S-Video ... 184 Serial Device Interface (SDI) ... 185 Sending the Camera Feed to S-Video Camera Out ... 185 DL.3 Digital Light User Manual xvii...
- Page 18 Moving Files Between Fixtures ...199 Archiving User Content ... 200 Using Local Archives to Prepare Content Offline ...200 Creating a Local Archive ...200 For CMA Running Windows XP ...200 For CMA Running Mac OS 10.4 ...201 xviii ... 187 DL.3 Digital Light User Manual...
- Page 19 Viewing Server Configuration ... 206 Viewing Current Configuration of All Servers ... 206 Viewing Individual Fixture Configuration Values ... 207 DL.3 and DL.2 Media Server Configuration Options ... 208 Server Tab ... 208 DMX Settings ... 208 Fixture Info ... 208 Version Info ...
- Page 20 Appendix A: DMX Protocol Appendix B: MSpeed Conversion Table Appendix C: Custom User Content Preparing Custom Content ... 301 Encoder Selection ... 301 Creating 3-D Objects ... 302 Managing Custom Content ... 302 ... 237 ... 299 DL.3 Digital Light User Manual...
- Page 21 Appendice E: Importantes Informations Sur La Sécurité ... 308 Anhang E: Wichtige Hinweise Für Ihre Sicherheit ... 309 Apéndice E: Información Importante De Seguridad ... 310 Appendice E: Importanti Informazioni Di Sicurezza ... 311 Vigtig Sikkerhedsinformation ... 311 DL.3 Digital Light User Manual ... 307...
- Page 22 DL.3 Digital Light User Manual...
-
Page 23: Chapter 1: Product Overview
3-D graphic objects. DL.3 fixtures use DMX512 protocol to control hardware functions like pan, tilt, as well as graphic control of the internal media server. Media control functions include loading images and movies and mapping them onto 3-D graphical objects. -
Page 24: Graphics Engine
• Vertical lens shift capability reduces pixel loss due to keystone correction • A royalty-free stock digital art collection features more than 1,500 lighting-optimized files. • DL.3 software utilizes Windows XP Embedded and DirectX technology • Powerful Content Management and Configuration software can remotely manage multiple DL.3, DL.2, and Axon media servers over an Ethernet network... -
Page 25: Content Management Application
Content Management Application • Available for Windows and Mac operating systems • Communicates with other DL.3, DL.2, Axon media servers over an Ethernet network • Uploads and downloads custom digital content to DL.3 fixtures • Configures DL.3, DL.2 and Axon media servers •... -
Page 26: Related Products And Accessories
Product Overview Related Products and Accessories The following table lists related products and accessories available for the DL.3 fixture. For more information, contact your High End Systems dealer/distributor (see “Contacting High End Systems®” on page -ii). Part Description Replacement lamp... -
Page 27: Chapter 2: Setup And Configuration
3. Mount the fixture upright or suspended from a standard truss. 4. Connect to an Ethernet network linked to a computer or an Axon media server running CMA software, and any other DL.3 or Axon units you wish to control via the CMA. -
Page 28: Hardware Components
• Two USB ports for connecting peripheral drives to assist with troubleshooting • RGBHV, VGA and S-Video In options for video input. • Camera Out provides S-Video input from output from the internal camera to another DL.3 fixture or other external video output device. -
Page 29: Pan And Tilt Locking
Note: Disengage Pan and Tilt locks before operating the fixture. Attaching a Power Cord Cap The DL.3 fixture ships with an SJT power cord. Use the information in this section to replace the power cord cap for locations with another electrical standard. -
Page 30: Mounting The Fixture
When used in a closed or fixed environment where fog or haze is used, we recommend at least a weekly check. • Do not situate DL.3 in areas of high fog density such as directly in front of a fog machine or mineral oil hazer. -
Page 31: Mounting The Fixture Upright
To mount the fixture upright, place the fixture on a sturdy, stable surface that will support more than the 53.5 kg (118 lb) weight of the DL.3 fixture. If the surface is above floor height, use safety cables to secure the fixture to the surface. -
Page 32: Linking Dl.3 Fixtures
Linking DL.3 Fixtures DL.3 fixtures should be linked to a standard DMX512 link for control by a DMX desk as well as a Ethernet fixture link for CMA functions. Setting up a Standard DMX Link The number of fixtures on a link will be determined by the combined number of channels required by all the fixtures. -
Page 33: Setting Up An Ethernet Fixture Link
Connectors” on page D-305. Setting up an Ethernet Fixture Link DL.3 fixtures utilize an Ethernet network to synchronize playback and access the CMA software for remote content management and fixture configuration. If you are using a DMX console and other automated lighting products compatible with Art-Net, this network can also serve as the link for DMX control. -
Page 34: Powering On The Fixture
Disengage Pan and Tilt locks before operating the fixture. For more information, see Pan and Tilt Locking on page 7. To power on the DL.3 fixture, simply connect it to an appropriately-rated power source. CAUTION: Always isolate DL.3 media servers from generators with a UPS... -
Page 35: Homing The Fixture
The DL.3 Menu Display Panel The DL.3 display panel gives access to the fixture’s onboard menu system. Chapter 3: The Digital Light Menu System describes the menu system configuration options in detail. -
Page 36: Software Setup
• Remotely control all menu commands • Update software Axon media servers can run the CMA directly. If you’re fixture network is linking DL.3 and DL.2 fixtures only, you will need to run the CMA on a computer connected to the Ethernet link you have established. -
Page 37: Verifying And Upgrading Fixture And Cma Software
CMA software version is noted upon installation and can be accessed after that under the File menu. The CMA All Servers view lets you view the fixture software version on all DL.3, DL.2 and Axon media servers linked to it via Ethernet. -
Page 38: Configuring Dl.3 Fixtures
• Identifying the DMX Source for the fixture • Selecting the Protocol type to determine the DMX channel range this fixture will utilize • Selecting a Fixture ID number to identify this fixture on the DL.3 fixture link (required if you will be synchronizing output between fixtures). -
Page 39: Setup Configuration Using The Cma
The Content Management Application running on your computer and linked to DL.3 fixtures via Ethernet lets you remotely configure the DL.3 fixtures. For more information on the CMA, see Chapter 15: Content Management Application (CMA) on page 163. All the setup configuration selections for DL.3 and DL.2 fixtures can be made in the Server tab. -
Page 40: Dmx Control Setup
DL.3 unit in the Fixture Schedule or Add Fixtures window. An easy way to organize these items is to assign user numbers e.g, (1-5 corresponds to DL.3 #1, where user number 1 is the motion, 2 is the global, and 3-5 the graphic fixture types). -
Page 41: Shutting Down The Fixture
1. A DMX controller can shut down the fixture’s motion controls and projector remotely with the shutdown option of the control channel (see “Fixture Operations” on page 14-180). 2. The DL.3 fixture automatically shuts down in the event of DMX data loss. The default time is 10 min. - Page 42 CHAPTER 2 Setup and Configuration 4. Place the DL.3 fixture in its 1. Place Top over the fixture first provided road case for shipping. Bring sides of case together and latch. DL.3 Digital Light User Manual...
-
Page 43: Chapter 3: The Digital Light Menu System
Chapter 3: The Digital Light Menu System DL.3 and DL.2 digital lights have an onboard Menu System you can use to configure the fixture, review diagnostic feedback, and view content information. Digital light fixtures use a 5” LCD screen to display the onboard menu system. Navigation and select buttons let you move to different tab levels and options displayed on the Menu screen. -
Page 44: Lcd Display Adjustment Buttons
Note: Display Black Level can also be controlled by the menu system (see Set Tab on page 30) or remotely through the configuration options in the CMA (see DL.3 and DL.2 Media Server Configuration Options on page 208. Display LED... -
Page 45: Navigating The Menu
Pressing the <Enter> button again stores the selection and closes the list. Pressing the <Menu> button instead of <Enter> leaves the original setting and closes the list. To return to the Menu tab column, press the left direction on the Navigation button. DL.3 Digital Light User Manual... -
Page 46: Menu Options
Inverts menu display and navigation Turns off the display invert Automatically inverts display when fixture mounting Auto is greater than 45° Function/Notes Note: Unless you select Off, you can adjust display intensity level from 0 - 100%. DL.3 Digital Light User Manual... - Page 47 SECAM_L1 Restores factory default settings Default Standard Long Selects the lens currently installed in the projector. Note: these options are active for DL.3 fixtures only Ultra Long Wide External Chooses the input the Projector will accept Internal Selecting Yes allows projector’s input source to be...
- Page 48 Clicking the Restart button reboots the internal media server Clicking the Delete button erases all User Content on server Clicking the Upgrade button installs updates to factory content (requires connection to the CMA) Function/Notes DL.3 Digital Light User Manual...
-
Page 49: Menu Screen Descriptions
Digital Light fixtures and uploading custom content with the Content Management Application (CMA). You can manually set this number in the menu or through the CMA, see “DL.3 and DL.2 Media Server Configuration Options” on page 16-208. Setting up an Ethernet Fixture Link is described in Chapter 2: Setup and Configuration. -
Page 50: Dmx_Protocol Tab
For more information on specific Graphic Function parameters, see: • Chapter 7: Graphic Functions: Defining Content; • Chapter 8: Graphic Functions: Rotation, Position, Scale; • Chapter 8: Graphic Functions: Opacity and Effects; • Chapter 10: Graphic Functions: Synchronizing Content. DL.3 Digital Light User Manual... -
Page 51: Dmx_Raw Screen
The Refresh Rate is the rate at which DMX is being received by the fixture. With Refresh Timer set to On, you see the raw DMX values updated instantly. DL.3 Digital Light User Manual... -
Page 52: Set Tab
Graphic Object options to ensure high quality playback. Note: After selecting the On or Preview option, you can use the numeric up/down control to adjust the Menu display brightness level from 25 (dim) to 100 (brightest). DL.3 Digital Light User Manual... -
Page 53: Set_Projector Screen
Lens Type Options (DL.3 fixture only) There are three accessory lenses available for the DL.3 Digital Light. The default setting for the Lens Type field is Standard. When you install a Long throw, an Ultra Long throw, or a Wide Angle lens, you will need to select that lens type to configure you system. - Page 54 For more information, refer to the Projector User Manual that shipped with your fixture. Projector Menu Default Command LANGUAGE ENGLISH CEILING REAR INPUT3 SVIDEO SYSTEM AUTO INPUT1 SCREEN NORMAL BLUE_BACKGROUND OFF INPUT2 Projector Menu Default Command POWER MANAGEMENT LOGO ON START FANSPEED NORMAL LAMP_MODE NORMAL DISPLAY R_CODE DL.3 Digital Light User Manual...
-
Page 55: File Tab
The bottom right window displays content folders and highlights the current file location. You can scroll through the Content folders and the files inside each folder to preview any content file. DL.3 Digital Light User Manual... -
Page 56: Test Tab
Selecting the button for Calibrate Motors realigns the Pan and Tilt stepper motors after maintenance procedures. The fixture can also be remotely homed via a DMX controller, (see “Control Function Options” on page 14-180) or through the Content Management Application, (see “DL.3 and DL.2 Configuration Options” on page 16-211). Test_Self Test Screen... -
Page 57: Info Tab
This screen displays status errors and warnings on items including: • Temperature • Filter life • Lamp life • USB and Camera Communication • USB Security For more detailed information, see Chapter 17: Maintenance and Troubleshooting. DL.3 Digital Light User Manual The Digital Light Menu System... -
Page 58: Reset Screen
Delete User Content removes all user content on the selected fixture(s). Upgrade Factory Content lets you reinstall factory content in a recovery situation. Note: A copy of the Factory Content can be obtained only from High End Systems customer service. DL.3 Digital Light User Manual... -
Page 59: Chapter 4: Dmx Programming Basics And Quick Start
If you are new to DMX programing, this chapter will give you a brief overview on programming DL.3, DL.2, and Axon media servers followed by a example of using a Wholehog console to patch and display output from a media server. -
Page 60: Determining A Dmx Start Channel
CMA for either Digital Light fixture and Axon media servers (see “Viewing Server Configuration” on page 16-206). The tables on the following pages list the parameters included in each level of protocol for DL.3 or DL.2 Digital Lights and Axon media servers. -
Page 61: Protocol Levels
Protocol Levels DL.3 and DL.2 Protocol Levels Mechanical Control Chan Chan Description Motion Tilt Dimmer Focus Zoom Mspeed Macro Control Function Camera Zoom Focus Infrared Camera Shutter White balance Camera Orientation Camera Effects Red Gain Blue Gain Blue Gain DL.3 Digital Light User Manual... -
Page 62: Axon Protocol Levels
Effect 1 Modifier 3 Effect Mode 2 Effect 2 Modifier 1 Effect 2 Modifier 2 Effect 2 Modifier 3 X-axis rotation Y -axis rotation Z-sxis rotation Scale X Scale Y Scale Z X Position Y Position Z Position DL.3 Digital Light User Manual... -
Page 63: Lighting Console Tips
In the Fixture Schedule or Add Fixtures window of Wholehog software, you would add 1 motion, 1 global, and 3 graphic “fixtures” for each complete DL.3 or DL.2 unit, or 1 global, and 3 graphic “fixtures” for each complete Axon unit. -
Page 64: Wholehog Iii Programming Notes
The default for Effect Mode 1 is set to CMY1 as well. For some effect options, the CMY parameters will not adjust color, but will adjust the effect per the DL.3 or DL.2 DMX protocol. You can find a description of CMY controls functionality for each effect option in Chapter 13: Effect Mode Options Descriptions on page 139. -
Page 65: Quick Start With A Wholehog Console
Axon media servers will have user number 1-4 where user number one is global and 2-4 the graphic fixture types. Patch the motion first, the global second, and the graphic fixture types last. DL.3 Digital Light User Manual... - Page 66 CHAPTER 4 DMX Programming Basics and Quick Start DL.3 Digital Light User Manual...
-
Page 67: Chapter 5: Tutorials
Fixture Set-up (DL.3 and DL.2 Media Servers) If you are using a DL.3 or DL.2 fixture, you will first need to set up the head and the projector. If you are using the Axon Media Server, this will not be necessary and you can proceed to Lesson 1. -
Page 68: Lesson 1: Cross Fading Between Graphic Objects
Tutorials Lesson 1: Cross Fading Between Graphic Objects 1. On your lighting console, set MOTION fixture Dimmer parameter (for DL.3 or DL.2 fixtures), the GLOBAL fixture Intensity parameter, and GRAPHIC OBJECT 1 fixture Opacity parameter to 100% (DMX value = 255). -
Page 69: Lesson 2 - Working With Multiple Graphic Objects
3. Select the Chromakey Medium option (DMX = 27). The DL.2 logo “floats” on a water background. 4. Select Invert Chroma Fine option (DMX value = 29). Now the Graphic Object 1 content shows through the logo. 5. Record this look to your console. DL.3 Digital Light User Manual Tutorials... -
Page 70: Lesson 3 - Girt, The Fire Breathing Lizard
37 pixels (DMX = 33530). 11. Set the Y Position parameter to a real world value of 13 pixels (DMX = 33042). 12. Set the Z Rotation parameter to a real world value of -25° (DMX = 33042). DL.3 Digital Light User Manual... -
Page 71: Define Graphic Object 3
19. Set the X Position parameter to a value of 20 pixels. (DMX = 33177) 20. Set the Y Position parameter to a value of 8 pixels. (DMX = 33932) 21. Record this look into your lighting console. DL.3 Digital Light User Manual Tutorials... -
Page 72: Lesson 4: 3-D Objects, Rotation, Wobbulation, And Glow
14. Change the X Rotation parameter to 28° (DMX = 33405) 15. Change the Y Rotation parameter to 36° (DMX = 33577) 16. Open the Effect Mode 1 parameter and set DMX = 66 (Circular Sinewave Z-axis Wobbulation). DL.3 Digital Light User Manual... -
Page 73: Adjust This Effect With The Modifier Parameters
DMX = 86 (34%) to adjust wobbulation rate. 19. Set the Effect Mode 1 Modifier 3 parameter to DMX = 114 (45%) to adjust offset. NOTE: Modifier parameters make different adjustments depending on the effect you choose. DL.3 Digital Light User Manual Tutorials... -
Page 74: Lesson 5: Viewpoint
14. Change the Object parameter to DMX = 44 (star bevel 4) 15. Set the Z Position parameter to 40 pixels (DMX = 33592), the Y Position parameter to -13 pixels (DMX = 32493), and the X Position parameter to 30 pixels (DMX = 33372) DL.3 Digital Light User Manual... -
Page 75: Apply A Global Solarize Effect
23. Set Viewpoint Position Z parameter to 116° (DMX = 43354). 24. Record this into your console and play back the cues you have created to observe how viewpoint changes the perspective on the graphic objects. DL.3 Digital Light User Manual Tutorials... - Page 76 CHAPTER 5 Tutorials DL.3 Digital Light User Manual...
-
Page 77: Chapter 6: Graphics Engine Overview
3-D objects you need. Select the protocol level in the fixture’s onboard menu system for DL.3 and DL.2 fixtures or through the CMA for both fixture and Axon media servers (see “Viewing Server Configuration” on page 16-206). -
Page 78: Graphics Control Hierarchy
It is especially important to keep this in mind when applying graphical effects. At the lowest level, Graphic effects are applied to an individual 3-D Graphic Object. Any Global effects applied affect each object in the combined Object image. Finally, motion effects control the projection of the composite image. DL.3 Digital Light User Manual... -
Page 79: Graphics Engine Function Flow
Effect 1 Effect 2 Global Functions are then applied to the composite-object image. Graphics Engine outputs final image to projector DL.3 Digital Light User Manual Graphics Engine Overview O bject C ontent O pacity Playback Visual M ode Visual M ode... -
Page 80: Graphics Engine Functions
Which solution you choose depends, to a large extent, on the transition to other effects you want to achieve. DL.3 Digital Light User Manual... -
Page 81: Chapter 7: Graphic Functions: Defining Content
Selecting Content How Content is Organized Every DL.3, DL.2 and Axon media server has a file system that holds the movies, images, and 3-D objects that make up the content that the server uses. These files, folders, and their associated DMX values are collectively known as the “Content”... -
Page 82: Content Selection Parameters
For a reference of 3-D object files available as stock content with your media server and infor- mation on how to create your own object files, go to the link for the Stock Object Guide for the DL.3, DL.2 and Axon products on http://www.highend.com/support/digital_lighting/. Default DMX Value: 1 = full screen flat surface TIP: You can select the same object file for images that will be interacting with each other. -
Page 83: Media Folder
• DMX value = 255 is reserved for live video input. Default DMX Value = 1 (HES Core Media files) The following table describes the Stock Content folders available on DL.3, DL.2 and Axon servers. NOTE: Media folders with DMX Values of 27-35 are only available as stock content on DL.3 fixtures... -
Page 84: Media File
For a reference of media files available as stock content with your media server, go to the link for the Stock Content Guide for DL.3, DL.2 and Axon products on support/digital_lighting/. You can also view thumbnail images of media files in the CMA, (see “Viewing Files”... -
Page 85: Defining A Media File Segment
Out Frame. When you create a segment in this way, you may notice a jump as playback skips from the end of the file to the beginning. DL.3 Digital Light User Manual Graphic Functions: Defining Content Example 1 In Frame... -
Page 86: Defining Playback
Displays frame that has been defined by the In Frame parameter with media file data overlaid on the output. Displays frame that has been defined by the Out Frame parameter with media file data overlaid on the output. DL.3 Digital Light User Manual... -
Page 87: Playback Speed
A DMX value of 0 or 128 (50%) plays back media files at the original recorded speed. DMX values from 1 to 127 plays the media file back at an increasing speed, from slowest to the original recorded speed. Values from 129-255 set playback speed from faster than normal to fastest speed. DL.3 Digital Light User Manual... - Page 88 CHAPTER 7 Graphic Functions: Defining Content DL.3 Digital Light User Manual...
-
Page 89: Chapter 8: Graphic Functions: Rotation, Position, Scale
Y Rotation produces a left-to-right flip. Z Rotation causes a circular motion. X Rotation Rotates image about the x axis DL.3 Digital Light User Manual Y Rotation Rotates image about the y axis Z Rotation... - Page 90 When the DMX value for a rotation parameter is greater than the 720° limit in either direction, the object begins rotating continuously. Additional adjustment to the DMX values increases the speed of continuous rotation. Counter-clockwise Clockwise Indexed Rotation Indexed Rotation Continuous Rotation Continuous Rotation 720-0 0-720 100% Rotation Speed Rotation Speed DL.3 Digital Light User Manual...
-
Page 91: Rotation Parameters
Continuous variable-speed clockwise image rotation around X-axis (slow to fast) Tip: Using this parameter you can turn one object through another. Original Object 1 and Object 2 DL.3 Digital Light User Manual Graphic Functions: Rotation, Position, Scale Function X-axis Rotation Applied to Object 2... -
Page 92: Y Rotation
76–100 Continuous variable-speed clockwise image rotation around Y-axis (slow to fast) Tip: Using this parameter you can turn one object through another Original Object 1 and Object 2 Function Y-axis rotation applied to Object 2 DL.3 Digital Light User Manual... -
Page 93: Z Rotation
(see “Global Viewpoint Mode” on page 11-120). Tip: Using this parameter you can turn one object around another Original Object 1 and Object 2 DL.3 Digital Light User Manual Graphic Functions: Rotation, Position, Scale Function Z-axis Rotation Applied to Object 2... -
Page 94: Scaling The Object
255 (100%). Default DMX Value: 128 (50%) = Normal Scale Original Object 1 and Object 2 All Scale DMX values = 128 (50%) Object 2 X-Scale DMX value = 165 Scaled 3 times in X direction DL.3 Digital Light User Manual... -
Page 95: Y Scale
Default DMX Value: 128 (50%) = Normal Scale Original Object 1 and Object 2 Object 2 Y-Scale parameter DMX value = 165 All Scale parameters DMX values = 128 (50%) Scaled 3 times in Y direction DL.3 Digital Light User Manual... -
Page 96: Z Scale
Default DMX Value: 128 (50%) = Normal Scale Original Object 1 and Object 2 Object 2 Z-Scale parameter DMX value = 223 All Scale parameters DMX values = 128 (50%) Scaled 7.5 times in Z direction DL.3 Digital Light User Manual... -
Page 97: Changing Object Position
Default DMX Value: 32768 (50%) = object centered in frame Original Object 1 and Object 2 All Position DMX values = 32768 (50%) Object 1: X Position DMX value = 33561 DL.3 Digital Light User Manual Graphic Functions: Rotation, Position, Scale Object 1: X Position DMX value = 32022... -
Page 98: Y Position
Default DMX Value: 32768 (50%) = object centered in frame Object 1: Y Position DMX value = 32255 Original Object 1 and Object 2 All Position DMX values = 32768 (50%) Object 1: Y Position DMX value = 33269 DL.3 Digital Light User Manual... -
Page 99: Z Position
Object 1: Z Position DMX value = 31884 Original Object 1 and Object 2 All Position DMX values = 32768 (50%) Object 1: Z Position DMX value = 33144 Object 1: Z Position DMX value = 32822 DL.3 Digital Light User Manual... - Page 100 CHAPTER 8 Graphic Functions: Rotation, Position, Scale DL.3 Digital Light User Manual...
-
Page 101: Chapter 9: Graphic Functions: Opacity And Effects
0 to make a defined image visible. Graphic Object 1 Intensity DMX = 255 (100%) Graphic Object 2 Intensity DMX = 255 (100%) DL.3 Digital Light User Manual Graphic Object 1 Intensity DMX = 255 (100%) Graphic Object 2 Intensity DMX = 179 (70%) -
Page 102: Visual Mode
Adjustments Modifier 2 Not Used Adjusts Contrast Adjusts Saturation Adjusts Saturation Adjusts brightness Adjusts contrast Adjusts Contrast Not Used Not Used Subtract red to Subtract Green Adjusts Color color shift Sets White Comparison Level Level DL.3 Digital Light User Manual... - Page 103 Shift component colors ShakeNBake Introduces a random vibration effect Zooms in and pans across a still image Horizontal position Vertical position and Scan DL.3 Digital Light User Manual Graphic Functions: Opacity and Effects Description Modifier 1 Selects the Source Graphic...
-
Page 104: Visual Mode Options
Content Optimization Visual Mode Parameter DMX value = 1 Stock content provided by High End Systems on your DL.3 fixture has been optimized for lighting applications. This option lets you make the same adjustments for User content or camera input. Content Optimization adjusts the image Black level and Contrast to optimize the projected image for your performance environment. -
Page 105: Chroma Shift
255 (100%). Original Content Visual Mode Parameter DMX value = 21 DL.3 Digital Light User Manual Graphic Functions: Opacity and Effects Visual Mode Modifier 1 DMX value = 105... -
Page 106: Drop Shadow
255 (100%) Original Content Visual Mode Parameter DMX value = 19 Visual Mode Parameter DMX value = 19 Visual Mode Modifier 1 DMX value = 0 Visual Mode Modifier 2 DMX value = 255 DL.3 Digital Light User Manual... -
Page 107: Exposure Control
Modifier 2: from 0 = least contrast through 255 (100%) = maximum contrast. At a DMX value of 128 (50%) there is no adjustment. Tip: All the factory content provided has been optimized already. This parameter is especially useful for optimizing user content or camera capture. DL.3 Digital Light User Manual... -
Page 108: Faux Led
DMX value of 255 (100%). Original Content Visual Mode Parameter DMX value = 16 Modifier 1 = 204, Modifier 2 = 16 Visual Mode Parameter DMX value = 16 Modifier 1 = 4, Modifier 2 = 76 DL.3 Digital Light User Manual... -
Page 109: Faux Tile
Original Content Visual Mode Parameter DMX value = 17 Modifier 1 = 255 (100%), Modifier 2 = 138 DL.3 Digital Light User Manual Graphic Functions: Opacity and Effects Visual Mode Parameter DMX value = 17 Modifier 1 = 255 (100%), Modifier 2 = 0... -
Page 110: Film Roll
Modifier 1: Maps the image color values from no adjustment at a value of 0 to all red to yellow tones at a value of 255 (100%). Modifier 2: Not Used Original Content Visual Mode Parameter DMX value = 8 Visual Mode Modifier DL.3 Digital Light User Manual... -
Page 111: Fuzzifier
Modifier 2: The default DMX value of 0 = no adjustment. Increasing DMX values blur the image vertically to a maximum at a DMX value of 255 (100%). Original Content Visual Mode Parameter DMX value = 18 DL.3 Digital Light User Manual Graphic Functions: Opacity and Effects Visual Mode Modifier 1 DMX value = 255 (100%) -
Page 112: Gray Maker 1
Visual Mode Parameter DMX value = 4 Visual Mode Modifier1 DMX value = 190 (75%) Visual Mode Modifier2 DMX value = 255 (100%) Visual Mode Parameter DMX value = 4 Visual Mode Modifier1 DMX value =128 (50%) DL.3 Digital Light User Manual... -
Page 113: Gray Maker 2
Visual Mode Parameter DMX value = 4 Visual Mode Modifier1 DMX value = 90 (33.3%) Visual Mode Modifier2 DMX value = 175 (77%) DL.3 Digital Light User Manual Graphic Functions: Opacity and Effects Visual Mode Parameter DMX value = 4... -
Page 114: Invert Black And White, Keep Color
255 (100%) = converting more of the image from black to white. Modifier 2: Adjusts the comparison level of white for inversion from a DMX value of 0= inverting only absolute white to 255 (100%) = converting more of the image from white to black. DL.3 Digital Light User Manual... -
Page 115: Negative Art
Visual Mode Parameter DMX value = 9 Modifier 1 DMX value = 0 Modifier 2 DMX value = 128 (50%) DL.3 Digital Light User Manual Graphic Functions: Opacity and Effects Visual Mode Parameter DMX value = 9 Modifier 1 DMX value = 0... -
Page 116: Pan And Scan
Visual Mode Parameter DMX value = 255 Modifier 1 DMX value = 128 Modifier 2 DMX value = 128 Visual Mode Parameter DMX value = 9 Modifier 1 DMX value = 255 Modifier 2 DMX value = 255 DL.3 Digital Light User Manual... -
Page 117: Pixelate
Modifier 2: Not Used Original Content Visual Mode Parameter DMX value = 15 DL.3 Digital Light User Manual Graphic Functions: Opacity and Effects Visual Mode Modifier 1 DMX value = 128... -
Page 118: Posterizer
Visual Mode Parameter DMX value = 6 Visual Mode Modifier1 DMX value = 190 (75%) Visual Mode Modifier2 DMX value = 255 (100%) Visual Mode Parameter DMX value = 6 Visual Mode Modifier2 DMX value = 255 (100% DL.3 Digital Light User Manual... -
Page 119: Push To Red
Visual Mode Parameter DMX value = 3 Visual Mode Modifier1 DMX value = 190 (75%) Visual Mode Modifier2 DMX value = 255 (100%) DL.3 Digital Light User Manual Graphic Functions: Opacity and Effects Visual Mode Parameter DMX value = 3... -
Page 120: Push To Sepia
Visual Mode Parameter DMX value = 2 Visual Mode Modifier1 DMX value = 190 (75%) Visual Mode Modifier2 DMX value = 255 (100%) Visual Mode Parameter DMX value = 2 Visual Mode Modifier2 DMX value = 255 (100 DL.3 Digital Light User Manual... -
Page 121: Shakenbake
Modifier 2: Selects the vertical center of the zoom point. Original Content Visual Mode Parameter DMX value = 20 DL.3 Digital Light User Manual Graphic Functions: Opacity and Effects Visual Mode Modifier 1 DMX value = 158 Visual Mode Modifier 2 DMX value = 168... -
Page 122: Effect 1 Mode And Effect 2 Mode
Red to Blue Green to Red Red to Green Green to Blue Green Green Green Green Green Green Green Green DL.3 Digital Light User Manual Modifier 3 Yellow Yellow Yellow Blue Blue Blue Blue to Green Blue to Red Blue Blue... - Page 123 Magnifying lens 2 applies spherical overlay that magnifies a portion of the texture. Cartoon Edge creates variable outline around picture elements Color DeConverge offsets pixels from original position DL.3 Digital Light User Manual Graphic Functions: Opacity and Effects Adjustments Modifier 1 Modifier 2 Green to...
- Page 124 LED size Spacing Tile size Spacing Horizontal Vertical distance distance Horizontal Vertical shadow shadow size size DL.3 Digital Light User Manual Modifier 3 Not Used Blue to Red Blue to Green Blue Controls fading Controls Transparency Controls raindrop rate...
- Page 125 Gaussian Blur Sharpen enhances image detail Spherical Mapping Adjustment 1 Spherical Mapping Adjustment 2 Pan and Scan Zooms in and pans across a still image DL.3 Digital Light User Manual Graphic Functions: Opacity and Effects Adjustments Modifier 1 Modifier 2 Horizontal...
- Page 126 CHAPTER 9 Graphic Functions: Opacity and Effects DL.3 Digital Light User Manual...
-
Page 127: Chapter 10: Graphic Functions: Synchronizing Content
For synchronization to work, you will need to assign each DL.2 and Axon server a Unique Fixture ID from 1 to 255 using the CMA (see “DL.3 and DL.2 Media Server Configuration Options” on page 16-208 and “Axon Media Server Configuration Options” on page 16-211) or through the onboard Menu System (for DL.3 and DL.2 fixtures). -
Page 128: Synchronization Parameters
Synchronize to Graphic Object 3 movie time and rotation 3 Synchronize to Graphic Object 1 movie time and reverse rotation 1 Synchronize to Graphic Object 2 movie time and reverse rotation 2 Synchronize to Graphic Object 3 movie time and reverse rotation 3 Option DL.3 Digital Light User Manual... -
Page 129: Chapter 11: Global Functions
0 for a defined image to be visible. Graphic Object 1 Intensity DMX = 255 (100%) Graphic Object 2 Intensity DMX = 179 (70%) DL.3 Digital Light User Manual Graphic Object 1 Intensity DMX = 255 (100%) Graphic Object 2 Intensity DMX = 255 (100%) -
Page 130: Global Effect Mode 1 And Effect Mode 2
Green Green From Red From Green to to Cyan Magenta Red to Green Green to Blue Red to Blue Green to Red DL.3 Digital Light User Manual Modifier 3 Yellow Yellow Yellow Blue Blue Blue Blue to Red Blue Blue... - Page 131 Horizontal Mirror creates a mirror effect RGB Swap to BGR redefines component color RGB Swap to RBG redefines component color RGB Swap to GRB redefines component color DL.3 Digital Light User Manual Global Functions Adjustments Modifier 1 Modifier 2...
- Page 132 Shake Number Vertical of Slats Displacement Number Horizontal of Slats Displacement Vertical Start Streak Position Angle DL.3 Digital Light User Manual Modifier 3 Controls fading Controls Transparency Controls raindrop rate Blue Blue to alpha Inverted Blue to alpha Crossfade Between...
- Page 133 Mattes apply provided mattes over image Collage Generator 360 adds right and left edge blending to enable 360 degree panoramas Pan and Scale Zooms in and pans across a still image DL.3 Digital Light User Manual Global Functions Adjustments Modifier 1 Modifier 2...
-
Page 134: Global Control
Shutdown and Reset Options When the Global Intensity parameter is set to 0, you can Shutdown Axon (DMX Value = 120- 130) or Reset the internal Graphics Engine for either DL.3, Axon or DL.2 media servers (DMX Value = 145-149). -
Page 135: On-Screen Frame Statistics
When the Global Control parameter is set at a DMX Value of 255, the Global Control Modifier channel lets you choose the text color that will best display over your selected image: DMX Value Color Gray Blue Green DL.3 Digital Light User Manual 4-in-1 Display Graphic Object 2 Texture Effect 1 Final Composite Image... -
Page 136: Masking Control
Vertical diamonds 1 Vertical diamonds 2 Horizontal diamonds 1 Horizontal diamonds 2 Pinwheel Oval Iris closing from outside in Oval Iris closing from inside out Oscillating iris closing from outside in Animated dynamic Iris Mask Shapes DL.3 Digital Light User Manual... -
Page 137: Mask Size
Tip: Crossfading the Mask Size parameter can create unique fades to and from video black. Mask Select value of 0 Mask Size DMX value = 128 (50%) DL.3 Digital Light User Manual Mask Select DMX value = 0 Mask Size DMX value = 255 (100%) -
Page 138: Mask Edge Fade
When a Mask Select parameter value of Note: A Global Effect Mode parameter option lets you define a Mask Edge Fade color on page 147. Original Image Mask with Edge Fade applied Mask applied without Edge Fade DL.3 Digital Light User Manual... -
Page 139: Image Edge Fade
Adjust each side separately for edge fade from 0 = no fade to 255 (100%) = opaque. Original Content 100% Left Edge Fade DL.3 Digital Light User Manual 100% Top Edge Fade 100% Top, Bottom, Left, Right Edge Fade Global Functions... -
Page 140: Keystone Correction Parameters
Tip: These parameters can also be used to create interesting skewing as a design effect. Note: DL.3 fixtures have vertical lens shift capability that provides additional keystone control. Engage lens shift with your DMX console in the Control parameter for motion control, (see Control Parameter Projector Options on page 181 for a description). -
Page 141: Ratio
DMX value settings above the midpoint of the range expands the image vertically from no expansion at a value of 128 to maximum expansion at a value of 255. DL.3 Digital Light User Manual Global Functions X Ratio DMX value = 255 (100%) -
Page 142: Global Viewpoint Mode
This Viewpoint mode creates a 3-D space without perspective. Viewpoint are located in terms of rectangular X, Y and Z positions describing a location in this space. In this case, the composite image is always flat. Output displayed with global viewpoint shown at left. DL.3 Digital Light User Manual... -
Page 143: Viewpoint Position X
DMX values above center move toward the maximum distance from origin in back of view target (a DMX value of 65535). DMX values below center move toward the maximum distance from origin in front of view target at a value of zero. DL.3 Digital Light User Manual Global Functions... - Page 144 CHAPTER 11 Global Functions DL.3 Digital Light User Manual...
-
Page 145: Chapter 12: Global Functions: Collage Generator™ Effect
DMX console. You can display either stock or custom content. You can create a Collage™ effect using DL.3, DL.2 fixtures or Axon media servers outputting to DL.1 fixtures or other digital projectors. When using third party projectors, you will need to position output manually. -
Page 146: Panorama Collage™ Configurations
You can create Collage arrays in any configuration up to 8 x 8 cells. The native aspect ratio of one DL.3, DL.2 or Axon media server output is 4:3. Some of the arrays configured in conjunction with the collage generator will output a different overall aspect ratio. -
Page 147: Central Panorama Collage Specifications
The second set of numbers is the aspect ratio for the overall panorama configuration. Image Resolution is represented as width and height in pixels. The number of DL.3 or DL.2 Units required is also noted. Central Panorama Collage Specifications... -
Page 148: Horizontal Panorama Collage Specifications
1328 W x 586 H 1456 W x 539 H 1568 W x 489 H 1652 W x 463 H 1152 W x 661 H 1280 W x 616 H 1376 W x 571 H Units DL.3 Digital Light User Manual... - Page 149 7 x 5 8 x 5 7 x 6 8 x 6 8 x 7 DL.3 Digital Light User Manual Global Functions: Collage Generator™ Effect Maximum Recommended DL.3 or DL.2 Image Resolution (W x H) 1456 W x 531 H...
-
Page 150: Vertical Panoramas Collage Specifications
400 W x 1875 H 864 W x 894 H 752 W x 1011 H 688 W x 1139 H 624 W x 1226 H 576 W x 1311 H 544 W x 1407 H Units DL.3 Digital Light User Manual... - Page 151 4 x 6 4 x 7 4 x 8 5 x 6 5 x 7 DL.3 Digital Light User Manual Global Functions: Collage Generator™ Effect Maximum Recommended DL.3 or DL.2 Image Resolution (W x H) 912 W x 847 H...
- Page 152 Collage Generator at the High End Systems website (www.highend.com/digital_lighting/support). Maximum Recommended DL.3 or DL.2 Image Resolution (W x H) 832 W x 866 H 976 W x 795 H 912 W x 844 H 976 W x 976 H Units DL.3 Digital Light User Manual...
-
Page 153: Configuring The Collage Generator
5 x 2 3 x 3 2 x 5 4 x 1 5 x 3 1 x 4 3 x 5 DL.3 Digital Light User Manual Global Functions: Collage Generator™ Effect Array Array Value (W x H) Value (W x H) - Page 154 Global Functions: Collage Generator™ Effect The Modifier 2 channel selects which cell of the grid a particular DL.3 or DL.2 fixture will display. DMX values 0 up to 63 are used to step through grid pattern you selected with the Modifier 1 channel.
-
Page 155: Collage Setup Example
128-159 (without edge blending) to put the media server output into their cropped collaged state. The choice between the two values will depend on your preference for aligning the images. DL.3 Digital Light User Manual Global Functions: Collage Generator™ Effect... -
Page 156: Mapping A Collage To A Spherical Surface
Spherical Mapping Setup Guide Before You Begin Successful spherical mapping requires careful positioning of the DL.3, DL.2 units or Axon- controlled projectors you are using. Units should be mounted at equal angles from each other and the same distance from the sphere. Mounting units at the same height will minimize the tilt angle adjustments you will need to make. - Page 157 “equator”. Modifier 2 adjusts the sphere’s offset to compensate for projector head tilt. NOTE: After completing a rough adjustment, you will use these two modifier channels for the fine tuning. DL.3 Digital Light User Manual Global Functions: Collage Generator™ Effect...
-
Page 158: Spherical Mapping Tips
Go back through steps 1 through 11. Remember that pan and tilt adjustments are also available when using a DL.3 or DL.2 fixture. Now you have a rough adjustment of the spherical mapping effect. From this point, finely adjust all the parameters until you bring the output to the desired shape. -
Page 159: Creating Custom Content For The Collage Generator Effect
Creating Custom Content for the Collage Generator Effect There are two main steps to process HD footage into DL.3, DL.2 and Axon compliant media for use with the collage generator. First, acquire or commission High-resolution media footage or stills. In most cases, scaling and cropping of the media is a simple process. - Page 160 CHAPTER 12 Global Functions: Collage Generator™ Effect DL.3 Digital Light User Manual...
-
Page 161: Chapter 13: Effect Mode Options Descriptions
DMX Value → Blue → Green → Cyan → Magenta → Yellow → Blue → → Green DL.3 Digital Light User Manual Object Effect Color Component Conversion Effect → Green Blue → Green Blue Blue → Green Magenta Blue → Green... -
Page 162: Effect Mode Color Options
Modifier 2: Defines the green color component speed in the same way as Modifier 1. Modifier 3: Defines the blue color component speed in the same way as Modifier 1. Object Effect Global Effect Object Effect Global Effect Object Effect Global Effect DL.3 Digital Light User Manual... -
Page 163: Chromakey
(100%) = maximum green saturation. Modifier 3: Defines the blue color component from DMX values of 0 = no blue to 255 (100%) = maximum blue saturation. DL.3 Digital Light User Manual Effect Mode Options Descriptions Object Effect Global Effect... -
Page 164: Chromakey, Inverse
Modifier 2: Defines the green color component from 0 = no green to 255 (100%) = maximum green saturation. Modifier 3: Defines the blue color component from 0 = no blue to 255 (100%) = maximum blue saturation. Object Effect Global Effect DL.3 Digital Light User Manual... -
Page 165: Cmy
Modifier 2: Increases Magenta color component from 0 = no adjustment to 255 (100%) = maximum red saturation. Modifier 3: Increases Yellow color component from 0 = no adjustment to 255 (100%) = maximum red saturation. DL.3 Digital Light User Manual Effect Mode Options Descriptions Object Effect Global Effect... -
Page 166: Color Cycle
Modifier 2: Sets the zero point of the color intensity level from 0 = no intensity to 255 (100%) = maximum intensity. Modifier 3: Fades from original color scheme to new color scheme using selected intensity. Object Effect Global Effect Object Effect Global Effect Object Effect Global Effect DL.3 Digital Light User Manual... -
Page 167: Color To Alpha
Modifier 2: Increases blue color component from 0 = no adjustment to 255 (100%) = maximum blue saturation. Modifier 3: Increases green color component from 0 = no adjustment to 255 (100%) = maximum green saturation. DL.3 Digital Light User Manual Effect Mode Options Descriptions Object Effect Global Effect... -
Page 168: Glow
DMX values above the midpoint of the range change all intensities outside of the selected range transparent from 129 = no transparency to 255 = full reverse transparency. Object Effect Global Effect Object Effect Global Effect Object Effect Global Effect DL.3 Digital Light User Manual... -
Page 169: Mask Color
Modifier 2: Increases blue color component from 0 = no adjustment to 255 (100%) = maximum blue saturation. Modifier 3: Increases green color component from 0 = no adjustment to 255 (100%) = maximum green saturation. DL.3 Digital Light User Manual Effect Mode Options Descriptions Object Effect Global Effect... -
Page 170: Rgb Add2, All Pixels
255 (100%) Modifier 3: Transitions the blue component from no adjustment at a value of 0 to yellow at a value of 255 (100%) Object Effect Global Effect Object Effect Global Effect Object Effect Global Effect DL.3 Digital Light User Manual... -
Page 171: Rgb Invert And Swap To Brg
Modifier 3: Scales Blue in the Media file. A DMX Value of 128 = no adjustment. DMX values below 128 (50%) reduce color value. DMX values over 128 increase color value. DL.3 Digital Light User Manual Effect Mode Options Descriptions... -
Page 172: Rgb Swap To Bgr
255 (100%) = blue Modifier 3: Transitions blue color component to red from 0 = no color change to 255 (100%) = red Object Effect Global Effect Object Effect Global Effect Object Effect Global Effect DL.3 Digital Light User Manual... -
Page 173: Rgb Swap To Grb
Maps image color intensities to the colors in a single horizontal line of the selected texture. Modifier 1: Selects a line of the media file to scan Modifier 2: Adjusts the mapping transition Modifier 3: Not used DL.3 Digital Light User Manual Effect Mode Options Descriptions Object Effect Global Effect... -
Page 174: Solarize
Modifier 2: Increases green color component from 0 = no adjustment to 255 (100%) = maximum green saturation. Modifier 3: Increases blue color component from 0 = no adjustment to 255 (100%) = maximum blue saturation. Object Effect Global Effect Object Effect Global Effect DL.3 Digital Light User Manual... -
Page 175: Geometric Effect Options
0 = No collage. DMX Values of 64-255 are reserved and default to No collage. Modifier 2: Selects which portion of the grid a particular DL.3 or DL.2 fixture will display. DMX values 0-63 step through grid pattern selected by the Modifier 1 parameter. DMX values 64-255 default to the upper left corner of the grid. -
Page 176: Chroma Shift
You can apply this correction to any media server output including multi-fixture image panoramas created with the Collage Generator Global Effect option, (see “Global Functions: Collage Generator™ Effect” on page 12-123). Object Effect Global Effect Object Effect Global Effect DL.3 Digital Light User Manual... - Page 177 DMX value of 255 (100%). NOTE: Modifier 3 is not used when projecting onto an inside or outside cylinder DL.3 Digital Light User Manual Effect Mode Options Descriptions Surface Values...
-
Page 178: Downward Vertical Streaks
DMX value = 0 to the converted image at a DMX value of 255 (100%). Original Graphic Object media file content Object Effect Original Graphic Object media file content Modifier 1 = 170, Modifier 2 = 158, Modifier 3 = 255 DL.3 Digital Light User Manual Global Effect... -
Page 179: Drop Shadow
Modifier 2: Adjusts vertical edge search size from 0= no adjustment to 255 (100%) = maximum adjustment. Modifier 3: Adjusts comparison edge threshold from 0= no adjustment to 255 (100%) = maximum adjustment. DL.3 Digital Light User Manual Effect Mode Options Descriptions Object Effect Global Effect... -
Page 180: Edge Detect Color
Modifier 3: Adjusts the color peaking to simulate lighting at the “LED” center. A DMX value of 0 = no adjustment and flat color across the cell. As you increase the DMX value, the peaking increases to a maximum at 255 (100%). Object Effect Global Effect Object Effect Global Effect DL.3 Digital Light User Manual... -
Page 181: Faux Tile
Modifier 3: Scales the image from 0 = no adjustment to maximum tiling at 255. NOTE: This option is also available as a Visual Mode adjusted with 2 Modifier parameters, (see Film Roll on page 88). DL.3 Digital Light User Manual Effect Mode Options Descriptions Object Effect... -
Page 182: Framing
This differs from Keystone Correction that modifies the image shape. Object Effect Effect Mode parameter = 133 Modifier 1 DMX = 1, Modifier 2 DMX = 251 Modifier 3 DMX = 10 DL.3 Digital Light User Manual Global Effect... - Page 183 Graphic Object 3 texture including its first applied Effect Graphic Object 3 texture including its first two applied Effects Graphic Object 3 texture including its first three applied Effects Not Used DL.3 Digital Light User Manual Effect Mode Options Descriptions Action Modifier 3...
-
Page 184: Fuzzifier
Modifier 2 = 128, Modifier 3 = 128 Object Effect Object Effect Original Content with Effect Mode = 81 Effect Mode = 81, Modifier 1 = 255, Modifier 2 = 255, Modifier 3 = 255 DL.3 Digital Light User Manual Global Effect Global Effect... -
Page 185: Horizontal Mirror
Modifier 3: Sets the rotation speed from a DMX value of 0 = static to 255 (100%) = maximum rotation speed. Tip: Try combining image rotate and object rotate for a multiple effect DL.3 Digital Light User Manual Effect Mode Options Descriptions Object Effect... -
Page 186: Magnifying Lens
(100%) = bottom edge of output. Modifier 3: Controls the size of the lens from 0=smallest to 255 (100%) = largest. Tip: Zooming in with this lens option creates an additional effect. Object Effect Global Effect Object Effect Global Effect DL.3 Digital Light User Manual... -
Page 187: Mattes
Black transparent, with matte color controlled by Modifier 3 as lookup in internal color gradient map Black transparent, with matte color controlled by Modifier 3 as lookup in internal color gradient map and inverted DL.3 Digital Light User Manual Effect Mode Options Descriptions Object Effect... - Page 188 Graphic Object 3 texture including its first two applied Effects Graphic Object 3 texture including its first three applied Effects 10 - 11 0-255 Color selected as a look up value from an internal gradient. Modifier 3 Action DL.3 Digital Light User Manual...
-
Page 189: Pan And Scan
Modifier 2: Controls the vertical position of the subpicture’s centerpoint from 0=top edge to 255 (100%) = bottom edge of output. Modifier 3: Controls the size of the picture from 0=smallest to 255 (100%) = largest. DL.3 Digital Light User Manual Effect Mode Options Descriptions Object Effect... -
Page 190: Pixelate
13-153. Modifier 3: Adjusts the raindrop creation rate from 0 = no adjustment to 255 (100%) = maximum rate. Object Effect Global Effect Object Effect Global Effect Object Effect Global Effect DL.3 Digital Light User Manual... -
Page 191: Shakenbake
Modifier 2: Adjusts the rate (frequency) of the wobble from 0 = no adjustment to 255 (100%) = maximum rate Modifier 3: Adjusts the offset (phase) of the wobble from 0 = no adjustment to 255 (100%) = maximum offset DL.3 Digital Light User Manual Effect Mode Options Descriptions Object Effect Global Effect... -
Page 192: Sinewave, Horizontal
Modifier 2: Adjusts the rate (frequency) of the wobble from 0 = no adjustment to 255 (100%) = maximum rate. Modifier 3: Adjusts the offset (phase) of the wobble from 0 = no adjustment to 255 (100%) = maximum offset. Object Effect Global Effect Object Effect Global Effect DL.3 Digital Light User Manual... -
Page 193: Slats
255 = the slatted image at full opacity. Vertical Slat Option Effect Mode parameter DMX value = 62 Modifier 1 = 204, Modifier 2 =40, Modifier 3 = 255 DL.3 Digital Light User Manual Effect Mode Options Descriptions Object Effect Original content Horizontal Slat Option... -
Page 194: Spherical Mapping
Adjusting toward 0 moves the center of the adjustment down toward the bottom of the image. Values above the midrange move the bend center up to the top of the image at a DMX value of 255 (100%). Object Effect Global Effect DL.3 Digital Light User Manual... - Page 195 Graphic fixture types. The default for Effect Mode 1 is set to CMY1 as well. Effect Mode 2 Modifier channels are labeled Mod 1, Mod 2, and Mod 3. DL.3 Digital Light User Manual Effect Mode Options Descriptions Values above the...
-
Page 196: Texture Mixing
Object Effect Graphic Object 1 media file content Graphic Object 2 media file content Effect Mode parameter DMX value = 51 Modifier 1 = 1, Modifier 2 = 0, Modifier 3 = 128 DL.3 Digital Light User Manual Global Effect... -
Page 197: Texture Ripple, Asymmetrical Circular
DMX Values above the midpoint increase speed in a forward direction to 255 (100%) = fastest speed. DMX values below the midpoint increase speed in a backward direction from no adjustment to 0 = fastest speed. DL.3 Digital Light User Manual Effect Mode Options Descriptions Object Effect... -
Page 198: Texture Ripple, Horizontal
DMX Values above the midpoint increase speed in a forward direction to 255 (100%) = fastest speed. DMX values below the midpoint increase speed in a backward direction from no adjustment to 0 = fastest speed. Object Effect Global Effect Object Effect Global Effect DL.3 Digital Light User Manual... -
Page 199: Tiling
Modifier 2: Selects the center of a wipe effect’s separation Modifier 3: Selects the wipe option. Each option occupies a portion of the DMX value range (see table). DL.3 Digital Light User Manual Effect Mode Options Descriptions Object Effect Object Effect Modifier 3: Wipe Option Value... -
Page 200: Zoom Blur
255 (100%) NOTE: This option is also available as a Visual Mode adjusted with 2 Modifier parameters, (see Zoom Blur on page 99). DL.3 Digital Light User Manual... -
Page 201: Chapter 14: Fixture Motion Functions
Pan and Tilt DL.3 and DL.2 fixtures have a 400° pan range and a 240° tilt range. Two DMX channels for Pan and two for Tilt provide 16-bit position adjustment to a fraction of a degree. MSpeed values can control the timing of pan and tilt motion for DL.3 and DL.2 fixtures, (see “MSpeed (Motor Speed)”... -
Page 202: Mspeed (Motor Speed)
MSpeed times vary from 0.15 seconds to 252.7 seconds. In general, allowing the console to crossfade the pan and tilt values for a DL.3 or DL.2 fixture is acceptable. However, extremely slow movements may require the use of Mspeed instead of console crossfades. For a listing of exact MSpeed times, see “Appendix B: MSpeed Conversion Table”. -
Page 203: Projector Control
“DMX_Control Screen” on page 3-27). RGBHV is the factory default. Graphics Engine to Projector Before using DMX to change DL.3 or DL.2 inputs, you must enable the Input from S-Video In (camera Projector Input by DMX option in the menu system (see “Set_Projector... -
Page 204: Using The Internal Projector's Menu
Projector Floor Orientation, Projector Ceiling Orientation, Projector Front Projection and Projector Rear Projection commands map to the Projector’s menu control buttons. 6. Use the projector’s on-screen display as discussed in the projector’s user manual that shipped with your DL.3 fixture. DL.3 Digital Light User Manual... -
Page 205: Chapter 15: Live Video Input And Control
Camera Input” on page 15-185). Other Video Sources A DL.3 fixture can also project other live video sources connected to the fixture’s SDI, RGBHV, or S-Video input ports. Live SDI or S-Video input can then be enhanced and manipulated by the graphics engine. -
Page 206: Live Video Connection Options
Live Video Input and Control Live Video Connection Options The DL.3 fixture has video connectors for RGBHV, VGA and S-Video on its rear panel, as shown in the following figure. including hard drives USB 1 USB 2 100-120 V; 50-60Hz; 7A 200-240 V;... -
Page 207: Serial Device Interface (Sdi)
DL.3s to have the same SDI feed without a switcher/splitter device. • In order for the DL.3 to output its camera through SDI, the S-video relays must be set to internal camera capture (otherwise known as camera feedback). This is necessary because the S-video signal must be routed to the computer. -
Page 208: Camera Focus
= 65535. IR Illuminator The DL.3 fixture is equipped with an illuminator that can output infrared (IR) light. The IR Illuminator parameter controls both the IR illuminator output and the camera’s infrared sensing option. DMX values = 0 – 63 turn the illuminator off and set the camera to sense the visible light spectrum. -
Page 209: Chapter 16: Content Management Application (Cma)
Ethernet network gives you remote control of content, software and configuration management functions. The Content Management Application software that shipped on CD with your DL.3, DL.2 or Axon media server is used to: • Upload and download custom digital content to fixtures •... -
Page 210: Launching The Cma
Installing the CMA on Your Computer You can download the latest version of the application for Windows XP or Mac OS 10.4 based system from the Digital Lighting support section of the High End Systems website www.highend.com/support/digital_lighting/. A download wizard simplifies installation on your personal computer. -
Page 211: Launching The Cma On Axon
Press the Launch CMA button on the local desktop. The application auto- matically finds and identifies the Local Drives including any connected USB drives, the CD/DVD drive as well as other Axon, DL.3 and DL.2 media servers connected to the same Ethernet network. -
Page 212: Fixture Identification
The CMA application’s Management Client Window style user interface provides views of the content and configuration of all DL.3, DL.2 and Axon servers connected to the Ethernet network. You can access options for each view from the tabs at the top of the Management Client Window. -
Page 213: Viewing Server Identification Information
In the following example, six servers have been identified on the network. The right pane contains the following details in a table format. • Server ID number defaults to 1, but can be configured in the CMA or in the DL.3 or DL.2 fixture’s Menu system •... -
Page 214: Client Window Content Organization
Preloaded Stock Content A large library of Stock Media and Stock Objects ships on every DL.3, DL.2 or Axon media server and will also be provided through upgrades from High End Systems. -
Page 215: Media Files
3D Object Files Object files are the 3-D object component files used to build a graphic image. DL.3, DL.2 and Axon protocol supports a combined total of 255 object files displayed in Stock Objects and User Objects folders. As with Stock Media files, the Stock Objects have a fixed DMX value and cannot be edited. -
Page 216: Viewing Server Configuration Data
• DMX is the currently assigned DMX value for the folder. This value can be auto-assigned and edited for User content. See “Editing User Content DMX Values” on page 16-197. • File Count of files in this collection • Date the folder was last modified DL.3 Digital Light User Manual... -
Page 217: Viewing Files
• Date the file was last modified. You can access several options for displaying files in the right pane through the drop down menu or by right clicking in the right pane when files are being displayed. DL.3 Digital Light User Manual Content Management Application (CMA) -
Page 218: Managing User Content
User content folders or all files within a User content folder: 1. Display the User content folders or the files for a single folder in the right pane of the Content Management window and deselect all files or folders. DL.3 Digital Light User Manual... -
Page 219: Editing User Content Dmx Values
• Is unique from other content of it’s type except for zero The following table shows valid and reserved values for User Content. Content Type DMX Values Media Folders (media file collections) Media Files Objects DL.3 Digital Light User Manual Description No Selection 1-40 Default Stock media 41-239 User collections 240-254... -
Page 220: Moving User Content Files And Folders
Between Notes Server(s) Does NOT preserve DMX Values Preserves DMX values and Replaces any previous User Content on destination drive Saves assigned DMX values when creating archive from content on a fixture DL.3 Digital Light User Manual... -
Page 221: Uploading Content From Your Local Drive To A Media Server
You can upload User Content Media files, Media folders and 3D object files from your hard drive to a DL.3, DL.2 or Axon media server, provided they are: • A valid file format (.jpg, .gif, .png, .bmp, .avi, .mpg, .m2v for Media Files; .x for 3D Object files) •... -
Page 222: Archiving User Content
6. Click Next at the bottom of the wizard. This will take you to another screen where you choose where to save and what to name your archive. 7. Click Browse to navigate to where you want to save and name your archive. 8. Click Next. Your archive will then be created. DL.3 Digital Light User Manual... -
Page 223: For Cma Running Mac Os 10.4
Deploying the Content Archive you created restores the user content to a fixture. To replicate this content to other fixtures on the link, use the Clone Content feature (see “Cloning User Content” on page 16-202). DL.3 Digital Light User Manual Content Management Application (CMA) -
Page 224: Cloning User Content
A Clone Content Wizard lets you select one or more servers on the fixture network as the destination for the cloned content. The cloning process erases all destination server(s) user content and replaces it with the selected server’s user content. Stock content is unaffected. DL.3 Digital Light User Manual... -
Page 225: Deleting Content
2. Select a Server in the right pane 3. Select DMX Summary from the drop down menu or the right-click popup list. 4. Press the Create Table button on the screen to build the summary table. DL.3 Digital Light User Manual Content Management Application (CMA) -
Page 226: Upgrading Software
The server software Digital Light and Axon media servers can only be uploaded to fixtures from the CMA. You must first save the latest version of the software from the High End Systems website (www.highend.com) to your hard drive and then use the CMA to upload it to any media server on your link. - Page 227 7. Click Next to continue upgrade. The server will reboot after the upgrading the software. Mac OS X: Upgrading Software To upgrade multiple servers, select multiple fixtures from the All Servers list. DL.3 Digital Light User Manual Content Management Application (CMA)
-
Page 228: Viewing Server Configuration
Fixture ID, various Projector settings, DMX Start Channel, etc. can be modified (configured). All of these settings are also available for DL.3 and DL.2 fixtures through the Digital Light onboard menu system. The CMA also has some additional configuration features that let you: •... -
Page 229: Viewing Individual Fixture Configuration Values
Configuration information is grouped under tabs in the right pane. Fields are provided for all editable configuration values. The number of tabs is determined by the model selected. DL.3 and DL.2 fixtures have four tabs while Axon media servers have two. -
Page 230: Dl.3 And Dl.2 Media Server Configuration Options
Content Management Application (CMA) DL.3 and DL.2 Media Server Configuration Options DL.3 and DL.2 fixtures include configuration options for the internal projector, the lamp, the menu display and motion features. The four tabs are labeled Server, Fixture, Lamp, and Test/Reset. -
Page 231: Fixture Tab
On accesses projector menu to invert the projected image Off reverts to original orientation Select currently installed lens from Standard, Long Throw, Ultra Long Throw, or Wide Angle for DL.3 fixtures. Note: This option is greyed out for DL.2 fixtures. Configuration Value Options... -
Page 232: Projector Diagnostics
On tests Pan and Tilt mechanical functionality Off stops self test On tests Iris mechanical functionality Off stops self test On tests focus mechanical functionality Off stops self test On tests Zoom mechanical functionality Off stops self test DL.3 Digital Light User Manual... -
Page 233: Axon Media Server Configuration Options
Configuration Item Software Firmware Misc Configuration Item Ext S-Video Format Fixture Defaults Reboot Server DL.3 Digital Light User Manual Content Management Application (CMA) Configuration Value Options 1-512 DMX512 or Art-Net 0-16 0-16 Standard protocol designates a DMX channel range of 149... -
Page 234: Display Settings Tab
Configuration Value Options Options in the drop-down lists are automatically populated by the Axon software for the specific display device attached. Configuration Value Options On tests Video Off stops self test DL.3 Digital Light User Manual... -
Page 235: Configuration Example
Axon) All these selections can be made in the Server tab for DL.3, DL.2 and Axon media servers. 1. To view configuration information for a individual server, click on All Servers in the left pane of the CMA window and select the + to view all the servers on the fixture network. - Page 236 DMX Channel Range Protocol Selection Axon Standard Protocol Dual Protocol Single Protocol For more information on selecting a valid start channel, see “Determining a DMX Start Channel” on page 4-38. Last Valid Start Channel DL.3/DL.2 Axon DL.3/DL.2 DL.3 Digital Light User Manual...
-
Page 237: Chapter 17: Maintenance And Troubleshooting
Pan and Tilt Locking The DL.3 fixture is equipped with mechanical pan and tilt locking latches to stabilize the fixture for shipping or servicing. There is a single pan lock position and three tilt lock positions. -
Page 238: Maintaining The Filtering System
When used in a closed or fixed environment where fog or haze is used, we recommend at least a weekly check. • Do not situate DL.3 in areas of high fog density such as directly in front of a fog machine or mineral oil hazer. -
Page 239: Cleaning The Base Housing Filter
4. Slide the top cover back to free it from the front bezel. Inspect the filters: 5. Lift the prefilter away from the filter bracket DL.3 Digital Light User Manual Pre-filter Tilt lock Pull base housing filter away from fixture to clean Maintenance and Troubleshooting... - Page 240 14. Carefully replace the rear bezel, making sure to position (but do not force) the gasket against the lamp cover located on the back of the projector. and Relatch the rear bezel assembly. Place HEPA filter with gasket against plenum Gasket DL.3 Digital Light User Manual...
-
Page 241: Replacing The Lamp
Accessories” on page 1-4. 9. Close the lamp cover and tighten the two lap cover screws. 10. Reconnect to power. DL.3 Digital Light User Manual Maintenance and Troubleshooting 1. Disconnect power before servicing LAMP ACCESS INSTRUCTIONS 2. Lock head in horizontal position Pull Here 3. -
Page 242: Removing The Projector
8. Remove projector by pulling from the rear of the fixture's head, taking care that the Zoom and Focus Wires do not get caught. DL.3 Digital Light User Manual... -
Page 243: Replacing The Lens
CAUTION: To avoid damaging the lens, do not touch glass. Lens installation and replacement should be made by qualified service personnel. Use the following steps to access and replace the DL.3 lens with any of the lens options available for the fixture. Accessing the lens 1. - Page 244 4. Slide the projector (lens first; feet down) back into the DL.3 fixture head. Once fully inside the head of the fixture, pull excess slack from the Zoom & Focus wires out through the front of the fixture's head so that the wires can be reconnected to the head logic card.
-
Page 245: Replacing The Fuse
Equipment surfaces may reach temperatures up to 130° C (266° F). Allow the fixture to cool before handling. The DL.3 has one user-serviceable fuse which controls mains voltage to the fixture. To replace a fuse: 1. Disconnect power to the fixture. If the fixture has been operating, allow the fixture to cool before handling. -
Page 246: Replacing Motor Driver Boards
130° C (266° F). Allow the fixture to cool before handling. The DL.3 fixture is designed with two motor driver boards: 1. The board that controls the motors for the tilt, focus, zoom, and iris functions as well as fans is located in the fixture head. -
Page 247: Replacing Fixture Base Driver Board
8. Ensure that the fixture is on a solid surface. Select Calibrate Motors through the Test_Home menu screen and leave the fixture undisturbed for 10 minutes while calibration occurs. DL.3 Digital Light User Manual Maintenance and Troubleshooting Gasket... -
Page 248: Troubleshooting
This section discusses troubleshooting LED states and general troubleshooting suggestions. Button Shortcut Commands DL.3 fixtures have button commands available for controlling and overriding functionality when you are troubleshooting your fixture. • Holding the [Menu] & [Enter] buttons for more than two seconds disables motion system. -
Page 249: Button Action
Communication Error Filter Missing Error FILTER MISSING ERROR Filter not present. Insert Filter! Service Filter Error FILTER SERVICE ERROR DL.3 Digital Light User Manual Maintenance and Troubleshooting Message Detail PROJ STATUS-COOLING The projector must cool down before it can re-strike the lamp... -
Page 250: System State Leds
Check the Comm cable connections at serial port on the back of projector and at the fixture head card. Make sure lamp is struck Cool fixture and then restrike the lamp Contact High End Systems Customer Support DL.3 Digital Light User Manual... -
Page 251: Board Led States
Board LED States LEDs located on DL.3 fixture boards indicate how the unit is functioning. The following Table lists LED States, and problems they may indicate. Location LED # State Steady Orange Red, Green or OFF Fixture Slow Flashing Green... - Page 252 • Check the Fixture filters (see page 17-217). or colors are unnatural • Is the DL.3 mounted less than 1.4 meters to an object? If so, move the DL.3 farther away to enable it to focus properly. • Make sure the DL.3 is not operating near fog machines, hazers, or mineral oil hazers (see See “Fog Machine Warning”...
-
Page 253: Frequently Asked Questions
Ethernet Cat 5 limit is 100 meters. For longer distances use a router that takes fiber input to Cat 5 output as for typical Ethernet distribution. What is the longest length High End Systems has tested for camera video distribution? High End has tested up to 1000 feet of quality Cat 5 without noticing degradation of signal. - Page 254 CHAPTER 17 Maintenance and Troubleshooting DL.3 Digital Light User Manual...
-
Page 255: Chapter 18: Restoring The System
1. Plug your USB CD or DVD drive, keyboard, and mouse (optional) into one of the external USB ports on the media server. On DL.3 and DL.2 fixtures, you may need to use a USB hub, although this should only be a requirement if you wish to use a mouse. - Page 256 Restoring the System 3. When the fixture boots and the High End Systems logo is seen, press F8 (Asus) or F10 (Intel) to enter the boot menu for the respective motherboard. 4. Select the appropriate boot device and when you see “Hit any key to boot from CD…”, press a key on your keyboard.
- Page 257 CHAPTER 18 Restoring the System 8. Allow the restore to run. This will take between 10-30 minutes depending on the speed of your USB drive. Status will be displayed throughout the restore. DL.3 Digital Light User Manual...
- Page 258 NOTE: If you encounter an error, press the Return to Main Menu button and start the recovery process again. An error on the second attempt may indicate a hard drive failure or damaged DVD. In that case, contact High End Systems Technical Support at www.highend.com.. DL.3 Digital Light User Manual...
-
Page 259: Appendix A: Dmx Protocol
Appendix A: DMX Protocol DL.3 and DL.2 Digital Lights and Axon Media Servers utilize the same DMX protocol except that DL.3 and DL.2 fixtures include channels for motion and camera control. This table describes the Standard, Dual and Single Protocol. - Page 260 Camera Routed to SDI Output (100) is available only in DL.3 fixtures. SDI Input Routed to Capture Card (100) feature is available only in DL.3 fixtures. Reserved To prevent inadvertent triggering, some Control Function options won’t activate until the value has been held for a period of time.
- Page 261 Freeze Frame ON, B&W ON Red gain adjustment (Requires White Balance Red Gain Mode = 128-191) Blue Gain adjustment (Requires White Balance Blue Gain Mode = 128-191) DL.3 Digital Light User Manual Description 65535 0-511 65535 64-127 128-255 50-100 64-95...
- Page 262 RGB Invert & Swap to GBR. Mod1 = red to inverted green, Mod2 = green to inverted blue, Mod3 = blue to inverted red Description Global Functions Global Effects Value Default dec. dec. 0-255 0-100 DL.3 Digital Light User Manual...
- Page 263 Color DeConverge Mod1= Moves red up, Mod2 = Moves green down and right, Mod3 = Moves blue down and left Horizontal Mirror, Mod1 = mirror center, Mod2 and Mod3 not used DL.3 Digital Light User Manual Description DMX Protocol Value Default dec.
- Page 264 Chroma Shift. Mod1 = horizontal shift, Mod2 = vertical shift, Mod3 = Scale ShakeNBake. Mod1 = horizontal shake, Mod2 = vertical shake, Mod3 = Scale Slats, Vertical. Mod1 = number, Mod2 = displacement, Mod3 = fade Description DL.3 Digital Light User Manual Value Default dec. dec.
- Page 265 Mod2=grid portion displayed, Mod3=edge blend Spherical mapping, Outside. Mod1=logitude angle, Mod2=latitude angle, Mod3-center latitude. Spherical mapping, Inside. Mod1=logitude angle, Mod2=latitude angle, Mod3-center latitude. Mattes. Mod1=Mode, Mod2=Matte Select, Mod3=texture source DL.3 Digital Light User Manual Description 64-79 83-127 DMX Protocol Value Default dec.
- Page 266 Global Effect Mode 1 and Effect Mode 2 Global Effect 1 on page 108, and specific effect options listed Modifier 3 alphabetically in Chapter 13. Description 145-254 0-255 0-255 0-255 DL.3 Digital Light User Manual Value Default dec. dec. 0-100 0-100 0-100...
- Page 267 RGB Invert & Swap to BRG. Mod1 = red to inverted blue, Mod2 = green to inverted red, Mod3 = blue to inverted green Edge Detect Color. Mod1 =horizontal size, Mod2 = vertical search size, Mod3 =comparison threshold DL.3 Digital Light User Manual Description DMX Protocol Value Default dec.
- Page 268 Horizontal Mirror, Mod1 = mirror center, Mod2 and Mod3 not used RGB Swap to BGR Mod1 = red, Mod2 = green, Mod3 = blue RGB Swap to RBG Mod1 = red, Mod2 = green, Mod3 = blue Description DL.3 Digital Light User Manual Value Default dec. dec.
- Page 269 Slats, Vertical. Mod1 = number, Mod2 = displacement, Mod3 = fade Slats, Horizontal. Mod1 = number, Mod2 = displacement, Mod3 = fade Reserved. Defaults to effect mode = 0 DL.3 Digital Light User Manual Description 64-79 DMX Protocol Value Default dec.
- Page 270 Spherical Mapping, Outside. Mod1=logitude angle, Mod2=latitude angle, Mod3-center latitude. Spherical Mapping, Inside. Mod1=logitude angle, Mod2=latitude angle, Mod3-center latitude. Mattes. Mod1=Mode, Mod2=Matte Select, Mod3=texture source Reserved. Defaults to effect 0 Description 83-127 145-254 DL.3 Digital Light User Manual Value Default dec. dec.
- Page 271 For more about Modifier functionality, see Global Effect Mode 1 and Effect Mode 2 on page 108, Global Effect 2 and specific effect options listed alphabetically in Modifier 3 Chapter 13. DL.3 Digital Light User Manual Description 0-255 0-255 0-255 DMX Protocol...
- Page 272 Strobing Masks Periodic strobe, round “iris” mask closing from outside in. Round iris closing from inside out Rectangle closing from outside in Rectangle closing from inside out Description Global Mask DL.3 Digital Light User Manual Value Default dec. dec. 31-127...
- Page 273 Fade, Bottom hard edge (0) to maximum fade (255) Adjusts the image’s left edge diffusion from hard Image Edge Fade, Left edge (0) to maximum fade (255) DL.3 Digital Light User Manual Description Global Image Edge Fade DMX Protocol Value Default dec.
- Page 274 0-255 0-100 0-255 0-100 0-255 0-100 0-255 0-100 0-255 0-100 0-255 0-100 0-255 0-100 0-255 0-100 0-255 0-100 0-255 0-100 12-255 32768 32768 50 65535 32768 32768 50 65535 30260 49 32768 65535 DL.3 Digital Light User Manual...
- Page 275 Reserved On-screen Frame Statistics (Channel 55 = 255) Text color = gray Text color = red Text color = blue Text color = green DL.3 Digital Light User Manual Description 1-119 120-130 131-144 145-149 150-251...
- Page 276 Graphic 1 Content Definition SDI available with DL.3 only. Other Media file values are ignored. Value Default dec. dec. 0-255 0-100 2-149 151-255 2-40 42-239 240-254 2-255 0-100 65535 0-100 65535 100 65535 10-255 3-100 DL.3 Digital Light User Manual...
- Page 277 Mod2 controls saturation. Gray maker. Mod1 compresses colors to shades of gray. Mod2 adjusts contrast Gray maker2. Always gray. Mod1 = brightness, Mod2 = contrast DL.3 Digital Light User Manual Description Graphic 1 Synchronization Graphic 1 Effects DMX Protocol...
- Page 278 For more about Modifier parameter functionality, Visual Mode see, Visual Mode on page 80 and Visual Mode Modifier 2 Options on page 82. Description 19-254 0-255 0-255 DL.3 Digital Light User Manual Value Default dec. dec. 0-100 0-100...
- Page 279 Mod1 = red to inverted blue, Mod2 = green to inverted red, Mod3 = blue to inverted green Edge Detect Color. Mod1=horizontal size, Mod2 = vertical search size, Mod3=comparison threshold DL.3 Digital Light User Manual Description DMX Protocol Value Default dec.
- Page 280 Horizontal Mirror, Mod1 = mirror center, Mod2 and Mod3 not used RGB Swap to BGR Mod1 = red, Mod2 = green, Mod3 = blue RGB Swap to RBG Mod1 = red, Mod2 = green, Mod3 = blue Description DL.3 Digital Light User Manual Value Default dec. dec.
- Page 281 Chroma Shift. Mod1 = horizontal shift, Mod2 = vertical shift, Mod3 = Scale ShakeNBake. Mod1 = horizontal shake, Mod2 = vertical shake, Mod3 = Scale Slats, Vertical. Mod1 = number, Mod2 = displacement, Mod3 = fade DL.3 Digital Light User Manual Description DMX Protocol Value Default dec.
- Page 282 Mod3=horizontal size adjustment. (Defaults to 0 and is ignored unless Spherical Mapping is selected as a Global Effect option) Pan and Scan. Mod1 = horizontal position, Mod2 = vertical position, Mod3 = Zoom Description 75-79 83-252 DL.3 Digital Light User Manual Value Default dec. dec.
- Page 283 Modifier parameter functionality, see Effect 1 Mode and Effect 2 Mode on page 100, and Effect Mode 1 Modifier 3 specific effect options listed alphabetically in Chapter 13. DL.3 Digital Light User Manual Description 0-255 0-255 0-255 DMX Protocol...
- Page 284 RGB Invert & Swap to BRG Mod1 = red to inverted blue, Mod2 = green to inverted red, Mod3 = blue to inverted green Edge Detect Color. Mod1=horizontal size, Mod2= vertical search size, Mod3=comparison threshold Description DL.3 Digital Light User Manual Value Default dec. dec.
- Page 285 Mod3 not used RGB Swap to BGR Mod1 = red, Mod2 = green, Mod3 = blue RGB Swap to RBG Mod1 = red, Mod2 = green, Mod3 = blue DL.3 Digital Light User Manual Description DMX Protocol Value Default dec.
- Page 286 Chroma Shift. Mod1 = horizontal shift, Mod2 = vertical shift, Mod3 = Scale ShakeNBake. Mod1 = horizontal shake, Mod2 = vertical shake, Mod3 = Scale Slats, Vertical. Mod1 = number, Mod2 = displacement, Mod3 = fade Description DL.3 Digital Light User Manual Value Default dec. dec.
- Page 287 Mod3=horizontal size adjustment. (Defaults to 0 and is ignored unless Spherical Mapping is selected as a Global Effect option) Pan and Scan. Mod1 = horizontal position, Mod2 = vertical position, Mod3 = Zoom DL.3 Digital Light User Manual Description 75-79 83-252 DMX Protocol...
- Page 288 Modifier parameter functionality, see Effect 1 Mode and Effect 2 Mode on page 100, and Effect Mode 2 Modifier 3 specific effect options listed alphabetically in Chapter 13. Description 0-255 0-255 0-255 DL.3 Digital Light User Manual Value Default dec. dec. 0-100 0-100 0-100...
- Page 289 Rotates the object clockwise around Z-axis in adjustment) steps to 720 degrees absolute Continuous rotation stop Continuous variable-speed clockwise object rotation around Z axis (slow to fast) DL.3 Digital Light User Manual Description Graphic 1 Rotation DMX Protocol Value Default dec.
- Page 290 1-49 129-254 51-99 1-127 1-49 129-254 51-99 1-127 1-49 129-254 51-99 0-36767 0-49 32768 32768 50 36769- 51-100 65535 0-36767 0-49 32768 32768 50 36769- 51-100 65535 0-36767 0-49 32768 32768 50 36769- 51-100 65535 DL.3 Digital Light User Manual...
- Page 291 Scrub (Display) the selected Out Frame Scrub (Display) the selected In Frame with statistics Scrub (Display) the selected Out Frame with statistics Reserved DL.3 Digital Light User Manual Description Graphic 2 Functions (Standard, Dual) Graphic 2 Content Definition SDI available with DL.3 only.
- Page 292 Gray maker2. Always gray. Mod1 = brightness, Mod2 = contrast Posterizer. Mod1 reduces color detail. Mod2 adjusts contrast. Description Graphic 2 Synchronization Graphic 2 Effects Value Default dec. dec. 1-127 1-49 129-255 51-100 16- 255 . . . DL.3 Digital Light User Manual...
- Page 293 For more about Modifier parameter functionality, Visual Mode see, Visual Mode on page 80 and Visual Mode Modifier 2 Options on page 82. DL.3 Digital Light User Manual Description 19-254 0-255 0-255 DMX Protocol...
- Page 294 RGB Invert & Swap to BRG Mod1 = red to inverted blue, Mod2 = green to inverted red, Mod3 = blue to inverted green Edge Detect Color. Mod1=horizontal size, Mod2= vertical search size, Mod3=comparison threshold Description DL.3 Digital Light User Manual Value Default dec. dec.
- Page 295 Mod3 not used RGB Swap to BGR Mod1 = red, Mod2 = green, Mod3 = blue RGB Swap to RBG Mod1 = red, Mod2 = green, Mod3 = blue DL.3 Digital Light User Manual Description DMX Protocol Value Default dec.
- Page 296 Chroma Shift. Mod1 = horizontal shift, Mod2 = vertical shift, Mod3 = Scale ShakeNBake. Mod1 = horizontal shake, Mod2 = vertical shift, Mod3 = Scale Slats, Vertical. Mod1 = number, Mod2 = displacement, Mod3 = fade Description DL.3 Digital Light User Manual Value Default dec. dec.
- Page 297 Mod3=horizontal size adjustment. (Defaults to 0 and is ignored unless Spherical Mapping is selected as a Global Effect option) Pan and Scan. Mod1 = horizontal position, Mod2 = vertical position, Mod3 = Zoom DL.3 Digital Light User Manual Description 75-79 83-252 DMX Protocol...
- Page 298 Modifier parameter functionality, see Effect 1 Mode and Effect 2 Mode on page 100, and Effect Mode 1 Modifier 3 specific effect options listed alphabetically in Chapter 13. Description 0-255 0-255 0-255 DL.3 Digital Light User Manual Value Default dec. dec. 0-100 0-100 0-100...
- Page 299 Mod3 = blue to inverted green Edge Detect Color. Mod1=horizontal size, Mod2 = vertical search size, Mod3=comparison threshold Edge Detect B/W Mod1=horizontal size, Mod2 = vertical search size, Mod3=comparison threshold DL.3 Digital Light User Manual Description DMX Protocol Value Default dec.
- Page 300 Horizontal Mirror, Mod1 = mirror center, Mod2 and Mod3 not used RGB Swap to RBG Mod1 = red, Mod2 = green, Mod3 = blue RGB Swap to GRB Mod1 = red, Mod2 = green, Mod3 = blue Description DL.3 Digital Light User Manual Value Default dec. dec.
- Page 301 ShakeNBake. Mod1 = horizontal shake, Mod2 = vertical shift, Mod3 = Scale Slats, Vertical. Mod1 = number, Mod2 = displacement, Mod3 = fade Slats, Horizontal. Mod1 = number, Mod2 = displacement, Mod3 = fade DL.3 Digital Light User Manual Description DMX Protocol Value Default dec.
- Page 302 Mod3=horizontal size adjustment. (Defaults to 0 and is ignored unless Spherical Mapping is selected as a Global Effect option) Pan and Scan. Mod1 = horizontal position, Mod2 = vertical position, Mod3 = Zoom Description 75-79 83-252 DL.3 Digital Light User Manual Value Default dec. dec.
- Page 303 Modifier parameter functionality, see Effect 1 Mode and Effect 2 Mode on page 100, and Effect Mode 2 Modifier 3 specific effect options listed alphabetically in Chapter 13. DL.3 Digital Light User Manual Description 0-255 0-255 0-255 DMX Protocol...
- Page 304 49154- 76-100 65535 0-24 16382 16383 16384- 26-49 32767 32768 32768 50 32769- 51-74 49151 49152 49154- 76-100 65535 0-24 16382 16383 16384- 26-49 32767 32768 32768 50 32769- 51-74 49151 49152 49154- 76-100 65535 DL.3 Digital Light User Manual...
- Page 305 Moves object nearer from center of display Centers object along Z axis in display Z-Position Moves object back along Z axis at center of display DL.3 Digital Light User Manual Description Graphic 2 Scaling Graphic 2 Position DMX Protocol Value Default dec.
- Page 306 (Standard Protocol) Graphic 3 Content Definition SDI available with DL.3 only. Other Media file values are ignored. Value Default dec. dec. 0-255 0-100 2-149 151-255 2-40 42-239 240-254 2-255 0-100 65535 0-100 65535 100 65535 10-255 DL.3 Digital Light User Manual...
- Page 307 Mod2 controls saturation. Gray maker. Mod1 compresses colors to shades of gray. Mod2 adjusts contrast Gray maker2. Always gray. Mod1 = brightness, Mod2 = contrast DL.3 Digital Light User Manual Description Graphic 3 Synchronization Graphic 3 Effects DMX Protocol...
- Page 308 For more about Modifier parameter functionality, Visual Mode 147 126 see, Visual Mode on page 80 and Visual Mode Modifier 2 Options on page 82. Description 19-254 0-255 0-255 DL.3 Digital Light User Manual Value Default dec. dec. 0-100 0-100...
- Page 309 Mod1 = red to inverted blue, Mod2 = green to inverted red, Mod3 = blue to inverted green Edge Detect Color. Mod1=horizontal size, Mod2 = vertical search size, Mod3=comparison threshold DL.3 Digital Light User Manual Description DMX Protocol Value Default dec.
- Page 310 Horizontal Mirror, Mod1 = mirror center, Mod2 and Mod3 not used RGB Swap to BGR Mod1 = red, Mod2 = green, Mod3 = blue RGB Swap to RBG Mod1 = red, Mod2 = green, Mod3 = blue Description DL.3 Digital Light User Manual Value Default dec. dec.
- Page 311 Chroma Shift. Mod1 = horizontal shift, Mod2 = vertical shift, Mod3 = Scale ShakeNBake. Mod1 = horizontal shake, Mod2 = vertical shift, Mod3 = Scale Slats, Vertical. Mod1 = number, Mod2 = displacement, Mod3 = fade DL.3 Digital Light User Manual Description DMX Protocol Value Default dec.
- Page 312 Mod3=horizontal size adjustment. (Defaults to 0 and is ignored unless Spherical Mapping is selected as a Global Effect option) Pan and Scan. Mod1 = horizontal position, Mod2 = vertical position, Mod3 = Zoom Description 75-79 83-252 DL.3 Digital Light User Manual Value Default dec. dec.
- Page 313 Modifier parameter functionality, see Effect 1 Mode and Effect 2 Mode on page 100, and Effect Mode 1 151 130 Modifier 3 specific effect options listed alphabetically in Chapter 13. DL.3 Digital Light User Manual Description 0-255 0-255 0-255 DMX Protocol Value Default dec.
- Page 314 RGB Invert & Swap to BRG Mod1 = red to inverted blue, Mod2 = green to inverted red, Mod3 = blue to inverted green Edge Detect ColorMod1=horizontal size, Mod2 = vertical search size, Mod3=comparison threshold Description DL.3 Digital Light User Manual Value Default dec. dec.
- Page 315 Mod3 not used RGB Swap to BGR Mod1 = red, Mod2 = green, Mod3 = blue RGB Swap to RBG Mod1 = red, Mod2 = green, Mod3 = blue DL.3 Digital Light User Manual Description DMX Protocol Value Default dec.
- Page 316 Chroma Shift. Mod1 = horizontal shift, Mod2 = vertical shift, Mod3 = Scale ShakeNBake. Mod1 = horizontal shake, Mod2 = vertical shift, Mod3 = Scale Slats, Vertical. Mod1 = number, Mod2 = displacement, Mod3 = fade Description DL.3 Digital Light User Manual Value Default dec. dec.
- Page 317 Mod3=horizontal size adjustment. (Defaults to 0 and is ignored unless Spherical Mapping is selected as a Global Effect option) Pan and Scan. Mod1 = horizontal position, Mod2 = vertical position, Mod3 = Zoom DL.3 Digital Light User Manual Description 75-79 83-252 DMX Protocol...
- Page 318 1 Mode and Effect 2 Mode on page 100, and Effect Mode 2 155 134 specific effect options listed alphabetically in Modifier 3 Chapter 13. Description 0-255 0-255 0-255 DL.3 Digital Light User Manual Value Default dec. dec. 0-100 0-100 0-100...
- Page 319 Rotates the object clockwise around Z-axis in adjustment) steps to 720 degrees absolute Continuous rotation stop Continuous variable-speed clockwise object rotation around Z axis (slow to fast) DL.3 Digital Light User Manual Description Graphic 3 Rotation DMX Protocol Value Default dec.
- Page 320 1-49 129-254 51-99 1-127 1-49 129-254 51-99 1-127 1-49 129-254 51-99 0-36767 0-49 32768 32768 50 36769- 51-100 65535 0-36767 0-49 32768 32768 50 36769- 51-100 65535 0-36767 0-49 32768 32768 50 36769- 51-100 65535 DL.3 Digital Light User Manual...
-
Page 321: Appendix B: Mspeed Conversion Table
1.60 1.75 1.92 2.09 2.27 2.46 2.66 2.86 3.07 3.29 3.52 3.76 4.00 4.25 4.52 4.78 5.06 5.34 DL.3 Digital Light User Manual Time Value Value Value (sec.) (dec.) (hex) 5.64 5.94 6.25 6.56 6.89 7.22 7.56 7.91 8.27 8.63 9.00... - Page 322 194.16 195.92 197.70 199.48 201.28 203.08 204.88 206.70 208.52 210.36 212.19 214.04 215.90 217.76 219.63 221.51 223.40 225.30 227.20 229.11 231.03 232.96 234.90 236.84 238.79 240.75 242.72 244.70 246.68 248.68 250.68 246.68 248.68 250.68 252.68 DL.3 Digital Light User Manual...
-
Page 323: Appendix C: Custom User Content Preparing Custom Content
DL.3 graphics engine software. Preparing Custom Content For the highest quality rendering and playback on a DL.3 fixture or Axon media server, use the following steps: 1. Commission or Design High Quality (Visually Clean or Never-Compressed) Video, at least 640 x 480 in Photo jpeg 98%-100% or Animation Non Compressed (best) format. -
Page 324: Creating 3-D Objects
Managing Custom Content The Content Management Application running on your own computer as a client to DL.3 media servers via Ethernet manages any User Content you create. All Stock and User content can be viewed and refreshed but the CMA client gives you additional control over other aspects of your custom content. -
Page 325: Mechanical
Weight (Fixture + Roadcase): 118 kg (260lbs) 254 mm 10.0 in 254 mm 10.0 in 594 mm 23.4 in 577 mm 22.7 in DL.3 Digital Light User Manual 353 mm 13.9 in 556 mm 22.3 in 597mm 23.5 in 238 mm 9.3 in Figure 1: DL.3 Physical Dimensions... -
Page 326: Electrical
Display technology: 1.3” LCD w/MLA, 3 panels Panel resolution: 1024 x 768 dots Zoom Lens Throw Ratio: 1.8 - 2.4:1 (standard) Long Zoom Lens Throw Ratio: 2.4-4.3:1 (optional accessory) Ultra Long Zoom Lens Throw Ratio: 4.3-6.0:1 (optional accessory) DL.3 Digital Light User Manual... -
Page 327: Peripheral/Network Connectors
Two 4-conductor twisted pairs plus a shield • Maximum capacitance between conductors: 30 pF/ft • Maximum capacitance between conductor and shield: 55 pF/ft • Maximum resistance: 20 Ohm/100 ft • Nominal impedance: 100–140 Ohm DL.3 Digital Light User Manual DL.3 Specifications... - Page 328 2 and 3. Grounding lug (inside XLR shell) XLR shell positive positive (data true)* (data true)* negative (data complement)* Common (cable shield) negative (data positive complement) (data true) Female XLR Connector DL.3 Digital Light User Manual...
-
Page 329: Appendix E: Safety Information
Class I equipment. This equipment must be earthed. Equipment suitable for dry locations only. Do not expose this equipment to rain or moisture. Refer servicing to qualified personnel; no user serviceable parts inside. DL.3 Digital Light User Manual , or coloured green or... -
Page 330: Appendice E: Importantes Informations Sur La Sécurité
À l'intérieur de l'équipement il n'y a pas de pièces remplaçables par l' utilisateur. Confiez l'entretien à un personnel qualifié. Equipement de Classe I. Cet équipement doit être mis à la terre. DL.3 Digital Light User Manual... -
Page 331: Anhang E: Wichtige Hinweise Für Ihre Sicherheit
Diese Geräte sind nur zum Einbau in trockenen Lagen bestimmt und müssen vor Regen und Feuchtigkeit geschützt werden. Servicearbeiten sollten nur von Fachpersonal ausgeführt werden. Das Gerät enthält keine wartungsbedürftigen Teile. Dieses Gerät gehört zur Klasse I. Dieses Gerät muß geerdet werden. DL.3 Digital Light User Manual Safety Information... -
Page 332: Apéndice E: Información Importante De Seguridad
Este equipo esta disenado para usarce en lugares secos no lo exponga a la lluvia o humedad. Derive el servicio de reparación de este equipo al personal calificado. El interior no contiene repuestos que puedan ser reparados por el usuario. Equipo de Clase I. Este equipo debe conectarse a tierra. DL.3 Digital Light User Manual... -
Page 333: Appendice E: Importanti Informazioni Di Sicurezza
Questa apparecchiatura e' da collegarsi ad un circuito con una protezione da sovraccarico massima di 20 ampere. Vigtig Sikkerhedsinformation Advarsel: Beskyttelse mod elektrisk chock. VIGTIGT! LEDEREN MED GUL/GROEN ISOLATION MAA KUN TILSLUTTES KLEMME MAERKET ELLER DL.3 Digital Light User Manual Safety Information... - Page 334 APPENDIX E Safety Information DL.3 Digital Light User Manual...
Need help?
Do you have a question about the DL.3 and is the answer not in the manual?
Questions and answers