FLIR SR-100 Installation And Operation Manual
Sr-series, thermal camera
Hide thumbs
Also See for SR-100:
- Installation and operation manual (21 pages) ,
- Brochure & specs (5 pages) ,
- Installation and operation manual (40 pages)
Table of Contents
Advertisement
T
h
e
T
h
e
I
n
s
t
a
l
l
a
t
i
I
n
s
t
a
l
l
a
t
FLIR Systems, Inc.
70 Castilian Drive
Goleta, CA 93117
Phone: 888.747.FLIR (888.747.3547)
International: +1.805.964.9797
http:// www.flir.com
427-0014-00-10 Revision 210
S
R
-
S
S
R
-
S
r
m
a
l
r
m
a
l
o
n
a
n
d
O
i
o
n
a
n
d
O
SR-100
SR-35
e
r
i
e
s
e
r
i
e
s
C
a
m
e
C
a
m
p
e
r
a
t
i
o
n
p
e
r
a
t
i
o
n
Camera Models
SR-100P
SR-19
Copyright © 2008 FLIR Systems, Inc.
r
a
e
r
a
M
a
n
u
a
l
M
a
n
u
a
l
SR-50
VSR-6
1
Advertisement
Table of Contents

Related Manuals for FLIR SR-100


Summary of Contents for FLIR SR-100
- Page 1 FLIR Systems, Inc. 70 Castilian Drive Camera Models Goleta, CA 93117 SR-100 SR-100P SR-50 Phone: 888.747.FLIR (888.747.3547) SR-35 SR-19 VSR-6 International: +1.805.964.9797 http:// www.flir.com 427-0014-00-10 Revision 210 Copyright © 2008 FLIR Systems, Inc.
-
Page 2: Flir Systems Inc
COPYRIGHT Copyright © FLIR Systems, Inc. All rights reserved. This publication, or any parts thereof, may not be reproduced in any form without the express written permission of FLIR Systems, Inc. -
Page 3: Table Of Contents
7.0 OPERATING THE SR-SERIES THERMAL CAMERA........ 25 Advantages of Thermal Imaging............... 25 Thermal Imaging....................25 Configuration and Control................. 26 Pelco Keyboard Control (SR-100 and SR-100P only) ........27 Flat Field Correction (FFC) ................27 8.0 CARING FOR YOUR SR-SERIES THERMAL CAMERA ......28 Temperature ..................... 28 Maintenance ..................... -
Page 4: Revision 210 Copyright © 2008 Flir Systems, Inc
10.0 KBD300 COMMANDS (SR-100, SR-100P) .......... 36 11.0 SR-100 & SR-100P CONTROL USING TVIS-7 USER INTERFACE ... 37 12.0 REFERENCES..................44 427-0014-00-10 Revision 210 Copyright © 2008 FLIR Systems, Inc. - Page 5 Figure 3-1: Rear view of SR-Series camera ................12 Figure 3-2: Earth Ground Connection..................13 Figure 3-3: Serial Communications Options ................15 Figure 4-1: SR-100 Connection Terminal ...................17 Figure 4-2: Screw Terminal Connector ..................18 Figure 5-1: SR-100P with Sun Shroud..................19 Figure 5-2: Mating connector as seen from end of cable............20 Figure 5-3: SR-100P Enclosure Rear ..................21...
-
Page 6: Figure 1-1: Thermal Image From Sr-Series Camera
Figure 1-1: Thermal image from SR-Series camera 427-0014-00-10 Revision 210 Copyright © 2008 FLIR Systems, Inc. -
Page 7: Warnings And Cautions
Check the laws in your local region before using this product for surveillance purposes. Support If you have questions that are not covered in this manual, or need service, contact FLIR Customer Support at (805) 964-9797 for additional information prior to returning your SR-Series Thermal Camera. -
Page 8: Introduction
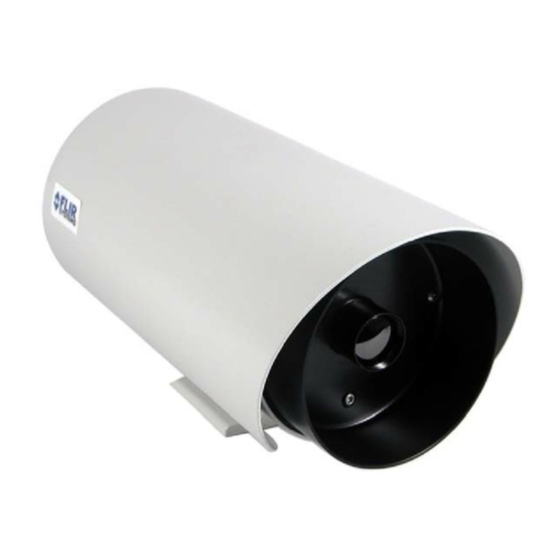
SR-100 The 7° horizontal field of view of the SR-100 provides long range surveillance with high visual acuity of distant targets. The camera features a motorized lens for adjustable focus. Like all SR- series cameras, the SR-100 can be used on a fixed mount or pan/tilt platform and provides crisp, clear thermal imagery in total darkness, light fog or smoke. -
Page 9: Serial Remote Control
The SR-100P camera features a pressurized enclosure for added environmental protection and the same focal length as the SR-100 camera (100mm, 7° FOV). This camera has a sealed and pressurized outdoor enclosure that is designed to protect the camera and lens components in adverse environmental conditions. -
Page 10: Camera Enclosures
Users can control the camera through a Windows®-based graphical user interface. Users can also control the SR-100 and SR-100P cameras with devices that support the Pelco® D protocol. Either method allows the user to operate the following functions or features: •... -
Page 11: Package Contents
Refer to the Shipping Check List that is shipped with each camera for a description of the parts and components that are included with the camera. If there is any discrepancy between the list and the contents of your shipment, please contact FLIR Systems Customer Support immediately using the contact information at the front of this manual. -
Page 12: Installation
If you have a question regarding installation or operation of your SR-Series camera, contact FLIR Systems, Inc Customer Support, using the contact information at the front of this manual. Check out our training web site (http://www.flir.com/training/) to get information on courses offered and to learn how you can become a FLIR-authorized Installer. -
Page 13: Ground Connection
Note: a ground connection to the exterior of the camera (for example, to the mounting foot) is insufficient. When the camera is shipped from FLIR, an internal ground wire (green) connects the interface board to the Earth Ground Lug, located on the inside of the rear of the enclosure . -
Page 14: Input Power
PC or laptop running the appropriate graphical user interface (GUI) software, which is included with the camera or downloaded from the FLIR website. For the SR-100 and SR-100P cameras, the software is known as “TVIS-7 User Interface” (refer to section 11.0 SR- 100 &... -
Page 15: Sealed Cable Glands
Leave the glands loosened until the cable installation has been completed. 427-0014-00-10 Revision 210 Copyright © 2008 FLIR Systems, Inc. -
Page 16: Analog Video Output
3.7 Camera Mounting Mounting the SR-Series camera is accomplished using the ¼x20 tripod mount holes on the underside of the enclosure foot. FLIR Systems recommends using the supplied hardware. The dimensions of the camera mounting foot are provided in the section titled... -
Page 17: Sr-100 Installation
(using the two hex screws). The front panel does not need to be removed. An example of the SR-100 with rear panel removed is shown in Figure 4-1. Caution! Proper ESD protocol should be followed while working inside the unit. -
Page 18: Figure 4-2: Screw Terminal Connector
6. Connect the cable to the BNC bulkhead connector on the rear of the SR-100. 7. Connect the External Earth Ground lead to the Earth Ground Lug on the inside of the rear of the enclosure (refer to Figure 3-2: Earth Ground Connection) The Internal Earth Ground connection should already be connected to the Earth Ground Lug. -
Page 19: Sr-100P Installation
(white and green) with terminal lugs. Attach one ground here, as shown, and also attach the Earth Ground connection here (not shown). The other ground should be attached to the connector shell, as shown here. 427-0014-00-10 Revision 210 Copyright © 2008 FLIR Systems, Inc. -
Page 20: Figure 5-2: Mating Connector As Seen From End Of Cable
Tied to pin G RS422 TX- Camera transmit RS422 TX+ Camera transmit RS422 RX+ Camera receive RS422RX- Camera receive AC NEUTRAL For enclosure heaters Not Connected Not Connected Table 3: SR-100P Connector pin designations 427-0014-00-10 Revision 210 Copyright © 2008 FLIR Systems, Inc. -
Page 21: Figure 5-3: Sr-100P Enclosure Rear
Figure 5-3: SR-100P Enclosure Rear 427-0014-00-10 Revision 210 Copyright © 2008 FLIR Systems, Inc. -
Page 22: Vsr-6, Sr-19, Sr35, Sr-50 Installation
DIP switches. Note: The SR-Series cameras come pre-configured for either RS- 232 or RS-422 communication from the factory and, with the exception of the SR-100 and SR- 100P models, the installer may change the protocol via a DIP switch . -
Page 23: Dip Switch Settings
Figure 6-3: SR-Series Connections (VSR-6, SR-19, SR-35, and SR-50). The power and serial communication leads attach to the detachable connector according to Table 4: Power and Serial Pin Designations. 427-0014-00-10 Revision 210 Copyright © 2008 FLIR Systems, Inc. -
Page 24: Figure 6-3: Sr-Series Connections (Vsr-6, Sr-19, Sr-35, And Sr-50)
Figure 3-2: Earth Ground Connection Table 4: Power and Serial Pin Designations BNC connector for video output Ground lug Power and serial connections Figure 6-3: SR-Series Connections (VSR-6, SR-19, SR-35, and SR-50) 427-0014-00-10 Revision 210 Copyright © 2008 FLIR Systems, Inc. -
Page 25: Figure 6-4: Tongue And Groove Alignment
7. Eliminate almost all of cable slack inside the enclosure. Now tighten the cable glands on the rear of the enclosure to create an appropriate seal. 427-0014-00-10 Revision 210 Copyright © 2008 FLIR Systems, Inc. -
Page 26: Operating The Sr-Series Thermal Camera
BNC cable for monitoring output video. Optionally, a serial cable can be connected to allow control of the camera settings and focus (focus control available on SR-100 and SR-100P only, all other cameras are fixed focus at hyperfocal distance). -
Page 27: Configuration And Control
The camera automatically optimizes the image to provide you with the best contrast in most conditions. FLIR Systems, Inc. offers a comprehensive selection of training courses to help you to get the best performance and value from your thermal imaging camera. You can find out more at the FLIR training web page: http://www.flir.com/training. -
Page 28: Pelco Keyboard Control (Sr-100 And Sr-100P Only)
(the Pelco KBD300A operates at 2400 baud only). The correct Pelco device ID (also known as Pelco address) must be used, and by default the FLIR camera also responds to device ID 99. Both the baud rate and the Pelco address may be changed using the TVIS-7 User Interface GUI. -
Page 29: Caring For Your Sr-Series Thermal Camera
This lens is designed for the harsh outdoor environment and has a coating for durability, but may require occasional cleaning. FLIR Systems Inc. suggests that you clean the lens when image quality degradation is noticed or excessive contaminant build-up is seen on the lens. -
Page 30: Troubleshooting Problems
(indoor or outdoor). Image out of focus The SR-100 and SR-100P have an electronically controlled focus mechanism for use during ongoing operation. This focus mechanism is controlled through the serial interface. - Page 31 By design, the camera image will freeze momentarily on a periodic basis during the Flat Field Correction (FFC) cycle. It is possible to change the interval used for FFC; refer to section 7.5 Flat Field Correction (FFC). 427-0014-00-10 Revision 210 Copyright © 2008 FLIR Systems, Inc.
-
Page 32: Sr-Series Camera Specifications
User Interface GUI) Connector Screw terminals (accepts tinned wire leads) 16-pin mating Style connector Note: These specifications are subject to change without notice. Additional SR-100P specifications provided in section 9.2 SR-100P Specifications. 427-0014-00-10 Revision 210 Copyright © 2008 FLIR Systems, Inc. -
Page 33: Sr-Series Camera Dimensions
10.5” (26.7) 15” (38.14) 18” (45.7) Width 5.0” (12.7) 5.0” (12.7) 4.5” (11.4) Height 5.68” (14.4) 5.68” (14.4) 5.5” (13.9) Note: Values in parentheses are in centimeters, all others in inches. 427-0014-00-10 Revision 210 Copyright © 2008 FLIR Systems, Inc. -
Page 34: Sr-100P Specifications
Prevents over pressurization of enclosure Enclosure Mounting Adjustable cradle secured with stainless steel bands Humidity Up to 100% relative humidity. Standard Schraeder and pressure relief valves provide positive internal pressure with dry nitrogen 427-0014-00-10 Revision 210 Copyright © 2008 FLIR Systems, Inc. -
Page 35: Sr-100P Dimensions
Note: the sun shield should always be installed. See below for dimensions including the sun shield. Figure 9-4. SR-100P Dimensions without Sun Shroud 20” Figure 9-5. SR-100P Length with Sun Shroud 427-0014-00-10 Revision 210 Copyright © 2008 FLIR Systems, Inc. -
Page 36: Figure 9-6 . Sr-100P Width And Height With Sun Shroud
7” 6.5” Figure 9-6 . SR-100P Width and Height with Sun Shroud 427-0014-00-10 Revision 210 Copyright © 2008 FLIR Systems, Inc. -
Page 37: Kbd300 Commands (Sr-100, Sr-100P)
10.0 KBD300 COMMANDS (SR-100, SR-100P) Note: To start, type the device id (99 is the universal id) and then press CAM Keystrokes Camera Function Toggle Values (default to first value) Near button Increments Focus closer Note: Holding the Near or Far button... -
Page 38: Sr-100 & Sr-100P Control Using Tvis-7 User Interface
11.0 SR-100 & SR-100P CONTROL USING TVIS-7 USER INTERFACE The SR-100 (formerly known as the TVIS-7º) and the SR-100P may be controlled through various sources including the TVIS-7º User Interface GUI which provides a Windows-based control program (Graphical User Interface) for the SR-100P. Instructions for using these controls are described in this section. - Page 39 LUT: The LUT or Look Up Table is a series of tables that map individual pixel values to various color schemes or palettes. Available color palettes are White Hot, Black Hot, Sepia, Color 1, Fire Ice, and Rain. 427-0014-00-10 Revision 210 Copyright © 2008 FLIR Systems, Inc.
- Page 40 A/D counts that correspond to pixels in the scene. Then the A/D counts that correspond to pixels in the background would again have their gray levels allotted in proportion to the number of scene pixels at those levels. 427-0014-00-10 Revision 210 Copyright © 2008 FLIR Systems, Inc.
- Page 41 TVIS-7º Setup Control Save Settings: The Save Current Settings to Power On Defaults will save all settings defined in the User Interface. The TVIS-7° will default to these settings upon power-up. 427-0014-00-10 Revision 210 Copyright © 2008 FLIR Systems, Inc.
- Page 42 File Save/Load: The system settings can be saved to an “.ini “ file and then loaded later. Once the settings have been loaded Save Settings to Current Power Defaults button to store the data n the camera. Exit: This will exit the application. 427-0014-00-10 Revision 210 Copyright © 2008 FLIR Systems, Inc.
- Page 43 If Enable Logging is exclusively selected, only error messages will be display. This window is useful in resolving technical issues. The data from the window can be copied and pasted to a text file using the right mouse button. 427-0014-00-10 Revision 210 Copyright © 2008 FLIR Systems, Inc.
- Page 44 About Tab TVIS-7º About Screen (Version on Screen not current) The About tab will display the version information and system information. 427-0014-00-10 Revision 210 Copyright © 2008 FLIR Systems, Inc.
-
Page 45: References
12.0 REFERENCES FLIR Standard Resolution Product Specification Document Number: 427-0014-00-09 FLIR Photon GUI User Guide Document Number 412-0035-00-10 FLIR TVIS 7 Degree Software Interface Control Document (ISC Doc. 427-007-05-21) Pelco EH8100 Series Enclosure Product Specification Pelco EH2500 Series Enclosure Product Specification Pelco Standard TF-002 Pelco “D”... - Page 46 Support If you have questions that are not covered in this manual, or need service, contact FLIR Customer Support at +1 (805) 964-9797 for additional information prior to returning your SR- Series Thermal Camera. In the US, you can also reach FLIR Customer Support at (888) 747-FLIR (747-3547).
Need help?
Do you have a question about the SR-100 and is the answer not in the manual?
Questions and answers