Rimage DLN5200 User Manual
Dvd/cd duplicator printer
Hide thumbs
Also See for DLN5200:
- Setup and installation (4 pages) ,
- User manual (24 pages) ,
- Replacement procedure (8 pages)

Related Manuals for Rimage DLN5200


Summary of Contents for Rimage DLN5200
- Page 1 Rimage DLN5200/DL5200™ User Guide This manual provides the information needed to operate the DLN5200/DL5200 and identify the parts. To set up and install your DLN5200/DL5200, refer to the Setup and Installation Guide.
- Page 3 Rimage Corporation described in this document at any time without any 7725 Washington Avenue South prior notice. Rimage Corporation reserves the right to Minneapolis, MN 55439 revise this publication and to make changes from time to time in the content hereof without obligation of...
-
Page 4: Support Information
Unit serial number and software version. • Functional and technical description of the problem. • Exact error message received. Learn more online At www.rimage.com/support.html, you can experience Rimage’s world-class Support and Services. Select your product family. Select your product. Learn more on your product page. -
Page 5: Table Of Contents
Media requirements....................1 Ribbon requirements ..................... 2 Label design requirements ..................2 Networking ability ....................2 Identify the parts of the Rimage DLN5200/DL5200......3 Front view......................3 Rear view - Rimage DLN5200................6 Rear view - Rimage DL5200 ................. 7 Operate the Rimage DLN5200/DL5200 ........... 9 Powering on ...................... - Page 6 Rimage DLN5200/DL5200...
-
Page 7: Introduction
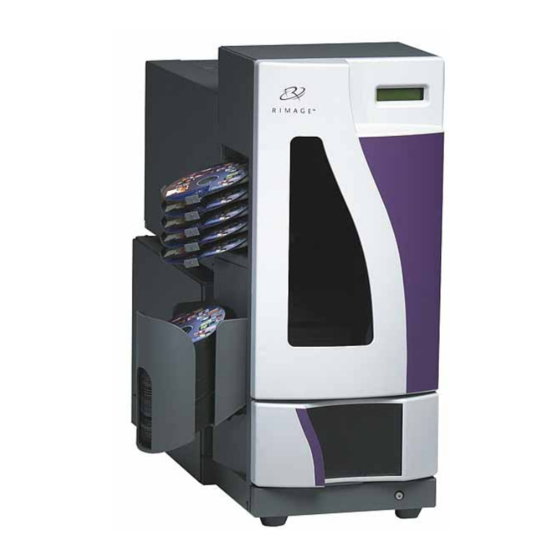
Introduction This manual provides the information needed to operate the DLN5200/DL5200 and identify the parts. To set up and install your DLN5200/DL5200, refer to the Setup and Installation Guide included with your product. The Rimage DLN5200 and DL5200 are robotic-controlled autoloaders containing two recorders, a two-line display panel, and an Everest Printer. -
Page 8: Ribbon Requirements
For label design requirements, refer to the Everest Printer User Guide. Networking ability Using the Rimage Producer Software Suite, you can submit orders to the Rimage DL/DLN5200 from a networked PC or Macintosh. For more information, refer to the Rimage Advanced Setup Guide at http://www.rimage.com. -
Page 9: Identify The Parts Of The Rimage Dln5200/Dl5200
Identify the parts of the Rimage DLN5200/DL5200 Identify the parts of the Rimage DLN5200/DL5200 This section describes the Rimage DLN5200/DL5200 hardware and its features. Front view Operator Button Printer Transfer Operator Slides Panel Everest Output Lift Trays Recorders PC Power... - Page 10 Beeper The Rimage DLN5200/DL5200 has a beeper that sounds when user intervention is required. Read the condition on the operator panel or at the client application and take appropriate action to correct the problem. To stop the beeping, open the supply door.
- Page 11 Identify the parts of the Rimage DLN5200/DL5200 Output trays The Rimage DLN5200/DL5200 is configured Output with five output trays and an output bin. When Trays a disc is recorded and printed, the lift arm moves the disc to the output bin or one of the output trays.
-
Page 12: Rear View - Rimage Dln5200
Rimage DLN5200/DL5200 Rear view - Rimage DLN5200 Printer USB Cable Printer Control Cable Printer Power Cord PC Power Cord Serial Cable Mouse Cable Network Connection Keyboard Cable USB cable Power Cord Monitor Cable 110768_D... -
Page 13: Rear View - Rimage Dl5200
Identify the parts of the Rimage DLN5200/DL5200 Rear view - Rimage DL5200 Printer Control Cable Printer USB Cable Printer Power Cord Printer Control Cable USB Cable FireWire Cable AC Power Cord Note: The 9-Pin serial connector is not used. 110768_D... - Page 14 Note: The PC power switch is on only the Rimage DLN5200. Main power switch The main power switch is used to apply power to the entire system (printer, embedded PC, and the autoloader) The Rimage DLN5200 requires both power switches to be switched to the ‘on’ position. DL5200...
-
Page 15: Operate The Rimage Dln5200/Dl5200
Note: After pressing the main power Switch switch to the ‘on’ position, the Everest printer initializes. 3. Press the PC power button to power on the embedded PC. When the DLN5200 autoloader has completed the initialization, the operator panel displays RIMAGE DLN5200 READY. PC Power... -
Page 16: Powering Off
1. Close all open applications. 2. Press the main power switch to power off the Rimage DL5200. Note: When you start the Rimage DL5200 again, you must first power on the DL5200 and then power on the attached computer so the recorders are recognized. -
Page 17: Loading Discs
Operate the Rimage DLN5200/DL5200 Loading discs The supply bin can be loaded with 50 discs. Use thermal printable discs compatible with the Everest printer. 1. Open the supply door. 2. Remove the supply bin. Supply Door 3. Place the discs in the supply bin with the recording side facing down. -
Page 18: Maintain The Dln5200/Dl5200
Rimage DLN5200/DL5200 Maintain the DLN5200/DL5200 The procedures in this section will help keep your DLN5200/DL5200 in optimum operating condition. Preventive maintenance schedule Maintenance Procedure Schedule Cleaning the Rimage Once a week. Using a damp, lint free cloth, remove dust from DLN5200/DL5200 the autoloader and surrounding work area. - Page 19 Maintain the DLN5200/DL5200 3. Check the disc alignment. To see if the disc is centered, observe the gap between the edge of the disc and the raised edges as shown by the arrows. If the disc is not centered side to side on Print Pad the print pad, continue to step 4.
- Page 20 Rimage DLN5200/DL5200 5. If necessary, perform a front to back Disc Retainer alignment. a. Turn the front to back alignment screw until there is a 1/16” (1.5mm) gap between the front edge of the disc and the raised edge of the disc retainer.
-
Page 21: Operate Gemini Utilities
Operate Gemini Utilities Operate Gemini Utilities The Rimage Producer Software Suite includes an application called Gemini Utilities, which is used to update the autoloader firmware. It may also be used to change the display name of the Rimage DLN5200/DL5200 and to enable the beeper. The Rimage DLN5200 displays the computer name on the operator panel, which is helpful to identify the computer on the network. -
Page 22: Learn More
Microsoft Windows® 2000 Professional Service Pack 4, Microsoft Windows XP Professional Service Pack 1or 2, Windows Server 2003 Rimage recommend 4 hard drives – One for the OS, one for the Rimage System Folder, and two for caching (one for each recorder). -
Page 23: Operator Panel Error Messages
3 to recalibrate the lift arm positioning. Everest printer errors Error messages from the Everest printer that may display on the Rimage DLN5200/DL5200 operator panel include: EVEREST PRINTER #1 NOT LOCKED – Open the Everest printer cover and close latch 1. - Page 24 • If the autoloader is a DLN5200, use the PC power button to power off the system. Switch off the main power switch. Then switch on the main power switch and press the PC power button to restart the system.
-
Page 25: Technical Support And Product Updates
Rimage–approved components to maintain the safety approval issued by UL. Caution: The DLN5200 model contains a lithium battery. There is a risk of explosion if the battery is replaced by an incorrect battery. Dispose the old battery according to the manufacture’s instructions included with the battery package. -
Page 26: Safety Testing
Rimage DLN5200/DL5200 Safety Testing Product name: Rimage DLN5200/DL5200 Model: • DLN5200: RAS15E • DL5200: RAS15 Notice for USA Tested to Comply with FCC Standards FOR HOME OR OFFICE USE. NOTE: This equipment has been tested and found to comply with the limits for a Class B digital device, pursuant to Part 15 of the FCC Rules. -
Page 27: Rimage Dln5200/Dl5200 Limited 1 Year Warranty/Guarantee
To Rimage’s location in Germany from a location in Europe with a typical response of 15 business days. To Rimage Minnesota from a location that is not in the US or Canada with a typical response of up to 25 business days.
Need help?
Do you have a question about the DLN5200 and is the answer not in the manual?
Questions and answers