Table of Contents
Advertisement
Quick Links
ASSIGNABLE WHEEL
EQUALIZER
AW1
AW2
VOLUME
LOW
LOW-MID
MID
HIGH-MID
HIGH
AL1/A
A
Owner's Manual
ASSIGNABLE SLIDER
AL2/a
AL3/0
AL4/!
VALUE
SPLIT
LAYER
EFFECT ON
SINGLE
EFFECT OFF
MASTER TUNE
TRANSPOSE
BANK
NORMAL
CURSOR
a
DELETE
INSERT
2
AI
Synthesis System
ASGN.SW
CHANNEL
LOCAL
EX FILTER
AFT.T FILT
DAMP.P POL
POL
DATA DUMP
MIDI RESET
GLOBAL
PROG
PERF
CONTROLLER
VEL CURVE
A.T CURVE
PROTECT
PROTECT
PAGE MEM
SYS NAME
CALIB
SW/
TIMBRE SEL
PROGRAM
LEVEL
PITCH
PANPOT
ZONE
FILTER
CHANNEL
PERF EDIT
CONTROLLER
VEL CURVE
A.T CURVE
TIMB COPY
CTRL COPY
MACRO
RENAME
WRITE
BRIGHTNESS
LEVEL
ATTACK
DECAY
RELEASE
KEY TOUCH
FX1 DEPTH
FX2 DEPTH
PROG EDIT
SCALE
FX1 TYPE
FX1 PARAM
FX2 TYPE
FX2 PARAM
PRELOAD
RENAME
WRITE
/BEND
PIANO1
PIANO2
PIANO3
E.PIANO1
E.PIANO2
E.PIANO3
PF LAYER
E.P.LAYER
PERFORMANCE
1
2
3
4
5
6
7
8
9
10
11
12
13
14
15
16
PROGRAM
ORGAN1
ORGAN2
COMP
BELL/VIBES
STRINGS
PAD1
PAD2
BASS
E
3
Advertisement
Table of Contents

Subscribe to Our Youtube Channel
Related Manuals for Korg SGPROX


Summary of Contents for Korg SGPROX
- Page 1 Synthesis System ASSIGNABLE WHEEL EQUALIZER ASSIGNABLE SLIDER VOLUME LOW-MID HIGH-MID HIGH AL1/A AL2/a AL3/0 AL4/! ASGN.SW VALUE CHANNEL LOCAL EX FILTER AFT.T FILT DAMP.P POL DATA DUMP MIDI RESET SPLIT GLOBAL LAYER EFFECT ON PROG PERF CONTROLLER VEL CURVE A.T CURVE PROTECT PROTECT PAGE MEM...
-
Page 2: Important Safety Instructions
Introduction IMPORTANT SAFETY INSTRUCTIONS WARNING — When using electrical products, basic precautions should be followed, including the following: 1. Read all the instructions before using the product. 2. Do not use this product near water — for example, near a bathtub, sink, in a wet basement, or near a swimming pool, etc. -
Page 3: Lcd Display
Back-up Battery The SGproX uses a back-up battery to prevent memory loss when the power is turned off. If the display shows “Battery Lo”, the battery should be replaced. Consult the nearest Korg Service Center or dealer. -
Page 4: Table Of Contents
Preparing to play ..........................10 Front and rear panel ........................12 Front panel ..........................12 Rear panel ..........................13 Playing the SGproX ..................14 Selecting a program ......................... 14 Using the equalizer .......................... 14 EFFECT ON / OFF switch ....................... 14 LAYER / SPLIT switch ........................15 TRANSPOSE / MASTER TUNE switch ................... - Page 5 Introduction Program mode / Performance mode ............. 25 Program mode ..........................25 Performance mode .......................... 26 Global mode ....................27 1. CHANNEL (Global MIDI channel setting) ................27 2. LOCAL (Local Control setting) ....................27 3. EX FILTER (Exclusive Filter setting) ..................27 4.
- Page 6 Introduction 1. TIMBRE SEL (Timbre select) ....................39 2. PROGRAM (Program select) / (Program number select) ............39 3. SW/CHANNEL (Tone generator setting) / (MIDI channel setting) .......... 39 4. LEVEL (Level setting) / (MIDI volume setting) ................ 39 5. PITCH (Pitch setting) ......................40 6.
- Page 7 Introduction Appendices ....................62 About MIDI ............................62 1. MIDI channels ......................... 62 2. Note numbers ......................... 62 3. Selecting a program ........................ 62 4. Polyphonic key pressure control ..................... 62 5. Damper (hold) pedal ....................... 62 6. Aftertouch ..........................63 7.
-
Page 8: Introduction
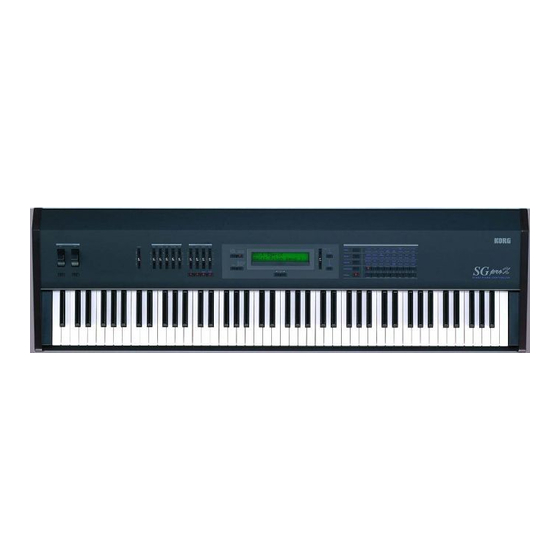
Introduction Thank you for purchasing the SGproX professional stage piano / MIDI controller. Main features High-quality stereo piano sound for outstanding on-stage presence Newly recorded samples are featured, with careful attention paid to the selection of the sampled sounds, their acoustic environment, mic position, and even the way in which notes were struck. - Page 9 MIDI messages such as control changes can be assigned freely. Seven different sets of frequently-used control settings such as tuning and pitch bend range can be stored. In addition, various functions of the SGproX itself (volume, effect depth, brightness etc.) can be assigned freely for control.
-
Page 10: Preparing To Play
Place the SGproX on a stable base or stand so that it will be easy to play. 3. Connect the monitor speakers etc. In order to fully enjoy the sound of the SGproX, use two powered monitor speakers (left and right), and connect them to the rear panel L/MONO and R jacks. -
Page 11: Turn On The Power
Introduction Turn on the power 1) With VOLUME 1 lowered, press the POWER switch 2 located on the rear panel to turn on the power. 2) The PROGRAM and PIANO1 LEDs 3 will light, and you can now play the keyboard to hear the PIANO1 sound. -
Page 12: Front And Rear Panel
Introduction Front and rear panel 7 EFFECT ON/OFF switch Front panel This switch lets you turn effects 1 and 2 on/off to- 1 Headphone jack gether ( p.14). 2 Assignable wheels / switches 1,2 AW 8 BANK switch The wheels and switches are paired, and you can Each time you press this switch, the program or specify different functions for both wheels ( p.16). -
Page 13: Rear Panel
PROGRAM mode ( p.25) Damper jack If an optional Korg DS-1H is connected here, E Select switches (8 it can function as a half-damper pedal. Use these switches to select programs, perfor- If a DS-1 is connected, it will function as a mances, and edit displays. -
Page 14: Playing The Sgprox
Each of the four banks has 16 sounds, for a total of 64 sounds. On the SGproX, these sounds are referred to as programs. 1. Use the 16 select switches to select programs. The LED of the selected switch will light. -
Page 15: Layer / Split Switch
Playing the SGproX LAYER / SPLIT switch Each time you press the select switch, the Play mode will cycle between SPLIT LAYER SINGLE (LED off) LAYER (blinking) SPLIT (lit) SINGLE . SINGLE This adjustment will return to the default setting when the power is turned off. -
Page 16: Transpose/Master Tune Switch
SGproX. If the controller function is selected from Individual or Set, it will not be possible to control the SGproX. If you wish to control the SGproX as well as simultaneously transmit MIDI messages, select one of the Internal functions... -
Page 17: Assignable Wheels/Switches 1/2
ASSIGNABLE WHEEL function of LFO is selected for AW2 . By operating a wheel or switch, you can modify the pitch of the SGproX’s sounds, or apply vibrato or wah. The corresponding MIDI message will also be transmitted from MIDI OUT. -
Page 18: Basic Operation
(edited) in Program Edit mode, Performance Edit mode, and Global mode. Global mode Here you can make settings that are common to all programs and performances of the SGproX (global MIDI channel, memory protect, etc.). You can also make settings that are common to all programs in Program mode (controllers, velocity curve etc.). -
Page 19: Editing
Basic operation Editing 1. On the front panel, find the parameter that you wish to edit. (Parameters for each mode are printed above the select switches.) 2. Press the appropriate mode switch. Press a select switch to choose the display page. Use the CURSOR switches to move the cursor so that the value that you wish to modify begins to blink. -
Page 20: Trying Out The Functions
3. Use select switches 1 to 6 to choose pages that will allow you to modify the sound ( p.34). Be aware that editing on the SGproX does not allow you to make drastic changes in the sound. For example, your edits can make a piano sound brighter, or slow down the attack of a note, etc. -
Page 21: Changing The Velocity Curve Of The Keyboard
Trying out the functions Changing the velocity curve of the keyboard 1. Press the GLOBAL switch (The LED will blink) and you will enter Global mode. 2. In the VEL CURVE page (select switch 10), you can change the velocity curve ( p.29). -
Page 22: Connecting Other Midi Devices
You will need to provide an additional MIDI device, and have its owner’s manual at hand for reference. • Connect a MIDI cable to the SGproX’s MIDI OUT A, and the other end of the cable to the MIDI IN of the MIDI device that you wish to control. -
Page 23: Selecting A Different Program
If the controller function is selected from Individual or Set, it will not be possible to control the SGproX. If you wish to control the SGproX as well as simultaneously transmit MIDI messages, select one of the Internal functions enclosed in square brackets [ ]. - Page 24 Performance mode if you wish to control two or more MIDI devices. Features of Performance mode • The SGproX provides eight timbres to control external MIDI devices. • You can specify the MIDI channel for each timbre. • MIDI channels can be selected from A1 to B16 or B1 to B16, for an actual total of 32 available channels.
-
Page 25: Program Mode / Performance Mode
Performance mode in which you can use the SGproX as a master keyboard. Program mode The SGproX contains 64 high-quality programs. With the factory settings, different banks of the same number will select similar sounds. Here’s how to select programs. -
Page 26: Performance Mode
You can specify the MIDI channel independently for each external timbre 1 to 8, so that each timbre will transmit MIDI data on the specified channel (A1 to A16, B1 to B16) when you play the SGproX’s keyboard or operate its controllers. -
Page 27: Global Mode
Also, system exclusive data will be received regardless of this setting if you are in page 7 DATA DUMP . Normally you will leave this set to DIS, but set it to ENA when you wish to edit the SGproX from an external device such as a computer. -
Page 28: Aft.t Fil (Aftertouch Filter Setting)
Specify the polarity of the damper (sustain) pedal that is connected to the rear panel Damper jack. Either closed ( ) or open ( ) type pedals can be used. If you are using a Korg DS-1H damper pedal (sold separately), set this to “closed”... -
Page 29: Midi Reset (Transmit Messages For Midi Reset)
This function allows you to transmit messages to reset the MIDI settings of an external device connected to the SGproX’s MIDI OUT. Press the +1/YES switch and you will be asked “Are You Sure OK”? Press +1/YES again, and the following MIDI messages will be transmitted, and the display will indicate “Completed.”... -
Page 30: Curve (Aftertouch Curve Selection)
If this setting is set to “RESET”, program A01 of Program mode will always be selected when the power is turned on. If it is set to “MEMORIZE”, the state in which the SGproX was when the power was turned off (the mode, program number, performance number) will be recalled when the power is turned on. -
Page 31: Sys Name (System Name Setting)
Be sure to rotate the control wheel all the way until it stops. If the display indicates “Invalid Data,” the calibration has failed. Perform the procedure once again. If the display repeatedly indicates “Invalid Data,” it is possible that a malfunction has occurred. Please contact a Korg authorized service center or your dealer. -
Page 32: Aftertouch Calibration
If the pedal is not pressed sufficiently, the display will indicate “Invalid Data.” Perform the procedure once again. If the display repeatedly indicates “Invalid Data,” it is possible that a malfunction has occurred. Please contact a Korg authorized service center or your dealer to check the pedal and the keyboard. -
Page 33: Program Edit Mode
Program Edit mode In the Program Edit mode you can modify the sound of a program, change settings for keyboard touch and scale, and modify the program name etc. How to enter Program Edit mode 1) In Program mode, first select the program that you wish to edit. 2) Press the PROG EDIT switch. -
Page 34: Brightness (Brightness Setting)
Program Edit mode 1. BRIGHTNESS (Brightness setting) This parameter adjusts the brightness of the sound. Negative (–) settings will cut the high frequency range, making the tone softer and darker. Positive (+) settings will make the tone louder and brighter. Range of settings –99 to +99 Factory setting... -
Page 35: Key Touch (Key Touch Setting)
Program Edit mode High note damp PIANO In the high note range of A6 and above, notes will always sound as though the damper pedal were being pressed, regardless of the actual operation of the damper pedal. NORMAL Even in the high note range of A6 and above, notes will sound in the same way as lower notes (i.e., they will decay more slowly while the damper pedal is pressed). -
Page 36: Scale/Bend (Scale Type / Pitch Bend Range Settings)
Program Edit mode 13. SCALE/BEND (Scale type / Pitch bend range settings) Scale This parameter specifies the scale type (temperament) and the scale key (the tonic for the selected scale). You can select from seven different temperaments. The scale key can be set in the range of C to B. EQUAL TEMP (Equal temperament) This is the conventional scale most widely used by keyboard instruments. -
Page 37: Rename (Program Name Setting)
Program Edit mode 15. RENAME (Program name setting) Here you can modify the name of a program. The name can consist of up to 10 characters. Use the CURSOR switches to move between character locations, and use the VALUE switches or VALUE slider to change the character at that location. -
Page 38: Performance Edit Mode
Performance Edit mode In Performance Edit mode you can change the program numbers that are assigned to each timbre of a Performance, and modify the controller settings etc. The dia- gram below shows the parameters that can be set for each timbre, and how a Performance is organized. -
Page 39: Timbre Sel (Timbre Select)
Performance Edit mode 1. TIMBRE SEL (Timbre select) Use the VALUE switches or the VALUE slider to select the timbre that you wish to edit. In addition, while you are in pages 1 to 8 you can select a timbre (1 to 8, A, or B) by holding down the PERF EDIT key and pressing a select key 1 to 8, 9 or 10. -
Page 40: Pitch (Pitch Setting)
Performance Edit mode When TIMBRE A/B is selected When TIMBRE 1 to 8 is selected 5. PITCH (Pitch setting) 5. PITCH (Pitch setting) Adjusts the pitch of the tone generator in steps of Specifies how pitch-related messages will be trans- semitones (Trans) and cents (Tune). -
Page 41: Zone (Keyboard Zone Settings)
8. FILTER (Settings for various 8. FILTER (Settings for various filters) filters) Damper/Sostenuto You can specify whether or not each of the SGproX’s controllers will transmit MIDI mes- sages.( p.55). Specifies whether the damper/sostenuto effects will be applied (ENA) or not (DIS). A.WHEEL1... -
Page 42: Controller (Controller Settings)
Performance Edit mode Parameters 9 to 11 are settings for the entire Performance (common to all tim- bres). 9. CONTROLLER (Controller settings) Specifies the function that each controller will have in Performance mode. Assignable wheels/switches AW1 AW2 Assignable sliders/switches AL1 AL2 AL3 AL4 Assignable pedal (AP) Assignable switch... -
Page 43: Curve (Aftertouch Curve Selection)
Performance Edit mode 11. A.T CURVE (Aftertouch Curve selection) This setting specifies how aftertouch data will be transmitted when you apply pressure to the SGproX’s keyboard after playing a note. You can select one of eight curves to specify how aftertouch data will be transmitted. -
Page 44: Macro (Loading/Preloading The Macro Settings)
14. MACRO (Loading/preloading the macro settings) Loading macro settings As a convenience when you are creating a new performance or editing an existing performance, the SGproX provides “macro settings” (frequently-used combinations of timbre settings) which you can load into the timbres that you specify. - Page 45 Performance Edit mode Procedure Resulting display after steps 1) through 6) 1) Use the CURSOR switches to select “[” and make it blink. 2) Use the VALUE switches to move it between 6 and 7. 3) Use the CURSOR switches to select “]” and make it blink. 4) Use the VALUE switches to move it between A and B.
-
Page 46: Rename (Performance Name Setting)
Performance Edit mode 6) Use the CURSOR switches to make Type blink. Resulting display after steps 6) through 8) 7) Use the VALUE switches to select “VEL SW.” 8) Use the CURSOR switches to make “OK?” blink. 9) Press +1/YES to get the “Are You Sure OK?” display. 10) Press +1/YES to execute the setting and get the “Completed”... -
Page 47: Overview Of Performance Settings
(MIDI-compatible effects 1 and 2). Settings • The output of the SGproX (timbres A/B) goes into the mixer. • The output of the synthesizer is processed by a program of MIDI LINE effect unit 1, and the output of the effect is sent to the mixer. - Page 48 Performance Edit mode Timbre A AUDIO LINE Press SS1 (Timbre) ............select TIMBRE A Press SS2 (Program for internal tone generator timbre A) ..select program A01 Press SS3 (Internal tone generator used/unused) ..... select ON Press SS4 (Output level) ............set to 127 Mixer, PA system etc.
- Page 49 Performance Edit mode Settings for each timbre are now complete. Make the following settings to complete the performance. Press SS9 (Controllers) ......make settings for each controller (refer to MIDI / Controllers on p.55) Press SS10 (Velocity Curve Figure) ........ select GLOBAL Press CURSOR switch (Velocity Curve: p) ......
-
Page 50: Effects
Effects The SGproX offers two effect units connected in series: effect 1 (FX1) and effect 2 (FX2). Effect 1 lets you select one of 12 types of effect, and effect 2 lets you select one of 11 types. Effect settings can be made independently for each program, and effect routing can be set for each perfor- mance. -
Page 51: No Effect
Effects 0. No Effect Select this when you do not wish to use an effect. 1. Reverb This effect simulates the acoustics of a hall, giving the sound a natural acoustic ambiance. This provides the reverberation of a mid-sized hall, and a natural feeling of space. Parameters Left Parameter name... -
Page 52: Stereo Chorus
Effects 4. Stereo Chorus This is a stereo effect that combines two chorus blocks. The right channel is modulated in opposite phase than the left channel. Stereo Chorus adds a natural spaciousness and depth to any sound, such as piano or strings. The equalizer (EQ Low, EQ High) settings will be valid even when Effect Depth is set to “DRY.”... -
Page 53: Stereo Phaser
Effects 7. Stereo Phaser While a chorus or flanger creates an effect by modulating the delay time, a phaser modulates the phase of the input signal. This creates a modulation or swelling effect that has a different character than either a chorus or flanger. This is especially effective when applied to electric piano or bass sounds. -
Page 54: Wah
Effects 10. Wah The controller selected for Src can be used to control the wah effect. If you specify Amp EG as the Src, an auto-wah (touch-wah) effect will be produced. Parameters Parameter name Range Left Dry Signal Dry Signal NONE to Select the control source Ctrl#12... -
Page 55: Controllers / Midi
Refer to the tables on p.58.) If the controller function is selected from Individual or Set, it will not be possible to control the SGproX. If you wish to control the SGproX as well as simultaneously transmit MIDI messages, select one of the Internal functions enclosed in square brackets [ Control via MIDI may be limited by the functionality of the external MIDI device. -
Page 56: Parameter Settings For The Assignable Controllers
Controllers / MIDI Assignable controller parameter settings Select the desired controller • In the first screen of the controller setting page, select the desired controller. While you are in this screen, operating a controller will cause that controller to automatically be selected. Controller whose function you wish to specify The controller for which settings will be made Specify the controller function (Type) - Page 57 11)Use the CURSOR switches to move to the next screen. “SW Val:...” will blink. 12)Use the VALUE switches (or slider) to specify “SW Val:R8191” With these completed settings, the AL1 of the SGproX will control the output balance of the device con- nected to MIDI OUT.
-
Page 58: Available Types, Ranges, Initial Values, And Midi Transmit Values (Individual)
Controllers / MIDI Available types, ranges, initial values, and MIDI transmit values (Individual) Use with a controller O: available : unavailable FIX: fixed value S(L): initial setting for controller lower limit value S(H): initial setting for controller upper limit value SW: initial SW setting W/L: AW1,2/AL1-4 VALUE CONTROLLER TYPE... - Page 59 Controllers / MIDI VALUE CONTROLLER TYPE RANGE S(L) S(H) SW W/L AP MIDI ( n:Channel ) 71:Harmonic Int 00 to 127 [ Bn,47,vv ] 72:Release Time –64 to +63 –64 –64 [ Bn,48,vv ] 73:Attack Time –64 to +63 –64 –64 [ Bn,49,vv ] 74:Brightness...
-
Page 60: Available Types, Ranges, Initial Values, And Midi Transmit Values (Set)
O P.Key Press allows aftertouch to be applied independently to an individual key. You can specify the key to be transmitted, and assign it to a controller which will control its value. (The SGproX’s keyboard does not support polyphonic key pressure.) -
Page 61: Available Types, Ranges, Initial Values, And Midi Transmit Values (Internal)
Controllers / MIDI Start, Stop, Clock [ F8, F8, F8..., FA, F8, F8, F8..., FC, F8, F8, F8... ] This set differs from the others in the way in which the switch and slider will be used. (The Mode setting will be ignored.) Press the switch, and START [ FA ] will be transmitted. -
Page 62: Appendices
5. Damper (hold) pedal When a damper pedal connected to the SGproX is pressed, the damper effect will apply. When it is released, the effect will be canceled. Simultaneously with these operations, a message of CC#64: Hold [Bn, 40, vv] (control change #64) will be transmitted. -
Page 63: Aftertouch
Appendices 6. Aftertouch When you apply additional pressure to the keyboard of the SGproX after playing a note, After Touch mes- sages [Dn, vv] (vv: value) will be transmitted. The MIDI Filter settings of Global mode allow you to specify whether or not aftertouch messages will be transmitted. -
Page 64: Effect 2 Depth
When an assignable controller whose function has been set to [FX2 Depth] (internal control type) or 91: Eff 1 Depth (external control type) is operated, or when the SGproX’s AL3 is operated in Program mode (with the factory settings of [FX2 Depth]), CC#91: Eff 1 Depth messages [Bn, 5B, vv] (vv: value) will be trans- mitted. -
Page 65: Tuning
00) to the SGproX. Then use data entry to specify the value by transmitting a message of [ Bn, 06, mm, 26, vv ] (control change #06 and 38) to the SGproX. In this case, a value of 8192 [ mm, vv=40H, 00H ] will be the normal tuning value, 0 will be -100 cents, and 16383 [ mm, vv=7FH, 7FH ] will be +100 cents. -
Page 66: System Exclusive Messages
Inquiry Message Reply of [ F0, 7E, nn, 06, 02, (9 bytes), F7 ] which means “I am a Korg SGproX, with system version ...” 2) When a GM System On [ F0, 7E, nn, 09, 01, F7 ] message is transmitted from the SGproX, a connected GM-compatible tone generator will be initialized for GM. -
Page 67: Troubleshooting
Appendices Troubleshooting Power does not come on when you press the POWER switch! Is the power cable correctly connected to the SGproX’s AC inlet and to an AC outlet? No sound! Are connections to the amp, mixer or headphones correct? -
Page 68: Specifications
Appendices Specifications Tone generator method AI squared synthesis system (full digital processing) Tone generator 64 voice, 64 oscillator (for a monaural program) 32 voice, 64 oscillator (for a stereo program) Keyboard 88 note weighted Waveform memory PCM 24 Mbytes Number of programs Number of performances 64 Effects Two digital multi-effect units... -
Page 69: Program Name List
Appendices PROGRAM NAME LIST *Monaural Program Concert Bright Classic Dynamic Studio Rock Piano Jazz Piano Ballad A03 * DancePiano B03 * Chorused Mix Piano StagePiano Dyna-Stage Classic EP C04 * Stage Bell D04 * Stage Tine A05 * Wurly EP B05 * Dyno Bell C05 * FM EP 2 D05 * FM EP 3... -
Page 70: Performance Assignable Controller
Appendices PERFORMANCE ASSIGNABLE CONTROLLER PERFORMANCE No. A01-A08, A10-A16, B01-B08, B10-B16, C01-C08, C10-C16, D01-D02, D04-D16 [ Pitch Bend ] [ LFO ] [ Volume ] [ FX1 Depth ] [ FX2 Depth ] [ Brightness ] [ Volume ] PERFORMANCE No. A09, B09, C09, D03 [ Pitch Bend ] [ LFO ]... -
Page 71: Midi Implementation Chart
*1 When the Performance is changed, transmitted from each timbre for which transmission is specified *2 LSB, MSB = 01, 00 : Fine Tune *3 In addition to Korg exclusive messages, Inquiry Message, Master Balance and Master Volume are also supported, and GM System On/Off is transmitted... - Page 72 These products are warranted by the KORG distributor only in each country. Any KORG product not sold with a warranty card or carrying a serial number disqualifies the product sold from the manufacturer’s/distributor’s warranty and liability. This requirement is for your own protection and safety.
Need help?
Do you have a question about the SGPROX and is the answer not in the manual?
Questions and answers