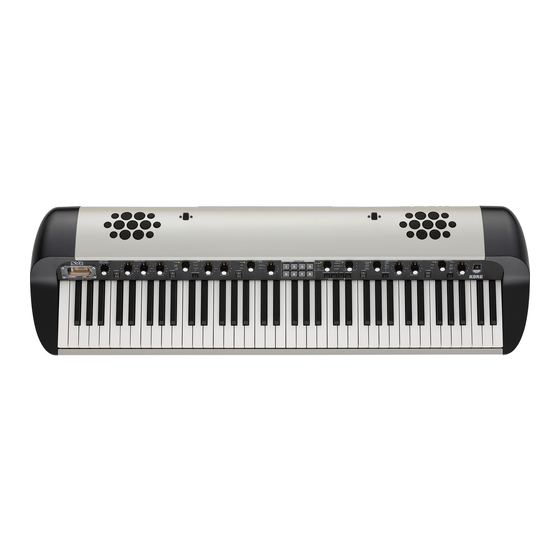
Korg SV-2 User Manual
Stage vintage piano
Hide thumbs
Also See for SV-2:
- Midi implementation manual (34 pages) ,
- User manual (142 pages) ,
- User manual (142 pages)
Table of Contents
Advertisement
Quick Links
Advertisement
Table of Contents

Subscribe to Our Youtube Channel
Related Manuals for Korg SV-2


Summary of Contents for Korg SV-2
- Page 1 User Manual MAN0010144...
- Page 2 Das Ausrufezeichen in einem gleichwinkli gen Dreieck soll den Anwender auf wichtige Bedienhinweise aufmerksam machen, die in der beiliegenden Dokumentation enthalten sind. Il punto esclamativo all’interno di un triango lo equilatero avverte l’utente della presenza di importanti istruzioni relative al funzionamento e alla manutenzione nella documentazione che accompagna il prodotto.
-
Page 3: Important Safety Instructions
Important safety instructions ▪ Read these instructions. The ventilation should not be impeded by covering the ventilation openings with items, Keep these instructions. such as newspapers, tablecloths, curtains, Heed all warnings. etc. Follow all instructions. ▪ No naked flame sources, such as lighted can Do not use this apparatus near water. - Page 4 A deterioration DECLARATION OF CONFORMITY (FOR USA) that might arise can be a sound signal emit Responsible Party: KORG USA INC. ted. This will stop when the electromagnetic disturbance ceases. Address: 316 SOUTH SERVICE ROAD, MELVILLE Telephone: 16313906500...
-
Page 5: Table Of Contents
|iii Table of Contents THE PIANO . . . . . . . . . . . . . . . . . . . . . . . . . . . . . . . . . . . . . . . . . . . . . . . . . . . . . . . . . 1 Introduction . - Page 6 Installing the KORG USBMIDI Driver ........
- Page 7 Editing workflow . . . . . . . . . . . . . . . . . . . . . . . . . . . . . . . . . . . . . . . . . . . . . . . . . . . .59 Side drawer .
- Page 8 Option menu ............118 About menu .
-
Page 9: The Piano
THE PIANO... - Page 10 (playing, pressing buttons or moving knobs). ucts, the specifications might differ to those Please save any edited data before taking a pro in the manual. KORG is not responsible for any longed pause. differences found between the specifications and the contents of the instruction manual – all...
-
Page 11: Introduction
Before starting to play… What’s in the box After you buy your SV2, please check all the following items are included in the package. If some of them are missing, immediately contact your KORG dealer. ▪ SV2 Stage Vintage Piano ▪... - Page 12 The elegant KORG STSV1 keyboard stand, recommended for safety and comfort, perfectly matching your piano design. ▪ One of the sturdy pedals and footswitches from the KORG catalogue, like the DS1H damper, the PS1 and PS3 footswitches, the EXP2 foot controller, the XVP10 or XVP20 volume/expression pedals.
-
Page 13: Main Features
▪ The highquality, realistic KORG RH3 keyboard (made in Japan) features four zones with different weights. This gives you the same realism and feeling as a grand piano keyboard. You can choose from eight different touch curves to adjust how the sound will respond to your keyboard playing dynamics. - Page 14 MIDI interface. A dedicated KORG USB MIDI Driver (for Windows; Mac directly supported) is freely available for full use of the SV2’s MIDI fea...
- Page 15 Listen the natural way ▪ The amplification system integrated in the “S” models has been jointly de veloped by KORG and Karray, a renowned manufacturer of unique audio solutions. ▪ The sound of the super highfidelity integrated speakers is clear and detailed even at the lowest volume level, for the pleasure of the latenight rehearsing...
-
Page 16: Real Experience
8| The Piano Real eXperience Are You eXperienced? The SV2 sounds feature KORG’s Real eXperience technology, giving unprec edented realism and detail to sounds. While existing sampling techniques have resembled an audio snapshot, our technology is more of a hologram, accurately reproducing every dimensional detail of the sound. -
Page 17: Valve Reactor Technology
Introduction |9 Valve Reactor Technology The Power (amp) and the Glory! The Valve Reactor circuitry in the SV2 has been tunedup especially for live performance. Since conventional modeling effects for line recording are not used directly with a speaker, they do not include a power amp circuit, output transformer, or speaker. -
Page 18: Controls And Connections
10| The Piano Controls and connections Front panel The front panel is where you access your SV2 controls. Control panel This strip contains the buttons, knobs and the other controls of the piano. The functions are explained in detail later in this manual. 2 Speakers (only SV2-73S and SV2-88S) In the models with integrated speakers, this is where the sound comes from. -
Page 19: Rear Panel
Use this connector to connect a computer for sequencing (this doubles the MIDI ports), or for using the SV2 Editor software for fine editing. Before using this connector, please install on your Windows PC the KORG USBMIDI Driver (the relevant instructions are provided together with the MIDI Driver, that can be downloaded from our site). - Page 20 12| The Piano Connect a footswitch (like the optional KORG PS1 or PS3) to the PEDAL 1 jack. The footswitch can operate as a sostenuto pedal, or as a rotary slow/ fast switch (when the rotary effect is selected). Connect a footswitch (like the optional KORG PS1 or PS3) or a volume/ expression pedal (like the optional KORG XVP10, XVP20, or EXP2) to the...
-
Page 21: Making The Connections
Controls and connections |13 Making the connections In this section you will learn how to connect your SV2 to an audio amplifica tion system, to the pedals and to MIDI devices. Turn both your SV2 and all connected devices off. NOTE: You must turn off the power of all your equipment before you make connec... - Page 22 14| The Piano...
-
Page 23: Turning The Sv-2 On
NOTE: When you turn on your KORG SV2, you may notice a brief flash in the tube. This is a characteristic of certain tubes we use and if it occurs, it only happens when your SV2 is turned on and the tube is not yet warm. -
Page 24: Adjusting The Master Volume
16| The Piano Automatic power off With the factory settings, this instrument will automatically power off af ter two hours of inactivity to save power. To avoid poweroff and reset the countdown, play the keyboard or use any button or knob on the control panel (apart for the MASTER VOLUME knob;... -
Page 25: Listening To The Demos
Turning the SV2 on |17 Listening to the demos Listen to the builtin demo songs to appreciate the power of the SV2. There are several demo songs to choose from. Press the TRANSPOSE and LOCAL OFF buttons together. Their LEDs will start blinking. -
Page 26: Playing The Sounds
18| The Piano Playing the sounds What do we mean by ‘sound’? In SV2, a sound is a ‘timbre’ or a set of timbres that can be heard when you play the keyboard. Each sound can be made of up to three ‘programs’, each one with a different timbre or a set of accessory ‘noises’, like the mechanics of the keyboard, hammerslap, etc. -
Page 27: Selecting The Factory Sounds
Playing the sounds |19 Selecting the factory sounds How to select a sound The SOUND section is where you can select the factory sounds. Use the TYPE knob of the SOUND section to select a base type of sound (one of six). Use the VARIATION knob of the SOUND section to select one of the varia... -
Page 28: Selecting The Favorite Sounds
20| The Piano Selecting the favorite sounds How to select a favorite sound The FAVORITES section is where you can select the favorite sounds, con taining your own custom sounds. To select a favorite sound in the current bank, press the corresponding FAVORITES (1‑8) button. -
Page 29: The Sounds
Playing the sounds |21 The sounds The following table contains the names and a brief description of each of the included sounds. When the name of the sound is a straight one (like “MK I Suitcase”) it is a simple sound extended to the full keyboard. When it has an ‘&’ in the middle (like “FM Piano &... - Page 30 German Mono 42 A mono version of the German grand. KORG M1 Piano The KORG piano heritage. From the popular M1 synth workstation that made an era, and from our pioneeris KORG SG1D tic SG1D digital piano. Digital Piano 38 An innovative, accurate and expressive piano sound, created in the late ’80s with a popular digital key...
- Page 31 Playing the sounds |23 Sound PC Notes Tack Piano Tack and HonkyTonk pianos, to enjoy ragtime and stride genres. HonkyTonk Piano & Strings 40 Layered piano and strings or pad. Perfect for evoca tive ambient music. Piano & Pad Piano & Synth Layers of piano and synth or brass.
-
Page 32: Favorite Sounds
Clav AC Italian Grand Clav BC EP MK II Perc. Organ Wurly Jazz Organ Clav Church Organ FM Piano KORG M1 Piano Piano & Strings Electric Grand Bass/EP Harpsichord Piano Layer German Grand Piano & Strings Italian Grand Piano & Pad Japanese Grand Piano &... - Page 33 Playing the sounds |25 Sound Sound Other Legacy SV1 Full Strings SV1 Grand Piano 1 Strings Octave SV1 Grand Piano 2 Orchestra Tutti SV1 Tine EP Amp Brass SV1 Reed EP1 Warm Pad SV1 Clav AC Synth Brass SV1 Clk.Tonewheel Pad/SynLead SV1 Full Strings Synth Bass...
-
Page 34: Using The Effects
26| The Piano Using the effects The effects You can select the various effects and amp models by turning the corre sponding TYPE knobs. You can change the effect settings by using the DEPTH, INTENSITY, SPEED, DRIVE knobs. If you press the knob, the original value of the parameter will be recalled. -
Page 35: Editing The Effects
Using the effects |27 Editing the effects Equalizer Use the three knobs of the EQUALIZER section to access the threeband equalizer and adjust the overall tonal characteristics of the sound coming from the SV2. To reset an EQ band to the original value, press the corre sponding knob. - Page 36 28| The Piano the INTENSITY knob. To return to the original settings, press the SPEED or INTENSITY knob. NOTE: The booster stompbox may produce a very loud signal. If the wah effect is selected, the Auto/Pedal can be used. When the button’s LED is off (Auto mode), the wah effect’s filter is set automatically depending on the sound and playing dynamics.
- Page 37 Using the effects |29 or AB) and negativefeedback circuit (or lack thereof) are also carefully sim ulated. You can change the preamp’s volume (therefore, its overdrive saturation) by using the DRIVE knob. To return to the original setting, press the DRIVE knob.
- Page 38 30| The Piano HINT: If you select the rotary effect, and a footswitch pedal is connected to the PEDAL 1 jack on the back of the instrument, you can use the pedal to switch the rotor speed between the SLOW and FAST settings. MODULATION type SPEED knob INTENSITY knob...
- Page 39 Using the effects |31 AMBIENT type DEPTH knob Room Plate Hall Spring Tape Echo Stereo Delay Turning the effects on/off via MIDI You can turn the effects on or off from an external MIDI device by sending to SV2 a Control Change message. The following table shows the MIDI mes sages corresponding to each effect, and the value corresponding to the On and Off status.
-
Page 40: Saving Or Resetting The Changes
32| The Piano Saving or resetting the changes Recalling the original settings Each time you move a knob, its value is changed. Press the same knob to recall the original value for the corresponding parameter. To recall the default value of a parameter, select the effect type again to reset all its parameters. - Page 41 Saving or resetting the changes |33 Press the same button again, to confirm saving. If you do not want to save the changes, just wait a few seconds until the but ton’s LED turns off, without pressing any button. HINT: Use the favorite banks to organize the sounds in separate sets, for example a different set for a particular style or show.
-
Page 42: Advanced Settings
34| The Piano Advanced settings The advanced settings buttons The group of buttons named TRANSPOSE, LOCAL OFF, TOUCH and FUNCTION give access to a series of advanced features that you may need to adapt the piano to your habits. Adjusting the master tune You can fine tune the instrument, to adapt to another instrument that can... -
Page 43: Transposing
Advanced settings |35 Transposing In some cases, a song may be written in a difficult key (e.g., many black keys), or you may wish to shift the pitch to match another instrument or vocalist. In such cases, you can transpose (shift the pitch) so that you can use an easier fingering, or use the same familiar fingering to play at a different pitch. -
Page 44: Choosing A Tuning Curve
36| The Piano Effect C3 – B3 12 – 1 semitones below C4 (Middle C) Standard pitch C#4 – C5 1 – 12 semitones higher If no note is played after some seconds, the transpose programming will end. Press the TRANSPOSE button again to turn transposition off. The LED will turn off. -
Page 45: Adjusting The Program Levels
Advanced settings |37 Adjusting the program levels Some Sounds can be made of up to three programs, whose volume level you can adjusts as you like. Press the FUNCTION button. After you press this button, one of the LEDs around each of the knobs in the EQUALIZER section starts blinking. -
Page 46: Changing The Touch Sensitivity
38| The Piano Changing the touch sensitivity The keyboard sensitivity, or touch, can be programmed. Press the TOUCH button. After you press this button, its LED starts blinking. Also, the FAVORITE but ton corresponding to the selected touch curve starts blinking. Press the FAVORITE button corresponding to the desired touch curve. -
Page 47: Choosing A Midi Channel
Advanced settings |39 Choosing a MIDI channel Choose a MIDI channel over which the SV2 can transmit and receive data to another instrument or a computer. Press the FUNCTION button. After you press this button, its LED starts blinking. Press one of the notes from C6 and D#7 to choose a transmit/receive MIDI channel: Note Channel... -
Page 48: The Local Off
40| The Piano The Local Off You can turn the Local Off function on or off. ▪ Press the LOCAL OFF button to turn its LED on. When you turn the LED of this button on, the keyboard is disconnected from the internal sounds. -
Page 49: Calibrating The Pedals
Connect all pedals to be calibrated to the SV2. Remember that DAMPER expects the included KORG DS2H damper pedal (or, as an alternative, the optional DS1H, or any footswitch pedal), PEDAL 1 expects a footswitch ped... -
Page 50: Locking The Control Panel
42| The Piano Locking the control panel We have shown you how to change the sounds and effects. Now we will tell you how to prevent to make any change! This can be useful if you want to avoid inadvertently changing the settings while playing. Press the TOUCH and FUNCTION buttons together to lock the control panel. -
Page 51: Checking The Operating System Version
Advanced settings |43 Checking the operating system version You may want to check the operating system version, to see if you have the latest version installed. Turn the SV2 on. When the instrument is on, press the SPEED and INTENSITY knobs in the PRE FX section. - Page 52 44| The Piano...
-
Page 53: The Editor
THE EDITOR... -
Page 54: Welcome To The Editor
Welcome to the Editor! What you can do with the Editor The KORG SV2 Editor for the SV2 Stage Vintage Piano is where you can create your own sounds. While we were very careful in keeping the editing capabilities of the piano itself at a minimum, to make it clean and easy to use, we don’t want to prevent you from accessing the most advanced editing... -
Page 55: Installing The Software
This software can be updated as new versions are released by KORG. You can download the new versions from our web site (www.korg.com). Please note that the SV2 Editor and the piano’s program lists should be kept in line. -
Page 56: Installing The Sv-2 Editor
Windows and the Mac). Installing the software Download the SV2 Editor Installer from our web site (www.korg.com), and launch it. The computer asks your authorization for installing new software. - Page 57 Installing the software |49 On the Mac, enter your Mac username and password, and click OK to con firm. A welcome dialog appears. Click Next > to continue, or Cancel to exit.
- Page 58 50| The Editor A dialog appears, showing you the destination directory (folder) for the SV2 Editor application. Click Browse to choose a different location, or Next > to confirm and continue. In Windows, choose a location where to place the SV2 Editor’s icon in the Windows menu.
- Page 59 Installing the software |51 If you click Cancel to stop the installation procedure, a warning appears. Click Exit to stop the installation, or Continue to resume and continue. After you click Next >, the needed files are installed. A progress bar shows the process going on.
- Page 60 52| The Editor When done, a confirmation dialog appears. You can click Finish to exit the installer. Updating the software When a new version of the software is released, just run the installer, and let it update the files. The procedure is completely automatic.
-
Page 61: Running Sv-2 Editor
Running SV2 Editor |53 Running SV-2 Editor Connecting your SV-2 via USB Before using the SV2 Editor, you must connect your SV2 to a personal com puter via a standard USB cable. Please note that not all USB hubs are compatible with SV2. In case you ex... - Page 62 54| The Editor When you launch SV2 Editor, the content of the SV2’s memory is trans ferred to the Editor. Please wait a few seconds for the transfer to complete. NOTE: An error message might warn you that the programs in the piano and the ones in the editor do not match.
-
Page 63: Getting To Know The Sv-2 Editor
Getting to know the SV2 Editor |55 Getting to know the SV-2 Editor Main screen When you run the SV2 Editor, you can see the main screen, as in the follow ing illustration. The layout is very clean, and you can easily identify the various logical sec... -
Page 64: Sound Name
56| The Editor Sound name The name of the selected sound always appears in the top center of the editor. Compare button You can use the Compare button to listen to the original sound, to compare it with the edited sound. ▪... -
Page 65: Side Drawer
Getting to know the SV2 Editor |57 ▪ The Global page, where you can edit the global settings. ▪ The Backup page, where you can exchange data with your SV2, as well as manage libraries of sounds. NOTE: Only the Backup page will be available if the SV2 is not turned on or connect Side drawer All editing happens on the selected sound or tuning curve. -
Page 66: Knobs
58| The Editor Knobs Use the knobs to edit the value of the corresponding parameter. Click a knob, then drag up to increase the value, down to decrease it. When a knob is selected, it becomes orange. While in this status, you can also use the Up or Right, and the Down or Left arrows in your computer’s keyboard to change the value with more precision. -
Page 67: Editing Workflow
Editing workflow |59 Editing workflow While it is very easy to understand how to use the SV2 Editor, and you are free to use the editing procedures that you prefer the best, please carefully follow these steps to connect the SV2 to a computer and to transfer data between them. -
Page 68: Side Drawer
60| The Editor Side drawer The side drawer mirrors the internal memory of the SV2. This is like the Sound and Favorites sections of the SV2’s control panel, with the addition of a list of the available Tuning Curves. Sounds, Favorite and Tuning Curve lists These lists are where you can select a factory or favorite sound, or a tuning curve to edit. - Page 69 Side drawer |61 Making the side drawer appear or disappear To make the drawer appear or disappear, click the small arrow next to the top left side of the drawer: Selecting an item in the list When a list is shown, click an item to select it. If you type the first letter of an item, it will be selected in the list.
-
Page 70: List Commands
62| The Editor List commands At the bottom of the side drawer there are two buttons, you can use to save your changes to the SV2 internal memory or to the computer disk. Write Favorite Click this button to save the changes you made to the current sound (the one selected in the list) into a favorite location inside the SV2’s memory. - Page 71 Side drawer |63 Backup All Data Click this button to get all data from the SV2’s memory, and save them to disk as a backup set (a file with the *.sv2 extension). This is useful to preserve all edited sounds on your computer’s disk for archival and future use. Click this command.
-
Page 72: Sound Page
64| The Editor Sound page The Sound page is where you can edit the selected sound, by turning pro grams on or off, adjusting the volume, equalizing them and settings the ped als. The edited sound can be saved as a favorite sound inside the SV2’s memory, by clicking the Write Favorite button in the side drawer (see “Write Favorite”... - Page 73 Sound page |65 Activating or deactivating the programs Use the On button on the left of the program area to activate or deactivate each one of the programs. Joining or splitting the keyboard Use the buttons in the Mode section to join or split the keyboard. ▪...
-
Page 74: The Basic Section
66| The Editor The Basic section You can choose a program for each of the three components of a sound. A program is a basic timbre, that alone or together with other one or two pro grams makes a sound. Choosing a program To select a program, click the name of the assigned program (in the exam... - Page 75 Sound page |67 You can search a program by typing its name (or part of it) in the Search field over the browser. All the matching results will appear in the Search Results list. Click one of the items in the list to select it. When a program has been selected, click OK to confirm selection (or Cancel to exit without selecting anything).
-
Page 76: Bypassing The Effects
68| The Editor Bypassing the effects While editing a sound, you may want to listen to the program dry, without any effect applied. Also, you may want the program to be left dry in the sound (for example, the piano’s mechanical noises). If so, click on the FX Bypass button to turn it on. -
Page 77: Eq Section
Sound page |69 EQ section Here you can adjust and turn the equalization on or off for the program. Use the On switch to turn equalization on/off. Use the equalization knobs to adjust the tone color of the program. HINT: You can add a more detailed equalizer as an effect for the whole sound in the FX page. -
Page 78: Touch Control Section
70| The Editor Touch control section The keyboard sensitivity, or touch, can be programmed for the sound as a whole. Use the TOUCH knob to select one of the touch curves. Setting Touch Curve Note Normal Normal piano touch. Soft 1 Loud notes can be produced even by playing lightly. -
Page 79: Tuning Curve Section
Sound page |71 Tuning Curve section SV2 comes with several preset tuning curves, that you can apply to your sound as an alternative to the standard Equal tuning. Alternative tuning curves reproduce the original tuning chosen by the original keyboard manu facturers, to better suit the sound of their instruments. - Page 80 72| The Editor Editing a User tuning curve You can edit each tuning curve, and save the edited curve into either of the two available User locations. User tuning curves can then be reached from the Curve list in the side drawer. Select a tuning curve to edit from the popup menu on the left of the key...
-
Page 81: Fx Page
FX page |73 FX page The FX page contains parameters for all the effects applied to the sounds as a whole. This is like the various effect sections on the control panel of the SV2. However, more parameters are available in the Editor. The edited effects can be saved into each favorite sound inside the SV2’s memory, by clicking the Write Favorite button in the side drawer (see “Write Favorite”... -
Page 82: The Effect Chain
74| The Editor The effect chain The EQ and pedal (“stompbox”) effect are placed before the amp model and cabinet, and the modulation and ambient (reverb/echo/delay) are placed af ter the cabinet model. Finally, a limiter takes care of dynamics. Modulation, delay, echo and reverb effects are placed after the amp module, since they are effects that are usually added after capturing the signal from the cabinet with the microphones. -
Page 83: Equalizer Section
FX page |75 Equalizer section This is an EQ with fully parametric mids, placed before the Pre FX. This equal izer is applied to all the programs of the sound. Parameter Values Notes Bass 18…18 [dB] Adjusts the bass frequencies gain. Middle Freq 50 Hz…10.0 kHz Sets the frequency of the middle band. -
Page 84: Pre Fx Section
76| The Editor Pre FX section The Pre FX is placed before the amp. Choosing a Pre FX pedal effect Click the name of the selected Pre FX effect, then choose a different item from the list. Red Compressor Gotta play a clean chordal passage that needs to be nice, smooth and even? Then, look no further: Compressor is the pedal for you. - Page 85 FX page |77 Treeble Boost This effect is modeled after the VOX VBM1, one of the highest rated boost/ overdrive effects ever, designed to achieve the famous “guitar orchestra” effect. This effect was able to provide a transparent boost to your signal, or a harmonically rich overdrive that’s great on organs.
- Page 86 78| The Editor Parameters Values Notes Speed 1.00…10.00 Hz Adjusts the speed of the UVibe effect. Depth 0…100 Adjusts the depth of the UVibe effect. 0…100 Adjusts the mix between the direct sound and the effect. ‘0’ is no effect, ‘50’ is chorus, and ‘100’ is vi brato.
- Page 87 FX page |79 Tremolo This models the popular tremolo circuit that’s built into the Twin amp model. The Spread setting lets you produce a panning effect that spreads to the left and the right. Parameters Values Notes Speed 0.10...10.00 Hz Adjusts the tremolo speed.
- Page 88 80| The Editor Parameters Values Notes Close 0…99 Adjusts the tone when the wah pedal is closed. Open 0…99 Adjusts the tone when the wah pedal is open. Manual 0…99 Adjusts the openness (position) of the wah when in Pedal mode.
-
Page 89: Amplifier Section
FX page |81 Amplifier section It wasn’t easy to select the amps to model, since, there’s a plethora of great sounding amps to choose from. After countless hours of searching, discuss ing and listening sessions, we came out with a top list. As you’re about to discover, the ones we went with are not only the cream of the crop but also offer up the widest possible array of the greatest tones. - Page 90 That is why we have fitted your SV2 with our patented Valve Reactor Technology – a modeling breakthrough that is unique to VOX (a member of the KORG family) and infuses our critically acclaimed Valvetronix range of amps with life and feel. This revolutionary technology emulates a tube poweramp by using real tubes in a real tube amp circuit and ensures that...
- Page 91 FX page |83 Choosing an Amp model Click the name of the selected Amp model, then choose the desired item from the list. Clean The Clean’s clean sound is very tight “n” twangy, with a deep, taut, pianolike bass. When pushed hard the bass tends to crumble. The original amp doesn’t have a Presence control but does have a Bright switch.
- Page 92 84| The Editor Twin This was a blackface guitar amplifier made in Southern California during the early ’60s. Its highwattage into 2 x 12” speakers earned it a shimmering tone. This amp’s medium output and powerful sound was a favorite in rock, blues, jazz or country clubs.
- Page 93 FX page |85 Organ This is a detailed model of the amp of a classic tonewheel organ. With the addition of the 3band EQ, this amp simulation will allow you to create a very versatile distortion. This amp model is especially suitable for organ sounds. You can select one of two amp models, or a direct line out from the organ’s preamp.
-
Page 94: Cabinet Section
86| The Editor Cabinet section Now let’s look at the cabinet models. Please note that these will be automat ically recalled when selecting an amp model from the SV2 front panel. This is the only place where you can edit the amp/cabinet combo! Cabinet and speaker accuracy There’s not much point in having incredibly accurate amp models if the speaker cabinet models on offer aren’t of the same exacting standards. - Page 95 FX page |87 Choosing a Cabinet model Click the name of the selected Cabinet model, then choose a different item from the list. Tweed – 1x12 This speaker is the other half of our Tweed amp. As the name suggests it is a single 12”...
- Page 96 88| The Editor Black – 2x10 Although we did not model the amp that goes exactly with this cabinet, we loved the tone of this mid60s Fullerton, California made open backed 2x10” 35 Watt combo featuring ceramic magnets (of US origin). Great for blues, jazz and country.
- Page 97 FX page |89 AD412 – 4x12 This cabinet is one of VOX’s latest products. The cabinet itself features cus tom designed Celestion speakers using Neodymium magnets, one of the first, if not the first, cabinet to use this technology. It also uses some special cabinet acoustic design technology that is also a first for VOX and 4x12s in general.
-
Page 98: What Goes With What
90| The Editor What goes with what? Basically, with your SV2 you can mix any amp model to any cabinet model, and create many varied tones. But to give you a starting point, here is a list ing of historically accurate matches: AMP MODEL HISTORICALLY ACCURATE CABINET MODEL Clean... -
Page 99: Modulation Effects Section
FX page |91 Modulation Effects section This section enables you to add a modulation effect after the miked cabinet. You can choose one of six types. Choosing a Modulation effect Click the name of the selected Modulation model, then choose a different item from the list. - Page 100 92| The Editor Black Chorus This stereo chorus + pitch modulator & flanger was originally intended for use with guitars, but many keyboardplayers have discovered it, especially to give an extra “touch” on electric pianos. Parameters Values Notes Speed 0.10…10.00 [Hz] Adjusts the modulation speed. Intensity 0…99 Adjusts the modulation intensity.
- Page 101 FX page |93 Small Phaser This classic phaser, made in New York City during the 70s, has a notable warm and rich tone, with liquid transparency. Parameters Values Notes Speed 0.10…10.00 Hz Adjusts the modulation speed. Color 0, 1 This changes the sound of the phaser between a full and robust phase shift when set to ‘0’, to a more pro...
- Page 102 Bright is based on Natural, but with less highend rolloff for a brighter sound. Original is the same as the original KORG CX3 speaker simulator. The +Direct versions add a bit of the direct signal mixed back in, resulting in greater extension of both high and low frequencies.
-
Page 103: Ambient Effects Section
FX page |95 Ambient Effects section Here you can adjust the settings of a reverb, echo or delay effect inserted after the modulation. Choosing an Ambient effect Click the name of the selected Ambient model, then choose a different item from the list. - Page 104 96| The Editor Plate This models a type of reverb unit that works by vibrating a metal plate. It is adjusted to a fairly short reverb time. This reverberation is characterized by a rapid attack, and is suitable for percussive playing. Parameters Values Notes...
- Page 105 FX page |97 Parameters Values Notes Time 1…100 Sets the reverb time. Size 5…100 Sets the size of the space. Damping 0…100 This sets the cutoff of the highfrequency damping filter. If Damping is set to 100, the high frequencies will decay at the same rate as the low frequencies;...
-
Page 106: Stereo Delay
98| The Editor Tape Echo This models one of the most respected analogue tape echo machines ever made. In the original, the “echo” is produced by a playback head and the ex act “delay time” is set by varying the tape motor speed. Many professionals prefer these “lofi”... - Page 107 FX page |99 Parameters Values Notes 40.00…300.00 Sets the delay time in BPM (Beats Per Minute). L Delay 1/32…1/1 Specifies the base note of the left channel delay. R Delay 1/32…1/1 Specifies the base note of the right channel delay. Feedback 0…100 Adjusts the amount of feedback.
-
Page 108: Total Fx Section
100| The Editor Total FX section Here you can adjust the settings of a final limiter inserted at the end of the audio signal. Please note that this section is not available from the SV2 front panel. This is the only place where you can edit it. Choosing a Total FX effect Click the name of the selected Total FX model, then choose a different item from the list. - Page 109 FX page |101 Stereo Mastering Limiter This is a stereo limiter that is optimized for giving the sound a “produced” feel. Parameters Values Notes Threshold 30…0 dB Sets the level above which the compressor is applied. Out Ceiling 30…0 dB Sets the output gain.
-
Page 110: Global Page
102| The Editor Global page The Global page is where you can edit some general parameters, like the master tuning, master transpose, pedal calibration, MIDI channel for sending and receiving control data, as well as turning the Local Off mode on or off. In this page you can also reset the piano to the factory status, if you like to start anew. -
Page 111: Master Tune And Transpose
Global page |103 Master Tune and Transpose You can adjust the fine pitch (Master Tune) and do a coarse transposition in semitones (Transpose). Master Tune By default, SV2 is tuned according to the standard Western tuning (A = 440Hz). You can fine tune the instrument, to match tuning of another instrument you will play with. -
Page 112: Midi
104| The Editor MIDI MIDI Channel Use the Channel menu you can specify the MIDI channel over which SV2 transmits and receives data. The selected channel will be automatically saved to the Global. Local Off When the Local Off function is not activated, SV2 can play its own sounds from the keyboard, and send MIDI data to a computer. - Page 113 Global page |105 Panic In case MIDI notes remain stuck for problems in MIDI communication, click the Panic button until the stuck notes are silenced. This is commonly called the MIDI Panic function. HINT: The Panic can always be invoked from the piano’s control panel by keep the EQUALIZER’s section On/Off button pressed until the stuck notes are silenced.
-
Page 114: Pedal Calibration
Connect all pedals to be calibrated to the SV2. Remember that DAMPER expects the included KORG DS2H damper pedal (or, as an alternative, the optional DS1H, or any footswitch pedal), PEDAL 1 expects a footswitch ped... - Page 115 Global page |107 ▪ If you connected a volume/expression pedal, push it all the way forward to its maximum position. When you have finished calibrating the pedal connected to the PEDAL 2 jack, FAVORITES button #2 will turn on. Finally calibrate the DAMPER pedal. Completely depress the pedal, then release it.
-
Page 116: Factory Restore
108| The Editor Factory Restore After making several changes, you might want to restore the original, fac tory status of the SV2 (including the favorite sounds and global settings): Go to the Global page, and click the Restore button in the Factory Restore section. -
Page 117: Backup Page
Backup page |109 Backup page The Backup page is where you can create and edit a backup set for exchange or archival purpose. -
Page 118: The Backup Tools
110| The Editor The Backup tools On top of the backup set’s content area there is the bar of the tools. These tools replicate most of the menu commands, but may be quicker to reach. Use them to manage the items in the current set, and the backup sets themselves. - Page 119 Backup page |111 Transmit Transmits the current backup set to the SV2. WARNING: Transferring the backup set will overwrite all the SV2’s memory content. Be sure you have a backup of that data. Copies the selected item(s) into the clipboard memory, and removes them from the backup set after pasting.
-
Page 120: Creating And Editing A Backup Set
112| The Editor Creating and editing a backup set Here is how to create a new backup set. Go to the Backup page. Click the New icon to create a new, empty set of favorite sounds. You will get a grid with eight favorite locations (18) for each of the eight banks (AH). Two User tuning curves locations will also appear. -
Page 121: Copying Data From A Backup Set To The Internal Memory
Backup page |113 Copying data from a backup set to the internal memory You can copy favorite sounds and User tuning curves from a backup set to the internal memory of the SV2. You can only paste the sounds into the favorite locations. -
Page 122: Changing The Order Of The Favorite Sounds
114| The Editor Changing the order of the favorite sounds You can rearrange the favorite sounds that come with the SV2. You might want to do so to create your own set list, because you don’t like the order we choose, or because there are sounds you are not using all that often, and prefer to replace them with sounds you find more useful. -
Page 123: Menu
Menu |115 Menu From the menubar you can access commands to manage your data on disk, or to transmit data to the SV2. File menu This menu contains data management commands. Creates a new, empty backup set. You can have multiple sets open at the same time, each one in a different tab. -
Page 124: Edit Menu
116| The Editor Transmit Transmits the current backup set to the SV2. WARNING: Transferring the backup set will overwrite all the SV2’s memory content. Be sure you have a backup of that data. Quit Exit from the SV2 Editor. If there are unsaved changes, you are prompted to save or delete them. - Page 125 Menu |117 Rename Only available in the Backup page. Choose this command to open the Rename dialog, and edit the name of the selected sound. As an alternative, doubleclick the name of the sound to open this dialog.
-
Page 126: Option Menu
118| The Editor Option menu This menu contains the preference command. Preferences Choose this command to open the Preference dialog. Warn when a favorite sound is not saved If the Warn when a favorite sound is not saved checkbox is checked, a warn ing message advises you when you are selecting a different sound while there are unsaved changes in the current favorite sound. -
Page 127: About Menu
Menu |119 About menu Here you can find information about the piano operating system and editor version. Info This contains copyright notices, the SV2 OS version, and the SV2 Editor version number. -
Page 128: Keyboard Shortcuts
120| The Editor Keyboard shortcuts This table shows the shortcuts corresponding to each menu command. Command Shortcut Windows File menu CtrlN CmdN Open CtrlO CmdO Save CtrlS CmdS Save As… CtrlShiftS CmdShiftS CtrlW CmdW Close CtrlT CmdT Transmit Quit CtrlQ Q Edit menu CtrlX... -
Page 129: Appendix
|121 APPENDIX... -
Page 130: Programs
122| Appendix Programs The following list contains the programs you can select from the Sound page to make a sound. Electric Piano Tine Wurly Classic Soft FM EP Belly EP Mk I Suitcase Pure Wurly Line FM & Pad EP & Glock Mk I Stage Pure Wurly Mic Electronic... - Page 131 Programs |123 Electronic Legacy Grand Piano 2 Upright PnoBright Korg M1 Piano Grand Piano 1 Grand Pno2 Bright Saloon Upright Grand&DigitBody Grand Pno1 BigRes Grand Pno2 NoRes Elect. Grand 70 Korg SG1D Grand Pno1 NoRes MIDI Grand M1 Dance 80’s Synth Piano Grand Pno 1 Mono Piano&FM PAD...
- Page 132 124| Appendix Brass/Woodwind Mallets Legacy Tape Strings 3 Swing Horns Vibraphone Strings 1 Tape Strings 4 Ballade Brass Marimba Strings 2 Choir 1 Tight Brass 1 Xylophone Strings 3 Choir 2 Tight Brass 2 Celesta Strings 4 Choir 3 French Section Orgel Strings 5 Choir 4...
-
Page 133: Saved Settings
Saved settings |125 Saved settings The following table shows which settings are saved and where, and which are reset when turning the instrument off. Parameter Sound Global Reset Master Tune √ Master Transpose √ Tuning Curve √ Program Levels √ Split Point √... -
Page 134: Troubleshooting
126| Appendix Troubleshooting If you suspect a malfunction, please check the following points first. If this does not resolve the problem, please contact your dealer or KORG Distributor. Problem Possible remedy The instrument Check that the AC cable is not damaged, and it is correctly connected will not turn on to the piano and the outlet. -
Page 135: Specifications
Specifications |127 Specifications Specifications SV-2 Keyboard Keys SV2‑73/SV2‑73S: 73 keys / SV2‑88/SV2‑88S: 88 keys. Velocity sensitive KORG RH3 (Real Weighted, Hammer Action 3) Touch selection Eight curves Tuning Master Transpose, Master Tuning, Tuning curves Sounds Sound generation EDSX (Enhanced Definition Synthesis – eXpanded) - Page 136 SV2‑88: 44.86 lbs (20.35 kg) / SV2‑88S: 47.29 lbs (21.45 kg) Other Included accessories Power cable, Quick Guide, music stand, damper pedal (KORG DS Optional accessories STSV1 piano stand, DS1H damper pedal, XVP10, XVP20, EXP2, volume/expression pedals, PS1, PS3 footswitch pedal, CBSV carrying bag.
- Page 137 |129...
- Page 142 Address KORG ITALY SpA Via Cagiata, 85 60027 Osimo (AN) Italy www.korg.com © KORG Italy 2020. All rights reserved PART NUMBER: MAN0010144...
Need help?
Do you have a question about the SV-2 and is the answer not in the manual?
Questions and answers