Table of Contents
Advertisement
Quick Links
Advertisement
Table of Contents

Related Manuals for Kyocera FS-6900


Summary of Contents for Kyocera FS-6900
- Page 1 Table of Contents FS-6900 User’s Manual Kyocera Laser Printer...
- Page 2 Kyocera Corporation is prohibited. Any copies made of all or part of this manual, any copyright- able subject must contain the same copyright notice as the material from which the copying is done.
- Page 3 Introduction IBM PROGRAM LICENSE AGREEMENT THE DEVICE YOU HAVE PURCHASED CONTAINS ONE OR MORE SOFTWARE PROGRAMS (“PROGRAMS”) WHICH BELONG TO INTERNATIONAL BUSINESS MACHINES CORPORA- TION (“IBM”). THIS DOCUMENT DEFINES THE TERMS AND CONDITIONS UNDER WHICH THE SOFTWARE IS BEING LICENSED TO YOU BY IBM. IF YOU DO NOT AGREE WITH THE TERMS AND CONDITIONS OF THIS LICENSE, THEN WITHIN 14 DAYS AFTER YOUR ACQUISITION OF THE DEVICE YOU MAY RETURN THE DEVICE FOR A FULL REFUND.
- Page 4 Introduction 3. Limitation of Remedies IBM’s entire liability under this license is the following; 1) For any claim (including fundamental breach), in any form, related in any way to this license, IBM’s liability will be for actual damages only and will be limited to the greater of: a) the equivalent of U.S.$25,000 in your local currency;...
- Page 5 Introduction 3. To protect proprietary rights of Agfa Japan, you agree to maintain the Software and other propri- etary information concerning the Typefaces in strict confidence and to establish reasonable proce- dures regulating access to and use of the Software and Typefaces. 4.
-
Page 6: Interface Connectors
Introduction Interface connectors Important note on the interface connectors Be sure to turn off printer power before connecting or disconnecting an interface cable* to the printer. For protection against static discharge which may be applied to the printer’s internal electronics through the interface connector(s), keep any interface connector which is not in use capped using the protective cap supplied. -
Page 7: Important Safeguards
Introduction Ozone concentration The printer generates ozone gas (O ) which may concentrate in the place of installation and cause an unpleasant smell. To minimize concentration of ozone gas to less than 0.1 ppm, we recommend you not to install the printer in a confined area where ventilation is blocked. IMPORTANT SAFEGUARDS Read all of these instructions and save these instructions for later use. - Page 8 Manufacturer’s address: 2-14-9 Tamagawadai, Setagaya Ward, Tokyo 158-8610, Japan declares that the product Product name: Page Printer Model number: FS-6900 (as tested with enhancement optional units: PF-26, DU-25, etc.) Conforms to the following product specifications. EN 55 022:1998 Class B EN 61 000-3-2:1995...
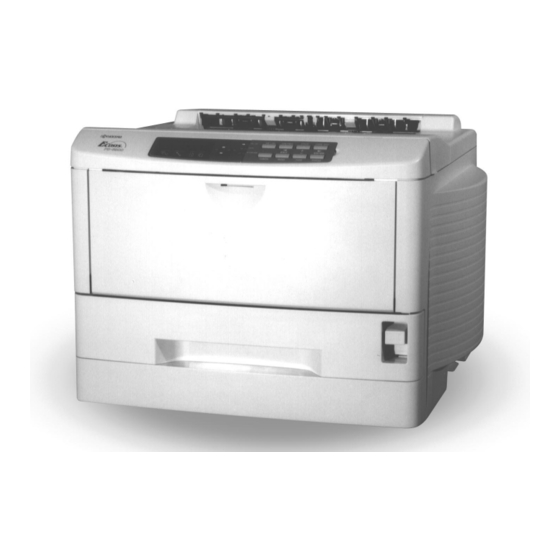
- Page 9 (EN 60 825-1:1994+A11) Description of device: This page printer model FS-6900 is the 25-ppm, up to A4 size paper adaptable, printer that utilizes plain paper, laser, dry toner etc. The printer can be equipped with several enhance- ment optional units such as the paper feeder as PF-26, duplexer as DU-25, etc.
- Page 10 Keep it as level as possible, to avoid spilling toner inside the printer. If you ship the printer, remove the developer unit and ship it separately. Be sure to consult your Kyocera dealer before attempting long-distance transportation of the printer. Remove the developer unit as explained below.
- Page 11 Introduction Remove the developer unit. 1. Remove the connector. 3. Remove the developer unit. 2. Press here. Place the developer unit in the protective package for transportation. Plastic Bag Protective Package for Transportation Place the toner container and waste toner bottle in the plastic bag included in the toner kit.
- Page 12 This product has been developed and manufactured with the express interest of reducing the impact on the environment. Using Kyocera's innovative cartridge free technology, Kyocera has created an advanced printing system that does not require the wasteful replacement and disposal of a cartridge.
- Page 13 Introduction Introduction The Kyocera laser printer has many extremely desirable features. It was designed to make a contribution to a cleaner environment as well as to represent the latest generation of page printer technology. Maintenance Features • Ultra long life modules The drum, developer, and fuser have been designed for ultra long life.
-
Page 14: Software Features
• Kyocera PrintMonitor Provides network wide management of the Kyocera FS family of laser printers. Refer to the readme file located in the Kyocera Digital Library CD-ROM (included with the printer) for details. -
Page 15: Other Features
Introduction Other Features • Large Memory Capacity This printer comes standards equipped with 16 MB of memory. This can be extended up to 64 MB of memory through optional expansion of memory. • Equipped with two expansion slots The printer's expansion slots can be used to install an optional network interface board or hard disk unit. - Page 16 Introduction HD-2 (Hard disk unit) Used for functions such as saving jobs and electronic sorting. Installed in the Hard disk unit slot at the rear of the printer. PA-25 (Paper path adaptor) Necessary when optional feeders and duplex units are attached to the printer.
-
Page 17: Guide To The Manual
Installation Printer basic operation CD-ROM (Kyocera Digital Library) The CD-ROM supplied contains the printer User’s Manual (this manual). PRESCRIBE 2e Programming Manual, and PDF417 Two Dimensional Bar Code Implementation Manual. To gain access to these documents, insert the CD-ROM into the appropriate drive and follow the instructions on the insert accompanying the CD-ROM. -
Page 18: Table Of Contents
Table of Contents Table of Contents Chapter 1 Installing the Printer ......1-1 1.1. Positioning the Printer..........1-1 Clearance................. 1-1 Places to Avoid ................ 1-2 Basic requirements ..............1-2 Power Supply ................1-3 1.2. Unpacking and Inspection........1-4 List of shipped components ............ 1-4 1.3. - Page 19 Table of Contents 1.7. Memory Expansion Installation......1-29 Removing the Main Circuit Board ........1-30 SIMM to be used ..............1-31 Installing and Removing SIMMs ......... 1-31 Testing the Expansion Memory ........... 1-32 Chapter 2 Operating the Laser Printer....2-1 ............2-1 2.1.
- Page 20 Table of Contents 2.8. Virtual Mail Box (VMB)........2-22 Outputting to a VMB ............2-22 Print Accumulated VMB Data ..........2-23 Print Accumulated VMB Data with a Password....2-23 Print VMB Accumulated Data List........2-24 Operations for Using a Barcode Reader ......2-25 2.9.
- Page 21 Table of Contents Chapter 3 Fonts........... 3-1 ............3-1 3.1. Internal Fonts 3.2. List of Fonts............3-2 Chapter 4 Maintenance........4-1 .........4-1 4.1. Toner Kit Replacement Toner Kit to be Used ............... 4-2 Supplying Toner..............4-2 Replace the Waste Toner Bottle..........4-5 ..............4-7 4.2.
- Page 22 Table of Contents Appendix A Printer Specifications......A-1 Appendix B Paper Selection .......B-1 ..........B-1 B.1. General Guidelines Paper Availability ..............B-1 Paper Specifications..............B-2 Paper........B-3 B.2. Selecting the Right ............B-6 B.3. Special Paper Overhead Projection (OHP) Film ...........B-6 Adhesive-Backed Labels ............B-7 Appendix C Host Computer Interface....C-1...
-
Page 23: Installing The Printer
1.1. Positioning the Printer Chapter 1 Installing the Printer This chapter explains how to unpack and install the printer. The topics covered are: Positioning the printer Unpacking and inspection Names of parts Setting up and interfacing 1.1. Positioning the Printer Clearance Allow at least the necessary minimum clearance around the printer (see below). -
Page 24: Places To Avoid
1.1. Positioning the Printer Places to Avoid Avoid installing the printer in locations subject to: Direct drafts of hot or cold air Direct drafts from outside (Avoid locations near doors leading outside.) Sudden temperature or humidity changes Sources of high temperature, for example, near stoves or radiators Excessive dust Vibration Ammonia or other harmful fumes. -
Page 25: Power Supply
1.1. Positioning the Printer Power Supply The printer should not be on the same power circuit as an air conditioner, fluorescent light, copier, or shredder, because these devices generate electrical noise on the power line. If it must share a power circuit with equipment like this, a high-frequency noise filter or isola- tion transformer is advisable. -
Page 26: Unpacking And Inspection
List of shipped components (A) Toner kit (toner container, wiper cloth, waste toner bottle) (B)Installation manual (the booklet) and Kyocera Digital Library (CD-ROM), including the printer drivers and manuals, and cleaning brush. (C)Power cord (D)Box for the developer unit... - Page 27 1.2. Unpacking and Inspection To remove the printer from the box, grasp the handholds on either side of the printer. Lift the printer from the carton as shown below. If necessary, have two people lift the printer. ‹ Always use these handholds whenever you lift or move the printer.
-
Page 28: Names Of Parts
1.3. Names of Parts 1.3. Names of Parts This section takes you on a guided tour of the printer, pointing out its major parts. The part names introduced here will be used throughout this manual. Symbols appearing with the part names have the following meanings. --- See page XX in the Installation Manual. -
Page 29: Interior View
1.3. Names of Parts Interior View Top Cover Side Cover P.11 P.1-11, 4-5, 4-7 Toner Container P.1-9, 4-2, 4-3 Cleaner Knob (Green) P.4-7 Main Charger Unit Waste Toner Bottle P.4-7 P.10 P.1-10, 4-5 Rear View Rear Cover Option Interface Slot Cover (OPT1) P.16 P.1-16... -
Page 30: Setting Up And Interfacing
1.4. Setting Up and Interfacing 1.4. Setting Up and Interfacing Before you can use the printer for the first time, you must set up the printer by installing the printer components and interfacing with the computer. The steps to be followed in set- ting up are: 1—Open the top cover. -
Page 31: 1-Open The Top Cover
1.4. Setting Up and Interfacing 1—Open the Top Cover Remove the packing tape from the printer. Open the printer top cover all the way. Top Cover 2—Install the Toner Container Take the toner container from the toner kit. With the side where the toner kit name and precautions are printed facing down, thor- oughly shake the toner container (in the direction of the arrow) ten times or more to... -
Page 32: 3-Close The Top Cover
1.4. Setting Up and Interfacing When the toner container is installed cor- Top Cover rectly on the developer, push the top of the container unit (“PUSH HERE”) until it locks in. Make sure that the toner container is prop- erly locked in the printer. 3—Close the Top Cover Close the top cover. - Page 33 1.4. Setting Up and Interfacing Open the side cover on the left side of the Side Cover printer. Insert the waste toner bottle with the bottle tilted slightly towards you as shown in the figure. Waste Toner Bottle Ensuring that it is correctly inserted, close the side cover.
-
Page 34: 5-Adjusting The Paper Guides Of The Paper Cassette
1.4. Setting Up and Interfacing 5—Adjusting the Paper Guides of the Paper Cassette By adjusting the position of the paper guides and paper stopper inside the cassette included with this printer, the cassette may be set to supply paper of standard sizes from A5 size to ledger size. - Page 35 1.4. Setting Up and Interfacing Open the cassette cover. Cassette Cover Adjust the paper guides. Adjust by pressing Lock Lever the lock levers as shown in the figure and aligning the paper guides to the paper size to Paper Guides be used.
-
Page 36: 6-Add Paper
1.4. Setting Up and Interfacing 6—Add Paper Be sure to use paper that has been unwrapped as recently as possible. Paper which has been exposed to the air for a long time will absorb moisture, causing multiple sheets to feed at a time and thus resulting in paper jams. - Page 37 1.4. Setting Up and Interfacing Some types of paper (such as thick paper) may be hard to place in the cassette using this method. If this is the case, the process is facilitated by inserting the paper from the back, as shown in the figure. Close the paper cassette cover.
-
Page 38: 7-Open The Paper Stopper On The Face-Down Output Tray (If Required)
1.4. Setting Up and Interfacing 7—Open the Paper Stopper on the Face-down Output Tray (if required) Open the paper stopper as shown in the figure. Depending on the paper, printing without opening the paper stopper may result in more evenly aligned output. Decide whether or not to use the paper stopper after checking the output condition of paper. -
Page 39: 10-Attach The Power Cord
1.4. Setting Up and Interfacing Parallel Interface Plug one end of the cable into the connector Printer’s Rear Side Clips marked Parallel ( ) on the printer. Close the clips on both sides to hold it in place. Plug the other end into a parallel (Centronics) interface connector on your computer. -
Page 40: 11-Print A Status Page
PCL 6 at power-up. If you primarily use software that supports PCL 6, or that supports the Kyocera printer itself, the factory setting is the one you want. If you primarily use software that supports another printer, it is convenient to change the printer’s power-up emulation mode. -
Page 41: 14-Install The Printer Driver
Printer drivers are provided for using the printer with Windows 95, Windows 98, or Windows 3.1. Use the Kyocera Digital Library CD-ROM supplied with the printer. To install the printer driver, proceed as follows. Reference to the Windows manual is also rec- ommended. - Page 42 1.4. Setting Up and Interfacing Insert the supplied CD-ROM (Kyocera Digital Library) into the CD-ROM drive of the computer. Click on Start with the mouse on the Windows95/98 Task Bar, and align the cursor with Settings. Click on Printers among the items displayed.
- Page 43 [CD-ROM Drive Name]:\drivers\[Language]\kpdl\9x Select Kyocera FS-6900 click on Next >, and follow the on-screen instructions to install. Once the driver has been properly installed, a Kyocera printer icon will be added to the printers folder. When printing under Windows 95/98, be sure to set the emulation of this printer to PCL 6 (default setting).
- Page 44 Click on Install. Select Install Unlisted or Updated Printer under List of Printers. Click Install. Select the drive into which you inserted the Kyocera Digital Library CD-ROM, and then select one of the following directories. (Standard PCL5E driver) [CD-ROM Drive Name]:\drivers\[Language]\pcl\3x...
-
Page 45: Mp (Multi-Purpose) Tray Feeding
1.5. MP (Multi-Purpose) Tray Feeding 1.5. MP (Multi-Purpose) Tray Feeding The MP tray is incorporated in the front of the printer. It can be used in one of two modes: the first mode or cassette mode. First mode (automatic manual feeding): If there is paper in the MP tray, paper is fed from the MP tray first even if another paper source is selected. - Page 46 1.5. MP (Multi-Purpose) Tray Feeding Adjust the paper guides to the size of the paper being fed. Paper Guides Check that the printer isý5HDG\. Press the FEED key until the message display indicatesý03ýWUD\ and the MP tray indica- tor on the printer symbol flashes, andý$GGý SDSHU appears on the message display.
-
Page 47: Setting Each Mode
1.5. MP (Multi-Purpose) Tray Feeding Setting Each Mode First Mode (Automatic Manual Feeding) The printer automatically feeds the paper placed on the MP tray regardless of the current paper source selection. To use the first mode (automatic manual feeding mode), simply place a sheet of paper on the MP tray in the same manner as above, even while the printer is pres- ently feeding the paper in the printer’s cassette. -
Page 48: Feeding Envelopes
1.5. MP (Multi-Purpose) Tray Feeding Press the EXIT key.ý5HDG\ appears on the message display. In cassette mode, duplex printing can be performed. We recommended that duplex printing be performed from the paper cassette. An optional duplexer (DU-25) is required to perform duplex printing. Feeding Envelopes Envelopes should be fed face up, right side first, as shown below. -
Page 49: Memory Card
(+5 V type) or SRAM-type and conform to the PCMCIA 2.1 (JEIDA 4.2) standards. Please use a memory card recommended by Kyocera. The memory card slot is located at the bottom right of the printer. -
Page 50: Handling A Memory Card
1.6. Memory Card Handling a Memory Card A memory card contains sensitive electronic circuits. Treat them with appropriate care. A memory card is sensitive to electrostatic discharge. Please discharge yourself before touching a memory card. Never attempt to force a memory card into its slot. Never bend a memory card. -
Page 51: Memory Expansion Installation
SIMM (single in-line memory module) on the main circuit board. ‹ The expansion memory should be installed only by a Kyocera authorized dealer or Kyocera certified technician. Kyocera shall not be liable for damage due to improper installation of the expansion memory. ‹... -
Page 52: Removing The Main Circuit Board
1.7. Memory Expansion Installation Removing the Main Circuit Board The main circuit board of the printer is equipped with two sockets for memory expansion. Expansion memory is available in the form of a SIMM. The following instructions are intended for the technician only. Notes on Handling the Main Circuit Board and SIMM Protect the electronics by taking these precautions: Before touching the main circuit board, touch a water pipe or other large metal object to dis-... -
Page 53: Simm To Be Used
1.7. Memory Expansion Installation SIMM to be used See your Kyocera dealer for purchasing information of the SIMMs that are best suited for use with this printer. Either 4 MB, 8 MB, 16 MB or 32 MB SIMMs can be used for memory expansion. Memory can be expanded up to a total of 64 MB. -
Page 54: Testing The Expansion Memory
1.7. Memory Expansion Installation Removing SIMMs To remove a SIMM, carefully pull the end catches slightly outwards and tilt the SIMM as shown, then pull the SIMM out of the socket. Reverse the procedure under Withdrawing the Main Circuit Board from the Printer to put the main circuit board back into the printer. -
Page 55: Operating The Laser Printer
2.1. Control Panel Chapter 2 Operating the Laser Printer This chapter explains the printer’s control panel and operating procedures. It covers the fundamental information you will need to use the page printer. 2.1. Control Panel The printer control panel comprises a message display, keys, and indicators, as shown below. -
Page 56: Message Display
2.1. Control Panel Message Display The message display gives information in the form of short messages. The seven messages listed below are displayed during normal warm-up and printing. Message Meaning 6HOIý WHVW The printer is self-testing after power-up. 3OHDVHý ZDLW The printer is warming up and is not ready. -
Page 57: Paper Size Indicator
2.1. Control Panel Paper Size Indicator The paper size indicator indicates the paper size of the cassette currently installed in the printer or the paper size currently set for the MP tray. The following abbreviations are used to indicate the paper sizes. $ê... -
Page 58: Symbolic Indicators
2.1. Control Panel Symbolic Indicators The symbolic indicators light during normal operation and when the printer needs attention. Indicator Name Description Flashing: Indicates the possibility that paper may be jammed at this point, open and remove any jammed paper. See Section 5.6. Face-down Lit: Indicates when printed pages are delivered to the face-down... -
Page 59: Control Keys
2.1. Control Panel Control Keys The control panel keys are used to configure the printer. Settings made with these keys effect only the interface currently in use. Function ON LINE Switches the printer on-line and off-line. 1. Depending on the message being indicated, there are cases where operation will CONTINUE continue after pressing the CONTINUE key. -
Page 60: Operating Procedures
2.2. Operating Procedures 2.2. Operating Procedures This section explains basic operations of the printer and procedures leading up to and including printing. Operating Precautions Do not turn off power during printing. This may result in a paper jam or damage to the printer. Do not open covers on the printer or covers of optional equipment or move the printer during printing. -
Page 61: Basic Printing Operations
2.2. Operating Procedures Basic Printing Operations The flow of basic operations to print is given below. Keys on the control panel are explained after that. For details on using the MODE key, be sure to read the section “Mode Select Menu” at the end of this manual in conjunction with this section. -
Page 62: Feed Selection
2.2. Operating Procedures Feed Selection Use the FEED key to select whether to feed paper from the paper feed cassette or the MP tray. If optional paper feeder (PF-26) is installed, any of these can also be selected. The FEED key can be used whenever the message display indicatesý5HDG\ orý$GGý SDSHU. -
Page 63: Canceling Printing
2.2. Operating Procedures Canceling Printing Perform the following procedure when you wish to cancel printing after it has begun. Check if the messageý3URFHVVLQJ is displayed in the message display. Press the ON LINE key to take the printer offline. Perform the necessary procedure on the computer to halt printing. Press the CANCEL key. -
Page 64: Status Printout
2.2. Operating Procedures Status Printout It is possible to print out and check the printer’s current status including unit emulation, font, and memory usage. Check that the ON LINE indicator lit and that the messageý 5HDG\ is displayed in the message display. -
Page 65: Sample Status Page
2.2. Operating Procedures Sample Status Page 2-11... - Page 66 2.2. Operating Procedures 1 — Software version This information shows the software version and date of issue of the printer. 2 — Hardware information This information shows the currently selected paper feed source (indicated by an asterisk), paper size, and main settings of the printer. 3 —...
-
Page 67: Form Feed
2.2. Operating Procedures Form Feed The messageý:DLWLQJ may be displayed in the message display when you get to the end of a print job. This occurs when the software does not issue a final form feed to the printer indicating the end of the print data. In this case, pressing the FORM FEED key allows you to finish printing immediately. -
Page 68: Mode Selection Menu
2.3. Mode Selection Menu 2.3. Mode Selection Menu This section explains the menu hierarchy used for all menus which can be set and selected using the MODE key. The MODE key can be used to display all of the menus in the table below. This mode selection menu conforms to the menu hierarchy given at the end of this manual. - Page 69 2.3. Mode Selection Menu Item Function Default Setting )RQWý ý ý ý ý ý ý ý ý ý ý ! Select the current interface font. The default Internal number for selecting an internal font is I000 (this I000 (Courier) is the number for Courier). If there are optional fonts in the printer other than the internal ones, you can specify them by switching to theý...
- Page 70 2.3. Mode Selection Menu Item Function Default Setting 3DSHUý KDQGOLQJý ! The following operations can be performed from sub-menus on paper type. MP tray mode First Paper size for MP tray A4 or Letter Paper type for MP tray Plain Paper type for Cassette Plain Paper type for Cassette 1-3...
-
Page 71: Configuring Interfaces
2.4. Configuring Interfaces 2.4. Configuring Interfaces The printer is equipped with both a parallel and serial interface. Independent settings can be made for each interface. Optional interface can also be installed. To configure each interface, press the MODE key and use the + or – key to select the interface you wish to make settings for. -
Page 72: Emulation Selection
2.5. Emulation Selection 2.5. Emulation Selection The following emulations can be selected for this printer. The emulation selected is stored even while the printer’s power is off. Line printer IBM Proprinter Diablo 630 Epson LQ-850 PCL 6 (Default setting) KPDL KC-GL KC-GL Emulation The following settings can be made from the sub-menu when KC-GL emulation is selected. -
Page 73: Reduction
2.6. Reduction (Page Set) 2.6. Reduction (Page Set) Make settings on the page set menu to print at a reduced size. This menu is used to set the source paper size and the paper size to use after reduction. These settings can be made from within programs or files using the PRESCRIBE 2e SPSZ command. - Page 74 2.6. Reduction (Page Set) Source Size-Target Size Combinations Source Size Indicator Target Size Indicator Reduction/Enlargement Ratio 100% CS 98% 100% Legal size LG 98% (8.5 14 inches) 100% Letter size (8.5 11 inches) LT 98% 100% Ledger size LD 98% (11 17 inches) 100% (14.8 21 cm)
-
Page 75: Ram Disk
2.7. RAM DISK 2.7. RAM DISK A RAM DISK can be set up as a virtual media device by setting a given amount of the total printer memory as the RAM DISK. This can then be used for reading and writing data just as with a memory card or as a virtual mail box function (see page 2-22). -
Page 76: Virtual Mail Box (Vmb)
2.8. Virtual Mail Box (VMB) 2.8. Virtual Mail Box (VMB) The Virtual Mail Box (VMB) function is a mail box function for the printer which does not require a physical mail box to be attached to the printer. The virtual mail box function can be used when RAM DISK mode isý2Q or when an optional hard disk unit is installed on the printer. -
Page 77: Print Accumulated Vmb Data
2.8. Virtual Mail Box (VMB) Print Accumulated VMB Data This function prints VMB data accumulated in a virtual output tray. Selectý5$0ý',6.ýPRGH on the printer's Mode Select Menu and displayý!3ULQWý 90%ýGDWDý7UD\. The VMB tray number will appear in the location marked byýú's below, while the VMB tray name will appear in the location marked byýø's. -
Page 78: Print Vmb Accumulated Data List
2.8. Virtual Mail Box (VMB) Press the ENTER key once the correct password is entered.ý3URFHVVLQJ will be dis- played and the data will be printed. If the password was incorrect, an error message will be displayed. (See page 5-11.) Pressing the CONTINUE key will return the printer toý 5HDG\ status. -
Page 79: Operations For Using A Barcode Reader
2.8. Virtual Mail Box (VMB) Information regarding virtual output trays which are set will be displayed in the virtual mail box list. A mark is shown with the bin number for virtual output trays which contain data. If a password is set for a virtual output tray, there is no barcode shown for that virtual output tray. -
Page 80: Memory Card
Memory Card Slot metallic object. ‹ Use a flash memory card or a S-RAM memory card conforming to JEIDA Ver. 4.2 which is approved by Kyocera. ‹ Be sure that its power is off when inserting or removing a memory card. ‹... -
Page 81: Operating A Memory Card
2.9. Memory Card Operating a Memory Card The following operations on a memory card inserted into the printer’s memory card slot is possible. Reading Fonts Reading Macros Reading Data Writing Data Deleting Data Formatting a Memory Card Printing a List of Data Names (Partitions) Note that only reading fonts and printing a list of partitions are possible when a font card is inserted. -
Page 82: Reading Macros From A Memory Card
2.9. Memory Card Reading Macros from a Memory Card Macro data on a memory card can be registered on the printer. Registered macro data can be used just like macro data located in printer memory. If a memory card already containing macro data is inserted in the printer, that macro data will be read into the printer automat- ically when the printer’s power is turned on. -
Page 83: Writing Data (Partitions) To A Memory Card
2.9. Memory Card Writing Data (Partitions) to a Memory Card Data sent from the computer can be written on a memory card. Data written on the card can be read into printer memory by key operations from the control panel of the printer. Assuming the card has enough memory capacity, up to 127 partitions can be written on a single card. -
Page 84: Deleting Data From A Memory Card
2.9. Memory Card Deleting Data from a Memory Card It is possible to delete data names on a memory card one at a time. Check that the memory card can be written (that write-protection is released). Bring up the menuý!'HOHWHýGDWD on the message display. This display only appears if the memory card contains data. -
Page 85: Formatting A Memory Card
2.9. Memory Card Formatting a Memory Card It is necessary to first format a new memory card before it can be used by the printer. For- matted a memory card can then be written with data. ‹ Note that if you format a memory card which already has data written on it, that data will be lost entirely. -
Page 86: Printing A List Of Data Names (Partitions)
2.9. Memory Card Printing a List of Data Names (Partitions) This operation prints the contents (data names, data size, etc.) of the memory card inserted in the memory card slot. Bring up the menuý!/LVWýRIý3DUWLWLRQV on the message display. Press the ENTER key.ý" will appear. Press the CANCEL key to cancel printing. -
Page 87: Setting The Paper Type
2.10. Setting the Paper Type 2.10. Setting the Paper Type This printer is capable of printing under the optimum setting for the type of paper being used. Setting the paper type for the paper source from the printer's control panel will cause the printer to automatically print in the mode best suited to that type of paper. -
Page 88: Making Settings
2.10. Setting the Paper Type Making Settings The following describes the procedure for setting the paper type using the Recycled type and Cassette as examples. Displayý3DSHUýKDQGOLQJý! on the printer's Mode Select Menu and press the key. Then use the + and – keys to display theý&DVVHWWHýW\SH. 3DSHUý... - Page 89 2.10. Setting the Paper Type key after selecting the paper type you want to customize. Pressing the + Press the and – keys will cycle through a display of the submenus given in the table below. Submenus displayed Selection parameters Description !!3DSHUý...
-
Page 90: Adjusting The Print Density
2.11. Adjusting the Print Density 2.11. Adjusting the Print Density If necessary, the print density can be adjusted from the MODE SELECT MENU. The required print density can be selected from five different steps (01 [light] - 05 [dark]). The factory setting is 03 , and there is normally no need to alter this setting. -
Page 91: Sleep Timer Setting
2.12. Sleep Timer Setting 2.12. Sleep Timer Setting This printer is equipped with a sleep timer function for conserving energy in cases where there has been no operation from the control panel or data has not been received for a pre- determined period of time. -
Page 92: Dumping Received Data
2.13. Dumping Received Data 2.13. Dumping Received Data It is possible to print data received by the printer as hexadecimal code for the purposes of debugging programs and files. Selecting Dump Received Data Mode Pressing the MODE key will put the printer in Mode Select mode. Press + or –... -
Page 93: Kir Level
2.14. KIR Level 2.14. KIR Level This printer incorporates the KIR (Kyocera Image Refinement) smoothing function. KIR provides high quality printing by providing a software-type improvement to the resolution. Print a status page to find out the current printing mode. - Page 94 2.14. KIR Level Status Page KIR Checking Lines Optimized stripes The current KIR setting is optimal. Dark vertical stripes The KIR mode currently set is too strong. Set the KIR mode toý2II. Try printing the test pattern again. If you still get dark vertical stripes, adjust the print density cotrol to a lighter setting.
-
Page 95: Selecting Kir Mode
2.14. KIR Level Selecting KIR Mode Pressing the MODE key will put the printer in Mode Select mode. Press + or – to select 2WKHUVý!. Press the key. Press the + or – key to displayý!.,5ýPRGH and then press the ENTER key. Aý" will flash and the current setting can be changed. -
Page 96: Ecoprint Mode
2.15. Ecoprint Mode 2.15. Ecoprint Mode The Ecoprint enables you to reduce the amount of toner consumed on the page so as to save your printing costs. Ecoprint setting isý 2II Ecoprint setting isý2Q (default). The Ecoprint setting has no effect on the print speed. Selecting Ecoprint Mode Pressing the MODE key will put the printer in Mode Select mode. -
Page 97: Resource Protection
2.16. Resource Protection 2.16. Resource Protection When you switch from the PCL 6 emulation to another, all downloaded fonts and macros are lost. Resource protection preserves these PCL resources in memory so that they are intact when you change the emulation back to PCL 6. By using the printer’sý!5HVRXUFHýSURWï, you can select from two resource protection modes as follows: !5HVRXUFHý... -
Page 98: Setting The Audio Warning (Buzzer)
2.17. Setting the Audio Warning (Buzzer) 2.17. Setting the Audio Warning (Buzzer) In addition to the message displayed when the paper supply is exhausted, or when paper jamming occurs, an audio warning is made to sound. This is useful, for example, when the printer is in a location some distance from the user. -
Page 99: Selecting Buzzer Mode
2.17. Setting the Audio Warning (Buzzer) The alarm will continue to sound while the error condition continues (if the printer is in the sleep mode, the alarm will be silent for that period alone). The alarm will cease to sound, however, when the CANCEL key is pressed. -
Page 100: Fonts
3.1. Internal Fonts Chapter 3 Fonts This chapter describes the types of fonts you can use with the printer, including the printer's internal fonts. 3.1. Internal Fonts A font is a set of characters of a particular design. The design is referred to as a typeface. Several characteristics identify a font. -
Page 101: List Of Fonts
3.2. List of Fonts 3.2. List of Fonts This section contains a full list of the printer's internal fonts. You can print the same font list from the printer by using the printer's control panel key. To print a list of fonts, refer to Mode Select Menu, List of fonts. - Page 102 3.2. List of Fonts Font number Font samples I038 I039 I040 I041 I042 I043 I044 I045 I046 I047 I048 I049 I050 I051 I052 I053 I054 I055 I056 I057 I058 I059 I060 I061 I062 I063 I064 I065 I066 I067 I068 I069 I070 I071 I072...
- Page 103 3.2. List of Fonts KPDL Fonts (1)
- Page 104 3.2. List of Fonts KPDL Fonts (2)
-
Page 105: Maintenance
4.1. Toner Kit Replacement Chapter 4 Maintenance This printer is designed to provide years of trouble-free service without the necessity of printer module replacement. However, you must replace the toner container in the printer with a replacement container from a new toner kit. Also, to ensure good print quality, various parts inside the printer must be cleaned at regular intervals. -
Page 106: Toner Kit To Be Used
(The kit supplied with the printer contains only the toner container and waste toner bottle.) We strongly recommend you use only the original Kyocera toner kit. Use of original Kyocera toner assures the intended long term reliability of the printer. - Page 107 4.1. Toner Kit Replacement Put the old toner container in the plastic bag Old Toner Container supplied with the toner kit. Dispose of the toner container. The old toner container may be incinerated Plastic Bag without the risk of generating harmful gas. Take the new toner container from its bag.
- Page 108 4.1. Toner Kit Replacement When the toner container is installed cor- Top Cover rectly on the developer, push the top of the toner container unit (“PUSH HERE”) until it locks in. Make sure that the toner container is prop- erly locked in the printer. Close the top cover as shown below.
-
Page 109: Replace The Waste Toner Bottle
4.1. Toner Kit Replacement Replace the Waste Toner Bottle When replacing the toner container, the used waste toner bottle in the printer should also be replaced with a new one from the new toner kit. Open the printer side cover. Side Cover Old Waste Toner Bottle Remove the waste toner bottle as shown... - Page 110 4.1. Toner Kit Replacement Locate the new waste toner bottle in the toner kit, and install in the printer as shown below. Do not cap the new waste toner bottle. Insert the new waste toner bottle with the bottle tilted slightly towards you as shown in the figure.
-
Page 111: Cleaning
4.2. Cleaning 4.2. Cleaning In addition to the maintenance procedures described on the following pages, the charger wire in the drum unit and paper feed unit should be cleaned from time to time, or whenever print quality problems occur. To avoid print quality problems, the following printer parts must be cleaned with every toner container replacement. - Page 112 4.2. Cleaning Cleaning the Grid Clean the grid at the time of toner kit replacement. Take the grid cleaner from protective bag in the new toner kit, and remove the cap. Protective Bag The grid cleaner pad is impregnated with water.
-
Page 113: Paper Feed Unit
4.2. Cleaning Paper Feed Unit To avoid print quality problems due to paper dust and debris, clean the paper feed unit in the following manner. Pull the paper feed unit release lever up and draw the paper feed unit all the way out until it stops. -
Page 114: Troubleshooting
5.1. General Guide Chapter 5 Troubleshooting This chapter explains how to handle printer problems which may or may not occur. The procedures are easy to follow. If a problem persists after you have completed the appro- priate troubleshooting procedures, call for the assistance of a service person. 5.1. -
Page 115: Power Problems
5.2. Power Problems 5.2. Power Problems The printer power rating must be within the voltage range in your country. If in doubt, consult your dealer. If nothing happens when you switch the printer’s power on, you have a power problem. The symptoms are a dark control panel, no printing, and no fan sound. -
Page 116: Print Quality Problems
5.4. Print Quality Problems 5.4. Print Quality Problems Print quality problems range from uneven tone to completely blank output. The trouble- shooting procedure for each type of problem is given below. If the checks explained in this section do not solve the problem, call for the assistance of a service person. -
Page 117: Dropouts, Horizontal Streaks, Stray Dots
5.4. Print Quality Problems Dropouts, horizontal streaks, stray dots Clean the charger wire. Open the printer side cover. Pull the green main charger wire cleaning knob slowly in and out a few times. See Section 4.2. Note the spacing of the defects. If the defects occur at regular intervals, the problem may be due to a scratch or foreign mat- ter on the drum, fuser roller, or transfer roller inside the printer. -
Page 118: The Image Is Smeared
5.4. Print Quality Problems The image is smeared Clean the charger wire Open the printer’s side cover. Pull the green main charger wire cleaning knob slowly in and out a few times. See Section 4.2. Faint or blurred printing Check the control panel. If the 7RQHUýORZý7.ðëíý&OHDQýSULQWHU message is displayed and the indica- tor is flashing, install a new toner kit. -
Page 119: Grey Background
5.4. Print Quality Problems Grey background Check the control panel. If the 7RQHUýORZý7.ðëíý&OHDQýSULQWHU message is displayed and the indica- tor is flashing, install a new toner kit. See Section 4.2. Check the print density. Display the print density menu from the control panel and select a lighter density setting. See Section 2.11. -
Page 120: Dirt On The Top Edge Or Back Of The Paper
5.4. Print Quality Problems Dirt on the top edge or back of the paper Check the paper chute and the ramp. Draw out the paper feed unit and check for toner on the paper ramp. Clean the paper ramp (see Section 4.2.) using the wiper supplied, or a soft, dry, lint-free cloth. Check the transfer roller. -
Page 121: Indicators And Messages
5.5. Indicators and Messages 5.5. Indicators and Messages The tables on the following pages indicate how to respond to problems indicated by the con- trol panel symbolic indicators and messages. Indicators Table 5.1 Symbolic Indicators Indicator Condition Corrective Action • The printer has run low on toner. The toner should be replaced as soon as possible. -
Page 122: Maintenance Messages
5.5. Indicators and Messages Maintenance Messages Table 5.2 Maintenance Messages Message Corrective Action 7RS FRYHU Open the top cover, then close tightly. 2SHQ 6LGH FRYHU Open the side cover, then close tightly. 2SHQ 3DSHU IHHG XQLWý Open the paper feed unit, then close tightly. 2SHQ )DFHðGRZQ WUD\ý... - Page 123 5.5. Indicators and Messages Message Corrective Action 5HSODFH :DVWHð Replace the old waste toner bottle with the new one which is included WRQHU ERWWOH in the TK-20/TK-20H toner kit. The message will also be shown if the waste toner bottle has become full. The waste toner bottle should be replaced when the message display eventually showsý...
-
Page 124: Error Messages
5.5. Indicators and Messages Message Corrective Action &DOO VHUYLFH Mechanical error (n=í,ýì,ýë, ...)-Call a service person. The printer SHUVRQ(Qãíìëêéèç does not operate when a message beginning withý ( is displayed. The total number of pages printed is also indicated. &DOO VHUYLFH Controller error (n=í,ýì,ýë, ...)-Call a service person. - Page 125 5.5. Indicators and Messages Message Corrective Action 5$0ý ',6.ý HUURUý úú Check the error code displayed in the place ofýúú and refer to the 3UHVVý &217,18( appropriate description below. íì: Abnormal format. Try turning the power off and on again. íë: RAM DISK mode isý2II.
- Page 126 5.5. Indicators and Messages Message Corrective Action 0(025<&$5' HUUúú This message appears when an error occurs during access to the 3UHVV &217,18( memory card using the PRESCRIBE 2e RWER (ICCD) command or from the printer's control panel. Look at the error code given in place ofýúú...
- Page 127 5.5. Indicators and Messages Message Corrective Action ,î) RFFXSLHG This message is displayed when you attempt to use the printer's con- trol panel to change the environmental settings on the interface from which data are presently being received. 3URFHVVLQJ ),7 (image FITting) flashes to indicate that a loss of raster data ),7 $é...
-
Page 128: Correcting A Paper Jam
5.6. Correcting a Paper Jam 5.6. Correcting a Paper Jam Theý3DSHUýMDP message is displayed on the message display when paper becomes stuck in the paper transport system, the paper feed timing is incorrect, or paper fails to feed at all. The jam can be corrected by removing the paper. - Page 129 5.6. Correcting a Paper Jam ‹ When pulling the paper, pull it gently so as not to tear it. Torn pieces of paper are difficult to remove and may be easily overlooked, deterring the jam recovery. ‹ The fuser unit inside the printer is hot. Do not touch it with your hands as it may result in burn injury.
- Page 130 5.6. Correcting a Paper Jam If you cannot find a paper jam by pulling out the paper feed unit and paper cassette as shown in Figures 5.2 through 5.4 on the previous pages, try checking inside the rear of the printer as shown below.
-
Page 131: Appendix A Printer Specifications
Printer Specifications Appendix A Printer Specifications Item Description Electrophotography, laser scan. Printing method 25 pages/minute (A4 or letter-size paper, landscape feed) Printing speed (when printing multiple 15.5 pages/minute (B4-size paper) 13.5 pages/minute (A3-size paper) copies of the same page) 2400 dpi equiv. 600 dpi (600 dpi + KIR) Resolution First print Approx. - Page 132 Printer Specifications Item Description Heat roller Fuser Toner saving Ecoprint mode Paper Plain paper. See Appendix B in this manual. Paper feed trays Cassette: A3 to A5 universal cassette. Holds approximately 250 sheets of weight 75 g/m , thickness 0.1 mm. MP tray: 90 mm 148 mm to 297 mm 432 mm.
-
Page 133: Appendix B Paper Selection
B.1. General Guidelines Appendix B Paper Selection B.1. General Guidelines The printer is designed to print on high-quality copier bond paper (the kind used in ordinary dry copier machines), but it can accept a variety of other types of paper as well within the limits specified below. -
Page 134: Paper Specifications
B.1. General Guidelines Paper Specifications The following table summarizes the basic paper specifications. Details are given on the fol- lowing pages. Table B.1 Specifications Item Specification Weight 60 to 90 g/m² (16 to 24 lbs./ream) Thickness 0.086 to 0.110 mm (3.4 to 4.3 mils) Dimensional accuracy ±0.7 mm (±0.0276 inches) Squareness of corners... -
Page 135: Selecting The Right Paper
B.2. Selecting the Right Paper B.2. Selecting the Right Paper Laser printing is a process involving laser light, electrostatic discharge, toner, and heat. In addition, as the paper passes through the printer it undergoes considerable sliding, bend- ing, and twisting motions. A high-quality printing paper matching the printer's require- ments withstands all these stresses, enabling the printer to turn out clean, crisp printed copy consistently. -
Page 136: Paper Size
B.2. Selecting the Right Paper Paper Size Cassettes and a MP tray are available for the paper sizes listed in Table B.2. The dimen- sional tolerances are ±0.7 mm (±0.0276 inches) for the length and width. The angle at the corners must be 90°... -
Page 137: Moisture Content
B.2. Selecting the Right Paper Moisture Content Moisture content is defined as the percent ratio of moisture to the dry mass of the paper. Moisture can affect the paper's appearance, feedability, curl, electrostatic properties, and toner fusing characteristics. The moisture content of the paper varies with the relative humidity in the room. When the relative humidity is high and the paper absorbs moisture, the paper edges expand, becom- ing wavy in appearance. -
Page 138: Special Paper
B.3. Special Paper B.3. Special Paper This section explains printing on special paper. The page printer can use the following types of special paper. In this case, set the media type according to the table below. Paper type Media type &RORU Colored paper 3UHSULQWHG... -
Page 139: Adhesive-Backed Labels
B.3. Special Paper Adhesive-Backed Labels The basic rule for printing on adhesive labels is that the adhesive must never come into con- tact with any part of the printer. Adhesive paper sticking to the drum or rollers will damage the printer. Label paper must be manually fed. -
Page 140: Colored Paper
B.3. Special Paper Envelopes The printer can print on envelopes using paper with a basis weight of 60 to 79 g/m² (16 to 21 lbs/ream). Envelopes must be manually fed. An envelope is a more complex object than a single sheet of paper. For this reason, it may not be possible to obtain consistent printing quality over the entire envelope surface. -
Page 141: Appendix C Host Computer Interface
C.1. Parallel Interface Appendix C Host Computer Interface This appendix describes the signals used in the laser printer's parallel, RS-232C/RS- 422A interfaces. It also lists pin assignments, signal functions, timings, connector spec- ifications, and voltage levels. The RS-232C/RS-422A protocols are also covered. Finally, it explains the use of the printer in a multi-computer environment. -
Page 142: Interface Signals
C.1. Parallel Interface Interface Signals The pins of the parallel interface connector carry the signals listed in Table C.1. Asterisks in the table indicate signals that are active low. The table also indicates whether each signal is incoming or outgoing with respect to the printer. Table C.1. - Page 143 C.1. Parallel Interface Detailed descriptions of the signals follow. Strobe* [nStrobe] (Pin 1) A negative-going Strobe* pulse causes the printer to read and latch the data on the Data 0 [1] to Data 7 [8] signal lines. Data 0 [1] to Data 7 [8] (Pins 2 to 9) These eight signals form the data byte sent from the host computer to the printer.
-
Page 144: Rs-232C/Rs-422A Interface
C.2. RS-232C/RS-422A Interface C.2. RS-232C/RS-422A Interface RS-232C interface Interface Signals The pins of the printer's RS-232C interface connector carry the signals listed in Table C.2. The table also indicates whether each signal is incoming or outgoing with respect to the printer. -
Page 145: Rs-422A Interface
The changing of the main circuit board jumper connector should be carried out only by a Kyocera authorized dealer or Kyocera certified technician. Kyocera shall not be liable for damage due to improper changing of this main circuit board jumper connector. - Page 146 C.2. RS-232C/RS-422A Interface Withdrawing the Main Circuit Board from the Printer Be sure to remove the memory card first if inserted in the printer's memory card slot. Withdraw the main circuit board completely from the printer as follows: Turn the printer's power off. Unplug the printer's power cable and disconnect the printer from the host computer.
- Page 147 C.2. RS-232C/RS-422A Interface Verifying the Setting The procedure described below should be followed to verify that the RS-422A mode had been correctly set. Print the service status page to verify that the RS-422A mode has been cor- rectly set. Make sure the power switch is off. Plug the power cord into the printer and turn power If the printer is on-line, selectý!!3ULQW 6WDWXV SDJH in the Mode Select menu (refer to Mode Select Menu at the end of this document), and print the service status page.
-
Page 148: Serial Connector
C.2. RS-232C/RS-422A Interface Overview of Signals (RS-422A) FG - Frame Ground - (Pin 1) This pin is connected directly to the printer frame. RDA - Receive Data Inverted - (Pin 3) RDB - Receive Data - (Pin 18) These pins carry asynchronous data sent from the computer to the printer. (differential input) SG - Signal Ground - (Pin 7) All signals can transmit between the printer and the host computer to send each signals... -
Page 149: Rs-232C/Rs-422A Protocol
C.3. RS-232C/RS-422A Protocol C.3. RS-232C/RS-422A Protocol A protocol is a set of rules the computer follows in sending data to the printer. The RS-232C/ RS-422A parameters are stored in battery backed-up memory. They are indicated on the status printout. They can be changed by the FRPO (firmware reprogram) command described in the Programming Manual. -
Page 150: Prescribe 2E Frpo D0 Command
C.3. RS-232C/RS-422A Protocol H6: Buffer nearly-full threshold This is a percentage from 0 to 99. The factory setting is 90. H7: Buffer nearly-empty threshold This is a percentage from 0 to 99. The factory setting is 70. The factory settings of the buffer nearly-full and nearly-empty thresholds (H6 and H7) are subject to change without notification. -
Page 151: Rs-232C Cable Connection
C.4. RS-232C Cable Connection C.4. RS-232C Cable Connection Preparing an RS-232C Cable After obtaining an RS-232C cable, check that it is wired correctly, referring to the pin assignment table in Appendix C. If you have an IBM communication adapter cable type 1502067, you will have to resolder the wiring at the printer end of the cable. - Page 152 C.4. RS-232C Cable Connection Set the computer to the same parameters as the printer. On many computers this can be done by setting DIP switches before power is turned on. Another method is as follows: With Windows 95 or Windows 98, make settings as follows. Click on Start with the mouse on the Windows 95/98 Task Bar, and align the cursor with Settings.
- Page 153 C.4. RS-232C Cable Connection In DOS, enter the following commands: C:\>MODE COM1:96,N,8,1,P C:\>MODE LPT1:=COM1 To test the interface, then enter: CTRL P C:\>DIR CTRL P The software settings made by the procedures above are temporary. On most comput- ers, permanent settings must be made with DIP switches. If you want to use a different baud rate or change any of the other RS-232C parameters, you can use the printer's FRPO (firmware reprogram) command.
-
Page 154: Index
PAR FIT A4 5-14 setting 2-39 Control Panel 2-1 RAM DISK error ## test page 2-39 control keys 2-5 Press CONTINUE 5-12 Kyocera Digital Library COPY indicator 2-3 Warning battery CD xvi INTERFACE indicator 2-2 MEMORY CARD 5-12 User’s Manual xvi... -
Page 155: Printer Specifications
Index Call service personEn 5-11 Sub Tray 1-23 PRESCRIBE 2e xvi Call service personFn 5-11 PRESCRIBE 2e Cassette not loaded 5-9 command xvi, 2-5, 5-7 Cassette size error 5-9 FRPO D0 command C-10 Clean printer Press Names of Parts RES command 2-9 CONTINUE 5-9 Front View 1-6 Print Density 2-36... - Page 156 Index Simple Network Management Protocol (SNMP) xiii Sleep Timer 2-37 Sleeping 2-2 Sleeping mode 2-37 Soft font 3-1 Status Page 1-18 Status page printing 5-1 Status page printing 2-10 Switching Online/Offline 2-8 Temperature and humidity 1-2 TK-20/TK-20H 4-1, 4-2 Toner Container 4-2 Dispose 4-3 Install 1-9 life 4-1...
-
Page 157: Mode Select Menu
Mode Select menu These items will not show unless the printer is installed with the applicable option unit/kit. ý 5HDG\ 3$5ý ý ý ý ý çííý $éý ííì ý 3ULQW ý 0HQXý 0DS Basic Operations During Mode Selection ý ý !3DUDOOHOý... - Page 158 ý Continued from Previous page ý ý (*1) (PXODWLRQý ý ý ý ý ý ý ý ! !&RGHý VHW ý 3&/ý ç ý ,62ðçý $6&,, ý ý ý (PXODWLRQý ý ý ý ý ý ý ý ! !.&ð*/ý ý ý ý ý ý ý ý ý ý ý ! !!3HQý...
- Page 159 ý Continued from Previous page ý ý !&RSLHV 3DJHý VHWý ý ý ý ý ý ý ý ý ! ý ý ý ý ý ý ý ý ý ý ý ý ý ý ííì ý !=RRP ý >&6@ >&6@ ý !2ULHQWDWLRQ ý...
- Page 160 ý Continued from Previous page ý 5$0ý ',6.ý PRGH ý 2II The 5$0ý',6.ýPRGH menu ý ý !5$0ý 'L6.ý VL]H 5$0ý ',6.ý PRGHý ý ý ý ! ý 2Q is not displayed when an optional hard disk unit is ý (*8) !5HDGý...
- Page 161 ý Continued from Previous page ý ý 2WKHUVý ý ý ý ý ý ý ý ý ý ý ! !06*ý ODQJXDJH After the printer accepts all data *11: ý ý (QJOLVK and there is no more data from the computer, the printer will wait ý...
Need help?
Do you have a question about the FS-6900 and is the answer not in the manual?
Questions and answers