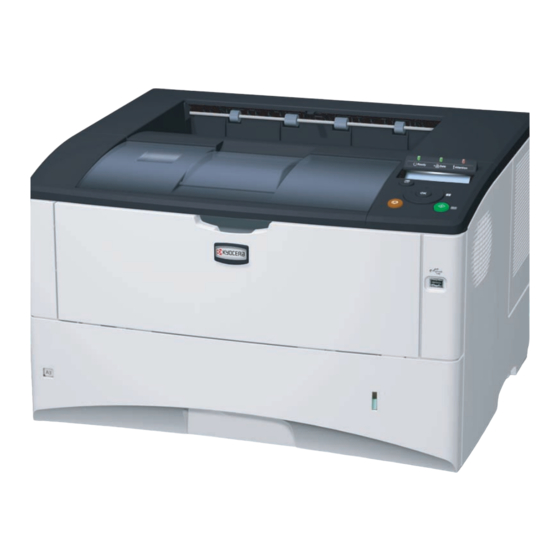
Kyocera FS-6970DN Operation Manual
Black-white printer wide variety of output sizes up to a3
Hide thumbs
Also See for FS-6970DN:
- Service manual (127 pages) ,
- Betjeningsvejledning (103 pages) ,
- Operation manual (219 pages)
Table of Contents
Advertisement
Advertisement
Table of Contents

Subscribe to Our Youtube Channel
Related Manuals for Kyocera FS-6970DN


Summary of Contents for Kyocera FS-6970DN
-
Page 3: Table Of Contents
Contents Machine Parts ................1-1 Components at the Front of the Printer ........1-2 Components at the Left of the Printer and Internal Components ..............1-2 Components at the Rear of the Printer ........1-3 Operation Panel ................1-4 Loading Paper ................2-1 Loading Paper into the Cassette .......... - Page 5 Legal and Safety Information Please read this information before using your machine. This chapter provides information on the following topics: Legal Information License Agreements Safety Information Symbols Installation Precautions Precautions for Use xviii About the Operation Guide Conventions in This Guide...
-
Page 6: Legal Information
All rights are reserved. Copying or other reproduction of all or part of this guide, or any copyrightable subject matter without the prior written consent of Kyocera Mita Corporation is prohibited. Any copies made of all or part of this guide, or any copyrightable subject must contain the same copyright notice as the material from which the copying is done. -
Page 7: License Agreements
License Agreements IBM Program License Agreement THE DEVICE YOU HAVE PURCHASED CONTAINS ONE OR MORE SOFTWARE PROGRAMS (“PROGRAMS”) WHICH BELONG TO INTERNATIONAL BUSINESS MACHINES CORPORATION (“IBM”). THIS DOCUMENT DEFINES THE TERMS AND CONDITIONS UNDER WHICH THE SOFTWARE IS BEING LICENSED TO YOU BY IBM. IF YOU DO NOT AGREE WITH THE TERMS AND CONDITIONS OF THIS LICENSE, THEN WITHIN 14 DAYS AFTER YOUR ACQUISITION OF THE DEVICE YOU MAY RETURN THE DEVICE FOR A FULL... - Page 8 1. the equivalent of U.S. $25,000 in your local currency; or 2. IBM's then generally available license fee for the Program This limitation will not apply to claims for bodily injury or damages to real or tangible personal property for which IBM is legally liable. IBM will not be liable for any lost profits, lost savings, or any incidental damages or other economic consequential damages, even if IBM, or its authorized supplier, has been advised of the possibility of such...
- Page 9 3. To protect proprietary rights of Monotype Imaging, you agree to maintain the Software and other proprietary information concerning the Typefaces in strict confidence and to establish reasonable procedures regulating access to and use of the Software and Typefaces. 4. You agree not to duplicate or copy the Software or Typefaces, except that you may make one backup copy.
-
Page 10: Original Ssleay License
Firmware of this machine is using in part the GPL applied codes (www.fsf.org/copyleft/gpl.html). Please access "http:// www.kyoceramita.com/gpl" for more information on how to make GPL applied codes available. Open SSLeay License Copyright © 1998-2006 The OpenSSL Project. All rights reserved. Redistribution and use in source and binary forms, with or without modification, are permitted provided that the following conditions are met: Redistributions of source code must retain the above copyright... - Page 11 This library is free for commercial and non-commercial use as long as the following conditions are aheared to. The following conditions apply to all code found in this distribution, be it the RC4, RSA, lhash, DES, etc., code; not just the SSL code. The SSL documentation included with this distribution is covered by the same copyright terms except that the holder is Tim Hudson (tjh@cryptsoft.com).
- Page 12 Interface Connectors IMPORTANT Be sure to power off the printer before connecting or disconnecting an interface cable. For protection against static electricity discharge to the printer's internal electronics through the interface connector(s), cover any interface connector that is not in use with the protective cap supplied.
-
Page 13: Safety Information
Radio Frequency Transmitter This machine contains a transmitter module. We, the manufacturer (Kyocera Mita Corporation) hereby declare that this equipment (page printer), models FS-6970DN are in compliance with the essential requirements and other relevant provisions of Directive 1999/5/EC. Radio Tag Technology... - Page 14 Laser inside the printer (Laser radiation warning)
-
Page 15: Energy Saving Function
ISO 7779. Disclaimer Kyocera Mita will not be liable to customers or any other person or entity for any loss or damage caused or alleged to be caused directly or indirectly by equipment sold or furnished by us, including but not limited... -
Page 16: Duplex Printing
Duplex Printing This printer includes duplex printing as a standard function. For example, by printing two single-sided originals onto a single sheet of paper as a duplex printing, it is possible to lower the amount of paper used. Recycled Paper This printer supports recycled paper which reduces the load on the environment. -
Page 17: Symbols
Symbols The sections of this guide and parts of the machine marked with symbols are safety warnings meant to protect the user, other individuals and surrounding objects, and ensure correct and safe usage of the machine. The symbols and their meanings are indicated below. DANGER: Indicates that serious injury or even death will very possibly result from insufficient attention to or incorrect compliance with the related points. -
Page 18: Installation Precautions
Installation Precautions Environment Caution Avoid placing the machine on or in locations which are unstable or not level. Such locations may cause the machine to fall down or fall over. This type of situation presents a danger of personal injury or damage to the machine. Avoid locations with humidity or dust and dirt. - Page 19 Power Supply/Grounding the Machine Warning Do not use a power supply with a voltage other than that specified. Avoid multiple connections in the same outlet. These types of situations present a danger of fire or electrical shock. Plug the power cord securely into the outlet. If metallic objects come in contact with the prongs on the plug, it may cause a fire or electric shock.
-
Page 20: Precautions For Use
Precautions for Use Cautions when using the machine Warning Do not place metallic objects or containers with water (flower vases, flower pots, cups, etc.) on or near the machine. This situation presents a danger of fire or electrical shock should they fall inside. - Page 21 If dust accumulates within the machine, there is a danger of fire or other trouble. It is therefore recommended that you consult with your service representative in regard to cleaning of internal parts. This is particularly effective if accomplished prior to seasons of high humidity.
-
Page 22: About The Operation Guide
About the Operation Guide This Operation Guide contains the following chapters: Parts Machine This chapter explains the names of parts. 2 Loading Paper This chapter explains paper specifications for this printer and how to load paper into the cassette or MP tray. 3 Connecting and Printing This chapter explains how to start up the printer, print from your PC, and use the application software included in the CD-ROM. -
Page 23: Conventions In This Guide
Conventions in This Guide This manual uses the following conventions. Convention Description Example Italic Used to emphasize a key word, Refer to Replacing the Toner Container Typeface phrase or reference to additional on page 4-3. information. Bold Used to denote buttons on the Select the printer you want to install, and software. - Page 24 xxii...
-
Page 25: Machine Parts
Machine Parts This section provides explanations and illustrations for you to determine the parts and their functions. Try to be familiar with the names and functions of these parts for correct use and optimal performance. Components at the Front of the Printer Components at the Rear of the Printer Operation Panel Machine Parts... -
Page 26: Components At The Front Of The Printer
Components at the Front of the Printer Top Cover Paper Stopper Top Tray Right Cover Operation Panel USB Memory Slot Paper Cassette MP (Multi-Purpose) Tray Components at the Left of the Printer and Internal Components Left Cover Toner Container Power Switch Waste Toner Box Machine Parts... -
Page 27: Components At The Rear Of The Printer
Components at the Rear of the Printer USB Interface Connector Network Indicators Network Interface Connector Parallel Interface Connector Power Cord Connector Rear Unit Option Interface Slot (CF card/Hard disk) Machine Parts... -
Page 28: Operation Panel
Operation Panel Indicators Message Display Cursor Keys [GO] Key [Cancel] Key [OK] Key [MENU] Key Machine Parts... -
Page 29: Loading Paper
Loading Paper This chapter explains the procedure for loading paper in the cassette and the MP tray Loading Paper into the Cassette Loading Paper into MP (Multi-Purpose) Tray Loading Paper... -
Page 30: Loading Paper Into The Cassette
Loading Paper into the Cassette The paper cassette can accommodate A5 to A4/Letter and Legal size paper and can hold approximately 250 sheets. Pull the paper cassette all the way out of the printer and remove the cassette cover. IMPORTANT When pulling the cassette out of the printer, ensure it is supported and does not fall out. - Page 31 Pull the release lever on the left side guide and slide to the desired paper size. If you are going to set paper that is longer than A4, pull out the extension paper cassettes pushing the lock lever one by one and adjust them to the desired paper size.
- Page 32 Place the paper in the paper cassette. Ensure the side to be printed is facing down and the paper is not folded, curled, or damaged. Note Do not load more paper than will fit under the load limits on the paper guides. Insert the paper cassette into the slot in the printer.
-
Page 33: Loading Paper Into Mp (Multi-Purpose) Tray
Loading Paper into MP (Multi-Purpose) Tray The MP tray can accommodate the various paper sizes and can hold approximately 100 sheets of paper. Fan the media (paper/transparencies), then tap it on a level surface to avoid media jams or skewed printing. Pull the MP tray towards you until it stops. - Page 34 Align the paper with the paper guides and insert as far as it will go. Note If the paper is considerably curled in one direction, for example, if the paper is already printed on one side, try to roll the paper in the opposite direction to counteract the curl. Printed sheets will then come out flat.
-
Page 35: Connecting And Printing
Connecting and Printing This chapter explains how to start up the printer, print from your PC, and use the application software included in the CD-ROM. Connections Changing Network Interface Parameters Printing a Network Interface Status Page 3-12 Installing the Printer Driver 3-13 Printing from Application Software 3-20... -
Page 36: Connections
Connections This section explains how to start up the printer. The figure shown below is the overviews of connections between the printer and the computer. Connecting the USB Cable Follow the steps as below for connecting the USB cable. Connect the USB cable (not included) to the USB interface connector at the rear of this machine. -
Page 37: Connecting The Power Cord
Connecting the Power Cord Install the printer close to an AC wall outlet. If an extension cord is used, the total length of the power cord plus extension should be 5 meters (16 feet) or less. Note Ensure the printer's power switch is off. Only use the power cord supplied with the printer. -
Page 38: Changing Network Interface Parameters
Changing Network Interface Parameters This printer supports TCP/IP, TCP/IP (IPv6), NetWare, AppleTalk, IPP, SSL Server, IPSec protocols, and Security Level. For more information, refer to the Advanced Operation Guide. Note After all network related settings have been done, turn the machine OFF and ON again. - Page 39 TCP/IP This section describes how to enable the TCP/IP protocol. If TCP/IP is set to Off, use to select On and press [OK]. >TCP/IP > Press . Each time you press , the selection changes. >>DHCP >>IP Address 000.000.000.000 >>Subnet Mask 000.000.000.000 >>Gateway 000.000.000.000...
- Page 40 TCP/IP (IPv6) This section describes how to enable the TCP/IP (IPv6) protocol. If TCP/IP (IPv6) is set to Off, use to selecto On and >TCP/IP (IPv6) > press [OK]. Press . Each time you press , the selection changes. >>RA(Stateless) >>DHCPv6 Display the item you want to set and press [OK].
- Page 41 IPSec to connect to a network, you must enter an administrator password and press [OK]. The default setting is the numeric part of your printer's model name. If you use FS-6970DN, enter "6970". Set this item to On when you connect to a network using NetWare.
- Page 42 Set the Security Level to High. >Security Level High NetWare This section explains the procedure for enabling NetWare. Enter the administrator ID and password. Then, if NetWare is set to >NetWare > Off, use to select On and press [OK]. Press >>Frame Type Auto...
- Page 43 AppleTalk This section explains the procedure for enabling AppleTalk. Enter the administrator ID and password. Then, if AppleTalk is set >AppleTalk to Off, use to select On. Press [OK]. A blinking question mark (?) appears. >AppleTalk Press [OK] again. Press [MENU]. The display returns to Ready. This section explains the procedure for enabling IPP.
- Page 44 SSL Server This section explains the procedure for enabling SSL Server. Enter the administrator ID and password. Then, if SSL Server is >SSL Server set to Off, use to select On and press [OK]. Press . Each time you press , the selection changes.
- Page 45 Security Level Security Level is primarily a menu used by service personnel for >Security Level maintenance work. There is no need for customers to use this menu. High Connecting and Printing 3-11...
-
Page 46: Printing A Network Interface Status Page
Printing a Network Interface Status Page You can print out a status page for the network interface. The network status page shows the network addresses, and other information under various network protocols about the network interface. Adjust/Maintenance Adjust/Maintenance is used to adjust the print quality and to carry out printer maintenance. -
Page 47: Installing The Printer Driver
Installing the Printer Driver According to the instructions of the Installation Guide, connect the PC to the printer and turn on them to install the printer driver. For more information on printer driver, refer to the KX Driver User Guide in the CD- ROM. - Page 48 • Custom Mode: This option allows you to select items to be installed as required and to specify the port. Proceed the section below according to the installation method. Express Mode When selecting Express Mode, printer driver and fonts are installed. After installing with this mode, the other utilities can be added using Custom Mode.
- Page 49 Custom Mode When selecting Custom Mode, printer port and utilities are changed as necessary. On Installation Method screen, click Custom Mode. The installer searches the connected printers on Discover Printing System screen. Select the printer you want to install, and click Next. Proceed to the step 5.
- Page 50 Confirm the settings and click Install. Printer driver installation starts. Note During any point in the installation process, if the Windows Security warning dialog box appears, click Install this driver software anyway. If the Hardware Installation screen appears in Windows XP, click Continue Anyway.
- Page 51 Double-click either OS X 10.2 and 10.3 Only or OS X 10.4 or higher depending on your Mac OS version. Double-click Kyocera OS X x.x. The printer driver installation program starts up. Choose Select Destination, Installation Type and then install the printer driver as directed by the instructions in the installation software.
- Page 52 Open System Preferences and click Print & Fax. Click the plus symbol (+) to add the installed printer driver. Click the IP icon for an IP connection and then enter the IP address and printer name. When you click the AppleTalk icon for an AppleTalk connection, enter the printer name.
- Page 53 The selected printer is added. This completes the printer setup procedure. Connecting and Printing 3-19...
-
Page 54: Printing From Application Software
Printing from Application Software The steps required to print a document created with an application are explained below. You can select the printing paper size and output destination. Note You can also select the various settings by clicking Properties to open the Properties dialog box. Load the paper required into the paper cassette. -
Page 55: Status Monitor
Status Monitor The Status Monitor monitors the printer status and provides an ongoing reporting function. It also allows you to specify and modify settings for printers not included in the KX Driver. The Status Monitor is installed automatically during KX Driver installation. - Page 56 If an information notification event occurs, the 3D view and an alert sound are used to notify you. For information on the sound notification settings, refer to Status Monitor Settings on page 3-23. Status Monitor icon The Status Monitor icon is displayed in the taskbar notification area when the Status Monitor is running.
-
Page 57: Status Monitor Settings
Status Monitor Settings The Status Monitor has two tabs to configure its settings. Use the Preference option to set up the Status Monitor. Sound Notification Tab The Event Notification tab contains the following items. IMPORTANT To confirm the settings on Sound Notification tab, the computer requires the sound capabilities such as sound card and speaker. - Page 58 Appearance Tab The Appearance tab is contains the following items. Enlarge window Doubles the size of the Status Monitor window. Always on top Positions the Status Monitor in front of other active windows. Transparency Displays the Status Monitor as a transparent window. 3-24 Connecting and Printing...
-
Page 59: Uninstalling Software (Windows Pc)
Insert the enclosed CD-ROM (Product Library) into the CD-ROM drive. Following the procedure used to install the printer driver, click Remove Software. The Kyocera Uninstaller wizard appears. Select the software package to remove. Click Uninstall. Note In Windows Vista, Remove Driver and Package screen appears. - Page 60 3-26 Connecting and Printing...
-
Page 61: Maintenance
Maintenance This chapter explains how to replace the toner container and clean the printer General Information Toner Container Replacement Cleaning the Printer Prolonged Non-Use and Moving of the Printer Maintenance... -
Page 62: General Information
The toner container packed with the new printer is a starter toner container. The starter toner container lasts an average of 7,500 pages. Toner Kits For best results, we recommend that you only use genuine Kyocera Parts and Supplies. A new toner kit contains the following items: •... -
Page 63: Replacing The Toner Container
Kyocera toner containers. For optimum performance, it is also recommended to use only the Kyocera toner containers which are specifically intended for use in your country or region. - Page 64 Push lock lever to the right and pull out the toner container. Put the old toner container in the plastic bag (contained in the toner kit) and discard it later according to the local code or regulations for waste disposal. Take the new toner container out of the toner kit.
-
Page 65: Replacing The Waste Toner Box
Replacing the Waste Toner Box When replacing the toner container, the used waste toner box in the printer should also be replaced with the new one from the new toner kit. A new waste toner box is included with the toner kit. The printer will not operate without replacing the waste toner box. - Page 66 Insert the new waste toner box as shown at the left. When the box is set correctly, it will snap into place. Make sure that the waste toner box is correctly inserted and close the left cover. After replacing the toner containers and the waste toner box, clean the internal parts.
-
Page 67: Cleaning The Printer
Cleaning the Printer To avoid print quality problems, the interior of the printer must be cleaned with every toner container replacement. Open the top cover and MP tray. Lift the developer unit together with the toner container out of the printer. -
Page 68: Prolonged Non-Use And Moving Of The Printer
Open the left cover. Use a lint free cloth to clean dust and dirt away from the vents. Close the left cover. Use a lint free cloth to clean dust and dirt away from the vent on the right side of the machine. Prolonged Non-Use and Moving of the Printer Prolonged Non-use If you ever leave the printer unused for a long period of time, remove the... -
Page 69: Troubleshooting
Troubleshooting This chapter explains how to handle printer problems, understand messages, and clean paper jams General Guidelines Print Quality Problems Error Messages Ready, Data, and Attention Indicators 5-10 Clearing Paper Jams 5-11 If a problem cannot be corrected, contact your service technician. Troubleshooting... -
Page 70: General Guidelines
General Guidelines The table below provides basic solutions for problems you may encounter with the printer. We suggest you consult this table to troubleshoot the problems before calling for service repairs. Symptom Check Items Corrective Actions Print quality is poor. –... -
Page 71: Print Quality Problems
Print Quality Problems The tables and diagrams in the following sections define print quality problems and the corrective action you can conduct to solve the problems. Some solutions may require cleaning or replacing parts of the printer. If the suggested corrective action will not solve the problem, call for service. - Page 72 Printed Results Corrective Action Gray background Check the operation panel. If the Toner low message is displayed and [Attention] indicator is flashing, install a new toner kit. To replace toner, refer to Toner Container Replacement on page 4-2 Check the print density. Display the print menu from the operation panel and select a lighter density setting.
-
Page 73: Error Messages
Error Messages The following table lists errors and maintenance messages that you can be dealt with by yourself. If Call service or Error.Power off. is displayed, turn off the printer then turn it back on to see if the printer has recovered. If the printer has not recovered, turn off the printer, disconnect the power cord, and contact your service representative or authorized service center. - Page 74 Message Corrective Action You attempted to print with a paper size and paper type that cannot be used for duplex printing. Press [GO] to print onto one-side of the paper only. Duplex disabled You can select an alternative paper size and type by pressing the .
- Page 75 No multi copies [GO] to print error report. Press GO Displayed when the installed toner is the original Kyocera product. Original toner installed A paper jam has occurred. The location of the paper jam is indicated in place of the #’s. For details, refer to Clearing Paper Jams on page 5-11.
- Page 76 Top tray tray. paper full Displayed when the installed toner is not the original Kyocera product. Install original Kyocera toner. Unknown toner Install the toner container.
-
Page 77: Storage Error Codes
Storage Error Codes Hard Disk Errors Code Meaning Hard disk format error. If this error recurs even if the power has been turned off and then on, reformat the hard disk. The disk system is not installed. Recheck the requirements for using the system and the devices. -
Page 78: Ready, Data, And Attention Indicators
RAM Disk Errors Code Meaning Format error. Try turning the power off and on again. RAM disk mode is Off. Turn RAM disk mode On from the operation panel. No disk space. Purge unnecessary files. Specified file is not on disk. Insufficient printer memory to support the RAM disk system. -
Page 79: Clearing Paper Jams
Clearing Paper Jams If paper jams in the paper transport system, or no paper sheets are fed at all, the Paper jam message appears and the location of the paper jam (the component where the paper jam has occurred) is also indicated. -
Page 80: General Considerations For Clearing Jams
Paper jam Paper jam message Description Reference page location Paper is jammed inside the printer. page 5-16 Paper jam Printer Paper is jammed inside the rear unit. page 5-17 Paper jam Rear Unit General Considerations for Clearing Jams Bear in mind the following considerations when attempting paper jam removal: CAUTION When pulling the paper, pull it gently so as not to tear it. - Page 81 MP Tray Paper is jammed at the MP tray. Remove the jammed paper using the procedure given below. Remove the paper jammed at the MP tray. Open and close the top cover to clear the error. Troubleshooting 5-13...
- Page 82 Paper Cassette/Paper Feeder Pull out the cassette or optional paper feeder. Remove any partially fed paper. Note Check to see if paper is loaded correctly. If not, reload the paper. Push the cassette back in securely. The printer warms up and resumes printing.
- Page 83 Duplexer Paper is jammed in the duplex section. Remove the jammed paper using the procedure given below. CAUTION Do not touch parts in this area, because it may result in burn injury. Pull the paper cassette all the way out of the printer. Open the duplexer's cover and remove any jammed paper.
-
Page 84: Inside The Printer
Inside the Printer Open the top cover and MP tray. Lift the developer unit together with the toner container out of the printer. Open the feed cover. Remove the paper from the printer. If the jammed paper appears to be pinched by rollers, pull it along the normal running direction of the paper. -
Page 85: Rear Unit
Rear Unit If paper is not completely ejected into the output tray, open the rear unit. Open the fuser cover and remove the jammed paper by pulling it out. Note If you cannot find a paper jam, try checking inside the rear of the printer. - Page 86 5-18 Troubleshooting...
-
Page 87: Appendix
Appendix This section lists the following information of this printer. Specifications Environmental Standard Requirements Appendix... -
Page 88: Specifications
Specifications Note These specifications are subject to change without notice. Item Description Type Desktop Printing Method Semiconductor laser and electrophotography Paper Weight Cassette 60 to 120 g/m² MP Tray 60 to 220 g/m² Paper Type Cassette Plain, Preprinted, Bond, Recycled, Rough, Letterhead, Color (Colour), Prepunched, High Quality, and Custom (1 to 8) MP Tray/Manual Plain, Transparency, Preprinted, Labels, Bond, Recycled, Rough, Vellum,... - Page 89 Item Description Supported OS Windows 2000 Service Pack 2 or later, Windows Server 2003, Windows XP, Windows Vista, Mac OS X 10.x Interface Parallel: 1 (IEEE1284) Hi-Speed USB: 1 Network: 1(10BASE-T/100BASE-TX) Full-speed USB: 1 (USB flash memory slot) KUIO-LV(W) slot PRESCRIBE Emulation PCL 6, KPDL, KPDL (AUTO), Line Printer, IBM Proprinter, DIABLO 630,...
-
Page 90: Environmental Standard Requirements
Environmental Standard Requirements This machine conforms to the following environmental standard requirements. • Time for switching to Sleep mode (default): 5 minutes • Duplex Printing: Standard Equipment • Durable paper for feeding: Paper made of 100% recycled paper Note Contact your Dealer or Service Representative for recommended paper types. -
Page 91: Index
Index Numerics 3D view GO key status monitor ............3-21 operation panel ............1-4 General problems troubleshooting ............5-2 Accessing the status monitor ......... 3-21 Appearance tab status monitor setting ..........3-24 Indicators operation panel ............1-4 Inside the printer clearing paper jams ..........5-16 Installation method Cancel key custom mode ............3-15 operation panel ............ - Page 92 AppleTalk ..........3-9, 3-10, 3-11 Starter container IPP ................3-9 toner container ............4-2 NetWare ..............3-8 Status monitor SSL Server ..............3-10 3D view ..............3-21 TCP/IP ..............3-5 access ..............3-21 TCP/IP (IPv6) ............3-6 exit ................3-21 Network interface status page pop-up window ............3-21 printing ..............3-12 status monitor icon ..........
- Page 93 <Memo>...
- Page 94 <Memo>...
- Page 95 We recommend the use of our own brand supplies. We will not be liable for any damage caused by the use of third party supplies in this machine.
- Page 97 2009 is a trademark of Kyocera Corporation...
- Page 98 First edition 2009.3 Printed in China 302J556010...
Need help?
Do you have a question about the FS-6970DN and is the answer not in the manual?
Questions and answers