Yealink SIP-T46G User Manual
Ultra-elegant gigabit ip phone
Hide thumbs
Also See for SIP-T46G:
- Quick start manual ,
- Administrator's manual (434 pages) ,
- User manual (243 pages)
Table of Contents
Advertisement
Advertisement
Table of Contents

Subscribe to Our Youtube Channel
Related Manuals for Yealink SIP-T46G


Summary of Contents for Yealink SIP-T46G
- Page 2 Copyright © 2013 YEALINK NETWORK TECHNOLOGY CO., LTD. Copyright © 2013 Yealink Network Technology CO., LTD. All rights reserved. No parts of this publication may be reproduced or transmitted in any form or by any means, electronic or mechanical, photocopying, recording, or otherwise, for any purpose, without the express written permission of Yealink Network Technology CO., LTD.
- Page 3 Note: This device is tested and complies with the limits for a Class B digital device, pursuant to Part 15 of the FCC Rules. These limits are designed to provide reasonable protection against harmful interference in a residential installation. This equipment generates, uses, and can radiate radio frequency energy and, if not installed and used in accordance with the instructions, may cause harmful interference to radio communications.
- Page 4 Yealink SIP-T46G firmware contains third-party software under the GNU General Public License (GPL). Yealink uses software under the specific terms of the GPL. Please refer to the GPL for the exact terms and conditions of the license. The original GPL license, source code of components licensed under GPL and used in Yealink products can be downloaded online: http://www.yealink.com/GPLOpenSource.aspx?BaseInfoCateId=293&NewsCateId=293&CateId=293.
- Page 5 Packaging Contents and Regulatory Notices sections in this guide before you set up and use the SIP-T46G IP phone. If this is your first time using the SIP-T46G IP phone, we recommend that you first refer to Quick Installation Guide...
- Page 6 User Guide for the SIP-T46G IP Phone Line Keys on page Anonymous Call on page Troubleshooting on page Appendix A - Time Zones on page ...
-
Page 7: Table Of Contents
Table of Contents About This Guide ..............ix In This Guide........................ix Summary of Changes ..................... ix Changes for Release 71, Guide Version 71.150 ............ix Table of Contents ..............xi Overview ................1 Hardware Component Instructions ................. 1 Icon Instructions........................ 3 LED Instructions ........................ -
Page 8: Table Of Contents
User Guide for the SIP-T46G IP Phone Audio Settings ........................ 30 Volume ......................... 30 Ring Tones ........................31 Contact Management ....................33 Directory ........................33 Local Directory ......................35 Blacklist........................47 Remote Phone Book ....................49 Call History Management ..................... 51 System Customizations .................... -
Page 9: Table Of Contents
Table of Contents Busy Lamp Field (BLF)....................117 Call Recording ......................120 Hot Desking ........................122 Intercom........................124 Outgoing Intercom Calls ..................124 Incoming Intercom Calls ................... 125 Multicast Paging ......................127 Sending RTP Stream ....................127 Receiving RTP Stream ....................129 Music on Hold ...................... - Page 10 User Guide for the SIP-T46G IP Phone...
-
Page 11: Overview
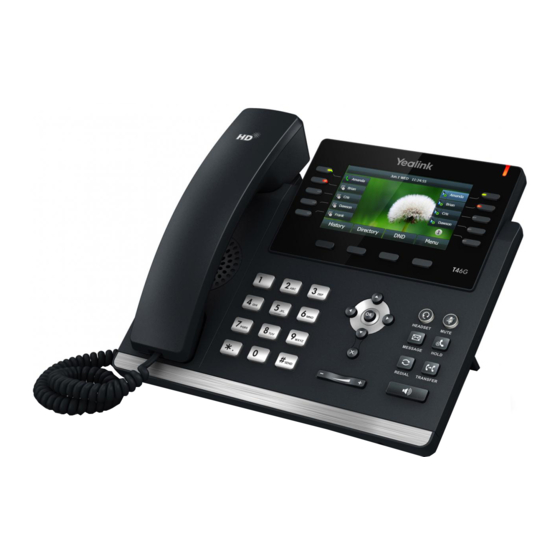
LED Instructions User Interfaces Documentations If you require additional information or assistance with your new phone, contact your system administrator. The main hardware components of the SIP-T46G IP phone are the LCD screen and the keypad. - Page 12 User Guide for the SIP-T46G IP Phone Hardware component instructions of the SIP-T46G IP phone are: Item Description Shows information about calls, messages, soft keys, time, date and other relevant data: • Call information—caller ID, call duration LCD Screen • Icons (for example, •...
- Page 13 Overview Icons appearing on the LCD screen are described in the following table: Icons Description Network is unavailable Registered successfully Register failed Registering Hands-free speakerphone mode Handset mode Headset mode Multi-lingual lowercase letters input mode Multi-lingual uppercase letters input mode Alphanumeric input mode Numeric input mode Multi-lingual uppercase and lowercase letters...
- Page 14 User Guide for the SIP-T46G IP Phone Icons Description Ringer volume is 0 Keypad Lock Received Calls Placed Calls Missed Calls Recording box is full A call cannot be recorded Recording starts successfully Recording cannot be started Recording cannot be stopped...
- Page 15 Overview Power Indicator LED LED Status Description Solid red The phone is initializing. Fast flashing red The phone is ringing. Slow flashing red The phone receives a text message or voice mail. The phone is powered off, powered on or idle. Line key LED LED Status Description...
-
Page 16: User Interfaces
User Guide for the SIP-T46G IP Phone Two ways to customize configurations of your SIP-T46G IP phone: The user interface on the IP phone. The user interface in a web browser on your PC. The hardware components keypad and LCD screen constitute the phone user interface, which allows the user to execute all call operation tasks and basic configuration changes directly on the phone. - Page 17 Overview Basic Call Features --Auto Answer √ --Auto Redial √ --Call Completion √ --Call Forward √ --Call Waiting √ √ --Call Park √ --Call Pickup √ --Call Return √ --Conference --Anonymous Call √ --Anonymous Call Rejection √ --DND √ Basic Phone Settings --Language √...
-
Page 18: Documentations
--STUN Server √ Note The table above lists most of the feature options. Please refer to the relevant sections for more information. The following table shows documentations available for the SIP-T46G IP phone. Name Contents Where found Format/ Language Quick Installation... -
Page 19: Getting Started
Getting Started This chapter provides the following basic installation instructions and information for obtaining the best performance with the SIP-T46G IP phone. Topics include: Packaging Contents Phone Installation Phone Initialization Phone Status Basic Network Settings ... - Page 20 User Guide for the SIP-T46G IP Phone Wall Mount Bracket (Optional) Power Adapter (Optional) Handset & Handset Cord Ethernet Cable Quick Installation Guide & Quick Reference Guide ...
- Page 21 Getting Started CD-ROM Check the list before installation. If you find anything missing, contact your system administrator. If your phone is already installed, proceed to Phone Initialization on page 14. This section introduces how to install the phone: Attach the stand or the optional wall mount bracket Connect the handset and optional headset Connect the network and power Attach the stand or the optional wall mount bracket...
- Page 22 The EXT port can also be used to connect an expansion module EXP40. For more information on how to use EHS36, EXP40 and Bluetooth USB Dongle BT40, refer to Yealink EHS36 User Guide, Yealink EXP40 User Guide and Yealink Bluetooth USB Dongle BT40 User Guide.
-
Page 23: Power Over Ethernet
Connect the included or a standard Ethernet cable between the Internet port on the phone and the one on the wall or switch/hub device port. Power over Ethernet With the included or a regular Ethernet cable, the SIP-T46G IP phone can be powered from a PoE-compliant switch or hub. To connect the PoE: Connect the Ethernet cable between the Internet port on the phone and an available port on the in-line power switch/hub. -
Page 24: Phone Initialization
User Guide for the SIP-T46G IP Phone After your phone is powered on, the system boots up and performs the following steps: Automatic Phone Initialization The phone finishes the initialization by loading the saved configuration. The LCD screen displays "Initializing…Please wait" during this process... - Page 25 Getting Started Click Confirm to login. The phone status is displayed on the first page of the web user interface. If your phone cannot contact a DHCP server for any reason, you need to configure network settings manually. The IP phone can support either or both IPv4 and IPv6 addresses.
- Page 26 User Guide for the SIP-T46G IP Phone Press , or the Switch soft key to select the Static IP from the Type field. Enter the desired values in the IP Address, IPv6 IP Prefix, Gateway, Primary DNS and Secondary DNS fields respectively.
-
Page 27: Line Keys On
Getting Started Generally, your phone will be deployed with multiple other phones. In this case, your system administrator will configure the phone parameters beforehand, so that after you start up your phone, the phone will be registered and ready for use. If your phone is not registered, you may have to register it. - Page 28 User Guide for the SIP-T46G IP Phone...
-
Page 29: Wallpaper
If you require additional information or assistance with your new phone, contact your system administrator. You can customize the wallpaper of the SIP-T46G IP phone. You can change the wallpaper image via phone user interface or web user interface. You can also upload custom wallpaper images via web user interface. -
Page 30: Backlight
User Guide for the SIP-T46G IP Phone Press , or the Switch soft key to select the desired wallpaper image. Press the Save soft key to accept the change or the Back soft key to cancel. Wallpaper is configurable via web user interface at the path Settings->Preference. -
Page 31: Contrast
Customizing Your Phone To configure the backlight via phone user interface: Press Menu->Basic->Display->General. Press , or the Switch soft key to select the desired level from the Backlight On Intensity field. Press , or the Switch soft key to select the desired value from the Backlight Idle Intensity field. -
Page 32: Language
User Guide for the SIP-T46G IP Phone The default language of the phone user interface is English. The phone will detect and use the same language as which of your web browser for the web user interface. If the language of your web browser is not supported by the phone, the web user interface will use English by default. -
Page 33: Time & Date
Customizing Your Phone Select the desired language from the pull-down list of Language. Click Confirm to accept the change. Text displayed on the web user interface will change to the selected language. The time and date are displayed on the LCD screen when the phone is idle. You can configure the phone to obtain the time and date from the SNTP server automatically, or configure the time and date manually. - Page 34 User Guide for the SIP-T46G IP Phone Press , or the Switch soft key to select the desired value from the Daylight Saving field. Press the Save soft key to accept the change or the Back soft key to cancel.
-
Page 35: Administrator Password
Customizing Your Phone Press , or the Switch soft key to select the desired date format from the Date Format field. Press , or the Switch soft key to select the desired time format (12 Hour or 24 Hour) from the Time Format field. Press the Save soft key to accept the change or the Back soft key to cancel. - Page 36 User Guide for the SIP-T46G IP Phone Enter the new password in the New Password field. Enter the new password again in the Confirm Password field. Press the Save soft key to accept the change or the Back soft key to cancel.
-
Page 37: Keypad Lock
Customizing Your Phone Keypad lock consists of the following: Menu Key: The Menu soft key is locked. You cannot access the menu of the phone until unlocked. Function Keys: The function keys are locked. You cannot use the MESSAGE, REDIAL, HOLD, MUTE, TRANSFER, OK, X, navigation keys, soft keys and line keys until unlocked. - Page 38 User Guide for the SIP-T46G IP Phone The LCD screen prompts “Keypad Lock!” and displays the icon You can configure the interval (in seconds) to automatically lock the keypad instead of long pressing To configure the interval of automatic keypad lock via web user interface: Click on Features->Phone Lock.
- Page 39 Customizing Your Phone Enter the desired values in the Current PIN, New PIN and Confirm PIN fields respectively. Press the Save soft key to accept the setting or the Back soft key to cancel. Note The unlock PIN length must be within 15 characters. To unlock the keypad via phone user interface: Press any locked key, the LCD screen prompts “Unlock PIN”.
-
Page 40: Volume
User Guide for the SIP-T46G IP Phone Press , or the Switch soft key to select Disabled from the Keypad Lock Enable field. Press the Save soft key to accept the change. Keypad lock is configurable via web user interface at the path Features->Phone Lock. -
Page 41: Ring Tones
Customizing Your Phone To adjust the volume when the phone is during a call: Press to adjust the volume of currently engaged audio device (handset, speakerphone or headset). Ring tones are used to indicate incoming calls. You can select different ring tones to distinguish different accounts registered on your phone, or to distinguish your phone from your neighbor’s. - Page 42 User Guide for the SIP-T46G IP Phone If Common is selected, this account will use the ring tone selected for the phone. Refer to the above instruction. Click Confirm to accept the change. Note A ring tone for the account is configurable via web user interface only.
-
Page 43: Directory
Customizing Your Phone Click Upload to upload the file. Note All custom ring tone files must be within 100KB. Uploading custom ring tones for your phone is configurable via web user interface only. This section provides the operating instructions for managing contacts. Topics include: Directory ... - Page 44 User Guide for the SIP-T46G IP Phone The LCD screen displays the list(s) in the adjusted order. Click Confirm to accept the change. Note Directory is configurable via web user interface only. To check directory via phone user interface: Press the Directory soft key when the phone is idle.
-
Page 45: Local Directory
Customizing Your Phone The built-in phone directory can store the names and phone numbers of your contacts. You can store up to 1000 contacts and 50 groups in your phone's local directory. There are four default groups in the local directory: All Contacts, Company, Family and Friend. You can add new groups and contacts;... - Page 46 User Guide for the SIP-T46G IP Phone You can also edit or delete the Company, Family and Friend contact groups. To edit a group in the local directory: Press the Directory soft key. The IP phone enters the local directory directly as there is only Local Directory in the directory by default.
-
Page 47: Adding Contacts Manually
Customizing Your Phone To delete a group from the local directory: Press the Directory soft key. The IP phone enters the local directory directly as there is only Local Directory in the directory by default. If Local Directory is removed from the directory, press Menu->Directory->Local Group to enter the local directory. - Page 48 User Guide for the SIP-T46G IP Phone The IP phone enters the local directory directly as there is only Local Directory in the directory by default. If Local Directory is removed from the directory, press Menu->Directory->Local Group to enter the local directory.
- Page 49 Customizing Your Phone Adding Contacts from Call History To add a contact to the local directory from the call history: Press the History soft key. Press to highlight the desired entry. Press the Option soft key, and then select Add to Contacts from the prompt list. Enter the contact name.
- Page 50 User Guide for the SIP-T46G IP Phone To edit a contact in the local directory: Press the Directory soft key. The IP phone enters the local directory directly as there is only Local Directory in the directory by default. If Local Directory is removed from the directory, press Menu->Directory->Local Group to enter the local directory.
- Page 51 Customizing Your Phone To delete a contact from the local directory: Press the Directory soft key. The IP phone enters the local directory directly as there is only Local Directory in the directory by default. If Local Directory is removed from the directory, press Menu->Directory->Local Group to enter the local directory.
- Page 52 User Guide for the SIP-T46G IP Phone You can also click Delete Photo to delete the photo. Note The phone only supports the .png, .jpg and .bmp format files. You can only delete the custom photo. To change the custom photo for the contact via web user interface: Click on Directory->Local Directory.
- Page 53 Customizing Your Phone To place a call to a contact from the local directory: Press the Directory soft key. The IP phone enters the local directory directly as there is only Local Directory in the directory by default. If Local Directory is removed from the directory, press Menu->Directory->Local Group to enter the local directory.
- Page 54 User Guide for the SIP-T46G IP Phone The IP phone enters the local directory directly as there is only Local Directory in the directory by default. If Local Directory is removed from the directory, press Menu->Directory->Local Group to enter the local directory.
- Page 55 Customizing Your Phone The LCD screen displays the search results in the adjusted order. Click Confirm to accept the change. Note Search source list in dialing is configurable via web user interface only. To search for an entry in the enabled search source lists: Pick up the handset, press the speakerphone key or press the line key.
- Page 56 User Guide for the SIP-T46G IP Phone You can manage your phone’s local directory via phone user interface or web user interface. But you can only import or export the contact list via web user interface. To import an XML file of contact list via web user interface: Click on Directory->Local Directory.
-
Page 57: Blacklist
Customizing Your Phone (Optional.) Select the contact information you want to import into the local directory from the pull down list of Index. Click Import to complete importing the contact list. To export a contact list via web user interface: Click on Directory->Local Directory. - Page 58 User Guide for the SIP-T46G IP Phone Enter the name and the office, mobile or other numbers in the corresponding fields. Press , or the Switch soft key to select the desired account from the Account field. If Auto is selected, the phone will use the first available account when placing calls to the contact from the blacklist directory.
-
Page 59: Remote Phone Book
Customizing Your Phone The LCD screen prompts the following warning: Press the OK soft key to confirm the setting. For operating instructions on editing, deleting, placing calls to and/or searching for contacts in the blacklist directory, refer to the operating instructions of Local Directory page 34. - Page 60 User Guide for the SIP-T46G IP Phone To access your corporate directory via phone user interface: Press Directory->Remote Phone Book. If Remote Phone Book is removed from the directory, press Menu->Directory->Remote Phone Book to enter remote phone book. Select the desired remote group, and then press the Enter soft key.
- Page 61 The default value is 21600 seconds. Click Confirm to accept the change. The SIP-T46G IP phone maintains call history lists of Missed calls, Placed calls, Received calls and Forwarded calls. Call history lists support 400 entries in all. You can view the call history, place a call, add a contact or delete an entry from the call history list.
- Page 62 User Guide for the SIP-T46G IP Phone To enable history record via phone user interface: Press Menu->Call Features->Others->General. Press , or the Switch soft key to select Enabled from the History Record field. Press the Save soft key to accept the change or the Back soft key to cancel.
-
Page 63: Contact Management
Customizing Your Phone For more information, refer to Contact Management on page 33. To delete an entry from the call history list: Press the History soft key. Press to switch between All, Missed, Placed, Received and Forwarded call lists. Press to select the desired entry. - Page 64 User Guide for the SIP-T46G IP Phone Enter the desired number and press the Send soft key, then the phone will place a call using the headset automatically. For more information on using the headset to place a call, refer to Placing Calls on page 83.
-
Page 65: Bluetooth Headset
Note Dual headset is configurable via web user interface only. The SIP-T46G IP phone supports Bluetooth. Bluetooth enables low-bandwidth wireless connections within a range of 10 meters (32 feet). The best performance is in the 1- to 2-meter (3- to 6-foot) range. - Page 66 User Guide for the SIP-T46G IP Phone To activate the Bluetooth mode via phone user interface: Press Menu->Basic->Bluetooth. Press , or the Switch soft key to select On from the Bluetooth field. Press the Save soft key to accept the change.
- Page 67 Customizing Your Phone The LCD screen prompts the following message: The phone proceeds to scan the local Bluetooth devices. When the phone completes scan, it will display the found Bluetooth devices on the LCD screen. Select the desired Bluetooth headset and press Connect soft key. Enter the PIN in the Password field.
- Page 68 User Guide for the SIP-T46G IP Phone The Bluetooth icon appears on the LCD screen. With the Bluetooth headset paired and connected, you can use the Bluetooth headset to place and answer calls. For more information, refer to the documentation from the Bluetooth headset manufacturer.
- Page 69 Customizing Your Phone Auto Connection: Enables or disables the Bluetooth headset to connect with the phone automatically. To change the priority of paired Bluetooth devices Press Menu->Basic->Bluetooth->Paired Bluetooth Device. Select the desired Bluetooth headset. Press the Option soft key, and then select Move Up or Move Down from the prompt list.
-
Page 70: Dss Keys
Two types of DSS keys: Line Keys and Programmable Keys. Details will be introduced in the following. The SIP-T46G IP phone supports 27 line keys. You can assign predefined functionalities to line keys. You can also define a label for line key feature which will appear on the LCD screen. - Page 71 Customizing Your Phone You can assign functionalities to 27 line keys. These 27 line keys are indicated on three pages. When you assign functionality to line keys located in line key 1-10, the labels of line keys are indicated on the first page. The following figure shows an example: When you assign functionality to line key located in line key 11-27, the label of the line key 10-18 are indicated on the second page, and the labels of the line key 19-27 are indicated on the third page.
- Page 72 User Guide for the SIP-T46G IP Phone Solid red: There is a parked call on the non-current page. Fast flashing: The line receives an incoming call on the non-current page. To configure the page icon to indicate status via web user interface: Click on DSSKey->Line Key.
- Page 73 Customizing Your Phone Transfer Hold Group Listening Zero Touch Keypad Lock Directory For more information, contact your system administrator. Line You can use this key feature to accept the incoming calls, place active calls on hold or resume a held call.
- Page 74 User Guide for the SIP-T46G IP Phone Voice Mail You can use this key feature to connect voice mail quickly. For more information, refer to Voice Mail on page 136. Type (Key Event) Dependencies: Key Event (Voice Mail) Account ID (the account this feature will be applied to)
- Page 75 Customizing Your Phone Value (DTMF sequence) Note DTMF sequence can only contain "0-9", "*", "#" and "A-D". Usage: Press the DSS key during an active call to send the key sequence specified in the Value field. Prefix You can use this key feature to add a specified prefix number before the dialed number. Type (Key Event) Dependencies: Key Event (Prefix)
- Page 76 User Guide for the SIP-T46G IP Phone Google search, etc. Type (Key Event) Dependencies: Key Event (XML Browser) Label (key label displayed on the LCD screen) Value (the access URL for XML browser) Usage: Press the DSS key to access the XML browser specified in the Value field.
- Page 77 Customizing Your Phone Usage: Press the DSS key to forward an incoming call to the number specified in the Value field. When call forward is in phone mode, press the DSS key to activate call forward for the phone. When call forward is in custom mode, press the DSS key to access the custom call forward interface.
- Page 78 User Guide for the SIP-T46G IP Phone Label (key label displayed on the LCD screen) Usage: Press the DSS key during an active call to place the call on hold. Press the DSS key again to retrieve the held call.
- Page 79 Customizing Your Phone Usage: During a call, press the DSS key to activate the group listening mode. You can then speak and listen through the handset/headset, other people at your side can listen through speaker at the same time. Press the DSS key again to deactivate the group listening mode. Zero Touch You can use this key feature to configure auto provision and network parameters quickly.
- Page 80 Note Programmable keys are configurable via web user interface only. You can register one or multiple accounts on the SIP-T46G IP phone. You can also configure each line key to associate with an account or configure multiple line keys to...
- Page 81 Customizing Your Phone To register an account via phone user interface: Press Menu->Advanced (password: admin) ->Account. Select the desired account and then press the Enter soft key. Select Enabled from the Account Status field. Enter the desired values in Label, Display Name, Register Name, User Name, Password and SIP Server1/2 fields respectively.
-
Page 82: Dial Plan
Dial plan is a string of characters that governs the way your SIP-T46GIP phone processes the inputs received from your phone keypad. The SIP-T46G IP phone supports the following dial plan features: Replace Rule ... - Page 83 Customizing Your Phone Basic expression syntaxes you need to know: Syntax Description The dot "." can be used as a placeholder or multiple placeholders for any character. Example: "12." would match "123", "1234", "12345", "12abc", etc. An "x" can be used as a placeholder for any character. Example: "12x"...
- Page 84 User Guide for the SIP-T46G IP Phone Enter the desired line ID in the Account field or leave it blank. Click Add to add the replace rule. When you enter the number “234” using the keypad and then press the Send soft key, the phone will dial out “12345”...
- Page 85 Customizing Your Phone You can configure one or more dial-now rules (at most 100) on your phone. When the dialed number matches the dial-now string, the number will be dialed out automatically. For example, a dial-now rule is configured as "2xx", then any entered three-digit string beginning with 2 will be dialed out automatically on the phone.
- Page 86 User Guide for the SIP-T46G IP Phone Enter the time within 1-14 (in seconds) in the Time-Out For Dial-Now Rule field. Click Confirm to accept the change. Note Delay time for dial-now rule is configurable via web user interface only.
- Page 87 Customizing Your Phone For more information on the valid value of the Account field, refer to Replace Rule on page 73. Click Confirm to accept the change. Note The default values of minimum and maximum length are 1 and 15 respectively. Area code is configurable via web user interface only.
-
Page 88: Emergency Number
User Guide for the SIP-T46G IP Phone For more information on the valid value of the Account field, refer to Replace Rule on page 73. Click Confirm to add the block out number. Note Block out number is configurable via web user interface only. -
Page 89: Live Dialpad
Note Emergency number is configurable via web user interface only. You can enable live dialpad on the SIP-T46G IP phone, which enables the IP phone to automatically dial out the phone number without pressing any other key. You can also configure a delay, where the phone will dial out the phone number automatically after the specified period of time. -
Page 90: Hotline
User Guide for the SIP-T46G IP Phone Enter the desired delay time in the Inter Digit Time (1~14s) field. The default delay time is 4s. Click Confirm to accept the change. Note Live dialpad is configurable via web user interface only. - Page 91 Customizing Your Phone Hotline is configurable via web user interface at the path Features->General Information.
- Page 92 User Guide for the SIP-T46G IP Phone...
-
Page 93: Basic Call Features
Basic Call Features The SIP-T46G IP phone is designed to be easily used like a regular phone on a public switched telephone network (PSTN). You can place calls, answer calls, transfer a call to someone else, or conduct a conference call. - Page 94 User Guide for the SIP-T46G IP Phone Using the speakerphone Using the headset You can also dial the number first, and then choose the way you want to speak to the other party. You can also search and dial a contact from call history, local directory or remote phone book.
- Page 95 54. To place multiple calls: You can have more than one call on your SIP-T46G IP phone. To place a new call during an active call, do one of the following: Press the line key. The active call is placed on hold.
- Page 96 User Guide for the SIP-T46G IP Phone Using the headset Note You can ignore incoming calls by pressing the X key, the Reject soft key or the Silence soft key. You can also activate Do Not Disturb mode to ignore the incoming calls without ring on your phone.
-
Page 97: Recent Call In Dialing
Basic Call Features To end a call: Do one of the following: If you are using the handset, press the End Call soft key or hang up the handset. If you are using the headset, press the End Call soft key. If you are using the speakerphone, press or the End Call soft key. -
Page 98: Auto Answer
User Guide for the SIP-T46G IP Phone Select Enabled from the pull-down list of Recent Call In Dialing. Click Confirm to accept the change. Note Recent call in dialing is configurable via web user interface only. To view placed calls list when the phone is in the pre-dialing interface: Pick up the handset, press the speakerphone key or press the line key. -
Page 99: Auto Redial
Basic Call Features Select the desired line and then press the Enter soft key. Press , or the Switch soft key to select Enabled from the Auto Answer field. Press the Save soft key to accept the change or the Back soft key to cancel. icon appears on the LCD screen. - Page 100 User Guide for the SIP-T46G IP Phone The default value is 10. Press the Save soft key to accept the change or the Back soft key to cancel. Auto redial is configurable via web user interface at the path Features->General Information.
-
Page 101: Call Completion
Basic Call Features You can use call completion to notify the caller who failed to reach a desired callee when the callee becomes available to receive a call. To configure call completion via phone user interface: Press Menu->Call Features->Others->Call Completion. Press , or the Switch soft key to select Enabled from the Call Completion field. -
Page 102: Call Return
User Guide for the SIP-T46G IP Phone When the called party becomes idle, the LCD screen prompts the following: Press the OK soft key to redial the number. Note Call completion is not available on all servers. For more information, contact your system administrator. - Page 103 Basic Call Features You can mute the microphone of the active audio device during an active call, and then the other party cannot hear you. To mute a call: Press during an active call. The LCD screen indicates that the call is on mute. The mute key LED illuminates solid red when the call is on mute.
- Page 104 User Guide for the SIP-T46G IP Phone The line key LED flashes green. The phone will beep softly every 30 seconds to remind you that you still have a call on hold. To resume a held call: Press or the Resume soft key.
- Page 105 Basic Call Features In the DND block, mark the desired radio box in the Mode field. Click Confirm to accept the change. Note DND mode is configurable via web user interface only. To activate DND in phone mode: Press the DND soft key when the phone is idle. icon on the idle screen indicates that DND is enabled.
- Page 106 User Guide for the SIP-T46G IP Phone The LCD screen displays a list of accounts on the phone. Press to select the desired account. Press soft key to select On to activate DND. Press the Save soft key to accept the change.
- Page 107 Basic Call Features Press the Save soft key to accept the change. icon appears on the idle screen, and all line icons change to Incoming calls will be rejected automatically, and the LCD screen will prompt "n New Missed Call(s)" ("n" indicates the number of the missed calls). Note The prompt message displays only if Missed Call Log for the line is enabled.
-
Page 108: Call Forward
User Guide for the SIP-T46G IP Phone Click Confirm to accept the change. When DND is enabled on the phone, the phone can still receive incoming calls from the numbers specified in the DND Authorized Numbers field. Note DND authorized number is configurable via web user interface only. - Page 109 Basic Call Features Click Confirm to accept the change. Note Call forward mode is configurable via web user interface only. To enable call forward in phone mode: Press Menu->Call Features->Call Forward. Press to select the desired forwarding type, and then press the Enter soft key.
- Page 110 User Guide for the SIP-T46G IP Phone 3) (Optional.) Enter the busy forward on code or off code respectively in the On Code or Off Code field. c.) If you select No Answer Forward: 1) Press , or the Switch soft key to select Enabled from the No Answer Forward field.
- Page 111 Basic Call Features 1) Press , or the Switch soft key to select Enabled from the Always Forward field. 2) Enter the destination number you want to forward all incoming calls to in the Forward To field. 3) (Optional.) Enter the always forward on code or off code respectively in the On Code or Off Code field.
- Page 112 User Guide for the SIP-T46G IP Phone 3) (Optional.) Enter the busy forward on code or off code respectively in the On Code or Off Code field. You can also enable busy forward for all accounts. After busy forward was...
- Page 113 Basic Call Features 4) (Optional.) Enter the no answer forward on code or off code respectively in the On Code or Off Code field. You can also enable no answer forward for all accounts. After no answer forward was enabled for a specific account, do the following: 1) Press to highlight the No Answer Forward field.
-
Page 114: Dynamic Forwarding
User Guide for the SIP-T46G IP Phone To disable call forward in phone mode: Do one of the following: Press when the phone is idle. Press Menu->Call Features->Call Forward. Press to select the desired forwarding type, then press the Enter soft key. - Page 115 Basic Call Features You can transfer a call to another party in one of the three ways: Blind Transfer: Transfer a call directly to another party without consulting. Semi-Attended Transfer: Transfer a call when the target phone is ringing. ...
-
Page 116: Call Waiting
User Guide for the SIP-T46G IP Phone To perform an attended transfer: Press or the Transfer soft key during a call. Do one of the following: Enter the number you want to transfer the call to. Press the Directory soft key, and then select Local Directory. Select the desired group and search for the contact (Directory should be configured in advance. -
Page 117: Conference
Network conference is not available on all servers. For more information, contact your system administrator. The SIP-T46G IP phone supports up to 3 parties (including yourself) in a conference call. This is the default method of conference called Local Conference. -
Page 118: Network Conference
Press the End Call soft key to drop the conference call. You can use network conference feature on the SIP-T46G IP phone to conduct a conference with multiple participants. This feature allows you to perform the following: Join two calls together into a conference call. - Page 119 Basic Call Features To configure network conference via web user interface: Click on Account->Advanced. Select Network Conference from the pull-down list of Conference Type. Enter the conference URI (e.g., conference@example.com) in the Conference URI field. Click Confirm to accept the change. Note Network conference is configurable via web user interface only.
-
Page 120: Call Park
User Guide for the SIP-T46G IP Phone The procedures to set up a network conference call on specific servers may be different from introduced above. Contact your system administrator for more information. You can use call park to place a call on hold, and then retrieve the call from another phone in the system (for example, a phone in another office or conference room). -
Page 121: Call Pickup
You can use call pickup to answer someone else’s incoming call on the phone. The SIP-T46G IP phone supports directed call pickup and group call pickup. Directed call pickup is used for picking up a call that is ringing at a specific phone number. Group call pickup is used for picking up a call that is ringing at any phone number in the group. - Page 122 User Guide for the SIP-T46G IP Phone To configure the directed call pickup code on a per-line basis via web user interface: Click on Account. Select the desired account from the pull-down list of Account. Click on Advanced. Enter the directed call pickup code in the Directed Call Pickup Code field.
-
Page 123: Group Call Pickup
Basic Call Features You can also configure a DSS key as a directed pickup key via phone user interface or web user interface. You can pick up a call by pressing the directed pickup key directly. Group Call Pickup To enable the group call pickup and configure the group call pickup code on a global basis via web user interface: Click on Features->Call Pickup. - Page 124 User Guide for the SIP-T46G IP Phone Enter the group call pickup code in the Group Call Pickup Code field. Click Confirm to accept the change. To pick up a call in the group: Pick up the handset. The GPickup soft key appears on the LCD screen.
-
Page 125: Anonymous Call On
Basic Call Features You can use anonymous call to block the identity and phone number from showing up to the called party when you call someone. For example, you want to call to consult some of the services, but don’t want to be harassed. Anonymous call is configurable on a per-line basis. -
Page 126: Anonymous Call Rejection
User Guide for the SIP-T46G IP Phone The LCD screen of phone B prompts an incoming call from anonymity. You can use anonymous call rejection to reject incoming calls from anonymous callers. Anonymous call rejection automatically rejects incoming calls from callers who deliberately block their identities and numbers from showing up. -
Page 127: Advanced Phone Features
Advanced Phone Features This chapter provides operating instructions for the advanced features of the SIP-T46G IP phone. Topics include: Busy Lamp Field (BLF) Call Recording Hot Desking Intercom Multicast Paging Music on Hold Automatic Call Distribution (ACD) ... - Page 128 User Guide for the SIP-T46G IP Phone (Optional.) Enter the pickup code in the Extension field. Press the Save soft key to accept the change or the Back soft key to cancel. BLF key is configurable via web user interface at the path DSSKey->Line Key.
-
Page 129: Call Transfer
Advanced Phone Features When the monitored line receives an incoming call, the followings occur on the phone: The phone plays a warning tone (if enabled). The BLF key LED flashes red. The caller ID appears on the LCD screen (if enabled). ... -
Page 130: Call Recording
Click Confirm to accept the change. Note Transfer mode via DSS key is configurable via web user interface only. You can record calls by pressing a record key on the phone. The SIP-T46G IP phone supports record and URL record. Two ways of call recording: Record: The phone sends SIP INFO message containing a specific header “Record:... - Page 131 Advanced Phone Features (Optional.) Enter a string that will appear on the LCD screen in the Label field. Press the Save soft key to accept the change or the Back soft key to cancel. To configure a URL record key via phone user interface: Press Menu->Call Features->DSS Keys.
-
Page 132: Hot Desking
You can use hot desking on the SIP-T46G IP phone to log out of the existing accounts and then log into a new account. As a result, many users can share the phone resource in different time. -
Page 133: Registration
Advanced Phone Features To configure a hot desking key via phone user interface: Press Menu->Call Features->DSS Keys. Select the desired DSS key. Press , or the Switch soft key to select Key Event from the Type field. Press , or the Switch soft key to select Hot Desking from the Key Event field. -
Page 134: Intercom
User Guide for the SIP-T46G IP Phone The login wizard will be shown as below: Enter the login information in each field. Press the Save soft key to login or the Back soft key to cancel. Intercom is a useful feature in an office environment to quickly connect with the operator or the secretary. -
Page 135: Incoming Intercom Calls
Press the intercom key again or the Cancel soft key to end the intercom call. The SIP-T46G IP phone supports automatically to answer an incoming intercom call by default. The phone automatically plays a warning tone when it receives an incoming intercom call. - Page 136 User Guide for the SIP-T46G IP Phone Make the desired changes. Press the Save soft key to accept the change or the Back soft key to cancel. These specific parameters are configurable via web user interface at the path Features->Intercom.
-
Page 137: Multicast Paging
Advanced Phone Features You can use multicast paging to quickly and easily forward time sensitive announcements out to people within the multicast group. You can configure a multicast paging key on the phone, which allows you to send a Real Time Transport Protocol (RTP) stream to the pre-configured multicast address(es) without involving SIP signaling. - Page 138 User Guide for the SIP-T46G IP Phone Select the desired codec from the pull-down list of Multicast Codec. The default codec is G722. Click Confirm to accept the change. Note If G722 codec is used for multicast paging, the LCD screen displays the icon indicate that is providing high definition voice.
- Page 139 Advanced Phone Features Press the Hold soft key to place the current multicast RTP session on hold. Press the End Call soft key to cancel the multicast RTP session. Note Multicast RTP is one way only from sender to the multicast address(es) (receiver). For outgoing RTP multicasts, all other existing calls on the phone will be placed on hold.
-
Page 140: Music On Hold
User Guide for the SIP-T46G IP Phone Enter the label in the Label field. Label will appear on the LCD screen when receiving the multicast RTP stream. Click Confirm to accept the change. Note The priorities of listening addresses are predefined: 1 with the highest priority, 10 with the lowest. - Page 141 ACD on the SIP-T46G IP phone allows the ACD system to distribute large volumes of incoming calls to the registered ACD users. To use this feature, you should configure an ACD key in advance.
- Page 142 User Guide for the SIP-T46G IP Phone (Optional.) Enter the string that will appear on the LCD screen in the Label field. Press the Save soft key to accept the change or the Back soft key to cancel. ACD key is configurable via web user interface at the path DSSKey->Line Key.
-
Page 143: Messages
It is recommended you configure no more than one ACD key per phone. At any time, at most one ACD key can be in progress on your phone. You can send and receive text messages using the SIP-T46G IP phone. New text messages can be indicated both acoustically and visually. When receiving a new text message, the phone will play a warning tone. - Page 144 User Guide for the SIP-T46G IP Phone Select the desired message and press the View soft key. Note If the phone prompts receiving new text messages, you can also press the View soft key to read the new messages directly.
- Page 145 Advanced Phone Features Select the desired message and then press the Option soft key. Select Delete to delete the desired message. The LCD screen prompts "Delete the selected message". Press the OK soft key to delete this message or the Cancel soft key to cancel. You can also delete all text messages by pressing the Option soft key and then select Delete All.
-
Page 146: Voice Mail
User Guide for the SIP-T46G IP Phone You can leave voice mails for someone else on the SIP-T46G IP phone. You can also listen to the voice mails stored in a centralized location. When receiving a new voice mail, the phone will play a warning tone, and the power indicator LED will slow flash red. -
Page 147: Message Waiting Indicator (Mwi)
Select an account and then press the Connect soft key to listen to voice mails. The SIP-T46G IP phone supports MWI when receiving a new voice message. If someone leaves you a voice mail, you will receive a message waiting indicator. MWI will be indicated in three ways: a warning tone, an indicator message (including a voice mail icon) on the LCD screen, and the power indicator LED slow flashes red. - Page 148 User Guide for the SIP-T46G IP Phone The MWI service is unsolicited for some servers, so the SIP-T46G IP phone only handles the MWI messages sent from the server. But for other servers, the MWI service is solicited, so the SIP-T46G IP phone must enable subscription for MWI.
- Page 149 Advanced Phone Features Enter the period time in the MWI Subscription Period (Seconds) field. Click Confirm to accept the change. The IP phone will subscribe to the account number for MWI service by default. To enable Subscribe MWI to Voice Mail via web user interface: Click on Account.
- Page 150 User Guide for the SIP-T46G IP Phone The IP phone will subscribe to the voice mail number for MWI service using Subscribe MWI to Voice Mail. Note MWI subscription is configurable via web user interface only.
-
Page 151: Troubleshooting
Troubleshooting This chapter provides general troubleshooting information to help you solve the problems you might encounter when using your SIP-T46G IP phone. If you require additional information or assistance with your new phone, contact your system administrator. Why is the LCD screen blank? Ensure that the phone is properly plugged into a functional AC outlet. - Page 152 User Guide for the SIP-T46G IP Phone Why can’t I get a dial tone? Check for any loose connections and that the phone has been installed properly. For the installation instructions, refer to Phone Installation on page 11. Switch between the Handset, Headset (if present) or Hands-Free Speakerphone to ...
- Page 153 Troubleshooting Why does the phone play a tone when there is a call on hold? How to disable it? When there is a call on hold, the phone will play a hold tone every 30 seconds. Call hold tone is enabled by default. Call hold tone and the interval of playing a hold tone are configurable via web user interface only.
- Page 154 User Guide for the SIP-T46G IP Phone Why I can’t send an SMS to any other phone? SMS depends on support from a SIP server. Contact your system administrator for more information. How to change the user password? To change the user password via web user interface: Click on Security->Password.
- Page 155 Troubleshooting Select the desired value (Optional or Compulsory) from the pull-down list of RTP Encryption (SRTP). Click Confirm to accept the change. Note SRTP is not available on all servers. Contact your system administrator for more information. SRTP is configurable via web user interface only. How to reboot the phone? To reboot the phone via web user interface: Click on Settings->Upgrade.
- Page 156 User Guide for the SIP-T46G IP Phone You can also long press the X key to reboot the phone directly. Any reboot of the phone may take a few minutes. How to export PCAP trace? We may need you to provide a PCAP trace to help analyze your problem.
- Page 157 Troubleshooting Click Export to open file download window, and then save the file to your local system. You can also export the system log to a syslog server, contact your system administrator for more information. How to export/import the phone configurations? We may need you to provide the phone configurations to help analyze problem.
- Page 158 User Guide for the SIP-T46G IP Phone Click Import to import the configuration file. Note The file format of configuration file must be .bin. How to upgrade firmware? To upgrade firmware via web user interface: Click on Settings->Upgrade. Click Browse to locate the firmware from your local system.
- Page 159 Troubleshooting The LCD screen prompts the following warning: Press the OK soft key. The LCD screen prompts “Welcom Initializing…Please wait”. The phone will be reset to factory sucessfully after startup. Note Reset of the phone may take a few minutes. Do not power off until the phone starts up successfully.
- Page 160 User Guide for the SIP-T46G IP Phone...
-
Page 161: Regulatory Notices
Without prior written consent, no organization or individual is permitted to make any change to the structure or the safety design of the device. Yealink is under no circumstance liable to consequences or legal issues caused by such changes. - Page 162 User Guide for the SIP-T46G IP Phone Keep the device dry and free of dusts. Place the device on a stable and level platform. Please place no heavy objects on the device in case of damageand deformation caused by the heavy load.
-
Page 163: Appendix A - Time Zones
Appendix A-Time Zones Time Zone Time Zone Name −11:00 Samoa −10:00 United States-Hawaii-Aleutian −10:00 United States-Alaska-Aleutian −09:00 United States-Alaska Time −08:00 Canada(Vancouver, Whitehorse) −08:00 Mexico(Tijuana, Mexicali) −08:00 United States-Pacific Time −07:00 Canada(Edmonton, Calgary) −07:00 Mexico(Mazatlan, Chihuahua) −07:00 United States-Mountain Time −07:00 United States-MST no DST −06:00... - Page 164 User Guide for the SIP-T46G IP Phone Time Zone Time Zone Name +01:00 Hungary(Budapest) +01:00 Italy(Rome) +01:00 Luxembourg(Luxembourg) +01:00 Macedonia(Skopje) +01:00 Netherlands(Amsterdam) +01:00 Namibia(Windhoek) +02:00 Estonia(Tallinn) +02:00 Finland(Helsinki) +02:00 Gaza Strip(Gaza) +02:00 Greece(Athens) +02:00 Israel(Tel Aviv) +02:00 Jordan(Amman) +02:00 Latvia(Riga)
-
Page 165: Audio Settings
Index Editing Contacts About This Guide Emergency Number Account Management Ending Calls Account Registration Adding Contacts Administrator password Anonymous Call General Settings Anonymous Call Rejection Getting Started Answering Calls Area Code Attaching Stand Hardware Component Instructions Audio Settings Headset Use Auto Answer Headset Mode Activation/Deactivation Auto Redial... -
Page 166: System Customizations
User Guide for the SIP-T46G IP Phone Phone Initialization Phone Installation Phone Status Phone User Interface Placing Calls Placing Calls to Contacts Programmable Keys Outgoing Intercom Calls Overview Recent Call In Dialing Redialing Numbers Registration Regulatory Notices Remote Phone Book...
Need help?
Do you have a question about the SIP-T46G and is the answer not in the manual?
Questions and answers