
Subscribe to Our Youtube Channel
Related Manuals for Fargo Persona M110


Summary of Contents for Fargo Persona M110
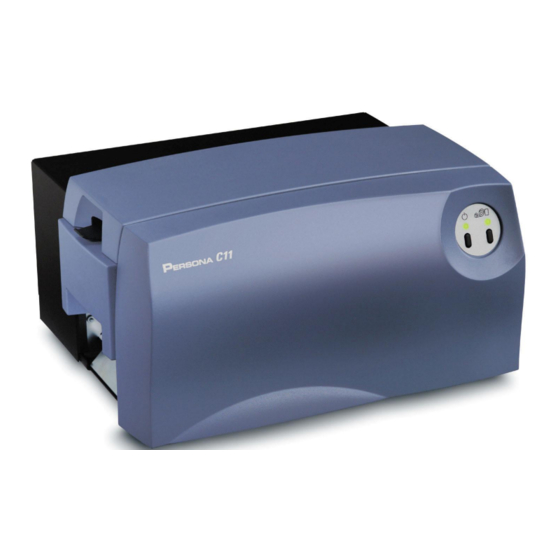
- Page 1 Persona C11 Card Printer and Persona M11 Card Printer User Guide (Rev. 4.0) Part Number: L000701...
- Page 2 Persona C11 Card Printer and Persona M11 Card Printer User Guide (Rev. 4.0), property of FARGO Electronics, Incorporated Copyright 2002, 2003, 2004, 2005, 2006 by FARGO Electronics, Incorporated. All rights reserved. Printed in the United States of America. Exclusive permission is granted to authorized resellers of FARGO products to reproduce and distribute this copyrighted document to authorized FARGO customers, who have signed a “no disclosure agreement”...
-
Page 3: How To Use The Manual
RESTRICTED USE ONLY Fargo Electronics, Inc. How to use the manual The Persona C11 Card Printer and Persona M11 Card Printer User Guide (Rev. 4.0) is, in fact, the troubleshooting and field service manual for the entire card Printer. The manual is designed to provide Installers and Technicians with quick, efficient lookup of related procedures, components, and terms. -
Page 4: Safety Messages (Review Carefully)
RESTRICTED USE ONLY Fargo Electronics, Inc. Safety Messages (review carefully) Symbol Critical Instructions for Safety purposes Danger: Failure to follow these installation guidelines can result in death or serious injury. Information that raises potential safety issues is indicated by a warning symbol (as shown to the below). -
Page 5: Table Of Contents
RESTRICTED USE ONLY Fargo Electronics, Inc. Persona C11/M11 Card Printer Overview Reviewing the Persona C11/M11 Block Diagram Motors Sensors Parts Card Feed Card Feed Card Input Roller Print Stepper Ribbon Sensor Cleaning Roller Ribbon Drive Ribbon Encoder Card Feed Roller... -
Page 6: Print Stepper
RESTRICTED USE ONLY Fargo Electronics, Inc. Reviewing the Persona C11/M11 Sequence of Operations The following sequence describes a full color print job with magnetic encoding. Step Process The File information is received from the PC Printer checks the installed Ribbon type stored in memory against the Ribbon type command that was sent from the Printer. -
Page 7: Ribbon Drive
RESTRICTED USE ONLY Fargo Electronics, Inc. Reviewing the Persona C11/M11 Sequence of Operations (continued) Step Process The Print Ribbon drive engages. The Print Ribbon Sensor looks for the color transition from Yellow to Magenta. Print Ribbon Encoder detects number of revolutions required to use an entire color panel. - Page 8 RESTRICTED USE ONLY Fargo Electronics, Inc. Reviewing the Persona C11/M11 Sequence of Operations (continued) Step Process The Print Ribbon drive engages. After Ribbon advances a few encoder clicks, assume Ribbon free of card. All Stop. Repeat steps 9 through 23 for appropriate number of color/overlay panels.
- Page 9 VeriMarkTM Cards - 2-D holographic foil application _____________________________________17 Custom HoloMarkTM Cards _________________________________________________________17 Visual Security - Card Stock Part Numbers ______________________________________________17 Visual Security - Fargo Certified Overlaminates (Special Order in 50 quantity minimum)__________17 Visual Security Card Stock - Tolerances ________________________________________________18 VeriMarkTM - Application Specifications_______________________________________________18...
- Page 10 RESTRICTED USE ONLY Fargo Electronics, Inc. Using the Idler Spring Upgrade Kit ____________________________________________________34 Print Process Errors ___________________________________________________________________35 Resolving a Headlift Motor or Sensor Error______________________________________________35 Resolving the Cover Open Error Message _______________________________________________36 Resolving the Blank Output issues _____________________________________________________37 Card Jam Errors______________________________________________________________________39...
- Page 11 RESTRICTED USE ONLY Fargo Electronics, Inc. Using the Buffer Single Card option ___________________________________________________92 Using the Disable Printing option______________________________________________________93 Using the Pause for Low Ribbon option_________________________________________________94 Using the Image Color tab______________________________________________________________95 Using the Resin Heat (K) option ______________________________________________________96 Using the Color Matching option and Default button_______________________________________97...
- Page 12 Section 8: Fargo Technical Support _____________________________________________ 190 Contacting Fargo Technical Support_____________________________________________________190 Reading the Serial Numbers on a Fargo printer ____________________________________________191 Finding out when a Fargo Card Printer was manufactured _________________________________191 Reviewing Example No. 1: Serial Number 80453289_____________________________________191 Reviewing Example No. 2: Serial Number A1280224 ____________________________________191...
-
Page 13: Section 1: Specifications
RESTRICTED USE ONLY Fargo Electronics, Inc. Section 1: Specifications The purpose of this section is to provide the User with specific information on the Regulatory Compliances, Agency Listings, Technical Specifications and Functional Specifications for the Persona C11 Card Printer and Persona M11 Card Printer User Guide (Rev. 5.0). -
Page 14: Agency Listings
RESTRICTED USE ONLY Fargo Electronics, Inc. Agency Listings Term Description Emissions CE, FCC, CRC c1374, BSMI, ITS (EN 55022 Class B:1995, FCC Standards Class B, EN 82082-1:1997). Safety UL 1950, CSA C2.2 No.950-95 and TüV-GS (EN 60950 A1-A4, A11). Standards... -
Page 15: Technical Specifications
RESTRICTED USE ONLY Fargo Electronics, Inc. Technical Specifications Type Description Accepted CR-80 (3.375” L x 2.125” W/85.6mm L x 54mm W) Standard Card Sizes Accepted 30 mil (.030"/.76mm) Card Thickness Accepted PVC or polyester cards with polished PVC finish; monochrome resin... - Page 16 RESTRICTED USE ONLY Fargo Electronics, Inc. Technical Specifications (continued) Type Description Print Method C11: Dye-Sublimation/Resin Thermal Transfer M11: Resin Thermal Transfer Print Speed C11: 30 seconds per card/120 cards per hour (YMCKO) M11: 5 seconds per card/720 cards per hour (K)
-
Page 17: Visual Security Solutions (Specifications)
The image is customer specific and the program mirrors our holographic laminates program with a couple exceptions. Visual Security - Card Stock Part Numbers All Visual Security Cards will be offered on the following Fargo Card Stocks only: P/N# 81754 Ultra Card ... -
Page 18: Visual Security Card Stock - Tolerances
RESTRICTED USE ONLY Fargo Electronics, Inc. Visual Security Card Stock - Tolerances Tolerance of base foil placement will equal +/- .010" from the nearest edges of the card Tolerance of layered foil will equal +/- .010" VeriMarkTM - Application Specifications VeriMarkTM foils will cover a dimensional area of 1.9 cm length x 1.3 cm height. -
Page 19: Functional Specifications
RESTRICTED USE ONLY Fargo Electronics, Inc. Functional Specifications This Card Printer utilizes two different, yet closely related printing technologies to achieve its remarkable direct-to-card print quality for dye-sublimation and resin thermal transfer. The Card Printer will print from any IBM-PC® or compatible running Windows® 95/98/Me, Windows NT 4.0, Windows 2000 or Windows XP. -
Page 20: Printer Components: Top Cover To Parallel Interface Card
RESTRICTED USE ONLY Fargo Electronics, Inc. Printer Components: Top Cover to Parallel Interface Card Components Description Top Cover Opens to allow access to the Printhead, print ribbon and card path. (Note: This cover must be closed in order for the Printer to begin printing.) -
Page 21: Printer Components: Centronics-Type Parallel Interface
RESTRICTED USE ONLY Fargo Electronics, Inc. Printer Components: Centronics-Type Parallel Interface The Card Printer is equipped with a standard 8-bit centronics-type parallel interface port. This communication port is the means through which the Printer receives data from the computer. This section describes the pin assignments and signal specifications for this port. -
Page 22: Printer Components: Resin-Only Print Ribbons
RESTRICTED USE ONLY Fargo Electronics, Inc. Printer Components: Resin-Only Print Ribbons Resin-only print ribbons consist of a continuous roll of a single resin color. No protective overlay panel (O) is provided since resin images do not require the protection of such an overlay. -
Page 23: Printer Components: Dye-Sublimation Print Ribbons
RESTRICTED USE ONLY Fargo Electronics, Inc. Printer Components: Dye-Sublimation Print Ribbons Note that the Printer requires both specialized and authorized print ribbons in order to print and function properly. Step Procedure Do not run the cards with a contaminated, dull or uneven surface through the Printer. -
Page 24: Printer Components: Dye-Sublimation/Resin Print Ribbons
RESTRICTED USE ONLY Fargo Electronics, Inc. Printer Components: Dye-Sublimation Print Ribbons (continued) Type Description Dye- It is available in a monochrome version. This ribbon consists of dye- Sublimation- sublimation ribbon panels which alternate with a clear protective Overlay Only Print (O) Panel. -
Page 25: Printer Components: Blank Cards
RESTRICTED USE ONLY Fargo Electronics, Inc. Printer Components: Blank Cards Type Description Card Size The Card Printer accepts standard CR-80 sized cards (3.370” L x 2.125” W/85.6mm L x 54mm W) with a thickness of 30 mil (.030"/.762mm). Card The Printer will print onto any card with a clean, level and polished PVC Design surface. -
Page 26: Reviewing The Upgraded 81754 Pvc Cards
2010104, indicating a new card lot number. The card lot number and date can be read on the bar code label attached to the shrink-wrapped stack of 100 cards, as shown below. All new Fargo printers with a serial number (S/N) starting with A320 will have factory for these new 81754 PVC cards. settings ... - Page 27 1. Instruction for new 81754 PVC card stock: Increase the Printer Driver’s Dye-Sub Intensity to print with the new 81754 PVC card stock on Fargo Card Printers (S/N A319 and older). See the chart provided below. See the appropriate Fargo service documents for specific Printer Driver instructions.
-
Page 28: Section 2: General Troubleshooting
RESTRICTED USE ONLY Fargo Electronics, Inc. Section 2: General Troubleshooting This section provides Troubleshooting procedures for this Printer for Communication Errors, Card Feed Errors, Print Process Errors, Card Jam Errors, Encoding Errors and Diagnosing Image Problems. Safety Messages (review carefully) -
Page 29: Interpreting The Led Lights
RESTRICTED USE ONLY Fargo Electronics, Inc. Interpreting the LED Lights Power LED Cause/Solution Media LED On solid On solid Printer is ON and READY to print. On solid Flashing Indicates an error with the media (print ribbon or cards). Refer to the following suggestions: The cards or ribbon have run out. -
Page 30: Communications Errors
Be sure the correct setup options within the Printer driver are selected. e. Confirm that the driver is current by checking at: www.fargo.com Continued on the next page Persona C11 Card Printer and Persona M11 Card Printer User Guide (Rev. 5.0) - Page 31 RESTRICTED USE ONLY Fargo Electronics, Inc. Resolving the Communication Errors (continued) Step Procedure Verify the use of an adequate data cable. a. Use a double-shielded parallel cable (no longer than six feet in length). (Note: Data transmission failure can be attributed to a long or faulty parallel cable.)
- Page 32 RESTRICTED USE ONLY Fargo Electronics, Inc. Resolving the Communication Errors (continued) Step Procedure Determine if the parallel port mode is set correctly or incorrectly a. Ensure that the parallel port is set to the Enhanced Communication Port (ECP) mode. (Note: The port mode can be determined by checking the Device Manager tab in the system control panel.)
-
Page 33: Card Feeding Errors
RESTRICTED USE ONLY Fargo Electronics, Inc. Card Feeding Errors Resolving the Card Feeding Errors Symptom: Two or more cards feed at the same time or the cards will not feed at all. Step Procedure Clean the Input Roller. Caution: Turn off the Printer and unplug the power cord from the Printer. -
Page 34: Using The Idler Spring Upgrade Kit
RESTRICTED USE ONLY Fargo Electronics, Inc. Using the Idler Spring Upgrade Kit The purpose of Technical Update No. 45 was to announce the release of the Idler Spring Upgrade Kit for the Persona C11, M11 and C16 Card Printers. ... -
Page 35: Print Process Errors
RESTRICTED USE ONLY Fargo Electronics, Inc. Print Process Errors Resolving a Headlift Motor or Sensor Error Symptom: The Printhead continuously cycles or does not cycle at all. Step Procedure Cycle the Headlift Motors. a. Press both buttons on the front control panel. -
Page 36: Resolving The Cover Open Error Message
RESTRICTED USE ONLY Fargo Electronics, Inc. Resolving the Cover Open Error Message Symptom: The Printer errors immediately after sending a print job or the rollers do not operate by pressing the cottons on the front panel (when the cover is open). -
Page 37: Resolving The Blank Output Issues
RESTRICTED USE ONLY Fargo Electronics, Inc. Resolving the Blank Output issues Symptom: A card is ejected blank (that should be printed). Step Procedure Run a self-test. a. Clear any card jams. b. Unplug power from the Printer. c. While holding down the Media button, reapply power. - Page 38 RESTRICTED USE ONLY Fargo Electronics, Inc. Resolving the Blank Output issues (continued) Step Procedure Check the Printhead connections. a. Open the top print cover. b. Remove the two (2) thumbscrews from the Printhead cover plate and remove the cover plate.
-
Page 39: Card Jam Errors
RESTRICTED USE ONLY Fargo Electronics, Inc. Card Jam Errors Resolving a Card Jam Error Symptoms: The card is physically jammed in the Printer or a Card Sensor is reporting a card is present. Step Procedure Look for a jammed card in the Printer. -
Page 40: Ribbon Errors
RESTRICTED USE ONLY Fargo Electronics, Inc. Ribbon Errors Resolving the Skipping Ribbon Panel issues Symptom: The Printer is using more than one set of ribbon panels to print one side of a card. Step Procedure Calibrate the Ribbon Sensor. (See the next page for illustration.) a. - Page 41 RESTRICTED USE ONLY Fargo Electronics, Inc. Resolving the Skipping Ribbon Panel issues (continued) Refer to the previous procedure. Continued on the next page Persona C11 Card Printer and Persona M11 Card Printer User Guide (Rev. 5.0)
- Page 42 RESTRICTED USE ONLY Fargo Electronics, Inc. Resolving the Skipping Ribbon Panel issues (continued) Step Procedure Test the Encoder Sensor. a. Remove the back cover. b. Using a Digital Voltmeter, connect the negative lead to ground. c. Connect the positive lead to Pin 4 of J13.
-
Page 43: Resolving The Wrong Ribbon Error (Being Displayed Incorrectly)
RESTRICTED USE ONLY Fargo Electronics, Inc. Resolving the Wrong Ribbon error (being displayed incorrectly) Symptom: A Wrong Ribbon Error is shown on the LEDs even though the correct ribbon is installed in the Printer. Step Procedure Verify the driver settings are correct. -
Page 44: Resolving The Ribbon Low Message
RESTRICTED USE ONLY Fargo Electronics, Inc. Resolving the Wrong Ribbon error (being displayed incorrectly) (continued) Step Procedure Test the Ribbon ID Sensor. a. Unplug the Printer. b. Remove the back cover. c. Flip switches 1,2,3 and 4 on the bank of DIP switches in the Main Board corner. -
Page 45: Resolving The Ribbon Breaking Issues
RESTRICTED USE ONLY Fargo Electronics, Inc. Resolving the Ribbon Breaking issues Symptom: The Ribbon breaks when printing. Step Procedure Calibrate the Ribbon Sensor. a. Reset the Printer to clear any Error Messages by removing Power and reapplying. b. From the Computer, open the Printer control panel. - Page 46 RESTRICTED USE ONLY Fargo Electronics, Inc. Resolving the Ribbon Breaking issues (continued) Persona C11 Card Printer and Persona M11 Card Printer User Guide (Rev. 5.0)
- Page 47 RESTRICTED USE ONLY Fargo Electronics, Inc. Resolving the Ribbon Breaking issues (continued) Step Procedure Determine where the ribbon is breaking. a. Open the Top Print Cover. b. Remove the ribbon from the Printer. c. Inspect the ribbon at the break point.
- Page 48 RESTRICTED USE ONLY Fargo Electronics, Inc. Resolving the Ribbon Breaking issues (continued) Continued on the next page Persona C11 Card Printer and Persona M11 Card Printer User Guide (Rev. 5.0)
- Page 49 RESTRICTED USE ONLY Fargo Electronics, Inc. Resolving the Ribbon Breaking issues (continued) Step Procedure Adjust the Image Placement positively. a. Reset the Printer to clear any Error Messages by removing Power and reapplying. b. Open the Printer Control Panel from the Computer.
-
Page 50: Encoding Errors
RESTRICTED USE ONLY Fargo Electronics, Inc. Encoding Errors Resolving the Mag Verify Error Message Symptoms: A Mag Verify error is displayed on the LED when attempting to encode. Step Procedure Check to ensure that the cards are loaded with the Magnetic Stripe facing down and towards the back of the Printer. - Page 51 RESTRICTED USE ONLY Fargo Electronics, Inc. Resolving the Mag Verify Error Message (continued) Persona C11 Card Printer and Persona M11 Card Printer User Guide (Rev. 5.0)
-
Page 52: Resolving The Printer's Inability To Read Encoded Data
RESTRICTED USE ONLY Fargo Electronics, Inc. Resolving the Printer’s inability to read Encoded Data Step Procedure Verify that the cards are loaded properly with the Magnetic Stripe facing down and towards the back of the Printer. Verify that the card is encoded with magnetic data by using a Magnetic Imager or Developer Solution. -
Page 53: Resolving Data Intended For Magnetic Stripe (Being Printed On The Card) Problem
RESTRICTED USE ONLY Fargo Electronics, Inc. Resolving Data intended for Magnetic Stripe (being printed on the card) problem Step Procedure Confirm that the application is formatting the magnetic string correctly. See the Using the Magnetic Track Options procedure in Section 3, page 104. -
Page 54: Diagnosing Image Problems
RESTRICTED USE ONLY Fargo Electronics, Inc. Diagnosing Image Problems Resolving the Pixel Failure problems Symptom: A thin line or scratch travels the entire length of the card. Step Procedure Check the card stock for scratches. Replace the cards (as needed). -
Page 55: Resolving The Card Surface Debris Problems
RESTRICTED USE ONLY Fargo Electronics, Inc. Resolving the Card Surface Debris problems Symptom: Prints have spots (white or colored voids) and/or dust on them. Step Procedure Be sure the cards are clean and stored in a dust-free environment. Do not use cards with embedded contaminants in the surface. -
Page 56: Resolving The Incorrect Image Darkness Problems
RESTRICTED USE ONLY Fargo Electronics, Inc. Resolving the Incorrect Image Darkness problems Symptom: Printed cards are too dark or too light. Step Procedure Run a self-test to ensure that the issue is not with the driver settings. Adjust the Dye-Sub Intensity setting within the Image Color tab of the Printer Driver. - Page 57 RESTRICTED USE ONLY Fargo Electronics, Inc. Resolving the Incorrect Image Darkness problems (continued) Step Procedure Correct the Image Darkness. See Using the Image Darkness option in Section 3, page 80. Persona C11 Card Printer and Persona M11 Card Printer User Guide (Rev. 5.0)
-
Page 58: Resolving The Ribbon Wrinkle Problems
Step Procedure Confirm that the Printer is using the most current driver via: http://www.fargo.com Reduce the Dye-Sub Intensity setting within the Image Color tab of the Printer driver. See the Using the Image Color tab procedure in Section 3, page 95. - Page 59 RESTRICTED USE ONLY Fargo Electronics, Inc. Resolving the Ribbon Wrinkle problems (continued) Step Procedure Reduce the Image Darkness. See Using the Image Darkness option in Section 3, page 80. Persona C11 Card Printer and Persona M11 Card Printer User Guide (Rev. 5.0)
-
Page 60: Resolving The Excessive Resin Printing Problems
RESTRICTED USE ONLY Fargo Electronics, Inc. Resolving the Excessive Resin Printing problems Symptom: Black resin text and barcodes appear smeared or too thick. Step Procedure Reduce the Resin Heat setting within the Image Color tab of the Printer Driver. See the Using the Image Color tab procedure in Section 3, page 95. - Page 61 RESTRICTED USE ONLY Fargo Electronics, Inc. Resolving the Excessive Resin Printing problems (continued) Step Procedure Reduce the Image Darkness. See Using the Image Darkness option in Section 3, page 80. Persona C11 Card Printer and Persona M11 Card Printer User Guide (Rev. 5.0)
-
Page 62: Resolving The Incomplete Resin Printing Problems
RESTRICTED USE ONLY Fargo Electronics, Inc. Resolving the Incomplete Resin Printing problems Symptom: Black resin text and barcodes appear faded or too light. Step Procedure Increase the Resin Heat setting within the Image Color tab of the Printer driver. See the Using the Image Color tab procedure in Section 3, page 95. -
Page 63: Resolving The Image Placement Problems
RESTRICTED USE ONLY Fargo Electronics, Inc. Resolving the Image Placement problems Symptom: Printing is cut off or is not centered on the card or a white border appears. Step Procedure Verify if the Image Position option within the Calibrate tab is set incorrectly. - Page 64 RESTRICTED USE ONLY Fargo Electronics, Inc. Resolving the Image Placement problems (continued) Step Procedure Verify if the Image Placement Setting is set correctly or incorrectly. See Graphic A on the next page. a. Open the Printer Control Panel from the Computer.
- Page 65 RESTRICTED USE ONLY Fargo Electronics, Inc. Resolving the Image Placement problems (continued) Graphic A Graphic B Persona C11 Card Printer and Persona M11 Card Printer User Guide (Rev. 5.0)
-
Page 66: Resolving The Poor Image Quality Problems
RESTRICTED USE ONLY Fargo Electronics, Inc. Resolving the Poor Image Quality problems Symptom: Photos on the cards look pixilated or grainy, as shown below. Step Procedure Use high-resolution, 24-bit color images to always capture an image: at a 24-bit color setting ... -
Page 67: Running The Self Test
RESTRICTED USE ONLY Fargo Electronics, Inc. Running the Self Test Perform a self-test after (a) an initial setup of the Printer, (b) a calibration procedure has been conducted or (c) a part has been replaced to check for proper Printer operation. -
Page 68: Using The Dip Switch (Self-Test)
RESTRICTED USE ONLY Fargo Electronics, Inc. Using the DIP Switch (Self-test) Step Procedure Activate any of these diagnostic tests and Calibration modes. See Running the Self Test in Section 2, page 67. During the activation of the Self-test, the Printer will: ... -
Page 69: Setting The Dip Switch Settings
RESTRICTED USE ONLY Fargo Electronics, Inc. Setting the DIP Switch Settings The capital letter “X” indicates that the switch should be set to ON or DOWN. Diagnostic modes Test5x3, Wrinkle, Gray15x3, ResTest, Gray15K, Steps is a standard YMCKO test card. -
Page 70: Running The 15-Shade Self Test
RESTRICTED USE ONLY Fargo Electronics, Inc. Running the 15-Shade Self Test This is the Self-test that appears when specific changes are made to the DIP Switch Settings. Persona C11 Card Printer and Persona M11 Card Printer User Guide (Rev. 5.0) -
Page 71: Interfacing Information
RESTRICTED USE ONLY Fargo Electronics, Inc. Interfacing Information The Printer is equipped with a standard 8-bit Centronics-type Parallel Data Communications Port. (Note: The Printer's Parallel Interface Connector is a standard 36-pin Amp type with two metal-wire retaining clips. It mates with a standard PC to Printer parallel cable.) Caution: For best results, keep the Interface Cable to less than six (6) feet. -
Page 72: Reviewing The Centronics Parallel Pin Assignments
RESTRICTED USE ONLY Fargo Electronics, Inc. Reviewing the Centronics Parallel Pin Assignments DB-25 M Centronics M Signal 1284A 1284B Funtion Name Pin # Pin # nStrobe Data Bit 0 Data Bit 1 Data Bit 2 Data Bit 3 Data Bit 4... - Page 73 RESTRICTED USE ONLY Fargo Electronics, Inc. Reviewing the Centronics Parallel Pin Assignments (continued) DB-25 M Centronics M Signal 1284A 1284B Funtion Name Pin # Pin # nError (nFault) nInit nSelectIn Grnd Rtn Grnd Rtn Grnd Rtn Grnd Rtn Grnd Rtn...
- Page 74 RESTRICTED USE ONLY Fargo Electronics, Inc. Reviewing the Centronics Parallel Pin Assignments (continued) Ch. Grnd Perif. Hi. Unused Unused Unused Unused Persona C11 Card Printer and Persona M11 Card Printer User Guide (Rev. 5.0)
-
Page 75: Reviewing The Printer Timing Diagram
RESTRICTED USE ONLY Fargo Electronics, Inc. Reviewing the Printer Timing Diagram The timing diagram (below) illustrates the data and handshake lines during the transfer of one data byte to the Computer. DATA VALID Data 0 - Data 7 Strobe Tdsu... -
Page 76: Reviewing The Printer Timing
RESTRICTED USE ONLY Fargo Electronics, Inc. Reviewing the Printer Timing Interval Description Minimum Value 0.5 µs Tdsu Data setup time Tstr Data strobe width 1 µs Tack Acknlg pulse width 3.75 µs 0.5 µs Data hold time Busy delay time from data strobe 0.5 µs (max.) -
Page 77: Section 3: Printer Adjustments
RESTRICTED USE ONLY Fargo Electronics, Inc. Section 3: Printer Adjustments Safety Messages (review carefully) Symbol Critical Instructions for Safety purposes Danger: Failure to follow these installation guidelines can result in death or serious injury. Information that raises potential safety issues is indicated by a warning symbol (as shown to the below). -
Page 78: Adjusting The Magnetic Encoding Head
RESTRICTED USE ONLY Fargo Electronics, Inc. Adjusting the Magnetic Encoding Head Use this procedure to adjust the coercivity of the Magnetic Encoding Head. Tools Needed: Phillips Head Screwdriver, Small Standard Screwdriver, Digital Voltmeter Steps Procedure Caution: Turn off the Printer and unplug the power cord from the Printer. -
Page 79: C11 Print Driver Options
RESTRICTED USE ONLY Fargo Electronics, Inc. C11 Print Driver Options Using the Settings dialog box Access the Settings dialog box via the Settings button on the Calibrate tab. Use the adjustment mode to change the Printer's internal settings for overall Image Darkness, Image Placement, Print Length and Magnetic Offset. -
Page 80: Using The Image Darkness Option
RESTRICTED USE ONLY Fargo Electronics, Inc. Using the Image Darkness option Use this option to set the overall darkness of the printed image by increasing or decreasing the amount of heat used by the Printhead when printing. Step Procedure Lighten the printed image by clicking the down arrow to enter a negative value and decrease the amount of Printhead heat. -
Page 81: Using The Image Placement Option
RESTRICTED USE ONLY Fargo Electronics, Inc. Using the Image Placement option Use this option to adjust the lengthwise or horizontal position of the printed image on a card so it appears centered. (Note: When adjusting this value, keep in mind that cards always remain in the same landscape orientation while moving through the Printer.) -
Page 82: Using The Print Length Option
RESTRICTED USE ONLY Fargo Electronics, Inc. Using the Print Length option Use this option to reduce or increase the overall printable area in order to optimize edge-to- edge printing toward the trailing edge of a card. (Note: When adjusting this value, keep in mind that cards always remain in the same position while moving through the Printer.) -
Page 83: Using The Magnetic Offset Option
RESTRICTED USE ONLY Fargo Electronics, Inc. Using the Magnetic Offset option Use this option only if the Printer has a built-in Magnetic Stripe encoder. (Note: If so, use this option to shift the starting point of where the Printer will begin encoding the magnetic track data on a card's Magnetic Stripe. -
Page 84: Using The Card Tab
RESTRICTED USE ONLY Fargo Electronics, Inc. Using the Card tab Adjusting the Card Size Option Step Description Click on the inches or mm option to choose the desired unit of measurement. (Note #1: When designing a card format, always set the card size or page size within the card design program to the exact dimensions of a CR-80 card.) -
Page 85: Adjusting The Orientation Option
RESTRICTED USE ONLY Fargo Electronics, Inc. Adjusting the Orientation Option Step Description Select Portrait under Orientation to cause the card to print in a vertical orientation. Select Landscape under Orientation to cause the card to print in a horizontal orientation. -
Page 86: Using The Copies Option
RESTRICTED USE ONLY Fargo Electronics, Inc. Using the Copies Option Step Description Specify the number of copies to be printed under Copies. Using the Test Print button Step Description Click on the Test Print button to send a simple self-test print to the Printer. -
Page 87: Using The About Button
RESTRICTED USE ONLY Fargo Electronics, Inc. Using the About button Step Description Click on the About button to open a dialog box containing the copyright and version information about this Printer driver software. Persona C11 Card Printer and Persona M11 Card Printer User Guide (Rev. 5.0) -
Page 88: Using The Device Options Tab
RESTRICTED USE ONLY Fargo Electronics, Inc. Using the Device Options tab Adjusting the Ribbon Type option Use the Ribbon Type option to select print ribbons. Step Description Select the appropriate print Ribbon Type option from the dropdown menu for the type of print ribbon in use. -
Page 89: Adjusting The Color Matching Option
RESTRICTED USE ONLY Fargo Electronics, Inc. Adjusting the Color Matching option Use the Color Matching dropdown menu to choose the color matching options which best fits the print job requirements. Step Description Select None for print speed versus print color or for use of third party color matching software. -
Page 90: Adjusting For The Resin Dither
RESTRICTED USE ONLY Fargo Electronics, Inc. Adjusting for the Resin Dither Select the appropriate dither method according to the type of image to be printed. This option only affects those objects printed on the backside of a card with the resin black panel of a YMCK or YMCKK print ribbon.) -
Page 91: Using The Rotate Image 180 Degrees Option
RESTRICTED USE ONLY Fargo Electronics, Inc. Using the Rotate Image 180 Degrees option Use this option to rotate the image on the front of the card 180 degrees when printed. Step Description Select this option to change the position of the printed image in relation to the set location of a card's Magnetic Stripe or smart chip. -
Page 92: Using The Buffer Single Card Option
RESTRICTED USE ONLY Fargo Electronics, Inc. Using the Buffer Single Card option Use this option to force the Printer's memory to buffer or hold, only one print job at a time. Step Description Select this option only when printing to multiple Printers that share print jobs over a network. -
Page 93: Using The Disable Printing Option
RESTRICTED USE ONLY Fargo Electronics, Inc. Using the Disable Printing option Use this option to disable the printing capabilities of the Printer, yet still allows the Printer to encode cards. Step Description Select this option to encode or re-encode cards without wasting additional time, effort or printing supplies. -
Page 94: Using The Pause For Low Ribbon Option
RESTRICTED USE ONLY Fargo Electronics, Inc. Using the Pause for Low Ribbon option Use this option as a definitive warning when running low on print ribbon. (Note: Select this option so the Printer will beep and pause and the Media LED will flash when approximately 10 to 20 prints remain on the print ribbon.) -
Page 95: Using The Image Color Tab
RESTRICTED USE ONLY Fargo Electronics, Inc. Using the Image Color tab Select the Algebraic color matching option and then use this option to control the Contrast and Gamma of the printed image, as well as the individual color balance of Yellow, Magenta and Cyan. -
Page 96: Using The Resin Heat (K) Option
RESTRICTED USE ONLY Fargo Electronics, Inc. Using the Resin Heat (K) option Use this option to control the amount of heat the Printer uses when printing with the resin black panel(s) of a full-color ribbon or when printing with a resin-only ribbon by adjusting the Resin Heat slide. -
Page 97: Using The Color Matching Option And Default Button
RESTRICTED USE ONLY Fargo Electronics, Inc. Using the Color Matching option and Default button Step Procedure Select the Algebraic color matching option to display and adjust all control options. Select the None or Monitor option to display only the Dye-Sub Intensity and Resin Heat sliders. -
Page 98: Using The Calibrate Tab
RESTRICTED USE ONLY Fargo Electronics, Inc. Using the Calibrate tab Use the Calibrate tab to (a) control the position of the printable area in relation to the card, (b) calibrate Sensors and (c) adjust the internal Printer settings that are customized for every Printer and saved directly within the Printer's memory. -
Page 99: Using The Image Position Controls
RESTRICTED USE ONLY Fargo Electronics, Inc. Using the Image Position Controls Use the Image Position controls to adjust the position of the overall print area to be precisely centered on a card. Step Procedure Click on the Vertical and Horizontal adjustment arrows to adjust the Image Position values. - Page 100 RESTRICTED USE ONLY Fargo Electronics, Inc. Using Image Position controls (continued) Review the Image Position diagram, which displays how the printed image will move in relation to the fixed card position as positive and negative image placement values are entered.
-
Page 101: Using The Sensors Button
RESTRICTED USE ONLY Fargo Electronics, Inc. Using the Sensors button Use the Sensors button to bring up a separate dialog box for calibrating the Printer's ribbon Sensor (see instructions in the Calibration window below). Persona C11 Card Printer and Persona M11 Card Printer User Guide (Rev. 5.0) -
Page 102: Using The Settings Button
RESTRICTED USE ONLY Fargo Electronics, Inc. Using the Settings button Use the Settings button (see previous page) to bring up a separate dialog box for adjusting the internal Printer settings, which are customized for every Printer at the factory and saved directly within the Printer's memory. -
Page 103: Using The Magnetic Encoding Tab
RESTRICTED USE ONLY Fargo Electronics, Inc. Using the Magnetic Encoding tab Use this option only if the Printer has an optional Magnetic Stripe Encoding Module installed. The following describes these options and the Printer's magnetic encoding process. The Card Printer comes with either a high-coercivity factory-installed Magnetic Stripe Encoding Module or a low-coercivity module. -
Page 104: Using The Magnetic Track Selection Radio Buttons
RESTRICTED USE ONLY Fargo Electronics, Inc. Using the Magnetic Track Selection radio buttons Use the Magnetic Track Selection option to specify which track to configure through the Magnetic Track Options if the application requires customization of the standard ISO encoding process. (Note: Although the default ISO Magnetic Track Options should be correct for almost all applications, these options can be customized if the application requires it.) - Page 105 RESTRICTED USE ONLY Fargo Electronics, Inc. Using the Magnetic Track Selection radio buttons (continued) Step Procedure Use the Magnetic Track Selections to configure the way in which each of the three magnetic tracks will encode. (Note #1: They do not designate which tracks the Printer will encode (e.g., to encode only Track 2).
-
Page 106: Using The Magnetic Track Options Radio Buttons
RESTRICTED USE ONLY Fargo Electronics, Inc. Using the Magnetic Track Options radio buttons Use the Magnetic Track options for these purposes: Customize the ISO encoded data format for each of the Magnetic Stripe's three tracks. Customize each track independently of the other two. -
Page 107: Using The Bit Density Radio Buttons
RESTRICTED USE ONLY Fargo Electronics, Inc. Using the Bit Density radio buttons Use this option to customize the Bit Recording Density (Bits per Inch) used to encode the magnetic data on the currently selected track. Step Procedure Select 75 BPI to change the bits per inch to 75 BPI. -
Page 108: Reviewing The Enable Mle Support Checkbox
RESTRICTED USE ONLY Fargo Electronics, Inc. Reviewing the Enable MLE Support checkbox Multi-Language Extension (MLE) support in Windows XP can cause text strings to be broken up into fragments. This fragmentation of the text string prevents magnetic encoding. Step Procedure Check this box to allow the Driver to process the fragmented text. -
Page 109: Using The Ascii Offset Radio Buttons
RESTRICTED USE ONLY Fargo Electronics, Inc. Using the ASCII Offset radio buttons Use this option to customize the Character ASCII Offset used to encode the magnetic data on the currently selected track. (Note: This character offset value is subtracted from the ASCII value of each Magnetic Stripe data character prior to encoding on the track.) -
Page 110: Using The Lrc Generation Radio Buttons
RESTRICTED USE ONLY Fargo Electronics, Inc. Using the LRC Generation radio buttons Use this option to customize the LRC Generation Mode (used to encode the magnetic data on the currently selected track). Step Procedure Select NO LRC to change the LRC Generation to none. -
Page 111: Using The Verification Radio Buttons And Retries Selection
RESTRICTED USE ONLY Fargo Electronics, Inc. Using the Verification radio buttons and Retries selection Use this option to customize the encoding verification settings. Step Procedure Select the Auto Eject 1st Error option to instruct the Printer to verify that all magnetic data has been correctly encoded on each card. -
Page 112: Using The Shift Data Left Checkbox
RESTRICTED USE ONLY Fargo Electronics, Inc. Using the Shift Data Left checkbox Use this option to shift the recorded magnetic data to the left-hand side of the card's Magnetic Stripe. Use this option for situations that require cards to be readable with insert type readers that may be unable to read the right-hand side of the card. -
Page 113: Reviewing The Iso Track Locations
RESTRICTED USE ONLY Fargo Electronics, Inc. Reviewing the ISO Track Locations Review the magnetic encoding module, which encodes onto tracks in accordance with an ISO 7811-2 Magnetic Stripe. (Note: Refer to the diagram (below) for track locations.) 0.223" 0.353" 0.493"... -
Page 114: Sending The Track Information
RESTRICTED USE ONLY Fargo Electronics, Inc. Sending the Track Information Magnetic track data is sent in the form of text strings from the application software to the Printer driver along with all of the other printable objects within the card design. -
Page 115: Reviewing Tracks 1, 2 And 3 (In Table Format)
RESTRICTED USE ONLY Fargo Electronics, Inc. Reviewing Tracks 1, 2 and 3 (in table format) Review this table, which displays the SS, ES, FS and the valid characters defined for each track. Start Field Valid Characters Maximum Sentinel Sentinel Separator... -
Page 116: Reviewing The Ascii Code And Character Table
RESTRICTED USE ONLY Fargo Electronics, Inc. Reviewing the ASCII Code and Character Table ASCII Code Character ASCII Code Character ASCII Code Character space " < & > Persona C11 Card Printer and Persona M11 Card Printer User Guide (Rev. 5.0) -
Page 117: Using The Overlay/Print Area Tab
RESTRICTED USE ONLY Fargo Electronics, Inc. Using the Overlay/Print Area tab Use this option to control where the Overlay (O) Panel and/or the print area appears on a card. (Note: This option is helpful if, for example, you would like to omit or block out the overlay or printing around a card's smart chip or Magnetic Stripe.) -
Page 118: Using The Overlay/Print Area Dropdown Menu
RESTRICTED USE ONLY Fargo Electronics, Inc. Using the Overlay/Print Area dropdown menu Step Procedure Select the Full Card option for the Printer to overlay and/or print the entire card. Select the Defined Area(s) option for the Printer to overlay and/or print only in the selected and defined area or areas. -
Page 119: Using The Overlay/Print Area
RESTRICTED USE ONLY Fargo Electronics, Inc. Using the Overlay/Print Area Use these Overlay/Print Area options to control both the print and overlay together or control each individually. Step Procedure Select For Print and Overlay for the defined area to apply to both the printing and overlay process. -
Page 120: Using The Defined Area Option
RESTRICTED USE ONLY Fargo Electronics, Inc. Using the Defined Area Option Step Procedure Select the Defined Area(s) option to activate the card grid in the upper half of the window. It is through this card grid that up to five (5) Defined Areas can be assigned. - Page 121 RESTRICTED USE ONLY Fargo Electronics, Inc. Using the Defined Area Option (continued) Step Procedure When the card grid is first activated, a small black square will appear at its default size of .2" x .2"/5mm x 5mm and at its default location in the lower left- hand corner (0,0).
- Page 122 RESTRICTED USE ONLY Fargo Electronics, Inc. Using the Defined Area Option (continued) Step Procedure Measure from the lower left corner of the card up and over to the lower left corner of for the defined area to begin and enter these values into the X and Y boxes.
- Page 123 RESTRICTED USE ONLY Fargo Electronics, Inc. Using the Defined Area Option (continued) Step Procedure a. Print the card design and observe how the image is oriented on the card as it ejects from the Printer. (Note: The location of a defined area is based on the card orientation as it exits the Printer.)
- Page 124 RESTRICTED USE ONLY Fargo Electronics, Inc. Using the Defined Area Option (continued) Step Procedure Use the Defined Area arrows to navigate back and forth from area to area. (Note: The active area will always be highlighted with a dotted outline.) a.
-
Page 125: Using Security Options (Visual Security Solutions)
RESTRICTED USE ONLY Fargo Electronics, Inc. Using Security Options (Visual Security Solutions) The Visual Security Solutions dropdown menu list will be used to enable and select which type of visual security will be used. The Visual Security dropdown list will be selectable only on the Front side (see below). -
Page 126: Selecting Orientation - Landscape Under Card Tab
RESTRICTED USE ONLY Fargo Electronics, Inc. Selecting Orientation - Landscape under Card tab Step Procedure Select the Landscape radio button (below) under Orientation under the Card Size tab to use the Visual Security Solutions (A to D), as shown in this window. -
Page 127: Selecting The Visual Security Solutions Dropdown Menu (A To D)
RESTRICTED USE ONLY Fargo Electronics, Inc. Selecting the Visual Security Solutions dropdown menu (A to D) Step Procedure Click on the Visual Security Solutions dropdown menu (below) under the Landscape - Orientation (see above) to use the options shown in this display. -
Page 128: Selecting Orientation - Portfolio Under Card Tab
RESTRICTED USE ONLY Fargo Electronics, Inc. Selecting Orientation - Portfolio under Card tab Step Procedure Select the Portrait radio button (below) under Orientation under the Card Size tab to use the Visual Security Solutions (E to H), as shown in this window. -
Page 129: Selecting The Visual Security Solutions Dropdown Menu (E To H)
RESTRICTED USE ONLY Fargo Electronics, Inc. Selecting the Visual Security Solutions dropdown menu (E to H) Step Procedure Click on the Visual Security Solutions dropdown menu under the Portrait - Orientation (see above) to use the options shown below. Persona C11 Card Printer and Persona M11 Card Printer User Guide (Rev. 5.0) -
Page 130: Selecting The Verimark Radio Button
RESTRICTED USE ONLY Fargo Electronics, Inc. Selecting the VeriMark radio button Step Procedure Click on either the VeriMark or HoloMark radio button, as shown below. The foil options are used to control the size of the exclusion area. (Note: When VeriMark is selected a rectangle-sized area is excluded, HoloMark uses a square sized area.) -
Page 131: Selecting The Holomark Radio Button
RESTRICTED USE ONLY Fargo Electronics, Inc. Selecting the HoloMark radio button Step Procedure Click on the HoloMark radio button (below) for the squared-area size. Persona C11 Card Printer and Persona M11 Card Printer User Guide (Rev. 5.0) -
Page 132: Reviewing The Custom Verimark Card (Custom Graphic In A 2D Foil)
RESTRICTED USE ONLY Fargo Electronics, Inc. Reviewing the Custom VeriMark Card (Custom Graphic in a 2D foil) The custom VeriMark image is stamped on blank, standard-sized cards. You can select one of eight positions (A to H), as shown in the Portrait and Landscape samples below. -
Page 133: Reviewing The Custom Holomark Card (Custom Graphic In A 2D Foil)
RESTRICTED USE ONLY Fargo Electronics, Inc. Reviewing the Custom HoloMark Card (Custom Graphic in a 2D foil) The custom HoloMark image is stamped on blank, standard-sized cards. You can select one of eight positions (A to H), as shown in the Portrait and Landscape samples below. -
Page 134: Using The K Panel Resin Tab
RESTRICTED USE ONLY Fargo Electronics, Inc. Using the K Panel Resin tab Select the K Panel Resin option to control where the resin black (K) panel of a full-color ribbon is printed. If printing with a resin-only ribbon type all K Panel Resin options will be grayed out. -
Page 135: Selecting From The Print All Black With K Panel Options
RESTRICTED USE ONLY Fargo Electronics, Inc. Selecting from the Print All Black With K Panel options Select one of the three options listed under Print All Black With K Panel if the black text or bar codes are not TrueType fonts and/or are not printing with the resin black panel. (Note: The Printer driver will print areas of the image where it finds black coloring with the print ribbon's resin black (K) panel as specified by each of the following options. -
Page 136: Selecting The Full Card Option
RESTRICTED USE ONLY Fargo Electronics, Inc. Selecting the Full Card option Step Procedure Select the Full Card option for the Printer driver to print the resin black (K) panel for all black found within all areas of the image. Persona C11 Card Printer and Persona M11 Card Printer User Guide (Rev. 5.0) -
Page 137: Selecting The Defined Area(S) Option
RESTRICTED USE ONLY Fargo Electronics, Inc. Selecting the Defined Area(s) option Step Procedure Select the Defined Area(s) option for the Printer driver to print the resin black (K) panel for all black found only in a desired and defined area or areas. -
Page 138: Selecting The Undefined Area(S) Option
RESTRICTED USE ONLY Fargo Electronics, Inc. Selecting the Undefined Area(s) option Step Procedure Select the Undefined Area(s) option for the Printer driver to print the resin black (K) panel for all black found only in the space outside the defined areas. (Note: In the card grid, black indicates the area in which the resin black (K) panel will be printed.) -
Page 139: Selecting The Defined Area(S) Function
RESTRICTED USE ONLY Fargo Electronics, Inc. Selecting the Defined Area(s) function To define an area, refer to the following steps: Step Procedure Click on the Defined Area(s) check box. (Note: This will activate the card grid in the upper half of the window. It is through this card grid that up to five areas can be defined.) - Page 140 RESTRICTED USE ONLY Fargo Electronics, Inc. Selecting the Defined Area(s) function (continued) Step Procedure a. Determine the area of the card necessary to define. In the sample (below), this area is indicated by the dashed outline. b. Determine the size of this area by actually printing a card and looking at it in the same orientation as when it exits the Printer.
- Page 141 RESTRICTED USE ONLY Fargo Electronics, Inc. Selecting the Defined Area(s) function (continued) Step Procedure a. Once the area is sized properly measure from the lower left corner of the card up and over to the lower left corner for the defined area to begin.
- Page 142 RESTRICTED USE ONLY Fargo Electronics, Inc. Selecting the Defined Area(s) function (continued) Refer to the previous procedure. Continued on the next page Persona C11 Card Printer and Persona M11 Card Printer User Guide (Rev. 5.0)
- Page 143 RESTRICTED USE ONLY Fargo Electronics, Inc. Selecting the Defined Area(s) function (continued) Refer to the previous procedure. Karen Atkins Access Level-2 ID# 1234478 * 172355* Y=0.2“ X=1.4“ Continued on the next page Persona C11 Card Printer and Persona M11 Card Printer User Guide (Rev. 5.0)
- Page 144 RESTRICTED USE ONLY Fargo Electronics, Inc. Selecting the Defined Area(s) function (continued) Refer to the previous procedure. Continued on the next page Persona C11 Card Printer and Persona M11 Card Printer User Guide (Rev. 5.0)
- Page 145 RESTRICTED USE ONLY Fargo Electronics, Inc. Selecting the Defined Area(s) function (continued) Step Procedure Define another area by clicking on the Defined Area up arrow. (Note: Another .2" x .2"/5mm x 5mm area will appear in the lower left-hand corner. This is the location in which all newly defined areas will first appear.)
- Page 146 RESTRICTED USE ONLY Fargo Electronics, Inc. Selecting the Defined Area(s) function (continued) Refer to the previous procedure. Persona C11 Card Printer and Persona M11 Card Printer User Guide (Rev. 5.0)
-
Page 147: Selecting The Print Ymc Under K And Print K Only Options
RESTRICTED USE ONLY Fargo Electronics, Inc. Selecting the Print YMC under K and Print K Only options Step Procedure Select between the Print YMC Under K and Print K Only options. (Note: When the Print YMC Under K option is selected, all black in the designated areas will print with the Yellow (Y), Magenta (M) and Cyan (C) ribbon panels directly beneath the resin black (K) panel.) -
Page 148: M11 Printer Driver Options
RESTRICTED USE ONLY Fargo Electronics, Inc. M11 Printer Driver Options Selecting from the Ribbon Type option Use the Ribbon Type option to select print ribbons. Step Description Select the appropriate print Ribbon Type option from the dropdown menu for the type of print ribbon in use. -
Page 149: Adjusting For The Resin Dither
RESTRICTED USE ONLY Fargo Electronics, Inc. Adjusting for the Resin Dither Select the appropriate dither method according to the type of image to be printed. (Note: This option affects objects printed with a resin-only print ribbon or those objects printed with the resin black panel of a YMCKO print ribbon.) -
Page 150: Selecting The Rotate Image 180 Degrees Option
RESTRICTED USE ONLY Fargo Electronics, Inc. Selecting the Rotate Image 180 Degrees option Use this option to rotate the image on the front of the card 180 degrees when printed. Step Description Select this option to change the position of the printed image in relation to the set location of a card's Magnetic Stripe or smart chip. -
Page 151: Selecting The Buffer Single Card Option
RESTRICTED USE ONLY Fargo Electronics, Inc. Selecting the Buffer Single Card option Use this option to force the Printer's memory to buffer or hold, only one print job at a time. Step Description Select this option only when printing to multiple Printers that share print jobs over a network. -
Page 152: Selecting The Disable Printing Option
RESTRICTED USE ONLY Fargo Electronics, Inc. Selecting the Disable Printing option Use this option to disable the printing capabilities of the Printer, yet still allows the Printer to encode cards. Step Description Select this option to encode or re-encode cards without wasting additional time, effort or printing supplies. -
Page 153: Selecting The Pause For Low Ribbon Option
RESTRICTED USE ONLY Fargo Electronics, Inc. Selecting the Pause for Low Ribbon option Use this option as a definitive warning when running low on print ribbon. (Note: Select this option so the Printer will beep and pause and the Media LED will flash when approximately 10 to 20 prints remain on the print ribbon.) -
Page 154: Selecting The Heat (M11 Only) Option
RESTRICTED USE ONLY Fargo Electronics, Inc. Selecting the Heat (M11 only) option Step Description Use the Heat (M11 only) option by adjusting the Heat slide to control the amount of heat (that the Printer uses when printing with the monochrome resin ribbon). -
Page 155: Using The Calibrate Tab
RESTRICTED USE ONLY Fargo Electronics, Inc. Using the Calibrate tab Use the Calibrate tab to (a) control the position of the printable area in relation to the card, (b) calibrate Sensors and (c) adjust the internal Printer settings that are customized for every Printer and saved directly within the Printer's memory. -
Page 156: Using The Image Position Controls
RESTRICTED USE ONLY Fargo Electronics, Inc. Using the Image Position Controls Use the Image Position controls to adjust the position of the overall print area to be precisely centered on a card. Step Procedure Click on the Vertical and Horizontal adjustment arrows to adjust the Image Position values. - Page 157 RESTRICTED USE ONLY Fargo Electronics, Inc. Using Image Position controls (continued) Review the Image Position diagram, which displays how the printed image will move in relation to the fixed card position as positive and negative image placement values are entered.
-
Page 158: Using The Settings Button
RESTRICTED USE ONLY Fargo Electronics, Inc. Using the Settings button Use the Settings button (see previous page) to bring up a separate dialog box for adjusting the internal Printer settings, which are customized for every Printer at the factory and saved directly within the Printer's memory. -
Page 159: Using The Magnetic Encoding Tab
RESTRICTED USE ONLY Fargo Electronics, Inc. Using the Magnetic Encoding tab Use this option only if the Printer has an optional Magnetic Stripe Encoding Module installed. The following describes these options and the Printer's magnetic encoding process. The Card Printer comes with either a high-coercivity factory-installed Magnetic Stripe Encoding Module or a low-coercivity module. -
Page 160: Using The Magnetic Track Selection Radio Buttons
RESTRICTED USE ONLY Fargo Electronics, Inc. Using the Magnetic Track Selection radio buttons Use the Magnetic Track Selection option to specify which track to configure through the Magnetic Track Options if the application requires customization of the standard ISO encoding process. (Note: Although the default ISO Magnetic Track Options should be correct for almost all applications, these options can be customized if the application requires it.) - Page 161 RESTRICTED USE ONLY Fargo Electronics, Inc. Using the Magnetic Track Selection radio buttons (continued) Step Procedure Use the Magnetic Track Selections to configure the way in which each of the three magnetic tracks will encode. (Note #1: They do not designate which tracks the Printer will encode (e.g., to encode only Track 2).
-
Page 162: Using The Magnetic Track Options Radio Buttons
RESTRICTED USE ONLY Fargo Electronics, Inc. Using the Magnetic Track Options radio buttons Use the Magnetic Track options for these purposes: Customize the ISO encoded data format for each of the Magnetic Stripe's three tracks. Customize each track independently of the other two. -
Page 163: Using The Bit Density Radio Buttons
RESTRICTED USE ONLY Fargo Electronics, Inc. Using the Bit Density radio buttons Use this option to customize the Bit Recording Density (Bits per Inch) used to encode the magnetic data on the currently selected track. Step Procedure Select 75 BPI to change the bits per inch to 75 BPI. -
Page 164: Using The Ascii Offset Radio Buttons
RESTRICTED USE ONLY Fargo Electronics, Inc. Using the ASCII Offset radio buttons Use this option to customize the Character ASCII Offset used to encode the magnetic data on the currently selected track. (Note: This character offset value is subtracted from the ASCII value of each Magnetic Stripe data character prior to encoding on the track.) -
Page 165: Using The Lrc Generation Radio Buttons
RESTRICTED USE ONLY Fargo Electronics, Inc. Using the LRC Generation radio buttons Use this option to customize the LRC Generation Mode (used to encode the magnetic data on the currently selected track). Step Procedure Select NO LRC to change the LRC Generation to none. -
Page 166: Using The Verification Radio Buttons And Retries Selection
RESTRICTED USE ONLY Fargo Electronics, Inc. Using the Verification radio buttons and Retries selection Use this option to customize the encoding verification settings. Step Procedure Select the Auto Eject 1st Error option to instruct the Printer to verify that all magnetic data has been correctly encoded on each card. -
Page 167: Using The Shift Data Left Checkbox
RESTRICTED USE ONLY Fargo Electronics, Inc. Using the Shift Data Left checkbox Use this option to shift the recorded magnetic data to the left-hand side of the card's Magnetic Stripe. Use this option for situations that require cards to be readable with insert type readers that may be unable to read the right-hand side of the card. -
Page 168: Reviewing The Iso Track Locations
RESTRICTED USE ONLY Fargo Electronics, Inc. Reviewing the ISO Track Locations Review the magnetic encoding module, which encodes onto tracks in accordance with an ISO 7811-2 Magnetic Stripe. (Note: Refer to the diagram (below) for track locations.) 0.223" 0.353" 0.493"... -
Page 169: Sending The Track Information
RESTRICTED USE ONLY Fargo Electronics, Inc. Sending the Track Information Magnetic track data is sent in the form of text strings from the application software to the Printer driver along with all of the other printable objects within the card design. -
Page 170: Reviewing Tracks 1, 2 And 3 (In Table Format)
RESTRICTED USE ONLY Fargo Electronics, Inc. Reviewing Tracks 1, 2 and 3 (in table format) Review this table, which displays the SS, ES, FS and the valid characters defined for each track. Start Field Valid Characters Maximum Sentinel Sentinel Separator... -
Page 171: Reviewing The Ascii Code And Character Table
RESTRICTED USE ONLY Fargo Electronics, Inc. Reviewing the ASCII Code and Character Table ASCII Code Character ASCII Code Character ASCII Code Character space " < & > Persona C11 Card Printer and Persona M11 Card Printer User Guide (Rev. 5.0) -
Page 172: Using The Print Area Tab
RESTRICTED USE ONLY Fargo Electronics, Inc. Using the Print Area tab Use this option to control where the print area appears on a card. (Note: This option is helpful if, for example, you would like to omit or block out printing around a card's smart chip or Magnetic Stripe.) -
Page 173: Using The Print Area Dropdown Menu
RESTRICTED USE ONLY Fargo Electronics, Inc. Using the Print Area dropdown menu Step Procedure Select the Full Card option for the Printer to overlay and/or print the entire card. Select the Defined Area(s) option for the Printer to overlay and/or print only in the selected and defined area or areas. -
Page 174: Using The Defined Area Option
RESTRICTED USE ONLY Fargo Electronics, Inc. Using the Defined Area Option Step Procedure Select the Defined Area(s) option to activate the card grid in the upper half of the window. It is through this card grid that up to five (5) Defined Areas can be assigned. - Page 175 RESTRICTED USE ONLY Fargo Electronics, Inc. Using the Defined Area Option (continued) Step Procedure When the card grid is first activated, a small black square will appear at its default size of .2" x .2"/5mm x 5mm and at its default location in the lower left- hand corner (0,0).
- Page 176 RESTRICTED USE ONLY Fargo Electronics, Inc. Using the Defined Area Option (continued) Step Procedure Measure from the lower left corner of the card up and over to the lower left corner of for the defined area to begin and enter these values into the X and Y boxes.
- Page 177 RESTRICTED USE ONLY Fargo Electronics, Inc. Using the Defined Area Option (continued) Step Procedure d. Print the card design and observe how the image is oriented on the card as it ejects from the Printer. (Note: The location of a defined area is based on the card orientation as it exits the Printer.)
- Page 178 RESTRICTED USE ONLY Fargo Electronics, Inc. Using the Defined Area Option (continued) Step Procedure Use the Defined Area arrows to navigate back and forth from area to area. (Note: The active area will always be highlighted with a dotted outline.) c.
-
Page 179: Section 4: Cleaning
RESTRICTED USE ONLY Fargo Electronics, Inc. Section 4: Cleaning The Card Printer is built to require a minimum amount of maintenance. Nevertheless, there are a few procedures you can perform on a regular basis or as needed to ensure the best... -
Page 180: Using The Required Supplies
RESTRICTED USE ONLY Fargo Electronics, Inc. Using the Required Supplies For the maintenance procedures outlined for the Printer, you will need a Printer Cleaning Kit, available from the reseller. This kit includes the following: Printhead Cleaning Pens pre-moistened with 99.99% isopropyl alcohol for cleaning the Printer's Printhead. -
Page 181: Cleaning Procedures
RESTRICTED USE ONLY Fargo Electronics, Inc. Cleaning Procedures Cleaning the Printhead Perform this procedure during every ribbon change or after every 250 prints to maintain consistent print quality. Also, perform this procedure after noticing a streak on the card where color was not transferred. -
Page 182: Cleaning The Card Feed And Cleaning Rollers
RESTRICTED USE ONLY Fargo Electronics, Inc. Cleaning the Card Feed and Cleaning Rollers The Card Feed Rollers move the card throughout the print process. The Cleaning Roller removes dust particles from a blank card as it feeds into the Printer. Cleaning these rollers will help prevent card jams and card contamination and will ultimately lead to better print quality and extended Printhead life. - Page 183 RESTRICTED USE ONLY Fargo Electronics, Inc. Cleaning the Card Feed and Cleaning Rollers (continued) Step Procedure Press and hold the Printer's Media button to feed the Cleaning Card all the way back through the Printer until it stops. a. Close the Printer's Top Cover and pull the Cleaning Card out of the Card Input Hopper.
-
Page 184: Cleaning The Platen Roller
RESTRICTED USE ONLY Fargo Electronics, Inc. Cleaning the Platen Roller Clean the Printer's Platen Roller approximately every 250 prints or during every ribbon change. This helps prevent jams and maintain the best print quality. Also, perform this procedure if the roller is visibly dirty. Use the following steps to clean the roller:... -
Page 185: Cleaning The Printer's Interior
RESTRICTED USE ONLY Fargo Electronics, Inc. Cleaning the Printer's Exterior The Printer has a durable casing that should retain its luster and appearance for many years. Clean it only with a Cleaning Pad from the Printer Cleaning Kit. DO NOT use cleaning... -
Page 186: Section 5: Packing The Card Printer
RESTRICTED USE ONLY Fargo Electronics, Inc. Section 5: Packing the Card Printer The purpose of this section to provide the User with a specific packing procedure for this Card Printer. Follow this instruction to pack the Card Printer for transport. -
Page 187: Section 6: Board Level Diagnostics
RESTRICTED USE ONLY Fargo Electronics, Inc. Section 6: Board Level Diagnostics The purpose of this section to provide the User with specific Board Level Diagnostic procedures for Board Errors and Sensor Testing for this Card Printer. Safety Messages (review carefully) -
Page 188: Sensor Testing
RESTRICTED USE ONLY Fargo Electronics, Inc. Sensor Testing Step Procedure Check the voltage to determine if a Sensor is working. a. Test the voltage of each Sensor using ground (GRD = Chassis) unless noted to the correct pin on each connector. See Sensor Location and Voltages table on the next page. -
Page 189: Reviewing The Sensor Location And Voltages
RESTRICTED USE ONLY Fargo Electronics, Inc. Reviewing the Sensor Location and Voltages Use this table as a reference tool for Board Level Diagnostics Sensor Location Low Range VDC High Range VDC Print Ribbon ID Present .02 Not Present .70 Headlift... -
Page 190: Section 7: Firmware Upgrades
(952) 941-0050 or by fax at (952) 941-1852 for additional, technical assistance. Contact Fargo Technical Support via the Web: http://www.fargo.com/tech_support/contact_tech_support.asp Position a phone near the Printer and Computer so Fargo technicians can help to help troubleshoot the Printer(s). Please have a self-test and a sample card ready when calling Fargo Technical Support. -
Page 191: Reading The Serial Numbers On A Fargo Printer
The purpose of this section is to provide updated instructions for reading serial numbers on a Fargo printer. Finding out when a Fargo Card Printer was manufactured You can determine when your card printer was manufactured by reading directly from the serial number (affixed to your card printer). -
Page 192: Section 9: Reviewing The Spare Parts List
RESTRICTED USE ONLY Fargo Electronics, Inc. Section 9: Reviewing the Spare Parts List Persona C11/M11 ID Card Printer Recommended Spare Parts List Effective Date: April 2004 For current pricing see http://www.fargopartner.com/support_services/ Persona C11 Card Printer and Persona M11 Card Printer User Guide (Rev. 5.0) -
Page 193: Glossary Of Terms
U.S. Manufactures prior or in addition, to acceptance by ISO. Institute) AS400 An IBM operating system running on a main frame. DTC500 Fargo Printers are built with fonts saved in the Printer memory so users of AS400 can write escape codes and print from the Printer. - Page 194 RESTRICTED USE ONLY Fargo Electronics, Inc. Glossary of Terms (continued) Term Definition Barcodes A series of alternating black and white stripes, of varying widths (each character denoted by a set number and width of black stripes) that allows characters to be optically read by a computer.
- Page 195 RESTRICTED USE ONLY Fargo Electronics, Inc. Glossary of Terms (continued) Term Definition Cache A type of memory buffer to store data temporarily, used to hold information that is most often exchanged between controller and peripheral, to expedite data transfer. Calibrating A procedure to adjust an electro-mechanical device so that it operates within established parameters.
- Page 196 RESTRICTED USE ONLY Fargo Electronics, Inc. Glossary of Terms (continued) Term Definition CR-79 A card dimension standard of 2.0625" L X 3.3125" W (+/-0.002" W, +/-0.005" L) or 52.400 X 84.150 mm. CR-80 A card dimension standard of 2.125" X 3.370" (+/-0.002" W, +/- 0.005"...
- Page 197 RESTRICTED USE ONLY Fargo Electronics, Inc. Glossary of Terms (continued) Term Definition Direct-to-Card (DTC) The Direct-to-Card printing process prints digital images directly Printing onto any plastic card with a smooth, clean, glossy PVC surface. Dither A system of distributing dots to control the hue, brightness and/or saturation.
- Page 198 RESTRICTED USE ONLY Fargo Electronics, Inc. Glossary of Terms (continued) Term Definition Dwell Time The speed at which the card moves across the lam roller, measured in seconds/inch (secs/in). This may be adjusted in the driver to ensure adhesion and card flatness.
- Page 199 EPROM A microchip based non-volatile memory storage device that cannot (Electronically be rewritten in the field. Firmware for many Fargo Printers is stored Programmable Read on these chips and so a change of the chip is necessary for an Only Memory) upgrade.
- Page 200 Glossy/Matte A smooth polished surface in comparison to a rougher matte surface. Fargo matte cards have a surface index (Ra) of approximately 65 microinches while glossy have a Ra = 3. Glossy PVC A card made of PVC with a smooth polished surface (Surface roughness of approximately 0 - 10 micro-inches).
- Page 201 HiCo (High The coercivity value of magnetic media between 2500 - 4000 Oe Coercivity) (ISO 7811-6). Fargo's High Coercivity encodes at 2750 Oe. HTML (HyperText A standard protocol used to format text files for use in a browser Markup Language) or on the Internet.
- Page 202 A standard method of signaling for a bi-directional parallel of Electrical and interface on personal computers. To ensure proper Printer Electronics communications and image output, Fargo recommends a parallel Engineers 1284) interface cable that complies with this specification. Image A collection of pictures or graphical elements that compose the visual features on a card.
- Page 203 LoCo (Low The coercivity value of magnetic media between 250 - 600 Oe Coercivity) (ISO 7811-2). Fargo's Low Coercivity encodes at 300 Oe. LPT Port (Line The system abbreviation for a PC's parallel Printer port. Printer Port)
- Page 204 RESTRICTED USE ONLY Fargo Electronics, Inc. Glossary of Terms (continued) Term Definition MB (Megabyte) A unit of storage that equals 1,048,576 bytes. Memory A generic term for any device that stores digital information using magnetic media or digital chip storage device.
- Page 205 RESTRICTED USE ONLY Fargo Electronics, Inc. Glossary of Terms (continued) Term Definition Oversized Cards Oversized cards are used for more efficient visual identification and are available in many non-standard sizes. The most popular sizes are CR-90 (3.63" x 2.37"/92mm x 60mm) and CR-100 (3.88"...
- Page 206 RESTRICTED USE ONLY Fargo Electronics, Inc. Glossary of Terms (continued) Term Definition Pinch roller A free spinning (non-driven) roller that presses the card against the drive roller, on the opposite side, to ensure an adequate normal force for proper traction.
- Page 207 Card technology, usually by communicating through a built-in antenna. Prox Card Encoder The Fargo prox card encoder uses an HID ProxPoint® Plus reader mounted on the e-card docking station inside the Printer/encoder. The ProxPoint is a "read only" device producing a Wiegand signal that is converted to RS-232 using a Cypress Computer Systems CVT-2232.
- Page 208 Parallel wires held flat in a row by plastic insulation. RibbonTraq A Fargo Electronics method of placing bar code-like marks on the transition area between color panels. These marks are arranged for detection by a reflective Sensor array for the identification of ribbon type and the ribbon position.
- Page 209 Simplex Single-sided printing. SmartGuard An application from Fargo Electronics that allows users to prevent access to the Printer through the use of a personally encoded smart card. SmartGuard™ SmartGuard is a Printer security option that uses a custom access card and a built-in reader to restrict Printer access.
- Page 210 RESTRICTED USE ONLY Fargo Electronics, Inc. Glossary of Terms (continued) Term Definition Spooling Rather than moving a print job directly to the Printer, the job is written to the disk so that the user can access the application faster while Windows takes care of printing in the background.
- Page 211 A font format that produces each character using a mathematical equation, rather than a graphical representation, resulting in a much sharper, cleaner image. UltraCard The Fargo brand of card stock, recommended for use in Fargo Printers, with the necessary glossy surface and composed of PVC. UltraCard III...
- Page 212 RESTRICTED USE ONLY Fargo Electronics, Inc. Glossary of Terms (continued) Term Definition USB (Universal A 1.5M/sec (12Mbit/sec) serial communication interface that can Serial Bus) support 127 separate devices consisting of 4 wires: power, ground, data in and data out. Virtual Memory...
-
Page 213: Index
RESTRICTED USE ONLY Fargo Electronics, Inc. Index card grid lines, 122, 176 card input, 81 Card Input Hopper, 20 About button, 87 Card Input Hopper Capacity, 15 AC - Alternating Current, 193 Card Jam Accepted Card Thickness, 15 Print, 39... - Page 214 DIP Switch, 68 DIP Switch Settings table, 68 Fargo Technical Support, 190 DIP switches (Dual In-line Package Switches), 196 Fargo Technical Support via the Web, 190 Direct-to-Card (DTC) Printing, 197 FCC, 13 Disable Printing option, 93, 152 feed card into encoder, 31, 52, 53...
- Page 215 RESTRICTED USE ONLY Fargo Electronics, Inc. high-resolution, 24-bit color images, 66 Landscape, 203 Horizontal adjustment, 100, 157 Landscape orientation, 99, 156 HTML (HyperText Markup Language), 201 LCD (Liquid Crystal Display), 203 HTTP (HyperText Transfer Protocol), 201 LED (Light Emitting Diode), 203...
- Page 216 RESTRICTED USE ONLY Fargo Electronics, Inc. OS (Operating System), 204 printed image diagram, 100, 157 Output, 204 Printer cannot read encoded data, 52 Output Hopper, 204 Printer Cleaning Kit, 33 over-adjust Printhead heat, 80 Printer driver setup screen, 105, 161...
- Page 217 RESTRICTED USE ONLY Fargo Electronics, Inc. Ribbon/Cards, 77, 179, 187 RibbonTraq, 208 RMA number, 208 TAC, 210 Roller, 208 Temp file, 210 Roller Up/Down Error, 35 Test Core Pins (Lam), 69 Rotate Front 180 Degrees option, 123, 141, 177 Test Core Pins (Print), 69...
- Page 218 RESTRICTED USE ONLY Fargo Electronics, Inc. YMC, 212 YMCK, 212 X and Y boxes, 122, 141, 176 YMCK or YMCKK print ribbon, 90, 149 YMCKH, 212 YMCKK, 212 YMCKO, 212 YMCKOK, 212 Yellow, Magenta and Cyan, 95 Persona C11 Card Printer and Persona M11 Card Printer User Guide (Rev. 5.0)
Need help?
Do you have a question about the Persona M110 and is the answer not in the manual?
Questions and answers