Table of Contents
Advertisement
Quick Links
- 1 Tools Need for Card Printer Repair- Replacement Procedures
- 2 Remove/Replace Printer Covers
- 3 Cover Removal Procedures
- 4 Remove/Replace the Mag Roller (D930122)
- 5 Remove/Replace Ribbon Take-Up Motor (D930014)
- 6 Remove/Replace Ribbon Sensor (D930016)
- 7 C50 Printhead Procedure
- 8 Appendix D Printer Mainboard Connections
- Download this manual
See also:
Configuration Manual
15370 Barranca Parkway
Irvine, CA 92618
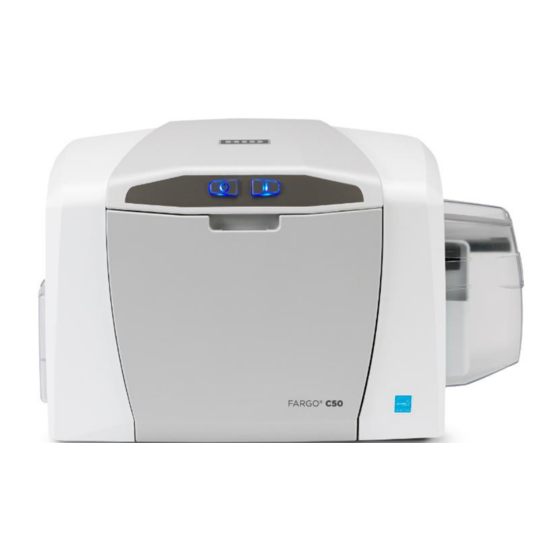
FARGO®C50 Printer
SERVICE MANUAL
PLT-01278 Rev 1.1
August 2013
© 2013 HID Global Corporation/ASSA ABLOY AB. All rights reserved.
HID GLOBAL CONFIDENTIAL AND/OR PROPRIETARY INFORMATION. This document contains confidential and/or proprietary
information, which may not be duplicated, published, disseminated or disclosed, or used for any purpose, without the written consent of
HID Global Corporation. If you are an unintended recipient of this information or are unwilling to accept the above restrictions, please
immediately return this document to HID Global Corporation, 15370 Barranca Pkwy, Irvine, CA 92618-3106..
Advertisement
Table of Contents

Related Manuals for Fargo C50


Summary of Contents for Fargo C50
- Page 1 15370 Barranca Parkway Irvine, CA 92618 FARGO®C50 Printer SERVICE MANUAL PLT-01278 Rev 1.1 August 2013 © 2013 HID Global Corporation/ASSA ABLOY AB. All rights reserved. HID GLOBAL CONFIDENTIAL AND/OR PROPRIETARY INFORMATION. This document contains confidential and/or proprietary information, which may not be duplicated, published, disseminated or disclosed, or used for any purpose, without the written consent of HID Global Corporation.
-
Page 2: Table Of Contents
C50 Card Printer Service Manual PLT-01278 rev 1.1 Contents Introduction ______________________________________________________________ 4 Safety Messages (review carefully) _______________________________________________ 4 Tools need for Card Printer repair- replacement procedures __________________________ 6 Cover Removal Procedures __________________________________________________ 7 Remove/Replace Printer Covers _________________________________________________ 7 Remove/Replace Printer Top Cover/PCB display ___________________________________ 10... -
Page 3: Revision History
M-F 9am – 6pm GMT +8 (FR 8:30 - 17:00) support.hidglobal.com www.hidglobal.com HID GLOBAL, HID, the HID logo, and FARGO are the trademarks or registered trademarks of HID Global Corporation, or its licensors, in the U.S. and other countries. August 2013 Page 3 HID GLOBAL CONFIDENTIAL AND/OR PROPRIETARY INFORMATION. -
Page 4: Introduction
C50 Card Printer Service Manual PLT-01278 rev 1.1 Introduction The service manual serves to inform the technician about the C50 Card Printer parts replacement procedures. Important: These procedures can only be performed by authorized service personnel. Estimated repair time may vary according to the technicians experience. - Page 5 C50 Card Printer Service Manual PLT-01278 rev 1.1 Symbol Critical Instructions for Safety purposes Caution: This device is electrostatically sensitive. It can be damaged if exposed to static electricity discharges. Information that raises potential electrostatic safety issues is indicated by a warning symbol (as shown to the left).
-
Page 6: Tools Need For Card Printer Repair- Replacement Procedures
C50 Card Printer Service Manual PLT-01278 rev 1.1 Tools need for Card Printer repair- replacement procedures T10 Torx screwdriver E Clip tool Small flathead screwdriver Needle Nose Pliers (NOTE: HID Global offers a kit that contains many of the tools needed to repair the printers. -
Page 7: Cover Removal Procedures
C50 Card Printer Service Manual PLT-01278 rev 1.1 Cover Removal Procedures Remove/Replace Printer Covers Tools needed: T10 Torx screwdriver Estimated Repair Time: 15 minutes Preparation: Important: This procedure can only be performed by authorized service personnel. Top Cover/PCB Assy D930034-03... - Page 8 C50 Card Printer Service Manual PLT-01278 rev 1.1 Step Procedure Remove the 2 screws (F000178) that hold the side covers to the frame. Remove both side covers. The input and output hoppers are attached to the side covers. When replacing the side covers, note the frame tabs fit into the cover holes to secure it at the bottom.
- Page 9 C50 Card Printer Service Manual PLT-01278 rev 1.1 Step Procedure Remove the outer back cover. Remove the 2 screws at the base of the back cover. Lift UP the bottom of this cover to release the upper tabs that hold the cover to the frame.
-
Page 10: Remove/Replace Printer Top Cover/Pcb Display
C50 Card Printer Service Manual PLT-01278 rev 1.1 Remove/Replace Printer Top Cover/PCB display Tools needed: T10 Torx screwdriver Estimated Repair Time: 15 minutes Preparation: Important: This procedure can only be performed by authorized service personnel. Top Cover/PCB Assy D930034-03 Replace complete top cover for the PCB or any part shown. -
Page 11: Parts Replacement- Printer
C50 Card Printer Service Manual PLT-01278 rev 1.1 Parts Replacement- Printer Remove/Replace the Mainboard Mainboard Part Number Printer Part Number PCA-00031 NAM 051975 (NM) PCA-00032 APAC/CCC 051976/ 051977 (AP) PCA-00033 LAM 051978 (LM) PCA-00034 BRAZIL 051979 (BR) PCA-00035 WE 051980 (WE) - Page 12 C50 Card Printer Service Manual PLT-01278 rev 1.1 Remove the 2 screws (F000178) shown. The center open hole is for the frame peg. from the slots on the front sideplate. Slide board out Install new board and reconnect all wires.
-
Page 13: Remove/Replace The Stepper Drive Motor (D930027) Remove/Replace Stepper Belt F000424 Remove/Replace Pulley D900430
C50 Card Printer Service Manual PLT-01278 rev 1.1 Remove/Replace the Stepper Drive Motor (D930027) Remove/Replace Stepper Belt F000424 Remove/Replace Pulley D900430 Tools needed: T10 Torx screwdriver E CLIP tool Estimated Repair Time: 30 min Preparation: Remove the Covers Important: This procedure can only be performed by authorized service personnel. - Page 14 C50 Card Printer Service Manual PLT-01278 rev 1.1 Step Procedure Remove the 3 screws that hold the Motor/Mount to the printer frame. ( Make note of where the 2 screw/washers go and the one machine screw. Remove the printhead cable for more clearance) The motor is attached to a plastic mounting frame.
- Page 15 C50 Card Printer Service Manual PLT-01278 rev 1.1 Step Procedure If replacing the Pulley D900430 remove the E CLIP (140063). Replace with new Pulley. Re- install the E-clip. Replace the new Motor to the mount frame. Make sure Spring (F000332) gets put back into proper place...
- Page 16 C50 Card Printer Service Manual PLT-01278 rev 1.1 Step Procedure This Stepper Motor Mount provides a self tensioning feature. Keep the four (4) screws loose while holding the Mount Frame. Allow the spring to self-tension, then tighten the four (4) screws.
- Page 17 C50 Card Printer Service Manual PLT-01278 rev 1.1 Step Procedure Fit the Mount behind the tab on the printers side plate frame. This locks the mount in place. Secure the stepper drive assembly with 2 screws (F000171) with 2 washers (140040), and one screw (F000178) at the specific locations shown.
- Page 18 C50 Card Printer Service Manual PLT-01278 rev 1.1 Step Procedure Plug motor cable back in. Replace the Printhead cable if it was removed in step 4. Procedure is complete. August 2013 Page 18 HID GLOBAL CONFIDENTIAL AND/OR PROPRIETARY INFORMATION. This document contains confidential and/or proprietary information, which may not be duplicated, published, disseminated or disclosed, or used for any purpose, without the written consent of HID Global Corporation.
-
Page 19: Remove/Replace The Mag Roller (D930122)
C50 Card Printer Service Manual PLT-01278 rev 1.1 Remove/Replace the Mag Roller (D930122) Located: Rear Sideplate (D930068) Tools needed: Small flat screwdriver, T10 Torx screwdriver Estimated Repair Time: 20 min Preparation: Remove the Covers Important: This procedure can only be performed by authorized service personnel. - Page 20 C50 Card Printer Service Manual PLT-01278 rev 1.1 Step Procedure Remove the Mag Roller Gear (D930361) by pulling out. Release the Remove the Ribbon Deflector Plate (D930129) to access the Mag Roller. tabs that hold the plate in place. August 2013 Page 20 HID GLOBAL CONFIDENTIAL AND/OR PROPRIETARY INFORMATION.
- Page 21 C50 Card Printer Service Manual PLT-01278 rev 1.1 Step Procedure Pull the Mag Roller out from the front side of the printer. Replace with the new roller. Install the Mag Gear from the back to hold the roller in place.
-
Page 22: Remove/Replace The Output Roller (D930123) Remove/Replace Pinch Roller-Spring (D920013-F000338)
C50 Card Printer Service Manual PLT-01278 rev 1.1 Remove/Replace the Output Roller (D930123) Remove/Replace Pinch Roller-spring (D920013-F000338) Tools needed: T10 Torx screwdriver Estimated Repair Time: 20 min Preparation: Remove the Covers Important: This procedure can only be performed by authorized service personnel. - Page 23 C50 Card Printer Service Manual PLT-01278 rev 1.1 Step Procedure Flip printer on front remove Roller (D930123) Pull straight up and out Replace with new roller and replace the gear onto the roller. Procedure completed. Remove the output roller first and then remove the Pinch Roller Use a small flathead screwdriver to release the spring (F000338) and the Pinch Roller (D920013).
-
Page 24: Remove/Replace The Platen Roller (D930120) & Pulley/Gear (D900429)
C50 Card Printer Service Manual PLT-01278 rev 1.1 Remove/Replace the Platen Roller (D930120) & Pulley/Gear (D900429) Tools needed: T10 Torx screwdriver Estimated Repair Time: 45 min Preparation: Remove the Covers Important: This procedure can only be performed by authorized service personnel. - Page 25 C50 Card Printer Service Manual PLT-01278 rev 1.1 Step Procedure Turn the twist lock Bushing-Twist Lock (D930178) counter clockwise to unlock and lift up. It is not necessary to remove the surrounding gears. Remove the Platen Cam (D930135). Rotate cam clockwise to remove. Pull off of the Platen Roller Shaft.
- Page 26 C50 Card Printer Service Manual PLT-01278 rev 1.1 Step Procedure Remove the print head assembly if better access is needed. See Printhead removal procedure. Move the lever up to clear the Platen Roller (D930120) Replace with new roller. Reverse assembly to reinstall parts.
-
Page 27: Remove/Replace The Lift Pinch Roller Assembly (D930137), Remove/Replace Pinch Lift Bracket (D930136)
C50 Card Printer Service Manual PLT-01278 rev 1.1 Remove/Replace the Lift Pinch Roller Assembly (D930137), Remove/Replace Pinch Lift Bracket (D930136) Tools needed: T10 Torx screwdriver Estimated Repair Time: 20 Min D930137 Preparation: . Remove the Covers Important: This procedure can only be performed by authorized service personnel. - Page 28 C50 Card Printer Service Manual PLT-01278 rev 1.1 Step Procedure Rotate the Lift Bracket (D930136) with the spring (D930266) upwards to disengage the hinge. Lift out the Pinch Roller Bracket (D930137). NOTE: Verify orientation when re installing. August 2013 Page 28 HID GLOBAL CONFIDENTIAL AND/OR PROPRIETARY INFORMATION.
- Page 29 C50 Card Printer Service Manual PLT-01278 rev 1.1 Step Procedure Replace with new Platen Roller. Lock platen with cam first into the front sideplate. To reinstall the Pinch Roller Assembly: a. Verify orientation of the Pinch Roller Assembly b. Connect the spring to the bracket.
- Page 30 C50 Card Printer Service Manual PLT-01278 rev 1.1 d. Tilt the spring upward and fit in to the slot provided. Some force is needed to snap the spring and tabs in place. e. Click the Bracket into the frame. August 2013 Page 30 HID GLOBAL CONFIDENTIAL AND/OR PROPRIETARY INFORMATION.
- Page 31 C50 Card Printer Service Manual PLT-01278 rev 1.1 f. Snap the Roller Bracket tabs to the Lift Bracket. g. Procedure is complete. August 2013 Page 31 HID GLOBAL CONFIDENTIAL AND/OR PROPRIETARY INFORMATION. This document contains confidential and/or proprietary information, which may not be duplicated, published, disseminated or disclosed, or used for any purpose, without the written consent of HID Global Corporation.
-
Page 32: Remove/Replace The Cleaning Roller (D930121), Remove/Replace Input Feed Lever (D930132), Remove/Replace Input Lever Gear (D930164)
C50 Card Printer Service Manual PLT-01278 rev 1.1 Remove/Replace the Cleaning Roller (D930121), Remove/Replace Input Feed Lever (D930132), Remove/Replace Input Lever Gear (D930164) Tools needed: T10 Torx screwdriver Estimated Repair Time: 30 min Preparation: Remove the Covers Important: This procedure can only be performed by D930121 authorized service personnel. - Page 33 C50 Card Printer Service Manual PLT-01278 rev 1.1 Step Procedure Remove the stepper motor assembly and belt (D930028) Remove the pulley (e-clip) and washers. Remove platen cam rotation. Locking bushing. Remove the Lever. Be careful not to lose the spring. NOTE: How the spring is set into the pegs.
-
Page 34: Remove/Replace Supply Spindle Rfid Motor (D930015-01)
C50 Card Printer Service Manual PLT-01278 rev 1.1 Remove/Replace Supply Spindle RFID Motor (D930015-01) Tools needed: T10 Torx screwdriver Estimated Repair Time: 20 min Preparation: Remove the Covers Important: This procedure can only be performed by authorized service personnel. Step Procedure Caution: Turn OFF the Printer and unplug the power cord from the Printer. - Page 35 C50 Card Printer Service Manual PLT-01278 rev 1.1 Step Procedure Slide the Supply Spindle DOWN To release. Slide the Motor UP to install. NOTE: You do not need to remove the gears or the Stepper Motor for this procedure. NOTE: If ribbon wrinkle occurs after replacing the motor, move the motor assembly DOWN slightly in the frame.
-
Page 36: Remove/Replace Ribbon Take-Up Motor (D930014)
C50 Card Printer Service Manual PLT-01278 rev 1.1 Remove/Replace Ribbon Take-Up Motor (D930014) Tools needed: T10 Torx screwdriver Estimated Repair Time: 20 min Preparation: Remove the Covers Important: This procedure can only be performed by authorized service personnel. Step Procedure Caution: Turn OFF the Printer and unplug the power cord from the Printer. - Page 37 C50 Card Printer Service Manual PLT-01278 rev 1.1 Step Procedure From the back of the printer, the motor fits into the track located on the rear sideplate. Slide the Take-Up Motor DOWN to release & remove. Slide the Motor UP to install the replacement.
-
Page 38: Remove/Replace Encoder Sensor (A930514) For Rfid Supply Spindle/ Cable (D930605), Remove/Replace Pcb Board (A000365-01)
C50 Card Printer Service Manual PLT-01278 rev 1.1 3.10 Remove/Replace Encoder Sensor (A930514) for RFID Supply Spindle/ Cable (D930605), Remove/Replace PCB board (A000365-01) NOTE: For any other parts (motor/ encoder wheel) REPLACE COMPLETE ASSEMBLY (D930015-01). Tools needed: Torx screwdriver and flat head... - Page 39 C50 Card Printer Service Manual PLT-01278 rev 1.1 Step Procedure Remove the Damper Cap (F000487) Use a thin flathead screwdriver to loosen one side. The cap will pop off. Note: Replace the Damper Cap by lining up the shaft first then snap the Damper Cap back Verify the gray shaft is pushed up to hold the encoder wheel in place.
- Page 40 C50 Card Printer Service Manual PLT-01278 rev 1.1 Step Procedure Remove the supply cover (D930116) by pulling up from the open end. This will unlatch the tabs holding the cover to the frame. This allows for access to the sensor.
- Page 41 C50 Card Printer Service Manual PLT-01278 rev 1.1 Step Procedure Remove the sensor. Use a thin flat blade screwdriver to unlatch the tabs holding the sensor to the frame. Press the new sensor into the assembly. Make sure the encoder wheel is in between the sensor.
-
Page 42: Remove/Replace The Pcb Board (A000365-01)
C50 Card Printer Service Manual PLT-01278 rev 1.1 3.11 Remove/Replace the PCB board (A000365-01) Step Procedure Remove Supply Spindle-RFID assembly. See procedure above (D930015-01). Un-snap the PCB from the frame. The PCB with the HOLES is set under the corner tabs. -
Page 43: Remove/Replace Ribbon Sensor (D930016)
C50 Card Printer Service Manual PLT-01278 rev 1.1 3.12 Remove/Replace Ribbon Sensor (D930016) Tools needed: T10 Torx screwdriver Estimated Repair Time: 30 min Preparation: Remove the Covers Important: This procedure can only be performed by authorized service personnel. Ribbon Sensor Cable D930608... - Page 44 C50 Card Printer Service Manual PLT-01278 rev 1.1 Step Procedure Remove the Input Feed Lever (D930132), Spring and Gear to access the Ribbon Sensor. From the INSIDE of the printer: Pinch the tabs on the other side to help remove the sensor from the frame.
- Page 45 C50 Card Printer Service Manual PLT-01278 rev 1.1 Step Procedure Replace with the new sensor. Push the sensor back in using the tabs to snap the sensor in place. This is done from the rear sideplate of the printer near the gears.
-
Page 46: Remove/Replace Card Path/Cover Sensor (D930613)
C50 Card Printer Service Manual PLT-01278 rev 1.1 3.13 Remove/Replace Card Path/Cover Sensor (D930613) Tools needed: T10 Torx screwdriver Estimated Repair Time: 30 min Preparation: Remove the Covers Important: This procedure can only be performed by authorized service personnel. Step Procedure Caution: Turn OFF the Printer and unplug the power cord from the Printer. - Page 47 C50 Card Printer Service Manual PLT-01278 rev 1.1 Step Procedure Replace with the new sensor. Line up the sensor and push down to snap it in place UNDER the small tab. Route the cable on the right side of the frame as shown in the picture below.
-
Page 48: C50 Printhead Procedure
C50 Card Printer Service Manual PLT-01278 rev 1.1 3.14 C50 Printhead procedure The guide serves to instruct the user about replacing the Printhead. This procedure can only be performed by authorized service personnel. Kit part number: 047500 Caution: Turn OFF the Printer and unplug the power cord from the Printer. - Page 49 C50 Card Printer Service Manual PLT-01278 rev 1.1 Step Procedure Use a flathead screwdriver to lift the cover from the frame. VERY IMPORTANT STEP Turn the gear clockwise until the Push Rod is in the DOWN position. (in relation to the printer base)
- Page 50 C50 Card Printer Service Manual PLT-01278 rev 1.1 correct position wrong position Pull the 2 tabs IN and pull UP to loosen the Printhead assembly. Hold UP until you can push the white rod to the right. Do not pull up until the push rod has been moved.
- Page 51 C50 Card Printer Service Manual PLT-01278 rev 1.1 Step Procedure Unlock the push-rod by moving it from the left to the right side of the tab. August 2013 Page 51 HID GLOBAL CONFIDENTIAL AND/OR PROPRIETARY INFORMATION. This document contains confidential and/or proprietary information, which may not be duplicated, published, disseminated or disclosed, or used for any purpose, without the written consent of HID Global Corporation.
- Page 52 C50 Card Printer Service Manual PLT-01278 rev 1.1 Step Procedure The printhead assembly can now be pulled up and out from the frame. The back side of Printhead assembly shown has been removed from the printer. August 2013 Page 52 HID GLOBAL CONFIDENTIAL AND/OR PROPRIETARY INFORMATION.
- Page 53 C50 Card Printer Service Manual PLT-01278 rev 1.1 Step Procedure Grasp the printhead mount and rotate to release the printhead from the main assembly. August 2013 Page 53 HID GLOBAL CONFIDENTIAL AND/OR PROPRIETARY INFORMATION. This document contains confidential and/or proprietary information, which may not be duplicated, published, disseminated or disclosed, or used for any purpose, without the written consent of HID Global Corporation.
- Page 54 C50 Card Printer Service Manual PLT-01278 rev 1.1 Step Procedure Remove the cable (D930602). Be careful not to damage the pins. Remove the Torx screw (F000170) and release the ground cable. Leave the wires in the main assembly. Before installing the new Printhead make note of the R=xxxx value. This number will be used after the Printhead is installed and ready to make the final adjustment.
- Page 55 C50 Card Printer Service Manual PLT-01278 rev 1.1 Step Procedure Replace with the new printhead. Install the printhead assembly holes into the tabs and tilt to snap the printhead assembly into place. Verify the printhead is secure in the mount.
- Page 56 C50 Card Printer Service Manual PLT-01278 rev 1.1 Step Procedure VERY IMPORTANT STEP Reinstall the printhead mount assembly into the printer. Line up the Printhead assembly. IMPORTANT NOTE: Verify the white Push Rod is to the right of the assembly before reinserting.
- Page 57 C50 Card Printer Service Manual PLT-01278 rev 1.1 Step Procedure Procedure is complete after you set the new printhead resistance value. Set the resistance of the new printhead in the Driver Toolbox. Open the Toolbox to access Advanced Settings tab from the printer driver.
- Page 58 C50 Card Printer Service Manual PLT-01278 rev 1.1 Step Procedure Adjust the Image Darkness, Print Top of Form (TOF), Print End of Form (EOF), and Print Left of Form (LOF) as needed by increasing or decreasing the CURRENT setting numbers.
- Page 59 C50 Card Printer Service Manual PLT-01278 rev 1.1 Step Procedure To adjust IMAGE DARKNESS: Increase the number to darken the image density or decrease the number to lighten the image density. Procedure is now complete. August 2013 Page 59 HID GLOBAL CONFIDENTIAL AND/OR PROPRIETARY INFORMATION. This document contains confidential and/or proprietary information, which may not be duplicated, published, disseminated or disclosed, or used for any purpose, without the written consent of HID Global Corporation.
-
Page 60: Appendix D Printer Mainboard Connections
C50 Card Printer Service Manual PLT-01278 rev 1.1 Appendix D Printer Mainboard connections J2-J4-J7-J12 Printhead Harness Cable (D930628) Printhead, Lift Stepper & Sensor, Fan August 2013 Page 60 HID GLOBAL CONFIDENTIAL AND/OR PROPRIETARY INFORMATION. This document contains confidential and/or proprietary information, which may not be duplicated, published, disseminated or disclosed, or used for any purpose, without the written consent of HID Global Corporation. - Page 61 C50 Card Printer Service Manual PLT-01278 rev 1.1 Motor Harness Cable (D930600) Stepper Motor, Ribbon Supply, Ribbon Take-up RFID Cable (D930603) Encoder Cable (D930605) August 2013 Page 61 HID GLOBAL CONFIDENTIAL AND/OR PROPRIETARY INFORMATION. This document contains confidential and/or proprietary information, which may not be duplicated, published, disseminated or disclosed, or used for any purpose, without the written consent of HID Global Corporation.
- Page 62 C50 Card Printer Service Manual PLT-01278 rev 1.1 J10 (D930608) Ribbon Sensor Cable J11 (D930613) Card Path Cable August 2013 Page 62 HID GLOBAL CONFIDENTIAL AND/OR PROPRIETARY INFORMATION. This document contains confidential and/or proprietary information, which may not be duplicated, published, disseminated or disclosed, or used for any purpose, without the written consent of HID Global Corporation.
-
Page 63: Appendix E Engineering Drawings
C50 Card Printer Service Manual PLT-01278 rev 1.1 Appendix E Engineering Drawings August 2013 Page 63 HID GLOBAL CONFIDENTIAL AND/OR PROPRIETARY INFORMATION. This document contains confidential and/or proprietary information, which may not be duplicated, published, disseminated or disclosed, or used for any purpose, without the written consent of HID Global Corporation. - Page 66 RELEASED...
- Page 67 RELEASED...
- Page 68 RELEASED...
Need help?
Do you have a question about the C50 and is the answer not in the manual?
Questions and answers