Avaya IP Office Installation Manual
Embedded voicemail
Hide thumbs
Also See for IP Office:
- Installation manual (406 pages) ,
- Manual (324 pages) ,
- User manual (210 pages)
Table of Contents
Advertisement
Advertisement
Table of Contents

Related Manuals for Avaya IP Office


Summary of Contents for Avaya IP Office
- Page 1 IP Office Embedded Voicemail Installation Guide 15-601067 Issue 4 (25 May 2006)
- Page 2 While reasonable efforts were made to ensure that the information in this document was complete and accurate at the time of printing, Avaya Inc. can assume no liability for any errors. Changes and corrections to the information in this document may be incorporated in future releases.
-
Page 3: Table Of Contents
2. Checking for Voice Compression Channels ...................17 3. Install the Memory Expansion Card....................17 4. System Configuration........................17 Configuring an IP Office for Embedded Voicemail ..................18 Upgrading Prompts ..........................19 Prompt Source and Destination Location ...................19 Upgrading Prompts Using a Memory Card Reader ................19 Upgrading Prompts Using TFTP File Transfer ...................20... - Page 4 Using a Short Code..........................40 Using an Auto Attendant ........................40 Using an Incoming Call Route......................40 Backing Up and Restoring Messages.....................41 Loading Other Files onto the Memory Card ....................42 Index............................43 Page 4 Embedded Voicemail Installation Guide 15-601067 Issue 4 (25 May 2006) IP Office...
-
Page 5: Introduction
Introduction About this Guide This guide describes how to install and configure Embedded Voicemail. This guide is for Avaya professional services staff, business partners, and system integrators but can be used by anyone who has been trained to install or configure Embedded Voicemail. These instructions assume that you are familiar with IP Office Manager. - Page 6 Embedded Voicemail Installation Guide Page 6 Embedded Voicemail Installation Guide 15-601067 Issue 4 (25 May 2006) IP Office...
-
Page 7: Ip Office Embedded Voicemail
IP Office Embedded Voicemail Overview IP Office Embedded Voicemail is supported on the IP Office Small Office Edition and IP Office 406 V2 control units. Embedded voicemail does not require an IP Office license. It provides basic voicemail mailbox operation without requiring a permanent voicemail server PC. It also provides multiple auto- attendant support for incoming calls. -
Page 8: What's New In Ip Office 3.0
Maximum Message Length For system other than the IP401, the default maximum message length is increased to 2 minutes. IP Office 3.0 allows this to be adjusted up to 3 minutes in the system configuration. Four Digit Mailbox Access Code Mailbox access codes, where set, are forced to a minimum of 4 digits (maximum is 15 digits). -
Page 9: Embedded Voicemail Mailbox Features
SNMP Disk Full Warning On IP Office systems configured for SNMP, a disk full alarm is generated when the embedded voicemail memory card reaches 90% full. In addition a critical space alarm is generated at 98% full (99% for the IP406 V2) and an OK alarm is generated when the disk space returns to below 90% full. -
Page 10: Languages Supported
Chinese (chs) Upgrading to IP Office 3.0 The method of transferring and handling prompts was changed in IP Office 3.0 so that prompts are no longer transferred from a Manager PC using TFTP following a system restart. For existing systems with embedded voicemail, the voicemail remains inactive after an IP Office control unit has been upgraded to 3.0. -
Page 11: Installing Embedded Voicemail
This covers the physical installation of the memory card and if necessary voice compression channels. This process varies according to the IP Office control unit type. 3. System Configuration Set the IP Office to use embedded voicemail and set the maximum record time for messages, greetings and prompts. 4. User Mailbox Configuration Configure the personal settings for individual users. -
Page 12: Setup Information
Voicemail Voicemail Code Ringback Reception Possible Values Blank or 4 to On or Off On or Off Blank or User/ (default underlined) 15 digits Group Number Page 12 Embedded Voicemail Installation Guide 15-601067 Issue 4 (25 May 2006) IP Office... -
Page 13: Hunt Group Mailboxes
Indication for how to enter the values. Name Voicemail Voicemail Users to receive group Code message waiting indication Possible Values Blank or 4 to On or Off None (default underlined) 15 digits Embedded Voicemail Installation Guide Page 13 IP Office 15-601067 Issue 4 (25 May 2006) -
Page 14: Auto Attendant Setup
Maximum Inactivity: ________________ (5 to 20 seconds, default 8 seconds) Fallback Destination: ____________________ Time Profiles Remember that IP Office configuration uses a 24-hour clock format for times. Time Profiles Morning Afternoon Evening (Out of Hours) Name Start Time... -
Page 15: Menu Actions
Embedded Voicemail Installation Guide Page 15 IP Office 15-601067 Issue 4 (25 May 2006) -
Page 16: Ip406 V2 Installation
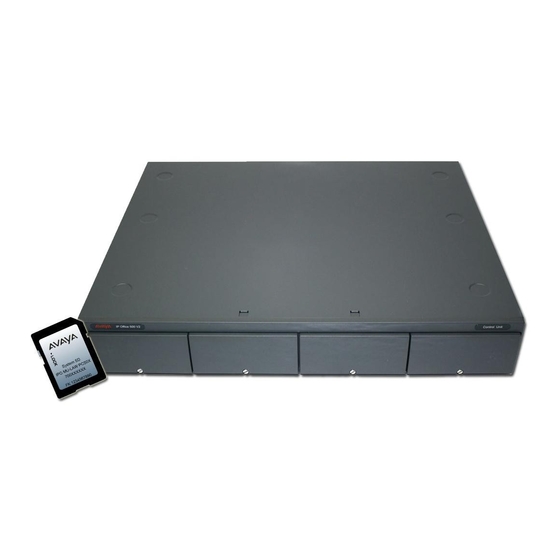
2. Install the Memory Expansion Card The IP 406 V2 Memory Card is a Type II Compact Flash memory card. Only a card supplied by Avaya can be used for embedded voicemail. Compact Flash cards from other sources cannot be used for embedded voicemail. -
Page 17: Small Office Embedded Voicemail Installation
The number of voice compression channels is indicated by VC and a number. As with all IP Office control units, the number of installed voice compression channels can also be check using the IP Office Monitor application. See Monitoring Embedded Voicemail. -
Page 18: Configuring An Ip Office For Embedded Voicemail
Embedded Voicemail Installation Guide Configuring an IP Office for Embedded Voicemail The system configuration for embedded voicemail is common to all the IP Office systems that support embedded voicemail memory cards. To configure an IP Office for embedded voicemail: 1. Start IP Office Manager and receive the IP Office configuration. -
Page 19: Upgrading Prompts
Upgrading Prompts Using a Memory Card Reader This method uses a third-party memory card reader capable of reading and writing to a Type II Compact Flash memory card. It requires the IP Office to have already been upgraded to IP Office 3.0 and to be restarted. -
Page 20: Upgrading Prompts Using Tftp File Transfer
Upgrading Prompts Using TFTP File Transfer This method uses IP Office Manager as a TFTP server to pass files from the CD drive to the memory card. It requires the IP Office to have already been upgraded to IP Office 3.0 and to be restarted. -
Page 21: Monitoring Embedded Voicemail
11. When all the files have been transferred, close the Command prompt window. 12. Restart the IP Office control unit by removing and then reapplying power. 13. When the IP Office has restarted, wait approximately 10 minutes while it scans the new prompts that are available. - Page 22 Embedded Voicemail Installation Guide Page 22 Embedded Voicemail Installation Guide 15-601067 Issue 4 (25 May 2006) IP Office...
-
Page 23: User Mailbox Configuration
This includes calls that are forwarded to another internal destination. An individual user's mailbox can be configured either through the mailbox and system short codes (refer to the Embedded Voicemail User Guide) or by configuring the user settings in the IP Office Manager. For more information, see Mailbox Configuration. -
Page 24: User Mailbox Configuration
User to display the list of existing users. 3. Double-Click the name of the required user. 4. Click the Voicemail tab. This tab includes settings that are used by IP Office Voicemail Lite and Voicemail Pro. For embedded voicemail complete the following details: ... -
Page 25: Hunt Group Mailbox Configuration
Hunt Group Mailbox Configuration Hunt Group Mailboxes Embedded voicemail creates a mailbox for each hunt group on the IP Office system. Calls are sent to the mailbox only when each available group member has been rung for the group's set ring time. -
Page 26: Hunt Group Mailbox Configuration
By default no message waiting indication is sent to any user for a hunt group mailbox. The following process shows how to give a user message waiting indication from a hunt groups mailbox. The method of indication will depend on the type of telephone the user has and whether they are using IP Office Phone Manager. -
Page 27: Hunt Group Mailbox Access
A short code can be created for hunt group mailbox access. This can be a system wide or user specific short code. For information about setting up short codes, see the IP Office Manager help or guide. The Voicemail Collect feature and hunt group mailbox name can also be assigned to a user's DSS key. - Page 28 Embedded Voicemail Installation Guide Page 28 Embedded Voicemail Installation Guide 15-601067 Issue 4 (25 May 2006) IP Office...
-
Page 29: Auto Attendant Configuration
Auto Attendant Configuration Auto Attendant Overview In addition to basic voicemail operation, the IP Office Small Office Edition and IP Office 406 V2 support the creation of auto attendants using embedded voicemail. Up to 4 auto attendants are supported on any one system. -
Page 30: Example Auto Attendant Setup
Separate time profiles have already been configured for the customer's morning and afternoon hours of business. 1. Start IP Office Manager and receive the Small Office Edition system configuration. 2. In the left-hand configuration tree panel, click Auto Attendant. - Page 31 Support hunt groups are not open. This could then be set as the Night Service Destination along with a Night Service Time Profile. 13. Click OK. Embedded Voicemail Installation Guide Page 31 IP Office 15-601067 Issue 4 (25 May 2006)
-
Page 32: Routing Incoming Calls To An Auto Attendant
Transferring Calls to an Auto Attendant Normally calls are directed to an auto attendant by an IP Office incoming call route. However it can also be useful to transfer calls received at an internal extension to an auto attendant. This can be done using the following methods. -
Page 33: Using Short Codes
1. Start IP Office Manager and receive the Small Office Edition system configuration. 2. For the user or hunt group for which you want to create remote access, open their settings and on the Voicemail tab ensure that a Voicemail Code has been set. -
Page 34: Changing Prompts And Prompt Short Codes
Using the Dial feature, the short codes can be assigned to a DSS key. This allows quick access and recording of any prompts that change frequently. Page 34 Embedded Voicemail Installation Guide 15-601067 Issue 4 (25 May 2006) IP Office... -
Page 35: Cascading Auto Attendants
The follow example short code will connect a caller to an auto attendant service named AutoAttend. Within another auto attendant, the short code *98 could be set as the Destination for a Normal Transfer. Embedded Voicemail Installation Guide Page 35 IP Office 15-601067 Issue 4 (25 May 2006) - Page 36 Embedded Voicemail Installation Guide Page 36 Embedded Voicemail Installation Guide 15-601067 Issue 4 (25 May 2006) IP Office...
-
Page 37: Miscellaneous
Using just ? in the Telephone Number without quote marks and a mailbox name allows remote access. The user would be prompted to enter the mailbox number and then the mailboxes access code if set. Embedded Voicemail Installation Guide Page 37 IP Office 15-601067 Issue 4 (25 May 2006) -
Page 38: Dss Key Programming
DSS Key Programming The same features used for embedded voicemail short codes can also be assigned to DSS keys. 1. Start IP Office Manager and receive the IP Office configuration. 2. Click User to display the list of existing users. - Page 39 This takes the form "?Name" for message collection and "#Name" for leaving a message. The Name part must match the user or hunt group name set in the IP Office configuration. On suitable phones the DSS key displays VMCol followed by the name.
-
Page 40: Remote Access
Normal Transfer key options. See Auto Attendant Remote Access. Using an Incoming Call Route The option Voicemail can be selected as the Destination and/or Night Service Destination of an Incoming Call Route. Page 40 Embedded Voicemail Installation Guide 15-601067 Issue 4 (25 May 2006) IP Office... -
Page 41: Backing Up And Restoring Messages
Backing Up Messages, Greetings and Prompts 1. Remove the memory card from the IP Office control unit and if necessary from its PCMCIA carrier. 2. Following the memory card reader manufacturer's instructions, insert the memory card into the memory card reader. -
Page 42: Loading Other Files Onto The Memory Card
Compact Flash memory card. Configuring the File Source This process allows a specified PC to send files to the memory card and tells the IP Office system to use the memory card 1. Start IP Office Manager and receive the IP Office configuration. -
Page 43: Index
Avaya 64MB Small Office Memory, 17 1mS PRN, 21 Back, 24, 26, 30, 32, 33, 38, 41, 42 24-hour, 12 IP Office, 24, 26, 32, 38, 42 uses, 12 Manager PC's IP, 42 2secs, 21 Small Office Edition, 30, 33... - Page 44 Default Short Codes, 37 Fallback Extension and/or Night Service Defined, 12, 29 Destination, 32 Depending, 21 File Source, 42 IP Office, 21 Configuring, 42 Destination, 30, 32, 35, 40 File Writer IP Address, 19, 42 Incoming Call Route, 32 set, 19, 42...
- Page 45 IP 401 2.1, 21 LAW, 21 IP 406 V2 Memory Card, 16 Line Group, 30 IP Office, 7, 8, 10, 11, 12, 16, 17, 18, 19, 21, Loading, 42 23, 24, 25, 26, 30, 32, 38, 41, 42 Files, 42...
- Page 46 Requests, 18 System Configuration, 18 HoldMusic.wav file, 18 Operator, 12, 29, 30, 33 Require, 7, 19, 41 Transfer, 12, 29, 30 IP Office, 7, 19, 41 Options Prompt, 29 PC, 41 Overview, 7 Restoring, 41 IP Office Embedded Voicemail, 7...
- Page 47 Speed Dials, 32 ENU, 19 Start, 18, 19, 42 USB, 19, 41 TFTP Log, 18 Use, 7, 9, 12, 19, 30, 41 Start IP Office Manager, 18, 30 24-hour, 12 Start Time, 12 Avaya, 7 Still Queued Messages, 9 Time Profile, 30...
- Page 48 Within Windows, 19, 42 Voicemail Ringback Off key, 38 Writing, 19 Voicemail Ringback On, 38 Type II Compact Flash, 19 Voicemail Ringback On/Off, 37 Voicemail Type, 18 Page 48 Embedded Voicemail Installation Guide 15-601067 Issue 4 (25 May 2006) IP Office...
- Page 49 Index Embedded Voicemail Installation Guide Page 49 IP Office 15-601067 Issue 4 (25 May 2006)
- Page 50 Performance figures and data quoted in this document are typical, and must be specifically confirmed in writing by Avaya before they become applicable to any particular order or contract. The company reserves the right to make alterations or amendments to the detailed specifications at its discretion.
Need help?
Do you have a question about the IP Office and is the answer not in the manual?
Questions and answers