TC Electronic Konnekt 24D User Manual
Hide thumbs Also See for Konnekt 24D:

Advertisement

Konnekt 24D
Konnekt 8
User's Manual
English Version

Advertisement

Table of Contents
loading
Need help?

Need help?

Do you have a question about the Konnekt 24D and is the answer not in the manual?

Questions and answers

Subscribe to Our Youtube Channel

Summary of Contents for TC Electronic Konnekt 24D

  • Page 1 Konnekt 24D Konnekt 8 User’s Manual English Version...
  • Page 3: Important Safety Instructions

    IMPORTANT SAFETY INSTRUCTIONS The lightning flash with an arrowhead symbol within The exclamation point within an equilateral triangle is an equilateral triangle is intended to alert the user to intended to alert the user to the presence of important the presence of uninsulated “dangerous voltage” operating and maintenance (servicing) instructions in within the product's enclosure that may be of sufficient the literature accompanying the product.
  • Page 4: Emc/Emi & Certificate Of Conformity

    15 of the FCC rules. Certificate of Conformity These limits are designed to provide reasonable TC Electronic A/S, Sindalsvej 34, 8240 protection against harmful interference in residential Risskov, Denmark, hereby declares on own installations. This equipment generates, uses and can...
  • Page 5: Table Of Contents

    EMC/EMI & Certificate of Conformity ..b Signal Flow Konnekt 24D ....60 Table of contents ......3 Signal Flow Konnekt 8 .
  • Page 6: Introduction

    Konnekt 8, which is a non-DSP version of Konnekt 24D with less I/O. The Fabrik C channel strip and Fabrik R reverb known from TC's PowerCore platform are built into the Konnekt 24D and they work even when the unit is used in stand-alone mode.
  • Page 7: Konnekt 24D / Konnekt 8 Compare Chart

    KONNEKT 24D & KONNEKT 8 - FEATURE COMPARE CHART Konnekt 24D Konnekt 8 • Outstanding IMPACT™ mic pre-amps • Outstanding IMPACT™ mic pre-amps • True Hi-Z guitar inputs – dedicated circuits for guitar • True Hi-Z guitar inputs – dedicated circuits for guitar...
  • Page 8: Quick Setup Guide

    • PowerPC (1 GHz or higher) or Intel CPU • 256 MB RAM • FireWire (IEEE 1394) port TC ELECTRONIC does not support Cubase. • OS X 10.3.9 Please refer to the Cubase manual for general and detailed information. Windows •...
  • Page 9: Konnekt And Cubase

    Go to Devices - Device Setup In Cubase LE for Macintosh the VST inputs are not named automatically. However, you may enter channel names of you choice. For Konnekt 24D we suggest using the names as they appear in the screenshot above.
  • Page 10: Fabrik R & Fabrik C As Vst Plug-Ins

    QUICK SETUP GUIDE Fabrik R as VST send effect In the example on the previous page we have labeled the two front panel inputs: “Mic/Inst ch 1” and “Mic/Inst ch 2”. The following example illustrates how Fabrik R is set up We have also activated those inputs by pressing the as a send effect using Cubase LE.
  • Page 11 QUICK SETUP GUIDE • Now use the slider to send signal from the channel to Fabrik C as VST insert effect Fabrik R. The following example illustrates how Fabrik C is set up as an insert effect using Cubase LE. •...
  • Page 12: 
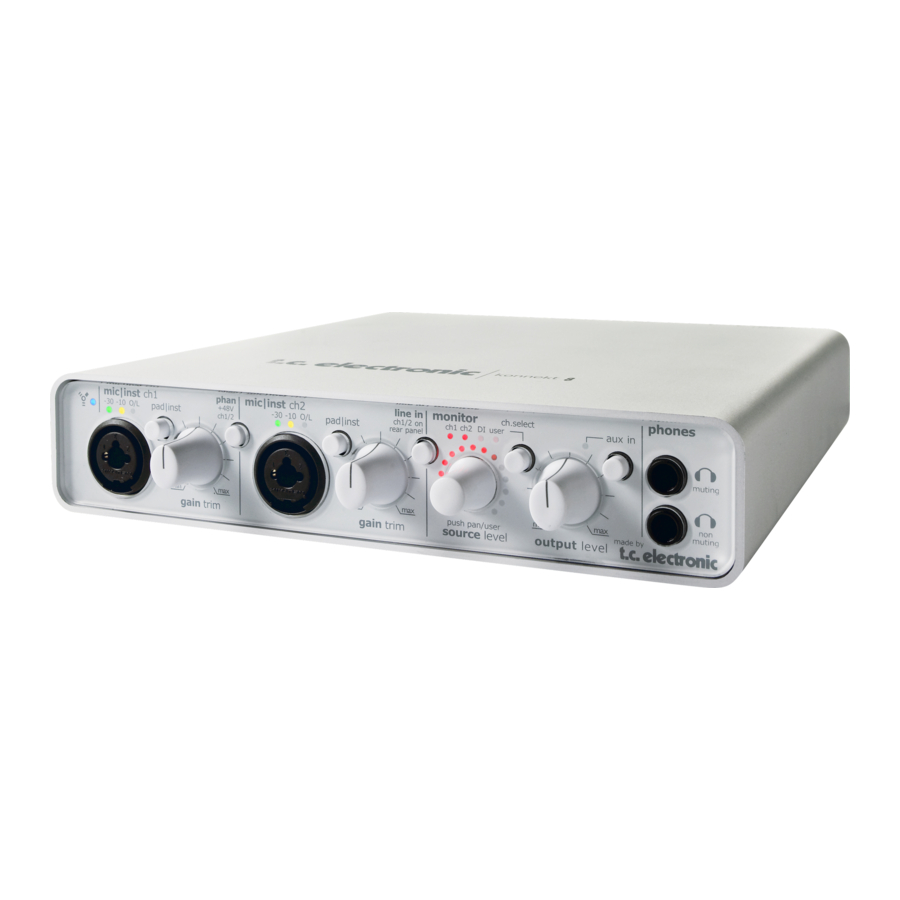
Front Panel - Konnekt 24D

    FRONT PANEL OVERVIEW - KONNEKT 24D 1 FireWire/Power LED indicator The 1/4 jack connection When Konnekt is hooked up via FireWire the blue Press PAD/INST to activate this circuit. LED can indicate the following: Steady lit: Sufficient power Flashing: Uploading firmware, hardware error or FireWire communication error.
  • Page 13 FRONT PANEL OVERVIEW - KONNEKT 24D 4 Input LEDs 7 Line In - ch 1/2 on rear panel Three input level indicators. -30dB, -10dB and 0dB. This switch alternates between using the front panel First adjust the Gain Trim so the 0dB LED is only lit at inputs or rear panel inputs for channels 1/2.
  • Page 14 11 Output level Sets the output level of analog outputs 1-2 and of the head-phone outputs. 12 DSP Total Recall (Konnekt 24D only) Three program settings can be stored in locations P1, P2 and P3. These programs are total recall presets recalling settings from both mixer page, setup page and plug-in pages.
  • Page 15: Bus-Power Notes

    BUS POWER NOTES Bus Power Konnekt 24D and Konnekt 8 are able to work with FireWire bus-power. With FireWire bus-power the device is powered directly from the FireWire connection and you do therefore not need to use the external power supply (included with Konnekt).
  • Page 16: Rear Panel - Konnekt 24D

    REAR PANEL OVERVIEW - KONNEKT 24D 1 Power Switch 5 Digital in/out - Coaxial S/PDIF On/off switch for the unit. 24bit digital in/out on S/PDIF. In addition to standard I/O it is possible to insert e.g. an external digital 2 Power In effects unit and use this as a send effect.
  • Page 17: Front Panel - Konnekt 8

    FRONT & REAR PANEL OVERVIEW - KONNEKT 8 Please refer to the description of the Konnekt 24D AUX In front panel on the previous pages. The next few lines The AUX IN LED and button replace the DSP recall describe the variations on Konnekt 8.
  • Page 18: Studio

    SETUP EXAMPLES - “STUDIO”...
  • Page 19 If bus-power is insufficient or if more than one Konnekt units is connected to one FireWire bus, you 7 Konnekt 24D front + instruments should use the external power supply delivered with Front panel view of the Konnekt illustrated with a the Konnekt.
  • Page 20: Mobile

    SETUP EXAMPLES - “MOBILE STUDIO” If only one Konnekt is used and no other FireWire This is a typical small mobile setup with just a guitar, devices are connected to the computer’s FireWire a microphone and a laptop computer. ports, Konnekt can be bus-powered directly from the computer’s FireWire port*.
  • Page 21: Live

    Connect all devices according to the illustration above. Remember to activate phantom power if you are using a condenser microphone. Also note that outputs 3/4 in this setup are used as main outs to PA. * Konnekt 24D only...
  • Page 22: Stand Alone

    SETUP EXAMPLES - “STAND-ALONE” Konnekt 24D can be used with no computer connected • Connect the microphone to Ch1 and the guitar to Ch2 as a stand-alone unit still providing both the excellent mic on the front panel. Activate phantom power if you are pre-amps and Hi-Z inputs on channels 1 and 2.
  • Page 23: Multiple Konnekts

    SETUP EXAMPLES - “MULTIPLE KONNEKTS” This setup shows how 4 Konnekt 24D units are hooked up via FireWire. With this setup you have up to 4 times as many inputs/outputs as with a single unit. • If you have more than one Konnekt device on the FireWire bus, only one of them can be bus-powered;...
  • Page 24: Mixer Page

    THE CONTROL PANEL - MIXER PAGE...
  • Page 25 THE CONTROL PANEL - MIXER PAGE All Channels 1 The Konnekt select tabs 4 Input Meters These meters indicate the level of the signal present on the input channels. Best signal to noise ratio is achieved when the input signal only occasionally peaks at “0”.
  • Page 26 DAW signal, right here on the Mixer page instead of having to switch between the programs. * Konnekt 24D only 14 Monitor Mixer - Main Out level This is where you set the output level for the monitor mixer.
  • Page 27: Preset Management

    By default, presets are saved to the default location for the TC Near control panel presets. 16 P1, P2 & P3 (Konnekt 24D) The TC Near control panel has 3 preset locations to which you can load and save presets from. These presets are “total recall”...
  • Page 28: Setup Page

    SETUP PAGE...
  • Page 29 SETUP PAGE Input Section - Analog Input Section - Digital 1 Ch1/Ch2 auto-sensing input To process an external digital signal it is imperative that Channel 1/2 connections on the front panel are auto- Konnekt is able to lock to this signal. The lock status is sensing.
  • Page 30: Monitor Mix

    SETUP PAGE 6 Mixer View - (digital) 8 Linked Devices The Mixer View function gives you a few options Up to four Konnekt units can be connected. You will regarding the appearance of the digital channels on most likely only monitor the physical outputs of one of the Mixer page.
  • Page 31 Example: External effect using S/PDIF Output In this section of the Setup page you set up signal routing to the Konnekt outputs. 11 OPTICAL outputs (Konnekt 24D only) ADAT Select ADAT to send up to 8 ADAT channels on the Lightpipe out connection.
  • Page 32: Dsp Effects Settings

    SETUP PAGE Stand Alone Clock Settings These settings handle the clock settings when Konnekt operates as a stand-alone unit. For changed settings to take effect: power off - power on. 12 Sync Source options Internal: Konnekt will sync to its internal clock and disregard the clock present on the digital inputs.
  • Page 33: Routing Modes

    Normally when working with a microphone and a • Go to the VST inputs and select e.g. Konnekt 24D standard pre-amp you will add slight compression mic/inst/line 1 to select the frontpanel input 1. Activate and EQ from the pre-amp and record this signal only.
  • Page 35: Konnekt Wdm Driver

    KONNEKT WDM DRIVER WDM handling (Windows only) Select "TCNear WDM Audio" for both Sound playback and Sound recording. WDM is Windows' audio driver system, and is used for Windows sounds, media player and other applications Konnekt is able to handle both WDM and ASIO at the that don't support ASIO.
  • Page 36: Examples Cubase Sx

    SYSTEM SETTINGS Access the System Settings page by pressing:...
  • Page 37: Buffer Size

    SYSTEM SETTINGS Buffer Size Example 1 - Konnekt as Clock Master: Setting Clock Master and Sync Source. 1 The buffer size can be set from 64 to 8192 samples. The higher buffer setting, the longer latency through Konnekt. The default buffer size is set to 256 samples.
  • Page 38 SYSTEM SETTINGS Example 2: Konnekt Jitter Rejection • The M4000 is connected to the other Konnekt in the setup (Peter’s Konnekt) and it is set to slave to “external”. 4 Sample Rate If Sync Source is set to “Internal”, the sample rate must be set.
  • Page 39: Update Firmware

    SYSTEM SETTINGS & FIRMWARE UPDATE & RESET TO DEFAULT Versions • Press UPDATE FIRMWARE and you will be directed to the folder where the firmware is located. This section gives information on Control panel versions and FireWire driver. (see page 36) Example Check for updates •...
  • Page 40: Fabrik C

    FABRIK C Introduction Fabrik C is based on the innovative Meta Intuitive Navigation Technology (MINT™) that redefines the way you use professional audio plug-ins for professional results. We have integrated a simple yet highly effective and intuitive approach to working with audio, and the result is a user-interface with few handles that are effective but simple to use. Often people think that if you want to create professional results the process has to be tedious and complex –...
  • Page 41 FABRIK C Overview Full-band or 3-band compression? Fabrik C includes both a 3-band and a Full-band compression mode. As Fabrik C is a plug-in that is designed to be used on single sources and not as a dedicated mastering tool you might wonder how the 3-band mode applies. An overall “rule of thumb”...
  • Page 42 FABRIK C 3-band compression on grouped sources If you have grouped several sources and want to do a “global” compression on this section, the 3-band mode can be very effective. It will give you more transparency in your overall mix as you can apply independent compression to each of the three frequency bands.
  • Page 43 FABRIK C Signal Flow - 3-band mode Comp/ Comp Make-up De-Esser In Level Gain 3 band Parametric Split Limiter Filter This is a schematic overview of the signals flow through the algorithm in 3-band mode. As illustrated - the signal first passes the 4 band parametric EQ.
  • Page 44 FABRIK C EQ section The Fabrik C EQ section is a 4-band parametric EQ with four selectable filter types: Notch, Parametric, Shelving and Cut. If you’re looking for a razor sharp filter, use the Notch filter that has a range as low as 0.01 octaves. For a more gentle approach the shelving filter with a variable slope is a better choice.
  • Page 45: Filter Types

    FABRIK C Notch Filter - Narrow type Filter types For Lo and Hi filters select between filter types: Parametric, Notch, Shelve and Cut. For Mid 1 and Mid 2, select between filter types: Parametric and Notch. Parametric Filter - Broad type Cut Filter - Bessel type Shelving Filter Cut Filter - Butterworth type...
  • Page 46 FABRIK C Type Freq Range for the Notch filter: Range - Lo band : 20Hz to 20kHz Lo Gain : -inf; -97dB to 0dB Range - Mid1 band : 20Hz to 20kHz Mid1 Gain : -inf; -97dB to 0dB Range - Mid2 band : 20Hz to 20kHz Mid2 Gain : -inf;...
  • Page 47 FABRIK C Compression Compression 3-band and Full-band modes - Source page 3-band and Full-band modes Gain page Source Selection Use the Source page to select which type of material you Gain Control are processing. The Gain settings are very important. The higher set In Gain the harder the signal meets the •...
  • Page 48 FABRIK C Compression Compression 3-band mode only 3-band mode only Compressor Control page Level page Compressor control Level Control The Low, Mid and High parameters indicate the set Depending on the amount of applied compression you compression amount for the three bands. may need to level compensate the three individual bands.
  • Page 49 FABRIK C Compression In 3-band mode the Compression Control “C” and the Level Control “L” handle the distribution of compression - Full-band mode and Level between the 3 bands. In Full-band mode these controls are redundant and not available. The Compressor is in Full-band mode when “3-band” is In Full-band mode only Source select “S”...
  • Page 50 FABRIK C The Limiter Fabrik C also holds a Limiter. The Limiter is used to prevent overloads occurring at extreme and occasional peaks in the source material, - peaks that may not be caught and attenuated sufficiently in the Compressor. As the Limiter can be used to limit the extreme, the Compressor can be used to apply a much more “musical”...
  • Page 51 FABRIK C Routing modes At 96kHz, USE Two routing modes can be selected via the Routing mode drop-down menu. At 96kHz (and 88.2) it is not possible to run both the Fabrik C and the Fabrik R plug-ins. Select either Fabrik Plug-In mode - must be selected when Fabrik C is used C or Fabrik R.
  • Page 52: Fabrik R

    FABRIK R Introduction Fabrik R is based on the innovative Meta Intuitive Navigation Technology (MINT™) that redefines the way you use professional audio plug-ins for professional results. Fabrik R combines four TC Reverb algorithms in one single plug-in. Thanks to the Meta Intuitive Navigation Technology (MINT™) it is a breeze to find the sound you are looking for.
  • Page 53: Reverb Section

    FABRIK R Overview Reverb section • Select one of the 4 Reverb types using the left mouse button. Live Live recorded audio sources sometimes have a lot of background noise. A very smooth discrete reverb on such a source will often be almost in-audible.
  • Page 54 FABRIK R Plate Welcome back in time! In the old days reverberating springs or large metallic plates were used to create a reverb effect. The Plate reverb emulates this characteristic type of reverb. If you’re working with a recording of percussive instruments, it will often call for a diffuse, bright and light reverb, and the Plate is just perfect for that job.
  • Page 55 FABRIK R Reverb page Modulation page Decay The algorithm designers have adjusted the diffuse field Range: 10ms to 20s part of the reverb to be as smooth and natural sounding The Decay parameter determines the length of the as possible. However, by modulating the diffuse field, the Reverb Diffuse Field.
  • Page 56 FABRIK R Color page Distance/Level page The Color parameter controls are advanced controls The relation between Dry, Early and Reverb levels handling the sonic spectrum of the Reverb diffuse field. defines the perceived distance of a source. The less dry Try adding a bit of HiColor if you feel the level of reverb the signal compared to Early and Reverb levels, the is correct, but still doesn’t stand out as intended.
  • Page 57 FABRIK R Routing Additional parameters The routing options for Fabrik R can be set both on the Bypass Setup page under DSP EFFECTS SETTINGS and on the Bypass function for the entire plug-in. Fabric R page itself. In/Out The options are: In level Range : -24 to 0dB Internal...
  • Page 58: Integrator

    INTEGRATOR The Integrator plug-in for Konnekt makes integration of external hardware into your DAW environment seamless. Integrator offers a “plug-in” audio routing representation of your external digital effects processors and operates as a normal VST/AU plug-in. The Integrator plug-in can be inserted on any track, utilizing external effects as send or insert effects on any track or bus in your host application.
  • Page 59 INTEGRATOR Installation Test & Auto The Integrator plug-in is automatically installed along with To verify that all cables to external units are properly the TC Near control panel. connected, a pink noise test signal can be sent to left/right channels. Use L or R to send to left/right Parameters channels individually.
  • Page 60: The Konnekt Tuner

    THE KONNEKT TUNER Konnekt holds an excellent tuner with various modes for stringed instruments. The Tuner page holds all relevant parameters as well as the tuner display. It is also possible to have Tuner indication via the lightring on the Konnekt unit. This is excellent for stand-alone applications.
  • Page 61 THE KONNEKT TUNER 3 Mode selector Click to switch between Strobe and normal mode. Strobe mode: Sections of three red LEDs will slide left, when the played note is too low, and right when it is too high..out of tune (Chromatic scale-mode selected) ...in tune (C major scale-mode selected) 4 Assign to lightring Assign to lightring.
  • Page 62: Appendix

    APPENDIX - SIGNAL FLOW KONNEKT 24D To computer From computer Phantom Line In on +48v ch 3/4 FW 1+2 Inputs Ch 1/main L Impact preamp Level Monitor Mix Combi Jack/XLR From Inputs Ch 2/main R - front ch 1 Level...
  • Page 63: Signal Flow Konnekt 8

    APPENDIX - SIGNAL FLOW KONNEKT 8 To computer From computer Phantom Line In on +48v ch 1/2 FW 1+2 Inputs Ch 1/main L Impact preamp Level Monitor Mix Combi Jack/XLR Ch 2/main R From Inputs - front ch 1 Level Gain trim Gain trim FW 1...
  • Page 64: Appendix Asio Channel Names Konnekt 8

    APPENDIX - ASIO CHANNEL NAMES The following 2 pages describe how the Konnekt ASIO channels distribute according to the selected sample rate. Konnekt 8 44.1 - 48 kHz 88.2 - 96 kHz 176.4 - 192 kHz Inputs Inputs Inputs 1 Mic inst / line 1 1 Mic inst / line 1 1 Mic inst / line 1 2 Mic inst / line 2...
  • Page 65 APPENDIX - ASIO CHANNEL NAMES Konnekt 24D 44.1 - 48 kHz 88.2 - 96 kHz 176.4 - 192 kHz Inputs Inputs Inputs 1 Mic inst / line 1 1 Mic inst / line 1 1 Mic inst / line 1...
  • Page 66: Faq

    APPENDIX - FAQ APPENDIX - DICE BACKGROUND TC Near prevents computer standby mode The Konnekts use the brand new TC developed DICE II Before setting your computer in standby mode the TC digital interface chip from TC Applied Technologies. The Near control panel must be shut down.
  • Page 67: Technical Specifications

    APPENDIX - TECHNICAL SPECIFICATIONS Digital Inputs and Outputs Monitor/Line Outputs Ch. 1,2,3,4 *5) Connector (S/PDIF): RCA Phono, 75 Ohm Connectors: 1/4” Phone Jack. Ground sensing design. Formats (S/PDIF and TosLink) *1) : S/PDIF (24 bit), IEC 958, Pro-status bits Impedance: 100 Ohm Connector (ADAT®...

This manual is also suitable for:

Konnekt 8

Table of Contents