Table of Contents
Advertisement
Quick Links
Advertisement
Table of Contents

Related Manuals for TC Electronic G-System


Summary of Contents for TC Electronic G-System
- Page 1 Users Manual Users Manual English Version...
-
Page 3: Important Safety Instructions
IMPORTANT SAFETY INSTRUCTIONS The lightning flash with an arrowhead symbol within The exclamation point within an equilateral triangle is an equilateral triangle is intended to alert the user to intended to alert the user to the presence of important the presence of uninsulated “dangerous voltage” operating and maintenance (servicing) instructions in within the product's enclosure that may be of sufficient the literature accompanying the product. -
Page 4: Emc/Emi & Certificate Of Conformity
15 of the FCC rules. Certificate of Conformity These limits are designed to provide reasonable TC Electronic A/S, Sindalsvej 34, 8240 protection against harmful interference in residential Risskov, Denmark, hereby declares on own installations. This equipment generates, uses and can... -
Page 5: Table Of Contents
Custom Setup of Switch functions ..44 G-System split with “GFX01” in a rack ..28 Additional setup information ....29 MIDI MIDI related parameters . - Page 6 TABLE OF CONTENTS Vintage Phaser ......62 Relays for amp channel switching Smooth Phaser ......62 Switch 1 / Switch 2 The Relay switching menu .
-
Page 7: Introduction
Congratulations At TC Electronic we are more than proud to present the new G-System that will be the center of your guitar setup in years to come. Presenting a new piece of equipment to guitarists is always exiting due to the very different demands they have. - Page 8 You may find your own way of utilizing the system, but the following describes part of the philosophy that has Preset Switches been the basis of the G-System’s design. For the purpose of the following example, let us assume that you have connected overdrive pedals to some or all of the four loops and maybe a pre-amp to the Insert loop.
- Page 9 • Presets hold all settings for all effect blocks – both Go ahead! The G-System’s board layout is a default the ones that are active in the preset and those that are suggestion based on input from numerous guitar players not.
-
Page 10: Quick Setup Guide
But check this out … Now let us connect your G-System. We assume that you are using the G-System as one floormount unit – as it The G-System consists of two main parts. was assembled in the factory. - Page 11 Insert loop. We are quite confident that once you have become familiar with the G-System, you will find that it is both easy to set up and customize. On the other hand, the flexibility the G-System offers means that it comes with a wealth of features that you may not want to utilize right away.
- Page 12 Expression Pedal connectors found on the GFX01. Depending on how the Input gain is set on the G-System, you may slightly have to adjust your drive settings on pedals and pre-amp when these are connected using the G-System loops.
- Page 13 Presets To switch effects on/off in Edit Mode: • Press EDIT to enter Edit mode. • The G-System holds 100 Factory presets. • Press PAGE to select an effect. Press ENTER. • You can store up to 200 User presets.
- Page 14 The “Setup Examples” sections gives a good overview of the front or on the rear of the GFX01. This is configured how the G-System can be connected to the rest of your using the Input Select parameter in the Global (Glb) gear.
-
Page 15: Menu Hierarchy
G-SYSTEM MENU HIERARCHY Tap Tempo Tap Global Tempo using TAP TEMPO (top right corner) Preset recall Press PRESET switches to recall presets. Tuner Press UP/DOWN to Press and hold TUNER switch change banks. (top right corner) Play mode Fx’s & Loops on/off... -
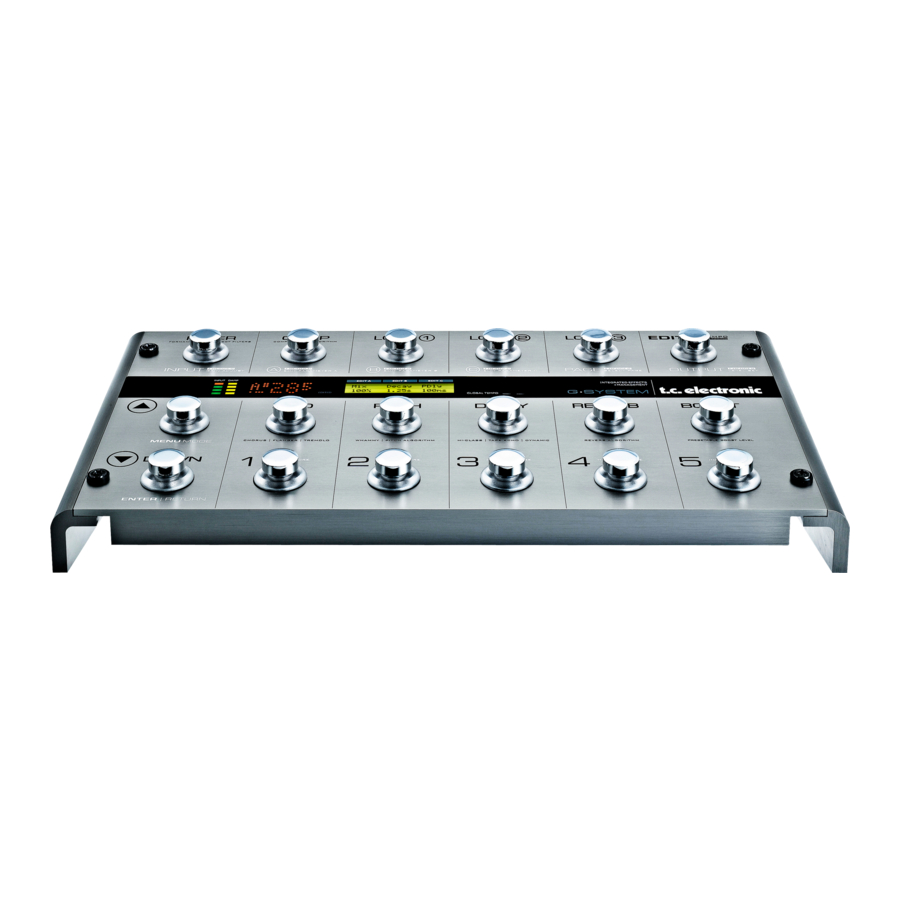
Page 16: Overview
OVERVIEW... - Page 17 OVERVIEW This section contains a brief description of the G-System’s switches and their functionality in Play Mode and Edit Mode. To enter Edit Mode, simply press EDIT. These pages are meant as a general overview or quick reference. For more detailed information, please refer to the relevant chapters in this manual.
-
Page 18: Edit Mode
OVERVIEW Play Mode Edit Mode 6 EDIT/TAP Tempo Press to enter Edit Mode. Press to enter Edit Mode or tap to enter the global In Edit Mode, this encoder adjusts the Preset Output tempo. A given tempo can be subdivided to adapt it to level. - Page 19 OVERVIEW Play Mode Edit Mode Press and hold for 2 seconds to enter Preset Handle 13 PRESET Switches 1 to 5 Mode. In this mode, you can store presets, delete Press once to recall presets 1 to 5 in the current presets and edit preset names.
-
Page 20: Control Board - Rear
Expression pedals can be connected to either the GFX01 (when the unit is assembled) or to the Control Board When the G-System is assembled, the Control Link when the GFX01 is mounted in a rack. connectors on the Control Board and on the GFX01 are It is possible to connect two expression pedals to the connected with a short Cat 5 cable. -
Page 21: Mounting G-System In A Pedal-Flightcase
OVERVIEW Mounting the G-System in a Pedal- Flightcase Though the G-System is built from heavy-duty materials, you may wish to mount it in a flightcase for extra protection on the road. Therefore, the G-System’s side panels have four screw threads (Ø 4mm). -
Page 22: Gfx01 - Rear
This is the input for your Guitar. unbalanced cables. Note: If the G-System is separated and the GFX01 is mounted in a rack, you may use the Output identical Input on the front instead. - Page 23 A connected expression pedal will per default control the Input Gain parameter. MIDI IN On the MIDI IN port, the G-System can receive MIDI information such as MIDI Program Change messages (for preset changes) and Continuous Controllers (MIDI CCs). You can use these to remote-control G-System parameters.
-
Page 24: Explanation Of Amp-Types
TYPICAL SETUPS If you an experienced gear “nerd” already, this page will not apply to you. This page gives information on a few basic issues regarding amp types. Generally said - all setups include both a pre-amp and a power-amp. This applies whether it is a Head, a Combo or a split system with separate pre/power-amp. -
Page 25: Pedals + Amp
TYPICAL SETUPS In this section we will take a look at some examples of how the G-System can be connected to your gear. There are probably no two setups that are 100% identical. We suggest you look for the setup that comes closest to your own. -
Page 26: Pedals + Pre-Amp + Amp
With a pre-amp in the signal chain, you can chose to • Connect expression pedals using a single standard connect the G-System to the input or the effects return 1/4" jack cable. Depending on the expression pedal (“power-amp in”) on the combo amp. -
Page 27: Pedals + Head
• Connect your guitar to the G-System’s Instrument connected to the G-System’s Insert loop. Set the Insert Input. loop to “on” on all G-System presets, using the Utility • Connect up to four drive pedals to the loops. menu. •... -
Page 28: 3-Way System
Loops 1 to 4. The left and right amplifiers receive only the effects. On all G-System presets, “Mix” must be set to 100%. In this particular setup, the mix of the effects is set solely using each effect’s Out level parameter. -
Page 29: Dual Amp
TYPICAL SETUPS Dual amp From Software version 1.05 it is possible, on each preset Most often you would NOT use both pre-amps at the to decide how much signal should be sent on left and same time. right output. This is setup in the Preset Routing menu located at: EDIT->MENU->Prst Routing A similar common application could be using the G- With this option you can e.g:... -
Page 30: G-System Split With "Gfx01" In A Rack
XLR housing, you can turn the wings that Please note that some racks require 5mm screws, are holding the blank faceplate by 180 while others require 6mm screws. The G-System degrees to make space for a normal XLR is assembled using 6mm screws. Use appropriate plug. -
Page 31: Additional Setup Information
(Mono or stereo, - depending on the type of The GFX01 has two Instrument inputs: one on the front expression pedal used). and one on the rear. You have to tell the G-System to which connector you have connected your guitar. Calibrate your expression pedals... -
Page 32: Play Mode & Edit Mode
What is a preset? After having worked with the G-System for a while, you will therefore most likely find yourself working in the User Use Presets to store and recall your favorite sounds by bank all of the time and only using the Factory bank as pressing a single switch. -
Page 33: Edit Mode
Editing Fast Access to Effect Parameters If the effect you wish to access has a switch Editing G-System presets is quite simple. assigned to it, the parameters are easily accessed simply by pressing EDIT, followed by Editing Presets in Play Mode the assigned switch. -
Page 34: Preset Handle Mode
• You can store up to 200 presets in the User bank. rename presets. • When storing a Factory preset: The G-System suggests the first free slot/location. Entering Preset Handle Mode • When storing a User preset: • Press EDIT. -
Page 35: Delete Presets
OVERVIEW – PRESET HANDLING EDIT A EDIT B EDIT C >> PRESET STORED << How to Store a Preset – Step by Step • Now either confirm the storage location by pressing • Press EDIT to enter Edit Mode. ENTER or edit the preset name by using encoders B The display will read something similar to: and C. - Page 36 MENU MODE – OVERVIEW To access Menu Mode: • Press EDIT • Press MENU.
-
Page 37: Routings
MENU MODE – PRESET ROUTING Effect Routings: What are they and what are they used for? The available routings for Effects are: Serial, Semi-parallel or Parallel. Take a look at the illustrations below and read the explanations to understand the differences. Setting Routings •... -
Page 38: Parallel Routing
MENU MODE – PRESET ROUTING Semi Parallel Routing The Semi Parallel routing connects most Effect Blocks The parallel connection of the Reverb and Delay may serially, but the Reverb and Delay blocks are now help to “clear the effects picture” when using both Delay connected in parallel. -
Page 39: Routing Lock
You can even send to both and at connecting a guitar with passive pickups (e.g. a Strat levels of your own choice. type) to the G-System input is a very sensitive point in the signal chain. The few extra bucks for good cables are Routing Lock well spent. -
Page 40: Optimizing Your Noise Level
If this is the sound you are looking for – This parameter sets how hard you hit the input of the go for it! If not, lower the Output level of the G-System. loop section. If you feel that the drive pedals in the loops... -
Page 41: Input Select
So you have made a good set of presets and all your levels are well matched … But wouldn’t it be nice if you could just hit a single switch and boost any of your sounds to a “solo” level. With the G-System, you can! The BOOST switch: •... -
Page 42: Expression Pedals - For What
If we look at the G-System with the Control Board and result. GFX01 separated, you will see that there are two... -
Page 43: Pedals Menu
Calibration step by PEDALS MENU Volume Ctrl.: Vol. step is explained on the following page of this manual. Navigation The G-System’s volume can be controlled via an • Press EDIT and then MENU. • Select Pedals using the PAGE encoder and press expression pedal connected to either the “Vol.”... -
Page 44: Volume Function - Expression Function
This parameter determines which of the two volume pedals with varying potentiometer types, it is applies. important to calibrate the connectors on the G-System to the connected pedals for optimal performance. There are two options for parameters assigned to pedals: Calibrating –... -
Page 45: Letting Expression Pedals Control Specific Parameters
MENU MODE – PEDALS • Vol: Refers to a pedal connected to the Vol Connector on the GFX01’s rear panel or to the Control Board’s Vol Connector. • Exp: Refers to a pedal connected to the Exp • The LCD now reads “Set Max”. Connector on the GFX01’s rear panel or to the •... -
Page 46: Custom Setup Of Switch Functions
Switches with fixed function About the Footswitches Custom Setup of Switch Functions The G-System’s 18 footswitches have individual default Follow this step-by-step guide to customize one or more functions. The labels above and below each switch switch functions. describe those functions. - Page 47 Function Style Param 3 Tap Tempo None – – Allows you to tap the global G-System tempo. Filter On/Off Toggle or Hold – Comp On/Off Toggle or Hold – Tuner Mute Loop 1 On/Off Toggle or Hold –...
-
Page 48: Midi
Press ENTER to reset the Program Map. all MIDI devices are designed to read the MSB. SysEx ID G-System has 300 preset locations. 100 factory presets Range: 0 to 126 and 200 user preset locations. Sets the G-System’s SysEx ID for identification in larger MIDI setups. -
Page 49: Utility
How to Dump via MIDI – Step by Step: dependent – delay time of 350ms. When the Tap Master • Connect the G-System’s MIDI Out to the MIDI In of a parameter is set to Preset, the G-System will set the MIDI sequencing device. -
Page 50: Relays For Amp Channel Switching
Example: You have a 2 channel amp and would like use channels on your amp or pre-amp. on of the switches on the G-System to switch between these channels. At the same time you would like to avoid Relay Switching Menu that the G-System sends out the Relay settings stored •... -
Page 51: Setting Up
You have a regular combo-amp with a clean channel configuration (Hold). and a lead channel. As a result, the G-System can select the amp channel of • The connector for the channel switching on the amp your choice at preset change. Then, within that preset, is a regular stereo jack connector. -
Page 52: The Tuner In Play Mode
Output Range: On/Off You may wish to mute the G-System’s outputs in Tuner Mode – especially if you do not use an expression pedal for volume control. In this case, set Output to off. -
Page 53: Tap Tempo
TAP TEMPO Tap Tempo: Hit Twice or More! The Tap Tempo function allows you to tap the Global tempo. Tap tempo is averaged from the first two taps and up to the last ten. Tap Tempo is always shown in both milliseconds (ms) and beats per minute (BPM). -
Page 54: Effects
EFFECTS – FILTER Touch Res Filter – This section of the manual describes the G-System’s effects and their parameters. To learn how to Additional Parameters navigate the G-System’s menus, please refer to the preceding chapters. The Touch Resonance filter creates an effect similar to a Touch Wah. -
Page 55: Touch Resonance Filter
EFFECTS – FILTER Auto Resonance Filter – Wah Wah Additional Parameters With this effect type, you can create the same effect as with a dedicated wah pedal, which you can control manually. All you need to do is assign an expression Speed pedal to control the Sweep parameter. -
Page 56: Touch Wah
EFFECTS – FILTER Touch Wah Auto Wah The wah effect occurs when a relatively narrow The wah effect occurs when a relatively narrow frequency area is boosted and swept through a frequency area is boosted and swept through a frequency range. The sweep is controlled by the input frequency range. -
Page 57: Formant Filters
EFFECTS – FILTER Formant Filters – Introduction Touch Formant – The Formant filters are somewhat special. The Additional Parameters characteristic vowels of the human speech can also be The Touch Formant effect is controlled by the input described as formants. Imagine a pedal that does not say “WAH WAH”, but instead goes “OOWEEAA- dynamics –... -
Page 58: Compressor
When the signal exceeds the set Threshold point, the effects. The G-System provides three basic types of Compressor is activated. The signal’s level above this compression. They assist you in finding the most Threshold point is processed according to the settings of appropriate sound for your particular application. -
Page 59: Sustaining & Percussive Modes
EFFECTS – COMPRESSOR Sustaining and Percussive Types The Sustaining and Percussive Types hold fewer handles than the Standard mode. Individually tuned these types allow you two easily setup commonly used compression styles. Use the Sustaining type to achieve the subtle compression settings that will give you plenty of sustain without “smashing”... -
Page 60: Classic Chorus
Range: 0 to 100% Introduction This parameter sets the relationship between the dry The G-System offers two types of Chorus: the simple signal and the level of the effect in this Effect Block. Classic Chorus and the Advanced type that includes a couple of extra parameters. -
Page 61: Advanced Chorus
EFFECTS – MOD Advanced Chorus Flanger – Introduction Additional parameters to the Classic Chorus: The Flanger belongs to the same “family” of modulation effects as the Chorus effect. The signal is split, and one Cho Dl – Chorus Delay of the signals is pitch modulated. Range: 0 to 50ms The characteristic “flanging”... -
Page 62: Advanced Flanger
EFFECTS – MOD Advanced Flanger FeedB – FeedBack Range: -100 to 100 Additional parameters to the Classic Flanger: This parameter controls the amount of feedback (Resonance) of the short modulated delay that causes Fla Dl – Flanger Delay the Flanging effect. When the Feedback is set too high Range: 0 to 50ms (above approximately 90% to 95%), this might introduce Typically, Delay values around 5ms are used for Flanging... -
Page 63: Vibrato
EFFECTS – MOD Vibrato Enable Range: Off/On The Vibrato effect modulates the pitch of the incoming The effect’s status. All settings are stored as part of the signal. The result is similar to the vibrato technique used preset even if this particular effect is disabled. by vocalists. -
Page 64: Vintage Phaser
Range: -100 to +100% Introduction This parameter controls the amount of feedback in the The G-System provides two very effective phaser types. Phaser. Negative values inverse the phase of the signal The Vintage Phaser will give you a phasing effect similar that is fed back to the algorithm’s Input. -
Page 65: Tremolo
EFFECTS – MOD Tremolo Sine Introduction A Tremolo is basically a change of the signal level controlled by an LFO. The G-System offers variations of Square this effect; ranging from soft and smooth to hard and aggressive. Speed Range: 0.050Hz to 20Hz Width This parameter sets the speed of the effect. -
Page 66: Panner
EFFECTS – MOD Panner Introduction The Panner simply pans the signal between the left and the right channel. Use this for extreme stereo perspective effects. Speed Range: 0.050Hz to 20Hz Sets the speed of the effect. Tempo Range: Ignore, 2 to 1/32T (T= Triplet & D= Dotted) When set to any value between 1 and 1/32T, the G- System’s Global Tempo is subdivided according to this setting. -
Page 67: Pitch Shifter
EFFECTS – PITCH Pitch Shifter Range: 0 to 100% The G-System’s Pitch Shifter gives you two voices, each This parameter determines how often the first voice will with a fixed pitch distance to the Input note. The be repeated by the Delay. -
Page 68: Octaver
EFFECTS – PITCH Octaver Whammy The Octaver gives you an additional voice with a fixed The Whammy effect allows you to control the pitch of an pitch distance of either one or two octaves above or added voice with an external Expression pedal. below the Input note. -
Page 69: Detune
EFFECTS – PITCH Detune OutLev – Out Level Range: -100 to 0dB The Detune effect is – to some extent – similar to a This parameter sets the overall Output level of this effect. Chorus: The source signal is split and a specified amount of the signal is detuned by an adjustable amount of Enable Cents (100 Cent = 1 semitone). -
Page 70: Intelligent Pitch-Shifter
Intelligent Pitch Shifter Voice 1-2 Range: -13 to Unison to 13 The G-System Intelligent pitch-shifter is a 2 voice pitch- The intelligent pitch-shifter can add two voices within the shifter that allows you to play harmonies within a variety selected scale. The pitch-shifter automatically calculates of scales in any key. -
Page 71: Delay
Delay – Introduction Fb – Feedback Range: 0 to 120% The G-System offers not only standard Delay types but This parameter sets the amount of feedback from the also a few new ones. We believe that the following types output of the effect back to its input. Use the Feedback... -
Page 72: Single Delay
The Single Delay effect is the most simple and basic Fi sound to your exact needs. delay type in the G-System. It comprises a single delay line with all the common parameters. In addition to the “common” parameters described in... -
Page 73: Dynamic
EFFECTS – DELAY Dynamic Delay Rel – Release Range: 20 to 1000ms The Dynamic Delay is a feature that was initially Determines how fast the attenuation of the delay repeats introduced in the well-recognized TC 2290. It allows the is released. dynamics of the Input level to actively alter the Delay Output level, which leaves the source signal clear and Dual Delay... -
Page 74: Reverb Types
EFFECTS – REVERB Reverb Types Common Reverb Parameters The G-System features four different Reverb classics. All Decay types have the same editable parameters, but the Range: 0.1 to 20 seconds reverbs’ characteristics vary. The Decay parameter determines the length of the Reverb Diffuse Field. -
Page 75: Parametric Eq
The two Color parameters can really change the The G-System features a 3 band parametric equalizer. characteristics and style of the reverb – from “dark” and You can use this EQ either to shape the sound of “ambient”... -
Page 76: Noise Gate
Optimum settings will vary depending on the signal point again. As a rule of thumb, this parameter should be present on the G-System’s input, so you will most likely set to a fairly high value. need different settings for Clean and Overdrive sounds. -
Page 77: Midi Implementation Chart
MIDI IMPLEMENTATION CHART MIDI Implementation Chart for G-System – Version 1.0 Function Transmitted Recognized Remarks Basic Channel Default Changed 1 to 16 1 to 16 Mode Default Messages Altered Note Number True Voice Velocity Note ON Note OFF After Touch... -
Page 78: Frequently Asked Questions
If you need to use the drive of the combo, the pre-amp compatible devices. section of the combo should be inserted in the Insert loop of the G-System (loop 5) to take full benefit of the Question - Volume Min value post effects of the G-System. -
Page 79: Preset List
PRESET LIST MIDI # Bank Preset Preset Name MIDI # Bank Preset Preset Name Scotty’s Blues Pure Liverpool Sheryl’s Detune Reverberated So Scho Vintage Phaser Gilmore’s Delays Filtered Rockabilly Light Detune Phasing The Facts Lofi Delay 70’s Tape Flange Echo Filters Slow Modulation TouchWah Tremo Vibe... - Page 80 PRESET LIST MIDI # Bank Preset Preset Name Phase Off Talk the Talk Funky Thang Straight Octaver LoFi Filters T Petty Chorus Bluesey Lead Vibra Wah Stuck In the Middle Funky Chorus Rhythm Subtle Acoustic Acoustic Detune Vibrato – Sweet Soft Vibrato Sustained Chorus Jazz Ballad...
-
Page 81: Technical Specifications
TECHNICAL SPECIFICATIONS Instrument Inputs Control Interface Connectors: Two 1/4" phone jack, pseudo-balanced MIDI: In/Out: 5 Pin DIN Impedance: 1 Mohm USB: USB 1.1, type B Max. Input Level: 18 dBu Pedal (Exp and Vol): Four 1/4" stereo phone jack Min. Input Level for 0 dBFS: -6 dBu (2 on GFX01, 2 on Control Board) Sensitivity:...
Need help?
Do you have a question about the G-System and is the answer not in the manual?
Questions and answers