Table of Contents
Advertisement
Available languages
Available languages
English
Contents
Inhalt
Important Safety Instructions . . . . .2
Wichtige Sicherheitsvorkehrungen .2
Connecting Up . . . . . . . . . . . . . . .4
Anschlüsse herstellen . . . . . . . . . . .4
Distributor List . . . . . . . . . . . . . .57
Vertriebsliste . . . . . . . . . . . . . . . .57
Introduction . . . . . . . . . . . . . . . . .5
Einfürung in den TrakMaster . . . .15
switches . . . . . . . . . . . . . . . . . . . .5
Schalter . . . . . . . . . . . . . . . . . . . .15
Getting Started . . . . . . . . . . . . . . .5
Erste Schritte . . . . . . . . . . . . . . . .15
Facilities and Controls . . . . . . . . .6
Komponenten unde Regler . . . . .16
sound . . . . . . . . . . . . . . . . . . . . . .9
Erzeugen . . . . . . . . . . . . . . . . . .19
guitar sound . . . . . . . . . . . . . . . . .9
Erzeugen . . . . . . . . . . . . . . . . . .20
Impoving sound quality using the 3-
band Equaliser . . . . . . . . . . . . . . .10
Verbessern . . . . . . . . . . . . . . . . .20
Mixing Down . . . . . . . . . . . . . . .10
Abmischen . . . . . . . . . . . . . . . . .21
Compression . . . . . . . . . . . . . . . .11
Einsteiger . . . . . . . . . . . . . . . . . .21
EQ-anleitung für Einsteiger . . . . .23
Equalisation . . . . . . . . . . . . . . . .13
FAQs . . . . . . . . . . . . . . . . . . . . .24
Frequently Asked Questions . . . .13
Fehlersuche . . . . . . . . . . . . . . . . .24
Troubleshooting . . . . . . . . . . . . .14
Kontaktaufnahme . . . . . . . . . . . .24
Contacting Us . . . . . . . . . . . . . . .14
Deutsch
Français
Table des matières
Consignes de sécurité . . . . . . . . . .3
Connexions . . . . . . . . . . . . . . . . .4
Distributeurs . . . . . . . . . . . . . . . .57
Arriere . . . . . . . . . . . . . . . . . . . .25
Prise en Main . . . . . . . . . . . . . . .25
Commande et Réglages . . . . . . . .26
Voix . . . . . . . . . . . . . . . . . . . . . .29
Électrique de Bonne Qualité . . . .30
par Correction . . . . . . . . . . . . . .30
Mixage Final . . . . . . . . . . . . . . . .31
Compression, mode d'emploi . . . .31
Correction, mode d'emploi . . . . .33
Questions-Réponses . . . . . . . . . .34
Assistance . . . . . . . . . . . . . . . . . .34
Contacts . . . . . . . . . . . . . . . . . . .34
Italiano
Indice
Sicurezza . . . . . . . . . . . . . . . . . . .3
Connessioni . . . . . . . . . . . . . . . . .4
Lista dei Distributori . . . . . . . . . .57
. . . . . . . . . . . . . . .25
Introduzione . . . . . . . . . . . . . . . .35
Posteriore . . . . . . . . . . . . . . . . . .35
Primo Approccio . . . . . . . . . . . . .35
Funzioni e controlli . . . . . . . . . . .36
Qualita . . . . . . . . . . . . . . . . . . . .39
Elettrica di Buona Qualita . . . . . .40
Migliorare la Qualita del Suono
Utilizzando L'equalizzatore . . . . .40
Missaggio . . . . . . . . . . . . . . . . . .41
Guida alla Compressione . . . . . . .41
Guida all'equallizzazione . . . . . . .43
Domande e Risposte . . . . . . . . . .44
Risoluzione dei Problemi . . . . . .44
Come Contattarci . . . . . . . . . . . .44
E
Español
N
G
L
I
S
Contenido
H
Seguridad . . . . . . . . . . . . . . . . . . .3
D
E
Conexionado . . . . . . . . . . . . . . . .4
U
Lista de Distribuidores . . . . . . . . .57
T
S
C
H
Introduccion . . . . . . . . . . . . . . . .45
F
Trasero . . . . . . . . . . . . . . . . . . . .45
R
A
Inicio . . . . . . . . . . . . . . . . . . . . .45
N
Prestaciones y Controles . . . . . . .46
Ç
A
I
un Sonido Vocal . . . . . . . . . . . . .49
S
I
Gran Calidad . . . . . . . . . . . . . . . .50
T
A
Ecualizador . . . . . . . . . . . . . . . . .50
L
I
Mezclando . . . . . . . . . . . . . . . . .51
A
N
Guia de Compresion . . . . . . . . . .51
O
Guia de Ecualizacion . . . . . . . . . .53
E
Preguntas Mas Comunes . . . . . . .54
S
P
Problemas . . . . . . . . . . . . . . . . . .54
A
Ñ
O
L
1
Advertisement
Table of Contents

Related Manuals for Focusrite TrakMaster


Summary of Contents for Focusrite TrakMaster
-
Page 1: Table Of Contents
English Deutsch Français Italiano Español Contents Inhalt Table des matières Indice Contenido Important Safety Instructions ..2 Wichtige Sicherheitsvorkehrungen .2 Consignes de sécurité ..3 Importtanti Istruzioni per la Instrucciones Importantes de Sicurezza . -
Page 2: Important Safety Instructions
Das interne Netzteil enthält keine Bauteile, die vom Anwender gewartet werden können. Überlassen The internal power supply unit contains no user serviceable parts. Refer all servicing to a Sie die Wartung einem qualifizierten Wartungstechniker, den Ihr Focusrite Fachhändler gern qualified service engineer, through the appropriate Focusrite dealer. -
Page 3: Consignes De Sécurité
Aucun élément de l’alimentation interne n’est réparable par in caso di guasto, contattare il centro di assistenza attraverso un l’utilisateur. Pour toute réparation, adressez-vous à un technicien preferible que se dirijan a su distribuidor Focusrite o a un servicio rivenditore Focusrite. qualifié. -
Page 4: Connecting Up
Balanced XLR Synth Guitar Microphone Unbalanced Jack Synth or Guitar Output Sleeve Sleeve Digital Output Option (see separate documentation for connection guidance) Unbalanced Jack Balanced Jack Balanced Jack Unbalanced Jack From Mixer output or Insert Send To Line I/P, Tape I/P From Synth output or Mixer Insert Return... -
Page 5: Introduction
INTRODUCTION TO THE TRAKMASTER GETTING STARTED SETTING UP THE UNIT FOR RECORDING The TrakMaster is an analogue mono channel strip, with an optional 24-bit/96 kHz high quality digital output. It combines a range of tools in one compact unit, providing the Ensure that nothing other than the mains supply is connected to your TrakMaster, project studio engineer, producer or musician with the perfect analogue solution for then switch it on via the POWER switch on the right hand side of the unit. -
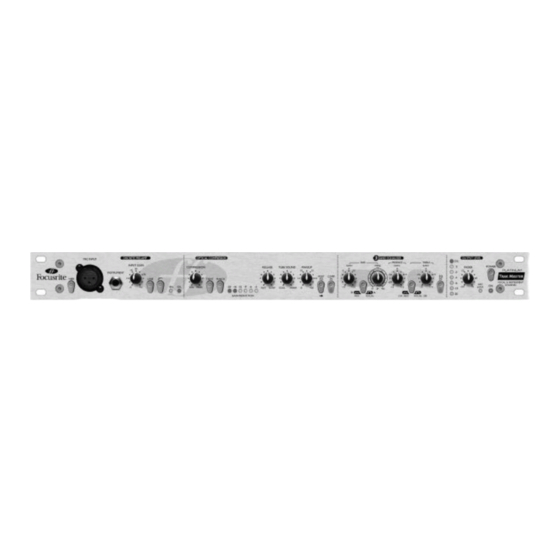
Page 6: Facilities And Controls
If necessary, use the 3-BAND EQUALISER to set the desired tonal quality. anti-clockwise, and increase the INPUT GAIN so that the green SIG LED is always illuminated when there is a signal present. The red O/L (Overload) LED may light Use the FADER to set the final output level (see instructions in Facilities And occasionally, but only if the input signal gets particularly loud. - Page 7 This switch should be used when you want the compressor to keep the volume of an – When engaged, this switch causes the OPTICAL POST EQ switch instrument at a very consistent level throughout its performance, and is best suited to COMPRESSOR section to process the signal after the 3-BAND EQUALISER section.
- Page 8 mixer etc.) When setting the output level, always start with this control set fully anti- – When this switch is engaged (INST mode), the clockwise and increase the output level until you reach the correct level – do not start with BASS INST/VOCAL switch BASS controls act as a low frequency shelving EQ.
-
Page 9: Obtaining A Good Quality Vocal Sound
OBTAINING A GOOD QUALITY VOCAL SOUND adjust the FREQ control until you get a deep, resonant and powerful-sounding voice. This is the sort of effect used by radio DJs. MICROPHONE POSITIONING BACKING VOCALS For a natural sound without pops, position the microphone at a distance of about 1 metre Backing vocals are normally heavily compressed, since you want them to have a continuous from the singer. -
Page 10: Band Equaliser
USING THE OPTICAL COMPRESSOR IMPROVING SOUND QUALITY USING THE 3-BAND It is normally a good idea to add compression to an electric guitar. This will even out EQUALISER inconsistencies in volume, helping it to sit nicely in the track. Compression will also have the effect of adding more sustain to a guitar. -
Page 11: A Beginner's Guide To Compression
A BEGINNER’S GUIDE TO COMPRESSION Compression has the result that any variations in the volume of the signal (in other words, the signal’s dynamic range – the difference between the minimum and maximum levels of a signal) are reduced. The amount of this reduction is determined by the threshold (the Compressors are probably the most widely used signal processors in the audio industry. - Page 12 Release determines the speed at which the compressor stops acting once the signal drops below the threshold. Think of it as the time taken to turn the volume back up. Check out http://www.focusrite.com/features for links to more information on the subject of compression.
-
Page 13: A Beginner's Guide To Equalisation
If you want to connect your TrakMaster to a device with XLR connectors, construct or purchase a cable that is wired as follows: Check out http://www.focusrite.com/features for links to more information on the subject of EQ. -
Page 14: Troubleshooting
CONTACTING US If have any questions about your TrakMaster, or are continuing to have difficulty, email us for help at tech@focusrite.com, phone us on +44 (0)1494 462246, or contact your local distributor (see listing at the back of this manual). -
Page 15: Einfürung In Den Trakmaster
EINFÜHRUNG IN DEN TRAKMASTER ERSTE SCHRITTE GERÄT FÜR DIE AUFNAHME EINRICHTEN Der TrakMaster ist ein analoges Mono-Gerät mit einem optionalen hochwertigen 24- Bit/96 kHz Digitalausgang. Der TrakMaster kombiniert mehrere Soundtools in einer Achten Sie darauf, dass nur das Netzkabel an Ihren TrakMaster angeschlossen ist und kompakten Einheit und bietet dem Projektstudio-Techniker, Produzenten oder Musiker schalten Sie ihn dann mit dem POWER-Schalter auf der rechten Seite des Geräts ein. -
Page 16: Komponenten Unde Regler
TIGHT-Funktion nicht ein. Wenn Sie nach dem klassischen Analogband- oder Ausgangspegel anschließen. Dieser Eingang funktioniert nur bei deaktiviertem LINE- Röhrensound suchen, sollten Sie den TUBE SOUND-Regler verwenden. Eingang. Stellen Sie nötigenfalls mit dem 3-BAND-EQ die gewünschte Klangfarbe ein. Stellen Sie mit dem FADER den endgültigen Ausgangspegel ein (siehe Anleitungen in –... - Page 17 – Damit bestimmen Sie den Lautstärkepegel oder Ihrem Klangmaterial beliebig viel dieser Wärme hinzufügen und ihm bei Aufnahmen auf COMPRESSION “Threshold/Schwellenwert”, an dem die Kompression einsetzt, und legen damit fest, ein digitales Medium mehr Charakter verleihen. welcher Anteil des Signals komprimiert wird. Durch eine Rechtsdrehung des COMPRESSION-Reglers erhöhen Sie den Anteil des Signals, auf den der Kompressor Da durch die Signalkomprimierung laute Parts leiser werden, liegt der MAKEUP –...
- Page 18 3-BAND-EQ verfügbar. Durch Anheben der Hi Mid-Frequenzen verbessern Sie die Präsenz des Signals, wodurch sich der Klang in der Mischung besser durchsetzt. Mit der 3-BAND-EQUALIZER-Sektion (auch ‘EQ’ genannt) des TrakMasters können Sie bestimmte Frequenzen absenken und anheben. Der TrakMaster EQ ist besonders - Mit diesem Shelving EQ können Sie hohe Frequenzen um +/- 14 TREBLE GAIN vielseitig, da sich die BASS- und TREBLE-Bänder getrennt zwischen VOCAL- und...
-
Page 19: Hochwertigen Gegangssound Erzeugen
DIGITAL OUTPUT HOCHWERTIGEN GESANGSSOUND ERZEUGEN Zusätzlich zu den analogen Ausgängen können Sie optional einen hochwertigen 24-Bit MIKROFON-POSITIONIERUNG Um einen natürlichen Klang ohne Pop-Geräusche zu erzeugen, stellen Sie das Mikrofon Digitalausgang mit 128-fachem Oversampling nachrüsten, der mit den Sample-Frequenzen etwa 1 Meter vom Sänger entfernt auf. Das Aufnehmen von Gesang erfordert eine andere 44.1, 48, 88.2 oder 96 kHz betrieben werden kann. -
Page 20: Hochwertigen E-Gitarrensound Erzeugen
SPRACHE • COMPRESSION auf etwa 12 Uhr Beim Aufnehmen von Sprache sollten Sie mit dem BASS-Regler die tiefen • TIGHT-Taste gedrückt Frequenzbereiche anheben, wobei die INST/VOCAL-Taste auf VOCAL eingestellt ist. Da • PUNCH-Taste gedrückt sich die Tonhöhen der Stimmen unterscheiden, variieren Sie die Einstellungen des FREQ- •... -
Page 21: Abmischen
KOMPRESSIONS-ANLEITUNG FÜR EINSTEIGER Matschiger Sound: Senken Sie mit dem BASS-Regler einige der tiefen Frequenzen etwas ab. Schalten Sie die Spur auf Solo, stellen Sie den BASS-Regler auf volle Absenkung und variieren Sie den FREQ-Regler (entweder im INST- oder VOCAL-Modus), bis der Klang Kompressoren sind wahrscheinlich die am häufigsten eingesetzten Signalprozessoren der ausgewogener ist. - Page 22 Kompression führt dazu, dass alle Variationen in der Lautstärke eines Signals (also der auch die wahrgenommene Lautheit des Signals erhöht, obwohl die Pegelspitzen immer Dynamikbereich des Signals - der Unterschied zwischen den Minimal- und noch bei –6 dB liegen. Maximalpegeln eines Signals) verringert werden. Das Ausmaß dieser Reduzierung wird vom Threshold-Wert (der Pegel, über dem die Verstärkung verringert wird) und dem Die anderen, bei den meisten Kompressoren vorhandenen Regler sind Attack und Ratio-Wert (die Stärke der Verringerung) bestimmt.
-
Page 23: Eq-Anleitung Für Einsteiger
EQs nützlich, da man die Störfrequenz eingrenzen und deren Pegel verringern kann. Man kann damit auch „kreativ“ arbeiten, um beispielsweise dem Gesang mehr Präsenz zu verleihen. Links mit weiteren Informationen über das Thema Kompression finden Sie unter Links zu näheren Einzelheiten über das Thema EQ finden Sie unter http://www.focusrite.com/features. http://www.focusrite.com/features... -
Page 24: Faqs
Kabel, das wie folgt verdrahtet ist: KONTAKTAUFNAHME Bei Fragen oder unlösbaren Problemen mit dem TrakMaster schicken Sie eine E-Mail an tech@focusrite.com oder rufen Sie uns unter der Nummer +44 (0)1494 462246 an oder kontaktieren Sie Ihren lokalen Vertrieb (siehe Liste am Ende dieses Handbuchs). -
Page 25: Introduction
INTRODUCTION PRISE EN MAIN Le Trak Master est une voie de console mono analogique pouvant être équipée en option CONFIGURATION DE L'APPAREIL EN ENREGISTREMENT d'une sortie numérique 24 bits/96 kHz de haute qualité. Il réunit de très nombreuses fonctions dans un même appareil aux dimensions réduites, offrant à tout ingénieur du son, Vérifiez que seul le cordon secteur est relié... -
Page 26: Commande Et Réglages
n'utilisez pas la fonction HARD. Si vous recherchez le célèbre son de bande analogique ou le son à lampes, servez-vous de la fonction CHARACTER. – Ce bouton permet de fournir une alimentation fantôme 48 V Bouton +48V Si vous le souhaitez, réglez la tonalité du son au moyen du correcteur (EQUALISER). nécessaire aux micros à... - Page 27 – Le fait d'enclencher ce bouton active l'opto-compresseur (section cesse une fois que le niveau du signal source est retombé sous le seuil de déclenchement du Bouton IN OPTICAL COMPRESSOR) du Trak Master. Pour ne pas utiliser le compresseur, laissez compresseur.
- Page 28 Section de correction "EQUALISER" – Correcteur Baxendall permettant d'accentuer ou Potentiomètre TREBLE La section de correction EQUALISER du Trak Master permet d'atténuer ou d'accentuer d'atténuer les fréquences aiguës sur une plage de +/- 15 dB. certaines fréquences. Outre sa fonction de correction première, un correcteur peut également être employé...
-
Page 29: Obtention D'une Bonne Prise De Voix
SORTIE NUMÉRIQUE OBTENTION D'UNE BONNE PRISE DE VOIX Outre les sorties analogiques standard, le Trak Master peut être équipé en option d'une PLACEMENT DU MICRO L'enregistrement de la voix est très différent de l'interprétation sur scène. Sur scène, il arrive sortie numérique 24 bits à... -
Page 30: Obtention D'un Son De Guitare Électrique De Bonne Qualité
propre, réglez le potentiomètre TUNING jusqu'à ce que vous obteniez une voix puissante, UTILISATION DE PÉDALES D'EFFETS profonde et résonante. C'est le type d'effet utilisé par les animateurs radio. Branchez toutes les pédales d'effets entre la guitare et le Trak Master. Coupez l'opto- compresseur (bouton OPTO-COMPRESSOR relâché), configurez le son souhaité... -
Page 31: Amélioration De La Qualité Sonore Par Correction
AMÉLIORATION DE LA QUALITÉ SONORE PAR COMPRESSION, mode d'emploi CORRECTION La section de correction EQUALISER du Trak Master permet de résoudre les problèmes Les compresseurs sont sans doute les processeurs de signaux les plus utilisés dans l'industrie suivants : audio. On peut comparer un compresseur à un réglage automatique du volume. Dès que le niveau du signal franchit un certain seuil de niveau, le compresseur se déclenche et réduit le Son terne : Le potentiomètre BASS permet d'atténuer certaines fréquences graves. - Page 32 Prenons un exemple. Si le seuil est fixé à -10 dB et que le taux est fixé à 4:1, tout signal dont le niveau dépasse -10 dB doit augmenter de 4 dB en entrée pour augmenter de 1 dB en sortie. Par conséquent, une crête de signal d'entrée atteignant -6 dB (correspondant à 4 dB au-dessus du seuil) va ressortir du compresseur à...
-
Page 33: Correction, Mode D'emploi
CORRECTION, MODE D'EMPLOI Les taux de compression faibles sont plutôt réservés aux instruments placés en avant du mixage, comme la guitare solo ou la voix. Pour ces instruments, on cherche en général à préserver une certaine dynamique de l'interprétation ou du jeu d'origine afin d'en garder Les correcteurs sont également très employés dans l'industrie audio et sont, pour simplifier, toute l'expressivité. -
Page 34: Questions-Réponses
Si vous avez des questions relatives au Trak Master, ou si vous rencontrez des difficultés persistantes, vous pouvez contacter notre service d'assistance à l'adresse e-mail tech@focusrite.com ou au numéro de téléphone +44 (0)1494 462246. Vous pouvez également contacter votre distributeur local (voir liste au dos du présent mode d'emploi). -
Page 35: Connessioni
INTRODUZIONE PRIMO APPROCCIO Preparare l’unità per la registrazione Il TrakMaster è un modulo di canale mono analogico , con una scheda opzionale di conversione A/D a 24 bit/96 KHz di alta qualità. TrakMaster comprende una grande Assicurarsi che nessun cavo, tranne quello di alimentazione in dotazione, sia collegato gamma di funzioni e controlli in un’unica unità... -
Page 36: Funzioni E Controlli
piuttosto basso e non usare la funzione HARD. Se si cerca un classico suono da nastro - Attiva l'alimentazione phantom necessaria ai microfoni a + 48V ( pulsante) analogico o valvolare, utilizzare il controllo CHARACTER. condensatore.Questo pulsante ha effetto solo sul MIC INPUT. Se non siete sicuri che il Se necessario, usare l’equalizzatore per settare la qualità... - Page 37 - Quando inserito rende attiva la sezione di OPTICAL reagire.Quando il potenziometro è ruotato in senso antiorario, il tempo di rilascio è IN (pulsante) COMPRESSOR del TrakMaster. Per metterla in Bypass, lasciare disinserito questo brevissimo, regolazione appropriata per suoni con transienti molto rapidi, in quanto ciò pulsante.
- Page 38 EQUALIZZATORE controllo TREBLE agisce su frequenze più alte, adatte ad un’equalizzazione tradizionale per strumenti. La sezione di Equalizzazione ( o EQ, come è più comunemente conosciuta ) del OUTPUT TrakMaster, permette di aumentare o tagliare certe frequenze. L’uso dell’ EQ può essere o “...
-
Page 39: Ottenere Un Suono Vocale Di Buona Qualita
DIGITAL OUTPUT OTTENERE UN SUONO VOCALE DI BUONA QUALITA In aggiunta all’uscita analogica tradizionale, è disponibile come opzione una scheda di POSIZIONARE IL MICROFONO Registrare la voce richiede una tecnica diversa da quella che si usa sul palco dal vivo, dove conversione A/D 24 bit 128 x Oversampling di alta qualità, con frequenze di il cantante di solito canta con il microfono che tocca le sue labbra, perciò... -
Page 40: Ottenere Un Suono Di Chitarra Elettrica Di Buona Qualita
PARLATO UTILIZZO DELL'OPTO-COMPRESSOR Quando si registra il parlato , utilizzare il controllo BASS per aumentare il livello delle basse E' normalmente una buona idea aggiungere compressione ad una chitarra elettrica.Questo frequenze con il pulsante LO MID inserito.Poiché le voci si differenziano per timbro , agire compenserà... -
Page 41: Missaggio
MIGLIORARE LA QUALITA' DEL SUONO GUIDA ALLA COMPRESSIONE UTILIZZANDO L'EQUALIZZATORE I compressori sono probabilmente i processori di segnale più utilizzati nell’industria audio. Puoi utilizzare la sezione di equalizzazione del TrakMaster per sistemare i seguenti Un compressore può essere visto come un controllo di volume automatico. Quando il problemi: volume del segnale oltrepassa un certo livello ( detto “soglia”) , il compressore riduce il guadagno ( o, in altre parole, “abbassa il volume”), attenuando il segnale. - Page 42 Facciamo un esempio con numeri reali.Se la soglia è regolata a – 10 dB e la ratio a 4:1, ogni segnale che supererà i – 10 dB, dovrà alzarsi in livello di 4 dB perché l’uscita del compressore si alzi di 1 dB. Perciò un segnale in ingresso con picco a – 6 dB ( che è a 4 dB sopra la soglia) uscirà...
-
Page 43: Guida All'equallizzazione
GUIDA ALL’EQUALIZZAZIONE Si tende ad utilizzare bassi valori di ratio su strumenti come voce o chitarre soliste, che nel mix sono in primo piano.In questo caso si cerca di preservare la dinamica della performance originale, per mantenerne l’espressione. Una riduzione della variazione del livello di Anche gli equalizzatori sono molto utilizzati nell’industria audio, e permettono un efficace volume è... -
Page 44: Domande E Risposte
L’Equalizzatore non funziona Il tasto IN (Equaliser) è schiacciato? COME CONTATTARCI Per ogni problema riguardo il vostro TrakMaster, contattateci per l’assistenza via e-mail: tech@focusrite.com, per telefono: +44 (0)1494 462246; oppure contattate direttamente il distributore locale (lista alla fine di questo manuale.) -
Page 45: Introduccion
INTRODUCCION INICIO CONFIGURAR LA UNIDAD PARA GRABACION El TrakMaster es una canal completo analógico mono, con una salida opcional digital 24- bit/96 kHz de alta calidad. Combina un conjunto de herramientas en una unidad compacta, Comprobar que no hay nada más conectado al TrakMaster que la alimentación, y facilitando al ingeniero del project studio, productor o músico una solución analógica luego ponerlo en marcha mediante el pulsador POWER situado a la derecha de la perfecta para grabar y mezclar un amplio rango de instrumentos. -
Page 46: Prestaciones Y Controles
Utilizar el FADER para determinar el nivel final de salida (ver las instrucciones en el – Es un filtro pasa altos, que elimina frecuencias bajas no deseadas HPF (Pulsador) capítulo Prestaciones y Controles del manual.) como la rumorosidad procedente de los pies de micrófono, o del efecto proximidad (donde las frecuencias bajas se sobre enfatizan al utilizar cierto tipo de micrófonos a poca distancia). - Page 47 COMPRESOR OPTICO más fuertes que el volumen de umbral. Este pulsador puede ser útil cuando se quiere que el compresor mantenga el volumen de un instrumento a un nivel consistente durante la El compresor de TrakMaster utiliza tecnología óptica, que ofrece unas características de ejecución.
- Page 48 EQUALISER – Al activarlo, este pulsador baja la frecuencia a la cual operará el control VOCAL TREBLE, convirtiéndolo en más práctico para las frecuencias altas de la voz humana. Al La sección EQUALISER (o EQ como es más conocido) del TrakMaster permite aumentar desactivarlo, el control TREBLE operará...
-
Page 49: Como Obtener Una Gran Calidad De Un Sonido Vocal
SALIDA DIGITAL COMO OBTENER UNA GRAN CALIDAD DE UN SONIDO VOCAL Además de las salidas analógicas, es posible montar de manera opcional una salida digital de POSICIONAMIENTO DEL MICROFONO alta calidad, a 24 bit, con 128 de sobremuestreo, que puede operar con frecuencias de La grabación de voces requiere una técnica distinta a la que se utiliza cuando se canta en un muestra de 44.1, 48, 88.2 y 96 kHz. -
Page 50: Obtener Una Guitarra Electrica De Gran Calidad
TUNING hasta que se obtenga la profundidad, resonancia y potencia sónica vocal. Es el AÑADIR EFECTOS MEDIANTE LOS PEDALES tipo de efecto buscado por los DJ’s de radio. Conectar todos los pedales a utilizar entre la guitarra y el TrakMaster. Poner el OPTO- COMPRESSOR en bypass (pulsador desactivado) y utilizar el EQUALISER para VOCES DE ACOMPAÑAMIENTO Estas voces suelen comprimirse con fuerza normalmente, para tener una presencia continua... -
Page 51: Mezclando
GUIA DE COMPRESION Aspero: Mediante el control PRESENCE reduciremos la resistencia de estas frecuencias. Será deseable añadir algo en BASS o LOW MID y si fuera necesario, eliminar algo en TREBLE. Los compresores son, quizás, los procesadores de señal más comúnmente usados en la industria del audio. - Page 52 Les daremos un ejemplo con algunos números reales. Si el umbral está determinado en En la mayoría de la música pop, los instrumentos secundarios (como baterías, bajos, –10dB y el ratio en 4:1, cualquier señal cuyo nivel supere los –10dB necesita crecer 4dB en guitarras rítmicas, etc.) tienden a ser comprimidos fuertemente (mediante un ratio bastante el nivel para que el nivel de la salida del compresor crezca 1dB.
-
Page 53: Guia De Ecualizacion
GUIA DE LA ECUALIZACION Se suele utilizar un ratio más suave en instrumentos como la guitarra solista o la voz que están situadas en la parte principal de la mezcla. En esta situación es deseable preservar la mayor parte posible de la dinámica original, para retener la expresión al máximo. Puede ser En la industria del audio también es amplia la utilización de ecualizadores, y son efectivos necesaria una pequeña variación en el nivel de volumen (por lo dicho anteriormente), pero controladores de tono, aunque un poco más complicados que los que se utilizan para los... -
Page 54: Preguntas Mas Comunes
PREGUNTAS MÁS COMUNES PROBLEMAS Mi TrakMaster se calienta cuando lo utilizo. ¿Debo preocuparme por este No hay LED’s iluminados ¿Está el pulsador POWER activado? motivo? ¿Está el selector de tensión cercano al conector de alimentación en la posición correcta? Si No. - Page 55 SPECIFICATIONS Optical Compressor Inputs Threshold (COMRPESSION control): -22 dB (MORE) to +12 dB (LESS) Ratio (TIGHT switch out): 3:1, soft knee Ratio (TIGHT switch in): 6:1, hard knee Gain: –3 dB to +57 dB Attack (PUNCH switch out): 3ms Frequency Response: 0 dB at 20 Hz and –3 dB at 250 kHz. Attack (PUNCH swtich in): 45mS THD+N: 0.002% (measured at 1kHz using 20 Hz/22 kHz bandpass filter) Release: 100 mS (FAST) to programme-dependent slow (SLOW)
- Page 56 EQ plots Bass EQ (VOCAL mode) Presence EQ Bass EQ (INST mode) Treble EQ (VOCAL and INST modes)
-
Page 57: Distributor List
United Kingdom & Ireland Technosound Phone: +361 252 0196 Phone: +5511 6331 6726 Phone: +27 11 728 3102 Focusrite Audio Engineering Ltd Phone: +357 2 499971 Fax: +361 341 0272 Fax: +5511 6336 3811 Fax: +27 11 728 6789 Phone: +44 (0) 1494 462246 Fax: +357 2 499986 Email: ad@absolute.hu... - Page 58 Notes...
- Page 59 Notes...
- Page 60 Notes...
Need help?
Do you have a question about the TrakMaster and is the answer not in the manual?
Questions and answers