Table of Contents
Advertisement
Advertisement
Table of Contents

Subscribe to Our Youtube Channel
Related Manuals for Datalogic QuickScan QS6500


Summary of Contents for Datalogic QuickScan QS6500
-
Page 1: Product Reference Guide
® QuickScan QS6500/QS6500BT Product Reference Guide... - Page 2 Datalogic representative. Electronic versions may either be downloadable from the Datalogic website (www.scanning.datalogic.com) or provided on appropriate media. If you visit our website and would like to make comments or suggestions about this or other Datalogic publications, please let us know via the "Con- tact Datalogic" page.
-
Page 3: Table Of Contents
Table of Contents Chapter 1 Getting Started ............1-1 About This Manual ................1-1 Manual Conventions ..............1-2 Default Information ............... 1-2 Nomenclature .................. 1-2 Symbologies ..................1-3 Linear Imager Settings ..............1-3 Return to Factory Defaults ..............1-3 Chapter 2 Bluetooth Models............2-1 Linking an Imager with a Base Station .......... - Page 4 Host Echo ................4-14 Host Echo Quiet Interval ............4-14 Signal Voltage: Normal/TTL........... 4-14 RS-232 Invert ..............4-14 Beep on ASCII BEL............... 4-16 Beep on Not on File.............. 4-16 ACK NAK Options ..............4-16 ACK Character..............4-18 NAK Character..............4-19 Retry on ACK NAK Timeout ...........
- Page 5 Checksum Transmission ............6-11 Truncate/Expand ..............6-11 Truncate Leading/Ending ............6-13 Code I.D. Selection ..............6-14 Example: Setting the UPC-E Code I.D........6-14 UPC-E Data Group Characters ............ 6-16 Add-ons .................. 6-18 EAN-13 ..................6-20 Disable/Enable EAN-13 .............. 6-20 Checksum Transmission ............
- Page 6 Truncate Leading/Ending ............6-58 Code I.D. Selection ..............6-59 Example: Setting the RSS Limited Code I.D......6-59 RSS Limited Data Group Characters ..........6-61 Code 39 ..................6-63 Disable/Enable Code 39 ............. 6-63 Checksum Verification ............... 6-63 Checksum Transmit ..............6-63 Minimum/Maximum Code Length ..........
- Page 7 Code I.D. Selection ..............6-103 Example: Setting the Industrial 2 of 5 Code I.D......6-103 Industrial 2 of 5 Data Group Characters ........6-105 Matrix 2 of 5 (Eur) .................6-107 Disable/Enable Matrix 2 of 5 .............6-107 Checksum Verification ..............6-107 Checksum Transmit ..............6-107 Minimum/Maximum Code Length ..........6-109 Truncate Leading/Ending ............6-110 Code I.D.
- Page 8 Checksum Verification ............. 6-148 Checksum Transmit ..............6-148 Minimum/Maximum Code Length ..........6-150 Truncate Leading/Ending ............6-151 Code I.D. Selection ..............6-152 Example: Setting the UK/Plessey Code I.D......6-152 UK-Plessey Data Group Characters ..........6-154 Telepen ..................6-156 Disable/Enable Telepen ............6-156 Checksum Verification .............
- Page 9 Micro PDF 417 Data Group Characters ........6-195 EAN UCC Composite ...............6-197 Disable/Enable EAN UCC Composite ...........6-197 UCC/EAN 128 Emulation ............6-197 Truncate Leading/Ending ............6-198 Code I.D. Selection ..............6-199 Example: Setting the EAN UCC Composite Code I.D....6-199 EAN UCC Composite Data Group Characters ........6-201 Code 4/5 ..................6-203 Disable/Enable Code 4 and Code 5 ..........6-203 Data Transmission Format ............6-203...
- Page 10 Bluetooth Imager Indications ..............F-1 Bluetooth Base Station Indications ............F-3 Appendix G Sample Symbols ............ G-1 Sample Symbols for PDF Models ONLY .......... G-2 viii ® QuickScan QS6500/QS6500BT...
-
Page 11: Chapter 1 Getting Started
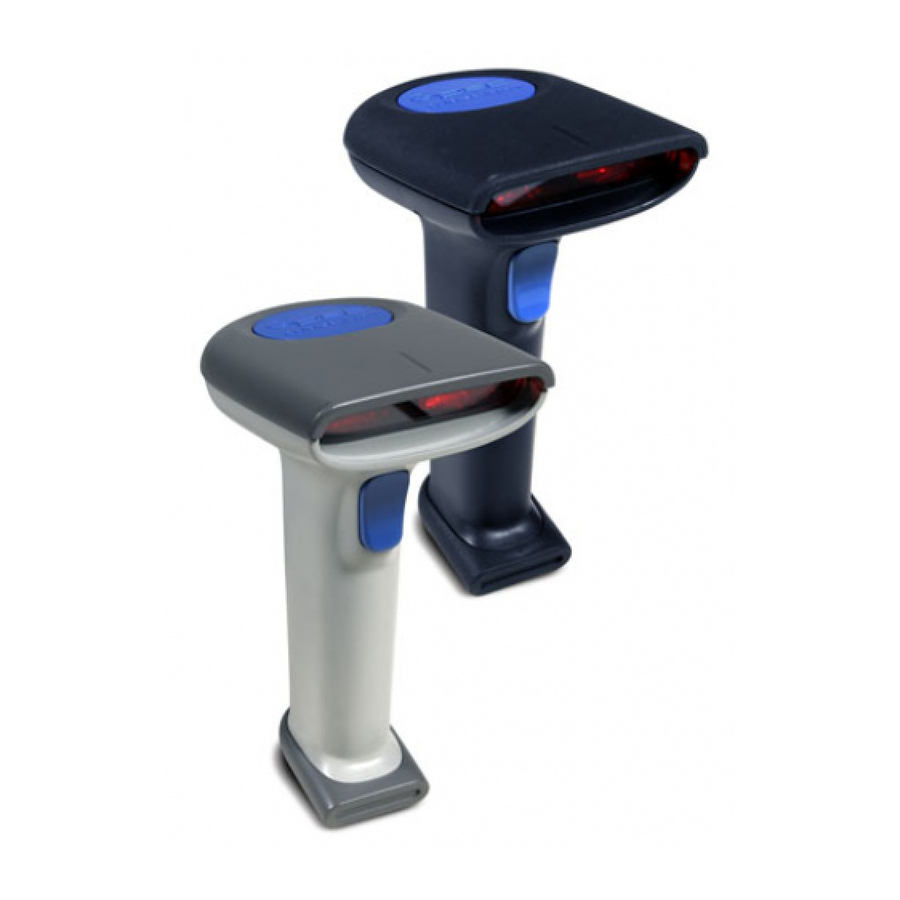
Chapter 1 Getting Started The linear imager uses a 16-bit processor and enhanced image processing algorithms to attain industry-leading speeds of 450 scans per second. Depth of field performance allows scanning of a low resolution shipping label at a distance of 1.5 meters. Even poor quality bar codes are readable with this scanner. -
Page 12: Manual Conventions
Getting Started Manual Conventions The symbols listed below are used in this manual to notify the reader of key issues or procedures that must be observed when using the linear imager: Notes contain information necessary for prop- erly diagnosing, repairing and operating the lin- ear imager. -
Page 13: Symbologies
Symbologies Symbologies In addition to standard linear bar code symbologies, the PDF model of the linear imager also reads 2-Dimensional stacked bar code symbologies such as PDF417, Micro PDF 417 and EAN UCC Composite. For more information plus a complete listing of available symbology types, turn to the chapter of this manual. - Page 14 Getting Started NOTES ® QuickScan QS6500/QS6500BT...
-
Page 15: Chapter 2 Bluetooth Models
Chapter 2 Bluetooth Models The following features and descriptions apply only to Bluetooth (BT) models of the imager. Linking an Imager with a Base Station Follow these instructions to link the two devices: 1. Connect power to the Base Station. The radio LED (marked with an antenna symbol) will blink amber and the Base Station will beep. -
Page 16: Unlinking
Bluetooth Models Unlinking There are three ways to unlink an imager from a Base Station: Unlink and Sleep — Reading the unlink bar code Scan the “Unlink and Sleep” bar code above while the imager is in range of the Base Station will break the link between the two devices and allow another imager to link to the Base Station. -
Page 17: Battery Charging
Battery Charging Battery Charging The imager contains a 1000mAh Lithium-Ion rechargeable battery. A fully charged battery will provide up to 12,000 scans over a 12 hour period. Actual charge life on the imager will depend on the configuration of the how the imager is configured via the programable features in this manual;... - Page 18 Bluetooth Models NOTES ® QuickScan QS6500/QS6500BT...
-
Page 19: Chapter 3 General Features
Chapter 3 General Features Double Read Timeout The Double Read Timeout feature sets a time limit that determines how much time must pass before reading the same label again (e.g. two identical items in succes- sion). START DURATION BARCODE 0.1 Second 0.2 Second 0.3 Second 0.4 Second... - Page 20 General Features START DURATION BARCODE 0.9 Second 1 Second ® QuickScan QS6500/QS6500BT...
-
Page 21: Imager Timeout
Imager Timeout Imager Timeout The Imager Timeout feature sets the time for automatically switching the unit off when the imager is not in use. START DURATION BARCODE 1 Second 2 Seconds 3 Seconds 4 Seconds 5 Seconds 6 Seconds 7 Seconds 8 Seconds 9 Seconds 10 Seconds... -
Page 22: Read Verification
General Features START DURATION BARCODE 13 Seconds 14 Seconds 15 Seconds Read Verification Sets the number of times a bar code must be read before it is transmitted. START # of TIMES BARCODE None ® QuickScan QS6500/QS6500BT... - Page 23 Read Verification START # of TIMES BARCODE Product Reference Guide...
-
Page 24: Led And Beeper Indicators
General Features LED and Beeper Indicators Power On Alert Disables or enables the indication (LED and/or Beeper) that the imager is receiving power. START STATE BARCODE Disable Enable LED Idle State This feature specifies the state of the green scanner LED when the scan- ner is idle and ready to read a label. -
Page 25: Good Read: When To Indicate
LED and Beeper Indicators Good Read: When to Indicate This feature specifies when the imager will provide indication (beep and/ or flash its green LED) upon successfully reading a bar code. Choices are: • Good Read = Indicate after decode •... -
Page 26: Good Read Beep Control
General Features Good Read Beep Control This feature enables/disables the imager’s ability to beep upon a success- ful decode of a label. START STATE BARCODE Disable Enable Good Read Beep Frequency Adjusts the good read beep to sound at a selectable low, medium or high frequency, selectable from the list below. -
Page 27: Good Read Beep Length
LED and Beeper Indicators START FREQUENCY BARCODE 2500 Hz 2600 Hz 2700 Hz 2800 Hz 2900 Hz Good Read Beep Length Specifies the duration of a good read beep. START LENGTH BARCODE 60msec 80msec 100msec 120msec Product Reference Guide... - Page 28 General Features START LENGTH BARCODE 140msec 160msec 180msec 200msec ® 3-10 QuickScan QS6500/QS6500BT...
-
Page 29: Good Read Beep Volume
LED and Beeper Indicators Good Read Beep Volume Selects the beeper volume (loudness) upon a good read beep. There are five selectable volumes, with each volume increment adding approxi- mately five decibels to the previous level. START VOLUME BARCODE Level 1 Level 2 Level 3 Level 4... -
Page 30: Scanning/Imaging Features
General Features Scanning/Imaging Features Scan Mode Selects the scan operating mode for the imager. Selections are: • Good read off — The trigger must be pressed to activate scanning. The light source stops scanning when there is a successful read or no bar code is decoded after the has elapsed. - Page 31 Scanning/Imaging Features Scan Mode — continued START MODE BARCODE Good read off Momentary Alternate Timeout off Stand mode Product Reference Guide 3-13...
-
Page 32: Stand Mode Led
General Features Stand Mode LED When this feature is set to ON while in stand mode, the illumination LEDs go to a dim state after a timeout of reading no labels. When set to OFF in stand mode, the illumination LEDs go off after a timeout of reading no labels. -
Page 33: Inverted Image Scan
Scanning/Imaging Features START DURATION BARCODE 90 Seconds 120 Seconds 150 Seconds 180 Seconds Continue Inverted Image Scan With this option enabled, the imager will scan black/white bar codes with a white/black background. START MODE BARCODE Disable Enable Product Reference Guide 3-15... -
Page 34: Global Features
General Features Global Features Global Minimum Code Length Global minimum length can be set to qualify data entry. The length is defined as the actual bar code data length to be sent. bar code labels with lengths exceeding these limits will be rejected. Ensure that the mini- mum-length setting is no greater than the maximum-length setting;... -
Page 35: Global Maximum Code Length
Global Features Global Maximum Code Length Global maximum length can be set to qualify data entry. The length is defined as the actual bar code data length to be sent. bar code labels with lengths exceeding these limits will be rejected. Ensure that the mini- mum-length setting is no greater than the maximum-length setting;... - Page 36 General Features NOTES ® 3-18 QuickScan QS6500/QS6500BT...
-
Page 37: Chapter 4 Interface Related Features
Chapter 4 Interface Related Features At the time of this writing, the Imager supports the interfaces listed in . Select the desired interface type from the table, then reference Table 4-1 the page number given for the customizable features section associated with each interface. - Page 38 Interface Related Features Table 4-1. Interfaces Supported RS-232 Page Keyboard Wedge Page RS-232 Standard 4-27 Keyboard Wedge I RS-232 Wincor-Nixdorf 4-27 Keyboard Wedge J 4-27 Keyboard Wedge K IBM 4683 Port 5B 4-25 4-27 Keyboard Wedge L IBM 4683 Port 9B 4-25 4-27 Keyboard Wedge M...
- Page 39 Table 4-2. Keyboard Wedge Interface Reference I/F Type PCs Supported PC/XT w/Alternate Key Encoding AT, PS/2 25-286, 30-286, 50, 50Z, 60, 70, 80, 90 & 95 w/Alternate Key Encoding PS/2 25 and 30 w/Alternate Key Encoding PC/XT w/Standard Key Encoding AT, PS/2 25-286, 30-286, 50, 50Z, 60, 70, 80, 90 &...
-
Page 40: Interface Selection
Interface Related Features Interface Selection START STATE BARCODE RS-232 Standard RS-232 Wincor-Nixdorf IBM 4683 Port 5B IBM 4683 Port 9B IBM 4683 Port 17 IBM USB USB Keyboard Keyboard Wedge A Keyboard Wedge B Keyboard Wedge C ® QuickScan QS6500/QS6500 BT... - Page 41 Interface Selection START STATE BARCODE Keyboard Wedge D Keyboard Wedge E Keyboard Wedge F Keyboard Wedge G Keyboard Wedge H Keyboard Wedge I Keyboard Wedge J Keyboard Wedge K Keyboard Wedge L Keyboard Wedge M Keyboard Wedge N Product Reference Guide...
- Page 42 Interface Related Features START STATE BARCODE Keyboard Wedge O Keyboard Wedge P Keyboard Wedge Q Keyboard Wedge R Keyboard Wedge S Keyboard Wedge T Keyboard Wedge U Keyboard Wedge V Keyboard Wedge W Keyboard Wedge X ® QuickScan QS6500/QS6500 BT...
- Page 43 Interface Selection START STATE BARCODE Keyboard Wedge Y Wand Emulation Product Reference Guide...
-
Page 44: Interface Features
Interface Related Features Interface Features Global Interface Features START STATE BARCODE Obey Host Commands Ignore Host Commands Disable Debug Mode Enable Debug Mode Host Transmission Buffers = 1 Host Transmissioin Buffers = 2 ® QuickScan QS6500/QS6500 BT... -
Page 45: Rs-232 Interface Features
Interface Features RS-232 Interface Features START STATE BARCODE 1200 Baud 2400 Baud 4800 Baud 9600 Baud 19200 Baud 38400 Baud 57600 Baud 115200 Baud Product Reference Guide... - Page 46 Interface Related Features RS-232 Interface Features — cont. START STATE BARCODE 7 Data Bits 8 Data Bits 1 Stop Bit 2 Stop Bits Parity = None Parity = Even Parity = Odd ® 4-10 QuickScan QS6500/QS6500 BT...
-
Page 47: Hardware Flow Control
Interface Features RS-232 Interface Features — cont. Hardware Flow Control The imager transmits to the host regardless of Disable Hardware Control — any activity on the CTS line. The CTS signal controls transmission of data Enable CTS Flow Control — to the host. - Page 48 Interface Related Features RS-232 Interface Features — cont. START STATE BARCODE Disable Hardware Control Enable CTS Flow Control Enable CTS Scan Control Inter-Char Delay = No Delay Interchar Delay = 10 msec Interchar Delay = 20 msec Interchar Delay = 30 msec Interchar Delay = 40 msec Interchar Delay...
- Page 49 Interface Features RS-232 Interface Features — cont. START STATE BARCODE Disable Software Flow Control Enable Software Flow Control Product Reference Guide 4-13...
-
Page 50: Host Echo
Interface Related Features RS-232 Interface Features — cont. Host Echo When enabled, this feature passes all data through the imager to the host as it comes in. This feature is used for applications where “daisy chain- ing” of RS-232 devices onto the same cable is necessary. If, for example, one of the devices in the chain is a terminal where someone is entering data while another person is simultaneously scanning a bar code requir- ing transmission to the host, the scanner will wait for the RS-232 chan-... - Page 51 Interface Features RS-232 Interface Features — cont. START STATE BARCODE Disable Host Echo Enable Host Echo Host Echo Quiet Interval = 0msec Host Echo Quiet Interval = 10msec Host Echo Quiet Interval = 20msec Host Echo Quiet Interval = 30msec Host Echo Quiet Interval = 40msec...
-
Page 52: Beep On Ascii Bel
Interface Related Features RS-232 Interface Features — cont. START STATE BARCODE Host Echo Quiet Interval = 100msec Signal Voltage: Normal RS-232 Signal Voltage: No TTL Inversion Invert TTL Beep on ASCII BEL Enables/disables ability of imager to beep (sound a good read tone) on receiving an ASCII BEL (07 hex). - Page 53 Interface Features • Enable for label transmission — the imager expects an ACK/NAK response from the host when a label is sent • Enable for host-command acknowledge — the imager will respond with ACK/NAK when the host sends a command •...
-
Page 54: Ack Character
Interface Related Features RS-232 Interface Features — cont. ACK Character START MODE BARCODE Sets the ACK character from the set of ASCII charac- ters or any hex value from 0 to FF. To configure this feature, scan the “START” bar code above to place the unit in Programming Mode, then the “Set ACK Character,”... -
Page 55: Nak Character
Interface Features RS-232 Interface Features — cont. NAK Character START MODE BARCODE Sets the NAK character from the set of ASCII charac- ters or any hex value from 0 to FF. To configure this feature, scan the “START” bar code above to place the unit in Programming Mode, then the “Set NAK Character,”... -
Page 56: Retry On Ack Nak Timeout
Interface Related Features RS-232 Interface Features — cont. Retry on ACK NAK Timeout Enables/disables retry after the configurable ACK NAK Timeout Value (set in the following feature) has expired. START STATE BARCODE Disable Retry on ACK NAK Timeout Enable Retry on ACK NAK Timeout ®... -
Page 57: Ack Nak Timeout Value
Interface Features RS-232 Interface Features — cont. ACK NAK Timeout Value START MODE BARCODE This item specifies the time the imager will wait for an ACK character from the host following a label trans- mission. 0 = Infinite timeout 1 - 75 = Timeout in 200-millisecond increments To configure this feature, scan the “START”... -
Page 58: Ack Nak Retry Count
Interface Related Features RS-232 Interface Features — cont. ACK NAK Retry Count START MODE BARCODE This feature sets the number of times for the imager to retry a label transmission under a retry condition. 0 = No retry 1 - 254 = Retry for the specified number of times 255 = Retry forever To configure this feature, scan the “START”... -
Page 59: Ack Nak Error Handling
Interface Features RS-232 Interface Features — cont. ACK NAK Error Handling This item specifies the method the imager will use to handle errors detected while waiting to receive the ACK character from the host. Errors include unrecognized host commands and communication errors such as parity or framing errors. -
Page 60: Transmission Failure Indication
Interface Related Features RS-232 Interface Features — cont. Transmission Failure Indication Enables/disables bad-label indication upon transmission failure. START STATE BARCODE Disable Transmission Error Indication Enable Transmission Error Indication ® 4-24 QuickScan QS6500/QS6500 BT... -
Page 61: Ibm-Usb Interface Features
Interface Features IBM-USB Interface Features IBM-USB Device usage The IBM-USB protocol allows for the imager to be identified as one of two different types of bar code scanners. Depending on what other scan- ners you may already have connected to a IBM-USB POS, you may need to change this setting to enable all devices to communicate. -
Page 62: Ibm
Interface Related Features IBM Transmit Labels in Code 39 Format This feature enables/disables imager's ability to set a symbology identifier for a specified label to Code 39 before transmitting that label data to an IBM host. This applies to: Code 128, Coda- bar, and Code 93 for IBM USB;... -
Page 63: Keyboard Wedge/Usb Keyboard
Interface Features Keyboard Wedge/USB Keyboard As a keyboard interface, the imager supports most popular PCs and IBM terminals. The installation of the wedge is a fairly simple process that doesn’t require any changes of software or hardware. All of the options in this section apply to the Key- board Wedge, however, only Keyboard Layout Caps... - Page 64 Interface Related Features START STATE BARCODE Portugal Spain Sweden Switzerland Japan 106 Key Hungary Czech Slovakia Romania ® 4-28 QuickScan QS6500/QS6500 BT...
- Page 65 Interface Features Keyboard Wedge/USB Keyboard — cont. Caps Lock State Specifies which format the imager sends character data. START STATE BARCODE Disable Caps Lock Caps Lock “ON” Shift Lock “ON” Product Reference Guide 4-29...
- Page 66 Interface Related Features Keyboard Wedge/USB Keyboard — cont. Power-On Simulation This feature does not apply to the USB Keyboard interface. NOTE All PCs check the keyboard status during the power-on Selftest. It is rec- ommended that you enable this function if you are working without a keyboard installation.
- Page 67 Interface Features Keyboard Wedge/USB Keyboard — cont. START STATE BARCODE Disable Power-on Simulation Enable Power-on Simulation Disable Control Characters Enable Transmission of Control Characters Enable Function Key Mapping Product Reference Guide 4-31...
- Page 68 Interface Related Features Keyboard Wedge/USB Keyboard — cont. Wedge Quiet Interval This feature does not apply to the USB Keyboard interface. NOTE Quiet Interval is the amount of time to look for keyboard activity before the imager breaks the keyboard connection in order to transmit data to the host..
- Page 69 Interface Features Keyboard Wedge/USB Keyboard — cont. Intercharacter Delay This feature does not apply to the USB Keyboard interface. NOTE START MODE BARCODE This delay is inserted after each data character trans- mitted. If the transmission speed is too high, the sys- tem may not be able to receive all characters.
-
Page 70: Wand Emulation
Interface Related Features Wand Emulation Supported Symbologies The Wand Emulation interface will transmit bar code data as a wand device would. This interface will transmit the following bar code sym- bologies: • UPC/EAN • UPC/EAN with addons • Code 39 •... -
Page 71: Bar/Space Polarity
Interface Features Wand Emulation — cont. Bar/Space Polarity Low/High — Black will be transmitted as a low voltage level (0V) and space as high level (+5). High/Low — Black will be transmitted as a high voltage level (+5) and space as low level (0V). Initial Polarity The idle polarity of the wand decode device can be set with the following options:... -
Page 72: Signal Speed
Interface Related Features Wand Emulation — cont. Signal Speed The speed of the transmission can be set. This selects the width of the minimum narrow bar. 330 microseconds 660 microseconds Transmit Trailing Noise The transmission of noise pulses after the label may be enabled or dis- abled. -
Page 73: Transmit Leading Noise
Interface Features Wand Emulation — cont. Transmit Leading Noise The transmission of noise pulses before the bar code may be enabled or disabled. Symbology Conversion Wand Emulation can convert all bar codes to a single symbology. Choices are: No Conversion Convert to Code 39 / Code 39 Full ASCII Convert to Code 128 START... - Page 74 Interface Related Features NOTES ® 4-38 QuickScan QS6500/QS6500 BT...
-
Page 75: Chapter 5 Data Editing
Chapter 5 Data Editing Data Editing Overview It is not recommended to use these features with IBM 46xx or IBM interfaces. CAUTION When a bar code is scanned, additional information can be sent to the host computer along with the bar code data. This combination of bar code data and supplementary user-defined data is called a “message string.”... -
Page 76: Please Keep In Mind
Data Editing Please Keep In Mind... • Modifying a message string is not a mandatory requirement. Data editing is sophisticated feature allowing highly customizable out- put for advanced users. Factory default settings for data editing is typically set to NONE. •... - Page 77 Data Editing Overview Prefix/Suffix — continued Example: Setting a Prefix In this example, we’ll set a prefix for all symbologies. 1. Determine which ASCII character(s) are to be added to scanned bar code data. In this example, we’ll add a dollar sign (‘$’) as a pre- fix.
- Page 78 Data Editing Prefix/Suffix — continued START MODE BARCODE Sets up to 22 characters each from the set of ASCII characters or any hex value from 0 to FF. To config- ure this feature, scan the “START” bar code above to place the unit in Programming Mode, then the “Set Prefix”...
-
Page 79: Preamble/Postamble
Data Editing Overview Preamble/Postamble Similar to the Prefix/Suffix, up to 22 ASCII characters may be added as a preamble (in a position before the bar code data) and/or as a postamble (in a position following the bar code data) as indicated in Figure 5-3 Figure 5-3. - Page 80 Data Editing Preamble/Postamble — continued START MODE BARCODE Sets up to 22 characters each from the set of ASCII characters or any hex value from 0 to FF. To config- ure this feature, scan the “START” bar code above to place the unit in Programming Mode, then the “SET PREAMBLE”...
- Page 81 Data Editing Overview START MODE BARCODE Transmit Postamble Product Reference Guide...
-
Page 82: Symbology, I.d. And Code Length
Data Editing Symbology, I.D. and Code Length Useful information, such as the scanned bar code’s symbology type, code I.D. and character length can all be variously added to the message string. The following are descriptions for each of these elements: This function is used to identify and display the Symbology —... - Page 83 Data Editing Overview Figure 5-4. Code Data Elements Code Length Transmission: A number of data digits can be transmitted before the code data. The total length of the bar code is the number of characters of bar code data without truncated leading or ending digits.
- Page 84 Data Editing Symbology, I.D. and Code Length — continued START MODE BARCODE Disable Symbology Name Enable Symbology Name Code I.D. Position: Before Bar Code Data Code I.D. Position: After Bar Code Data Code I.D. Transmission: Disable Code I.D. Transmission: Proprietary I.D.
-
Page 85: Data Group Characters
Data Editing Overview Data Group Characters Options are available to insert characters in up to four positions between the scanned bar code data. This is accomplished by selecting the position and up to 22 ASCII characters for each for Data Group 1, Data Group 2, Data Group 3 and Data Group 4 settings. - Page 86 Data Editing 2. Scan the START bar code. 3. Next, scan the SET DATA GROUP 1 CHARACTER bar code. 4. Reference , to find the hex value Appendix A, ASCII Conversion Chart assigned to each desired character. The corresponding hex number for the ‘+’...
- Page 87 Data Editing Overview Data Group Characters — continued START MODE BARCODE Set Group 2 Character(s) Set Group 3 Position Set Group 3 Character(s) Set Group 4 Position Set Group 4 Character(s) Product Reference Guide 5-13...
-
Page 88: Case Conversion
Data Editing Case Conversion This feature can convert scanned bar code data to either all lower case or all upper case characters. Case conversion affects ONLY scanned bar code data, and does not affect Code I.D., Preamble, Postamble, or other appended data. NOTE START MODE... - Page 89 Chapter 6 Symbologies The imager supports the following symbologies (bar code types). Options for each symbology are included in this chapter. ·UPC-A ·Interleaved 2 of 5 ·UPC-E ·Industrial 2 of 5 ·EAN-13 ·Matrix 2 of 5 (Eur) ·EAN-8 ·Codabar ·GTIN ·Code 93 ·RSS-14 ·Code 11...
-
Page 90: Upc-A
Symbologies UPC-A The following options apply to the UPC-A symbology. Disable/Enable UPC-A When disabled, the imager will not read UPC-A bar codes. Checksum Transmission Enable this option to transmit the checksum along with UPC-A bar code data. Expand UPC-A to EAN-13 Enable this option to add a leading zero to a UPC-A bar code which ‘expands’... - Page 91 UPC-A UPC-A — continued START STATE BARCODE Disable UPC-A Enable UPC-A Don’t Send Checksum Send Checksum No Expansion Expand UPC-A to EAN-13 Product Reference Guide...
-
Page 92: Truncate Leading/Ending
Symbologies UPC-A — continued Truncate Leading/Ending The leading or ending digits of bar code data characters can be trun- cated. Select from 00 (no truncation) to 15. The imager will beep instead of reading anything when the truncate value is more than the bar code data digits or the truncate leading value overlaps the truncate end- ing value. -
Page 93: Code I.d. Selection
UPC-A UPC-A — continued Code I.D. Selection The Code I.D. for this symbology consists of one or two user-selectable ASCII characters. It can be appended previous to or following the trans- mitted UPC-A bar code data depending on how this feature is enabled. Example: Setting the UPC-A Code I.D. - Page 94 Symbologies UPC-A — continued START STATE BARCODE Set UPC-A Code I.D. Character(s) DEFAULT SETTING FOR THIS FEATURE: A (41 hex) Select 0000 to disable Code ID for this symbology only. ® QuickScan QS6500/QS6500 BT...
-
Page 95: Upc-A Data Group Characters
UPC-A UPC-A — continued UPC-A Data Group Characters Once you’ve pre-set your desired Data Group Characters using the Data feature found in , you can choose Group Characters Chapter 5, Data Editing to output up to two of those pre-sets whenever a UPC-A bar code is scanned. -
Page 96: Upc-A - Continued
Symbologies UPC-A — continued START STATE BARCODE Set UPC-A Data Group(s) DEFAULT SETTING FOR THIS FEATURE: None (00) ® QuickScan QS6500/QS6500 BT... -
Page 97: Add-Ons
UPC-A UPC-A — continued Add-ons Add-ons (or supplemental characters) are commonly added to the end of UPC-A bar codes. The imager will read the add-ons if they are enabled and in the field of view. Three add-on types are supported: 2-digit, 5- digit and UCC/EAN 128. - Page 98 Symbologies UPC-A — continued START STATE BARCODE None 2-Digits 5-Digits 2 & 5-Digits UCC/EAN 128 2-Digit & UCC/ EAN 128 5-Digit & UCC/ EAN 128 ® 6-10 QuickScan QS6500/QS6500 BT...
-
Page 99: Upc-E
UPC-E UPC-E The following options apply to the UPC-E symbology. Disable/Enable UPC-E When disabled, the imager will not read UPC-E bar codes. Checksum Transmission Enable this option to transmit the checksum along with UPC-E bar code data. Truncate/Expand None — Turns off the truncation/expansion features listed below. - Page 100 Symbologies UPC-E — continued START STATE BARCODE Disable UPC-E Enable UPC-E Don’t Send Checksum Send Checksum Truncate NSD/ Expand to EAN-13: NONE Truncate NSD Expand UPC-E to EAN-13 Expand UPC-E to UPC-A ® 6-12 QuickScan QS6500/QS6500 BT...
-
Page 101: Truncate Leading/Ending
UPC-E UPC-E — continued Truncate Leading/Ending The leading or ending digits of bar code data characters can be trun- cated. Select from 00 (no truncation) to 15. The imager will beep instead of reading anything when the truncate value is more than the bar code data digits or the truncate leading value overlaps the truncate end- ing value. -
Page 102: Code I.d. Selection
Symbologies UPC-E — continued Code I.D. Selection The Code I.D. for this symbology consists of one or two user-selectable ASCII characters. It can be appended previous to or following the trans- mitted UPC-E bar code data depending on how this feature is enabled. Example: Setting the UPC-E Code I.D. - Page 103 UPC-E UPC-E — continued START STATE BARCODE Set UPC-E Code I.D. Character(s) DEFAULT SETTING FOR THIS FEATURE: E (45 hex) Select 0000 to disable Code ID for this symbology only. Product Reference Guide 6-15...
-
Page 104: Upc-E Data Group Characters
Symbologies UPC-E — continued UPC-E Data Group Characters Once you’ve pre-set your desired Data Group Characters using the Data feature found in , you can choose Group Characters Chapter 5, Data Editing to output up to two of those pre-sets whenever a UPC-E bar code is scanned. - Page 105 UPC-E UPC-E — continued START STATE BARCODE Set UPC-E Data Group(s) DEFAULT SETTING FOR THIS FEATURE: None (00) Product Reference Guide 6-17...
-
Page 106: Add-Ons
Symbologies UPC-E — continued Add-ons Add-ons (or supplemental characters) are commonly added to the end of UPC-E bar codes. The imager will read the add-ons if they are enabled and in the field of view. Three add-on types are supported: 2-digit, 5- digit and UCC/EAN 128. - Page 107 UPC-E UPC-E — continued START STATE BARCODE None 2-Digits 5-Digits 2 & 5-Digits UCC/EAN 128 2-Digit & UCC/ EAN 128 5-Digit & UCC/ EAN 128 Product Reference Guide 6-19...
-
Page 108: Disable/Enable Ean-13
Symbologies EAN-13 The following options apply to the EAN-13 symbology. Disable/Enable EAN-13 When disabled, the imager will not read EAN-13 bar codes. Checksum Transmission Enable this option to transmit the checksum along with EAN-13 bar code data. ISBN/ISSN When enabled, this feature truncates the leading three digits from labels that contain ISBN (International Standard Book Number) and ISSN (International Standard Serial Number) numbers. - Page 109 EAN-13 EAN-13 — continued START STATE BARCODE Disable EAN-13 Enable EAN-13 Don’t Send Checksum Send Checksum Disable ISBN/ ISSN Enable ISBN/ ISSN Product Reference Guide 6-21...
-
Page 110: Ean-13 — Continued
Symbologies EAN-13 — continued ISBN ID Setting Sets the Code ID used for labels that are translated to ISBN/ISSN num- bers. The Code I.D. for this symbology consists of one or two user- selectable ASCII characters. It can be appended previous to or following the transmitted bar code data depending on how this feature is enabled. - Page 111 EAN-13 EAN-13 — continued START STATE BARCODE Set ISBN Code I.D. Character(s) DEFAULT SETTING FOR THIS FEATURE: I (49 hex) Select 0000 to disable Code ID for this symbology only. Product Reference Guide 6-23...
-
Page 112: Truncate Leading/Ending
Symbologies EAN-13 — continued Truncate Leading/Ending The leading or ending digits of bar code data characters can be trun- cated. Select from 00 (no truncation) to 15. The imager will beep instead of reading anything when the truncate value is more than the bar code data digits or the truncate leading value overlaps the truncate end- ing value. -
Page 113: Code I.d. Selection
EAN-13 EAN-13 — continued Code I.D. Selection The Code I.D. for this symbology consists of one or two user-selectable ASCII characters. It can be appended previous to or following the trans- mitted EAN-13 bar code data depending on how this feature is enabled. Example: Setting the EAN-13 Code I.D. - Page 114 Symbologies EAN-13 — continued START STATE BARCODE Set EAN-13 Code I.D. Character(s) DEFAULT SETTING FOR THIS FEATURE: F (46 hex) Select 0000 to disable Code ID for this symbology only. ® 6-26 QuickScan QS6500/QS6500 BT...
-
Page 115: Ean-13 Data Group Characters
EAN-13 EAN-13 — continued EAN-13 Data Group Characters Once you’ve pre-set your desired Data Group Characters using the Data feature found in , you can choose Group Characters Chapter 5, Data Editing to output up to two of those pre-sets whenever an EAN-13 bar code is scanned. - Page 116 Symbologies EAN-13 — continued START STATE BARCODE Set EAN-13 Data Group(s) DEFAULT SETTING FOR THIS FEATURE: None (00) ® 6-28 QuickScan QS6500/QS6500 BT...
-
Page 117: Add-Ons
EAN-13 EAN-13 — continued Add-ons Add-ons (or supplemental characters) are commonly added to the end of EAN-13 bar codes. The imager will read the add-ons if they are enabled and in the field of view. Three add-on types are supported: 2-digit, 5- digit and UCC/EAN 128. - Page 118 Symbologies EAN-13 — continued START STATE BARCODE None 2-Digits 5-Digits 2 & 5-Digits UCC/EAN 128 2-Digit & UCC/ EAN 128 5-Digit & UCC/ EAN 128 ® 6-30 QuickScan QS6500/QS6500 BT...
-
Page 119: Disable/Enable Ean-8
EAN-8 EAN-8 The following options apply to the EAN-8 symbology. Disable/Enable EAN-8 When disabled, the imager will not read EAN-8 bar codes. Checksum Transmission Enable this option to transmit the checksum along with EAN-8 bar code data. START STATE BARCODE Disable EAN-8 Enable EAN-8 Don’t Send... -
Page 120: Truncate/Expand
Symbologies EAN-8 — continued Truncate/Expand None — Turns off the truncation/expansion features listed below. Has no affect on the feature. Truncate Leading/Ending To turn it off, set leading/ending values to 00. NOTE The Number System Digit (NSD) which is usually a Truncate NSD —... -
Page 121: Truncate Leading/Ending
EAN-8 EAN-8 — continued Truncate Leading/Ending The leading or ending digits of bar code data characters can be trun- cated. Select from 00 (no truncation) to 15. The imager will beep instead of reading anything when the truncate value is more than the bar code data digits or the truncate leading value overlaps the truncate end- ing value. -
Page 122: Code I.d. Selection
Symbologies EAN-8 — continued Code I.D. Selection The Code I.D. for this symbology consists of one or two user-selectable ASCII characters. It can be appended previous to or following the trans- mitted EAN-8 bar code data depending on how this feature is enabled. Example: Setting the EAN-8 Code I.D. - Page 123 EAN-8 EAN-8 — continued START STATE BARCODE Set EAN-8 Code I.D. DEFAULT SETTING FOR THIS FEATURE: FF Character(s) (4646 hex) Select 0000 to disable Code ID for this symbology only. Product Reference Guide 6-35...
-
Page 124: Ean-8 Data Group Characters
Symbologies EAN-8 — continued EAN-8 Data Group Characters Once you’ve pre-set your desired Data Group Characters using the Data feature found in , you can choose Group Characters Chapter 5, Data Editing to output up to two of those pre-sets whenever an EAN-8 bar code is scanned. - Page 125 EAN-8 EAN-8 — continued START STATE BARCODE Set EAN-8 Data Group(s) DEFAULT SETTING FOR THIS FEATURE: None (00) Product Reference Guide 6-37...
-
Page 126: Add-Ons
Symbologies EAN-8 — continued Add-ons Add-ons (or supplemental characters) are commonly added to the end of EAN-8 bar codes. The imager will read the add-ons if they are enabled and in the field of view. Three add-on types are supported: 2-digit, 5- digit and UCC/EAN 128. - Page 127 EAN-8 EAN-8 — continued START STATE BARCODE None 2-Digits 5-Digits 2 & 5-Digits UCC/EAN 128 2-Digit & UCC/ EAN 128 5-Digit & UCC/ EAN 128 Product Reference Guide 6-39...
-
Page 128: Gtin
Symbologies GTIN The following options apply to the GTIN label data format. Disable/Enable GTIN When this feature is enabled, the imager will translate UPC/EAN labels to the 14 digit GTIN format. Code I.D. Selection The Code I.D. for this symbology consists of one or two user-selectable ASCII characters. - Page 129 GTIN 8. The resulting message string for scanned GTIN labels would appear as follows: Scanned bar code data: 0123456789123 Resulting message string output: G0123456789123 GTIN — continued START STATE BARCODE Disable GTIN Enable GTIN Set GTIN Code I.D. Character(s) DEFAULT SETTING FOR THIS FEATURE: G (47 hex) Select 0000 to disable Code ID for this symbology only.
-
Page 130: Disable/Enable Rss-14
Symbologies RSS-14 The following options apply to the RSS-14 symbology. Disable/Enable RSS-14 When this feature is disabled, the imager will not read RSS-14 bar codes. Checksum Transmission Enable this option to transmit the checksum along with RSS-14 bar code data. UCC/EAN 128 Emulation When enabled, RSS-14 bar codes will be translated to the UCC/EAN 128 label data format. - Page 131 RSS-14 RSS-14 — continued START STATE BARCODE Disable RSS-14 Enable RSS-14 Don’t Send Checksum Send Checksum Disable UCC/EAN 128 Emulation Enable UCC/EAN 128 Emulation Product Reference Guide 6-43...
-
Page 132: Truncate Leading/Ending
Symbologies RSS-14 — continued Truncate Leading/Ending The leading or ending digits of bar code data characters can be trun- cated. Select from 00 (no truncation) to 15. The imager will beep instead of reading anything when the truncate value is more than the bar code data digits or the truncate leading value overlaps the truncate end- ing value. -
Page 133: Code I.d. Selection
RSS-14 RSS-14 — continued Code I.D. Selection The Code I.D. for this symbology consists of one or two user-selectable ASCII characters. It can be appended previous to or following the trans- mitted RSS-14 bar code data depending on how this feature is enabled. Example: Setting the RSS-14 Code I.D. - Page 134 Symbologies RSS-14 — continued START STATE BARCODE Set RSS-14 Code I.D. DEFAULT SETTING FOR THIS FEATURE: R4 Character(s) (52hex, 34 hex) Select 0000 to disable Code ID for this symbology only. ® 6-46 QuickScan QS6500/QS6500 BT...
-
Page 135: Rss-14 Data Group Characters
RSS-14 RSS-14 — continued RSS-14 Data Group Characters Once you’ve pre-set your desired Data Group Characters using the Data feature found in , you can choose Group Characters Chapter 5, Data Editing to output up to two of those pre-sets whenever an RSS-14 bar code is scanned. - Page 136 Symbologies RSS-14 — continued START STATE BARCODE Set RSS-14 Data Group(s) DEFAULT SETTING FOR THIS FEATURE: None (00) ® 6-48 QuickScan QS6500/QS6500 BT...
-
Page 137: Rss Expanded
RSS Expanded RSS Expanded The following options apply to the RSS Expanded symbology. Disable/Enable RSS Expanded When this feature is disabled, the imager will not read RSS Expanded bar codes. UCC/EAN 128 Emulation When enabled, RSS Expanded bar codes will be translated to the UCC/ EAN 128 label data format. -
Page 138: Minimum/Maximum Code Length
Symbologies Minimum/Maximum Code Length Many symbologies have their own maximum and minimum code length, which can be set to qualify data entry. The length is defined as the actual bar code data length to be sent. Labels with lengths below the minimum or above the maximum will be rejected. -
Page 139: Truncate Leading/Ending
RSS Expanded RSS Expanded — continued Truncate Leading/Ending The leading or ending digits of bar code data characters can be trun- cated. Select from 00 (no truncation) to 15. The imager will beep instead of reading anything when the truncate value is more than the bar code data digits or the truncate leading value overlaps the truncate end- ing value. -
Page 140: Code I.d. Selection
Symbologies RSS Expanded — continued Code I.D. Selection The Code I.D. for this symbology consists of one or two user-selectable ASCII characters. It can be appended previous to or following the trans- mitted RSS Expanded bar code data depending on how this feature is enabled. - Page 141 RSS Expanded RSS Expanded — continued START STATE BARCODE Set RSS Expanded Code I.D. DEFAULT SETTING FOR THIS FEATURE: RX Character(s) (52 hex 58 hex) Select 0000 to disable Code ID for this symbology only. Product Reference Guide 6-53...
-
Page 142: Rss Expanded Data Group Characters
Symbologies RSS Expanded — continued RSS Expanded Data Group Characters Once you’ve pre-set your desired Data Group Characters using the Data feature found in , you can choose Group Characters Chapter 5, Data Editing to output up to two of those pre-sets whenever an RSS Expanded bar code is scanned. - Page 143 RSS Expanded RSS Expanded — continued START STATE BARCODE Set RSS Expanded Data Group(s) DEFAULT SETTING FOR THIS FEATURE: None (00) Product Reference Guide 6-55...
-
Page 144: Rss Limited
Symbologies RSS Limited The following options apply to the RSS Limited symbology. Disable/Enable RSS Limited When this feature is disabled, the imager will not read RSS Limited bar codes. Checksum Transmission Enable this option to transmit the checksum along with RSS Limited bar code data. - Page 145 RSS Limited RSS Limited — continued START STATE BARCODE Disable RSS Limited Enable Limited Don’t Send Checksum Send Checksum Disable UCC/EAN 128 Emulation Enable UCC/EAN 128 Emulation Product Reference Guide 6-57...
-
Page 146: Truncate Leading/Ending
Symbologies RSS Limited — continued Truncate Leading/Ending The leading or ending digits of bar code data characters can be trun- cated. Select from 00 (no truncation) to 15. The imager will beep instead of reading anything when the truncate value is more than the bar code data digits or the truncate leading value overlaps the truncate end- ing value. -
Page 147: Code I.d. Selection
RSS Limited RSS Limited — continued Code I.D. Selection The Code I.D. for this symbology consists of one or two user-selectable ASCII characters. It can be appended previous to or following the trans- mitted RSS Limited bar code data depending on how this feature is enabled. - Page 148 Symbologies Resulting message string output: RL0123456789123 RSS Limited — continued START STATE BARCODE Set RSS Limited Code I.D. DEFAULT SETTING FOR THIS FEATURE: RL Character(s) (52hex, 4C hex) Select 0000 to disable Code ID for this symbology only. ® 6-60 QuickScan QS6500/QS6500 BT...
-
Page 149: Rss Limited Data Group Characters
RSS Limited RSS Limited — continued RSS Limited Data Group Characters Once you’ve pre-set your desired Data Group Characters using the Data feature found in , you can choose Group Characters Chapter 5, Data Editing to output up to two of those pre-sets whenever an RSS Limited bar code is scanned. - Page 150 Symbologies RSS Limited — continued START STATE BARCODE Set RSS Limited Data Group(s) DEFAULT SETTING FOR THIS FEATURE: None (00) ® 6-62 QuickScan QS6500/QS6500 BT...
-
Page 151: Code 39
Code 39 Code 39 The following options apply to the Code 39 symbology. Disable/Enable Code 39 When this feature is disabled, the imager will not read Code 39 bar codes. Checksum Verification When enabled, the imager will verify the checksum of the labels. Turn this option on only when a checksum is present in the Code 39 labels. - Page 152 Symbologies Code 39 — continued START STATE BARCODE Disable Code 39 Enable Code 39 Disable Checksum Verification Enable Checksum Verification Disable Checksum Transmission Enable Checksum Transmission ® 6-64 QuickScan QS6500/QS6500 BT...
-
Page 153: Minimum/Maximum Code Length
Code 39 Code 39 — continued Minimum/Maximum Code Length Many symbologies have their own maximum and minimum code length, which can be set to qualify data entry. The length is defined as the actual bar code data length to be sent. Labels with lengths below the minimum or above the maximum will be rejected. -
Page 154: Truncate Leading/Ending
Symbologies Code 39 — continued Truncate Leading/Ending The leading or ending digits of bar code data characters can be trun- cated. Select from 00 (no truncation) to 15. The imager will beep instead of reading anything when the truncate value is more than the bar code data digits or the truncate leading value overlaps the truncate end- ing value. -
Page 155: Code I.d. Selection
Code 39 Code 39 — continued Code I.D. Selection The Code I.D. for this symbology consists of one or two user-selectable ASCII characters. It can be appended previous to or following the trans- mitted Code 39 bar code data depending on how this feature is enabled. Example: Setting the Code 39 Code I.D. - Page 156 Symbologies Code 39 — continued START STATE BARCODE Set Code 39 Code I.D. DEFAULT SETTING FOR THIS FEATURE: * Character(s) (2A hex) Select 0000 to disable Code ID for this symbology only. ® 6-68 QuickScan QS6500/QS6500 BT...
-
Page 157: Code 39 Data Group Characters
Code 39 Code 39 — continued Code 39 Data Group Characters Once you’ve pre-set your desired Data Group Characters using the Data feature found in , you can choose Group Characters Chapter 5, Data Editing to output up to two of those pre-sets whenever a Code 39 bar code is scanned. - Page 158 Symbologies Code 39 — continued START STATE BARCODE Set Code 39 Data Group(s) DEFAULT SETTING FOR THIS FEATURE: None (00) ® 6-70 QuickScan QS6500/QS6500 BT...
-
Page 159: Format
Code 39 Code 39 — continued Format Use this feature to select standard or Full ASCII Code 39, which is an enhanced set of Code 39 and uses a total of 128 characters to represent Full ASCII code. Each Full ASCII Code 39 character is a combination of one of the characters +,%, $ and / with an uppercase alphabetical charac- ter (A to Z). - Page 160 Symbologies Code 39 — continued START STATE BARCODE Standard Code 39 Full ASCII Code 39 Disable Append Enable Append Disable Start/End Transmission Enable Start/End Transmission ® 6-72 QuickScan QS6500/QS6500 BT...
-
Page 161: Pharmacode 39
Pharmacode 39 Pharmacode 39 The following options apply to the Pharmacode 39 symbology. Disable/Enable Pharmacode 39 When this feature is disabled, the imager will not read Pharmacode 39 bar codes. Leading ‘A’ When this option is enabled, a letter A is appended to the leading end of Pharmacode 39 bar code data. -
Page 162: Minimum/Maximum Code Length
Symbologies Pharmacode 39 — continued Minimum/Maximum Code Length Many symbologies have their own maximum and minimum code length, which can be set to qualify data entry. The length is defined as the actual bar code data length to be sent. Labels with lengths below the minimum or above the maximum will be rejected. -
Page 163: Truncate Leading/Ending
Pharmacode 39 Pharmacode 39 — continued Truncate Leading/Ending The leading or ending digits of bar code data characters can be trun- cated. Select from 00 (no truncation) to 15. The imager will beep instead of reading anything when the truncate value is more than the bar code data digits or the truncate leading value overlaps the truncate end- ing value. -
Page 164: Code I.d. Selection
Symbologies Pharmacode 39 — continued Code I.D. Selection The Code I.D. for this symbology consists of one or two user-selectable ASCII characters. It can be appended previous to or following the trans- mitted Pharmacode 39 bar code data depending on how this feature is enabled. - Page 165 Pharmacode 39 Pharmacode 39 — continued START STATE BARCODE Pharmacode 39 Code I.D. Character(s) DEFAULT SETTING FOR THIS FEATURE: A (41 hex) Select 0000 to disable Code ID for this symbology only. Product Reference Guide 6-77...
-
Page 166: Pharmacode 39 Data Group Characters
Symbologies Pharmacode 39 — continued Pharmacode 39 Data Group Characters Once you’ve pre-set your desired Data Group Characters using the Data feature found in , you can choose Group Characters Chapter 5, Data Editing to output up to two of those pre-sets whenever a Pharmacode 39 bar code is scanned. - Page 167 Pharmacode 39 Pharmacode 39 — continued START STATE BARCODE Pharmacode 39 Data Group(s) DEFAULT SETTING FOR THIS FEATURE: None (00) Product Reference Guide 6-79...
-
Page 168: Code 128
Symbologies Code 128 The following options apply to the Code 128 symbology. Disable/Enable Code 128 When this feature is disabled, the imager will not read Code 128 bar codes. Checksum Verification When enabled, the imager will verify the checksum of the labels. Checksum Transmit Enable this option to transmit the checksum with scanned bar code data. - Page 169 Code 128 Code 128 — continued START STATE BARCODE Disable Code 128 Enable Code 128 Disable Checksum Verification Enable Checksum Verification Disable Checksum Transmission Enable Checksum Transmission Disable Func- tion Code Transmission Enable Function Code Transmission Product Reference Guide 6-81...
-
Page 170: Minimum/Maximum Code Length
Symbologies Code 128 — continued Minimum/Maximum Code Length Many symbologies have their own maximum and minimum code length, which can be set to qualify data entry. The length is defined as the actual bar code data length to be sent. Labels with lengths below the minimum or above the maximum will be rejected. -
Page 171: Truncate Leading/Ending
Code 128 Code 128 — continued Truncate Leading/Ending The leading or ending digits of bar code data characters can be trun- cated. Select from 00 (no truncation) to 15. The imager will beep instead of reading anything when the truncate value is more than the bar code data digits or the truncate leading value overlaps the truncate end- ing value. -
Page 172: Code I.d. Selection
Symbologies Code 128 — continued Code I.D. Selection The Code I.D. for this symbology consists of one or two user-selectable ASCII characters. It can be appended previous to or following the trans- mitted Code 128 bar code data depending on how this feature is enabled. - Page 173 Code 128 Code 128 — continued START STATE BARCODE Set Code 128 Code I.D. Character(s) DEFAULT SETTING FOR THIS FEATURE: # (23 hex) Select 0000 to disable Code ID for this symbology only. Product Reference Guide 6-85...
-
Page 174: Code 128 Data Group Characters
Symbologies Code 128 — continued Code 128 Data Group Characters Once you’ve pre-set your desired Data Group Characters using the Data feature found in , you can choose Group Characters Chapter 5, Data Editing to output up to two of those pre-sets whenever a Code 128 bar code is scanned. - Page 175 Code 128 Code 128 — continued START STATE BARCODE Set Code 128 Data Group(s) DEFAULT SETTING FOR THIS FEATURE: None (00) Product Reference Guide 6-87...
-
Page 176: Format As Ean-128
Symbologies EAN-128 Format as EAN-128 When this feature is enabled, the imager will translate Code 128 data strings starting with "FNC1" character to the UCC/EAN-128 data for- mat. The first "FNC1" character will be translated to "]C1", and any following "FNC1" characters will be translated to "<GS>(1Dhex)". Append When the function is enabled, the imager will store, but not immediately show data read as long as bar codes include the FNC2 code. -
Page 177: Ucc/Ean-128 Id Setting
EAN-128 EAN-128 — continued UCC/EAN-128 ID setting Specifies UCC/EAN-128 label ID (2 bytes) to be added to label data. START MODE BARCODE UCC/EAN-128 ID Setting DEFAULT SETTING FOR THIS FEATURE: None Product Reference Guide 6-89... -
Page 178: Interleaved 2 Of 5
Symbologies Interleaved 2 of 5 The following options apply to the Interleaved 2 of 5 (I 2 of 5) symbol- ogy. Disable/Enable Interleaved 2 of 5 When this feature is disabled, the imager will not read Interleaved 2 of 5 bar codes. - Page 179 Interleaved 2 of 5 Interleaved 2 of 5 — continued START STATE BARCODE Disable Interleaved 2 of 5 Enable Interleaved 2 of 5 Disable Checksum Verification Enable Checksum Verification Disable Checksum Transmission Enable Checksum Transmission Product Reference Guide 6-91...
-
Page 180: Fixed Length Control
Symbologies Interleaved 2 of 5 — continued Fixed Length Control One or two fixed lengths may be configured for Interleaved 2 of 5. Lengths must be even and must include any check digit that may be in the bar code. If Length 1 or Length 2 are set to non-zero values, the min- imum and maximum length settings are ignored. - Page 181 Interleaved 2 of 5 Interleaved 2 of 5 — continued START MODE BARCODE DEFAULT SETTINGS FOR THIS FEATURE: 00 (None) Fixed Length 1 Scan the bar code above, then two digits from Appendix B, representing the desired length. Alpha-Numeric Pad Fixed Length 2 Scan the bar code above, then two digits from Appendix B,...
-
Page 182: Minimum/Maximum Code Length
Symbologies Interleaved 2 of 5 — continued Minimum/Maximum Code Length Many symbologies have their own maximum and minimum code length, which can be set to qualify data entry. The length is defined as the actual bar code data length to be sent. Labels with lengths below the minimum or above the maximum will be rejected. -
Page 183: Truncate Leading/Ending
Interleaved 2 of 5 Interleaved 2 of 5 — continued Truncate Leading/Ending The leading or ending digits of bar code data characters can be trun- cated. Select from 00 (no truncation) to 15. The imager will beep instead of reading anything when the truncate value is more than the bar code data digits or the truncate leading value overlaps the truncate end- ing value. -
Page 184: Code I.d. Selection
Symbologies Interleaved 2 of 5 — continued Code I.D. Selection The Code I.D. for this symbology consists of one or two user-selectable ASCII characters. It can be appended previous to or following the trans- mitted Interleaved 2 of 5 bar code data depending on how this feature is enabled. - Page 185 Interleaved 2 of 5 Interleaved 2 of 5 — continued START STATE BARCODE Set I 2 of 5 Code I.D. Character(s) DEFAULT SETTING FOR THIS FEATURE: i (69 hex) Select 0000 to disable Code ID for this symbology only. Product Reference Guide 6-97...
-
Page 186: Interleaved 2 Of 5 Data Group Characters
Symbologies Interleaved 2 of 5 — continued Interleaved 2 of 5 Data Group Characters Once you’ve pre-set your desired Data Group Characters using the Data feature found in , you can choose Group Characters Chapter 5, Data Editing to output up to two of those pre-sets whenever an Interleaved 2 of 5 bar code is scanned. - Page 187 Interleaved 2 of 5 Interleaved 2 of 5 — continued START STATE BARCODE Interleaved 2 of 5 Data Group(s) DEFAULT SETTING FOR THIS FEATURE: None (00) Product Reference Guide 6-99...
-
Page 188: Industrial 2 Of 5
Symbologies Industrial 2 of 5 The following options apply to the Industrial 2 of 5 (I 2 of 5) symbology. Disable/Enable Industrial 2 of 5 When this feature is disabled, the imager will not read Industrial 2 of 5 bar codes. START STATE BARCODE... -
Page 189: Minimum/Maximum Code Length
Industrial 2 of 5 Industrial 2 of 5 — continued Minimum/Maximum Code Length Many symbologies have their own maximum and minimum code length, which can be set to qualify data entry. The length is defined as the actual bar code data length to be sent. Labels with lengths below the minimum or above the maximum will be rejected. -
Page 190: Truncate Leading/Ending
Symbologies Industrial 2 of 5 — continued Truncate Leading/Ending The leading or ending digits of bar code data characters can be trun- cated. Select from 00 (no truncation) to 15. The imager will beep instead of reading anything when the truncate value is more than the bar code data digits or the truncate leading value overlaps the truncate end- ing value. -
Page 191: Code I.d. Selection
Industrial 2 of 5 Industrial 2 of 5 — continued Code I.D. Selection The Code I.D. for this symbology consists of one or two user-selectable ASCII characters. It can be appended previous to or following the trans- mitted Industrial 2 of 5 bar code data depending on how this feature is enabled. - Page 192 Symbologies Industrial 2 of 5 — continued START STATE BARCODE Set Code 39 Code I.D. Character(s) DEFAULT SETTING FOR THIS FEATURE: i (69 hex) Select 0000 to disable Code ID for this symbology only. ® 6-104 QuickScan QS6500/QS6500 BT...
-
Page 193: Industrial 2 Of 5 Data Group Characters
Industrial 2 of 5 Industrial 2 of 5 — continued Industrial 2 of 5 Data Group Characters Once you’ve pre-set your desired Data Group Characters using the Data feature found in , you can choose Group Characters Chapter 5, Data Editing to output up to two of those pre-sets whenever an Industrial 2 of 5 bar code is scanned. - Page 194 Symbologies Industrial 2 of 5 — continued START STATE BARCODE Industrial 2 of 5 Data Group(s) DEFAULT SETTING FOR THIS FEATURE: None (00) ® 6-106 QuickScan QS6500/QS6500 BT...
-
Page 195: Matrix 2 Of 5 (Eur)
Matrix 2 of 5 (Eur) Matrix 2 of 5 (Eur) The following options apply to the Matrix 2 of 5symbology. Disable/Enable Matrix 2 of 5 When this feature is disabled, the imager will not read Matrix 2 of 5 bar codes. - Page 196 Symbologies Matrix 2 of 5 (Eur) — continued START STATE BARCODE Disable Matrix 2 of 5 Enable Matrix 2 of 5 Disable Checksum Verification Enable Checksum Verification Disable Checksum Transmission Enable Checksum Transmission ® 6-108 QuickScan QS6500/QS6500 BT...
-
Page 197: Minimum/Maximum Code Length
Matrix 2 of 5 (Eur) Matrix 2 of 5 (Eur) — continued Minimum/Maximum Code Length Many symbologies have their own maximum and minimum code length, which can be set to qualify data entry. The length is defined as the actual bar code data length to be sent. Labels with lengths below the minimum or above the maximum will be rejected. -
Page 198: Truncate Leading/Ending
Symbologies Matrix 2 of 5 (Eur) — continued Truncate Leading/Ending The leading or ending digits of bar code data characters can be trun- cated. Select from 00 (no truncation) to 15. The imager will beep instead of reading anything when the truncate value is more than the bar code data digits or the truncate leading value overlaps the truncate end- ing value. -
Page 199: Code I.d. Selection
Matrix 2 of 5 (Eur) Matrix 2 of 5 (Eur) — continued Code I.D. Selection The Code I.D. for this symbology consists of one or two user-selectable ASCII characters. It can be appended previous to or following the trans- mitted Matrix 2 of 5 bar code data depending on how this feature is enabled. - Page 200 Symbologies Matrix 2 of 5 (Eur) — continued START STATE BARCODE Matrix 2 of 5 Code I.D. Character(s) DEFAULT SETTING FOR THIS FEATURE: B (42 hex) Select 0000 to disable Code ID for this symbology only. ® 6-112 QuickScan QS6500/QS6500 BT...
-
Page 201: Matrix 2 Of 5 Data Group Characters
Matrix 2 of 5 (Eur) Matrix 2 of 5 (Eur) — continued Matrix 2 of 5 Data Group Characters Once you’ve pre-set your desired Data Group Characters using the Data feature found in , you can choose Group Characters Chapter 5, Data Editing to output up to two of those pre-sets whenever a Matrix 2 of 5 bar code is scanned. - Page 202 Symbologies Matrix 2 of 5 (Eur) — continued START STATE BARCODE Matrix 2 of 5 Data Group(s) DEFAULT SETTING FOR THIS FEATURE: None (00) ® 6-114 QuickScan QS6500/QS6500 BT...
-
Page 203: Codabar
Codabar Codabar The following options apply to the Codabar symbology. Disable/Enable Codabar When this feature is disabled, the imager will not read Codabar bar codes. Checksum Verification When enabled, the imager will verify the checksum of the labels. Checksum Transmit Enable this option to transmit the checksum with scanned bar code data. - Page 204 Symbologies Codabar — continued START STATE BARCODE Disable Codabar Enable Codabar Disable Checksum Verification Enable Checksum Verification Disable Checksum Transmission Enable Checksum Transmission ® 6-116 QuickScan QS6500/QS6500 BT...
-
Page 205: Minimum/Maximum Code Length
Codabar Codabar — continued Minimum/Maximum Code Length Many symbologies have their own maximum and minimum code length, which can be set to qualify data entry. The length is defined as the actual bar code data length to be sent. Labels with lengths below the minimum or above the maximum will be rejected. -
Page 206: Truncate Leading/Ending
Symbologies Codabar — continued Truncate Leading/Ending The leading or ending digits of bar code data characters can be trun- cated. Select from 00 (no truncation) to 15. The imager will beep instead of reading anything when the truncate value is more than the bar code data digits or the truncate leading value overlaps the truncate end- ing value. -
Page 207: Code I.d. Selection
Codabar Codabar — continued Code I.D. Selection The Code I.D. for this symbology consists of one or two user-selectable ASCII characters. It can be appended previous to or following the trans- mitted Codabar bar code data depending on how this feature is enabled. Example: Setting the Codabar Code I.D. - Page 208 Symbologies Codabar — continued START STATE BARCODE Codabar Code I.D. Character(s) DEFAULT SETTING FOR THIS FEATURE: % (25 hex) Select 0000 to disable Code ID for this symbology only. ® 6-120 QuickScan QS6500/QS6500 BT...
-
Page 209: Codabar Data Group Characters
Codabar Codabar — continued Codabar Data Group Characters Once you’ve pre-set your desired Data Group Characters using the Data feature found in , you can choose Group Characters Chapter 5, Data Editing to output up to two of those pre-sets whenever a Codabar bar code is scanned. - Page 210 Symbologies Codabar — continued START STATE BARCODE Codabar Data Group(s) DEFAULT SETTING FOR THIS FEATURE: None (00) ® 6-122 QuickScan QS6500/QS6500 BT...
-
Page 211: Start/End Type
Codabar Start/End Type Codabar has four pairs of Start/End patterns. Select one pair to match your application. Start/End Transmission The transmission of start and end characters of Codabar is selected below. START STATE BARCODE Start/Stop Type: ABCD/ ABCD Start/Stop Type: abcd/ abcd Start/Stop Type: ABCD/... -
Page 212: Code 93
Symbologies Code 93 The following options apply to the Code 93 symbology. Disable/Enable Code 93 When this feature is disabled, the imager will not read Code 93 bar codes. Checksum Verification When enabled, the imager will verify the checksum of the labels. Checksum Transmit Enable this option to transmit the checksum with scanned bar code data. - Page 213 Code 93 Code 93 — continued START STATE BARCODE Disable Code 93 Enable Code 93 Disable Checksum Verification Enable Checksum Verification Disable Checksum Transmission Enable Checksum Transmission Product Reference Guide 6-125...
-
Page 214: Minimum/Maximum Code Length
Symbologies Code 93 — continued Minimum/Maximum Code Length Many symbologies have their own maximum and minimum code length, which can be set to qualify data entry. The length is defined as the actual bar code data length to be sent. Labels with lengths below the minimum or above the maximum will be rejected. -
Page 215: Truncate Leading/Ending
Code 93 Code 93 — continued Truncate Leading/Ending The leading or ending digits of bar code data characters can be trun- cated. Select from 00 (no truncation) to 15. The imager will beep instead of reading anything when the truncate value is more than the bar code data digits or the truncate leading value overlaps the truncate end- ing value. -
Page 216: Code I.d. Selection
Symbologies Code 93 — continued Code I.D. Selection The Code I.D. for this symbology consists of one or two user-selectable ASCII characters. It can be appended previous to or following the trans- mitted Code 93 bar code data depending on how this feature is enabled. Example: Setting the Code 93 Code I.D. - Page 217 Code 93 Code 93 — continued START STATE BARCODE Matrix 2 of 5 Code I.D. Character(s) DEFAULT SETTING FOR THIS FEATURE: & (26 hex) Select 0000 to disable Code ID for this symbology only. Product Reference Guide 6-129...
-
Page 218: Code 93 Data Group Characters
Symbologies Code 93 — continued Code 93 Data Group Characters Once you’ve pre-set your desired Data Group Characters using the Data feature found in , you can choose Group Characters Chapter 5, Data Editing to output up to two of those pre-sets whenever a Code 93 bar code is scanned. - Page 219 Code 93 Code 93 — continued START STATE BARCODE Code 93 Data Group(s) DEFAULT SETTING FOR THIS FEATURE: None (00) Product Reference Guide 6-131...
-
Page 220: Code 11
Symbologies Code 11 The following options apply to the Code 11 symbology. Disable/Enable Code 11 When this feature is disabled, the imager will not read Code 11 bar codes. Checksum Verification When enabled, the imager will verify the check sum of the labels. Checksum Transmit When this option is enabled, the imager will transmit one-digit or two- digit checksums, depending upon the setting for checksum verification. - Page 221 Code 11 Code 11 — continued START STATE BARCODE Disable Code 11 Enable Code 11 Disable Checksum Verification 1-Digit Checksum Verification 2-Digit Checksum Verification Disable Checksum Transmission Enable Checksum Transmission Product Reference Guide 6-133...
-
Page 222: Minimum/Maximum Code Length
Symbologies Code 11 — continued Minimum/Maximum Code Length Many symbologies have their own maximum and minimum code length, which can be set to qualify data entry. The length is defined as the actual bar code data length to be sent. Labels with lengths below the minimum or above the maximum will be rejected. -
Page 223: Truncate Leading/Ending
Code 11 Code 11 — continued Truncate Leading/Ending The leading or ending digits of bar code data characters can be trun- cated. Select from 00 (no truncation) to 15. The imager will beep instead of reading anything when the truncate value is more than the bar code data digits or the truncate leading value overlaps the truncate end- ing value. -
Page 224: Code I.d. Selection
Symbologies Code 11 — continued Code I.D. Selection The Code I.D. for this symbology consists of one or two user-selectable ASCII characters. It can be appended previous to or following the trans- mitted Code 11 bar code data depending on how this feature is enabled. Example: Setting the Code 11 Code I.D. - Page 225 Code 11 Code 11 — continued START STATE BARCODE Matrix 2 of 5 Code I.D. Character(s) DEFAULT SETTING FOR THIS FEATURE: O (4F hex) Select 0000 to disable Code ID for this symbology only. Product Reference Guide 6-137...
-
Page 226: Code 11 Data Group Characters
Symbologies Code 11 — continued Code 11 Data Group Characters Once you’ve pre-set your desired Data Group Characters using the Data feature found in , you can choose Group Characters Chapter 5, Data Editing to output up to two of those pre-sets whenever a Code 11 bar code is scanned. - Page 227 Code 11 Code 11 — continued START STATE BARCODE Code 11 Data Group(s) DEFAULT SETTING FOR THIS FEATURE: None (00) Product Reference Guide 6-139...
-
Page 228: Msi/Plessey
Symbologies MSI/Plessey The following options apply to the MSI/Plessey symbology. Disable/Enable MSI/Plessey When this feature is disabled, the imager will not read MSI/Plessey bar codes. Checksum Verification The imager will verify Mod 10, Mod 10/10, Mod 11/10, or no check digits. - Page 229 MSI/Plessey MSI/Plessey — continued START STATE BARCODE Disable MSI/Plessey Enable MSI/Plessey Disable Checksum Verification Mod 10 Checksum Verification Mod 10/10 Checksum Verification Mod 11/10 Checksum Verification Disable Checksum Transmission Enable Checksum Transmission Product Reference Guide 6-141...
-
Page 230: Minimum/Maximum Code Length
Symbologies MSI/Plessey — continued Minimum/Maximum Code Length Many symbologies have their own maximum and minimum code length, which can be set to qualify data entry. The length is defined as the actual bar code data length to be sent. Labels with lengths below the minimum or above the maximum will be rejected. -
Page 231: Truncate Leading/Ending
MSI/Plessey MSI/Plessey — continued Truncate Leading/Ending The leading or ending digits of bar code data characters can be trun- cated. Select from 00 (no truncation) to 15. The imager will beep instead of reading anything when the truncate value is more than the bar code data digits or the truncate leading value overlaps the truncate end- ing value. -
Page 232: Code I.d. Selection
Symbologies MSI/Plessey — continued Code I.D. Selection The Code I.D. for this symbology consists of one or two user-selectable ASCII characters. It can be appended previous to or following the trans- mitted MSI/Plessey bar code data depending on how this feature is enabled. - Page 233 MSI/Plessey MSI/Plessey — continued START STATE BARCODE MSI/Plessey Code I.D. DEFAULT SETTING FOR THIS FEATURE: @ (40 Character(s) hex) Select 0000 to disable Code ID for this symbology only. Product Reference Guide 6-145...
-
Page 234: Msi/Plessey Data Group Characters
Symbologies MSI/Plessey — continued MSI/Plessey Data Group Characters Once you’ve pre-set your desired Data Group Characters using the Data feature found in , you can choose Group Characters Chapter 5, Data Editing to output up to two of those pre-sets whenever an MSI/Plessey bar code is scanned. - Page 235 MSI/Plessey MSI/Plessey — continued START STATE BARCODE MSI/Plessey Data Group(s) DEFAULT SETTING FOR THIS FEATURE: None (00) Product Reference Guide 6-147...
-
Page 236: Uk-Plessey
Symbologies UK-Plessey The following options apply to the UK/Plessey symbology. Disable/Enable UK/Plessey When this feature is disabled, the imager will not read UK/Plessey bar codes. Checksum Verification When enabled, the imager will verify the check sum of the labels. Checksum Transmit When this option is enabled, the imager will transmit the checksum. - Page 237 UK-Plessey UK-Plessey — continued START STATE BARCODE Disable UK/Plessey Enable UK/Plessey Disable Checksum Verification Enable Checksum Verification Disable Checksum Transmission Enable Checksum Transmission Product Reference Guide 6-149...
-
Page 238: Minimum/Maximum Code Length
Symbologies UK-Plessey — continued Minimum/Maximum Code Length Many symbologies have their own maximum and minimum code length, which can be set to qualify data entry. The length is defined as the actual bar code data length to be sent. Labels with lengths below the minimum or above the maximum will be rejected. -
Page 239: Truncate Leading/Ending
UK-Plessey UK-Plessey — continued Truncate Leading/Ending The leading or ending digits of bar code data characters can be trun- cated. Select from 00 (no truncation) to 15. The imager will beep instead of reading anything when the truncate value is more than the bar code data digits or the truncate leading value overlaps the truncate end- ing value. -
Page 240: Code I.d. Selection
Symbologies UK-Plessey — continued Code I.D. Selection The Code I.D. for this symbology consists of one or two user-selectable ASCII characters. It can be appended previous to or following the trans- mitted UK/Plessey bar code data depending on how this feature is enabled. - Page 241 UK-Plessey UK-Plessey — continued START STATE BARCODE MSI/Plessey Code I.D. DEFAULT SETTING FOR THIS FEATURE: @ (40 Character(s) hex) Select 0000 to disable Code ID for this symbology only. Product Reference Guide 6-153...
-
Page 242: Uk-Plessey Data Group Characters
Symbologies UK-Plessey — continued UK-Plessey Data Group Characters Once you’ve pre-set your desired Data Group Characters using the Data feature found in , you can choose Group Characters Chapter 5, Data Editing to output up to two of those pre-sets whenever a UK-Plessey bar code is scanned. - Page 243 UK-Plessey UK-Plessey — continued START STATE BARCODE UK-Plessey Data Group(s) DEFAULT SETTING FOR THIS FEATURE: None (00) Product Reference Guide 6-155...
-
Page 244: Telepen
Symbologies Telepen The following options apply to the Telepen symbology. Disable/Enable Telepen When this feature is disabled, the imager will not read Telepen bar codes. Checksum Verification When enabled, the imager will verify the check sum of the labels. Checksum Transmit When this option is enabled, the imager will transmit the checksum. - Page 245 Telepen Telepen — continued START STATE BARCODE Disable Telepen Enable Telepen Disable Checksum Verification Enable Checksum Verification Disable Checksum Transmission Enable Checksum Transmission Format = Numeric Only Format = Full ASCII Product Reference Guide 6-157...
-
Page 246: Minimum/Maximum Code Length
Symbologies Telepen — continued Minimum/Maximum Code Length Many symbologies have their own maximum and minimum code length, which can be set to qualify data entry. The length is defined as the actual bar code data length to be sent. Labels with lengths below the minimum or above the maximum will be rejected. -
Page 247: Truncate Leading/Ending
Telepen Telepen — continued Truncate Leading/Ending The leading or ending digits of bar code data characters can be trun- cated. Select from 00 (no truncation) to 15. The imager will beep instead of reading anything when the truncate value is more than the bar code data digits or the truncate leading value overlaps the truncate end- ing value. -
Page 248: Code I.d. Selection
Symbologies Telepen — continued Code I.D. Selection The Code I.D. for this symbology consists of one or two user-selectable ASCII characters. It can be appended previous to or following the trans- mitted Telepen bar code data depending on how this feature is enabled. Example: Setting the Telepen Code I.D. - Page 249 Telepen Telepen — continued START STATE BARCODE Telepen Code I.D. Character(s) DEFAULT SETTING FOR THIS FEATURE: S (53 hex) Select 0000 to disable Code ID for this symbology only. Product Reference Guide 6-161...
-
Page 250: Telepen Data Group Characters
Symbologies Telepen — continued Telepen Data Group Characters Once you’ve pre-set your desired Data Group Characters using the Data feature found in , you can choose Group Characters Chapter 5, Data Editing to output up to two of those pre-sets whenever a Telepen bar code is scanned. - Page 251 Telepen Telepen — continued START STATE BARCODE Telepen Data Group(s) DEFAULT SETTING FOR THIS FEATURE: None (00) Product Reference Guide 6-163...
-
Page 252: Standard 2 Of 5
Symbologies Standard 2 of 5 The following options apply to the Standard 2 of 5 symbology. Disable/Enable Standard 2 of 5 When this feature is disabled, the imager will not read Standard 2 of 5 bar codes. Checksum Verification When enabled, the imager will verify the checksum of the labels. Checksum Transmit When this option is enabled, the imager will transmit the checksum. - Page 253 Standard 2 of 5 Standard 2 of 5 — continued START STATE BARCODE Disable Std 2 of 5 Enable Std 2 of 5 Disable Checksum Verification Enable Checksum Verification Disable Checksum Transmission Enable Checksum Transmission Product Reference Guide 6-165...
-
Page 254: Minimum/Maximum Code Length
Symbologies Standard 2 of 5 — continued Minimum/Maximum Code Length Many symbologies have their own maximum and minimum code length, which can be set to qualify data entry. The length is defined as the actual bar code data length to be sent. Labels with lengths below the minimum or above the maximum will be rejected. -
Page 255: Truncate Leading/Ending
Standard 2 of 5 Standard 2 of 5 — continued Truncate Leading/Ending The leading or ending digits of bar code data characters can be trun- cated. Select from 00 (no truncation) to 15. The imager will beep instead of reading anything when the truncate value is more than the bar code data digits or the truncate leading value overlaps the truncate end- ing value. -
Page 256: Code I.d. Selection
Symbologies Standard 2 of 5 — continued Code I.D. Selection The Code I.D. for this symbology consists of one or two user-selectable ASCII characters. It can be appended previous to or following the trans- mitted Standard 2 of 5 bar code data depending on how this feature is enabled. - Page 257 Standard 2 of 5 Standard 2 of 5 — continued START STATE BARCODE Std 2 of 5 Code I.D. Character(s) DEFAULT SETTING FOR THIS FEATURE: S (53 hex) Select 0000 to disable Code ID for this symbology only. Product Reference Guide 6-169...
-
Page 258: Standard 2 Of 5 Data Group Characters
Symbologies Standard 2 of 5 — continued Standard 2 of 5 Data Group Characters Once you’ve pre-set your desired Data Group Characters using the Data feature found in , you can choose Group Characters Chapter 5, Data Editing to output up to two of those pre-sets whenever a Standard 2 of 5 bar code is scanned. - Page 259 Standard 2 of 5 Standard 2 of 5 — continued START STATE BARCODE Standard 2 of 5 Data Group(s) DEFAULT SETTING FOR THIS FEATURE: None (00) Product Reference Guide 6-171...
-
Page 260: Code 16K
Symbologies Code 16K The following options apply to the Code 16K symbology. Disable/Enable Code 16K When this feature is disabled, the imager will not read Code 16K bar codes. START STATE BARCODE Disable Code 16K Enable Code 16K ® 6-172 QuickScan QS6500/QS6500 BT... -
Page 261: Truncate Leading/Ending
Code 16K Code 16K — continued Truncate Leading/Ending The leading or ending digits of bar code data characters can be trun- cated. Select from 00 (no truncation) to 15. The imager will beep instead of reading anything when the truncate value is more than the bar code data digits or the truncate leading value overlaps the truncate end- ing value. -
Page 262: Code I.d. Selection
Symbologies Code 16K — continued Code I.D. Selection The Code I.D. for this symbology consists of one or two user-selectable ASCII characters. It can be appended previous to or following the trans- mitted Code 16K bar code data depending on how this feature is enabled. - Page 263 Code 16K Code 16K — continued START STATE BARCODE Code 16K Code I.D. NO DEFAULT SETTING FOR THIS FEATURE Character(s) Select 0000 to disable Code ID for this symbology only. Product Reference Guide 6-175...
-
Page 264: Code 16K Data Group Characters
Symbologies Code 16K — continued Code 16K Data Group Characters Once you’ve pre-set your desired Data Group Characters using the Data feature found in , you can choose Group Characters Chapter 5, Data Editing to output up to two of those pre-sets whenever a Code 16K bar code is scanned. - Page 265 Code 16K Code 16K — continued START STATE BARCODE Code 16K Data Group(s) DEFAULT SETTING FOR THIS FEATURE: None (00) Product Reference Guide 6-177...
-
Page 266: China Post
Symbologies China Post The following options apply to the China Post symbology. Disable/Enable China Post When this feature is disabled, the imager will not read China Post bar codes. START STATE BARCODE Disable China Post Enable China Post ® 6-178 QuickScan QS6500/QS6500 BT... -
Page 267: Minimum/Maximum Code Length
China Post China Post — continued Minimum/Maximum Code Length Many symbologies have their own maximum and minimum code length, which can be set to qualify data entry. The length is defined as the actual bar code data length to be sent. Labels with lengths below the minimum or above the maximum will be rejected. -
Page 268: Truncate Leading/Ending
Symbologies China Post — continued Truncate Leading/Ending The leading or ending digits of bar code data characters can be trun- cated. Select from 00 (no truncation) to 15. The imager will beep instead of reading anything when the truncate value is more than the bar code data digits or the truncate leading value overlaps the truncate end- ing value. -
Page 269: Code I.d. Selection
China Post China Post — continued Code I.D. Selection The Code I.D. for this symbology consists of one or two user-selectable ASCII characters. It can be appended previous to or following the trans- mitted China Post bar code data depending on how this feature is enabled. - Page 270 Symbologies China Post — continued START STATE BARCODE China Post Code I.D. DEFAULT SETTING FOR THIS FEATURE: NONE Character(s) Select 0000 to disable Code ID for this symbology only. ® 6-182 QuickScan QS6500/QS6500 BT...
-
Page 271: China Post Data Group Characters
China Post China Post — continued China Post Data Group Characters Once you’ve pre-set your desired Data Group Characters using the Data feature found in , you can choose Group Characters Chapter 5, Data Editing to output up to two of those pre-sets whenever a China Post bar code is scanned. - Page 272 Symbologies China Post — continued START STATE BARCODE China Post Data Group(s) DEFAULT SETTING FOR THIS FEATURE: None (00) ® 6-184 QuickScan QS6500/QS6500 BT...
-
Page 273: Pdf417
PDF 417 PDF 417 The following options apply to the PDF 417 symbology. Disable/Enable PDF 417 When this feature is disabled, the imager will not read PDF 417 bar codes. Escape Sequence Transmit Disables/enables transmission of the escape sequence. START STATE BARCODE Disable... -
Page 274: Truncate Leading/Ending
Symbologies PDF 417 — continued Truncate Leading/Ending The leading or ending digits of bar code data characters can be trun- cated. Select from 00 (no truncation) to 15. The imager will beep instead of reading anything when the truncate value is more than the bar code data digits or the truncate leading value overlaps the truncate end- ing value. -
Page 275: Code I.d. Selection
PDF 417 PDF 417 — continued Code I.D. Selection The Code I.D. for this symbology consists of one or two user-selectable ASCII characters. It can be appended previous to or following the trans- mitted PDF 417 bar code data depending on how this feature is enabled. Example: Setting the PDF 417 Code I.D. - Page 276 Symbologies PDF 417 — continued START STATE BARCODE PDF 417 Code I.D. Character(s) DEFAULT SETTING FOR THIS FEATURE: S (53 hex) Select 0000 to disable Code ID for this symbology only. ® 6-188 QuickScan QS6500/QS6500 BT...
-
Page 277: Pdf 417 Data Group Characters
PDF 417 PDF 417 — continued PDF 417 Data Group Characters Once you’ve pre-set your desired Data Group Characters using the Data feature found in , you can choose Group Characters Chapter 5, Data Editing to output up to two of those pre-sets whenever a PDF 417 bar code is scanned. - Page 278 Symbologies PDF 417 — continued START STATE BARCODE PDF 417 Data Group(s) DEFAULT SETTING FOR THIS FEATURE: None (00) ® 6-190 QuickScan QS6500/QS6500 BT...
-
Page 279: Micro Pdf 417
Micro PDF 417 Micro PDF 417 The following options apply to the Micro PDF 417 symbology. Disable/Enable Micro PDF 417 When this feature is disabled, the imager will not read Micro PDF 417 bar codes. Escape Sequence Transmit Specifies transmission format of the escape sequence. START STATE BARCODE... -
Page 280: Truncate Leading/Ending
Symbologies Micro PDF 417 — continued Truncate Leading/Ending The leading or ending digits of bar code data characters can be trun- cated. Select from 00 (no truncation) to 15. The imager will beep instead of reading anything when the truncate value is more than the bar code data digits or the truncate leading value overlaps the truncate end- ing value. -
Page 281: Code I.d. Selection
Micro PDF 417 Micro PDF 417 — continued Code I.D. Selection The Code I.D. for this symbology consists of one or two user-selectable ASCII characters. It can be appended previous to or following the trans- mitted Micro PDF 417 bar code data depending on how this feature is enabled. - Page 282 Symbologies Micro PDF 417 — continued START STATE BARCODE Micro PDF 417 Code I.D. Character(s) DEFAULT SETTING FOR THIS FEATURE: U (55 hex) Select 0000 to disable Code ID for this symbology only. ® 6-194 QuickScan QS6500/QS6500 BT...
-
Page 283: Micro Pdf 417 Data Group Characters
Micro PDF 417 Micro PDF 417 — continued Micro PDF 417 Data Group Characters Once you’ve pre-set your desired Data Group Characters using the Data feature found in , you can choose Group Characters Chapter 5, Data Editing to output up to two of those pre-sets whenever a Micro PDF 417 bar code is scanned. - Page 284 Symbologies Micro PDF 417 — continued START STATE BARCODE Set Micro PDF 417 Data Group(s) DEFAULT SETTING FOR THIS FEATURE: None (00) ® 6-196 QuickScan QS6500/QS6500 BT...
-
Page 285: Ean Ucc Composite
EAN UCC Composite EAN UCC Composite The following options apply to the EAN UCC Composite symbology. Disable/Enable EAN UCC Composite When this feature is disabled, the imager will not read EAN UCC Com- posite bar codes. UCC/EAN 128 Emulation When enabled, EAN UCC Composite bar codes will be translated to the UCC/EAN 128 label data format. -
Page 286: Truncate Leading/Ending
Symbologies EAN UCC Composite — continued Truncate Leading/Ending The leading or ending digits of bar code data characters can be trun- cated. Select from 00 (no truncation) to 15. The imager will beep instead of reading anything when the truncate value is more than the bar code data digits or the truncate leading value overlaps the truncate end- ing value. -
Page 287: Code I.d. Selection
EAN UCC Composite EAN UCC Composite — continued Code I.D. Selection The Code I.D. for this symbology consists of one or two user-selectable ASCII characters. It can be appended previous to or following the trans- mitted EAN UCC Composite bar code data depending on how this fea- ture is enabled. - Page 288 Symbologies EAN UCC Composite — continued START STATE BARCODE EAN UCC Composite DEFAULT SETTING FOR THIS FEATURE: Code I.D. RC (5243 hex) Character(s) Select 0000 to disable Code ID for this symbology only. ® 6-200 QuickScan QS6500/QS6500 BT...
-
Page 289: Ean Ucc Composite Data Group Characters
EAN UCC Composite EAN UCC Composite — continued EAN UCC Composite Data Group Characters Once you’ve pre-set your desired Data Group Characters using the Data feature found in , you can choose Group Characters Chapter 5, Data Editing to output up to two of those pre-sets whenever an EAN UCC Compos- ite bar code is scanned. - Page 290 Symbologies EAN UCC Composite — continued START STATE BARCODE Set EAN UCC Composite Data Group(s) DEFAULT SETTING FOR THIS FEATURE: None (00) ® 6-202 QuickScan QS6500/QS6500 BT...
-
Page 291: Code 4/5
Code 4/5 Code 4/5 The following options apply to the Code 4 and Code 5 symbologies. Disable/Enable Code 4 and Code 5 When this feature is disabled, the imager will not read Code 4 or Code 5 bar codes. Data Transmission Format Hex or decimal data transmission format may be selected. -
Page 292: Code I.d. Selection
Symbologies Code I.D. Selection The Code I.D. for this symbology consists of one or two user-selectable ASCII characters. It can be appended previous to or following the trans- mitted Code 4/5 bar code data depending on how this feature is enabled. Example: Setting the Code 4/5 Code I.D. - Page 293 Code 4/5 Code 4/5 — continued START STATE BARCODE Code 4/5 Code I.D. Character(s) DEFAULT SETTING FOR THIS FEATURE: N (4E hex) Select 0000 to disable Code ID for this symbology only. Product Reference Guide 6-205...
-
Page 294: Code 4/5 Data Group Characters
Symbologies Code 4/5 — continued Code 4/5 Data Group Characters Once you’ve pre-set your desired Data Group Characters using the Data feature found in , you can choose Group Characters Chapter 5, Data Editing to output up to two of those pre-sets whenever a Code 4 or Code 5 bar code is scanned. - Page 295 Code 4/5 Code 4/5 — continued START STATE BARCODE Set Code 4/5 Data Group(s) DEFAULT SETTING FOR THIS FEATURE: None (00) Product Reference Guide 6-207...
- Page 296 Symbologies NOTES ® 6-208 QuickScan QS6500/QS6500 BT...
-
Page 297: Chapter 7 Bluetooth Features
Chapter 7 Bluetooth Features Features in this section are applicable only to Bluetooth (BT) models. The Bluetooth model includes an imager and Base Station. When the imager and Base Station are linked together, the imager will read and decode bar codes and transmit them via a Bluetooth radio to the Base Station. - Page 298 Bluetooth Features Auto Update — continued START STATE BARCODE Auto Update Enable Configure Auto Update Enable Application Auto Update Enable Auto Update Disable ® QuickScan QS6500/QS6500BT...
-
Page 299: Deep Sleep Mode
Deep Sleep Mode Deep Sleep Mode The BT model of the imager can be placed into Deep Sleep Mode after this programmed duration (since the unit’s last scanning activity). Press its trigger to wake the imager from this mode. START DURATION BARCODE Disable... -
Page 300: Leash Alarm
Bluetooth Features Leash Alarm When enabled, the Leash Alarm will force the imager to sound an alarm for a preprogrammed length of time to notify if an imager is leaving the immediate vicinity of the Base Station. This is especially useful in instances where the imager might inadvertently have been placed in a bag or cart. - Page 301 Leash Alarm START DURATION BARCODE 9 Seconds 10 Seconds 15 Seconds 20 Seconds 25 Seconds 30 Seconds 35 Seconds 40 Seconds 45 Seconds 50 Seconds 55 Seconds 60 Seconds Product Reference Guide...
-
Page 302: Bluetooth Connectivity Mode
Bluetooth Features Bluetooth Connectivity Mode The feature allows the imager to be linked to any Bluetooth (BT) enabled device which can accept such a connection with other devices. To implement this mode, follow these instructions: 1. Place the imager in Programming Mode by scanning the START bar code. - Page 303 Bluetooth Connectivity Mode Bluetooth Connectivity Mode — continued START STATE BARCODE Connect to Base Station Connect to a BT Device Begin Pin End Pin Product Reference Guide...
-
Page 304: Inquiry Beep Control
Bluetooth Features Inquiry Beep Control When the Base Station is not linked to a handheld, the Radio LED will blink amber and the Base Station will beep. This beep can be disabled or reconfigured to sound for different durations by using the following pro- gramming bar codes. - Page 305 Inquiry Beep Control START STATE BARCODE Inquiry Beep = 5 Minutes Inquiry Beep = 6 Minutes Inquiry Beep = 7 Minutes Inquiry Beep = 8 Minutes Product Reference Guide...
- Page 306 Bluetooth Features NOTES ® 7-10 QuickScan QS6500/QS6500BT...
-
Page 307: Chapter 8 Product Specifications
Chapter 8 Product Specifications Imager Product Specifications Parameter Specification Dimensions (Typical): Height 6.5 inches (16.5 cm) Length 3.9 inches (9.9 cm) Width 2.9 inches (7.4 cm) Weight 6.0 ounces (170.1 g) Voltage Requirements +4.5 to 14 VDC +/- 5% Input Power Operating 1250 mW: POT w/all interfaces Standby... -
Page 308: Standard Cable Pinouts (Primary Interface Cables)
Product Specifications Standard Cable Pinouts (Primary Interface Cables) RS-232 1 0 P i n M o d u l a r P l u g ( C on n ec ts t o th e i m ag e r m od u le ) P i n 1 0 P i n 1 VCC_IN... -
Page 309: Usb
Standard Cable Pinouts (Primary Interface Cables) 1 0 P i n M o d u l a r P l u g ( C on n e cts t o th e i m ag e r m od u l e) P i n 1 0 P i n 1 VBUS_VIN... - Page 310 Product Specifications NOTES ® QuickScan QS6500/QS6500 BT...
- Page 311 Appendix A ASCII Conversion Chart ASCII ASCII ASCII ASCII Hex No. Hex No. Hex No. Char. Char. Char. Char. ‘ “ & ’ < > Product Reference Guide...
- Page 312 ® QuickScan QS6500/QS6500BT...
-
Page 313: Appendix B Alpha-Numeric Pad
Appendix B Alpha-Numeric Pad Use the bar codes contained in this chapter to modify configuration set- tings as described in the feature/option descriptions. Product Reference Guide... - Page 314 ® QuickScan QS6500/QS6500BT...
-
Page 315: Keyboard Model Cross Reference
Appendix C Keyboard Function Key Mappings Keyboard Model Cross Reference summarizes the keyboard models, their defined protocol, Table C-2 scancode set, and some unique features. The remaining tables in this chapter provide the function key maps associated with each of the scan- code sets. - Page 316 DOWN arrow (inner keypad) 00h 51h UP arrow (inner keypad) 00h 52h 00h 3Fh 00h 3Ah 00h 3Bh 00h 3Ch 00h 3Dh 00h 3Eh 00h 29h 00h 40h 00h 41h 00h 42h 00h 43h Table C-2. Keyboard Model Cross Reference Func.
- Page 317 Keyboard Model Cross Reference IBM 3xxx Terminals Wedge H AT/PS2 Scan Set 3 (102-key keyboard) PS55 5530T with Japanese Wedge I AT/PS2 JAPANESE DOS (TDOS) NEC 9801 Wedge J NEC 9801 9801 Table C-3. Scanset 1 Function Key Map ASCII ASCII code Scancode (hex)
- Page 318 Table C-4. Scanset 2 Function Key Map ASCII ASCII code Scancode (hex) ALT right Make E0h 11h ALT right Break E0h F0h 11h ALT left Make ALT left Break F0h 11h CTRL left Make CTRL left Break F0h 14h CTRL right Make E0h 14h CTRL right Break E0h F0h 14h...
- Page 319 Keyboard Model Cross Reference Table C-5 Scanset 3, 102-Key Function Key Map ASCII (hex) ASCII code Scancode ALT right Make ALT right Break F0h 39h ALT left Make ALT left Break F0h 19h CTRL left Make CTRL left Break F0h 11h CTRL right Make CTRL right Break F0h 58h...
- Page 320 Table C-6. Scanset 3 122-Key Function Key Map ASCII (hex) ASCII code Scancode ALT Right Make ALT Right Break F0h 39h ALT left Make ALT left Break F0h 19h CTRL left (RESET) Make only CTRL left (RESET) Make/Break 11h F0h 11h ONLINE Enter Make only ONLINE Enter Make/Break 58h F0h 58h...
- Page 321 Keyboard Model Cross Reference Table C-7. Japanese DOS Function Key Map ASCII value ASCII code Scancode ALT right Make ALT right Break ALT left Make ALT left Break CTRL left Make CTRL left Break CTRL right Make CTRL right Break TAB right RIGHT arrow (inner keypad) TAB left...
- Page 322 Table C-8. NEC 9801-Key Function Key Map ASCII value ASCII code Scancode unused CAPS LOCK ON (make) CAPS LOCK OFF (break) CTRL left Make CTRL left Break CTRL-C TAB right RIGHT arrow (inner keypad) TAB left 0Fh + S DELETE INSERT (inner keypad) KATAKANA LOCK ON (Make) KATAKANA LOCK OFF (Break)
-
Page 323: Defaults By Symbology
Appendix D Default Settings Defaults by Symbology The following is a partial list of key settings for each symbology type. Checksum Checksum Read Code Code Type Verification Transmission Enable Enable Enable UPC-A UPC-E EAN-13 EAN-8 RSS-14 RSS Expanded RSS Limited Code 39 PharmaCode 39 Code 128... -
Page 324: Interface Default Exceptions
Checksum Checksum Read Code Code Type Verification Transmission Enable Enable Enable UK/Plessey Telepen Standard 2 of 5 Code 16K China Post PDF417 Micro PDF-417 UCC/EAN Composite Interface Default Exceptions The factory default settings indicated in the programming sections (by bold text and yellow highlighting) reflect factory configuration for the RS-232 standard interface. -
Page 325: Rs-232 Wincor/Nixdorf
Interface Default Exceptions RS-232 Wincor/Nixdorf Parameter Default Setting Interface Type RS-232-WN Number of Host Transmit Buffers One Buffer RS-232 Parity RS-232 Hardware Control CTS Flow Control UCC/EAN-128 Code I.D. ‘P’ Code 39 Read Disable Code 39 Code I.D. ‘M’ Code 93 Code I.D. ‘L’... -
Page 326: Keyboards
Keyboards Keyboard interfaces include USB Keyboard and Keyboard Wedge A-J. Parameter Default Setting Keyboard Wedge Interface Type USB Keyboard Code I.D. Transmission Disable Wand Emulation Parameter Default Setting Code I.D. Transmission Disable Suffix Characters No Suffix Code 128 Function Code Transmission Enable ®... -
Page 327: Appendix E List Commands
Appendix E List Commands Parameter Settings List The following bar codes are used to cause the scanner to display (list) its internal data at a connected terminal. List Standard Parameter Settings Displays the current configu- ration of your scanner. List Unique Parameter Settings Displays any unique parame- ter settings currently pro-... - Page 328 NOTES ® QuickScan QS6500/QS6500 BT...
-
Page 329: Chapter F Led & Beeper Indications
Chapter F LED & Beeper Indications Bluetooth models offer a special set of LED and Beeper indications beyond the simple “Good Read” and error signals provided by corded models. These indications allow you to understand a variety of functions and features implemented for the product. Bluetooth Imager Indications GREEN ORANGE... - Page 330 LED & Beeper Indications GREEN ORANGE STATUS BEEPER ON for Data transmission OK Xmsec Low battery (Trigger is Blinks pressed only) ® QuickScan QS6500/QS6500 BT...
-
Page 331: Bluetooth Base Station Indications
Bluetooth Base Station Indications Bluetooth Base Station Indications GREEN ORANGE STATUS BEEPER Beeps Inquiry Blinking once a sec- Connecting Link estab- lished Hardware fail Flash Data receiving On for BlueTooth from the scan- ~ 0.5 Status second Bar code data Good beep proof or trans- (for test... - Page 332 LED & Beeper Indications NOTES ® QuickScan QS6500/QS6500 BT...
-
Page 333: Appendix G Sample Symbols
Appendix G Sample Symbols UPC-A Interleaved 2 of 5 0 123456 7890 Code 128 1234567890 EAN-13 Code 128 Code 39 9 780330 290951 Codabar BC321 Code 93 A13579B Industrial Code 2 of 5 123456-9$ 123456 Product Reference Guide... -
Page 334: Sample Symbols For Pdf Models Only
Sample Symbols — continued Matrix 2 of 5 RSS-14 6543210 (01)00123456789012 Sample Symbols for PDF Models ONLY Micro PDF417 PDF417 Test Message Car Registration ® QuickScan QS6500/QS6500 BT... - Page 336 Telephone: 44 (0) 1923 809500 Fax: [39] (0) 39/6859496 Fax: 44 (0) 1923 809 505 www.scanning.datalogic.com Datalogic Scanning, Inc. 959 Terry Street Eugene, OR 97402 Telephone: (541) 683-5700 Fax: (541) 345-7140 ©2004 - 2007 Datalogic Scanning, Inc. R44-2816 (Rev. A) 6/07...
Need help?
Do you have a question about the QuickScan QS6500 and is the answer not in the manual?
Questions and answers