Table of Contents
Advertisement
Quick Links
Advertisement
Table of Contents

Related Manuals for Axis 27980R1


Summary of Contents for Axis 27980R1
-
Page 1: Axis 5570E
AXIS 5570e Host-to-LAN Print Servers User’s Manual AXIS 5570e User’s Manual... -
Page 2: Regulatory Information
Every care has been taken in the preparation of this manual; if you detect any inaccuracies or omissions, please inform your local Axis office, which can be found on the cover of this document. Axis Communications AB cannot be held responsible for any technical or typographical errors and reserves the right to make changes to the product and manuals without prior notice. -
Page 3: Table Of Contents
Adding NetBIOS/NetBEUI Printers in Windows 2000 using AXIS Print Monitor ......76 Adding Printers over NetBIOS/NetBEUI in Windows NT using AXIS Print Monitor . - Page 4 SuSE 8.0 ........120 AXIS axinstall Script ......121 Print Methods on TCP/IP Networks .
- Page 5 Configuring the AS/400 Host, 5494 CU mode ..197 Configuring the Axis Network Print Server ..197 Verifying the Communications Link ....198 Amending Device Features .
-
Page 6: Introduction
Introduction Section 1 Introduction Thank you for purchasing the AXIS 5570e print server. This product has been developed to connect your printers anywhere in your network, allowing all network users access to the shared printer resources. The AXIS 5570e is a LAN attached multi-protocol print server that prints IBM and ASCII data streams to any ASCII printer. -
Page 7: Support Services
• Find answers to previously resolved problems in the FAQ database. Search by product, category or phrase • Report problems to Axis support staff by logging in to your private support area • Visit the Axis support Web at www.axis.com/techsup... -
Page 8: Product Overview
Product Overview Section 2 Product Overview Package Contents Verify that nothing is missing from the AXIS 5570e package by using the check list below. Please contact your dealer if anything is missing or damaged. All packing materials are recyclable. AXIS 5570e... -
Page 9: Protocols And Datastreams
• • TN3270E • • TN5250E • SNA support • Digital Copier Support Note: All models may not be available in all countries in which Axis operates. Please contact your local sales representative for more information. AXIS 5570e User’s Manual... -
Page 10: Physical Description
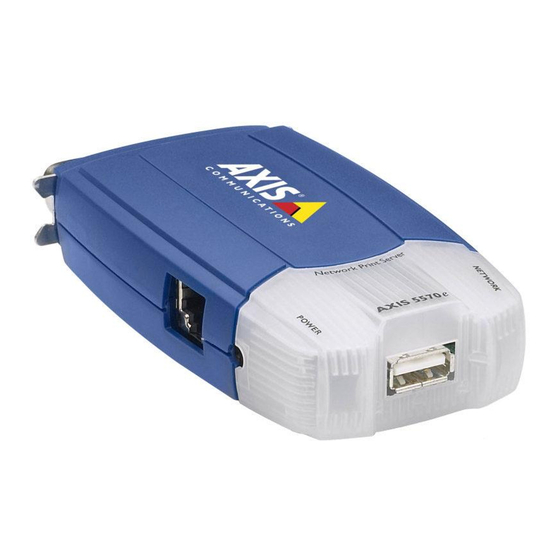
(Category 5 or 6 twisted pair) cable. Printer Ports AXIS 5570e AXIS 5570e is equipped with one USB port that is USB 1.1 and 2.0 Low- and Full-Speed compliant, and one high-speed IEEE 1284 compatible parallel port. AXIS 5570e User’s Manual... -
Page 11: Axis Network Product Cd
To read the PDF documents you need an Acrobat Reader, which can be fetched at http://www.adobe.com/products/acrobat/readermain.html Start-up Procedures If your computer is configured to autostart CDs, the AXIS Network for Windows Product CD will start automatically when inserted into a local CD drive on Windows 98, Me, NT, 2000 and XP platforms. -
Page 12: Print Server Features And Benefits
The Axis Network Print Server print server provides high performance and reliability combined with low power consumption. The electronic circuits are based on the AXIS ETRAX 100LX chip, which comprises an integrated 32 bit RISC processor and associated network controllers. -
Page 13: Basic Installation
Management and Configuration, on page 127, for more information. • The AXIS 5570e uses high speed Centronics communication. For use with older printers not supporting high speed, this function can be disabled by using any standard Web browser. Please refer to “Management and Configuration” on page 127, for more information. -
Page 14: Installation Guide
Basic Installation Installation Guide After connecting the Axis Network Print Server to your network, you are now ready to perform the basic setup procedures. The method of installation that you choose should be dictated by your printing requirements and the type of network into which you are integrating. -
Page 15: Setting The Ip Address
Server required Comment See “Adding Printers in Windows 2000 / XP / 2003 us- AXIS AddPrinter Wizard ing AXIS AddPrinter Wizard” on page 63 Dynamic assignment of IP addresses. DHCP DHCP server See Dynamic IP Address Assignment, on page 15 Static assignment of IP addresses. - Page 16 • Use a Web browser with JavaScript support and Java enabled. • The Axis Network Print Server supports WINS (Windows Internet Name Service), which is recommended when setting the IP address using DHCP in Windows environments. • If you are working in a WINS/ DDNS network, you can access the print server’s Web pages using its default host name: In the Web browser’s Location/Address field, enter the...
- Page 17 Setting the IP Address Refer to the appropriate section below to assign an IP address to your using arp/ping Axis Network Print Server using arp/ping: Windows Open a Command Prompt and enter the following syntax: Syntax Example arp -s <Internet address>...
- Page 18 3. If it is not already running, start the RARP daemon. This is typically performed using the command. rarpd -a 4. Restart the AXIS 5570e to download the IP address. Notes: • The Ethernet address is equal to the serial number, which can be found on the underside label of the AXIS 5570e.
- Page 19 Basic Installation Notes: • The Axis Network Print Server supports WINS (Windows Internet Name Service), which is recommended when setting the IP address using DHCP in Windows environments. • The Ethernet Address is the same as the serial number, found on the print server’s under- side label.
- Page 20 IP address from your network administrator. Important: DO NOT use the IP addresses used in the following examples when installing your Axis Network Print Server. Always consult your network administrator before assigning an IP address to your Axis Network Print Server.
-
Page 21: Setting Up - As/400 (Iseries)
IPDS on page 30 for IPDS over TCP/IP If you intend to operate your Axis Network Print Server in a multi- protocol environment, you should also proceed to the other relevant sections in this manual. SNA Printing - 5494 Mode... - Page 22 Axis Web site for further documentation. Note: You will find an AS/400 Parameter checklist in the AXIS 5570e User’s Guide where you can enter the values described in this section for future reference. on the AS/400 command line and press Enter. For future 1.
- Page 23 SNA. For your future reference, note the SSAP value for this entry. Verify that the number of controllers displayed on this screen does not exceed the value for maximum controllers (MAXCTL) from above. AXIS 5570e User’s Manual...
- Page 24 *YES Autodelete controller: AUTODLTCTL 1440 Press Enter to continue. Bottom F3=Exit F11=Nondisplay keywords F12=Cancel on the command line and press Enter. Note the 7. Type DSPSYSVAL QCHRID code page for future reference. Press F3 to exit. AXIS 5570e User’s Manual...
- Page 25 F 3 = E x i t F 1 1 = N o n d i s p l a y k e y w o r d s F 1 2 = C a n c e l AXIS 5570e User’s Manual...
- Page 26 4 WRKCFGSTS *CTL xxxx* xxxx characters of the Axis Network Print Server 5494 LU Name)and press Enter to delete any previously created Controller and Device descriptions specific to your Axis Network Print Server. Delete the Device Descriptions (indented text) first and then the Controllers.
- Page 27 1. Start a Web browser, e.g. Internet Explorer or Netscape Navigator. 2. Enter the IP address or the host name of the Axis Network Print Server in the location field and press the Enter key on your keyboard. The internal Web pages of the Axis Network Print Server will appear.
-
Page 28: Tn5250E Printing (Scs Over Ip)
Enter. This command starts the writer for this printer device. 3. Press the Axis Network Print Server test button once to print a test page. Ensure that the SNA status is defined on the test page as... - Page 29 1. Start a Web browser, e.g. Internet Explorer or Netscape Navigator. 2. Enter the IP address or the host name of the Axis Network Print Server in the location field and press the Enter key on your keyboard. The internal Web pages of the Axis Network Print Server will appear.
-
Page 30: Ppr/Ppd Printing - Ipds Data Streams
PPR/PPD Printing - IPDS Data Streams Note: IPDS is only available for AXIS 5570e models with the IPDS option installed. For more information, refer to Protocols and Datastreams, on page 9. The configuration procedures presented in this section are divided into three separate steps: •... - Page 31 9. Enter a FGID number at the line, e.g. 11 (Courier). Font Identifier (FONT) 10. Define the . Use the IP address of the Axis Remote location (RMTLOCNAME) Network Print Server. 11. (Optional) Enter the name of the previously created PSF configuration at the line.
- Page 32 Remote location: ..RMTLOCNAME Name or address..> ‘192.168.5.23’ User-defined options ..USRDFNOPT *NONE + for more values More... AXIS 5570e User’s Manual...
- Page 33 1. Start a Web browser, e.g. Internet Explorer or Netscape Navigator. 2. Enter the IP address or the host name of the AXIS 5570e in the location field and press the Enter key on your keyboard. The internal Web pages of the AXIS 5570e will appear.
- Page 34 Setting Up - AS/400 (iSeries) 6. Direct a printout to this printer device. A successful printout verifies the communication link between the AS/400 and the AXIS 5570e. The AXIS 5570e is now ready for printing in the AS/400 environment. AXIS 5570e User’s Manual...
-
Page 35: Setting Up - Ibm Mainframe (Zseries)
SNA transport protocol. Important: The Axis Network Print Server must be set up to emulate an IBM 3174 (3174 CU mode) in the Mainframe/VTAM environment. Configuring for SNA printing in 3174 CU Mode is described in three separate stages: •... - Page 36 When using a concentrator gateway between the host and your print server, it is not necessary to define separate VTAM Major Node and PU definitions for the Axis Network Print Server. You will instead be working with the gateway VTAM definitions. Since the Axis Network Print Server will appear to the host as one or several LU's attached to the gateway PU, you need only add LU definitions to the gateway major node definition and then proceed to item 3 below.
- Page 37 The examples below are based on samples given in VTAM Customization (IBM part no: SC23-0112), with some changes to optimize use for Axis Network Print Server. VTAM for MVS is assumed, although the configuration for VM and VSE is similar.
- Page 38 The example below shows how the print server PU, PATH, and LU Node Definitions definitions may be coded in a switched major node definition. * PU definition * E07xxxxxx is the node ID set in Axis Network Print Server. PU5570e1 PUADDR=04, PUTYPE=2,...
- Page 39 In the path definition, PATH DIALNO should be comprised with its first two digits equal to the place holder, the next two set to the SAP and the remaining twelve digits set to the Axis Network Print Server Ethernet or Node address. By default the Ethernet/Node address is identical to the Axis Network Print Server serial number.
- Page 40 Case 1: VTAM Major Node definition is a Switched Major Node. The MAC address of the Axis Network Print Server must be bit-order reversed in the PATH entry. An Axis Network Print Server with a MAC/node address of 00408C1B06D4 will be...
-
Page 41: Tcp/Ip Tn3270E Printing
LU-3 Note: Please refer to the Parameter List and FAQ on the Axis Web site, if the status line indicates that the SNA link is not active. The Axis Network Print Server is now ready for use in the SNA environment. - Page 42 1. Start a Web browser, e.g. Internet Explorer or Netscape Navigator. 2. Enter the IP address or the host name of the Axis Network Print Server in the location field and press the Enter key on your keyboard. The internal Web pages of the Axis Network Print Server will appear.
- Page 43 Microsoft SNA Server Communication is established in two separate stages, SNA Server-to-Host connection and SNA Server to Axis Network Print Server connection, as described below: SNA Server-to-Host Connection Follow the steps below to set-up a SNA Server-to-Host connection for the Axis Network Print Server: 1.
- Page 44 5. Click the IP Address List tab. 6. Specify the IP Address of the client(s) that you want to assign to this LU. This is the IP address of the Axis Network Print Server, i.e. the same as the INT_ADDR parameter in the Print Server.
- Page 45 For additional information about configuring other TN3270E servers, refer to the Technical Notes on www.axis.com NetWare for To set-up a TN3270E connection to the Axis Network Print Server you SAA Server have to set up PU and LU definitions. This is done by following the steps below: 1.
- Page 46 16. Set maximum frame size to transmit inbound to match the MAXDATA in the host definition. 17. Enter the host node address. 18. Leave the rest at their default settings. 19. Click the LU Defaults icon. The panel below will appear 20. Set Default LU category to Public. AXIS 5570e User’s Manual...
- Page 47 VTAM Name Prefix: BRLTST Default LU Type: Default Model Number: Default LU Category: Public Maximum frame size to transmit inbound: 0521 Remote node address: 020066800000 Remote Service Access Point: Local Service Access Point: Enable PU profile at startup: AXIS 5570e User’s Manual...
- Page 48 LU in the host is activated. 2. Send a print job from the host. The Axis Network Print Server is now ready for use. If needed, it can be further adapted to your system using the Web-based configuration pages or IBM Printer Emulation.
-
Page 49: Ppr/Ppd Printing - Ipds Data Streams
IPDS is only available for print server models with the IPDS option installed. Please refer to “Protocols and Datastreams” on page 9. Before you Begin In order to use the Axis Network Print Server to print IPDS data using TCP/IP as the transport protocol, the following software must be installed and configured on your MVS: •... - Page 50 Packet Size Subnet mask Subnet value BCPLAN 2000 255.255.255.0 10.10.12.0 DEFAULTNET 10.10.12.1 BPCLAN 2000 255.255.255.0 0 Note: If you change any of the values in the TCP/IP profile, you must restart TCP/IP to activate the new settings. AXIS 5570e User’s Manual...
- Page 51 1. Start a Web browser, e.g. Internet Explorer or Netscape Navigator. 2. Enter the IP address or the host name of the Axis Network Print Server in the location field and press the Enter key on your keyboard. The internal Web pages of the Axis Network Print Server will appear.
- Page 52 (Use ATTN to interrupt.) EZA0464I PING: Ping #1 timed out If the ping is not successful, make sure the Axis Network Print Server is configured according to the instructions in Setting the IP Address, on page 15 and in Configuring the Axis Network Print Server, on page 42.
- Page 53 • The block sizes of the font, page segment, overlay, form definition, and page definition libraries JES2 Initialization The example below shows a sample JES2 statements for a TCP/IP- attached Axis Network Print Server: FSS (FSS1) PROC=SAMPPROC,HASPFSSM=HASPFSSM PRT1 FSS=FSS1,MODE=FSS,PRMODE=(LINE,PAGE,), CLASS=C,UCS=0,SEP=NO,SEPDS=NO,CKPTPAGE=100...
- Page 54 Specifies the FSS for this device and must match the FSA name specified in the corresponding FSS statement. This parameter is required. Enables form markings to be placed on the job trailer pages. For the Axis Network Print Server you should set this parameter to NO.
- Page 55 Explanation Statement Specifies the data-set processing modes supported for the printer. It lists all the PRMODE values that the printer accepts. If the Axis Network Print Server is connected to a PostScript printer, the correct setting is PRMODE .. This setting indicates that composed-page PRMODE=(PAGE,LINE,) and line data sets can be printed.
- Page 56 In this case, printer performance is significantly reduced if PSF errors continue to occur. The recommended starting value is 100. Identifies the printer device type. For the Axis Network Print Server you should DTYPE specify the parameter value .
- Page 57 Specifies: JUNIT 1. The device address (host-connected, channel-attached, non-SNA printers only). Do not specify a device address for the Axis Network Print Server when using TCP/IP attachment. 2. The name of the processor to which the device is attached 3. A destination class for messages about the device 4 .Whether the device is initially online or offline...
- Page 58 THE FULL NAME OF THE DEFAULT FORMDEF IS F1A10110. THE FULL NAMES OF THE DEFAULT FONTS ARE X0GF10, X0GS10, X0TU10, AND X0GU10 THE FULL NAME OF THE SEPARATOR PAGE PAGEDEF IS P1V06483 THE FULL NAME OF THE SEPARATOR PAGE FONT IS X0GT15 AXIS 5570e User’s Manual...
- Page 59 DISP=SHR //FONT02 DSN=SYS1.FONT300, /* SYSTEM FONTS - 300 PEL DISP=SHR //PSEG01 DSN=SYS1.PSEGLIB, /* SYSTEM PAGE SEGMENTS DISP=SHR //OLAY01 DSN=SYS1.OVERLIB, /* SYSTEM MEDIUM OVERLAYS DISP=SHR //PDEF01 DSN=SYS1.PDEFLIB, /* SYSTEM PAGEDEFS DISP=SHR //FDEF01 DSN=SYS1.FDEFLIB, /* SYSTEM FORMDEFS DISP=SHR AXIS 5570e User’s Manual...
- Page 60 /* PSF ACTION ON TIMEOUT MGMTMODE=IMMED, /* PRINTER MANAGEMENT MODE DISCINTV=40, /* DISCONNECT INTERVAL IN /* SECONDS IPADDR=’xxx.xxx.xxx.xxx’ /* Axis Network Print Server IP ADDRESS PORTNO=’5100’, /* TCP/IP PORTO //PRT1 ENDCNTL Although it is not recommended, it is possible to drive the printer with just one FSA, if one of the following conditions are met: •...
- Page 61 *VARY printer-name, OFF *CANCEL printer-name The variable printer-name specifies the name of the printer FSA as defined in JES definitions, on page 52. You can now disconnect the Power Adapter from the Axis Network Print Server. AXIS 5570e User’s Manual...
-
Page 62: Adding Printers In Windows
Each client computer must install the appropriate printer drivers in order to print properly. For Windows 98 and Me, it is only necessary to install AXIS Print Monitor on a server for client/server printing. AXIS 5570e User’s Manual... -
Page 63: Adding Printers In Windows 2000 / Xp / 2003 Using Axis Addprinter Wizard
Each client computer must install the appropriate printer drivers in order to print properly. In Windows 98 and Me, AXIS Print Monitor must be installed on all (printing) client computers for Peer-to-Peer printing. SNMP Device Index... - Page 64 Wizard to suggest a static IP address. Example: Select Suggest... and click OK. Confirm — or modify — the Wizard’s suggested IP settings. Click OK. Note: The Suggest... option is only available when the computer has one network card. AXIS 5570e User’s Manual...
-
Page 65: Adding Printers In Windows 2000 / Xp / 2003 Using Windows Add Printer Wizard
Faxes | Add a Printer to start the Windows Add Printer Wizard) Windows 2000: 1. Go to Start | Settings | Printers and click the Add Printer icon to start the Add Printer Wizard. Click Next. AXIS 5570e User’s Manual... - Page 66 If you have an old version of Windows, it will not detect the USB port. If so, type “_LPT2” instead of “_USB1” in the example above, e.g. 192.168.3.191_LPT2. For additional information, see “*Tcpmon.ini” on page 70. AXIS 5570e User’s Manual...
- Page 67 If you have an old version of Windows, it will not detect the USB port. If so, type “_LPT2” instead of “_USB1” in the example above, e.g. 192.168.3.191_LPT2. For additional information, see “*Tcpmon.ini” on page 70. AXIS 5570e User’s Manual...
- Page 68 Adding Printers in Windows 7. Click Next. Click Next and Finish AXIS 5570e User’s Manual...
- Page 69 10. Click Next. Supply a name for the printer and choose whether you want to make it your default printer. Click Next. AXIS 5570e User’s Manual...
- Page 70 For the USB port to appear as an option in the Windows Device Port list (see Step 5 above ), you must install Axis tcpmon Upgrade Utility, a script that aids Windows in recognizing the USB port. This script upgrades the tcpmon.ini file (in the system32 directory) by adding new Axis print server ports in the Windows Available Ports list.
-
Page 71: Adding Printers In Windows 2000 / Xp / 2003 Using The Microsoft Lpr Monitor
Windows 2000: the Add Printer Wizard. Click Next. 2. Select the appropriate radio button: Local Printer. Click Next. 3. Click the Create a new port radio button and select LPR Port from the list. Click Next. AXIS 5570e User’s Manual... -
Page 72: Adding Printers In Windows Nt Using The Microsoft Lpr Monitor
6. Click the LPR radio button and enter the queue name (PR1, PR2...). 7. Click OK to finish. Adding Printers in Windows NT Using the Microsoft LPR Monitor If you have not already done so, you should perform the TCP/IP basic AXIS 5570e User’s Manual... - Page 73 Serial port AXIS 5570e USB1 LPT1 — — 6. The added print server will now appear in the Available Ports list. 7. Click Next, choose an appropriate driver and finish the installation in the normal manner. AXIS 5570e User’s Manual...
-
Page 74: Axis Print Monitor Software
Note: AXIS Print Monitor can also be used for DOS printing. Please refer to the AXIS Print Monitor’s Readme file for instructions. The Readme file is located in the same folder where AXIS Print Monitor is installed on your PC. -
Page 75: Adding Printers Over Tcp/Ip In Windows Nt Using Axis Print Monitor
3. The Wizard asks you to select My Computer or Network printer server. Select My Computer, click Next. 4. Click Add Port... In the Available Ports dialog, select AXIS Port and click New Port... 5. Select LPR (TCP/IP) as your choice of protocol and click OK. -
Page 76: Adding Netbios/Netbeui Printers In Windows 2000 Using Axis Print Monitor
Next. 4. Select NetBIOS/NetBEUI as your choice of network protocol and click OK. 5. Select the AXIS Port you want to add from the list of available ports. The port appears as <name>.<port> (Example: AX100086.LP1). The <port> is taken from the table below. Click OK. -
Page 77: Adding Printers Over Netbios/Netbeui In Windows Nt Using Axis Print Monitor
Port... 5. Select NetBIOS/NetBEUI as your choice of network protocol and click OK. 6. Select the AXIS Port you want to add from the list of available ports. The port appears as <name>.<port> (Example: AX100086.LP1). The <port> is taken from the table below. Click OK. -
Page 78: Adding Printers In Windows 98 And Me Over Tcp/Ip Using Axis Print Monitor
Adding Printers in Windows Adding Printers in Windows 98 and Me over TCP/IP using AXIS Print Monitor 1. Install AXIS Print Monitor on all workstations that will print via the Axis print server. 2. Next, start the Windows Add Printer Wizard: select Settings | Printers from the Start menu and double-click the Add Printer icon. - Page 79 Settings. 2. Choose whether error condition pop-up messages are to be displayed by checking the box in the Configure AXIS Ports dialog. Define the frequency at which the error messages should be displayed after retry. Click OK. Even if the desired printer is available in the Manufacturers and Printers lists, you are advised to use the print driver provided with the printer.
-
Page 80: Netbios/Netbeui Using Axis Print Monitor
5. Select the printer driver you want to install and click Next. 6. Select the AXIS Printer Port from the Available Ports list. The port names appears as <name>.<port>. Here, <name> is AX followed by the last six digits of the print server’s serial number (e.g. -
Page 81: Adding Printers In Macintosh
Adding Printers in Macintosh Section 7 Adding Printers in Macintosh Having connected the AXIS 5570e to your network, this section now describes how to set up your print server for printing in Mac OS X and earlier Macintosh environments using AppleTalk. - Page 82 If the print server using Bonjour is already installed and the print server name or service name is changed, the print server must be removed from the Printer List and then re-installed with the new Bonjour service name. AXIS 5570e User’s Manual...
-
Page 83: Installation In Mac Os X Using Appletalk
Queue Name: Ports available USB port Parallel port 1 Parallel port 2 Serial port AXIS 5570e USB1 LPT1 — — Choose a printer driver from the Printer Model list and click Add to finish. AXIS 5570e User’s Manual... -
Page 84: Installation On Mac Os 9.1 Or Older, Using Appletalk
1. Select Chooser from the Apple menu. 2. Click the LaserWriter icon. 3. If your network has more than one zone, click on the zone you want. (If your network does not have any zones, this box will not appear.) AXIS 5570e User’s Manual... - Page 85 Repeat this procedure for each Macintosh computer on the network using the print server. Bi-directional The AXIS 5570e allow the printer driver to communicate directly with the Support printer and consequently facilitates complete functional control over print jobs, e.g. automatic downloading of fonts not resident in the printer.
- Page 86 • Some printers, e.g. Epson InkJet printers, can not be used when TBCP is enabled. Setting Parameters In AppleTalk, you can change a limited number of the parameters of the AXIS 5570e. You can: • enable and disable binary data transfers for your printing •...
- Page 87 8. Open the Chooser and select the printer port you wish to use for printing documents. 9. Close the Chooser. Note: The _CFG port disappears 60 minutes after the AXIS 5570e has been powered on. If you want it to reappear, you must restart your print server. AXIS 5570e User’s Manual...
-
Page 88: Adding Printers In Netware
Having assigned an IP address to the AXIS 5570e as described in Setting Network Print Server the IP Address, on page 15, you are now ready to install the Axis Network in the NDPS Print Server for NDPS printing. You can select to install the connected environments printers as public or controlled access printers. - Page 89 Important: • The NDPS Enabled parameter of the Axis Network Print Server is by default enabled. It must be set to Yes in order for the communication between the print server and the NDPS gateway to be enabled. To change this parameter, log in to the print server’s Web pages and choose: Admin | Network Settings | Detailed View | NetWare=>...
- Page 90 2. Choose a port in the Print Server Port field e.g., 192.168.70.243 and LPT1 The available ports are : Ports available USB port Parallel port 1 Parallel port 2 Serial port AXIS 5570e other/unknown LPT1 — — Note: “other/unknown”, stands for the USB1 port. AXIS 5570e User’s Manual...
- Page 91 <IPX External Network Number>:<Print server’s HW address>:<Socket Number> i.e.: 01d7e1c2:00408c5ff6a6:400c where 400c, 401c, and 402c are the socket numbers corresponding to the LPT1, LPT2, USB1 and COM1 physical ports: LPT1 400c LPT2 401c USB1 401c COM1 402c AXIS 5570e User’s Manual...
- Page 92 LPT1 Ports available USB port Parallel port 1 Parallel port 2 Serial port AXIS 5570e other/unknown LPT1 — — Note: other/unknown, stands for the USB1 port. 4. When done, select your printer and click Finish. AXIS 5570e User’s Manual...
- Page 93 Follow these steps to create a controlled access printer as an object in the Printers Directory Tree, using the NetWare administrator utility: 1. Log in as Admin. 2. Start the NW Admin utility on any Workstation (SYS:PUBLIC\WIN32\nwadmin32.exe). 3. Browse the context your NDPS Manager resides in. AXIS 5570e User’s Manual...
- Page 94 - Public Access Printer Agent. Use an existing Printer Agent representing a Public Access Printer. 7. Select Create a New Printer Agent and click Create to display the Create Printer Agent dialog. AXIS 5570e User’s Manual...
- Page 95 NDPS Manager to which you want to assign it 9. Select AXIS Gateway Configuration in the Gateway Type field. 10. Click OK. 11. In the Select the printer’s type window choose your printer. If you cannot find the printer, select an appropriate Generic one (PCL, PS, etc) 12.
- Page 96 2. Choose a port in the Print Server Port field e.g., 192.168.70.243 and LPT1: Ports available USB port Parallel port 1 Parallel port 2 Serial port AXIS 5570e other/unknown LPT1 — — Note: other/unknown stands for the USB1 port. AXIS 5570e User’s Manual...
- Page 97 If the printer is not in the displayed print list: 1. Click Manually specify the print server and enter the <IPX External Network Number> in the Network field. 2. Enter the <Print server’s HW address> in the LAN HW address field. AXIS 5570e User’s Manual...
- Page 98 6. Click Continue and OK in the next NDPS window. Your printer will appear as an NDS object in the Directory Tree and will offer a full range of network security options. To install the printer on the workstation, See “Installing an NDPS Printer AXIS 5570e User’s Manual...
- Page 99 The Novell Printers dialog appears, displaying a list of installed Public or Controlled printers (if any printers have previously been installed on the workstation). 3. From the Printer Manager’s Printer pull down menu, select New. 4. Click Add. A list of available printers appears. AXIS 5570e User’s Manual...
- Page 100 The Novell Printers dialog appears with the new printer, e.g. AXIS5FF6A6_IPX1 in the installed list. 8. Click Close. In the Novell Printer Manager window the new installed NDPS printer appears with the name e.g. AXIS5FF6A6_IPX1 and is available for print jobs. AXIS 5570e User’s Manual...
- Page 101 2. Start the Add Printer Wizard on the workstation. The Add Printer Wizard dialog will appear. Click Next. 3. Select Network printer and click Next. 4. Click Next again in the Locate Your Printer dialog (Win2000/XP) or press the Browse button (Win9X) AXIS 5570e User’s Manual...
-
Page 102: Setup Using Iprint
Gateway Configuration Utility for use with earlier versions of NetWare from www.axis.com. • To print using TCP/IP, Axis print server firmware 6.1 or later is required. In order to print using IPX/SPX, Axis print server firmware 5.51 or later is needed. - Page 103 Adding Printers in NetWare When you install Service Pack 6 (16 April 2003) for NetWare 5.1 or later and Service Pack 3 (16 April 2003) for NetWare 6.0 or later, the AXIS LPR Gateway Configuration will automatically be installed and configured on the NetWare Servers and ready for use.
- Page 104 You have to have Administrator rights to install the printers through iPrint. Install a printer with 1. Use an AXIS 5570e and connect a printer to whatever port you want. AXIS IPP Gateway 2. Connect the print server to the network.
- Page 105 Adding Printers in NetWare Install a printer using 1. Use an AXIS 5570e and connect a printer to whatever port you want. AXIS LPR Gateway 2. Connect the print server to the network. Configuration Snap- 3. Connect the Power Adapter.
- Page 106 3. After installing a printer, it is added to the user's Printer folder. Users can print to the printer by selecting it from any application. AXIS 5570e User’s Manual...
-
Page 107: Basic Setup With Axis Netpilot
1. Start AXIS NetPilot by double-clicking the NetPilot icon, which is located in the folder where you installed AXIS NetPilot. 2. Locate the Axis Network Print Server in the ‘New Axis Units’ folder. Select it and click the Install button on the AXIS NetPilot toolbar. If your network is large, it could take a few seconds before the print server appears in the folder. - Page 108 If you find, at any time, that printing is not satisfactory, the parameters can easily be changed to tune the system to your requirements. • For information on advanced functions, please refer to the AXIS Network Print Server Tech- nical Reference. You can download this or other technical information over the Internet by accessing www.axis.com...
-
Page 109: Advanced Installation Using Axis Netpilot
Having installed your Axis Network Print Server print server in accordance with the basic installation procedures described in Basic Setup with AXIS NetPilot, on page 107, your Axis Network Print Server print server should now feature in the ‘Network Print Servers’ folder located in the AXIS NetPilot main window. - Page 110 8. Select Print Server Mode or Remote Printer Mode. If you selected Print Server Mode, advance directly to step 11, otherwise continue with step 9. 9. Select an appropriate NetWare Print Server name, that will be associated with the Axis Network Print Server, by using the Browse... button. Notes: •...
-
Page 111: Basic Queue-Based Printing Over Ip
Adding Printers in NetWare Basic Queue-based printing over IP Axis print servers with software version 6.0 or later allow users to print in a Pure IP environment using traditional queue-based printing (which usually uses the IPX transport protocol). Note that only NDS queue-based printing is supported. - Page 112 Print Server Mode The Axis Network Print Server logs in to a file server(s) and repeatedly polls the print queues for print jobs. In this fashion, the Axis Network Print Server emulates a NetWare print server, which is a workstation running PSERVER.
- Page 113 Print Layout You can view installed AXIS 5570e and their relative print queues for any NetWare Organizational Unit. You can also display summary information by right-clicking on the printer object you want to examine.
-
Page 114: Adding Printers In Unix/Linux
X Window System installed, or if you prefer the text-based interface. Log in as root (or use the command su to temporarily change to the root user), and type the command /usr/sbin/printconf-tui from a shell prompt. AXIS 5570e User’s Manual... -
Page 115: Typical Invocation Via A Windows Manager
Five types of print queues can be configured in the Mandrake distribution: • Local Printer • Printer on remote lpd server • Network printer (TCP/Socket) • Printer on SMB/Windows 95/98/NT server • A printer device URl AXIS 5570e User’s Manual... -
Page 116: Typical Invocation From A Terminal Window
System installed, the command will start a text based version. The same information as was described above will be needed. Note: In Mandrake, even if you type at a shell prompt, will printtool printerdrake automatically start. AXIS 5570e User’s Manual... -
Page 117: Debian 3.0
• Remote Queue and input filter — The remote printer queue and input filter. 4. Click Next to continue. 5. Click Select to choose a printer driver and to set it up. Click OK. Finally, click Test and print a test page. AXIS 5570e User’s Manual... -
Page 118: Red Hat 7.3
• If a printer appears in the main printer list with the Queue Type set to INVALID, the printer configuration is missing options that are required for the printer to function properly. To remove this printer from the list, select it from the list and click the Delete button. AXIS 5570e User’s Manual... - Page 119 Find your printer from the expanded list, and click the arrow beside the printer name. A list of drivers for your printer will appear. Select one. Then finish the Wizard in the usual manner. AXIS 5570e User’s Manual...
-
Page 120: Suse 8.0
• Local printers (Parallel, USB, Serial and Disk File) • LPD protocol network printing (Forward queue to a remote LPD and Prefiltered queue for an LPD forwarding queue) • Other network printing (Samba/Windows, Novell) The SuSE installation manual explains the setup procedures in detail. AXIS 5570e User’s Manual... -
Page 121: Axis Axinstall Script
PROS, LPR, FTP or Reverse Telnet protocols. However, if you want to integrate the AXIS 5570e with your host spooler, you can use the Axis automatic installation script axinstall. The axinstall script is available from ftp://ftp.axis.com/pub_soft/prt_srv/utility/axinstall/latest/... -
Page 122: Print Methods On Tcp/Ip Networks
This is the recommended method for UNIX/Linux systems, but some System V versions do not support LPD. Advantages: Easy to set up — install the AXIS 5570e as a remote queue in System V, or add a remote printer to using the fields (BSD). - Page 123 Adding Printers in UNIX/Linux named pipe (PROS A) and filter (PROS B). PROS A The AXIS 5570e appears as a device to the system. This makes all filter Advantages and model options available. It provides accounting and status logging. Supports bi-directional printing. The printer information read back can be viewed in a log file.
-
Page 124: Adding Printers In Os/2
2. Select a printer driver and double-click a free Output port, for instance \PIPE\LPD0. 3. Enter the host name or the IP address of the Axis Network Print Server in the LPD server field. 4. Enter one of the Axis Network Print Server logical printer names, for example pr1, in the LPD printer field. -
Page 125: Netbios/Netbeui Printing In Os/2
Repeat this procedure for each server using the Axis Network Print Server. The AXIS Print Utility for OS/2 must be running in order to print through your Axis Network Print Server. It is strongly recommended that you modify the startup.cmd file, enabling AXIS Print Utility for OS/2 to automatically start when your client is re-booted. - Page 126 3. Drag and drop a printer from the template. 4. Enter the Alias name, select a Server name and the previously created Spooler Queue Name. 5. Click OK. The setup is completed and you can now print through your Axis Network Print Server. AXIS 5570e User’s Manual...
-
Page 127: Management And Configuration
“Setting the IP Address” on page 15, you are free to access the Axis Network Print Server Web pages from any standard Web browser. The Web interface of the Axis Network Print Server is divided into two modes of operation, User mode and Admin mode. User In User mode you can change language, but you have no rights to change any other parameters. - Page 128 This is done from the Admin | General Settings | General tab. Enter the password in the Root Password field. Accessing the Web Follow the steps below to access the internal Web pages of the Axis Pages Network Print Server: 1.
- Page 129 The Help page presents you with basic information about the Axis Network Print Server and the Web user interface. A short description of the Axis installation tools you should use when installing a printer on your PC is also included.
- Page 130 Network Settings From the Network Settings page you can set all parameters that control the network traffic to and from the Axis Network Print Server. You can enable or disable any of the supported network protocols and fine-tune the parameter settings. For additional information, see the Online Help pages.
- Page 131 • IP Address (INT_ADDR.) • DHCP enabled (DHCP_ENB) • Installed certificate • Private key See The Test Button, on page 208 for instructions on performing a Factory Default. Firmware Upgrade Upgrades the print server’s internal software. AXIS 5570e User’s Manual...
-
Page 132: Using Axis Thinwizard For Print Server Management
To install, follow the instructions given by the Installation Wizard. During the installation, you will be asked to enter a user id and a password — these will be used when logging in to AXIS ThinWizard, so please take a note of them. - Page 133 AXIS ThinWizard servers more efficiently. The scope of each network group is determined by the Axis server types and IP address ranges that are included. You can create as many network groups as you want. Follow the instructions below to create a network group: 1.
-
Page 134: Using Ftp For Print Server Management
Management and Configuration Changing the IP Using AXIS ThinWizard you can also set or change each print server’s IP Settings parameters. 1. Click IP Settings in the main menu. 2. Select print server in the list. 3. Enter your data: IP address, Subnet mask, Default gateway and the print server’s password (default password is pass). - Page 135 • It is important that the destination file is specified in capital letters. Otherwise the edits are temporary and will be lost once the Axis Network Print Server has been powered off. • To edit the config file from a Macintosh you will need FTP support such as MacTCP, Fetch or Anarchie.
-
Page 136: Using Telnet
Using Telnet Having assigned an IP address to your Axis Network Print Server, as described in “Setting the IP Address” on page 15, you can manage your Axis Network Print Server using the Telnet protocol. - Page 137 Status file assigned to, and their current status. Follow the instructions below to view the status file using telnet: 1. Log in to the Axis Network Print Server by typing: in a DOS window telnet <host name> telnet <IP address>...
- Page 138 Management and Configuration Printing Hexdumps The Axis Network Print Server allows you to record a trace of the communication between the Axis Network Print Server and the host. The Axis Network Print Server supports hexdump printing for the SNA, TN3270E, TN5250E, LPR/LPD and Raw TCP/IP printing protocols. Please refer to “Protocols and Datastreams”...
-
Page 139: Using Snmp
MIBs (Management Information Base), where MIB-II is a standard database. The Axis Network Print Server supports all relevant parts of MIB-II and also includes a private enterprise MIB. Refer to The AXIS MIB, on page 139. System Requirements... -
Page 140: Using Novell Utilities
Printer Status The Printer Status menu, detailed below, shows the status of an active print job serviced by an Axis Network Print Server network print server. It displays detailed information concerning the active job including, Print Queue, print job description, size of print file, percentage of job completed, etc. -
Page 141: Configuring The Print Server From An Ibm Host
NetWare Print Layout with corresponding information summary Configuring the Print Server from an IBM Host Once communication with an IBM host has been established, all the Axis Network Print Server parameters can be edited by printing a file containing special configuration commands. To start the configuration, the command is entered in the file. - Page 142 (If you have not changed the default %CONFIG+ password; PRDRIVER = PCL5; password (pass), the password is optional) %CONFIG++ NETW_ENB = NO; %CONFIG-- SAVE; %CONFIG- For parameters requiring more than one value, the values should be separated using a comma. AXIS 5570e User’s Manual...
-
Page 143: Configuration Possibilities
Configuration Possibilities Section 12 Configuration Possibilities This section describes some special features offered by the AXIS 5570e: Autodetect Printer Type, on page 143 Auto-IP, on page 143 Changing Language in the Print Server’s Web Interface, on page 144 E-mail Notification, on page 144... -
Page 144: E-Mail Notification
The person responsible for changing the toner in the printer PRINTER OFFLINE The person responsible for the overall maintenance of printer 2. Enter the respective e-mail addresses of the trouble-report recipients in the blank fields as follows: name@company.com 3. Click OK and exit when done. AXIS 5570e User’s Manual... -
Page 145: Ipp (Internet Printing Protocol)
Printing System Web site at www.cups.org). • If you wish to print using iPrint over IPP, use AXIS IPP Gateway Configuration Snap-in for iPrint in NetWare 5.x. It is available on www.axis.com (Support | Select Software). See its read-me file for installation instructions. - Page 146 1. Select the IPP printer to which you want to send your document. Choose the destination printer from the Printer name field (in File | Print). 2. When you press Print, the print job is sent over the Internet to the AXIS 5570e, which then forwards the print job to the destination printer.
- Page 147 Adding an IPP printer to your printer list is described below. 2. When you press Print, the print job is sent over the Internet/WAN to the AXIS 5570e, which then forwards the print job to the destination printer.
- Page 148 6. The Printer Ports dialog will appear, showing a list of Available Printer Ports. 7. Choose The HP Internet Printer Connection Port and click New Port. 8. The HP Internet Printer Connection will start. Click Next. AXIS 5570e User’s Manual...
- Page 149 Configuration Possibilities 9. In the IP Address, Host Name or URL field, type the address of the AXIS 5570e to which the destination printer is connected. The URL will automatically appear in the Port Name field as well: Example: http://171.16.5.218:631/LPT1 if you want to address the parallel port or http://171.16.5.218:631/USB1 to address the USB port.
- Page 150 Adding an IPP printer to your printer list is described below. 2. When you press Print, the print job is sent over the Internet to the AXIS 5570e, which then forwards the print job to the destination printer.
- Page 151 Select the printer driver from the list and click OK. 7. The Wizard will ask you if you want the printer to be your default destination printer. Make your choice and click Next to complete the Add Printer Wizard installation. AXIS 5570e User’s Manual...
- Page 152 Configuration Possibilities 8. The new printer is added to your Select Printer window: 9. You are now ready to print using IPP: specify your new destination printer from the printer list and click Print. AXIS 5570e User’s Manual...
-
Page 153: Logical Printers For Customized Printing
• The examples should only be viewed as suggestions how to configure the logical printers. You should, of course, configure them according to the needs of your network. • In the Parameter List chapter of this manual, you can find a complete list of the AXIS 5570e parameters. - Page 154 Your network contains a host using the character set ISO 8859-2 and a host using the character set DEC. In order to direct print jobs to the printer connected to the AXIS 5570e, you should assign the host to a separate logical printer, and install a character set conversion filter.
- Page 155 0D 0A the substitute string 4. Click the OK button. This conversion is the default setting for logical printers PR5 through PR8. AXIS 5570e User’s Manual...
- Page 156 1B 59 the new printer command Click the OK button. Note: Extensive use of string substitutions will naturally decrease the throughput rate of the AXIS 5570e. ASCII to Postscript The AXIS 5570e logical printers can translate ASCII print data into Conversion PostScript format.
- Page 157 120 = 12 characters per inch 60 = 6 lines per inch 30 = 3 mm left margin 50 = 5 mm top margin 7. Enter the string Helvetica in the PostScript Font text field. 8. Click the OK button. AXIS 5570e User’s Manual...
- Page 158 • If both printers are busy, the print job will be printed on the printer that first finishes its active print job. Read Back of The AXIS 5570e support bi-directional printing. The information from the information printer is read back on the parallel port when the parameter Read Back Port (PRx_IN.) has the default setting of AUTO.
- Page 159 3. Set the Hex Dump Mode Enabled radio button to YES. 4. Click OK. Note: The page length for hex dump printouts is determined by the lines per page value of the PostScript page format parameter. AXIS 5570e User’s Manual...
-
Page 160: Network Speed
If you choose a faulty Network Speed option for your network, you may loose contact with the print server. To reset the Network Speed parameter to AUTO_SENSE, you will have to reboot the print server (disconnect and then re-connect the external power supply). AXIS 5570e User’s Manual... -
Page 161: Netware Packet Signature Levels
Print server signs packets and requires the server to sign packets (or logging in will fail) Regardless of server level, the AXIS print server has the capability to log in in Print Server Mode since it supports NCP Packet Level 3 (which is the most restrictive). -
Page 162: Tcp/Ip Restrictions
Configuration Possibilities TCP/IP Restrictions In a new and unconfigured Axis Network Print Server any user is allowed to send TCP/IP print jobs. Using a restriction list you can reject TCP/IP printing from specified IP addresses. Enabling TCP/IP In the print server’s Web interface, select Admin | Network Settings | Restrictions Detailed View | TCP/IP Printing. -
Page 163: Enabling Secure Web Services - Ssl/Tls
Configuration Possibilities Enabling Secure Web Services — SSL/TLS In a new and unconfigured AXIS 5570e, SSL/TLS is disabled. Certificates To use SSL/TLS you have to create or obtain a digital certificate. There are two kinds of certificates: self-signed certificates and third party certificates. - Page 164 Whenever SSL/TLS is enabled, you can only reach the print server’s Web Server’s Web pages interface through the secure services. The unsecure way via http:// is over https:// closed and now you have to address the print server’s Web interface in the secure way, i.e. via https://. AXIS 5570e User’s Manual...
- Page 165 Configuration Possibilities Disabling Protocols To further increase security, you must disable protocols that are considered insecure; • FTP (used by AXIS ThinWizard. If FTP is disabled, AXIS ThinWizard can not function properly.) • Telnet • Auto-IP • DHCP • BOOTP •...
-
Page 166: Enabling The Snmp3 Protocol
To Update the Initial To update the initial user, select Admin | Network Settings | Detailed View User | SNMP, enter the two passwords (one for authentication and one for privacy) and click the Update initial user button. AXIS 5570e User’s Manual... -
Page 167: Overriding Port Status
• Click Upload and provide the path to the certificate in the first field, or use the Browse button to locate it and click OK. • To remove a certificate, click the Remove button. AXIS 5570e User’s Manual... - Page 168 6. Select the 802.1X Enabled radio button. 7. Click OK to save the settings. Important! Time/date validation requires that SNTP is enabled. To enable SNTP, go to Network Settings | Detailed View | TCP/IP Network and select the SNTP Enabled radio button. AXIS 5570e User’s Manual...
-
Page 169: Upgrading The Firmware
Upgrading the Firmware Section 13 Upgrading the Firmware Upgrading the Firmware You can upgrade the AXIS 5570e firmware using one of the following methods: • AXIS ThinWizard (TCP/IP) • From the print server’s internal Web pages (TCP/IP) • FTP (TCP/IP) Note: Updating instructions are supplied with the firmware release notes. - Page 170 Click the Start button to start the upgrading job. 9. You can view the progress of the job in the Event Log. Refer to “Using AXIS ThinWizard for Print Server Management” on page 132 for more information about AXIS ThinWizard.
-
Page 171: Obtaining The Software
Upgrading the Firmware 1. From www.axis.com, download the firmware and save it to a new directory on your computer, e.g. c:\Axis (if the directory does not exist, create it). 2. Open a command prompt from Start => Run. The Run window will appear. -
Page 172: Sna Parameter Overview
An overview of how parameters are mapped during the auto- configuration process is also provided. Refer to the Parameter List document on www.axis.com for a complete description of the Axis Print server parameters. Communication Parameters In most environments, the basic communication parameters need to be customized in order to establish a communication link to the host system. - Page 173 SNA Parameter Overview Parameter Summary The following tables summarize SNA host communication parameters that must be considered when installing the Axis Network Print Server. The parameters are presented as: • Common Mainframe and AS/400 parameters • Mainframe specific parameters •...
-
Page 174: Updating Parameters
Parameter Name Default Emulation Description - Axxxxxxx, where "xxxxxxx" is the last 7 characters of the Axis Network Print Server serial number, in reverse order, e.g. if s.no. = 00 40 8C 1B 06 D4 the default LU Name = A4D60B1C. -
Page 175: Auto-Configuration And Mapping
AUTODIAL to YES to initiate a new configuration process. Auto-configuration and Mapping The configuration created in the AS/400 and the mapping to the Axis Network Print Server as a result of the auto-configuration process is illustrated by the figure below. - Page 176 Printer device #2 Logical Printer #3 Printer device #3 Illustration of the configuration created in the AS/400 and the mapping to the Axis Network Print Server as a result of the auto-configuration Printer Device Through auto-configuration, the APPC controller, APPC device, RWS...
-
Page 177: Sna Gateways
Communications Controller, IBM 3174 Establishment Controller, IBM 3172 LAN Interconnect Controller, etc. You need to set up at least one PU and LU definition for each Axis Network Print Server on the host, as described in the VTAM section. When attaching an Axis Network Print Server to a remote pass-through gateway, you need to set the mapping of SDLC or sub-channel address to MAC address in the gateway. - Page 178 Concentrator gateway, This is an outline of the procedure for configuring to a Microsoft SNA Microsoft Server. More information is provided in the Support section of the Axis Web site at http://www.axis.com 1. Configure host connection. 2. Configure downstream connection.
-
Page 179: Extended Ibm Printer Emulation
(Substitute Strings). Up to 128 pairs of Match/Substitute Strings may be defined. AIC (AXIS Internal Codes) are listed in the AXIS Network Print Server Technical Reference. Font Selection Fonts can be selected directly by FGID (Extended Emulation commands or SCS SFG commands) or indirectly by pitch SCS SCD/SPD commands. - Page 180 Bar Codes The bar code function provides easy access to a range of standard bar code types resident in the Axis Network Print Server. Bar codes can only be printed on PCL printers. Before the bar codes can be printed, a bar code format has to be defined.
- Page 181 0123 4565 0123 4565 AXIS Cobra products The Axis Network Print Server supports a subset of the extended printer compatibility emulation syntax of the AXIS Cobra products, including the bar codes syntax. For more information, please refer to the AXIS Network Print Server Technical Reference supplied on the AXIS Network Product CD.
-
Page 182: Ibm Fonts
IBM font. The IBM to PCL font mapping is controlled by the Font Definition Table. All entries in this table are fully editable, and you can also add new entries. Refer to DBCS Support, on page 197 for details on DBCS font types supported by the Axis Network Print Server. Available Fonts The fixed pitch fonts are not scalable. - Page 183 Courier Bold 17 Pitch 17 CPI Fonts Courier 17 (sub/super) Courier 18 Pitch 18 CPI Fonts Gothic Text 20 Pitch 20 CPI Fonts Gothic Text 25 Pitch 25 CPI Fonts Gothic Text 27 Pitch 26.7 CPI Fonts AXIS 5570e User’s Manual...
- Page 184 Univers Bold Italic Univers Medium Condensed 3854 Univers Bold Condensed 3855 Univers Medium Condensed Italic 3856 Univers Bold Condensed Italic 3857 Antique Olive 3858 Antique Olive Bold 3859 Antique Olive Italic 3860 Garamond Antiqua 3861 Garamond Halbfett 3862 AXIS 5570e User’s Manual...
- Page 185 Proportional Typographic Fonts Futura Book Italic 33719 (Scalable Point Size) Futura Heavy Italic 33729 Helvetica 34103 34123 Helvetica Bold Helvetica Italic 34231 Helvetica Bold Italic 34251 Cursive 41783 Cursive Bold 41803 Cursive Italic 41911 Cursive Bold Italic 41931 AXIS 5570e User’s Manual...
-
Page 186: Ibm Print Formatting
5x27 002 Twinax printer: Korean 5x27_002_ TX_KSSM (KSSM) 5x27 001 Twinax printer: 5x27_001_ TX Japanese 5x27 005 Twinax printer: 5x27_005_TX Chinese System Languages The following tables describe the valid system languages that can be used in coax and twinax mode. AXIS 5570e User’s Manual... - Page 187 1144 Danish/Norwegian Alternate Spanish (Euro) 1145 Swedish/Finnish Alternate UK English (Euro) 1146 Spanish Alternate French (Euro) 1147 Japanese International Set 5 (Euro) 1148 Icelandic 1149 French User defined USER International Typographic Greek (GKB) International set 5 AXIS 5570e User’s Manual...
- Page 188 DSPSYSVAL SYSVAL(QCHRID) on the command line and press Enter. The Code page value is the value of the system language (see the table above). • Visit the Axis Web site http://www.axis.com/ for more information on how to edit the char- acter translation tables Page Formats You can configure the formats for each paper bin separately from the Axis Network Print Server internal Web pages.
- Page 189 ASCII Printer Driver This parameter should match the printer type you have connected to your Axis Network Print Server. Select the correct printer type from the Axis Network Print Server internal Web pages. Click Admin | IBM Emulators | Detailed View for SCS/IPDS Emulator Configuration.
-
Page 190: Ipds Overview
IPDS System Languages The Axis Network Print Server must be set up for the System Language of your IBM system configuration in order to obtain the correct characters in each specific language. This is done from the IBM Emulators | Detailed View (SCS/IPDS Emulator Configurations) page. - Page 191 ISO Latin 1 1252 Windows Latin 1 Code page System language - Latin 2/3/4/5 EBCDIC and ASCII Croatian, Czech, East German, Hungarian, Polish, Romanian, Slovak, Slovenian Latin 2 ISO/ ANSI 8 Bit Latin 3 Multilingual PC AXIS 5570e User’s Manual...
- Page 192 The Duplex Support setting determines whether duplex support for the attached printer shall be reported to the host. Enabled means that duplex commands are transferred to the printer. Disabled means that duplex printing is not supported. The default setting is Disabled. AXIS 5570e User’s Manual...
- Page 193 A downloaded 240 dpi font may appear jagged when printed on a 300 dpi Smoothing printer. The Axis Network Print Server uses a font smoothing feature to enhance the appearance of these fonts. The font smoothing may be disabled if you want to speed up the font loading or if your printer has insufficient PostScript virtual memory.
-
Page 194: Ipds Fonts
Enabling this feature will require more free Postscript Virtual Memory in the printer. Virtual This value defines how much memory the Axis Network Print Server can Memory kB use in the PostScript printer for storing resources. The default value is 2000 kbytes. -
Page 195: Printer Resident Fonts
Printer Resident Fonts The rest of this section deals with printer resident fonts. The non-standard PostScript fonts are resident in the Axis Network Print Server (OCR-B is one example), so you do not need font cards etc. to use the listed fonts. -
Page 196: Immediate Font Substitutions
(6 points). Scalable Fonts If the selected font width (point size) is not available for the selected FGID, the Axis Network Print Server will set a point size in one of the following ways depending on the font: Times Roman,... -
Page 197: Dbcs Support
5x27_005_TX Axis Network Print Server Double-byte Character Tables Important! The Axis Network Print Server supports SNA DBCS printing in IBM 5494 emulation only. Configuring the AS/400 Host, 5494 CU mode Follow the instructions below to configure the AS/400 Host for DBCS support: 1. -
Page 198: Verifying The Communications Link
1. Start a Web browser, e.g. Internet Explorer or Netscape Navigator. 2. Enter the IP address or the host name of the Axis Network Print Server in the location field and press the Enter key on your keyboard. The internal Web pages of the Axis Network Print Server will appear. -
Page 199: Extended Ibm Printer Emulation
<SI> (SCS Shift In Control Code) %CONFIG+ SAVE; %CONFIG- <SO>(SCS Shift Out Control Code) Example (with DBCS mode before entering extended emulation) AXIS 5570e User’s Manual... -
Page 200: Font Tables
DBCS Support Font Tables The following tables define the DBCS font types supported in the Axis Network Print Server (5494 CU Mode): DBCS FONTS (Japan) DBCS FONTS (China) FGID IBM Font Name FGID IBM Font Name MS Mincho 10 CPI... - Page 201 21.5 CPI 50041 50141 50042 HanYang 21.5 CPI 50142 Compst 21.5 CPI 50052 HanYang 21.5 CPI 50152 Compst 21.5 CPI HanYang 25.7 CPI Compst 25.7 CPI 50043 50143 HanYang 25.7 CPI Compst 25.7 CPI 50053 50153 AXIS 5570e User’s Manual...
-
Page 202: Digital Copier Support
From the drop-down list of supported copiers, select the digital copier that you have connected the Axis Network Print Server to. Copier Duplex The Axis Network Print Server supports duplex printing i.e. printing on both sides of the paper. The options in the drop-down list are: •... - Page 203 Paper Source and Copies. However, you must refer to the documentation of your specific Digital Copier to check that all the options are supported. If you experience problems with this functionality the Digital Copier printing options may have been set inconsistently. Please check your configuration settings and try again. AXIS 5570e User’s Manual...
-
Page 204: Ip Addressing
• Part one (‘192.168.3’) identifies the network on which the device resides. • Part two (‘.191’) identifies the device within the network. This type of IP address generally operates on a subnet mask of ‘255.255.255.0’. AXIS 5570e User’s Manual... - Page 205 Static Addressing With this method you must enter an IP Address and the subnet mask manually on every device. Using a static IP and subnet mask means the address is permanently fixed. AXIS 5570e User’s Manual...
- Page 206 Notes: • The default host name of the print server is ’AXIS’ followed by the last 6 digits in the serial number. e.g. AXIS181636. The host name (Print server name) can be changed in the PS_NAME.
- Page 207 The config file is downloaded immediately after the print server receives its IP address. 3. You have now successfully set the IP address of your print server. Note: You have to restart the print server to download the IP address. AXIS 5570e User’s Manual...
-
Page 208: The Test Button
The Test Button Section 23 The Test Button The test button is located on the front right hand side of the AXIS 5570e and is used for: • Printing a test page to check the connection to the printer. •... -
Page 209: Troubleshooting
AXIS 5570e. Fault symptoms, possible causes and remedial actions are provided within a quick reference table. Please visit the Axis Web site for latest troubleshooting tips, more support and additional help through the FAQ database or to fill in and submit a Support question. - Page 210 By sending a data packet to a specific IP address and waiting for a reply, Ping Ping can determine whether that IP address is accessible. Ping can also help you to determine IP address conflicts with your AXIS 5570e and troubleshoot TCP/IP problems on the network. Follow the instructions below to diagnose your problem.
- Page 211 Troubleshooting Axis Support In order to obtain optimal support from Axis support technicians, please Server Report follow these instructions when filling in and submitting a Support question. 1. Go to the print server’s Web pages by typing the print server’s IP address in the Address/Location field of your Web browser.
-
Page 212: Technical Specification
All Unix systems supporting TCP/IP (Linux, BSD, System V, Solaris, HP- UX, IBM AIX, Silicon Graphics IRIX, etc.) Additional Systems Other systems supporting TCP/IP: IBM (MVS, VM, VSE, OS/400), DEC, VMS Microsoft LAN Manager IBM LAN Server LANtastic AXIS 5570e User’s Manual... - Page 213 AXIS AddPrinter for easy and automated installation in Windows environments Internal Web pages or FTP for installation, configuration, monitoring and firmware upgrading SNMP-MIB II compliant (RFC 1213), Axis private enterprise MIB included Netware: Full PCONSOLE, NWAdmin, ConsoleOne and iPrint-iManager support Firmware Upgrade Firmware upgrade using AXIS ThinWizard, the print server’s Web pages...
- Page 214 USB: USB 1.1 Low and Full speed. Successfully tested with USB 2.0 Printers Note: If the AXIS 5570e is powered from the printer via the parallel port (i.e. instead of via the Power Adapter), the USB port will be switched off.
- Page 215 -C-TICK AS/NZS 3548 -Compliance to FCC part 15 Subpart B, Class B Safety EN 60950 Included Accessories AXIS Network Product CD with software for installation, management and printing, including AXIS ThinWizard (the recommended Axis management software) User documentation Quick Installation Guide Power adapter All specifications are subject to change without prior notice.
-
Page 216: The Parameter List
The Parameter List Section 26 The Parameter List These are the default parameters in a new, unconfigured print server. A complete list of all Axis print server parameters can be found on www.axis.com AXIS 5570e (AXIS 5570e Network Print Server V7.10 Nov 4 2006. - Page 217 : YES TELNET_ENB. : YES DEF_IP_FRAME_TYPE. : EthernetII (EthernetII, SNAP) --- TCP/IP Printing Menu TCP_ENB. : YES PAR_TCP_RESTRICT_LIST. : PROS_PWD. : netprinter PROS_PRT. : 35 LPD_BANN. : OFF (OFF, AUTO, LAST) DEFAULT_RAW_TCP. : 9100-9101 (9100-9101, CLOSED) AXIS 5570e User’s Manual...
- Page 218 PSERVER_BINDERY1. : PSERVER_BINDERY2. : PSERVER_BINDERY3. : PSERVER_BINDERY4. : PSERVER_BINDERY5. : PSERVER_BINDERY6. : PSERVER_BINDERY7. : PSERVER_BINDERY8. : PSERVER_BINDERY9. : PSERVER_BINDERY10. : PSERVER_BINDERY11. : PSERVER_BINDERY12. : PSERVER_BINDERY13. : PSERVER_BINDERY14. : PSERVER_BINDERY15. : PSERVER_BINDERY16. : NPRINTER1. NPRINTER2. NPRINTER3. NPRINTER4. AXIS 5570e User’s Manual...
- Page 219 (NONE, LPT1, USB1) PR1_NAME. PR1_SCND. : PR1 (PR1, PR2, PR3, PR4, PR5, PR6, PR7, PR8) PR1_WAIT. : YES PR1_IN. : AUTO (AUTO, NONE) PR1_BEF. PR1_STR. PR1_CSET. : NONE (NONE, ISO>IBM, 7UK>IBM, 7SW>IBM, 7GE>IBM, 7FR>IBM, 7ND>IBM, DEC>IBM) AXIS 5570e User’s Manual...
- Page 220 : 66 0 100 60 30 50 PR2_FONT. PR2_DC_MOD. : NONE (NONE, Canon_GP335, Canon_GP605, Canon_IR3300, Gestetner_3235, Gestetner_3245, Gestetner_3255, Gestetner_3265, Gestetner_P7032, HP_LaserJet_5Si, Konica_Minolta_Pi3502, Konica_Minolta_Pi3505e, Konica_Minolta_Pi4700e, Konica_Minolta_Pi5500, Konica_Minolta_Pi5501, Konica_Minolta_Pi6500e, Konica_Minolta_Pi7200e, Konica_Minolta_Pi7500, Konica_Minolta_CF2001, Ricoh_Aficio_220, Ricoh_Aficio_270, Ricoh_Aficio_350, Ricoh_Aficio_450, Ricoh_Aficio_550, Ricoh_Aficio_650, Ricoh_Aficio_AP4500, Ricoh_Aficio_AP3200, AXIS 5570e User’s Manual...
- Page 221 SHORT_EDGE_BINDING) PR3_DC_STAP. : OFF (OFF, TOP_LEFT_SLANT, TOP_LEFT_HORIZONTAL, TOP_LEFT_VERTICAL, TOP_RIGHT, BOTTOM_LEFT, BOTTOM_RIGHT, TOP_DOUBLE, LEFT_DOUBLE, CENTER) PR3_DC_HOLE. : OFF (OFF, LONG_EDGE, SHORT_EDGE) PR3_DC_FOLD. : OFF (OFF, HALF_FOLD, Z_FOLD) PR3_DC_TRAY. : DEFAULT (DEFAULT, 1, 2, 3, 4, 5) PR3_DC_COP. AXIS 5570e User’s Manual...
- Page 222 7FR>IBM, 7ND>IBM, DEC>IBM) PR5_FILT. : NONE (NONE, POSTSCR, AUTO_PS) PR5_AFT. PR5_DUMP. : NO PR5_SIZE. : A4 (A4, LETTER, LEGAL, EXECUT) PR5_ORNT. : PORTR (PORTR, LANDS, R_PORTR, R_LANDS) PR5_FORM. : 66 0 100 60 30 50 PR5_FONT. AXIS 5570e User’s Manual...
- Page 223 Konica_Minolta_Pi4700e, Konica_Minolta_Pi5500, Konica_Minolta_Pi5501, Konica_Minolta_Pi6500e, Konica_Minolta_Pi7200e, Konica_Minolta_Pi7500, Konica_Minolta_CF2001, Ricoh_Aficio_220, Ricoh_Aficio_270, Ricoh_Aficio_350, Ricoh_Aficio_450, Ricoh_Aficio_550, Ricoh_Aficio_650, Ricoh_Aficio_AP4500, Ricoh_Aficio_AP3200, Savin_9935DP, Savin_9945DP, Savin_9955DP, Savin_9965DP, Sharp_AR286_FN1, Sharp_AR336_FN1, Sharp_AR405_FN1, Sharp_AR505_FN1, Sharp_AR286_FN2, Sharp_AR336_FN2, Sharp_AR405_FN2, Sharp_AR505_FN2, Toshiba_DP_4580, Toshiba_DP_5570, Toshiba_DP_6570, Toshiba_DP_8070, Toshiba_eSTUDIO35, Toshiba_eSTUDIO45, Toshiba_eSTUDIO55, Toshiba_eSTUDIO65, Toshiba_eSTUDIO80, Custom_copier_driver) AXIS 5570e User’s Manual...
- Page 224 (DEFAULT, 1, 2, 3, 4, 5) PR7_DC_COP. --- Printer8 Menu PR8_OUT. : USB1 (NONE, LPT1, USB1) PR8_NAME. PR8_SCND. : PR8 (PR1, PR2, PR3, PR4, PR5, PR6, PR7, PR8) PR8_WAIT. : YES PR8_IN. : AUTO (AUTO, NONE) PR8_BEF. AXIS 5570e User’s Manual...
- Page 225 PAR_CUST_DC_PCL_CTRL_POSTSCRIPT. : PAR_CUST_DC_PCL_CTRL_PCL. : PAR_CUST_DC_PCL_CTRL_PCLXL. : PAR_CUST_DC_PCL_CTRL_EXIT. : --- DC PCL Duplex Menu PAR_CUST_DC_PCL_DUP_SIMPLEX. : PAR_CUST_DC_PCL_DUP_LONG. : PAR_CUST_DC_PCL_DUP_SHORT. : --- DC PCL Staple Menu PAR_CUST_DC_PCL_STP_TOP_L_SLN. : PAR_CUST_DC_PCL_STP_TOP_L_HOR. : PAR_CUST_DC_PCL_STP_TOP_L_VER. : PAR_CUST_DC_PCL_STP_TOP_RIGHT. : PAR_CUST_DC_PCL_STP_LOW_LEFT. : PAR_CUST_DC_PCL_STP_LOW_RIGHT. : AXIS 5570e User’s Manual...
- Page 226 PAR_CUST_DC_PS_STP_TOP_2. : PAR_CUST_DC_PS_STP_LEFT_2. : PAR_CUST_DC_PS_STP_MID_2. : --- DC PS Punch Menu PAR_CUST_DC_PS_PUNCH_LONG. : PAR_CUST_DC_PS_PUNCH_SHORT. : --- DC PS Fold Menu PAR_CUST_DC_PS_FOLD_HALF. : PAR_CUST_DC_PS_FOLD_Z. : --- DC PS Media Menu PAR_CUST_DC_PS_MEDIA_DEFAULT. : PAR_CUST_DC_PS_MEDIA_TRAY1. : PAR_CUST_DC_PS_MEDIA_TRAY2. : PAR_CUST_DC_PS_MEDIA_TRAY3. : AXIS 5570e User’s Manual...
- Page 227 : Default, 100, 100, 0, 0 PS_DEST. : 0, 0, 0, 0, 0, 0 --- IBM IPDS PCL Driver Settings PCL_VER. (3, 4, 5) PCL_SBSET. : AUTOMATIC (AUTOMATIC, US-ASCII, Latin1, Latin5, Latin9, PC437, PC850, PC852, Roman8, ISO8859-7) PCL_OCR_ENB. : Enabled AXIS 5570e User’s Manual...
- Page 228 861, 863, 865, 870, 871, 875, 880, 892, 893, 905, 912, 914, 920, 923, 924, 1004, 1026, 1069, 1140, 1141, 1142, 1143, 1144, 1145, 1146, 1147, 1148, 1149, 1252) IPDS_PD2. : PostScript (PostScript, PCL) IPDS_SOJS2. IPDS_EOJS2. AXIS 5570e User’s Manual...
- Page 229 : 5.0 (5.0, 6.0, 6.7, 7.5, 9.0) AUTORI3. : YES LM3. : 0, 0, 48 TM3. : 26, 26, 74 LDSF3. : 100, 100, 70 DEFBIN3. : BIN1 (BIN1, BIN2, BIN3, BIN4, BIN5, BIN6, MANUAL, ENVELOPE, CONTINUOUS) AXIS 5570e User’s Manual...
- Page 230 861, 863, 865, 870, 871, 875, 880, 892, 893, 905, 912, 914, 920, 923, 924, 1004, 1026, 1069, 1140, 1141, 1142, 1143, 1144, 1145, 1146, 1147, 1148, 1149, 1252) IPDS_PD5. : PostScript (PostScript, PCL) IPDS_SOJS5. IPDS_EOJS5. AXIS 5570e User’s Manual...
- Page 231 : 5.0 (5.0, 6.0, 6.7, 7.5, 9.0) AUTORI6. : YES LM6. : 0, 0, 48 TM6. : 26, 26, 74 LDSF6. : 100, 100, 70 DEFBIN6. : BIN1 (BIN1, BIN2, BIN3, BIN4, BIN5, BIN6, MANUAL, ENVELOPE, CONTINUOUS) AXIS 5570e User’s Manual...
- Page 232 861, 863, 865, 870, 871, 875, 880, 892, 893, 905, 912, 914, 920, 923, 924, 1004, 1026, 1069, 1140, 1141, 1142, 1143, 1144, 1145, 1146, 1147, 1148, 1149, 1252) IPDS_PD8. : PostScript (PostScript, PCL) IPDS_SOJS8. IPDS_EOJS8. AXIS 5570e User’s Manual...
- Page 233 FGID_CPI25COR. : 289 FGID_CPI27COR. : 290 PROPOCOR. : 230 TYPOCOR. : 230 --- IBM SCS JOB CONTROL REINIT. : YES SUPFFBLANK. : NO --- IBM 3270 OPTIONS CASE. : DUAL (DUAL, MONO) BASCOL. : BLACK, ENA XSTRN. AXIS 5570e User’s Manual...
- Page 234 : 1B 26 6C 32 31 48 BIN6S. : 1B 26 6C 32 32 48 MANUALS. : 1B 26 6C 32 48 ENVELOPES. : 1B 26 6C 36 48 CONTINUOUSS. : 1B 26 6C 31 48 AXIS 5570e User’s Manual...
- Page 235 : 68, DEFAULT,FIXED, 150, ITALIC,MEDIUM,4102, FONT. : 69, DEFAULT,FIXED, 150, UPRIGHT,BOLD, 4102, FONT. : 70, DEFAULT,FIXED, 120, UPRIGHT,MEDIUM,4099, FONT. : 71, DEFAULT,FIXED, 120, ITALIC,MEDIUM,4099, FONT. : 72, DEFAULT,FIXED, 120, UPRIGHT,BOLD, 4099, FONT. : 80, DEFAULT,FIXED, 120, UPRIGHT,MEDIUM,4099, AXIS 5570e User’s Manual...
- Page 236 DEFAULT,FIXED, 100, UPRIGHT,BOLD, 4099, FONT. : 252, DEFAULT,FIXED, 171, UPRIGHT,MEDIUM,4099, FONT. : 253, DEFAULT,FIXED, 171, UPRIGHT,BOLD, 4099, FONT. : 254, DEFAULT,FIXED, 220, UPRIGHT,MEDIUM,4099, FONT. : 258, DEFAULT,FIXED, 180, UPRIGHT,MEDIUM,4099, FONT. : 266, DEFAULT,FIXED, 100, UPRIGHT,BOLD, 4099, AXIS 5570e User’s Manual...
- Page 237 28 73 34 53 FONT. : 3855, 100, DEFAULT,PROP, NONE, BOLD, 4148, 28 73 34 53 FONT. : 3856, 100, DEFAULT,PROP, NONE, MEDIUM,4148, 28 73 35 53 FONT. : 3857, 100, DEFAULT,PROP, NONE, BOLD, 4148, 28 73 35 53 AXIS 5570e User’s Manual...
- Page 238 : 6199, 100, DEFAULT,PROP, UPRIGHT,MEDIUM,4197, FONT. : 6219, 100, DEFAULT,PROP, UPRIGHT,BOLD, 4197, FONT. : 6327, 100, DEFAULT,PROP, ITALIC,MEDIUM,4197, FONT. : 6347, 100, DEFAULT,PROP, ITALIC,BOLD, 4197, FONT. : 16951,100, DEFAULT,PROP, UPRIGHT,MEDIUM,4101, FONT. : 16971,100, DEFAULT,PROP, UPRIGHT,BOLD, 4101, AXIS 5570e User’s Manual...
- Page 239 28 31 39 4B 1B 26 74 33 31 50 FONT. : 50006,100, PC942,PROP, UPRIGHT,MEDIUM,28752, 28 31 39 4B 1B 26 74 33 31 50 FONT. : 50007,100, PC942,PROP, 101, UPRIGHT,MEDIUM,28752, 28 31 39 4B 1B 26 74 33 31 50 AXIS 5570e User’s Manual...
- Page 240 28 31 39 48 1B 26 74 33 38 50 FONT. : 50032,100, PC891,PROP, 120, UPRIGHT,MEDIUM,43088, 28 31 39 48 1B 26 74 33 38 50 FONT. : 50033,100, PC891,PROP, 108, UPRIGHT,MEDIUM,43088, 28 31 39 48 1B 26 74 33 38 50 AXIS 5570e User’s Manual...
- Page 241 28 31 39 48 1B 26 74 33 38 50 FONT. : 50052,100, PC891,PROP, UPRIGHT,MEDIUM,41040, 28 31 39 48 1B 26 74 33 38 50 FONT. : 50053,100, PC891,PROP, UPRIGHT,MEDIUM,41040, 28 31 39 48 1B 26 74 33 38 50 AXIS 5570e User’s Manual...
- Page 242 28 31 38 43 1B 26 74 33 38 50 FONT. : 50102,100, PC903,PROP, 120, UPRIGHT,MEDIUM,37058, 28 31 38 43 1B 26 74 33 38 50 FONT. : 50103,100, PC903,PROP, 108, UPRIGHT,MEDIUM,37058, 28 31 38 43 1B 26 74 33 38 50 AXIS 5570e User’s Manual...
- Page 243 28 31 38 43 1B 26 74 33 38 50 FONT. : 50122,100, PC903,PROP, UPRIGHT,MEDIUM,37058, 28 31 38 43 1B 26 74 33 38 50 FONT. : 50123,100, PC903,PROP, UPRIGHT,MEDIUM,37058, 28 31 38 43 1B 26 74 33 38 50 AXIS 5570e User’s Manual...
- Page 244 28 31 38 48 1B 26 74 33 38 50 FONT. : 50148,100, PC891,PROP, UPRIGHT,MEDIUM,41040, 28 31 38 48 1B 26 74 33 38 50 FONT. : 50149,100, PC891,PROP, 101, UPRIGHT,MEDIUM,41040, 28 31 38 48 1B 26 74 33 38 50 AXIS 5570e User’s Manual...
- Page 245 28 31 38 48 1B 26 74 33 38 50 FONT. : 50153,100, PC891,PROP, UPRIGHT,MEDIUM,41040, 28 31 38 48 1B 26 74 33 38 50 --- Email Menu EMAIL_NOTIFICATION. : NO REPLY_ADDRESS. : PAPER_JAM_ADDRESS. : OUT_OF_PAPER_ADDRESS. : TONER_LOW_ADDRESS. : NO_TONER_ADDRESS. : PRINTER_OFFLINE_ADDRESS. : AXIS 5570e User’s Manual...
-
Page 246: Netware Parameter Combinations
The Parameter List NetWare Parameter Combinations In AXIS 5570e, when NetWare is enabled (i.e. when the NETW_ENB. parameter is set to “yes” in the NetWare Menu), the different settings of the NETW_TRANSPORT_PROTOCOL. and NDPS. parameters will result in these functionalities:... -
Page 247: Tcp Ports Opened For Raw Printing
SNMP Status is enabled through Windows’ printer port settings. You have a three port print server and want to enable SNMP Status for Example LPT2. The table above tells you to set the SNMP Device Index to 3. Using Windows XP as an example: AXIS 5570e User’s Manual... - Page 248 4. Click Configure Port... 5. Ensure that SNMP Status Enabled is ticked and enter the correct index number in SNMP Device Index, taken from the table above (3 in this example). 6. Click OK and Close. AXIS 5570e User’s Manual...
-
Page 249: Glossary
Table for an entry matching the print server's Ethernet address. If a matching entry is found, the daemon downloads the IP address to the print server. Berkeley Software Distribution. The University of California, Berkeley additions to the UNIX operating system. AXIS 5570e User’s Manual... - Page 250 This is a file that resides in the print server’s memory and contains all the parameters that determine the Axis Network Print Server functionality. By editing the config file (changing the parameter settings), you can configure the Axis Network Print Server to meet the printing needs of your network. CPGID...
- Page 251 System V versions do not support LPD. Line PRinter. The Unix print command. This does not actually print files but rather copies or links them to a spool area from where a daemon copies them to the printer. AXIS 5570e User’s Manual...
- Page 252 TCP/IP application protocol. Supported on AS/400s and Mainframes for transporting IPDS printer data over TCP/IP. This is not an open standard. Physical Unit type within SNA. The software in an SNA node controlling the node's communications hardware. AXIS 5570e User’s Manual...
- Page 253 The SSCP is a NAU located on a host node in the network. Secure Sockets Layer, a protocol designed to provide secure communications on the Internet. Transmission Control Protocol. The connection-oriented, transport-level protocol used in the TCP/IP suite of protocols. AXIS 5570e User’s Manual...
- Page 254 NetBIOS names to dynamically assigned IP addresses. Wizard A special form of user assistance that automates a task through a dialog with the user. Wizards help the user to accomplish tasks that are complex and require experience. AXIS 5570e User’s Manual...
-
Page 255: Index
AXIS IPP Gateway Configuration ........102... -
Page 256: Configuration Methods
Delete Certificate..........165 AXIS 5570e User’s Manual... - Page 257 Hex Dump Mode ..........159 AXIS 5570e User’s Manual...
- Page 258 Installing AXIS ThinWizard ........
- Page 259 AXIS Print Utility for OS/2 ........
- Page 260 RISC ............253 AXIS 5570e User’s Manual...
- Page 261 Starting AXIS ThinWizard ........
- Page 262 World Wide Web ..........188 AXIS 5570e User’s Manual...
Need help?
Do you have a question about the 27980R1 and is the answer not in the manual?
Questions and answers