Table of Contents
Advertisement
Advertisement
Chapters
Table of Contents

Related Manuals for BMW R1150RT - MAINTENANCE BMW INTEGRAL ABS


Summary of Contents for BMW R1150RT - MAINTENANCE BMW INTEGRAL ABS
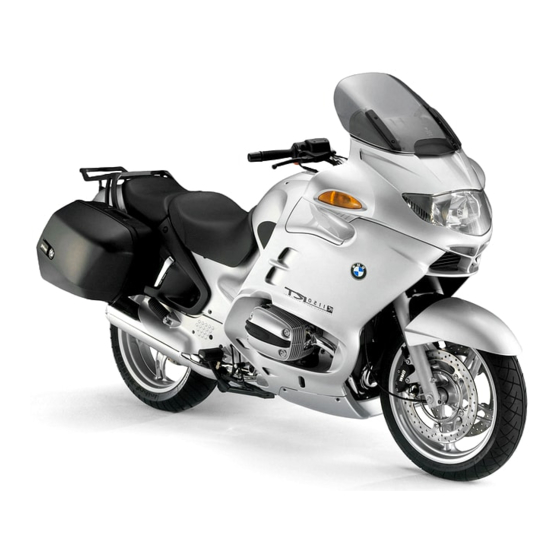
- Page 1 Maintenance BMW Integral ABS R 1150 RT BMW Motorrad After Sales...
- Page 2 Published by: © BMW Motorrad After Sales UX-VS-2 All rights reserved. Not to be reprinted, translated or duplicated either wholly or in part without prior written permission. Errors and omissions excepted; subject to technical amendment. Produced in Germany 01/01...
- Page 3 Registration No. Order No. Mechanic’s signature Read the fault code memory with the BMW MoDiTeC [Integral ABS] perform bleed test with BMW MoDiTeC Change oil while at regular operating temperature and replace the oil filter element If the motorcycle is ridden only for short distances or outside temperatures are below 0 °C: at the...
- Page 4 Check headlight setting and adjust if necessary. Check tightness of rear wheel studs (note correct tightening torque) Check tyre pressures Fill up with fuel [Integral ABS] perform bleed test with BMW MoDiTeC Final inspection as functional check: – Clutch, gear shift –...
-
Page 5: Engine
BMW Motorrad Service data R 1150 RT Item Desired value Unit of measure- ment/specification Oil capacities Engine (with filter) 3.75 (6.6) litres (Imp. pints) (without filter) 3.50 (6.15) litres (Imp. pints) [SI 11 048 90] Engine oil grade: brand-name HD oil for four-stroke spark-ignition engines, API classes SE, SF , SG;... -
Page 6: Table Of Contents
00 Tightening torque Table of operating fluids Contents Page Tightening torque .........................3 11 Engine ............................3 12 Engine electrics ........................5 13 Fuel preparation and control ....................5 16 Fuel tank and lines ........................5 18 Exhaust system .........................5 21 Clutch ............................6 23 Transmission ..........................6 31 Front forks ...........................7... - Page 7 00.2...
-
Page 8: Tightening Torque
Tightening torque Model R 1150 RT Connection 11 Engine Cylinder head Tightening sequence: 1 Tighten cylinder head nuts (oiled) in diagonally opposite sequence 1.1 Tighten all nuts to closing torque 1.2 Tighten all nuts to correct wrench ° angle 1.3 Tighten all nuts to correct wrench °... - Page 9 Model R 1150 RT Connection 11 Engine Oil filter Oil filter Oil drain plug Oil pump Mesh filter basket to engine block Oil pump cover Pressure relief valve Oil pressure switch Oil cooler Cooling oil line to engine block Cooling oil line banjo screw with oil vent valve Oil cooler to bracket Oil cooler return line to engine block...
-
Page 10: 12 Engine Electrics
Model R 1150 RT Connection 12 Engine electrics Starter motor to engine Positive lead to starter motor Alternator to generator support cover Tensioning and retaining link to alternator Spacer to alternator Positive lead to alternator Belt pulley to alternator Belt pulley to crankshaft Poly-V belt preload NGK BKR 7 EKC spark plug Model... -
Page 11: 21 Clutch
Model R 1150 RT Connection 21 Clutch Clutch housing Initial tightening torque (oil screw threads lightly) + additional wrench angle ° Housing cover to housing Clutch line to handlebar fitting Slave cylinder to gearbox Grub screw in filler adapter Model R 1150 RT Connection 23 Transmission... -
Page 12: 31 Front Forks
Model R 1150 RT Connection 31 Front forks Quick-release axle clamp screws Sliding tube bridge to slider tube (clean thread + Loctite 243) Threaded connection, fork fixed tube to fork bridge (free from oil and grease) Threaded stud to frame (clean thread + Loctite 243) Ball joint to sliding tube bridge (lightly grease threads with Optimoly TA) -
Page 13: 33 Rear Wheel Drive
Model R 1150 RT Connection 33 Rear wheel drive Rear axle differential Oil filler plug Oil drain plug Threaded ring (clean thread + Loctite 577) Hexagon nut, input bevel gear (clean thread + Loctite 2701) Cover to rear-wheel drive housing Swinging arm Reaction link to rear wheel drive / gearbox (load approx. -
Page 14: 34 Brakes
Brake hose to brake lever fitting Filler adapter to brake line Bracket to front frame Retainer to rear frame (clean thread + Loctite 2701) BMW Integral ABS ABS pressure modulator on retainer ABS pressure modulator on battery carrier Model R 1150 RT... -
Page 15: Frame
Model R 1150 RT Connection 46 Frame Frame Frame to engine Struts to frame Strut to engine (clean thread + Loctite 2701) Rear frame to left/right of engine (clean thread + Loctite 2701) Rear frame with footrest plate to left/right of transmission (clean thread + Loctite 2701) Fairing bracket to frame... -
Page 16: 51 Equipment
Model R 1150 RT Connection 51 Equipment Ignition/steering lock to fork bridge (micro-encapsulated) Model R 1150 RT Connection 61 General electrical equipment Horn to holder (clean thread + Loctite 243) Horn to fairing bracket Ground (earth) strap to engine block Battery carrier to rubber-metal element Strut to battery carrier 00.11... -
Page 17: Table Of Operating Fluids
83 19 9 407 855 500 ml spray housings Crack testing agent for aluminium Developer MR 70 81 22 9 407 495 500 ml spray housings Installation aids BMW cooling spray Cooling spray 83 19 9 407 762 300 ml spray 00.12... - Page 18 Checking tightness of rear wheel studs ................21 Checking tyre pressures ......................21 Checking headlight beam angle, adjusting if necessary ........22 [Integral ABS] Performing bleed test with BMW MoDiTeC ........23 Final inspection and function check ................23 Final cleaning ..........................23 Handing over the motorcycle ....................24...
- Page 19 00.14...
-
Page 20: General View Of Crated Motorcycle
General view of crated motorcycle R22009010 00.15... -
Page 21: Checking The Crated Motorcycle For Damage
Checking the crated motorcycle for Unpacking the motorcycle damage • Lever off the cover. • • When the motorcycle arrives, check the crated Remove plastic covers. • motorcycle immediately for damage and, if nec- Take out the separate pack of items: essary, examine the contents for consequential –... -
Page 22: Assembling The Motorcycle
Clamping screws of quick-release axle ..22 Nm • Remove rear straps. Brake caliper to fork slider ......30 Nm • Using the assembly crane, BMW No. 46 5 640, Installing front mudguard carefully push the motorcycle forward off the pal- let. •... -
Page 23: Filling And Charging The Battery
R22460020 Filling and charging the battery Warning: • Remove seat. Battery acid is highly caustic. • Remove left side fairing panel. It must not contact the eyes, face hands, clothing or • Remove the air filter cover. the motorcycle’s paintwork. •... - Page 24 Note: After switching on the ignition, always wait for the Note: BMW Integral ABS to complete its self-diagnosis. Follow the instructions for use supplied with the bat- Do not operate the brake lever until self-diagnosis tery charger. has completed.
-
Page 25: Installing Cover For Windscreen Adjuster And Installing Windscreen
Installing cover for windscreen Assembling case adjuster and installing windscreen R22000070 R22000060 • Position the lid on the case for alignment. Open • Install the cover for the windscreen adjuster. the hinges of the lid and guide them into the base •... -
Page 26: Inspecting Motorcycle For Damage
10 mm (0.3937 in). R22000080 • Check oil level with the motorcycle upright. Attention: Never top up the engine-oil level past the “MAX” mark. Required level:..........MAX BMW recommends Castrol 00.21... -
Page 27: Checking Headlight Beam Angle, Adjusting If Necessary
Checking headlight beam angle, adjusting if necessary R22000110 • Turn screw (2) to adjust beam throw, if neces- R22000090 sary. • Motorcycle on level surface. Direction of rotation, left .....further/higher • Rider’s weight on motorcycle Direction of rotation, right....shorter/deeper (approx. 85 kg/187.4 lbs). •... -
Page 28: Integral Abs Performing Bleed Test With Bmw Moditec
Warning: When performing maintenance and repair work on BMW Integral ABS, never pump quickly or vigorous- • Perform bleed test. • Perform all requisite repair work. -
Page 29: Handing Over The Motorcycle
– controls – instruments and telltale lights – optional equipment and accessories fitted – features of BMW Integral ABS: brake servo, residual braking function, pump noises, self-diagnosis with pull-away test. • The user must be given the following information: –... - Page 30 ....................29 Reading the BMW MoDiTeC fault code memory ............29 (Inspections I, II, III and IV) .........................29 Integral ABS: Performing bleed test with BMW MoDiTeC ........29 (Inspections I, II, III and IV) .........................29 Changing engine oil, replacing oil filter element ............30 (Inspections I, II, III and IV) .........................30...
- Page 31 Contents Page Checking brake pads and discs for wear/replacing ..........37 (Inspections II and III) .........................37 Checking brake pads for wear ....................37 Brake pads, front brake ........................37 Brake pads, rear brake ........................37 Checking brake disc wear ......................38 Replacing brake pads .........................38 Brake pads, front brake ........................38 Brake pads, rear brake ........................39 Changing/bleeding brake fluid in wheel circuit...
- Page 32 Contents Page Checking/adjusting valve clearances ................55 (Inspections I, II and III) ........................55 Checking freedom of throttle cable, checking for chaffing and kinks, replacing if necessary, Checking throttle-cable play Checking and adjusting idle speed and throttle-valve synchronisation ..55 (Inspections I, II and III) ........................55 Final inspection with road safety and functional check ........57 (Inspections I, II, III and IV) .........................57...
- Page 33 00.28...
-
Page 34: Key To Maintenance Intervals
BMW Service every 10,000 km • (6,000 miles) Remove front and rear seats. • – BMW Inspection every 20,000 km Connect the BMW MoDiTeC to the diagnosis (12,000 miles) connector. • – BMW Annual Service Read all fault memories. •... -
Page 35: Changing Engine Oil, Replacing Oil Filter Element
Remove oil drain plug and drain off oil. 11 4 650 C000030 • Use oil filter wrench, BMW No. 11 4 650, to re- move the oil filter. • Coat sealing ring on new oil filter element with oil and install filter. -
Page 36: Changing Oil In Gearbox
R22000250 R28000100 • Remove oil filler plug (1). • Push in oil drain tube, BMW No. 23 4 680, and turn it to the right. • Remove oil drain plug (2) and allow the oil to drain out. Attention: •... -
Page 37: Replacing Fuel Filter
R22160010 Replacing fuel filter • 16 12 008 Disconnect breather and overflow hoses. • Disconnect quick-connect adapters of the fuel (Inspection III) lines. • In normal operating conditions every 40,000 km Disconnect the plug of the fuel pump. • (24,000 miles); if fuel quality is poor every 20,000 km Drain fuel tank. - Page 38 Note correct direction of flow through fuel filter. Make sure that breather lines are correctly routed. • Secure non-reusable hose clips with pliers, BMW No. 13 1 500. Tightening torque: Fuel pump unit to fuel tank ......5 Nm Attention: Fuel tank to rear frame .........
-
Page 39: Checking Battery Fluid Level And Topping Up If Necessary; Cleaning And Greasing The Battery Posts
R22000120 Checking battery fluid level 61 20 029 Note: and topping up if necessary; clean- Disconnecting the battery means that the entries in ing and greasing the battery posts the fault memory of the Motronic MA2.4 control unit are deleted and the adaptation values are reset. (Inspections III and IV) This can temporarily impair the operating character- istics when the engine is restarted. -
Page 40: Replacing Intake Air Filter Element
Replacing intake air filter 13 72 000 element (Inspection III) in very dirty and dusty operating conditions, replace every 10,000 km (6,000 miles) or even more frequently if necessary RS110480 • Slacken alternator securing screws (1,3,4). • Remove old Poly-V belt. Note: Loop Poly-V belt over crankshaft belt pulley first, R22000130... -
Page 41: Checking Brake Fluid Level
• Check brake fluid level at sight glass. Note: After switching on the ignition, always wait for the BMW Integral ABS to complete its self-diagnosis. Do not operate the brake lever until self-diagnosis has completed. Warning: When performing maintenance and repair work on BMW Integral ABS, never pump quickly or vigorously. -
Page 42: Checking Brake Pads And Discs For Wear/Replacing
Checking brake pads and discs for Brake pads, rear brake wear/replacing (Inspections II and III) Checking brake pads for wear Brake pads, front brake R22000170 • Visually inspect the brake pads. – Make sure that the brake disc is not visible through the bore (arrow) in the inner brake pad. -
Page 43: Checking Brake Disc Wear
4.5 mm (0.177 in) Note: rear: ..........4.5 mm (0.177 in) After switching on the ignition, always wait for the BMW Integral ABS to complete its self-diagnosis. Replacing brake pads Do not operate the brake lever until self-diagnosis has completed. -
Page 44: Brake Pads, Rear Brake
• 34 21 200 Brake pads, rear brake Installation is the reverse of the removal proce- dure. • Check operation of the brake system with the ig- Attention: nition switched on. Integral brakes, the front brake must be ready for use. -
Page 45: Changing/Bleeding Brake Fluid In Wheel Circuit
Integral brakes, the rear brake must be ready for • use. Use resetting tool, BMW No. 34 1 531, and locator, BMW No. 34 1 532, to force the pistons • Remove fuel tank. in the left and right brake calipers all the way back and hold them in this position. - Page 46 The higher the brake pressure the faster the fluid is • Slowly fill container, BMW No. 34 1 581, with pumped through the system, which means that the new brake fluid until it is approximately 1/2 full.
-
Page 47: Instructions For Filling Front Wheel Circuit Reservoir
“MAX” mark if necessary With the ignition switched on, bed in the brake • Install adapters 22, BMW No. 34 1 533, in reset- pads against the brake discs. • ting tool, BMW No. 34 1 531/532, for both front... - Page 48 ( 00.42) • Connect 1.5 m (4.9214 ft) silicon hose, • BMW No. 34 1 561, to the bleed screw of the left Check operation of the brake system with the ig- brake caliper. nition switched on. Note:...
-
Page 49: Bleeding/Changing Brake Fluid In Rear Wheel Circuit
BMW No. 34 1 531. Attention: R22000350 Install piston resetting tool, BMW No. 34 1 531 only when the cap has been removed from the wheel-cir- • cuit reservoir. Screw container, BMW No. 34 1 581, onto rear wheel circuit reservoir. - Page 50 Note: bleed screw. • After switching on the ignition, always wait for the Disconnect the container from the wheel-circuit BMW Integral ABS to complete its self-diagnosis. reservoir. Do not operate the brake lever until self-diagnosis has completed. Attention: After changing and/or bleeding the brakes, always top up the fluid in the wheel-circuit reservoir to the correct level in accordance with the instructions.
-
Page 51: Instructions For Filling Rear Wheel Circuit Reservoir
Top up the fluid in the wheel-circuit reservoir until one of the three protrusions in the filler neck just 34 1 531 touches the surface of the fluid (arrow). • Remove resetting tool, BMW No. 34 1 531, and adapter, BMW No. 34 1 536. R28000170 Warning: •... - Page 52 BMW No. 34 2 541. nition switched on. • Connect 1.5m (4.9214 ft) silicon hose, BMW No. 34 1 561, to the bleed screw. Attention: After all the work on the brake system has been Note: completed, run a bleed test using the If necessary, use a cable tie to secure the bleed BMW MoDiTeC.
-
Page 53: Changing/Bleeding Brake Fluid In Control Circuit
Change brake fluid in control circuit every 2 years (Inspection IV) Warning: All repair and maintenance work on the BMW Integral ABS must be performed by trained, qualified specialists. Comply with all maintenance and repair instructions and always work through the various steps in the correct order. - Page 54 (3) and – front metering cylinder (1) for the second time using ring spanner, BMW No. 34 2 532, in accord- ance with instructions for bleeding. Instructions for bleeding: 1. Slowly pull brake lever until brake-light switch clicks (blow-by bore closed).
-
Page 55: Bleeding/Changing Brake Fluid In Rear Control Circuit
– rear control circuit (3) and – rear metering cylinder (1) for the second time using ring spanner, BMW No. 34 2 532, in accord- ance with instructions for bleeding. Instructions for bleeding: R22000151 1. Slowly depress brake lever until brake-light switch clicks (blow-by bore closed). -
Page 56: Checking Clutch Operating Fluid Level
After all the work on the brake system has been completed, run a bleed test using the R22000190 BMW MoDiTeC. • Perform bleed test with BMW MoDiTeC. Required level with a new clutch liner: 00.29) ........... Half way up sight glass •... -
Page 57: Changing The Clutch Fluid
Changing the clutch fluid • 21 52 005 Screw the bleed screw all the way into the filler adapter (valve in filler adapter closed). (Inspection IV) every 2 years at the latest Attention: While bleeding the system, do not allow the brake Note: fluid level to drop below the bottom edge of the ring The description applies to a brake system filling and... -
Page 58: Checking Tightness Of Rear Wheel Studs
Checking tightness of rear wheel Greasing the side stand pivot studs (Inspections I, II and III) (Inspection I) • Tighten the rear wheel studs with a torque wrench. Tightening torque: Securing screws for rear wheel ....105 Nm Checking rear wheel bearing play by tilting wheel (Inspection III) •... -
Page 59: Checking/Replacing Spark Plugs
R21000330 R21000190 • Remove cylinder head cover. • Pull off spark plug caps with special puller, BMW No. 12 3 520. • Remove spark plugs with the spark plug wrench, Attention: BMW No. 12 3 510. Catch escaping oil. Attention: Do not bend electrodes - risk of breakage! Spark plug:........ - Page 60 Checking/adjusting valve Checking freedom of throttle 11 34 004 13 60 110 clearances cable, checking for chaffing and kinks, replacing if necessary (Inspections I, II and III) Checking throttle-cable play Checking and adjusting idle speed and throttle-valve synchronisation (Inspections I, II and III) •...
- Page 61 Note: Play of throttle cable: ..approx. 2 mm (0.0787 in) Zero play can cause the throttle valves to rattle. • Connect hose of BMW Synchro to vacuum adapter and connect cables to BMW MoDiTeC. • Start the engine. Attention:...
- Page 62 Final inspection with road safety and functional check (Inspections I, II, III and IV) Road safety check • Check wheels and tyres. • Check/correct tyre pressures. • Wait at least 10 minutes after heating the engine to operating temperature in the trial run/road test before checking/correcting engine oil level.
- Page 63 00.58...
- Page 64 34 Brakes Contents Page Technical Data 34 Brakes ......................3 Removing and installing front brake caliper ..............4 Disassembling and assembling front brake caliper ..........5 Removing and installing rear brake caliper ..............6 Disassembling and assembling rear brake caliper ...........7 Disassembling rear brake caliper ....................7 Assembling rear brake caliper ....................7...
- Page 65 Instructions for filling front wheel circuit reservoir ................25 Filling and bleeding rear wheel circuit ....................26 Instructions for filling rear wheel circuit reservoir ................28 Integral ABS Reading fault memory with BMW MoDiTeC ..............29 Integral ABS Performing bleed test with BMW MoDiTeC ..............29...
-
Page 66: Technical Data 34 Brakes
(in) 0.15 (0.0059) Piston dia. in brake caliper mm (in) 26/28 (1.0236/1.1023) Piston dia. in actuating cylinder mm (in) 13 (0.5118) BMW Integral ABS Type Active fully integral system Sensor gap, front mm (in) 0.2...1.7 (0.0079...0.0670) (active sensor) Sensor gap, rear mm (in) 0.2...1.7 (0.0079...0.0670) (active sensor) -
Page 67: Removing And Installing Front Brake Caliper
Removing and installing front 34 11 brake caliper Attention: Do not allow brake fluid to come into contact with painted parts of the motorcycle as brake fluid de- stroys paint. • Integral ABS Drain front wheel circuit 34.16). Suds R28340010 •... -
Page 68: Disassembling And Assembling Front Brake Caliper
Remove and install the other two brake pistons in the same way. • – Integral ABS Drain front wheel circuit ( 34.16). Using piston resetting tool, BMW No. 34 1 531, – Remove the brake caliper. press the pistons fully back. • Install brake caliper. -
Page 69: Removing And Installing Rear Brake Caliper
R22340090 Removing and installing rear 34 21 Tightening torque: brake caliper Brake caliper to rear wheel drive ....40 Nm Brake hose to brake caliper ......18 Nm Bleed screw to brake caliper ......5 Nm Attention: Do not allow brake fluid to come into contact with painted parts of the motorcycle as brake fluid de- stroys paint. -
Page 70: Disassembling And Assembling Rear Brake Caliper
• • Inspect the brake caliper piston for hairline Using piston resetting tool, BMW No. 34 1 531, cracks, score-marks and other damage. press the pistons fully back. • Integral ABS Fill and bleed rear wheel circuit 34.26). -
Page 71: Removing And Installing Front Brake Discs
Removing and installing front Removing and installing rear 34 11 34 21 brake discs brake disc Warning: Warning: When removing and installing the brake calipers, When removing and installing the brake caliper, force back the pistons carefully to ensure that the force back the pistons carefully to ensure that the wheel-circuit reservoir does not overflow. -
Page 72: Removing And Installing Integral Abs Sensor
R22340060 Removing and installing Integral ABS sensor Removing and installing front 34 52 044 Integral ABS sensor • Remove the cable ties securing the sensor ca- ble. • Disconnect plug (1) of sensor cable. • Guide the sensor cable down until clear. •... -
Page 73: Removing And Installing Rear Integral Abs Sensor
R22340070 Removing and installing rear 34 52 111 Integral ABS sensor • Remove front and rear seats. • Remove right case, if necessary. • Remove small right side fairing panel. • Remove the cable ties securing the sensor ca- ble. •... -
Page 74: Removing And Installing Footbrake Lever
• Tightening torque: Tighten non-reusable hose clip (7) with pliers, Footbrake lever to footrest plate BMW No. 13 1 500. • (clean thread + apply Loctite 2701) ....21 Nm Integral ABS Fill and bleed rear control circuit 34.21). -
Page 75: Checking And Adjusting Blow-By Clearance Of Piston Rod
Checking and adjusting blow-by clear- Adjusting blow-by clearance at piston rod ance of piston rod Checking blow-by clearance of piston rod R22340010 • Set the adjusting screw of the footbrake lever to R22340020 distance A. • Press the footbrake lever. Distance A: .. -
Page 76: Checking And Adjusting Setting Of Rear Brake Light Switch
• Switch on the ignition. Note: After switching on the ignition, always wait for the BMW Integral ABS to complete its self-diagnosis. Do not operate the brake lever until self-diagnosis has completed. • Depress the footbrake lever (brake light comes on and pump starts up). -
Page 77: Removing And Installing Integral Abs Pressure Modulator
Warning: Do not allow brake fluid to come into contact with All repair and maintenance work on the painted parts of the motorcycle as brake fluid de- BMW Integral ABS must be performed by trained, stroys paint. qualified specialists. •... -
Page 78: Installing Integral Abs Pressure Modulator
34.19). • After all the work on the brake system has been completed, run a bleed test using the BMW MoDiTeC ( 34.29). Note: Disconnecting the battery means that the entries in the fault memory of the Motronic MA2.4 control unit are deleted and the adaptation values are reset. -
Page 79: Draining The Integral Abs Brake System
• Remove fuel tank. Use resetting tool, BMW No. 34 1 531, and locator, BMW No. 34 1 532, to force the pistons Drain both wheel circuits in the left and right brake calipers all the way back and hold them in this position. -
Page 80: Draining Rear Wheel Circuit
34 1 536 34 1 531 R28000170 • Install adapter, BMW No. 34 1 536, instead of the outboard brake pad. • Install resetting tool, BMW No. 34 1 531, with the handle toward the outside in the rear brake caliper, press the pistons fully back and secure them in this position. -
Page 81: Draining Control Circuits
Draw off old brake fluid and clean the reservoir. R28340110 • Draw off the brake fluid from the circuits in the correct sequence, using ring spanner, BMW No. 34 2 532: – rear metering cylinder (4), – rear integral circuit (5) and –... -
Page 82: Filling And Bleeding Integral Abs System
All repair and maintenance work on the the brake system. BMW Integral ABS must be performed by trained, qualified specialists. Comply with all maintenance and repair instructions and always work through the various steps in the correct order. -
Page 83: Bleeding Front Control Circuit
(3) and – front metering cylinder (1) for the second time using ring spanner, BMW No. 34 2 532, in accord- ance with instructions for bleeding. Instructions for bleeding: 1. Slowly pull brake lever until brake-light switch clicks (blow-by bore closed). -
Page 84: Filling The Rear Control Circuit
(3) and R22000151 – rear metering cylinder (1) for the second time using ring spanner, BMW No. 34 2 532, in accord- • Top up the brake fluid level to the “MAX” mark. ance with instructions for bleeding. - Page 85 Recheck the brake-fluid level. – Place the motorcycle on its centre stand. R22000150 Specified level not below ............MIN Attention: After all the work on the brake system has been completed, run a bleed test using the BMW MoDiTeC. Brake fluid............DOT 4 34.22...
-
Page 86: Filling And Bleeding Wheel Circuits
Do not scrape the wheel – mask it off if necessary. • Use resetting tool, BMW No. 34 1 531, and locator, BMW No. 34 1 532, to force the pistons in the left and right brake calipers all the way back and hold them in this position. - Page 87 • Pump off brake fluid until it emerges clear and free from air bubbles. • Close the bleed screw. • Release the brake. • Disconnect the brake bleeding device from the bleed screw. • Connect the brake bleeding device to the bleed screw of the right brake caliper, but do not switch on the device.
-
Page 88: Instructions For Filling Front Wheel Circuit Reservoir
With the ignition switched on, bed in the brake “MAX” if necessary pads against the brake discs. • • Install adapters 22, BMW No. 34 1 533, in reset- Disconnect the container from the wheel-circuit ting tool, BMW No. 34 1 531/532, for both front reservoir. •... -
Page 89: Filling And Bleeding Rear Wheel Circuit
Screw container, BMW No. 34 1 581, onto rear wheel circuit reservoir. • Slowly fill container, BMW No. 34 1 581, with new brake fluid until it is approximately 1/3 full. • Connect the brake bleeding device to the bleed screw, but do not switch on the device. - Page 90 • Close the bleed screw. • Release the brake and switch off the ignition. • Disconnect the brake bleeding device from the bleed screw. • Disconnect the container from the wheel-circuit reservoir. Attention: After changing and/or bleeding the brakes, always top up the fluid in the wheel-circuit reservoir to the correct level in accordance with the instructions.
-
Page 91: Instructions For Filling Rear Wheel Circuit Reservoir
R28000170 • Top up fluid in rear wheel-circuit reservoir to “MAX” if necessary. • Fully tighten resetting tool, BMW No. 34 1 531, and adapter, BMW No. 34 1 536. R28340090 • Attention: Top up the fluid in the wheel-circuit reservoir until... -
Page 92: Integral Abs
• Check operation of the brake system with the ig- • nition switched on. Remove front and rear seats. • Connect the BMW MoDiTeC to the diagnosis connector. • Attention: Read out the fault memory. • After all the work on the brake system has been... -
Page 93: Integral Abs
R22340080 Integral ABS 34 51 Removing and installing bleed lines, wheel circuit reservoirs • Remove caps of wheel circuit reservoirs com- plete with bleed lines. • Installation is the reverse of the removal proce- dure. Pay particular attention to the following: •... -
Page 94: Integral Abs: Removing And Installing Brake Lines
Always replace the seals (square-section rings) be- tween the brake lines and the pressure modulator when you replace the brake lines. • Carefully remove square-section rings (3) using disassembly tool, BMW No. 34 2 561. • Install square-section rings with brake lines. 34.31... -
Page 95: Installed Position Of Front Brake Line
Installed position of front brake line R22340100 34.32... -
Page 96: Installed Position Of Rear Brake Line
Installed position of rear brake line R22340110 34.33...
Need help?
Do you have a question about the R1150RT - MAINTENANCE BMW INTEGRAL ABS and is the answer not in the manual?
Questions and answers
Red light is fix. bulbs are ok
The red light in a BMW R1150RT with Integral ABS could stay on even if the bulbs are okay due to the ABS self-diagnosis not completing. This can happen if the brake lever or footbrake is operated before the self-diagnosis finishes after switching on the ignition. Additionally, issues such as a faulty brake light switch, low battery voltage, or an ABS fault code stored in the system could also cause the red light to remain on. Running a fault code check with the BMW MoDiTeC tool may help diagnose the issue.
This answer is automatically generated