Table of Contents
Advertisement
Maintenance Instructions (US Model)
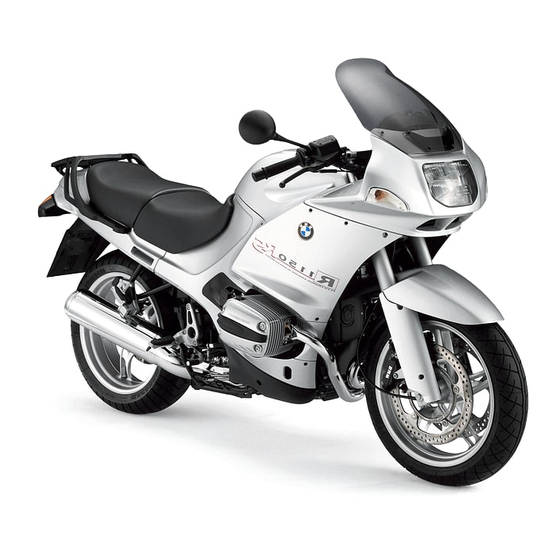
R 1150 RS
BMW Motorrad
BMW Motorrad
BMW Motorrad
BMW Motorrad
BMW Motorrad
BMW Motorrad
BMW Motorrad
BMW Motorrad
BMW Motorrad
BMW Motorrad
BMW Motorrad
BMW Motorrad
BMW Motorrad
BMW Motorrad
On-board
On-board
On-board
On-board
On-board
On-board
On-board
On-board
On-board
On-board
On-board
On-board
On-board
On-board
documentation
documentation
documentation
documentation
documentation
documentation
documentation
documentation
documentation
documentation
documentation
documentation
documentation
documentation
consisting of
consisting of
consisting of
consisting of
consisting of
consisting of
consisting of
consisting of
consisting of
consisting of
consisting of
consisting of
consisting of
consisting of
Rider's Manual
Rider's Manual
Rider's Manual
Rider's Manual
Rider's Manual
Rider's Manual
Rider's Manual
Rider's Manual
Rider's Manual
Rider's Manual
Rider's Manual
Rider's Manual
Rider's Manual
Rider's Manual
and Maintenance
and Maintenance
and Maintenance
and Maintenance
and Maintenance
and Maintenance
and Maintenance
and Maintenance
and Maintenance
and Maintenance
and Maintenance
and Maintenance
and Maintenance
and Maintenance
Instructions
Instructions
Instructions
Instructions
Instructions
Instructions
Instructions
Instructions
Instructions
Instructions
Instructions
Instructions
Instructions
Instructions
1
Advertisement
Table of Contents

Related Manuals for BMW R 1150 RS


Summary of Contents for BMW R 1150 RS
- Page 1 Maintenance Instructions (US Model) R 1150 RS BMW Motorrad BMW Motorrad BMW Motorrad BMW Motorrad BMW Motorrad BMW Motorrad BMW Motorrad BMW Motorrad BMW Motorrad BMW Motorrad BMW Motorrad BMW Motorrad BMW Motorrad BMW Motorrad On-board On-board On-board On-board On-board...
- Page 2 Please note This symbol stands for pre- cautions and measures which are essential in order to pro- tect the rider or other persons from possibly severe or fatal injury. Specific instructions and safety precautions intended to pre- vent damage to the motorcycle. Disregarding them may render the warranty invalid.
- Page 3 Services. retailers are fully informed about all aspects of your motorcycle Important and will gladly advise and assist BMW does not accept liability you. for damage or consequential damage due to repairs or ser- With every good wish, vice work performed by other...
-
Page 4: Important Safety Information
BMW cannot test every single product of outside origin in order to decide whether or not it can be used on or with a BMW vehicle without constituting a safety hazard. Nor is approval by an official... -
Page 5: Maintenance Schedule
Maintenance Maintenance is divided up into Service, Inspection and Annual Service. BMW Inspection 600 miles (1,000 km) BMW Running-in Check after the first 600 miles (1,000 km). BMW Service After the first 6,000 miles (10,000 km) and every further 12,000 miles (20,000 km) (18,000 miles/30,000 km...,... -
Page 6: Confirmation Of Maintenance
Confirmation of maintenance BMW Service Pre-delivery check 6,000 miles (10,000 km) Performed in accordance with Performed in accordance with manufacturer’s instructions manufacturer’s instructions Odometer reading Odometer reading Date, stamp, signature Date, stamp, signature BMW Inspection BMW Inspection 600 miles (1,000 km) - Page 7 Confirmation of maintenance BMW Service BMW Service 18,000 miles (30,000 km) 30,000 miles (50,000 km) Performed in accordance with Performed in accordance with manufacturer’s instructions manufacturer’s instructions Odometer reading Odometer reading Date, stamp, signature Date, stamp, signature BMW Inspection BMW Inspection...
- Page 8 Confirmation of maintenance BMW Service BMW Service 42,000 miles (70,000 km) 54,000 miles (90,000 km) Performed in accordance with Performed in accordance with manufacturer’s instructions manufacturer’s instructions Odometer reading Odometer reading Date, stamp, signature Date, stamp, signature BMW Inspection BMW Inspection...
- Page 9 Confirmation of maintenance BMW Service BMW Service 66,000 miles 78,000 miles (110,000 km) (130,000 km) Performed in accordance with Performed in accordance with manufacturer’s instructions manufacturer’s instructions Odometer reading Odometer reading Date, stamp, signature Date, stamp, signature BMW Inspection BMW Inspection...
- Page 10 Confirmation of maintenance BMW Service BMW Service 94,000 miles 106,000 miles (150,000 km) (170,000 km) Performed in accordance with Performed in accordance with manufacturer’s instructions manufacturer’s instructions Odometer reading Odometer reading Date, stamp, signature Date, stamp, signature BMW Inspection BMW Inspection...
-
Page 11: Bmw Annual Service
Performed in accordance with Performed in accordance with manufacturer’s instructions manufacturer’s instructions Brake fluid changed: Brake fluid changed: Without BMW Integral ABS Without BMW Integral ABS annually annually With BMW Integral ABS With BMW Integral ABS Wheel circuit - annually... - Page 12 Performed in accordance with Performed in accordance with manufacturer’s instructions manufacturer’s instructions Brake fluid changed: Brake fluid changed: Without BMW Integral ABS Without BMW Integral ABS annually annually With BMW Integral ABS With BMW Integral ABS Wheel circuit - annually...
-
Page 13: Confirmation Of Service
Confirmation of service Record of all work performed in workshop Work performed miles (km) Date The list is intended as a record of maintenance, warranty and repair work, the installation of accessories and, if appropriate, special campaign work. - Page 14 Confirmation of service Record of all work performed in workshop Work performed miles (km) Date The list is intended as a record of maintenance, warranty and repair work, the installation of accessories and, if appropriate, special campaign work.
- Page 15 Confirmation of service Record of all work performed in workshop Work performed miles (km) Date The list is intended as a record of maintenance, warranty and repair work, the installation of accessories and, if appropriate, special campaign work.
- Page 16 Confirmation of service Odometer replaced Odometer replaced Odometer reading is not total Odometer reading is not total distance covered. distance covered. Odometer reading Odometer reading Date, stamp, signature Date, stamp, signature Odometer replaced Odometer replaced Odometer reading is not total Odometer reading is not total distance covered.
-
Page 17: General Instructions
General instructions Your motorcycle is equipped with Digital Motor Electronic (MOTRONIC) engine manage- ment and a high-power ignition If you intend to perform the system. maintenance and general care work described in the following section yourself, you must pos- sess the necessary knowledge Do not touch live parts while of technical matters and the engine is running or the... - Page 18 Remember: the safety and reliability of your motorcycle are the most important consider- ations. BMW does not accept liability You should therefore not for damage or consequential attempt any complex repair or damage due to repairs or maintenance tasks.
- Page 19 Genuine BMW parts Tampering with the For reasons of safety, use genu- MOTRONIC control unit ine BMW parts and accessories. represents an increased safety Genuine BMW parts are risk for the rider. identical with those fitted to your motorcycle as original equipment.
-
Page 20: Troubleshooting Chart
Troubleshooting chart Fault: Engine does not start at all or is very difficult to start Possible cause Remedy Page Wrong ignition key Operate correctly Rider’s Manual position Kill switch on Operate correctly Rider’s Manual Side stand out and Operate correctly Rider’s Manual gear engaged Power supply... - Page 21 For more serious faults – and mation is available in the following those not detailed on pages publications: 15 -59 – take your motorcycle – BMW Repair Manual to an authorized BMW motorcy- – BMW electrical circuit- cle retailer,to be repaired. diagrams brochure...
-
Page 22: Removing The Front Wheel
Removing the front wheel • Place the motorcycle on its main (center) stand on a flat, firm surface When removing, avoid damage to brake pipes, brake disks, Apply a load over the rear brake pads or the wheel rim wheel so that the motorcycle (mask off with tape if necessary). - Page 23 Removing the front wheel Mark the installed position on the tire and ABS sensor ring; note also the direction-of-rotation arrow if it is marked on the tire. • Remove front-fork fairing panels 5 • Remove 2 retaining screws 6 • Remove 2 spacers 4...
- Page 24 Removing the front wheel BMW Integral ABS : Do not Do not scratch the rim when force brake pads back further forcing back the brake pads or than is necessary. removing the calipers (apply Immediately consult an masking tape if necessary).
- Page 25 Removing the front wheel • Slacken off axle clamp screws 2 on the left and right If the wheel is laid down, make • Insert a suitable screwdriver sure that the brake disk and through hole A into the quick- ABS sensor ring are not release axle 1...
-
Page 26: Fitting The Front Wheel
Keep dirt and moisture away recess on the speedometer from the wheel bearings. drive to prevent damage to the Important for BMW Integral speedometer shaft. : Do not damage the ABS sensor cable, the ABS sensor • Insert the spacing bushing ring and the ABS sensor. - Page 27 Fitting the front wheel • Clean the quick-release axle 1, grease it, and insert it from the right, turning slightly at the same time • Tighten axle clamp screws 2 • Hand-tighten axle bolt 3 on the left and right to their •...
-
Page 28: Installing The Front Wheel
Installing the front wheel • Insert 2 spacers 1 into recesses A Note the spacers. Always have • Install front-fork fairing the tightening torques checked panels 2 by an authorized BMW motor- • Install 2 securing screws 3 cycle retailer. and hand-tighten... - Page 29 Fitting the front wheel Motorcycle not equipped with BMW Integral ABS: when assembly work has been • Install the front mudguard 6 completed, pull the brake • Insert securing screws 4 and lever firmly several times to 5 and tighten them carefully check that the front brake is •...
-
Page 30: Removing The Rear Wheel
• Select first gear (mask off with tape if necessary). • Take off the rear seat Important for BMW Integral • Take out the two Phillips- : Do not damage the ABS head screws 1 in the rear... - Page 31 Removing the rear wheel Do not scratch the wheel when forcing back the brake pads or BMW Integral ABS : Do not removing the caliper (apply force brake pads back further masking tape if necessary). than is necessary. To prevent damage to the brake...
- Page 32 • Lift the rear wheel off the centering spigot and carefully Protect the wheel hub contact roll it out to the rear face against dust and dirt. • BMW Integral ABS : note spacing washer 3 • Remove four wheel studs 1 with taper rings 2...
-
Page 33: Fitting The Rear Wheel
Use only wheel studs with the • BMW Integral ABS : slip same length code number. Do spacing washer 3 onto the not oil or grease the wheel wheel centering spigot studs. - Page 34 Fitting the rear wheel • Carefully place brake caliper 1 Always have the tightening over the brake disk torques checked by an autho- rized BMW motorcycle retailer. Ensure that retaining bracket Tightening torque: A is positioned correctly. Preload torque Wheel studs ....50 Nm •...
- Page 35 Fitting the rear wheel Motorcycle not equipped with BMW Integral ABS: when assembly work has been completed, depress the brake pedal firmly several times to check that the rear brake is operating correctly. BMW Integral ABS : once assembly work on the brake •...
-
Page 36: Checking Brake Pads
For your safety, we recommend The brake pads show clear having work on the brake system signs of wear 1. performed an authorized BMW – If the wear indicating mark is motorcycle retailer. no longer clearly visible: Have the brake pads •... -
Page 37: Rear Brake
– If the brake disk is visible having work on the brake system through the hole 1 in the inner performed by an authorized brake shoe: BMW motorcycle retailer. Have the brake pads changed by an authorized BMW motorcycle retailer. Optional equipment... -
Page 38: Adjusting Gear-Shift Lever
Adjusting gear-shift lever Maximum length A = 0.5905 in (15 mm) • Place the motorcycle on its • Set gear-shift lever 4 to the main (center) stand desired position • Remove retainer 2 • Press lower ball head 3 onto •... - Page 39 Information on changing bulbs Risk of fatal accident! Only carry out work on the electrical system when the circuit is open (switch off ignition and lights). For greater safety, disconnect and insulate the negative battery lead. When the engine is running or the ignition is switched on, do Your motorcycle is equipped not touch electrically live...
- Page 40 Information on changing bulbs Your vehicle has a high-beam/ low-beam bulb, parking light bulbs, a brake-light bulb/rear- Avoid touching the glass of new light bulb, and four bulbs for the bulbs with your fingers. turn indicators. Use a clean, dry cloth to hold If any of these bulbs fail, you the bulbs when inserting them.
-
Page 41: Changing Bulbs
• Take off the rear seat • Remove the two knurled screws 1 • Take off the rear light BMW Integral ABS only: • Turn holder 2 to the left to If the tail light fails the brake release it from its catch, and... - Page 42 Changing bulbs • Place the motorcycle on its main (center) stand • Turn the steering to the full left or right lock position. Front indicators • Remove the 4 screws 1 in the cockpit fairing and take off the fairing •...
-
Page 43: Rear Turn Indicators
Changing bulb Rear turn indicators • Take off the flashing turn indicator glass 5 Switch off the ignition before • Press bulb 3 into its socket changing a bulb. and turn it counter-clockwise to release. Remove the bulb • Installation is performed in reverse order Do not touch the glass of new bulbs with your fingers. - Page 44 Changing bulb • Place the motorcycle on its main (center) stand • Turn the steering to the full left or right lock position. Low-beam/high-beam • Remove the 4 screws 1 in the headlights cockpit fairing and take off the fairing •...
- Page 45 Changing bulbs Parking light • Place the motorcycle on its main (center) stand Switch off the ignition before • Pull bulb holder 1 downwards changing a bulb. out of the headlight casing • Remove bulb 2 from its socket • Installation is performed in Do not touch the glass of new reverse order bulbs with your fingers.
-
Page 46: Fuse Assignment
Fuses Fuse assignment 1 Instrument cluster, indicator damping and brake light (without BMW Integral ABS only) ..4 A 2 Parking light, rear light..4 A 3 FID, power socket Before changing a fuse, switch accessories socket 15 A off the ignition. -
Page 47: Changing Fuses
• Insert a new fuse of the correct rating If the electrical system often • Close the lid of the central displays faults, have it checked electrical equipment box by an authorized BMW motor- • Close and lock the seat cycle retailer. - Page 48 Fairing side panels • Place the motorcycle on its main (center) stand • Remove the entire seat • Remove securing screws 2 Removing fairing side • Open quick-release fasteners 1 panels • Disengage lugs A from their holders • Carefully guide the side panel past the cylinder head and The procedure is the same for remove...
-
Page 49: Air Filter
Air filter Replacing air filter element – Remove left and right fairing side panels. To avoid damaging the paint- work when working on the fuel Note nut of securing screw 1 tank, lay a cloth between the fork bridge and the fuel tank. •... - Page 50 Air filter • Remove the air filter cover 1 from the air filter housing. • Remove the old filter cartridge 3 from the air filter housing To avoid damaging the paint- work, lay a cloth between the fork bridge and the component When installing, position the air and between the fork bridge filter cover as illustrated and...
-
Page 51: Battery Safety Instructions
Battery safety instructions Gel batteries are maintenance- free. Compliance with the Do not attempt to jump-start instructions below is important the motorcycle using the on- in order to maximize battery life: board socket – Risk of fire! • Push-start the motorcycle only when the engine is –... - Page 52 This can cause the battery to run flat. If this happens, warranty In case of doubt ask a specialist, claims will not be preferably an authorized BMW accepted. motorcycle retailer , to prepare Disconnect the ground lead the vehicle for storing and to...
-
Page 53: Removing The Battery
Battery Removing the battery • Remove the left-hand side panel ( • Remove the air filter cover Avoid damage to fuel tank, • Remove securing screw 1 for wiring and hoses during air intake pipe removal work. • Remove air intake pipe 2 Before disconnecting the battery, switch off the ignition. - Page 54 Battery • Pull the battery out to the left and ensure that it remains level • Swing up protective cap 5 the • Release the battery retaining positive post clip 3 • Disconnect the positive • Disconnect the negative battery lead (+) 6 battery lead (–) 4 •...
-
Page 55: Fitting The Battery
Battery • Installation is performed in reverse order Fitting the battery Disconnecting the battery deletes all entries (e.g. faults, settings) stored in the Motronic Before connecting the control unit's memory. battery, switch off the ignition. Loss of settings can temporarily To avoid short-circuits: impair the operating character- •... - Page 56 Cleaning/care Aggressive or deep-action cleaning products and solvents should not be used to clean rubber and plastic parts; they may cause damage. Correct and regular cleaning of Do not use steam or pressure the battery is an important cleaners. factor in maintaining the value High water pressure can of your motorcycle.
- Page 57 Cleaning/care • Use only BMW care products to clean trim parts. Washing • Do not use solvents or cleaning products to wash the instrument cluster, switches After cleaning or before or the windshield. starting a journey, always test Avoid scratching the the brakes.
- Page 58 Cleaning/care Removing road salt Cleaning the windshield • Wash the motorcycle down immediately with cold water at the end of the journey. Do not use cleaning products. Fuel or chemical solvents attack the windshield material. Do not use warm water; this intensifies the effect of the salt.
- Page 59 • Minor damage caused by Care of muffler stones striking the painted • Use “Metal Polish” to touch surface can be touched up up any (operational or with a BMW touch-up pencil environmental) discoloration of the correct color. of the exhaust system.
- Page 60 • Coat bright metal/chrome- filter element changed by an plated parts with an acid-free authorized BMW motorcycle grease (e.g. Vaseline) retailer. • Place the motorcycle on its It is always a good idea to...
-
Page 61: Restoring To Use
Restoring to use Restoring to use • If necessary, remove protective wax coating • Clean the motorcycle ( • Check the brakes • Install a charged battery Rider's Manual, chapter 2) • Carry out safety checks • Check/correct tire pressures Rider's Manual, Rider's Manual, chapter 2) chapter 2, 3) - Page 62 Engine Design Two-cylinder, air-cooled boxer engine with additional oil-cooled outlet, chain-driven side camshaft 4 bucket tappet/push rod-operated valves/cylinders, wet sump lubrication. Displacement 1,130 cc Maximum rated output in accordance with DIN 70 020 70 kW - at engine speed 7,250 rpm Maximum torque 100 Nm - at engine speed...
- Page 63 Transmission Clutch Lightweight single-plate dry clutch mounted on crankshaft, with increased-leverage diaphragm spring and starter gear ring. Hydraulic actuation Clutch plate dia. 6.4961 in (165 mm) Manual transmission 6-speed with claw shift and integral torsional vibration damper Reduction ratio 1st gear = 3.863 in the manual transmission 2nd gear = 3.022 3rd gear = 2.393...
-
Page 64: Frame And Suspension
Sintered metal brake pads Note color coding ( Rear brake Hydraulically actuated disk brake with floating caliper and stainless steel disk. Organic Brake pads Brake system BMW Integral ABS , partially integral Optional equipment... - Page 65 Frame and suspension Wheel control Front Telelever with central suspension strut, of new design, with immedi- ate response to wheel movement. Rear Cast aluminum single swinging arm with additional torque reac- tion link to compensate for shaft drive effects (Paralever); central suspension strut.
- Page 66 Frame and suspension Front wheel suspension Central strut with linear-rate coil spring (with taper-wound ends) and twin-tube, gas-filled shock absorber. Continuously variable rebound damping setting. Spring compression 2.5591 in (65 mm) Spring extension 2.1653 in (55 mm) Total suspension travel 4.7244 in (120 mm) Fixed tube diameter 1.3779 in (35 mm)
- Page 67 Frame and suspension Wheels and tires BMW cast aluminum wheels with 5 double spoke design, low cross-section tires Front wheel Angled rim shoulder and double tire retaining hump Tire size and designation 3.50 x 17 MT H 2 Tire size and designation...
-
Page 68: Fuel And Lubricants
“Special Oils” are approved individually by BMW AG and avail- able from your authorized BMW motorcycle retailer. All engine oils supplied by BMW are subject to regular BMW quality assurance checks. BMW does not approve the use of any upper-cylinder lubricants or similar oil additives. - Page 69 Fuel and lubricants Transmission oil Brand-name hypoid gear oil, API class GL 5 Capacity Transmission approx. 0.85 US quarts (0.8 l) (to bottom edge of filler neck) Rear wheel drive (after dis- approx. 0.24 US quarts (0.25 l) assembly) (to bottom edge of filler plug) Viscosity class EPX 90, alternatively SAE 90 API Fuel type...
- Page 70 -13 °F...+248 °F (–25 °C …+120 °C), drip point 374 °F (190 °C), high corrosion protection, good resistance to water and oxidation; e.g. Shell Retinax EP2 Brake fluid DOT 4 We recommend BMW brake fluids Use only new brake fluid to DOT 4 specification.
-
Page 71: Electrical System
Electrical system Battery Gel battery, 12 V 19 Ah maintenance-free Spark plugs Approved makes/types Primary spark plug NGK BKR 7 EKC Secondary spark plug Bosch YR6LDE or NGK DCPR 8 EKC Electrode gap 0.03 in (0.8 mm) Wear limit 0.04 in (1.0 mm) Fuses “Minifuse”... -
Page 72: Dimensions And Weights
(ready to ride, tank full) 538 lb/549 lb* (244 kg/249 kg*) Dry weight 496.25 lb (225.1 kg) Allowable weight 992.07 lb (450 kg) Allowable wheel loads Front 396.83 lb (180 kg) Rear 661.38 lb (300 kg) *) with BMW Integral ABS... -
Page 73: Performance Data
Performance data Maximum speed acc. to type approval test more than 124 mph (200 km/h) Flexibility 4th gear 50-75 mph 3.2 s (80-120 km/h) 5th gear 50-75 mph 4.0 s (80-120 km/h) 6th gear 50-75 mph 6.0 s (80-120 km/h) Power/weight ratio ready for road + 15.4 lb/kW (4.7 kg/kW) - Page 74 A - D Accessories, genuine BMW Capacity parts, 17 Engine, 66 Air filter, 47, 48 Transmission, 67 Air filter element Caster offset, 63 Replacing, 47 Cleaning plastic parts, 54 Annual Service, notes, 3 Cleaning/care General notes, 54, 56 Paintwork damage, 57...
- Page 75 E - N General instructions, 15, 16 Electrical system, 69 Genuine BMW parts and Engine oil accessories, 17 Capacity, 66 Ground clearance, 70 Consumption, 60 Technical data, 66 High-beam/low-beam Viscosity, 66 headlights, 42 Engine, design, 60 Exhaust system, care product, 57...
- Page 76 O - T Speed limitations, 60 Odometer change, Speedometer drive, 24 confirmation, 14 Spring deflection, 64 Oil capacity Steam/pressure cleaners, 54 Engine, 66 Steering angle, 63 Transmission, 67 Storing, motorcycle, 58 Paralever, 63 Technical Data, from page, 60 Power/weight ratio, 71 Technical modifications, 16 Pre-delivery check, 4 Telelever, 63...
- Page 77 V - Z Vehicle performance, 71 Warning lights ABS, 69 Weights, 70 Wet weight, 70 Wheel control, 63 Wheel loads, 70 Wheel suspension, Technical Data, 64 Wheelbase, 70 Wheels, Technical Data, 65...
- Page 78 Motorcycle data Model Frame No. Color No. First registered on Registration No. Retailer data Person to contact for Service work Ms./Mr. Tel. No. Retailer’s address with telephone No. (company stamp)
- Page 79 ©2004 BMW Motorrad crepancies. Not to be reproduced either wholly Dimensions, weights, fuel con- or in part without written permis- sumption and performance data sion from BMW Motorrad, are quoted to the customary toler- After Sales. ances. Printed in Germany...
- Page 80 BMW recommends Castrol BMW Motorrad Printed information Order No.: 01 47 7 693 617 05.2004 The Ultimate 3rd edition US / RF Driving Machine...
Need help?
Do you have a question about the R 1150 RS and is the answer not in the manual?
Questions and answers