Advertisement
BEFORE INSTALLATION
READ INSTRUCTIONS CAREFULLY BEFORE STARTING INSTALLATION. REMOVE CONTENTS FROM BOX AND VERIFY ALL PARTS ARE PRESENT. FAILURE TO IDENTIFY DAMAGE BEFORE INSTALLATION COULD LEAD TO A REJECTION OF ANY CLAIM. IF MISSING PARTS OR ANY DAMAGE FOUND, PLEASE TAKE A PICTURE FOR THE CLAIM PURPOSE. TO FILE YOUR CLAIM, PLEASE VISIT: WWW.TYGERAUTO.COM/CONTACT
TORQUE VALUES
| Fastener Size | Class 8.8 Torque (ft-lbs) | Class 10.9 Torque (ft-lbs) |
| 6mm | 6-7 | 6-7 |
| 8mm | 15-16 | 22-23 |
| 10mm | 31-32 | 44-45 |
| 12mm | 54-55 | 78-79 |
| 14mm | 87-88 | 125-126 |
Parts List

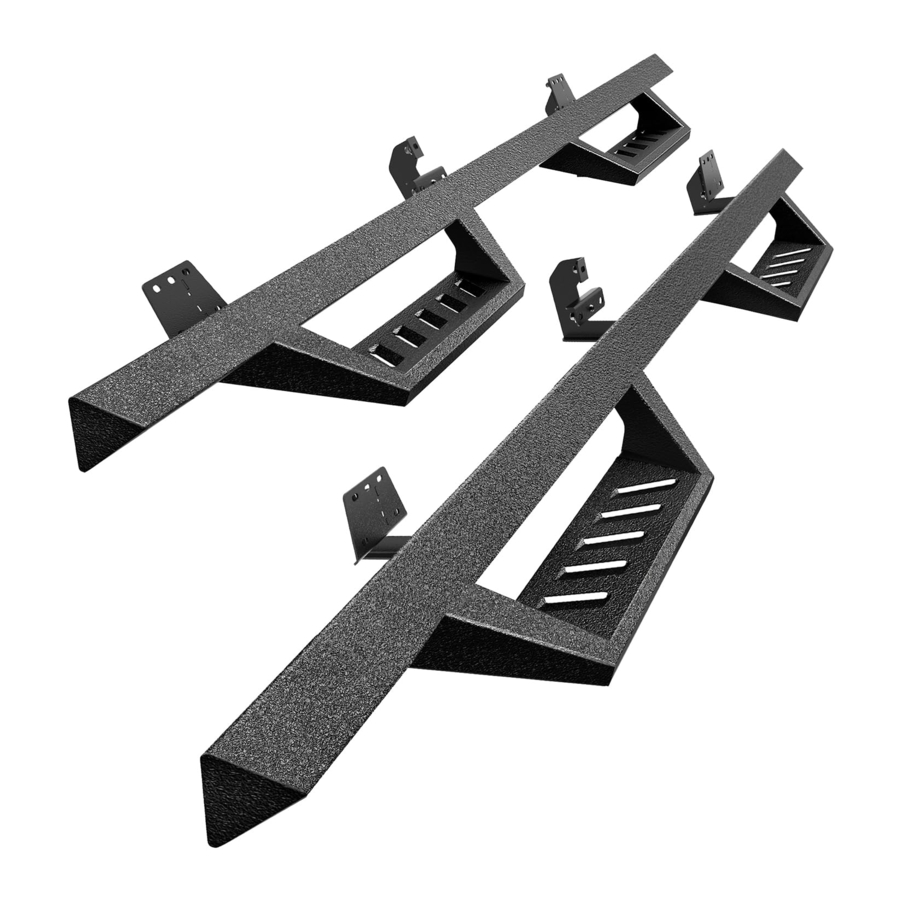
x1 Driver/Left TYGER LanderX
x1 Passenger/Right TYGER LanderX
x4 Front/Rear Upper Mounting Brackets
x4 Front/Rear Lower Mounting Brackets
x2 Center Mounting Brackets
x2 Center Support Brackets
x8 8mm x 25mm Hex Bolts
x12 8mm x 25mm Combo Bolts
x20 8mm x 24mm OD x 2mm Flat Washers
x16 8mm x 16mm OD x 1.6mm Flat Washers
x28 8mm Nylon Lock Nuts
INSTALLATION
PROCEDURE: REMOVE CONTENTS FROM BOX. VERIFY ALL PARTS ARE PRESENT. READ INSTRUCTIONS CAREFULLY BEFORE STARTING INSTALLATION. USE WIRE BRUSH TO CLEAN MOUNTING STUDS OF PAINT AND DEBRIS.
- Start the installation under the Driver/Left side of the vehicle. Locate the front (3) factory studs along the inner side of the body panel.

- Select (1) Front Upper Mounting Bracket. Attach the Mounting Bracket to the (3) factory studs with (3) 8mm x 24mm Flat Washers and (3) 8mm Nylon Lock Nuts (Fig 2). DO NOT tighten hardware.

- Select (1) Front Lower Mounting Bracket. Attach the Lower Bracket to the short side of the Upper Bracket with (2) 8mm Hex Bolts, (4) 8mm x 16mm Flat Washers and (2) 8mm Nylon Lock Nuts (Fig 3). DO NOT tighten hardware.

- Move to the center location (Fig 4). Select (1) Center Support Bracket. Attach the Support Bracket to the (2) lower threaded studs with (2) 8mm x 24mm Flat Washers and (2) 8mm Nylon Lock Nuts (Fig 5). Select (1) Center Mounting Bracket and attach to the Support Bracket and upper threaded stud with (2) 8mm x 24mm Flat Washers and (2) 8mm Nylon Lock Nuts (Fig 6). DO NOT tighten hardware.


- Repeat STEPS 2-3 to attach (1) Rear Upper Mounting Bracket and (1) Rear Lower Mounting Bracket to the rear mounting location (Fig 7). DO NOT tighten hardware.

- Select the Driver/Left TYGER LanderX. With assistance, place the TYGER LanderX onto the (3) Mounting Brackets. Attach the TYGER LanderX to the Mounting Brackets with (6) 8mm Combo Bolts (Fig 8). DO NOT tighten hardware.

- Level and adjust the TYGER LanderX as necessary, then fully tighten all hardware.
- Repeat STEPS 1-7 to attach the Passenger/Right TYGER LanderX.
- Do periodic inspections to the installation to make sure that all hardware is secure and tight.


Customer Support: www.tygerauto.com/contact
Documents / Resources
References
Download manual
Here you can download full pdf version of manual, it may contain additional safety instructions, warranty information, FCC rules, etc.
Advertisement


Need help?
Do you have a question about the LanderX and is the answer not in the manual?
Questions and answers