Advertisement
Quick Links
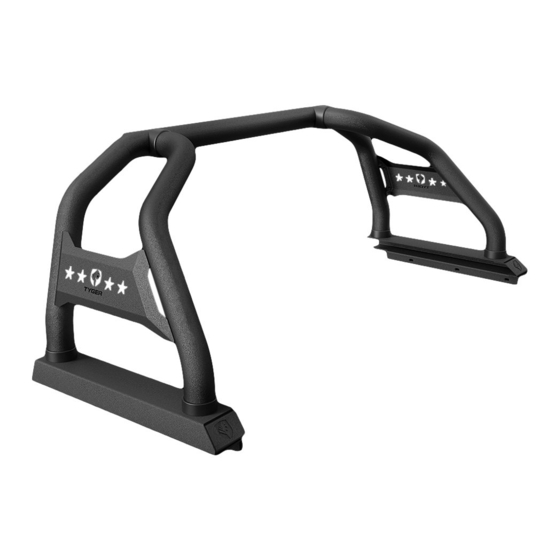
SPORT BAR
BEFORE INSTALLATION
READ INSTRUCTIONS CAREFULLY BEFORE STARTING
INSTALLATION. REMOVE CONTENTS FROM BOX AND
VERIFY ALL PARTS ARE PRESENT. FAILURE TO IDENTI-
FY DAMAGE BEFORE INSTALLATION COULD LEAD TO
A REJECTION OF ANY CLAIM. IF MISSING PARTS OR
ANY DAMAGE FOUND, PLEASE TAKE A PICTURE FOR
THE CLAIM PURPOSE. TO FILE YOUR CLAIM, PLEASE
VISIT: WWW.TYGERAUTO.COM/CONTACT
Parts List
Front Cross Tube
x1
Driver/Left Cross Tube
x1
Passenger/Right Cross tube
x1
Driver/Left Base Bracket
x1
Passenger/Right Base Bracket
x1
Driver/Left Adaptor Bracket
x1
Passenger/Right Adaptor Bracket
x1
Driver/Left Decorative Plate
x1
Passenger/Right Decorative Plate
x1
Driver/Left Logo Plate
x1
Passenger/Right Logo Plate
x1
L-Brackets
x2
DISCLAIMER
THIS PRODUCT IS NOT DESIGNED TO
WORK AS A SAFETY DEVICE AGAINST
ROLLOVER ACCIDENTS. TYGER AUTO
IS NOT RESPONSIBLE OR LIABLE FOR
ANY DAMAGES & INJURIES AS A
RESULT OF A ROLLOVER ACCIDENTS.
Driver/Left Plastic Sleeve
x1
Passenger/Right Plastic Sleeve
x1
Plastic Base Covers
x4
Plastic Plugs
x2
Driver/Left Long Support Bracket
x1
Passenger/Right Long Support Bracket
x1
Driver/Left Short Support Bracket
x1
Passenger/Right Short Support Bracket
x1
12-1.75mm x 60mm Button Head Bolts
x2
12-1.75mm x 35mm Flat Head Bolts
x4
12mm Lock Washers
x2
12mm x 24mm OD x 2.5mm Flat Washers
x2
10mm Bolt Plates
x6
10mm x 30mm OD x 2.5mm Flat Washers
x6
10mm Lock Washers
x6
Customer Support: www.TygerAuto.com/Contact
1/7
TORQUE VALUES
Fastener
Class 8.8 Torque
Size
(ft-lbs)
6mm
6-7
8mm
15-16
10mm
31-32
12mm
54-55
14mm
87-88
10mm Hex Nuts
x6
10mm Plastic Retainers
x6
8-1.25mm x 25mm Hex Bolts
x6
8-1.25mm x 16mm Hex Bolts
x2
8mm x 24mm OD x 2.5mm Flat Washers
x10
8mm Lock Washers
x8
8mm Hex Nuts
x2
6-1.0mm x 25mm Hex Bolts
x4
6-1.0mm x 20mm Button Head Combo Bolts
x2
6mm x 22mm OD x 2mm Flat Washers
x4
6mm Lock Washers
x4
6mm Flange Nylon Lock Nuts
x8
8mm Hex Wrench
x1
4mm Hex Wrench
x1
12mm Fish Wire
x1
TG-SB7J88678
Class 10.9 Torque
(ft-lbs)
6-7
22-23
44-45
78-79
125-126
V210610
Advertisement

Related Manuals for Tyger TG-SB7J88678


Summary of Contents for Tyger TG-SB7J88678
- Page 1 Size (ft-lbs) (ft-lbs) INSTALLATION. REMOVE CONTENTS FROM BOX AND WORK AS A SAFETY DEVICE AGAINST ROLLOVER ACCIDENTS. TYGER AUTO VERIFY ALL PARTS ARE PRESENT. FAILURE TO IDENTI- 15-16 22-23 FY DAMAGE BEFORE INSTALLATION COULD LEAD TO IS NOT RESPONSIBLE OR LIABLE FOR A REJECTION OF ANY CLAIM.
- Page 2 PROCEDURE: REMOVE CONTENTS FROM BOX. VERIFY ALL PARTS ARE PRESENT. READ INSTRUCTIONS CAREFULLY BEFORE STARTING INSTALLATION. ASSISTANCE IS RECOMMENDED. Front STEP 1 Remove tonneau cover if equipped. Select the Front Cross Tube. Insert (1) 12mm Button Head Bolt into (1) 12mm Lock Washer and (1) 12mm Flat Washer.
- Page 3 STEP 5 Select the Passenger/Right Decorative Plate. Attach the Decorative Plate to the welded brackets on the sides of the Tubes with (4) 6mm Flange Nuts (Figs 7 & 8). Repeat this STEP to attach the Driver/Left Decorative Plate. DO NOT tighten hardware. (4) 6mm Flanged Nuts (Fig 5) Passenger/Right Support Tube installed...
- Page 4 c. Line up the Bolt Plates to the (3) slots in the Passenger/Right Base Plates. STEP 6 d. With assistance attach the Base Brackets to the (6) Bolt Plates with the Passenger/Right Long Support Bracket, (6) 10mm Flat Washers, (6) 10mm Lock Washers and (6) 10mm Hex Nuts (Fig Determine if vehicle is equipped with bedrails 11).
- Page 5 c. Attach the Adaptor Bracket to the walls of the bad with (2) f. Repeat previous Steps to attach the Driver/Left Base Bracket 6mm Button Head Bolts, (2) 6mm Lock Washers and (2) 6mm Flat and Long Support Bracket. Washers (Fig 15). DO NOT tighten hardware. g.
- Page 6 g. Attach the Short Support Brackets to the front of the bed wit (2) 8mm x 25mm Hex Bolts, (2) 8mm Lock Washers and (2) 8mm Flat Washers (Fig 17). STEP 9 h. Continue to STEP 7. (Optional to attach a Light Bar) Select (1) L-Bracket. Attach to the Passenger/Right top of the Sports Bar with (1) 8mm x 25mm Hex 8mm x 25mm Hex Bolt Bolt, (2) 8mm Flat Washers, (1) 8mm Lock Washer and (1) 8mm...
- Page 7 STEP 11 (OPTIONAL) Locate the threaded mounting hole on the inside of the Base Bracket for the Passenger/Right Logo Plate. Attach Logo Plate with one 6mm Combo Bolt (Figs 21-23). Repeat this STEP to attach the Driver/Left Logo Plate. Do not attach Plates if a Front tonneau cover will be installed.
Need help?
Do you have a question about the TG-SB7J88678 and is the answer not in the manual?
Questions and answers