Table of Contents
Advertisement
Quick Links
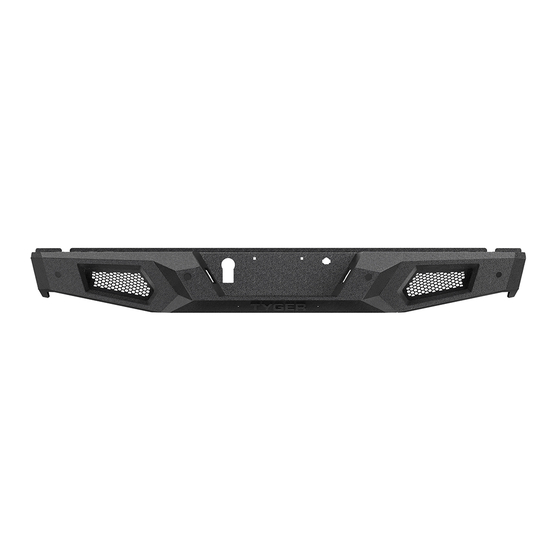
REAR BUMPER
REAR BUMPER
BEFORE INSTALLATION
READ INSTRUCTIONS CAREFULLY BEFORE STARTING INSTALLATION. REMOVE
CONTENTS FROM BOX AND VERIFY ALL PARTS ARE PRESENT.
IDENTIFY DAMAGE BEFORE INSTALLATION COULD LEAD TO A REJECTION OF
ANY CLAIM. IF MISSING PARTS OR ANY DAMAGE FOUND, PLEASE TAKE A
PICTURE FOR THE CLAIM
WWW.TYGERAUTO.COM/
C
ONTACT
TORQUE VALUES
Fastener Size
Class 8.8 Torque (ft-lbs)
Fastener Size
Class 8.8 Torque (ft-lbs)
6mm
8mm
10mm
12mm
14mm
(4) Sensor Plugs
Driver/left Frame Bracket
U P
RP
O
SE.
T
O
FILE
O Y
UR
CLAIM,
Class 10.9 Torque (ft-lbs)
Class 10.9 Torque (ft-lbs)
6-7
15-16
31-32
54-55
87-88
125-126
(2) Plastic Plugs for License Plate
(4) Foam Washers
(4) Retaining Rings
(4) Foam Spacers
Customer Support: www.TygerAuto.com/Contact
Parts List
TG-BP9F80298
FAILURE TO
PLAESE
VISIT:
x10
6-7
22-23
44-45
78-79
Passenger/right
Frame Bracket
1/7
Rear Bumper
x1
Driver/left side Mounting Bracket
x1
Passenger/right side Mounting Bracket
x1
Sensor Foam Washers
x4
(15.5mm x 25mm x 2mm)
Sensor Foam Spacers
(20mm x 10mm)
x4
Sensor Semi-Retaining Clips
x4
Sensor Rubber Plugs
x4
Sensor Cover Kit
x1
Nylon Wire Ties
Plastic Plugs for License Plate
x2
10mm x 40mm Double Bolt Plates
x2
10mm Plastic Retainers
x4
10mm x 30mm x 2.5mm Flat Washers
x4
10mm Nylon Lock Nuts
x4
x8
4mm x 10mm Button Head Bolts
2.5mm Wrench
x1
(2) 10mm Double
Bolt Plates
Advertisement
Table of Contents

Subscribe to Our Youtube Channel
Related Manuals for Tyger TG-BP9F80298


Summary of Contents for Tyger TG-BP9F80298
- Page 1 REAR BUMPER REAR BUMPER Parts List TG-BP9F80298 Rear Bumper Driver/left side Mounting Bracket Passenger/right side Mounting Bracket BEFORE INSTALLATION Sensor Foam Washers (15.5mm x 25mm x 2mm) READ INSTRUCTIONS CAREFULLY BEFORE STARTING INSTALLATION. REMOVE Sensor Foam Spacers (20mm x 10mm) CONTENTS FROM BOX AND VERIFY ALL PARTS ARE PRESENT.
- Page 2 PROCEDURE: REMOVE CONTENTS FROM BOX. VERIFY ALL PARTS ARE PRESENT. READ INSTRUCTIONS CAREFULLY BEFORE STARTING INSTALLATION. BUMPER IS HEAVY, ASSISTANCE IS RECOMMENDED TO AVOID POSSIBLE INJURY OR DAMAGE TO THE VEHICLE. IMPORTANT: OEM BUMPER REINFORCEMENT USED WITH “STANDARD” TOW PACKAGE WITHOUT RECEIVER HITCH CANNOT BE REINSTALLED.
- Page 3 STEP 4 Rear Optional LED light installation at ends of bumper (sold separately). (Lights not included). a. Insert light into opening and up to mounting slots. Check for clearance between front and back of light. If necessary, remove the screens from the back of the openings, (Figure 5). IMPORTANT: Screens must be removed before Bumper is installed.
- Page 4 STEP 5 Foam Washer Foam Spacer NOTE: Sensors, (if equipped), must be installed onto the back of the Bumper before attaching the Bumper to the vehicle. Retaining Clip Models wihtout bumper sensors: a. Select the included (4) Rubber Plugs. b. From behind bumper, push plugs into sensor mounting holes. (Fig 6) Sensor assembly pictured from back of bumper Models with bumper mounted sensors:...
- Page 5 STEP 7 Determine towing pac k age supplied with vehicle: Models with “standard tow package” without HD receiver below bumper and models with “Max Duty” frame mounted receiver hitch below bumper. a. Select the Passenger/right Mounting Bracket. Insert the factory Double or Triple Bolt Plate through the Bracket and frame.
- Page 6 (2) 10mm Flat Washers (2) 10mm Nylon Lock Nuts STEP 10 Rear With assistance, hold the Bumper assembly up to the ends of the frame. Temporarily support the weight of the Bumper. WARNING: To avoid possible injury or damage to the vehicle, do not proceed until the bumper is fully and safely supported.
- Page 7 STEP 15 Do periodic inspections to the installation to make sure that all hardware is secure and tight. Do not use any type of polish or wax that may contain abrasives To protect your investment, wax this product after installing. that could damage the finish.
Need help?
Do you have a question about the TG-BP9F80298 and is the answer not in the manual?
Questions and answers