Table of Contents
Advertisement
Quick Links
Advertisement
Table of Contents

Related Manuals for TRENDnet TW100-BRF214


Summary of Contents for TRENDnet TW100-BRF214
- Page 1 Cover Page TRENDnet User’s Guide...
-
Page 2: Table Of Contents
Set up DHCP reservation ....................20 Check the router system information ................. 41 Enable/disable UPnP on your router ................21 View your router log ....................42 Allow VPN connections through your router............... 22 © Copyright 2012 TRENDnet. All Rights Reserved. - Page 3 Table of Contents TRENDnet User’s Guide Configure your router log .................... 43 Router Management Page Structure ..........45 Technical Specifications..............46 Troubleshooting ................47 Appendix ..................48 © Copyright 2012 TRENDnet. All Rights Reserved.
-
Page 4: Product Overview
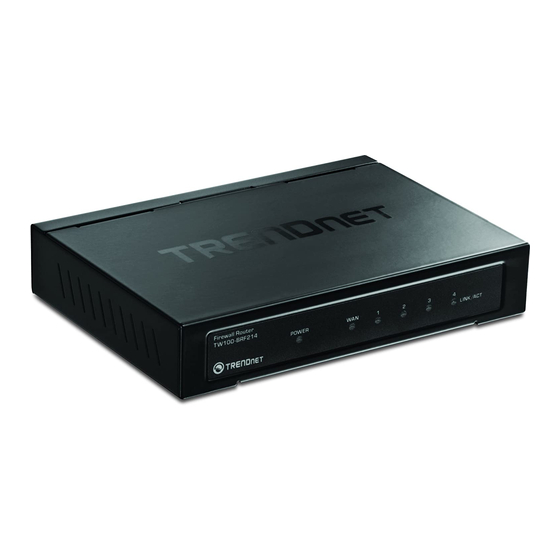
Product Overview Features The 4-Port Fast Ethernet Firewall Router, model TW100-BRF214, is easy to setup up and suitable for home office, small office, and medium sized business installations. It comes in a sturdy metal housing, offers four Fast Ethernet Ports, and features advanced QoS, Firewall, and event log functions. -
Page 5: Product Hardware Features
WAN Port–Connect a Network cable from your router WAN port to your modem. • Power Port – Connect the included power adapter from your router power port and to an available power outlet. Note: Use only the adapter that came with your router. © Copyright 2012 TRENDnet. All Rights Reserved. - Page 6 LAN 1-4 (Link/Activity) LEDs – These LED indicators are solid green when the LAN ports are successfully connected to your wired network devices (which are turned on). These LED indicators will blink green while data is transmitted or received through your router’s LAN ports. © Copyright 2012 TRENDnet. All Rights Reserved.
-
Page 7: Application Diagram
Internet. A network server and computers are connected to the wired Fast Ethernet LAN ports (1-4) located on the back of router thereby providing local connectivity to access network resources and Internet access. © Copyright 2012 TRENDnet. All Rights Reserved. -
Page 8: Basic Router Setup
2. Make sure that your modem is working properly. Your modem is provided by your Internet Service Provider (ISP) when you sign up for Internet service. If your modem is not working contact your ISP to verify functionality. © Copyright 2012 TRENDnet. All Rights Reserved. -
Page 9: Router Installation
Alias IP Address 4: _____. _____._____._____(e.g. 215.24.24.125) PPTP Account: ________________ … PPTP Password: ________________ Retype Password: ________________ Service IP: _____. _____._____._____(e.g. 215.24.24.130) My IP Address: _____. _____._____._____ (e.g. 215.24.24.129) Subnet Mask:_____. _____._____._____(e.g. 255.255.255.0) Gateway:_____. _____._____._____(e.g. 215.24.24.1) © Copyright 2012 TRENDnet. All Rights Reserved. - Page 10 8. Verify that the following front panel LED indicators on your router: Power (Solid Green), LAN 1, 2, 3, or 4 (Solid/Blinking Green for ports for which devices are connected), WAN (Solid/Blinking Green). © Copyright 2012 TRENDnet. All Rights Reserved.
- Page 11 Login. Default User Name: admin Default Password: admin 4. Select your Time Zone from the drop-down list and set the Daylight Savings Time if applicable. Click Next. © Copyright 2012 TRENDnet. All Rights Reserved.
- Page 12 7. Click Next to bypass the cloning of your computer’s MAC address (Cloning is required for instances when your router would need to be identified as the same address as your computer). © Copyright 2012 TRENDnet. All Rights Reserved.
- Page 13 11. Verify you have an Internet connection by opening a Web browser on your computer. Note: If you cannot access the Internet, power down your modem and router again. Occasionally certain modems need to be power cycled to adopt new router settings. 9. Click Restart. © Copyright 2012 TRENDnet. All Rights Reserved.
-
Page 14: Connect Additional Wired Devices To Your Network
Please ensure that your computer or device network settings (also called TCP/IP settings) are configured to obtain IP address settings automatically (also called dynamic IP address or DHCP) and to Obtain DNS Server address settings automatically. © Copyright 2012 TRENDnet. All Rights Reserved. -
Page 15: Access Control Filters
1-65535 (e.g. 21 ~ 30) and for a single port, enter the same number in both range fields (e.g. 21 ~ 21). © Copyright 2012 TRENDnet. All Rights Reserved. -
Page 16: Mac Address Filters
MAC address from your router’s DHCP client list. • Add MAC Address - Enter the 12-digit MAC address in the fields provided . (e.g. 00-11-22-AA-BB-CC) © Copyright 2012 TRENDnet. All Rights Reserved. -
Page 17: Domain/Url Filters
You may want to block computers or devices on your network access to specific following MACs which will only allow the MAC addresses listed in the MAC Address websites (e.g. www.trendnet.com, etc.), also called domains or URLs (Uniform Resource Control List and deny all others devices that are unlisted. - Page 18 After the settings have been applied, click Continue on the following page. Note: If you would like to discard the changes, click Cancel before you click Apply. To verify that the entries were successfully removed, check if the entries are no longer listed. © Copyright 2012 TRENDnet. All Rights Reserved.
-
Page 19: Advanced Router Setup
Note: If you change the router login password, you will need to access the router management page using the User Name “admin” and the new password instead of the 3. At the main Login page, click on Advanced Setup. default password “admin”. © Copyright 2012 TRENDnet. All Rights Reserved. -
Page 20: Set Your Router Date And Time
Default SNTP Server (Optional) – Set your router date and time to synchronize with an SNTP (Simple Network Time Protocol) server address (e.g. pool.ntp.org). Check the Enable option and enter the SNTP server address in the Server IP field, (e.g. pool.ntp.org). © Copyright 2012 TRENDnet. All Rights Reserved. -
Page 21: Manually Configure Your Internet Connection
Note: If you would like to discard the changes, click Cancel before you click Apply. Advanced Setup > WAN > Dynamic IP, in the Host Name field. To save changes, click Apply at bottom of the page. © Copyright 2012 TRENDnet. All Rights Reserved. -
Page 22: Change Your Router Ip Address
Note: The Start IP and End IP specify the range of IP addresses to automatically address settings so you do not have to change the DHCP address range manually to assign to computers or devices on your network. match your new router IP address settings. © Copyright 2012 TRENDnet. All Rights Reserved. -
Page 23: Set Up Dhcp Reservation
• Remaining Time – The remaining lease time of the IP address assigned. • Static – If checked, assigns the current IP address to the computer or network device as a DHCP Reservation. © Copyright 2012 TRENDnet. All Rights Reserved. -
Page 24: Enable/Disable Upnp On Your Router
Click Add to add the DHCP Reservation to the list of active lease entries. • Advertise Time - This is the interval the router will send out UPnP advertisements. By default, the router is configured to send out an advertisement every 1800 seconds. © Copyright 2012 TRENDnet. All Rights Reserved. -
Page 25: Allow Ftp Connections Using An Ftp Non-Standard Port
4. Click OK at the bottom of the page to apply the changes. After the settings have been applied, click Continue on the following page. Note: If you would like to discard the changes, click Cancel before you click OK. © Copyright 2012 TRENDnet. All Rights Reserved. -
Page 26: Allow Netmeeting H.323 Connections Through Your Router
4. Click OK at the bottom of the page to apply the changes. After the settings have been applied, click Continue on the following page. Note: If you would like to discard the changes, click Cancel before you click OK. © Copyright 2012 TRENDnet. All Rights Reserved. -
Page 27: Identify Your Network On The Internet
5. In the Server Provider drop-down list, select the provider you selected, and enter your information in the fields. 3. Under the Remote Management section, check the Enable option. Note: Unchecking the Enable option will disable Remote Management. © Copyright 2012 TRENDnet. All Rights Reserved. -
Page 28: Open A Device On Your Network To The Internet
2. Log into your router management page (see “Access your router management page” page 16). 3. Click on Advanced Setup and click on Firewall, then and click on DMZ. 4. Next to DMZ function, click Enabled. © Copyright 2012 TRENDnet. All Rights Reserved. - Page 29 IP address (computers or network devices) on your network. a. Log into your router management page (see “Access your router management page” page 16). b. Click on Advanced Setup and click on WAN, then click on Static IP. © Copyright 2012 TRENDnet. All Rights Reserved.
-
Page 30: Virtual Server
An example would be forwarding a port to an IP camera Note: Please refer to the device documentation to determine which (TRENDnet IP cameras default to HTTP TCP port 80 for remote access web requests) on ports and protocols are required. -
Page 31: Port Mapping
10. Click Add to add the virtual server to the list. 1. Setup DynDNS service (See DynDNS section). 2. Access TRENDnet IP Camera management page and forward Port 80 (see product documentation) 3. Make sure to configure your network/IP camera to use a static IP address or you can 11. -
Page 32: Port Trigger
Trigger Port – Enter the ports or port range requested by the device. To delete an entry, next to the entry under Action in the list, click the trash icon (e.g. 554-554 or 6112-6112). and click Apply at the bottom of the page. © Copyright 2012 TRENDnet. All Rights Reserved. -
Page 33: Set Up Quality Of Service (Qos) On Your Router
. Then click Apply at the bottom of the page. To delete an entry, next to the entry under Action in the list, click the trash icon and click Apply at the bottom of the page. © Copyright 2012 TRENDnet. All Rights Reserved. -
Page 34: Dscp Based
. Then click Apply at the bottom of the page. To delete an entry, next to the entry under Action in the list, click the trash icon and click Apply at the bottom of the page. © Copyright 2012 TRENDnet. All Rights Reserved. -
Page 35: Prevent Arp Spoofing Attacks On Your Network
IP Address - Enter the IP address of the computer or device for the binding entry. • MAC Address - Enter the 12-digit MAC address of the computer or device for the binding entry, then click Add and click OK to save the changes. (ex. AA:BB:CC:11:22:33) © Copyright 2012 TRENDnet. All Rights Reserved. -
Page 36: Prevent Dos (Denial Of Service) Attacks On Your Network
5. Click OK at the bottom of the page to apply the changes. After the settings have been applied, click Continue on the following page. Note: If you would like to discard the changes, click Cancel before you click OK. © Copyright 2012 TRENDnet. All Rights Reserved. -
Page 37: Enable/Disable Nat On Your Router
Continue on the following page. Note: If you would like to discard the changes, click Cancel before you click Apply. Note: If you would like to discard the changes, click Cancel before you click Apply. © Copyright 2012 TRENDnet. All Rights Reserved. -
Page 38: Add Static Routes To Your Router
Note: If you would like to discard the changes, click Cancel before you click Apply. To delete an entry, next to the entry in the list, click Delete and click Apply at the bottom of the page. © Copyright 2012 TRENDnet. All Rights Reserved. -
Page 39: Enable Dynamic Routing On Your Router
NAT default gateway to the Internet. Default Gateway - Use this mode when using your router to route traffic locally and simultaneously used as a NAT default gateway to the Internet. © Copyright 2012 TRENDnet. All Rights Reserved. -
Page 40: Router Maintenance & Monitoring
2. Click on Advanced Setup and click on System, then click on Configuration Tools. 3. Under Restore to Factory Default, click Reset. When prompted to confirm this action, click OK. Wait for your router to reboot. Your router will be reset to default settings after reboot. © Copyright 2012 TRENDnet. All Rights Reserved. -
Page 41: Backup And Restore Your Router Configuration Settings
4. Select the router configuration file to restore and click Restore Settings. (Default Filename: yearmmdd-cfg.bin). If prompted to confirm the action, click Yes or 5. Wait for the router to restore settings and reboot. © Copyright 2012 TRENDnet. All Rights Reserved. -
Page 42: Upgrade Your Router Firmware
4. Click on Advanced Setup and click on System, then click on Firmware Upgrade. TRENDnet may periodically release firmware upgrades that may add features or fix problems associated with your TRENDnet router model and version. To check if there is Your router’s current firmware version information will be listed as “Current Firmware a firmware upgrade available for your device, please check your TRENDnet model and Version:”... -
Page 43: Restart Your Router
/ URL, enter in the domain or name/URL/web address page 16). (e.g.www.trendnet.com) to test and click Lookup. You will see the DNS Lookup results in the DNS Lookup Results window. 2. Click on Advanced Setup and click on System, then click on Reboot. Click the Reboot button. -
Page 44: Check The Router System Information
• Subnet Mask - The current subnet mask assigned to your router WAN port or interface configuration. • Gateway – The current gateway assigned to your router WAN port or interface configuration. © Copyright 2012 TRENDnet. All Rights Reserved. -
Page 45: View Your Router Log
1. Log into your router management page (see “Access your router management page” page 16). 2. Click on Advanced Setup and click on System, then click on Log Setting. © Copyright 2012 TRENDnet. All Rights Reserved. -
Page 46: Configure Your Router Log
5. Click Apply at the bottom of the page to apply the changes. After the settings have been applied, click Continue on the following page. Note: If you would like to discard the changes, click Cancel before you click Apply. © Copyright 2012 TRENDnet. All Rights Reserved. - Page 47 5. Click Apply at the bottom of the page to apply the changes. After the settings have been applied, click Continue on the following page. Note: If you would like to discard the changes, click Cancel before you click Apply. © Copyright 2012 TRENDnet. All Rights Reserved.
-
Page 48: Router Management Page Structure
System Information • Port Mapping • Advanced Setup • Passthrough • Log Setting View/Download Logs Non-standard FTP Logout Remote Log (Syslog) NetMeeting E-mail Log • Log out of router management page • Reboot © Copyright 2012 TRENDnet. All Rights Reserved. -
Page 49: Technical Specifications
Output: 5V DC, 1A Power 4.1 W (max) Consumption Certifications CE, FCC Router Connection Type Dynamic IP, Static (Fixed) IP, PPPoE, PPTP, L2TP Network Protocols TCP/IP, NAT/SPI, UDP, ICMP, PPPoE, UPnP, HTTP, DHCP, © Copyright 2012 TRENDnet. All Rights Reserved. -
Page 50: Troubleshooting
Click Internet Protocol (TCP/IP) and click Properties. d. Then click Obtain an IP address automatically and click OK. Note: If you are experiencing difficulties, please contact your computer or operating system manufacturer for assistance. © Copyright 2012 TRENDnet. All Rights Reserved. -
Page 51: Appendix
2. In the Network Preference window, next to "Show:", select Network Status. You'll see Network and select the TCP/IP tab. your network status and your IP address settings displayed. In MAC OS 10.5/10.6, in the left column, select Network. e. Configure TCP/IP to use DHCP. © Copyright 2012 TRENDnet. All Rights Reserved. - Page 52 1. Apple Menu > System Preferences > Network 2. Select Network from the list on the left. 3. Click the Advanced button. 3. On the Network tab, the Network ID is your MAC Address. © Copyright 2012 TRENDnet. All Rights Reserved.
- Page 53 This equipment should be installed and operated with minimum distance 20cm between the radiator & your body. This transmitter must not be co-located or operating in conjunction with any other antenna or transmitter. © Copyright 2012 TRENDnet. All Rights Reserved.
- Page 54 Por medio de la presente TRENDnet declara que el TW100- 2004/108/CE. [Spanish] BRF214 cumple con los requisitos esenciales y cualesquiera otras Slovensko TRENDnet izjavlja, da je ta TW100-BRF214 v skladu z bistvenimi disposiciones aplicables o exigibles de la Directiva 2004/108/CE. [Slovenian] zahtevami in ostalimi relevantnimi določili direktive 2004/108/ES. Ελληνική...
- Page 55 Download section limited to, duty, tax, and other fees. and look for the desired TRENDnet product to access to the GPL Code or LGPL Code. These codes are distributed WITHOUT WARRANTY and are subject to the copyrights of WARRANTIES EXCLUSIVE: IF THE TRENDNET PRODUCT DOES NOT OPERATE AS the developers.
Need help?
Do you have a question about the TW100-BRF214 and is the answer not in the manual?
Questions and answers