Table of Contents
Advertisement
Quick Links
Advertisement
Table of Contents

Related Manuals for Insportline Velocer UB


Summary of Contents for Insportline Velocer UB
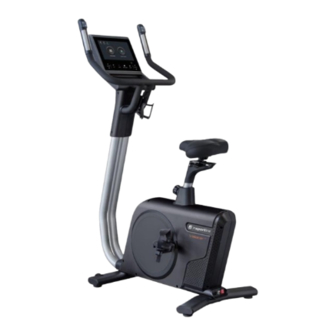
- Page 1 USER MANUAL – EN IN 26626 Exercise bike inSPORTline Velocer UB...
-
Page 2: Table Of Contents
CONTENTS SAFETY INSTRUCTIONS ........................3 DRAWING ............................... 4 PART LIST ............................... 5 ASSEMBLY ............................. 8 CONSOLE ............................. 15 USE ............................... 29 EXERCISING INSTRUCTIONS ......................30 CORRECT BODY POSTURE ....................... 31 MAINTENANCE ............................ 31 STORAGE ............................. 31 IMPORTANT NOTICE ........................... 31 ENVIRONMENT PROTECTION ...................... -
Page 3: Safety Instructions
SevenSport s.r.o. reserves the right to make any changes and improvements to its product without prior notice. Visit our website www.insportline.eu where you will find the latest version of the manual. SAFETY INSTRUCTIONS • Please read the manual carefully before first use and keep it for future reference. -
Page 4: Drawing
• WARNING! The heart rate monitoring system may not be accurate. Overexertion during training can cause serious injury or death. If you feel nauseous, stop exercising immediately! DRAWING... -
Page 5: Part List
PART LIST Name Qty. Main frame Main frame paint Seat tube slider Power switch group Power outlet Overcurrent protection Power switch Connecting line Two-way bearing Lower control board Plate Washer S20 Philips screw Philips screw Crank axle Magnetic flywheel Magnetic control Flywheel positioning plate Spring washer M10 Nut M10x5T... - Page 6 Phillips screw Allen bolt M8*30L Allen bolt M8*30L Flat washer d6*D22*2T Flat washer d4.3*D12*1T Crank cover Pulley set Belt Magnet Allen bolt M8*20L Nut M8 Seat post Phillips screw ST4*12L Seat post engraving Seat post cover Saddle slider Saddle set Seat Saddle slider Screw M10*70L...
- Page 7 Left cover Right cover Allen bolt M8*65L Allen bolt M8*60L Screw M4*10L Handles Handle assembly Bottle holder and screws Heart rate sensor covers Heart rate sensors Covers Screw 3*14 Covers and others Spring clip Phillips screw Phillips screw ST4*12L Left cover Left logo Left seat cover Right cover...
-
Page 8: Assembly
Console cable 800 mm Socket Transformer 220 mm - 6 pin (blue) 220 – 6 pin (red) 925 mm, 6pin (blue), 1 terminal 4pin 2.54 male, 1 terminal divided into 2 terminals 110 female, sensor head connection (black) 925 mm, 6pin (blue), 1 terminal 4pin 2.54 male, 1 terminal divided into 2 terminals 110 female, sensor head connection (black) ASSEMBLY Allen key 4mm... - Page 9 Step 1 Attach the rear stabilizer (J) to the main frame with bolts (51).
- Page 10 Step 2 Connect the cables before attaching the handle post (K) to the main frame. Make sure the handle post (K) is inserted into the main frame before attaching the front stabilizer (I) with the bolts (52). Step 3 Before attaching the console (74) to the handle post, connect the cables of the same color. Be careful not to pinch the cables between the frames.
- Page 11 Step 4 Connect cables of the same color and fix the handles (L) to the handle post with bolts (59). Step 5 Attach the covers (56 and 57) to the handle post with bolts (60).
- Page 12 Step 6 Turn and pull out the hand knob and at the same time pull out the seat post using the eyelet. Step 7 Attach the seat slider (75) to the seat post with bolts (76). Attach saddle (42) to saddle slider (75) and secure with nuts (D).
- Page 13 Step 8 Attach the pedals (78). SEAT ADJUSTMENT Adjust the saddle to make the exercise as comfortable as possible.
- Page 14 TRANSPORT Step 1 Step 2 Grasp the handles on both sides, push and Carefully move the machine on the transport wheels. move the machine onto the transport wheels Do not slide the machine stabilizers across the floor. on the front stabilizer. WARNING WARNING Do not lift the machine by the seat...
-
Page 15: Console
CONSOLE Wireless charger The wireless charger with dimensions of 24*9.4 cm allows you to charge smart devices with a display up to 7.2 inches. Make sure your smart device is positioned correctly. When charging is active, the symbol is displayed Note: if you are using covers, stickers or rings that contain metal, they must be removed before using the charger. - Page 16 1. Stops or pauses the program 2. Starts the program 3. Press the button to start the console, hold the 4. Increase / decrease resistance button for 3 seconds to turn off the console 5. Wireless charging 6. Increase / decrease volume 7.
- Page 17 Unit: Metric / Imperial Resistance setting Auto mode: achieve precise performance by varying load and pedaling speed Manual mode: achieving different performance using precisely given load and pedaling speed Power display: In manual mode, you can select WATT or MET units Button sounds Update if USB with update is plugged in SLEEP MODE: enable or disable sleep mode...
- Page 18 BT SPEAKER IOS MUSIC CONNECT Step 1 Step 2 Turn on Bluetooth on your device and select BT-Speaker. Select to turn on. The icon will flash during pairing. The icon will disappear if pairing is not completed within 30 seconds.
- Page 19 Step 3 Step 4 Select music. If the icon is displayed, the speaker is connected and you can control the volume. ANDRIOD Step 1 Krok 2 Turn on Bluetooth on your device and select BT-Speaker. Select to turn on. The icon will flash during pairing.
- Page 20 Step 3 Krok 4 Select music. If the icon is displayed, the speaker is connected and you can control the volume. Note: To disconnect the device, press . If you want to connect another device, you need to disconnect the previous device. ICON DESCRIPTION Connecting the console using applications with the FTMS protocol.
- Page 21 QUICK START PULSE: If you wear the chest belt or hold the pulse sensors on the handles, the pulse rate will be displayed BLUETOOTH: If the chest belt is connected to a third-party app, an icon will appear CALORIES: Number of calories burned during exercise TIME: Training time RPM/SPEED: Revolutions per minute or speed DISTANCE: Distance during exercise...
- Page 22 Press + to select one of 54 avatars. If you don't choose one, it will be randomly assigned to you. After setting all data, press the key After creating a profile, you can select a user profile. By pressing the pencil you can profile: EDIT –...
- Page 23 MANUAL TIME COUNTDOWN DISTANCE COUNTDOWN CALORIES COUNTDOWN WARM UP INTENSITY INTERVAL VALLEY SLOPE MOUNTAIN CONSTANT HILLS FAT BURNING CARDIO STRENGTH CLIMB RECOVERY USER PROGRAM X3 CONSTANT SPEED CONSTANT WATT...
- Page 24 QUICK START The program will add all values. When the program starts, a 3-second countdown is displayed. After completing the exercise, all measured values are displayed (WORKOUT SUMMARY) MANUAL Quick start exercise program. COUNTDOWN PROGRAMS Time Distance countdown Calories countdown countdown You can only set one countdown program at the same time.
- Page 25 WARM UP 3 min warm-up before training. Intensity interval Mountain Constant Hills Ramp Fat burning Strengthening Cardio Valley Climb There are 10 pre-set programs to choose from with different resistances. Step 1: Select a program. Step 2: Set the training time. Step 3: Confirm the program.
- Page 26 CONSTANT SPEED The program automatically adjusts the resistance to reach the set speed value. Step 1: Choose a program Step 2: Set speed target. Step 3: Confirm. Step 4: After completing the exercise, the exercise summary will be displayed. CONSTANT WATT The program automatically adjusts the load to reach the set performance value.
- Page 27 Step 2: Set program duration. Step 3: Set 60% / 80% or your own target heart rate. Step 4: Confirm. Step 5: If the chest strap is connected, the heart rate icon and Bluetooth will appear. Step 6: After completing the exercise, you will see a summary of the exercise. RECOVERY The test requires constant heart rate measurement, we recommend wearing a chest belt.
- Page 28 USER MODE X3 Set your own exercise program (up to 3 programs), which is divided into 30 segments. Step 1: Select USER MODE X3. Step 2: Select one of the three user programs. Step 3: From left to right, adjust the intensity of all segments. Step 4: Press OK to save and run the program.
-
Page 29: Use
Step 1: Select a HIIT program. Step 2: Select a user or practice as a guest. Step 3: Choose program values. Step 4: Press Next to start the program. The HIIT program is divided into segments according to colors: warm-up (yellow), sprint (blue-green), recovery (green), calm down (blue). Press SKIP to move to the next screen. -
Page 30: Exercising Instructions
When exercising, it's important to choose the right load and the right tempo. Try to keep it throughout the exercise. It is not recommended to choose a high pace right from the start. Increase tempo after about a week of regular exercise. The high pace is not equal to the faster burning of calories. Correct calorie burning is reflected in an appropriate and regular exercise. -
Page 31: Correct Body Posture
Calves and Achilles tendon Lean against a wall with your left leg in front of the right one and your arms forward. Stretch out your right leg and keep your left foot on the floor. Bend your left leg and lean forwards by moving your right hip in the direction of the wall. -
Page 32: Terms And Conditions Of Warranty, Warranty Claims
By proper disposal you will protect the environment and natural sources. Moreover, you can help protect human health. If you are not sure in correct disposing, ask local authorities to avoid law violation or sanctions. Don’t put the batteries among house waste but hand them in to the recycling place. TERMS AND CONDITIONS OF WARRANTY, WARRANTY CLAIMS General Conditions of Warranty and Definition of Terms All Warranty Conditions stated here under determine Warranty Coverage and Warranty Claim... - Page 33 VAT ID: CZ26847264 About shipping Phone: +420 556 300 970 E-mail: eshop@insportline.cz reklamace@insportline.cz servis@insportline.cz Web: www.inSPORTline.cz inSPORTline s.r.o. Headquaters, warranty & service center: Električná 6471, Trenčín 911 01, SK CRN: 36311723 VAT ID: SK2020177082 Phone: +421(0)326 526 701 E-mail: objednavky@insportline.sk reklamacie@insportline.sk...
Need help?
Do you have a question about the Velocer UB and is the answer not in the manual?
Questions and answers