Advertisement
Advertisement

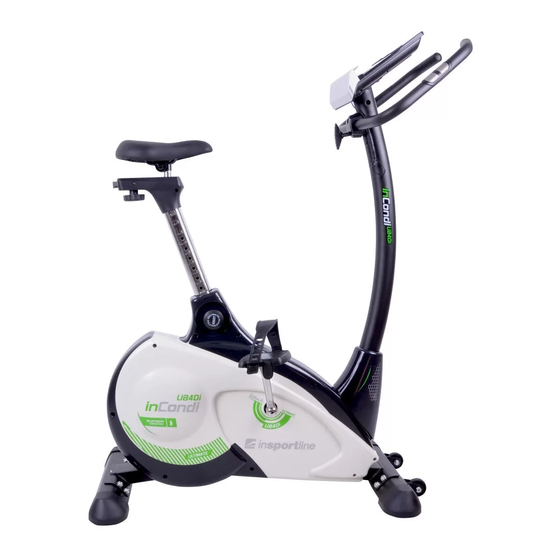
Summary of Contents for Insportline IN 9119UB40i
- Page 1 USER MANUAL – EN IN 9119 Exercise Bike inSPORTline UB40i Made in P.R.C...
-
Page 2: Table Of Contents
CONTENTS SAFETY CAUTION ............................... 3 EXPLODED VIEW ..............................4 PARTS LIST ................................5 ASSEMBLY ................................8 KNOWING THE ICONSOLE ..........................14 TRAINING INSTRUCTION ..........................18 TERMS AND CONDITIONS OF WARRANTY, WARRANTY CLAIMS ............19... -
Page 3: Safety Caution
PREFACE Let’s start a fearless adventure in knowing what to do when no one’s there telling you what to do. Before that please read the following. SAFETY CAUTION This exerciser is made for home use only, and tested up to a max body weight of 120kg. ... -
Page 4: Exploded View
EXPLODED VIEW... -
Page 5: Parts List
PARTS LIST DESCRIPTION CONSOLE SCREW M5X10L HANDLEBAR SET 1 (set) HAND-PULSE FOAM GRIP CONNECTION WIRE HANDLEBAR POST HANDLEBAR POST COVER CURVED WASHER ø8xφ19x2t SCREW M8xP1.25x16L CABLE FRONT STABILIZER SET 1 (set) FRONT CAP (LEFT) SCREW M8xP1.25x40L TRANSPORTATION WHEEL ø57xφ8x20 NYLON NUT M8 FLAT WASHER ø8*φ19*2T FRONT CAP (RIGHT) MAINFRAME... - Page 6 SCREW REAR CAP (LEFT) ADJUST CAP REAR CAP (RIGHT) HORIZONTAL SEAT POST SET 1 (set) SADDLE SEAT SLIDER SOCKET FLAT WASHER ø14.3xφ25x2.0t SEAT SLIDER KNOB SEAT POST COVER SCREW M5xP0.8x6L SCREW M4x15L HARDWARE 1 (set) SCREW M8xP1.25x20L FLAT WASHER ø8*φ19*2T COVER SPRING WASHER ø7x2t FLAT WASHER ø7xφ12x1t...
- Page 7 HEXAGON SCREW M6xP1.0x12L FLYWHEEL SET 1 (set) FLYWHEEL BEARING 6300RS ONE WAY BEARING 1 (set) BEARING 6203RS AXLE SHAFT FLAT WASHER ø30xφ34x1t SMALL PULLEY BEARING 6000RS M-10 STAR WASHER M-11 BUSHING M-12 BEARING 6003RS M-13 BUSHING GEAR BOX SHAFT FOR GEAR BOX MAGNET SET SPRING WASHER FLAT WASHER...
-
Page 8: Assembly
ASSEMBLY STEP 1 Assemble the front & rear stabilizer (D & G) with screw & washer (I-1 & I-2). - Page 9 STEP 2 1. Screw the pedals (F-R/L) onto the crank. The pedals are marked with R and L at the screw. 2. Tighten the left pedal anti-clockwise, the right pedal clockwise.
- Page 10 STEP 3 1. Assemble the saddle (H-1) with horizontal slider (as the small drawing). 2. Insert the seat post (H) in the main frame, choose the situation position and tighten the locking knob aside the cover. Ensure the knob is always tightened.
- Page 11 STEP 4 1. Loose the pre-assembly screws & washer (C-3 & C-2) on the front tube holder. 2. Connect the computer cable upper & lower (C-4 & E-1). 3. Put the handlebar post (C) into the cover (C-1) and main frame and fix it with 4 allen screws and washers (C-3 &...
- Page 12 STEP 5 1. Place handlebar (B) on the handlebar fixture, and put the handlebar cover (I-3) on the top of handlebar. 2. Insert T-shape knob (I-7) into the lower hole of handlebar cover and ensure to screw it tightly with bushing (I-6), washers (I-4 &...
- Page 13 STEP 6 1. Connect the computer cable (C-4) insert the back side of computer. 2. Mount the computer to the hold of the handlebar pole with the enclosed screws (A-1). 3. Plug the delivered of hand-on pulse wire (B-4) in the socket at the backside of computer. 4.
-
Page 14: Display Functions
KNOWING THE ICONSOLE SUPPORT DEVICES iOS devices: iPhone iPad iPod . iPhone 5S . iPad Air . iPod touch (5th generation) . iPhone 5C . iPad 4 . iPod (4th generation) . iPhone 5 . iPad 3 . iPod (3rd generation) . - Page 15 Rotation per minute Range 0 ~ 999 WATT Workout power consumption In Watt Program mode, computer will remain preset watt value (setting range 0~350) MANUAL Manual mode workout. PROGRAM Beginner, Advance, and Sporty PROGRAM selection. CARDIO Target HR training mode. KEYS ITEM DESCRIPTION...
- Page 16 1) Press UP or DOWN to select workout program, choose Manual and press Mode to enter. 2) Press UP or DOWN to preset TIME, DISTANCE, CALORIES, PULSE and press MODE to confirm. 3) Press START/STOP keys to start workout. Press UP or DOWN to adjust load level. 4) Press START/STOP keys to pause workout.
- Page 17 1) Press UP or DOWN to select workout program, choose Sporty mode and press Mode to enter. 2) Press UP or DOWN to preset TIME. 3) Press START/STOP key to start workout. Press UP or DOWN to adjust load level. 4) Press START/STOP key to pause workout.
-
Page 18: Training Instruction
NOTE: 1. Once console is connect to tablet via Bluetooth, the console will power off. 2. Please exit iConsole app and turn off the Bluetooth from iPad, then the console will power on again. TRAINING INSTRUCTION If you have not been physically active for a long period of time and also to avoid health risks you should consult your physician before the exercise. -
Page 19: Terms And Conditions Of Warranty, Warranty Claims
SUCCESS Even after a short period of regular exercises you will realize that you constantly have to increase the pedaling resistance to reach your optimum pulse rate. The units will be continuously easier and you will feel a lot fitter during your normal day. For this achievement you should motivate yourself to exercise regularly. - Page 20 513/1991 Coll., Commercial Code, and Act No. 634/1992 Coll., Consumer Protection Act, as amended, also in cases that are not specified by these Warranty rules. The seller is SEVEN SPORT s.r.o. with its registered office in Borivojova Street 35/878, Prague 13000, Company Registration Number: 26847264, registered in the Trade Register at Regional Court in Prague, Section C, Insert No.
- Page 21 +420 556 770 190, Mobile: +420 604 853 019, servis@insportline.cz Fax: +420 556 770 192, (Service +420 556 770 191) Web: www.insportline.cz, www.worker.cz, www.worker-moto.cz INSPORTLINE, s.r.o. Bratislavska 36, 911 05 Trencin, Slovakia CRN: 36311723, VAT ID: SK2020177082 Orders: +421(0)326 526 701, +421(0)917 649 192, objednavky@insportline.sk...


Need help?
Do you have a question about the IN 9119UB40i and is the answer not in the manual?
Questions and answers