Table of Contents
Advertisement
Quick Links
Advertisement
Table of Contents

Subscribe to Our Youtube Channel
Related Manuals for Insportline inCondi S1000i


Summary of Contents for Insportline inCondi S1000i
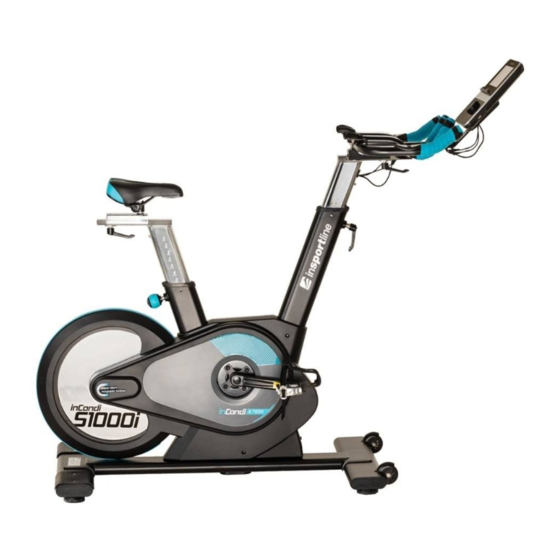
- Page 1 USER MANUAL – EN IN 20069 Indoor Spinning Bike inSPORTline inCondi S1000i...
-
Page 2: Table Of Contents
CONTENTS SAFETY INSTRUCTIONS ........................3 IMPORTANT NOTES ..........................3 PARTS LIST ............................4 DIAGRAM ..............................7 ASSEMBLY ............................. 8 CONSOLE ............................. 11 PROGRAMY ............................16 MEDIA ..............................25 USE ............................... 27 CORRECT BODY POSTURE ....................... 28 EXERCISE INSTRUCTIONS ........................ 28 MAINTENANCE ............................ -
Page 3: Safety Instructions
SAFETY INSTRUCTIONS • To ensure the best safety of the exerciser, regularly check it on damages and worn parts. • If you pass on this exerciser to another person or if you allow another person to use it, make sure that that person is familiar with the content and instructions in these instructions. •... -
Page 4: Parts List
contents of the delivery are complete by referring to the parts list of the assembly and operating instructions. • Be sure to set up the exerciser in a dry and even place and always protect it from humidity. If you wish to protect the place particularly against pressure points, contamination, etc., it is recommended to put a suitable, non-slip mat under the exerciser. - Page 5 Φ16* Φ6 Gasket Hand screw M16*30 Φ45* Φ40,5*4 Flat washer 1 Knob L M10*25 Screw 3 M8*16 M12*1,25 Φ28*6,5 Crank end cap Knob 1 M16*35 Φ10* Φ6,2*5 Sleeve Left crank 170*15 Screw 4 M3*6 Bearing 6004ZZ Right crank 170*15 Φ5 Spring washer 1 M20*1,2 Flywheel...
- Page 6 Magnet 28*20*3 Φ25* Φ20,2*48,2 Fixing rod Pulse sensor plug 45*25*9 End cap 100*50*2 Nut 1 M20*1,0 Brakes holder Console Screw 3 M5*8 Sensor 350 mm, 2P Kabel 1 250 mm, 5P Kabel 2 800 mm, 5P Kabel 3 950 mm, 5P Motor cable 150 mm, 5P Screw 3...
-
Page 7: Diagram
DIAGRAM... -
Page 8: Assembly
ASSEMBLY Make sure you have enough space before assembly. Make sure no part is missing. STEP 1 Secure the front stabilizer (15) to the main frame (16) with 2 washers (5) and 2 screws (3). Attach the rear stabilizer (4) to the main frame (16) using 2 washers (5) and 2 screws (3). STEP 2 Attach the seat post (10) to the main frame (16). - Page 9 STEP 3 Loosen the knob (24) and insert the handlebar post (17) into the main frame (16). Adjust the height and secure the handle with the knob (24). Then attach the handlebars (18) to the handlebar post (17) with the screws (26) and the knob (19). Attach the console (67) to the console bracket located on the handlebars (18) with 4 screws (68).
- Page 10 The load / resistance is adjusted using the console.
-
Page 11: Console
CONSOLE BUTTONS Starts program Pause program Return to main menu Return Increase load Decrease load Stop load Navigation button, press to confirm function Media Increase volume Decrease volume... - Page 12 PLAY/PAUSE Previous Next SPECIFICATIONS LCD display 1024*600 TFT LCD 7 inches Processor ITE9854 Memory Inner 64 MB USB connector Supports MP3, videos with maximum resolution 1280*768, H.264 MP4 files, MKV files Flash 8M NOR + 8 G EMMC FUNCTIONS AND DISPLAY When switched on, the start menu is displayed.
- Page 13 RPM Speed: Displays the current speed in revolutions per minute Distance: Displays the current distance in Km Time: Displays the current training time, hours: minutes Calories: Displays calories burned in calories HRC: Shows Current Heart Rate, BPM (Beats Per Minute) The current load is displayed EXERCISE PROGRAMS Use the navigation button to select a program or function and press to confirm...
- Page 14 Target distance: After the start of the training, the countdown starts to 0, then the training is completed. Select icon: Target Calories: After the start of the workout, the countdown starts to 0, then the training is completed. Select icon: User Programs: The user can set up to 6 preset programs.
- Page 15 The console includes 12 work out exercises. Select icon: Backlight settings. Select icon: System settings, configuration. You must enter a password to enter. MEDIA Select the icon using the navigation knob and press the knob to confirm Music: Play music by connecting a USB drive. Select icon: Video: Play the video using a USB drive connection.
-
Page 16: Programy
PROGRAMY QUICK START The load can be adjusted using the buttons on the console Pressing "STOP" stops the program and displays the training data. - Page 17 TARGET MODE Select the icon using the navigation knob. Press the knob to confirm and the following screen is display: You can adjust the parameters using the navigation knob. Press the START button to turn on the program. Set the desired parameters. After the program starts, the device starts according to the set parameters.
- Page 18 USER PROGRAM Select the icon using the navigation knob. Press the knob to confirm. User select load values; they are automatically saved. The following screen is displayed: Select the program using the navigation knob. Press the confirm button. Enter the settings. Use the navigation knob to adjust the values.
- Page 19 VIRTUAL SCENE Select the icon using the navigation knob. Press the knob to confirm and the following screen is display: Select the program using the navigation knob. Press the knob to confirm. Enter the settings. The original resistance value is 10. Use the buttons on the console to adjust the value. The speed of the device and the scene will vary depending on the resistance.
- Page 20 RACING Select the icon using the navigation knob. Press the knob to confirm and the following screen is display: Select the program using the navigation knob. Press the knob to confirm. Enter the settings. You can use the navigation knob to adjust the values. Use the START button to start the device.
- Page 21 Press CONFIRM to stop the program. After stopping the device, you can start another function. With CANCEL, the device will continue to operate. WORK OUT Select the icon using the navigation knob. Press the knob to confirm and the following screen is display: Select the program using the navigation knob.
- Page 22 Use the START button to start the device. Select the program and set the length of the workout. The program is divided into 16 segments, each segment = set time / 16.
- Page 23 HRC PROGRAM Select the icon using the navigation knob. Set age and the system automatically calculates the target heart rate. Time can be set from 22 to 44 min. The following screen will appear: Use the navigation knob to adjust the values. Start with START button and warm-up begins (2 min) Training Stage...
- Page 24 Cool down stage (2 min) If no pulse is detected, the following screen is displayed.
-
Page 25: Media
MEDIA MUSIC Press the MEDIA button. Use the navigation button to select a file and press the knob to confirm. Use the navigation button to select music, press the button to start music. Use the play, pause buttons to start and stop playback. Adjust volume using volume + and volume -. VIDEO Press the MEDIA button. - Page 26 SETTINGS Press the navigation button to view the interface below: Use the navigation knob to adjust the backlight. System settings, configuration. You must enter a password to enter. OTHER (FIT SHOW APP) Pair your console with your smartphone using Bluetooth. The following interface is displayed: Selecet: Search Selecet: Connect...
-
Page 27: Use
1. Press STOP to stop 2. Select CONTINUE 3. Set resistance / load 4. Set parameters the device to restart Exercise on the spinning bike is based on very simple movements, but you will surely fall in love with them. Thanks to simplicity of the exercise on the spinning bike in can be done by elderly people. Prior to exercise, it is necessary to adjust the height of the saddle. -
Page 28: Correct Body Posture
Bicycle exercise is an effective exercise for all busy people. Exercise on the spinning bike is effective in strengthening muscles, especially thighs, calves and buttocks. Regular exercise can lead to a slimmer figure. Exercise is recommended not only as a winter training for cyclists but also for people who want to burn excess calories. -
Page 29: Maintenance
Then let the muscles calm down by reducing the pace for approx. 5 min. Then do the warm-up exercises. Train regularly at least 3 times a week. MAINTENANCE • When assembling, tighten all screws and adjust the bike to the horizontal position. •... -
Page 30: Environment Protection
• The heart rate monitor is not a medical device. It provides only approximate information about your average heart rate, and any suggested pulse rate is not medically binding. Accumulated data may not always be accurate regarding uncontrollable human and environmental factors. ENVIRONMENT PROTECTION After the product lifespan expired or if the possible repairing is uneconomic, dispose it according to the local laws and environmentally friendly in the nearest scrapyard. - Page 31 • Adjustments made by unqualified person • Improper maintenance, improper placement, damages caused by low or high temperature, water, inappropriate pressure, shocks, intentional changes in design or construction etc. Warranty Claim Procedure The Buyer is obliged to check the Goods delivered by the Seller immediately after taking the responsibility for the Goods and its damages, i.e.
Need help?
Do you have a question about the inCondi S1000i and is the answer not in the manual?
Questions and answers
Jeg kan ikke få min Spinningcykel S1000i til at lave modstand i mine programmer eller bare generalt. Hvad kan jeg selv gøre for at få den til at virke igen?
To fix a resistance issue on your Insportline inCondi S1000i spinning bike, follow these steps:
1. Check the Resistance Cable – Ensure the resistance cable (part 53) is properly connected and not damaged.
2. Inspect the Resistance Adjustment – Verify that the resistance adjustment mechanism (part 54) is functioning correctly.
3. Examine the Magnet Assembly – Check the magnet assembly (part 60) for any misalignment or damage.
4. Tighten Loose Screws – Make sure all screws, bolts, and joints are properly tightened.
5. Test the Console Settings – If resistance is electronically controlled, confirm the console (part 67) settings are properly configured.
6. Look for Obstructions – Ensure no foreign objects or debris are interfering with the resistance mechanism.
7. Contact Support – If the issue persists, refer to the warranty terms and contact customer support.
Regular maintenance and proper assembly can help prevent resistance problems.
This answer is automatically generated