
Related Manuals for Pitney Bowes SendPro MailCenter


Summary of Contents for Pitney Bowes SendPro MailCenter
- Page 1 Shipping & Mailing Postage Meters SendPro® MailCenter HVF1, HVF2, HVF3 User Guide Canada English Edition SV63406-enca Rev.A 10 April 2024...
- Page 2 However, we cannot assume responsibility for errors or omissions or liability for the misuse or misapplication of our products. Except as provided in writing, duly signed by an officer of Pitney Bowes, no license either express or implied, under any Pitney Bowes or third party’s patent, copyright or other intellectual property rights is granted by providing this information.
- Page 3 About this Book The SendPro MailCenter User Guide is designed to assist in the daily operations of the device. Use this book as a reference, as it includes system operating procedures. Version History Document Part Number Release Date Comments SV63406-enca Rev. A...
-
Page 4: Table Of Contents
Table of Contents 1 - Getting Started The Home screen Parts of the SendPro MailCenter System specifications Envelope specifications Manual adjustments Weigh-On-The-Way (W-O-W) Viewing the onscreen keyboard Shutting down your system 2 - Accounting Creating an account Editing an account... - Page 5 Printing a test label Printing a test pattern Installing a new tape roll 7 - Postage Funding Adding or refilling postage Checking your balance at Pitney Bowes Finding your PB Postage account number Viewing the refill history 8 - Jobs Jobs overview...
- Page 6 Canada Post requirements Ordering label rolls and printer ink 12 - Rates and Updates Checking for rates and software updates Setting the time to check for updates Performing the rate updates Viewing the update history Pitney Bowes User Guide April 2024...
- Page 7 Refilling the envelope and tape sealant bottle 16 - Settings Advancing the date Changing the machine speed Changing the envelope size Changing the envelope or tape quantity Setting the Energy Star timeout 17 - Safety Safety information Pitney Bowes User Guide April 2024...
-
Page 8: Getting Started
1 - Getting Started In this section The Home screen Parts of the SendPro MailCenter System specifications Envelope specifications Manual adjustments Weigh-On-The-Way (W-O-W) Viewing the onscreen keyboard Shutting down your system... -
Page 9: The Home Screen
Postal Tools - Track your Canada Post packages, look up delivery standards and learn more about postal classes and services such as Xpresspost, Priority Next A.M. or Addressed Admail. pbSmart - Connects you to the Pitney Bowes Canadian website. Learn how Pitney Bowes can help you improve and strengthen your business. -
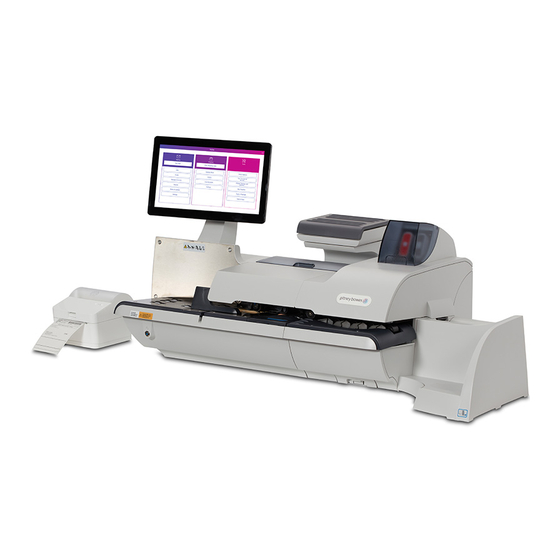
Page 10: Parts Of The Sendpro Mailcenter
6. The tape sealant bottle is an optional feature for SendPro MailCenter devices. It contains the E- Z Seal used for moistening gummed tape. The tape sealant bottle is located to the right of the printer module, behind the stacker. - Page 11 Getting Started 7. The wet / dry tape lever is an optional feature for SendPro MailCenter 3000 devices. Use this lever to set the type of tape you are using on your system. The wet / dry tape lever is located to the right of the printer module, behind the stacker.
- Page 12 14. The power button turns the device on. This is located on the lower left side of the feed deck. 15. The feed deck is the area where you load the envelopes. If you have a SendPro MailCenter 2000 or SendPro MailCenter 3000 system, this feeds the envelopes to the WEIGH-ON-THE- WAY®...
-
Page 13: System Specifications
100-240 VAC, 50/60 Hz., 6.4-3.0 A Operating temperature Maximum room ambient 40°C System dimensions SendPro MailCenter 1000 Length: 953 mm With drop stacker fully extended, add 394 mm With optional power stacker fully extended, add 1207 mm Depth with printer cover open: 597 mm... - Page 14 SendPro MailCenter 2000: W-O-W (HVF2) feeder SendPro MailCenter 3000: Optional W-O-W (HVF3) feeder Feeder Deck SendPro MailCenter 1000 and SendPro MailCenter 2000: Standard - letter mail and flats SendPro MailCenter 3000: Extra wide feed deck, letter mail and flats Sealer Capacity...
- Page 15 SendPro MailCenter 2000: Non W-O-W: 3-speeds, 145 (standard), 160, and 180 letters/min SendPro MailCenter 2000: W-O-W: 3-speeds, 70 (standard), 90, 110 letters/min SendPro MailCenter 3000: Non W-O-W: 4-Speed options, 165 (standard), 220, 270, and 310 letters/min SendPro MailCenter 3000: W-O-W: 4-Speed options, 105 (standard), 135, 170 and 205...
-
Page 16: Envelope Specifications
Envelope dimensions Minimum 89 mm x 127 mm postcard size Maximum SendPro MailCenter 1000 and SendPro MailCenter 2000: 330 mm x 356 mm SendPro® MailCenter 3000: 381 mm x 381 mm Envelope thickness Minimum SendPro MailCenter 1000 and SendPro MailCenter 2000: 0.18 mm SendPro MailCenter 3000: 0.09 mm... - Page 17 Minimum 25 mm Maximum SendPro MailCenter 1000 and SendPro MailCenter 2000: 76 mm SendPro MailCenter 3000: 98 mm Envelope flap angles for sealing For envelopes with a flap length from 25 mm to 60 mm, the minimum flap angle is 18 degrees.
- Page 18 Getting Started Acceptable envelope materials Material type and finish must be matte and may include (if available in your market): White Wove Kraft/Brown Kraft Manila Envelopes made of recycled paper Pitney Bowes User Guide April 2024...
-
Page 19: Manual Adjustments
Weigh-On-The-Way (W-O-W) The W-O-W module processes mixed mail (mail of varying sizes and weights) and determines the postage amount based on the weight and dimensions of each envelope. Pitney Bowes User Guide April 2024... -
Page 20: Viewing The Onscreen Keyboard
Follow this process to shut your machine down correctly. 1. Select Settings in the lower right corner of the Home screen. 2. Select Shut Down twice. 3. Wait until all messages clear from the screen. Pitney Bowes User Guide April 2024... -
Page 21: Accounting
2 - Accounting In this section Creating an account Editing an account... - Page 22 Select Add a sub account to this account if you want to create a sub account for this account. Sub accounts are an optional feature. Select Continue. Select the Home button to return to the Home screen. Pitney Bowes User Guide April 2024...
- Page 23 Account passwords must be turned on to password protect an account. 5. Type in the appropriate information and select OK. 6. Once you have finished editing the account information, select OK. 7. Select Continue to return to the Home or Select Account screen. Pitney Bowes User Guide April 2024...
-
Page 24: Connectivity
3 - Connectivity In this section Networking and connectivity options Networking and connectivity details Networking and connectivity Frequently Asked Questions... -
Page 25: Networking And Connectivity Options
Connectivity Networking and connectivity options The SendPro MailCenter has multiple choices for how to configure your system for connectivity to Pitney Bowes. Connect via direct connection (direct LAN Ethernet). This is the preferred connection method because of reliability and the most common configuration in office, warehouse, and mail center environments. - Page 26 It is strongly recommended that the firewall reference the URL rather than IP address, which can change over time. Required URLs SendPro MailCenter Network Linux Proxy Test - Built in tool that pings select PB servers for connectivity testing. Used by PB Service (Resides on Linux Desktop). Network Test: Domain www.google.com...
- Page 27 Postal Tools - A link to Canada Post web pages offering postal information rules and support. Track a Package - Carrier independent web tracking site for packages. DM Works - Access to Pitney Bowes solutions and support Buy Supplies - Utility website to order supplies...
- Page 28 2. Unlocking of URLs of the following formats (to any Server) GET /din.aspx?s=…&client=DynGate… GET /dout.aspx?s=…&client=DynGate… POST /dout.aspx?s=…&client=DynGate… Regardless of which method is chosen to unblock TeamViewer, also check that no content filter or similar is blocking one of the following URLs: Pitney Bowes User Guide April 2024...
- Page 29 Communication requirements All communication is initiated from the SendPro MailCenter system via ports 80 (HTTP) and 443 (HTTPS). All communication from the SendPro MailCenter system to the back end system is in the form of XML messages. Port 80 (HTTP)
-
Page 30: Networking And Connectivity Frequently Asked Questions
What anti-virus controls does SendPro MailCenter use? What is the software update process, and how often does this occur? What is the network traffic flow to and from the SendPro MailCenter system? What firewall rules need to be in place to allow the necessary communication? - Page 31 Allow only the ports HTTP, HTTPS and DNS. What is the security patch process? SendPro MailCenter security patches are applied by emergency updates via Pitney Bowes only, and on a regular schedule through Pitney Bowes services. What anti-virus controls does SendPro MailCenter use? ClamAv is installed on every system.
- Page 32 Connectivity What is the network traffic flow to and from the SendPro MailCenter system? What firewall rules need to be in place to allow the necessary communication? Outgoing contact initiated (no push) utilizing HTTPS, URLs provided by Pitney Bowes services.
- Page 33 4 - Mailing and Shipping In this section Printing a shipping label Running mail Run Mail screen icons and buttons Run Mail options Running mail - step-by-step Running mail with different shapes and weights Changing the class, carrier, or special services...
-
Page 34: Mailing And Shipping
4. Enter the recipient's address using one of two methods: Type in the recipient's address in the fields provided. SendPro MailCenter supports typeahead so that if the name or part of the name is already in the address book, it will display the matching address(es). -
Page 35: Running Mail
2. Ensure that the appropriate job is open and selected on the Run Mail screen. 3. Load the envelopes. 4. Check the postage amount on the screen. 5. Check the sealer setting. 6. Select Start or Tape to run the job. Pitney Bowes User Guide April 2024... -
Page 36: Run Mail Screen Icons And Buttons
Envelope Preview icon Displays a preview of the envelope to be printed. Envelope Preview image Opens the Edit Envelope screen so you can make changes to your envelope. Postage Amount image Shows the current postage value. Pitney Bowes User Guide April 2024... -
Page 37: Run Mail Options
The sealer icon opens the sealing method dialog screen. The icons shown here indicates sealing is on. Run Mail options Select Options button at the bottom of the Run Mail screen and select the appropriate option. Pitney Bowes User Guide April 2024... -
Page 38: Running Mail - Step-By-Step
5. To change the speed at which you process mail, select Machine Speed from the Mail Information list box. 6. To preview the envelope, select the View full preview button at the bottom of the Edit envelope screen. Pitney Bowes User Guide April 2024... -
Page 39: Running Mail With Different Shapes And Weights
Depending on the weight and measurements, the appropriate postage rate gets selected and the postage is calculated. If an item's postage cannot be calculated because of its weight or dimension, use the attached scale method and manually select the appropriate class. Pitney Bowes User Guide April 2024... -
Page 40: Changing The Class, Carrier, Or Special Services
For example, if the weighing method is incompatible you are prompted to select a new method. 5. Select any extra service or services available for the class from the Extra services list box. 6. Select OK. Pitney Bowes User Guide April 2024... - Page 41 5 - Address Management In this section Adding an address to the Address Book Creating a label from an address Changing the sender's address Editing or deleting an address...
-
Page 42: Adding An Address To The Address Book
View all senders - Select to show all the available sender addresses in the Address Book. Select the one you want to use and confirm with OK. The address appears in the Sender section. Pitney Bowes User Guide April 2024... -
Page 43: Editing Or Deleting An Address
Select the Save button at the bottom of the screen. c. The updated displays in the list of addresses. If you select Delete: a. You are asked to confirm that you want to delete the address. b. Select Delete to delete the address. Pitney Bowes User Guide April 2024... - Page 44 6 - Maintenance In this section Changing the label roll in the shipping label printer Cleaning the printheads Replacing a printhead Out of ink warning Printing a test label Printing a test pattern Installing a new tape roll...
-
Page 45: Maintenance
Once the label roll has been positioned, close the cover and press the button to feed the label. Cleaning the printheads You can clean the printheads at any time to ensure optimal print quality. Pitney Bowes User Guide April 2024... -
Page 46: Replacing A Printhead
5. Select the Install new... button. 6. Wait for the print carriage to be prepared and moved forward. This process may take a minute. 7. Once the print carriage has moved forward, open the printer cover. Pitney Bowes User Guide April 2024... - Page 47 9. Lift the blue printhead handle up to a vertical position and then lift the printhead straight up and out. 10. Remove the new printhead from its packaging. 11. Shake the printhead three times. Pitney Bowes User Guide April 2024...
- Page 48 Maintenance 12. Insert the new printhead. The printhead contact must be facing toward the front of the meter. During installation, only apply pressure to the center of the printhead. Pitney Bowes User Guide April 2024...
-
Page 49: Out Of Ink Warning
The Out of Ink warning displays when there is not enough ink left in the cartridge for your mailing system to print, and the system stops printing. In order to resume printing you must replace the ink cartridge. Pitney Bowes User Guide April 2024... -
Page 50: Printing A Test Label
1. Select Settings under Mailing on the Home screen. 2. The Settings screen displays. Select Hardware. 3. Select Printer. 4. Select either the Ink Cartridges or Print Head tab. Pitney Bowes User Guide April 2024... -
Page 51: Installing A New Tape Roll
Important : If you do not use Pitney Bowes supplied tape, you will not be able to determine when the tape is running out and this may cause a jam. The red stripe on the tape notifies you that you are running low on tape. - Page 52 8. Drop the new roll tape into the well. Make sure the leading tape edge comes up from under the roll and to the right. 9. Select Feed forward >>. The meter will advance the tape feed drive. Pitney Bowes User Guide April 2024...
- Page 53 10. Insert the lead edge of the tape into the entrance guide. The meter will advance the tape to the proper position. 11. Close the cover. 12. Select Done to return to the Home screen. Pitney Bowes User Guide April 2024...
-
Page 54: Postage Funding
7 - Postage Funding In this section Adding or refilling postage Checking your balance at Pitney Bowes Finding your PB Postage account number Viewing the refill history... -
Page 55: Adding Or Refilling Postage
Postage Funding Adding or refilling postage In order to print postage onto your mailpiece, you must transfer postage funds from your Pitney Bowes account to your meter. The meter deducts the amount of your postage from the available funds on your meter. -
Page 56: Checking Your Balance At Pitney Bowes
Postage Funding Checking your balance at Pitney Bowes Before refilling your meter, you should check the funds available through your postage account. 1. Select the Funds button in the Mailing tile on the Home screen. 2. If necessary, select the Meter Funds tab. - Page 57 8 - Jobs In this section Jobs overview Creating a new job from the Jobs screen Creating a new job from the Run Mail screen Opening a job Previewing a job Setting the default job Reloading the default job Closing all jobs Counting mail without printing postage Weighing, rating and counting mail without printing postage...
-
Page 58: Jobs
4. Select OK. The Run Mail screen appears with the job you selected in a new job tab. 5. Select the appropriate job settings. 6. Select Save As. 7. Enter the new job name and select OK. Creating a new job from the Run Mail screen You can create a job: Pitney Bowes User Guide April 2024... -
Page 59: Opening A Job
If necessary, you can sort the jobs by name, type or creator. Select the appropriate column heading to change the sort order. Use the up and down arrow buttons to scroll through the list. Pitney Bowes User Guide April 2024... -
Page 60: Setting The Default Job
3. Select Options then select Make this job the default job.The system gives the selected job the default icon. The job also appears on the default jobs tab in the Run Mail application. 4. Select OK when done. Pitney Bowes User Guide April 2024... -
Page 61: Reloading The Default Job
Resettable - Count only: the total number of pieces run since you reset the counter. 7. Select an account. 8. If necessary, select a surcharge. 9. Select Start to begin feeding and counting envelopes. Pitney Bowes User Guide April 2024... -
Page 62: Weighing, Rating And Counting Mail Without Printing Postage
Received on incoming mail. If you have already created a received date and time job, open the job and begin running mail. If your system uses accounting, a piece count will be retained for accounting reports. The sealer is set to off when you run this job. Pitney Bowes User Guide April 2024... - Page 63 2. Select Create new job... and then select Received date and time. 3. Select OK. 4. Select Start or Tape. 5. To save the job, select the Save As link at the top of the screen. 6. Enter the new job name and select OK. Pitney Bowes User Guide April 2024...
- Page 64 9 - Printing In this section Reactivating spot black (#2) printing Adding a graphic Adding or changing a text message or return address 67 Printing a date correction Printing a postage correction Printing a sample mailpiece...
-
Page 65: Printing
If the test pattern has missing or incomplete lines, select Not OK - Clean print head. Once the cleaning operation completes, you will be prompted to print another test pattern. If the pattern still has broken or missing lines, you may need to replace the ink cartridge or printhead. Pitney Bowes User Guide April 2024... -
Page 66: Adding A Graphic
5. If you try to add an image and there is not enough room, the system will display a message telling you to either remove an existing image or change the size of the envelope. Pitney Bowes User Guide April 2024... -
Page 67: Adding Or Changing A Text Message Or Return Address
Note: The weighing method does not appear in the postage correction job. Sealing mode is set to off. 4. Click Account and select an account. 5. If necessary, change the format of the date. Pitney Bowes User Guide April 2024... -
Page 68: Printing A Postage Correction
Place the envelope on the feed deck with the flap facing down. b. Press the Start button. 10. To save the job, select the Save As link at the top of the screen. 11. Enter the new job name and select OK. Pitney Bowes User Guide April 2024... -
Page 69: Printing A Sample Mailpiece
1. Ensure that the appropriate job is open and selected on the Run Mail screen. 2. Select the Options button. 3. Select Print a sample piece..4. Select Start or Tape. Pitney Bowes User Guide April 2024... -
Page 70: Feeding And Jamming
10 - Feeding and Jamming In this section Preparing and feeding the mailpieces... -
Page 71: Preparing And Feeding The Mailpieces
Preparing and feeding the mailpieces If your meter has Weigh-On-The-Way (SendPro MailCenter 2000 or SendPro MailCenter 3000), you do not need to sort your mail. Place the larger pieces on the bottom of the stack on the feeder. If your mailpieces are sealed, fan them to make sure they are not stuck together as a result of previous processing. -
Page 72: Product Information
11 - Product Information In this section Postal Security Device Canada Post requirements Ordering label rolls and printer ink... -
Page 73: Postal Security Device
Inspection Required appears on the Run Mail screen and then prompts you to connect to Pitney Bowes and perform an inspection. The postage tape you use must meet Canada Post specifications. -
Page 74: 12 - Rates And Updates
12 - Rates and Updates In this section Checking for rates and software updates Setting the time to check for updates Performing the rate updates Viewing the update history... -
Page 75: Checking For Rates And Software Updates
4. Select Done to return to the Home screen. Performing the rate updates The SendPro MailCenter meters update postal rates and software automatically. Your meter checks for updates every day at a specific time. Pitney Bowes... -
Page 76: Viewing The Update History
You will see the title, size, effective date and installation date of each installed update. Updates can be sorted by column in ascending or descending order. 3. Select Done to return to the Home screen. Pitney Bowes User Guide April 2024... -
Page 77: History And Reports
13 - History and Reports In this section Printing a funds report Reprinting a refill receipt report Printing a refill summary report... -
Page 78: Printing A Funds Report
To print a copy of the refill receipt report: 1. Select Reports from the Home screen. 2. Select Refill Receipt. 3. Select Start to print the receipt on an envelope, or select Tape to print the receipt on a tape. Pitney Bowes User Guide April 2024... -
Page 79: Printing A Refill Summary Report
4. Select Done to return to the Home screen. The refill summary report includes the following: The date, time and amount of the last 5 refills. The PB Postage account number. The date the report gets printed. Pitney Bowes User Guide April 2024... -
Page 80: Scales And Weighing
14 - Scales and Weighing In this section Changing or selecting the weighing method Zeroing the scale while running mail... -
Page 81: Changing Or Selecting The Weighing Method
1. Select the Run Mail button in the Mailing tile on the Home screen. 2. Select the Weighing icon. 3. Select the Attached scale option. 4. Select the Zero scale button under the current weight. Pitney Bowes User Guide April 2024... -
Page 82: 15 - Sealing
15 - Sealing In this section Changing the sealing method Setting or changing Seal Only mode Sealing envelopes without printing postage Refilling the envelope and tape sealant bottle... -
Page 83: Changing The Sealing Method
If you do not adjust the wetness, the job will use the default sealer wetness setting. 5. If you are using a SendPro MailCenter 3000, and you selected Sealing on or Sealing only, No printing, select the appropriate flap position: All envelopes are open flap and nested, or Some envelopes are closed flap (No previously sealed envelopes). -
Page 84: Sealing Envelopes Without Printing Postage
50 envelopes. Pitney Bowes recommends using E-Z Seal® because it helps keep your moistener tank clean and improves sealing performance. Refill the sealant bottle when your E-Z Seal® is running low. - Page 85 3. Add enough E-Z Seal® to bring the level up to the bottom of the throat of the bottle. Do not overfill the envelope sealant bottle. 4. Replace and tighten the cap and return the bottle to its original position. Pitney Bowes User Guide April 2024...
-
Page 86: 16 - Settings
16 - Settings In this section Advancing the date Changing the machine speed Changing the envelope size Changing the envelope or tape quantity Setting the Energy Star timeout... -
Page 87: Advancing The Date
2. Tap anywhere within the envelope on the Run Mail screen.. 3. Select the Envelope size option from the list box on the left of the Edit envelope screen. 4. Select the appropriate size (#10, Flat, Post Card, Custom). 5. Select OK. Pitney Bowes User Guide April 2024... -
Page 88: Changing The Envelope Or Tape Quantity
4. Select the Tape button. The meter will stop once it has processed the number of tapes you specified. Setting the Energy Star timeout Follow these steps to set the Energy Star timeout. 1. Select Settings under Mailing on the Home screen. 2. Select System. 3. Tap Timeouts. Pitney Bowes User Guide April 2024... - Page 89 Settings 4. Tap Energy Star. 5. Move the slider to set the length of time before the meter goes into energy saving mode. Note: Energy Star is not available on all versions of the SendPro MailCenter. Pitney Bowes User Guide...
-
Page 90: 17 - Safety
17 - Safety In this section Safety information... -
Page 91: Safety Information
To obtain Pitney Bowes supplies, please contact our Supply Line™ to place orders. Material Safety Data Sheets can be obtained on the web or from our Supply Line™. - Page 92 To prevent overheating, do not cover the vent openings. Operation of this equipment without periodic maintenance will inhibit optimum operating performance and could cause the equipment to malfunction. Contact your Pitney Bowes Customer Service Representative for required service schedule. Read all instructions before attempting to operate the equipment.
- Page 93 Caution: In case of an ink spill, leaking ink or excessive ink accumulation, immediately disconnect the power cord from the wall plug and contact Pitney Bowes. In Canada, English speaking Customer Service Representatives are available Monday to Friday 8:00 AM - 8:00 PM EST. French speaking representatives are available 8:00 AM - 5:00 PM EST.
- Page 94 This is a Class A product. In a domestic environment this product may cause radio interference in which case the user may be required to take adequate measures. Responsible Party within Canada: Pitney Bowes 5500 Explorer Drive Mississauga, ON L4W 5C7 Servicing This product is serviceable.
- Page 95 3001 Summer Street Stamford, Connecticut 06926 www.pitneybowes.com/ca/en SV63406-enca Rev.A ©2024 Pitney Bowes Inc. All Rights Reserved...
Need help?
Do you have a question about the SendPro MailCenter and is the answer not in the manual?
Questions and answers