Pitney Bowes SendPro C Auto Operator's Manual
Hide thumbs
Also See for SendPro C Auto:
- User manual (177 pages) ,
- Operator's manual (77 pages) ,
- Quick start manual (36 pages)

Related Manuals for Pitney Bowes SendPro C Auto


Summary of Contents for Pitney Bowes SendPro C Auto
- Page 1 Shipping & Mailing Postage Meters SendPro® C Auto Operator Guide US English Edition SV63245 Rev E April 29, 2022...
- Page 2 However, we cannot assume responsibility for errors or omissions or liability for the misuse or misapplication of our products. Except as provided in writing, duly signed by an officer of Pitney Bowes, no license either express or implied, under any Pitney Bowes or third party’s patent, copyright or other intellectual property rights is granted by providing this information.
-
Page 3: Table Of Contents
Filling the moistener tank Replacing the ink cartridge Printing a test pattern Adding favorite apps Creating presets for printing postage Selecting a preset for printing postage Ordering supplies from your device 2 - Connectivity information Pitney Bowes Operator Guide April 2022... - Page 4 Creating and printing a USPS return shipping label Printing a USPS scan form Reprinting a USPS, UPS or FedEx shipping label Canceling a UPS or FedEx shipping label Getting a USPS refund for a shipping label 5 - Managing Shipping Labels Pitney Bowes Operator Guide April 2022...
- Page 5 Sending mail using a Certificate of Mailing Advancing the date Printing postage without a date for pre-printed mailpieces Printing additional postage Re-dating your mail Using USPS special services Entering the weight manually when printing postage Pitney Bowes Operator Guide April 2022...
- Page 6 Turning Envelope Printing or Print on Envelopes account passwords on or off for printing postage 160 Adding a Envelope Printing or Print on Envelopes account Editing an account Making an account inactive Deleting an account Creating presets for printing postage Pitney Bowes Operator Guide April 2022...
- Page 7 Replacing the ink cartridge Changing the ink waste pad Cleaning the printhead Installing the printhead Cleaning the moistener brush and wick assembly Filling the moistener tank Feeding envelopes Moving your device 10 - Supplies Pitney Bowes Operator Guide April 2022...
- Page 8 Finding the SendPro application software version Postal Security Device Parts of the device Connections on the back Specifications Material specifications 12 - Contacting Pitney Bowes Contacting Pitney Bowes 13 - Safety Lithium Ion Battery Agency Compliance Information Important Safety Notes...
-
Page 9: Quick Start Guide
1 - Quick start guide In this section Finding the Product Code Number (PCN) and serial number Navigating the Home screen Printing a shipping label or printing postage on an envelope Printing a shipping label Using cost accounts to charge back shipping label postage Adding a shipping label cost account Adding a Envelope Printing or Print on Envelopes... - Page 10 Quick start guide Adding favorite apps Creating presets for printing postage Selecting a preset for printing postage Ordering supplies from your device Pitney Bowes Operator Guide April 2022...
-
Page 11: Finding The Product Code Number (Pcn) And Serial Number
To locate the (1) Product Code Number (PCN) and the (2) 7-digit serial number, check the label on the rear of the device or under the display cover. The serial number appears as zeros here for security reasons. Pitney Bowes Operator Guide April 2022... -
Page 12: Navigating The Home Screen
Quick start guide Navigating the Home screen You can create a shipping label or print postage from the Home screen on the SendPro C Auto. Creating shipping labels or printing on envelopes Tap Envelope Printing or Print on Envelopes to print postage for envelopes and post cards. Tap Trackable Labels or Shipping Labels to create a shipping label for important large envelopes or packages using USPS, UPS®, or FedEx®. - Page 13 Essential tools and guides. Voice (mobile app) and text search to resolve issues quickly. Product health management and tracking. Account balances and case status. Spending and saving insights to track your budget more effectively. Pitney Bowes Operator Guide April 2022...
- Page 14 4. Network - View the current network type (wireless or Ethernet) and status and strength (for wireless connection). Allows you to turn wireless connection on or off. The icon here represents a wireless connection. Pitney Bowes Operator Guide April 2022...
-
Page 15: Printing A Shipping Label Or Printing Postage On An Envelope
6. Profile - View your profile (name and email for shipping label account), log out, or lock your SendPro C Auto. Printing a shipping label or printing postage on an envelope You can either create a shipping label or print postage on an envelope. - Page 16 Quick start guide USPS non flat rate envelopes Boxes USPS flat rate boxes USPS non flat rate boxes Tube Use Envelope Printing or Print on Envelopes for the following Large envelopes Standard envelopes and postcards Pitney Bowes Operator Guide April 2022...
-
Page 17: Printing A Shipping Label
1. Tap Create Shipping Labels on the Home screen. 2. Tap the carrier you wish to use. 3. Verify that the sender address is correct. If not, tap on the Sender field and select a new address. Pitney Bowes Operator Guide April 2022... - Page 18 Quick start guide 4. Select an account if cost accounts are enabled. Verify the selected cost account. Tap Cost Account and select an account to change or add the account.. 5. Tap Continue. Pitney Bowes Operator Guide April 2022...
- Page 19 Quick start guide 6. Enter the recipient address manually or tap Address book to select one from the address book. 7. Tap Continue. 8. Tap a package type. Pitney Bowes Operator Guide April 2022...
- Page 20 If you have an attached scale, place the package on the scale and tap Weight. Tap Scale and the weight appears. Tap Apply. If you do not have a scale, tap Weight and enter the weight, then tap Apply. 10. Tap Continue. 11. Tap the service you wish to use. Pitney Bowes Operator Guide April 2022...
- Page 21 12. To add additional services, tap Add additional services. If you are not adding any extra services, go to step 14. 13. Select the desired services and tap Apply. 14. To print the label, tap Print. Pitney Bowes Operator Guide April 2022...
-
Page 22: Using Cost Accounts To Charge Back Shipping Label Postage
You can assign the costs for a shipping label to an account when you create the label. In order to use cost accounts for label postage, you need to turn on the cost accounts feature. Pitney Bowes Operator Guide April 2022... - Page 23 To assign a cost account to every label, tap the check box for Require cost account for all shipments. 4. Tap Apply. Once you turn cost accounts on, you will need to have at least 1 cost account to print a shipping label. Pitney Bowes Operator Guide April 2022...
-
Page 24: Adding A Shipping Label Cost Account
6. Tap Active or Inactive. Your selection should be whichever is appropriate for this account. 7. Tap Make this my default Cost Account to make this cost account automatically used for all shipping labels. 8. Tap Apply. Pitney Bowes Operator Guide April 2022... -
Page 25: Adding A Envelope Printing Or Print On Envelopes Account
Tap Add a Sub Account to this account to add a sub account to the account you just created. Tap Done if you do not need to create any more accounts. 11. Press the back arrow to return to the account list. Pitney Bowes Operator Guide April 2022... -
Page 26: Navigating The Envelope Printing Or Print On Envelopes App
5. Preview or add graphics. 6. Tap Start to begin feeding and printing postage on the envelopes loaded on the feed deck. The Start button is only present on SendPro C models equipped with an automatic feeder. Pitney Bowes Operator Guide April 2022... -
Page 27: Feeding Envelopes
You can also choose to seal envelopes without printing postage. Related topics Feeding envelopes Your SendPro C Auto can automatically feed a stack of envelopes. Before you begin All envelopes in a single stack must be the same width and thickness. - Page 28 3. Slide the side guide up to the mail stack. Leave about 1/8" space (about the thickness of 2 quarters) between the stack and the side guide so the envelopes do not drag against the guide. Pitney Bowes Operator Guide...
- Page 29 If you are using a stacker, extend the stacker tray so that the envelopes exit the feeder completely. If you are moistening the envelope flaps, press down on the envelopes after printing to ensure the flaps are securely glued closed. Pitney Bowes Operator Guide April 2022...
-
Page 30: Printing Postage On Tapes
5. Tap First-Class Retail Metered for a First-Class Mail envelope. 6. Tap Letter. 7. Select any special services you wish to use. 8. Tap Apply. 9. Place the envelope on the scale. The weight appears. Pitney Bowes Operator Guide April 2022... -
Page 31: Sending A Large First-Class® Envelope
Weigh the mailpiece and measure the dimensions 1. Tap Envelope Printing or Print on Envelopes on the Home screen. 2. If you have the accounting feature enabled, tap Account and select an account. Pitney Bowes Operator Guide April 2022... - Page 32 Start to feed the envelopes. If the envelope is too thick to go through the feeder, print the postage on a tape and apply the tape to the large envelope or flat. Pitney Bowes Operator Guide April 2022...
-
Page 33: Sending Certified Mail
2. If you have the accounting feature enabled, tap Account and select an account. 3. Tap Class. 4. Tap Start Over to display a list of all the available classes. 5. Tap First-Class Mail Intl Retail for a First-Class Mail envelope. Pitney Bowes Operator Guide April 2022... -
Page 34: Sending Mail Using A Certificate Of Mailing
Envelope Printing or Print on Envelopes. 5. Scroll down and tap Print Mode on the Envelope Printing or Print on Envelopes screen. Pitney Bowes Operator Guide April 2022... - Page 35 10. Take the mailpieces and the printed form to the Post Office. They will apply a round stamp proof of induction mark that serves as legal proof that your items will enter the USPS. Pitney Bowes Operator Guide April 2022...
-
Page 36: Using Usps Special Services
Keep your device turned on and connected to your network to get your automatic updates, as the device downloads updates during the evening hours. Manual postal rate updates 1. Select Rates and Updates: Tap SendPro Apps, then Rates and Updates. Pitney Bowes Operator Guide April 2022... -
Page 37: Refilling Postage For Printing On Envelopes
3. To continue tap Got it. Refilling postage for printing on envelopes Before you begin Check that your device is connecting to the internet. For wired network connections, the following connection image appears in the toolbar: Pitney Bowes Operator Guide April 2022... -
Page 38: Sealing Envelopes And Printing Postage
1. Check the level of sealing solution by checking the sight window on the front of the feeder deck. 2. Place the envelopes with the flap side facing down and the top edge against the rear wall. Pitney Bowes Operator Guide... -
Page 39: Filling The Moistener Tank
If the moistener tank is full and your envelopes do not seal correctly, clean or replace the moistener brush and wick. Filling the moistener tank Your device will need refills of E-Z Seal® in order to seal envelopes. Follow these steps to fill the moistener tank. Pitney Bowes Operator Guide April 2022... - Page 40 1. Check the level of sealing solution in the moistener tank by checking the sight window on the front of the feeder deck. 2. Open the feeder access cover to access the moistener bottle. 3. Remove the moistener bottle and place it with the cap up on a flat surface. Pitney Bowes Operator Guide April 2022...
-
Page 41: Replacing The Ink Cartridge
Quick start guide 4. Unscrew the moistener bottle cap and fill it with Pitney Bowes E-Z Seal®. Do not overfill the moistener bottle. 5. Screw the cap back on and place the bottle back in its original site (upside down in the device). - Page 42 4. Lift the top cover. The ink cartridge moves to the front position. 5. Remove the ink cartridge, as shown on the label next to the cartridge holder. 6. Insert the new ink cartridge, then close the ink cartridge guard. Pitney Bowes Operator Guide April 2022...
-
Page 43: Printing A Test Pattern
Print a test pattern to see if the printhead is working properly or if you have enough ink in the cartridge. 1. Tap Settings. 2. Scroll down and tap Envelope Printer Maintenance. 3. Tap Print Test Pattern. 4. Insert the envelope into the device when the message "Print a Test Pattern?" appears. Pitney Bowes Operator Guide April 2022... -
Page 44: Adding Favorite Apps
Add yourfavorite apps to make them easy to find on the Home screen. 1. Tap SendPro Apps on the Home screen. All the available apps display. 2. Tap Edit favorites and a star appears next to each app. Pitney Bowes Operator Guide April 2022... -
Page 45: Creating Presets For Printing Postage
1. Tap Envelope Printing or Print on Envelopes on the Home screen. 2. Tap Class, select the class and any special services, messages or graphics. 3. Verify the settings in the Envelope Printing or Print on Envelopes app. Pitney Bowes Operator Guide April 2022... -
Page 46: Selecting A Preset For Printing Postage
5. Tap Save New Preset to save it. If you wish to save it and replace the default setting, tap Replace Default Preset. 6. For a new preset, enter a name, then tap Save. Selecting a preset for printing postage Select a preset to quickly apply a group of settings. Pitney Bowes Operator Guide April 2022... -
Page 47: Ordering Supplies From Your Device
Tap the "i" to open the online operator guide. This contains detailed information on using the Supplies app. b. View alerts and notifications Tap the Bell icon to view your order status or any notifications. Pitney Bowes Operator Guide April 2022... - Page 48 If you do not use the AutoInk program, as soon as ink level for your device drops below 20%, Order Now appears next to Your Ink Level in the Supplies app. To order ink, tap Order Now. If you enrolled in AutoInk, the service automatically orders ink for you. Pitney Bowes Operator Guide April 2022...
- Page 49 2 - Connectivity information In this section Setting up a wired network connection Setting up a wireless (Wi-Fi) network connection Connecting to a hidden Wi-Fi network Forgetting a Wi-Fi network Checking your network connection Finding the MAC address for wired and wireless networks Setting up a Proxy server...
-
Page 50: Connectivity Information
Connectivity information Setting up a wired network connection Use a network cable to connect your SendPro C Auto to the Pitney Bowes Data Center. Step 1: Plug in your network cable Plug one end of your network cable to your device and the other end to an internet jack on the wall or a router. - Page 51 7. Plug the power cord back in directly into a wall outlet. 8. Quickly tap and release the power button to turn the device back on. 9. Tap Settings. 10. Tap Wired (Ethernet). 11. Tap DHCP. 12. Tap Connect. Static IP 1. Tap Settings. Pitney Bowes Operator Guide April 2022...
- Page 52 Address in the corresponding fields. 6. Tap Connect. 7. If SendPro C Auto fails to connect, remove the network cable from the back of the device. 8. Tap Connect. Wait for the attempted connection to fail. 9. Plug the network cable back in.
-
Page 53: Setting Up A Wireless (Wi-Fi) Network Connection
IP Address, Netmask, Gateway and DNS Address as well as the proxy information. Setting up a wireless (Wi-Fi) network connection You can connect your SendPro C Auto with a wireless network connection. 1. Tap Settings. 2. Tap Wi-Fi in the Device & Network section. - Page 54 Connectivity information 3. Tap Add Network at the top of the Wi-Fi screen. Pitney Bowes Operator Guide April 2022...
-
Page 55: Forgetting A Wi-Fi Network
Forget a Wi-Fi network if: You do not want your device to automatically connect to that network or You need to resolve a wireless network issue. 1. Tap Settings. 2. Tap Wi-Fi in the Device & Network section. Pitney Bowes Operator Guide April 2022... - Page 56 Connectivity information 3. Tap the network you want to forget. Note that you can only forget a network to which you have previously connected. The network details appear. Pitney Bowes Operator Guide April 2022...
-
Page 57: Checking Your Network Connection
3. Tap Close twice to return to the Home screen. If you are unable to connect to the internet, ask your IT department or internet provider to check the internet settings before you contact Pitney Bowes. Pitney Bowes Operator Guide... -
Page 58: Finding The Mac Address For Wired And Wireless Networks
Your device contains two MAC addresses: One for wireless connections and one for wired connections. Locating the MAC address for wireless connections 1. Tap Settings. 2. Tap Wi-Fi. 3. The MAC address appears above the list of wireless networks. Pitney Bowes Operator Guide April 2022... - Page 59 Locating the MAC address for wired connections 1. Tap Settings. 2. Tap Wired (Ethernet). The MAC address is present at the top of the screen. 3. Tap Check Network. The Checking Network Connection screen appears. Pitney Bowes Operator Guide April 2022...
- Page 60 The MAC address appears: 5. Tap X to close this window. 6. Tap Close, then the back arrow to return to the Home screen. If the MAC address does not appear, try these steps: 1. Tap Settings. Pitney Bowes Operator Guide April 2022...
-
Page 61: Setting Up A Proxy Server
Choose the connection type Choose how you connect your device to set up a Proxy server: Setting up a proxy server using a Wi-Fi network connection Setting up a proxy server using a wired network connection Pitney Bowes Operator Guide April 2022... - Page 62 7. Enter the port number for the proxy server in the Proxy Port field. 8. (Optional) Enter any specific URLs or URL patterns (such as internal addresses) that you wish to bypass the proxy in the Bypass field. Pitney Bowes Operator Guide April 2022...
- Page 63 4. If you select DHCP, tap on the drop-down arrow next to Proxy Setting and select Manual. 5. Enter the IP address, HTTP or HTTPS proxy address of your proxy server in the Proxy Hostname field. 6. Enter the port number for the proxy server in the Proxy Port field. Pitney Bowes Operator Guide April 2022...
- Page 64 Enter the Proxy username in the Proxy Username field. This may be case sensitive for some proxy servers. b. Enter the Proxy password in the Proxy Password field. This is case sensitive for proxy servers. Pitney Bowes Operator Guide April 2022...
- Page 65 3 - Managing your Device In this section Creating or disabling the security PIN Adjusting time zone and scale location code Adjusting display brightness Adding favorite apps Setting up the Energy Saver Using USPS Informed Delivery Installing a scale Uploading system logs...
-
Page 66: Managing Your Device
2. Tap Security PIN in the Device & Network section. 3. Tap Change PIN or Turn OFF Security PIN. 4. Enter the current security PIN for either option. Manually lock your device 1. Tap the user profile image. Pitney Bowes Operator Guide April 2022... -
Page 67: Adjusting Time Zone And Scale Location Code
2. Tap Location & Time Zone. 3. Enter the new location code. 4. Enter the time zone. 5. Tap Apply. Adjusting display brightness Set the brightness of the display to suit your work space. Pitney Bowes Operator Guide April 2022... -
Page 68: Adding Favorite Apps
3. Tap the star next to an app to make it a favorite. 4. Tap Done when complete. Setting up the Energy Saver Use the energy saver to reduce energy usage. The energy saver turns your device off after a period of inactivity. Pitney Bowes Operator Guide April 2022... -
Page 69: Using Usps Informed Delivery
Install a scale if you did not install one when you installed your device. Your device contains step-by- step installation instructions for compatible scales. 1. Tap Settings. 2. Scroll to the Advanced Device Options section at the bottom of the Settings screen, then tap Scale Installation Guides. Pitney Bowes Operator Guide April 2022... -
Page 70: Uploading System Logs
Uploading system logs Your device creates system logs that monitor operations on your device. If you need to upload system logs to a Pitney Bowes support representative, you can find them in the Advanced Device Options section under Settings. 1. Tap Settings. - Page 71 Managing your Device 5. Tap Upload Selected Logs. 6. The message "Sending Log Files" appears. Once the upload is complete, the message "Upload Complete" displays. 7. Tap Got It to return to the Home screen. Pitney Bowes Operator Guide April 2022...
- Page 72 This page intentionally left blank.
-
Page 73: Printing Shipping Labels
4 - Printing Shipping Labels In this section Signing in to and out of the shipping label app Printing a shipping label Comparing rates when printing a shipping label Creating a new sender address for shipping labels Editing the sender address for shipping labels Printing an international shipping label Creating and printing a USPS return shipping label Printing a USPS scan form... -
Page 74: Signing In To And Out Of The Shipping Label App
Use Trackable Labels or Shipping Labels to get the best pricing, free tracking, and detailed delivery history for USPS package services. You can also send via UPS® or FedEx®. The packaging options and benefits are almost identical. Pitney Bowes Operator Guide April 2022... - Page 75 1. Tap Create Shipping Labels on the Home screen. 2. Tap the carrier you wish to use. 3. Verify that the sender address is correct. If not, tap on the Sender field and select a new address. Pitney Bowes Operator Guide April 2022...
- Page 76 Printing Shipping Labels 4. Select an account if cost accounts are enabled. Verify the selected cost account. Tap Cost Account and select an account to change or add the account.. 5. Tap Continue. Pitney Bowes Operator Guide April 2022...
- Page 77 Printing Shipping Labels 6. Enter the recipient address manually or tap Address book to select one from the address book. 7. Tap Continue. 8. Tap a package type. Pitney Bowes Operator Guide April 2022...
- Page 78 If you have an attached scale, place the package on the scale and tap Weight. Tap Scale and the weight appears. Tap Apply. If you do not have a scale, tap Weight and enter the weight, then tap Apply. 10. Tap Continue. 11. Tap the service you wish to use. Pitney Bowes Operator Guide April 2022...
- Page 79 12. To add additional services, tap Add additional services. If you are not adding any extra services, go to step 14. 13. Select the desired services and tap Apply. 14. To print the label, tap Print. Pitney Bowes Operator Guide April 2022...
-
Page 80: Comparing Rates When Printing A Shipping Label
If you have SendPro application software version 2.0.061R or later, your system allows you to compare the shipping rates of different carriers for every mailpiece or package. 1. Tap Create Shipping Labels on the Home screen. 2. Tap the carrier you wish to use. Pitney Bowes Operator Guide April 2022... - Page 81 4. If cost accounts are enabled, you must select an account. If an account is already present, verify that it is correct. To change or add the account, tap Cost Account and select an account. 5. Tap Continue. Pitney Bowes Operator Guide April 2022...
- Page 82 Printing Shipping Labels 6. Enter the recipient address manually or tap Address book to select one from the address book. 7. Tap Continue. Pitney Bowes Operator Guide April 2022...
- Page 83 If you have an attached scale, place the package on the scale and tap Weight. Tap Scale and the weight appears. Tap Apply. If you do not have a scale, tap Weight and enter the weight, then tap Apply. Pitney Bowes Operator Guide April 2022...
- Page 84 The system displays a list of the available carriers along with their estimated delivery dates and the total cost to send the package. Scroll down the screen to view all the carriers and their rates. 11. Tap the carrier you want to use. This example uses Priority Mail. Pitney Bowes Operator Guide April 2022...
- Page 85 12. To add additional services, tap Extra Services. If you are not adding any extra services, go to step 14. 13. Select the desired service or services. 14. Tap Apply. The system displays the total cost including the additional service. Pitney Bowes Operator Guide April 2022...
-
Page 86: Creating A New Sender Address For Shipping Labels
You may need to enter the Sender and Recipient's phone number, as it is required for some services. Creating a new sender address for shipping labels If you need to ship from more than one address, you can add additional sender addresses to the Address Book. Pitney Bowes Operator Guide April 2022... -
Page 87: Editing The Sender Address For Shipping Labels
Add the sender and recipient addresses Select the package type and enter the dimensions Enter the type of items in the shipment Select Exemption type Add Customs information Select the shipping services required Print the shipping label Pitney Bowes Operator Guide April 2022... - Page 88 If you do not have a 1E50 or 1E60 laser printer, you print an international label from your SendPro Online or PitneyShip account using any 8.5 x 11 printer. Select the carrier 1. Tap Create Shipping Labels on the Home screen. 2. Tap the carrier you wish to use. Pitney Bowes Operator Guide April 2022...
- Page 89 1. Verify that the sender address is correct. If not, tap on the Sender field and select a new address. 2. Select an account if cost accounts are enabled. Verify the selected cost account. Tap Cost Account and select an account to change or add the account. 3. Tap Continue. Pitney Bowes Operator Guide April 2022...
- Page 90 Printing Shipping Labels 4. Enter the recipient address manually or tap Address book to select one from the address book. 5. Tap Continue. Select the package type and enter the dimensions 1. Select the package type. Pitney Bowes Operator Guide April 2022...
- Page 91 Enter the type of items in the shipment 1. Enter the type of items included in your shipment, in this example Documents. 2. Select either Abandon it or Return to Sender if the item cannot be delivered. Pitney Bowes Operator Guide April 2022...
- Page 92 5. Enter a description of each item, including the quantity, weight, value and where the item was made. 6. If appropriate, enter optional HS Tariff information. 7. To add additional items, tap Save and Add. 8. Tap Continue. Pitney Bowes Operator Guide April 2022...
- Page 93 1. Tap Select Exemption Type and select the appropriate value. For further information, refer to the USPS.COM Postal Explorer. 2. Tap on the checkbox to agree to the USPS Privacy Act Statement. 3. Tap Continue. Pitney Bowes Operator Guide April 2022...
- Page 94 If you have registered with the Import One-Stop Shop (IOSS) portal you can include your IOSS number with your additional customs information. Your device must have SendPro application software version 2.0.061R or later to use this feature. For more information about the IOSS, visit the IOSS FAQ page. Pitney Bowes Operator Guide April 2022...
- Page 95 Printing Shipping Labels Select the shipping services required 1. Tap the service you wish to use. Pitney Bowes Operator Guide April 2022...
- Page 96 Printing Shipping Labels 2. To add additional services, tap Extra Services. 3. Enter the value of the item. Tap Apply when complete. Pitney Bowes Operator Guide April 2022...
-
Page 97: Creating And Printing A Usps Return Shipping Label
If you need to provide a label for someone to ship something back to you, you can create a return label. 1. Tap SendPro Apps on the Home screen, then tap Shipping History. All of the shipping labels appear by date. The most recent date appears first in the list. Pitney Bowes Operator Guide April 2022... -
Page 98: Printing A Usps Scan Form
1. Tap Envelope Printing or Print on Envelopes on the Home screen. 2. From the Carrier Home screen, tap Shipping Manifests. 3. Tap USPS SCAN Form. The number of shipments included in the manifest appear. Pitney Bowes Operator Guide April 2022... -
Page 99: Reprinting A Usps, Ups Or Fedex Shipping Label
1. Sign in to SendPro Online or PitneyShip. In your web browser, go to https://login.pitneybowes.com/sendpro and sign in with your SendPro C Auto user ID and password. 2. In SendPro Online or PitneyShip, select Print > USPS SCAN Form from the menu at the top. -
Page 100: Canceling A Ups Or Fedex Shipping Label
2. Locate your label in the list. To sort by a different column, tap that column heading. To reverse the sort order, tap the same column heading again. 3. Tap on the shipment. 4. Tap Request Refund. 5. Select the box to agree to the conditions, then tap Continue. Pitney Bowes Operator Guide April 2022... - Page 101 Printing Shipping Labels Important: Labels for First-Class Large Envelope do not bear a tracking barcode. You cannot request a refund for them via the SendPro C Auto device. Sign in to sendpro.pitneybowes.com to request a refund for these transactions. If your international package was returned by USPS due to COVID-19 restrictions, you cannot request a refund through SendPro Online or PitneyShip.
- Page 102 This page intentionally left blank.
- Page 103 5 - Managing Shipping Labels In this section Using the Address Book About cost accounts for shipping labels Changing the default refill amounts for shipping labels Using cost accounts to charge back shipping label postage Turning on address autofill for shipping labels Adding new addresses to the shipping labels Address Book Managing your shipping labels cost accounts...
-
Page 104: Managing Shipping Labels
Change the default refill amount for shipping labels to store an amount you want to refill your device with. 1. Tap Settings. 2. Scroll to Shipping Settings. 3. Tap Shipping Refills. 4. Tap Auto-refill Postage. 5. Tap the box under Default refill amount for trackable labels. Pitney Bowes Operator Guide April 2022... -
Page 105: Using Cost Accounts To Charge Back Shipping Label Postage
1. Tap SendPro Apps on the Home screen, then tap Cost Accounts. 2. Tap the Cost Account settings image in the upper right corner of the Cost Accounts screen. If cost accounts are not enabled, you will see this screen. Pitney Bowes Operator Guide April 2022... -
Page 106: Turning On Address Autofill For Shipping Labels
Autofill automatically fills in the address fields as you start to enter an address. This makes it easier to enter addresses when creating shipping labels. 1. Tap Settings. 2. Scroll down to Shipping Settings. 3. Tap SendPro Experimental Features. 4. Tap on the check box for Use Geosearch. Pitney Bowes Operator Guide April 2022... -
Page 107: Adding New Addresses To The Shipping Labels Address Book
Add shipping Cost Accounts to record shipping label usage by department. 1. Open the Shipping Cost Accounts app: Tap SendPro Apps on the Home screen, then tap Cost Accounts. 2. Tap + in the upper left corner of the shipping Cost Accounts screen. Pitney Bowes Operator Guide April 2022... -
Page 108: Editing A Cost Account
7. Tap Make this my default Cost Account to make this cost account automatically used for all shipping labels. 8. Tap Apply. Editing a cost account When you edit a cost account you can: Make an existing cost account active or inactive. Make the cost account the default cost account. Pitney Bowes Operator Guide April 2022... -
Page 109: Refilling Postage For Shipping Labels
Check that your device is connecting to the internet. If you have a wired network connection, you will see the following connection icon in the toolbar: If you have a wireless connection, you will see the following connection icon in the toolbar: Pitney Bowes Operator Guide April 2022... -
Page 110: Setting An Alert When Shipping Label Postage Refill Is Pending
Arrange to have your device alert you when a shipping label postage refill is pending. In order to set up the alert you must also define a minimum postage threshold amount. To refill your shipping labels postage account: Pitney Bowes Operator Guide April 2022... -
Page 111: Setting Up Your Fedex Account
Use SendPro Online or PitneyShip to set up your FedEx account. You must do this before you use FedEx for shipping labels. You cannot set up a FedEx account on your SendPro C Auto. In your web browser, go to https://login.pitneybowes.com/sendpro and sign in with your SendPro C Auto user ID and password. - Page 112 4. Tap Manage next to FedEx on the right side of the screen. The Manage FedEx Account screen appears. 5. Tap the Make this my default FedEx account box to use this as your default FedEx account. Pitney Bowes Operator Guide April 2022...
-
Page 113: Setting Up Your Ups Account
Use SendPro Online or PitneyShip to set up your UPS account. You must do this before you use UPS for shipping labels. You cannot set up a UPS account on your SendPro C Auto. In your web browser, go to https://login.pitneybowes.com/sendpro and sign in with your SendPro C Auto user ID and password. -
Page 114: Setting Up Default Printing Options
Tracking Number Email: Emails a tracking number for each new shipping label automatically. Shipment Delivery Email: Emails a delivery confirmation for each new shipping label automatically. Refund notifications: Emails a confirmation each time your postage balance receives a credit through a label refund. 1. Tap Settings. Pitney Bowes Operator Guide April 2022... -
Page 115: Setting The Default Address For Usps Return Labels
4. Tap the check box for I wish to use the same recipient address for all of my return labels. 5. Enter the address in the fields provided using the keypad on the screen. Tap the green check mark when done. Pitney Bowes Operator Guide April 2022... -
Page 116: Determining How You Spend Your Shipping Labels Postage
Your device has separate accounts for the Envelope Printing or Print on Envelopes app and for the Trackable Labels or Shipping Labels app. To remove funds from one or both of your accounts, call Pitney Bowes support at 1-877-822-0996. Pitney Bowes deals with the funds from each account separately. -
Page 117: Printing On Envelopes
6 - Printing on envelopes In this section Navigating the Envelope Printing or Print on Envelopes app Printing postage on tapes Checking the available funds for printing postage Refilling postage for printing on envelopes Sending a First-Class Mail envelope Sending a large First-Class® envelope Sending Certified Mail Sending an international letter Sending mail using a Certificate of Mailing... -
Page 118: Navigating The Envelope Printing Or Print On Envelopes App
It also allows you to change what you print. To open the Envelope Printing or Print on Envelopes app, tap Envelope Printing or Print on Envelopes. On this screen, you can: Pitney Bowes Operator Guide April 2022... -
Page 119: Printing Postage On Tapes
(b). Make sure that the printable side faces to the right (toward the touchscreen). 2. Tap Envelope Printing or Print on Envelopes on the Home screen. 3. Select the postage mode and settings (account, class and special service, weight). Pitney Bowes Operator Guide April 2022... - Page 120 4. For a single tape, tap Tape. The default value is set to 1 tape. For multiple tapes, tap the number on the tape field and use the keypad to enter the number of tapes. Pitney Bowes Operator Guide April 2022...
-
Page 121: Checking The Available Funds For Printing Postage
Checking the available funds for printing postage Viewing the amount available in your device 1. Tap Envelope Printing or Print on Envelopes on the Home screen. 2. The Postage Balance shows the available funds in your device. Pitney Bowes Operator Guide April 2022... -
Page 122: Refilling Postage For Printing On Envelopes
Printing on envelopes Viewing the amount available in your postage account at Pitney Bowes 1. Tap Envelope Printing or Print on Envelopes on the Home screen. 2. Tap Postage Balance. 3. Tap Refill Settings. Refilling postage for printing on envelopes Before you begin Check that your device is connecting to the internet. -
Page 123: Sending A First-Class Mail Envelope
9. Place the envelope on the scale. The weight appears. 10. Place the envelope or envelopes on the feed deck. Depending on the SendPro C model you have, feed the envelopes manually or tap Start to feed the envelopes. Pitney Bowes Operator Guide April 2022... -
Page 124: Sending A Large First-Class® Envelope
Weigh the mailpiece and measure the dimensions 1. Tap Envelope Printing or Print on Envelopes on the Home screen. 2. If you have the accounting feature enabled, tap Account and select an account. Pitney Bowes Operator Guide April 2022... - Page 125 Start to feed the envelopes. If the envelope is too thick to go through the feeder, print the postage on a tape and apply the tape to the large envelope or flat. Pitney Bowes Operator Guide April 2022...
-
Page 126: Sending Certified Mail
2. If you have the accounting feature enabled, tap Account and select an account. 3. Tap Class. 4. Tap Start Over to display a list of all the available classes. 5. Tap First-Class Mail Intl Retail for a First-Class Mail envelope. Pitney Bowes Operator Guide April 2022... -
Page 127: Sending Mail Using A Certificate Of Mailing
Envelope Printing or Print on Envelopes. 5. Scroll down and tap Print Mode on the Envelope Printing or Print on Envelopes screen. Pitney Bowes Operator Guide April 2022... -
Page 128: Advancing The Date
10. Take the mailpieces and the printed form to the Post Office. They will apply a round stamp proof of induction mark that serves as legal proof that your items will enter the USPS. Advancing the date Watch this video or follow the instructions below to learn how to advance the date. Pitney Bowes Operator Guide April 2022... -
Page 129: Printing Postage Without A Date For Pre-Printed Mailpieces
1. Tap Envelope Printing or Print on Envelopes on the Home screen. 2. Tap First-Class Retail Metered Letter. 3. On the Class & Extra Services screen, scroll down and tap the Restricted Use Return Mail box. Pitney Bowes Operator Guide April 2022... -
Page 130: Printing Additional Postage
4. Tap Apply. 5. Tap the postage amount. 6. Use the keypad to enter the additional postage amount. 7. Tap the check mark when done. 8. Turn your envelope over to the blank side. Pitney Bowes Operator Guide April 2022... -
Page 131: Re-Dating Your Mail
9. Place the envelope on the feed deck. Depending on the SendPro C model you have, feed the envelope manually or tap Start to feed the envelope. The word “Redate” appears on the newly printed print on the back of the envelope. Pitney Bowes Operator Guide April 2022... -
Page 132: Using Usps Special Services
Then, attach your label to your envelope or package. 8. Tap Apply. Entering the weight manually when printing postage Enter the weight of a mailpiece when you know its weight and are not using the scale. Pitney Bowes Operator Guide April 2022... -
Page 133: Using The Scale When Printing Postage
10. Place the envelope or envelopes on the feed deck. Depending on the SendPro C model you have, feed the envelopes manually or tap Start to feed the envelopes. Using the scale when printing postage Use the scale to weigh your mail and calculate the correct postage for you. Pitney Bowes Operator Guide April 2022... -
Page 134: Sealing Envelopes Without Printing Postage
Use Seal Only mode to seal envelopes without printing anything. 1. Tap Envelope Printing or Print on Envelopes on the Home screen. 2. Tap Print Mode. You may need to swipe up on the screen to see this option. Pitney Bowes Operator Guide April 2022... -
Page 135: Sealing Envelopes And Printing Postage
1. Check the level of sealing solution by checking the sight window on the front of the feeder deck. 2. Place the envelopes with the flap side facing down and the top edge against the rear wall. Pitney Bowes Operator Guide... -
Page 136: Zeroing The Scale
If the moistener tank is full and your envelopes do not seal correctly, clean or replace the moistener brush and wick. Zeroing the scale Zero the scale to set the weight to zero. Make sure there is nothing on the scale when you zero it. Pitney Bowes Operator Guide April 2022... -
Page 137: Adding Insurance To Your Mail
Tap Start Over and select a new class and any special services you need. Tap Apply after adding special services. b. Tap the Insurance box, enter the amount, and tap Apply. 4. To confirm, tap Apply. Pitney Bowes Operator Guide April 2022... -
Page 138: Adding A Graphic To Your Envelope Or Tape
2. Place the envelope or package on the scale. 3. Tap Class. If Priority Mail Retail is not the current class, tap Start Over, then select Priority Mail Retail from the list of classes. 4. Tap Envelope or Package. Pitney Bowes Operator Guide April 2022... -
Page 139: Getting A Usps Refund For Damaged Or Incorrectly Printed Mail
Incorrect information (street name, street number, city, etc.) Your refund request must include: a completed USPS Form 3533 proof that the person requesting a refund is an authorized user of the device unused meter indicia Pitney Bowes Operator Guide April 2022... -
Page 140: Creating A Custom Text Message For Your Mail
1. Tap Envelope Printing or Print on Envelopes on the Home screen. 2. Tap Print Mode. 3. Tap Graphic Only. 4. Tap Apply. 5. Tap + Graphic. 6. Tap Custom Text. Pitney Bowes Operator Guide April 2022... - Page 141 8. When creating a message, a message appears to inform you that you must comply with Postal rules. Tap Accept & Continue to agree. 9. Enter a name for the text message, then tap Save Pitney Bowes Operator Guide April 2022...
-
Page 142: Adding A Custom Text Message To Your Envelope Or Tape
Adding a custom text message to your envelope or tape Your SendPro C Auto allows you to add a custom text message to your mail. This can be a return address, for example. Your message can be up to five lines, with 20 characters per line. The message prints on the left side of the print. - Page 143 Printing on envelopes 3. Tap + Graphics. 4. Tap Custom Text. Pitney Bowes Operator Guide April 2022...
-
Page 144: Editing Or Deleting A Custom Text Message
7. Feed the envelope or tape strip through the device. Editing or deleting a custom text message Your device allows you to add a custom text message to your mail. You can edit or delete messages you no longer need. Pitney Bowes Operator Guide April 2022... - Page 145 Printing on envelopes 1. Tap Envelope Printing or Print on Envelopes on the Home screen. 2. Tap + Graphics on the Envelope Printing or Print on Envelopes screen. 3. Tap Custom Text. Pitney Bowes Operator Guide April 2022...
-
Page 146: Printing A Graphic Without Printing Postage
5. Select the appropriate option. You can edit the text message, rename it, or delete it. 6. Tap Apply. Printing a graphic without printing postage Print a graphic without printing postage, such as the Received graphic on incoming mail. Pitney Bowes Operator Guide April 2022... -
Page 147: Printing An Inscription
For example, if you select First Class mail, the First Class inscription prints automatically on your mail. Adding a graphic to your envelope or tape on page 138 Printing only the date and time Print the date and time to keep a record of when you receive incoming mail. Pitney Bowes Operator Guide April 2022... - Page 148 3. Select Date and Time Stamp. 4. Tap Apply. 5. Place the envelope or envelopes on the feed deck. Depending on the SendPro C model you have, feed the envelopes manually or tap Start to feed the envelopes. Pitney Bowes Operator Guide April 2022...
-
Page 149: Presort Features
Printing on envelopes Presort features There are four optional presort features available for SendPro C Auto: Presort Rates, PresortXtra Rates, Marketing Mail, and Marketing Mail Nonprofit. Presort Rates A set of common presort rates, First-Class Commercial - Automation and Presorted, are present on the device. - Page 150 Set the Rate 1. Tap Print on Envelopes on the Home screen. 2. Tap Class. 3. Tap Start Over. 4. Tap Pitney Bowes Presort Xtra. 5. Tap First Class Letter. 6. Tap Apply. Add Drop Ship Text If Needed 1. Tap Graphic.
- Page 151 Printing on envelopes 3. Tap Apply. Reset the batch counter 1. Tap x Pieces | $x.xx. 2. Tap Reset Counter to 0. Pitney Bowes Operator Guide April 2022...
- Page 152 This page intentionally left blank.
- Page 153 7 - Managing Printing on Envelopes In this section Confirming your meter update Changing the default refill amount for printing postage Uploading postage transactions Clearing or resetting the number of mailpieces sent 156 Performing USPS postal inspections for postage printing Updating postal rates or software for printing on envelopes Confirm the effective date for postal rates...
-
Page 154: Managing Printing On Envelopes
From Envelope Printing or Print on Envelopes: 1. Tap Envelope Printing or Print on Envelopes from the Home screen. 2. Tap Postage Balance. 3. Tap Refill Settings. 4. Tap the box under Default refill amount. Pitney Bowes Operator Guide April 2022... -
Page 155: Uploading Postage Transactions
Uploading postage transactions Automatic upload of your postage transactions Your device automatically uploads your postage transactions to the Pitney Bowes Data Center. This occurs at least once during the day and once after hours. If you lock your device or turn it off for any extended period, it automatically uploads your transactions when you turn it on again. -
Page 156: Clearing Or Resetting The Number Of Mailpieces Sent
Keep your device turned on and connected to your network to get your automatic updates, as the device downloads updates during the evening hours. Manual postal rate updates 1. Select Rates and Updates: Tap SendPro Apps, then Rates and Updates. Pitney Bowes Operator Guide April 2022... -
Page 157: Confirm The Effective Date For Postal Rates
You can check to see if you have downloaded the latest rates for each postal class on your device. 1. Tap Envelope Printing or Print on Envelopes. 2. Tap Class. 3. Tap Start Over to display a list of all the available classes. Pitney Bowes Operator Guide April 2022... -
Page 158: Setting The Low Funds Warning For Printing Postage
Setting up a mailer ID Your mailer ID is a 9-digit number that you need when using Electronic Return Receipt (ERR). To get your mailer ID, submit Form 5053, Bulk Proof of Delivery to the USPS. Pitney Bowes Operator Guide April 2022... -
Page 159: Updating The Zip Code
The ZIP code printed by your device should be either your ZIP code or the ZIP code of the post office picking up your mail. If your device prints an incorrect ZIP code, a Pitney Bowes representative must resolve this issue. Contact technical support for assistance. -
Page 160: Turning Envelope Printing Or Print On Envelopes Account Passwords On Or Off For Printing Postage
Engineering; Sub account - Hardware; Sub sub account - Quality Approval; Sub sub account - Testing Turning Envelope Printing or Print on Envelopes account passwords on or off for printing postage You can protect each account from unauthorized access by turning account passwords on. Pitney Bowes Operator Guide April 2022... - Page 161 Tap Turn account passwords off if account passwords are on and you wish to turn them off. Tap OK. 6. Tap the back arrow on the top left side of the screen to return to the list of accounts. Pitney Bowes Operator Guide April 2022...
-
Page 162: Adding A Envelope Printing Or Print On Envelopes Account
Tap Add a Sub Account to this account to add a sub account to the account you just created. Tap Done if you do not need to create any more accounts. 11. Press the back arrow to return to the account list. Pitney Bowes Operator Guide April 2022... -
Page 163: Editing An Account
8. Tap OK to return to the Accounts screen. 9. Tap the back arrow to return to the list of accounts. 10. Tap Cancel to return to the Envelope Printing or Print on Envelopes screen. Pitney Bowes Operator Guide April 2022... -
Page 164: Deleting An Account
1. Tap Envelope Printing or Print on Envelopes on the Home screen. 2. Tap Class, select the class and any special services, messages or graphics. 3. Verify the settings in the Envelope Printing or Print on Envelopes app. Pitney Bowes Operator Guide April 2022... -
Page 165: Viewing Presets For Printing Postage
6. For a new preset, enter a name, then tap Save. Viewing presets for printing postage 1. To view the presets, tap the Preset box on the Envelope Printing or Print on Envelopes screen. 2. Tap each preset to view its settings. Pitney Bowes Operator Guide April 2022... -
Page 166: Selecting A Preset For Printing Postage
Modify a preset to rename a preset, replace the default preset or delete a preset. 1. Tap Envelope Printing or Print on Envelopes on the Home screen. 2. Tap Preset. 3. Tap the preset you wish to modify. 4. Tap Options. 5. Tap the option you want. Pitney Bowes Operator Guide April 2022... -
Page 167: Setting The Default Preset Reset Timer
3. Tap Postage Refills. 4. Tap Default Preset Timer. 5. Use the slider to set the time between 1 and 9 minutes. 6. To save the value and exit the screen, tap the back arrow or Home. Pitney Bowes Operator Guide April 2022... - Page 168 This page intentionally left blank.
- Page 169 8 - View and Print Reports In this section Viewing a receipt when refilling postage Viewing the total spent on printing postage Viewing the refill history for printing postage Printing a funds report Running account reports Emailing an account report Setting the report period for an account Setting the account report preferences Creating a shipping report...
-
Page 170: Viewing A Receipt When Refilling Postage
Important: At this time, you can only view the report. Printing a funds report Print a funds report if you need a report showing the total number of mailpieces sent. The funds report provides the following information about your device: Pitney Bowes Operator Guide April 2022... -
Page 171: Running Account Reports
Tap Report Period and set the time range for your reports. b. Tap Preferences and set how to you wish to identify the accounts. 5. Set the report period. 6. Tap View & print reports. 7. Tap to select a report. 8. Tap Next. Pitney Bowes Operator Guide April 2022... -
Page 172: Emailing An Account Report
3. Tap Reports. 4. Tap View & print reports. 5. Tap the report to select it. 6. Tap Next. 7. Tap Actions or View Reports at the bottom of the screen. 8. Tap Email Report. Pitney Bowes Operator Guide April 2022... -
Page 173: Setting The Report Period For An Account
Set the reporting period of an account report by setting its start and end dates. 1. Tap SendPro Apps on the Home screen. 2. Tap Manage Accounts. 3. Tap Reports. 4. Tap Report period. Pitney Bowes Operator Guide April 2022... -
Page 174: Setting The Account Report Preferences
Set the account report preferences to select the account level you wish to report on (Account, Sub account or Sub sub account). You can also choose how you want to identify accounts: by Name or by Code. Pitney Bowes Operator Guide April 2022... -
Page 175: Creating A Shipping Report
You will receive an email with an attached .csv transactions history file. Related topics Creating a USPS shipping label refund report You can view and print all the USPS shipping label refunds you have requested on your device. Pitney Bowes Operator Guide April 2022... - Page 176 4. (Optional) To create an email report of all the USPS shipping label refunds: a. Tap Create Report. b. Enter the email address. Tap the green check mark to confirm. c. Tap Email Report. d. You will receive an email with an attached .csv transactions history file. Pitney Bowes Operator Guide April 2022...
-
Page 177: Maintenance
9 - Maintenance In this section Checking the postage print quality Clearing a tape error or jam Printing a test pattern Checking the ink level Replacing the ink cartridge Changing the ink waste pad Cleaning the printhead Installing the printhead Cleaning the moistener brush and wick assembly Filling the moistener tank Feeding envelopes... -
Page 178: Checking The Postage Print Quality
Follow the on-screen instructions or the steps below to resolve the problem. Out of tape strips If you do not have enough tapes loaded in the tape slot, the following error message appears: "You're out of tape strips" Pitney Bowes Operator Guide April 2022... - Page 179 Add enough tapes and tap Resume to continue. Tape jam The following error message appears, along with on-screen instructions for clearing the jam. "Tape Transport Error" The instructions appear here for your convenience. 1. Remove the tapes from the tape slot. Pitney Bowes Operator Guide April 2022...
-
Page 180: Printing A Test Pattern
Print a test pattern to see if the printhead is working properly or if you have enough ink in the cartridge. 1. Tap Settings. 2. Scroll down and tap Envelope Printer Maintenance. 3. Tap Print Test Pattern. 4. Insert the envelope into the device when the message "Print a Test Pattern?" appears. Pitney Bowes Operator Guide April 2022... -
Page 181: Checking The Ink Level
Good Test Pattern Bad Test Pattern Checking the ink level Check the ink level to ensure you have enough ink in your device. 1. Tap Settings. 2. Scroll down and tap Envelope Printer Maintenance. Pitney Bowes Operator Guide April 2022... -
Page 182: Replacing The Ink Cartridge
Replace the ink cartridge when the low ink warning appears. This ensures your device is in optimal working condition. 1. Tap Settings. 2. Scroll down and tap Envelope Printer Maintenance. 3. Tap Install Ink. 4. Lift the top cover. The ink cartridge moves to the front position. Pitney Bowes Operator Guide April 2022... - Page 183 Maintenance 5. Remove the ink cartridge, as shown on the label next to the cartridge holder. 6. Insert the new ink cartridge, then close the ink cartridge guard. Pitney Bowes Operator Guide April 2022...
-
Page 184: Changing The Ink Waste Pad
If the message is showing on the screen follow these steps: To purchase replacement waste pad Tap Buy Pad. The Supplies app appears where you can order a new pad right from the device. Pitney Bowes Operator Guide April 2022... - Page 185 If that fails to clear the message, contact Pitney Bowes support. If the message no longer appears on the screen follow these steps: If you need a replacement waste pad, use the Supplies app to purchase the pad.
-
Page 186: Cleaning The Printhead
8. After you enter the code, the message "Your Ink Waste Pad is Ready to Use" displays. If you do not see this message, or if you still get a message that the waste tank is full, restart the device. If that fails to clear the message, contact Pitney Bowes support. Cleaning the printhead If you clean the print nozzle and you still get a bad test print pattern, try cleaning the printhead. - Page 187 Maintenance 5. Flip the ink cartridge cover open. 6. Remove the ink cartridge. 7. Squeeze the tabs on either side of the printhead. Pitney Bowes Operator Guide April 2022...
- Page 188 8. While squeezing, lift and tilt to the printhead to the right. The printhead should come up out of the device. 9. Clean off the printhead by wiping the surface of the printhead with a dry, lint-free cloth or a foam swab. Pitney Bowes Operator Guide April 2022...
- Page 189 Warning: If you do not seat the printhead correctly it can damage the device. 11. Keep squeezing the tabs and push the printhead flush against the wall. The tabs snap outward when placed correctly. Pitney Bowes Operator Guide April 2022...
-
Page 190: Installing The Printhead
15. Print a print test pattern to be sure that your printhead is functioning properly. 16. If the test pattern looks good, tap Done. Installing the printhead You may need to install a new printhead when the existing printhead is producing poor print quality. Pitney Bowes Operator Guide April 2022... - Page 191 2. Scroll down and tap Envelope Printer Maintenance. 3. Tap Install Printhead. 4. Lift the cover. The ink cartridge moves to the front position. 5. Flip the ink cartridge cover open. 6. Remove the ink cartridge. Pitney Bowes Operator Guide April 2022...
- Page 192 Maintenance 7. Squeeze the two gray tabs on either side of the printhead. 8. While squeezing, lift and tilt the printhead to the right. The printhead should come up out of the device. Pitney Bowes Operator Guide April 2022...
- Page 193 9. Unwrap the new printhead and remove the protective strip. 10. Squeeze the tabs and slide the printhead pegs into the lower set of grooves. Warning: If you do not seat the printhead correctly it can damage the device. Pitney Bowes Operator Guide April 2022...
- Page 194 Maintenance 11. Keep squeezing the tabs and push the printhead flush against the wall. Tabs will snap outward when placed correctly. 12. Install the ink cartridge and close the guard. Pitney Bowes Operator Guide April 2022...
-
Page 195: Cleaning The Moistener Brush And Wick Assembly
15. Print a print test pattern to be sure that your printhead is working properly. Cleaning the moistener brush and wick assembly If the moistener tank is full and your envelopes are not sealing properly, clean the moistener brush and wick. Pitney Bowes Operator Guide April 2022... - Page 196 Maintenance 1. Open the feeder cover. 2. Remove the moistener bottle from the machine. Pitney Bowes Operator Guide April 2022...
- Page 197 Maintenance 3. Grasp the moistener brush assembly and depress the moistener release button as shown here. The release button is located on the underside of the moistener assembly. Pitney Bowes Operator Guide April 2022...
- Page 198 Maintenance 4. While continuing to press the release button, slide the moistener brush assembly straight out toward you. Pitney Bowes Operator Guide April 2022...
- Page 199 5. Slowly and carefully pull the moistener tank (located under the moistener bottle) out toward you. This may contain EZ-Seal solution. 6. Separate the shield from the wick. Clean the wick in plain water and rinse thoroughly. Blot excess water from the wick. Pitney Bowes Operator Guide April 2022...
- Page 200 Maintenance 7. Replace the wick and shield. Pitney Bowes Operator Guide April 2022...
- Page 201 You may need to exert some pressure to remove the brush. 9. Clean the brush by running it under plain water. Blot the excess water from the brush after rinsing it. Replace the brush if you cannot clean it thoroughly. Pitney Bowes Operator Guide April 2022...
- Page 202 Maintenance 10. Slide the moistener tank back into the machine, followed by the moistener brush assembly. You should hear the moistener brush assembly click into place. Pitney Bowes Operator Guide April 2022...
-
Page 203: Filling The Moistener Tank
Your device will need refills of E-Z Seal® in order to seal envelopes. Follow these steps to fill the moistener tank. 1. Check the level of sealing solution in the moistener tank by checking the sight window on the front of the feeder deck. Pitney Bowes Operator Guide April 2022... - Page 204 Maintenance 2. Open the feeder access cover to access the moistener bottle. 3. Remove the moistener bottle and place it with the cap up on a flat surface. Pitney Bowes Operator Guide April 2022...
-
Page 205: Feeding Envelopes
Maintenance 4. Unscrew the moistener bottle cap and fill it with Pitney Bowes E-Z Seal®. Do not overfill the moistener bottle. 5. Screw the cap back on and place the bottle back in its original site (upside down in the device). - Page 206 3. Slide the side guide up to the mail stack. Leave about 1/8" space (about the thickness of 2 quarters) between the stack and the side guide so the envelopes do not drag against the guide. Pitney Bowes Operator Guide...
- Page 207 If you are using a stacker, extend the stacker tray so that the envelopes exit the feeder completely. If you are moistening the envelope flaps, press down on the envelopes after printing to ensure the flaps are securely glued closed. Pitney Bowes Operator Guide April 2022...
-
Page 208: Moving Your Device
6. Unplug the power cord and pack it with the device. 7. Once in the new location, re-install all USB cables and devices. 8. Plug the power cord into the device and power outlet. 9. Re-install the ink cartridge. 10. Re-install the moistener assembly. Pitney Bowes Operator Guide April 2022... -
Page 209: 10 - Supplies
10 - Supplies In this section Ordering supplies from your device Supplies, ink cartridges, and options... - Page 210 Start Checkout to go to checkout. d. View product details for any item Tap anywhere on the product card for an item to view detailed information. This information also appears when you tap Buy Now. Pitney Bowes Operator Guide April 2022...
- Page 211 If you do not use the AutoInk program, as soon as ink level for your device drops below 20%, Order Now appears next to Your Ink Level in the Supplies app. To order ink, tap Order Now. If you enrolled in AutoInk, the service automatically orders ink for you. Pitney Bowes Operator Guide April 2022...
- Page 212 608-0 E-Z Seal ® Sealing Solution - 5 gallon Cubetainer 605-0 Moistener Brush, Wick and Grate for 621-8 SendPro C Auto, Models with PCN 2H00 and 8H00 Moistener Brush, Wick and Grate for 770-T SendPro C Auto 25 double sheets...
- Page 213 SendPro C Auto super blue ink cartridge 17 ml SL-798-0SB SendPro C Auto super blue ink cartridge 35 ml 793-5SB (Not in USA) SendPro C Auto 0 super blue ink cartridge 45 ml 765-9SB Pitney Bowes Operator Guide April 2022...
- Page 214 Backlit self-standing graphical tower display for MP82 scale MP00099 External USB platform scale (15/30 lb.) MT30 External USB platform scale (70 lb.) MT70 2.0 4-port USB Hub 552-3 I D barcode scanner 1E02 Report Printer 1E50 Envelope drop stacker HZ80001 Pitney Bowes Operator Guide April 2022...
- Page 215 11 - Device Information In this section USPS requirements Key in Postage Sections of the meter impression Finding the SendPro application software version Postal Security Device Parts of the device Connections on the back Specifications Material specifications...
-
Page 216: Usps Requirements
Key in Postage is not available on any of the SendPro C devices. Sections of the meter impression The meter impression contains elements that identify the mailer and the type of mail. Pitney Bowes Operator Guide April 2022... -
Page 217: Finding The Sendpro Application Software Version
SendPro is the software that runs many features on your device. If you need to check which version you have, follow these steps. 1. Tap Settings. 2. Scroll to Advanced Device Options. 3. Tap About this Device. Pitney Bowes Operator Guide April 2022... -
Page 218: Postal Security Device
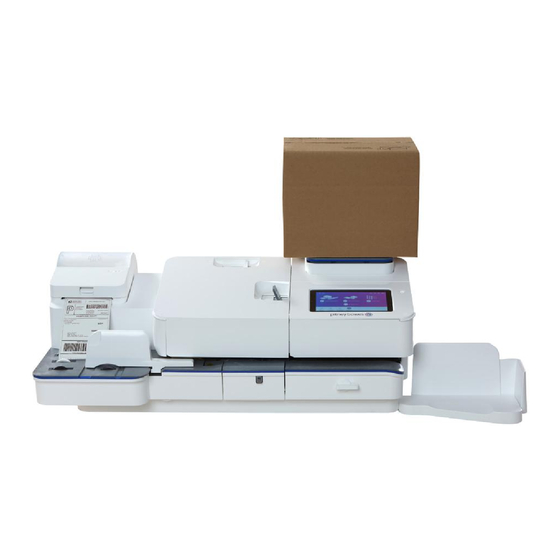
It includes the latest technology approved by USPS. This technology eliminates the need for USPS to perform physical inspections, thereby making your device easier and more convenient for you to use. Parts of the device Familiarize yourself with the parts of your SendPro C Auto. Pitney Bowes Operator Guide April 2022... - Page 219 12. Seal or No Seal Lever - Allows you to turn envelope sealing on and off. 13. Tape Feeder - Stores and feeds tape strips for postage printing. Pitney Bowes Operator Guide April 2022...
-
Page 220: Connections On The Back
2. USB port, type B host - Service personnel use only. 3. RJ45 - Use for a wired network connection. Specifications Review the specifications of your SendPro C Auto including the throughput, ink cartridge yield, and other component details. Power requirements 100-240 VAC, 50/60 Hz, 2.0 A... - Page 221 41.75 in L x 24 in W x 12.5 in H With feeder cover in up position: 41.75 in L x 19.25 in W x 22 in H With drop stacker fully extended: 48.5 in L x 19.25 in W x 12.5 in H Pitney Bowes Operator Guide April 2022...
- Page 222 8,800 imprints or 6 months, whichever comes first with existing 45 ml cartridge (at 88 pieces/day, 21 working days/month, and at 75 °F) These values are for device imprints only and do not include envelope ads. Actual ink yields vary with usage, graphics printed, and environmental conditions. Pitney Bowes Operator Guide April 2022...
- Page 223 1 in x 7 in Tape strips Self-adhesive, dual tape strip for use on mailpieces that are too large to run in the device. Ideal for adding postage to oversized envelopes, priority mail, and packages. Pitney Bowes Operator Guide April 2022...
-
Page 224: Material Specifications
3 in – This is the height of the inner edge of the side guide Envelope Weight Minimum: 0.035 oz Maximum: 16 oz Tape Size Minimum: 1.75 x 4 in Maximum: 1.76 x 8 in Pitney Bowes Operator Guide April 2022... - Page 225 For envelopes with a flap length from 1-2.36 in, the minimum flap angle is 18 degrees. For envelopes with a flap length greater than 2.36 in to the maximum flap length for the particular model, the minimum flap angle is 21 degrees. Pitney Bowes Operator Guide April 2022...
- Page 226 Device Information Pitney Bowes Operator Guide April 2022...
-
Page 227: Contacting Pitney Bowes
12 - Contacting Pitney Bowes In this section Contacting Pitney Bowes... -
Page 228: Contacting Pitney Bowes
Note that the serial number appears blurred here for security reasons. Be sure to have the following information available before contacting Pitney Bowes Technical Support: Provide a description of the problem... - Page 229 What steps have you already tried to fix the problem? If you tried, what happened? Contact Technical and Account Support Check the Pitney Bowes support site to make sure you have the latest information about your product. Visit us at: www.pitneybowes.com/support...
- Page 230 This page intentionally left blank.
-
Page 231: 13 - Safety
13 - Safety In this section Lithium Ion Battery Agency Compliance Information Important Safety Notes Note for California Customers Only on all Models... -
Page 232: Lithium Ion Battery
This product contains a lithium ion battery. The battery must be recycled or disposed of properly. If you are leasing this product, you must return it to Pitney Bowes. Alternatively, contact your local waste disposal or recycle facility for instructions on how to dispose of it properly. - Page 233 The cabinet encloses hazardous parts. If you should drop or otherwise damage the unit, call Pitney Bowes. Use only Pitney Bowes approved ink, tape strips, and cleaners. To obtain Material Safety Data Sheets (MSDS) for OSHA requirements, please go to www.pb.com/msds. When prompted, enter the product name, manufacturer, the Pitney Bowes MSDS Number, or reorder number of the item you are interested in.
-
Page 234: Note For California Customers Only On All Models
See: http://www.dtsc.ca.gov/hazardouswaste/perchlorate/ Servicing Please refer to the warranty information if problems occur. For reference purposes, the Pitney Bowes U.S. Service Center contact address is: Pitney Bowes Inc., 3001 Summer Street, Stamford, CT, 06926. All inquiries can be done by calling 1-800-522-0020 and following the telephone prompts. -
Page 235: Third Party Software
14 - Third party software In this section Third party software... -
Page 236: Third Party Software
Third party software Third party software Third party software may have been incorporated into this product by Pitney Bowes Inc. (“PBI”) under permission from PBI’s licensors. Any special terms and conditions that apply to such software are provided below: This product contains the following software: Okhttp3 which is licensed under the Apache License, Version number 2.0. - Page 237 The source code for this software is available from https://github.com/JamesNK/Newtonsoft.Json. MaterialChips which is licensed under the Apache License, Version number 2.0. The license can be downloaded from: http://www.apache.org/licenses/LICENSE-2.0.html. The source code for this software is available from https://github.com/DoodleScheduling/android-material-chips. Pitney Bowes Operator Guide April 2022...
- Page 238 This product contains Paho.mqtt.java, which is licensed under the Eclipse Public License - v 2.0 and the Eclipse Distribution License - v 1.0. The licenses can be downloaded from https://www.eclipse.org/legal/epl-2.0/ and https://www.eclipse.org/org/documents/edl-v10.php, respectively. The modified source code can be downloaded from: https://github.com/PitneyBowes. Pitney Bowes Operator Guide April 2022...
Need help?
Do you have a question about the SendPro C Auto and is the answer not in the manual?
Questions and answers