Table of Contents
Advertisement
Quick Links
ADVANCED MANUAL
COMMUNICATIONS RECEIVER
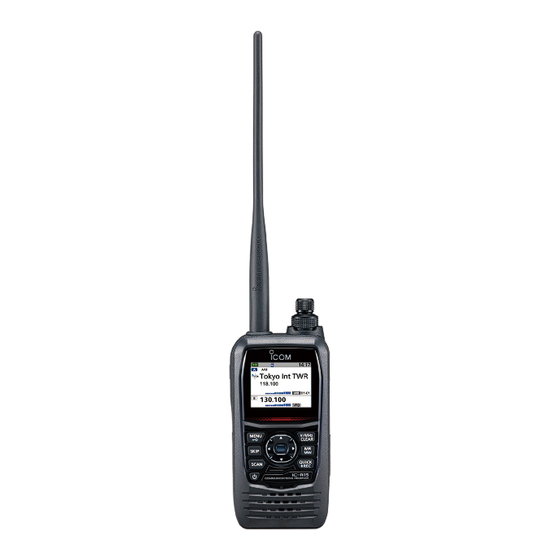
|R15
This manual describes instructions for advanced features and
instructions.
See the BASIC MANUAL that comes with the receiver for
precautions and basic operations.
1 BATTERY CHARGING
2 USING a microSD CARD
3 MEMORY OPERATION
4 SCAN OPERATION
5 FM RADIO OPERATION
6 RECORDER FUNCTION
7 SET MODE
8 OTHER FUNCTIONS
9 UPDATING THE FIRMWARE
10 OPTIONS
Advertisement
Chapters
Table of Contents

Related Manuals for Icom IC-R15


Summary of Contents for Icom IC-R15
- Page 1 ADVANCED MANUAL 1 BATTERY CHARGING COMMUNICATIONS RECEIVER |R15 2 USING a microSD CARD 3 MEMORY OPERATION 4 SCAN OPERATION 5 FM RADIO OPERATION 6 RECORDER FUNCTION 7 SET MODE 8 OTHER FUNCTIONS 9 UPDATING THE FIRMWARE 10 OPTIONS This manual describes instructions for advanced features and instructions.
- Page 2 INTRODUCTION Thank you for choosing this Icom product. This product is designed and built with Icom’s state of the art technology and craftsmanship. With proper care, this product should provide you with years of trouble-free operation. ABOUT THE CONSTRUCTION OF THE MANUAL (As of March 2024) You can use the following manuals to understand and operate this receiver.
- Page 3 INTRODUCTION ENTERING AND EDITING TEXT Controls used for text entry: To change the character type: 1. When not selecting text, or an entered text is [DIAL] (Rotate) selected, push [QUICK]. Selects a character 2. Rotate [DIAL] to select the character type, and then push [ENT].
- Page 4 INTRODUCTION USABLE CHARACTERS The usable characters and symbols and the maximum characters differ, depending on the item. See the following list for details. L The usable characters and symbols for each character type are described at the bottom of the list. Maximum Category Item...
- Page 5 INTRODUCTION HOW TO ENTER TEXT Example: Entering “2m Call” as a Memory name of channel 00 in group 06 (No Category). [MENU] > MEMORY > Memory CH 1. Push [MENU]. 12. Rotate [DIAL] to select a character, then push [ENT]. 2.
- Page 6 INTRODUCTION TIME SETTING IC-R15 does not have the function to automatically set the time. We recommend you set the time from the SET mode before operating. ([MENU] > SET > Time Set > Date/Time) L Set the time if the battery pack has been removed for more than a day.
-
Page 7: Table Of Contents
Section 1 BATTERY CHARGING Battery information ���������������������������������������������������������������������������������������1-2 D Battery life ���������������������������������������������������������������������������������������������������������1-2 D Battery icon �������������������������������������������������������������������������������������������������������1-2 D Capacity of the battery pack ������������������������������������������������������������������������������1-2 Charging information ������������������������������������������������������������������������������������1-3 D Charging with a USB cable �������������������������������������������������������������������������������1-3 Charging with the BC-223 optional rapid charger�����������������������������������������1-4 About the optional battery case ��������������������������������������������������������������������1-5 D About the battery replacement ��������������������������������������������������������������������������1-5 Specifications for the battery charger and battery pack �������������������������������1-6 D BP-287 Li-ion battery pack �����������������������������������������������������������������������������1-6... -
Page 8: Battery Information
BATTERY CHARGING Battery information DBattery life DBattery icon The approximate battery life (operating time) is 13 The “ ” battery icon is displayed when the battery hours under the following assumptions: pack is attached to the receiver� • External speaker (8 Ω load, at 10% distortion) DCapacity of the battery pack NOTE: BE SURE to replace the battery pack with Icon... -
Page 9: Charging Information
BATTERY CHARGING Charging information NOTE: • Before using the receiver for the first time, the battery pack must be fully charged for optimum life and operation� • BE SURE to turn OFF the receiver while charging. Otherwise, the attached battery pack cannot be charged. L While charging, the charging icon “... -
Page 10: Charging With The Bc-223 Optional Rapid Charger
L When about 90% of the battery capacity is charged, • R DANGER! NEVER use a battery pack that is the BC-223 stops charging, and the charging not manufactured or approved by Icom� indicator lights green. Therefore, the battery life • CAUTION: DO NOT connect anything to the... -
Page 11: About The Optional Battery Case
BATTERY CHARGING About the optional battery case DAbout the battery replacement The BP-293 uses three AA (LR6) size alkaline batteries� When the alkaline batteries are almost exhausted, 1� Remove the battery case top, as shown below. “LOW BATTERY” is displayed, and the battery 2�... -
Page 12: Specifications For The Battery Charger And Battery Pack
(projections are not included) DBC-223 rapid charger • Power source requirement: 12 V ~ 16 V DC or the specified Icom power adapter • Charging temperature range: 15°C ~ 40°C, 59°F ~ 104°F • Weight: Approximately 120 g, 4.2 oz (without power adapter) •... - Page 13 Section USING A microSD CARD About data saved on a microSD card �����������������������������������������������������2-2 NOTE: See the Basic manual Saving settings onto a microSD card �����������������������������������������������������2-2 Section 6 for details on how to insert or remove a microSD card D Saving as a new file �����������������������������������������������������������������������������������2-2 and precautions�...
-
Page 14: Section 2 Using A Microsd Card
USING A microSD CARD About data saved on a microSD card The following data can be saved onto the card: • The receiver’s settings • Voice recorder • Captured screens • Memory channel contents • FM Radio memory • Pictures for the Opening Picture setting Saving settings onto a microSD card The Memory channels and settings on the MENU 5�... -
Page 15: Saving With A Different File Name
USING A microSD CARD Saving with a different file name [MENU] > SET > SD Card > Save Setting 1� Push [MENU]� 2� Select “SD Card” in the “SET” menu� 3� Select “Save Setting�” 4� Select “<<New File>>�” 5� Hold down [CLEAR] to delete the characters� 6�... -
Page 16: Loading The Saved Files On The Microsd Card
The saved Memory channels and settings on the MENU screen can be copied to the receiver� This makes it easy to copy Memory channels to another IC-R15 and operate with the same data� NOTE: Saving the current data before loading other data into the receiver is recommended�... -
Page 17: Backing Up Data Saved On The Microsd Card Onto A
A backup file enables easy restoration, even if the data on the microSD card is accidentally deleted� DAbout the microSD card’s folder • IC-R15 folder The folder in the microSD card contains the following: The folders created in the receiver are contained in this folder�... -
Page 18: D Making A Backup File On Your
C drive) 2� Click the “Open folder to view files” option to access the card� Click Click • ‘IC-R15’ folder is displayed� 3� Right-click “USB Drive�” 4� Click “ �” 6� To remove the card, click the remove media icon (“... -
Page 19: Importing Or Exporting A Csv Format File
USING A microSD CARD Importing or exporting a CSV format file Read this section before importing or exporting a 6� Select the CSV file to import� Comma Separated Values (CSV) format file from the microSD card� You can import or export the following data: •... -
Page 20: Dexporting
USING A microSD CARD Importing or exporting a CSV format file DExporting Saving as a new file: Example: Exporting the memory channel� [MENU] > SET > SD Card > Import/Export > Export 1� Push [MENU]� 7� Push [ENT]� 2� Select “SD Card” in the “SET” menu� •... -
Page 21: About The Sd Card Mode
USING A microSD CARD About the SD Card mode When “USB connect” is set to “SD Card Mode,” and NOTE: Before connecting the receiver in the SD the receiver is connected to the PC through a USB Card mode to a PC with a USB cable, a microSD data cable, you can transfer the files between the card must be inserted�... -
Page 22: Check The Free Space And The Recording Time On The Microsd Card
USING A microSD CARD Check the free space and the recording time on the microSD card [MENU] > SET > SD Card > SD Card Info 1� Push [MENU]� 2� Select “SD Card” in the “SET” menu� 3� Select “SD Card Info�” •... - Page 23 Section 3 MEMORY OPERATION General description ��������������������������������������������������������������������������������3-2 D Memory channel content ����������������������������������������������������������������������������3-2 MEMORY screen ������������������������������������������������������������������������������������3-2 D Tree view of the MEMORY screen �������������������������������������������������������������3-2 D Viewing the Memory channel contents �������������������������������������������������������3-3 Selecting a Memory channel ������������������������������������������������������������������3-3 Entering Memory channel contents ��������������������������������������������������������3-4 D Entering into a selected channel ����������������������������������������������������������������3-4 D Overwriting a selected channel ������������������������������������������������������������������3-5 Copying Memory content to the VFO �����������������������������������������������������3-6...
-
Page 24: General Description
MEMORY OPERATION General description MEMORY screen The Memory mode enables you to quickly select On the MEMORY screen, you can easily manage the often-used frequencies, modes, and other parameters� Memory channel content� While operating in the Memory mode, you can temporarily change the operating frequency, mode, and so on without overwriting the memory channel contents�... -
Page 25: Dviewing The Memory Channel Contents
MEMORY OPERATION Selecting a Memory channel MEMORY screen DViewing the Memory channel contents In the Memory mode, you can select the Memory channels by rotating [DIAL]� You can view the Memory channel contents on the The memory contents on the screen may differ, MEMORY screen�... -
Page 26: Entering Memory Channel Contents
MEMORY OPERATION Entering Memory channel contents After selecting a frequency in the VFO mode, you can enter it into a selected channel or an automatically selected blank channel� DEntering into a selected channel Example: Entering 146�030 MHz/FM mode into Channel 02 in Group 06 (No Category)� 9�... -
Page 27: Doverwriting A Selected Channel
MEMORY OPERATION Entering Memory channel contents DOverwriting a selected channel You can write a frequency into a pre-entered channel� Example: Entering 146�330 MHz/FM mode into Channel 03 of Group 01 in the Airband category� 8� Select “YES�” 1� Push [MR] to enter the Memory mode� L For the USA version, pushing [MR] each time selects the Memory and Weather Channel modes�... -
Page 28: Copying Memory Content To The Vfo
MEMORY OPERATION Copying Memory content to the VFO It is convenient when you want to operate on a channel frequency near a Memory channel� Example: Copying Memory Channel 00 of Group 00 in the Airband category to the VFO� 1� Push [MR] to enter the Memory mode� L For the USA version, pushing [MR] each time selects the Memory and Weather Channel modes�... -
Page 29: Copying Memory Contents To Another Memory Channel
MEMORY OPERATION Copying Memory contents to another Memory channel You can copy the memory content to another Memory channel� Example: Copying Channel 01 in Group 00 to Channel 06 in Group 00� [MENU] > MEMORY > Memory CH 1� Push [MENU]� 9�... -
Page 30: Moving The Memory Contents To Another Channel
MEMORY OPERATION Moving the Memory contents to another channel in a different category or group You can move the memory content to another Memory channel in a different category or group� Example: Moving Channel 01 of Group 00 in the Airband category to Channel 00 of Group 02 in the same category�... -
Page 31: Inserting A Blank Channel
MEMORY OPERATION Inserting a blank channel You can insert a blank channel between 2 Memory channels� This function is convenient to organize your memory channels� Example: Inserting a blank channel between Channel 00 and 01 of Group 00 in the Airband category�... -
Page 32: Entering A Category/Group/Memory Name
MEMORY OPERATION Entering a category/group/memory name You can assign a name of up to 16 characters to each channel group (00 ~ 99) and memory channel� Example: Entering “Tower” as a Memory name to Channel 00 of Group 00 in the Airband category�... -
Page 33: Selecting A Memory Name Display
MEMORY OPERATION Selecting a memory name display While in the memory mode, the entered memory name can be displayed in different styles� You can select a display type� Example: Selecting “Name” in the Dual band display� [MENU] > SET > Display > Display Type 1�... -
Page 34: Clearing A Memory Contents
MEMORY OPERATION Clearing a Memory contents Contents of entered memories can be cleared (erased), if desired� L The cleared channel becomes a blank channel� NOTE: Cleared memory channel contents cannot be restored� Example: Clearing channel 01 of group 00 in the Airband category�... -
Page 35: About The Category
MEMORY OPERATION About the Category You can add or delete a category� DEntering a selected category Example: Entering the “Railway” category Step 4. Select a group to enter into a category Step 1. Adding a category 1� Select “Group Select�” [MENU] >... -
Page 36: Ddeleting A Category
MEMORY OPERATION About the Category DDeleting a category DCategory icon list Example: Deleting the “Railway” category L You can also change the icon from the CS-R15 programming software in the Category Operation sheet� The category icons and names are as follows� [MENU] >... -
Page 37: Fm Radio Memory
MEMORY OPERATION FM Radio memory DUsing the FM Radio Memory DAdding an FM Radio memory A total of 26 groups are selectable for FM Radio Step 1. Adding an FM Radio memory and entering memory� the edit mode You can assign up to 50 FM Radio memory channels to each group, for easy memory management�... - Page 38 MEMORY OPERATION FM Radio memory D Adding an FM Radio memory Step 2. Entering an FM Radio Memory name Step 4. Selecting the skip setting 1� Select “NAME�” 1� Select “SKIP�” 2� Select “OFF” or “SKIP�” 2� Enter a name� •...
-
Page 39: Ddeleting An Fm Radio Memory
MEMORY OPERATION FM Radio memory DDeleting an FM Radio memory All the contents of an FM Radio memory can be deleted� NOTE: Deleted memories cannot be restored� [MENU] > MEMORY > FM Radio Memory 1� Push [MENU]� 8� Select “YES�” 2�... -
Page 40: Dediting An Fm Radio Memory
MEMORY OPERATION FM Radio memory DEditing an FM radio memory This function edits FM Radio memory contents� This is useful when already-entered data is incorrect, has changed, or new data should be added to the list� [MENU] > MEMORY > FM Radio Memory 1�... -
Page 41: Drearranging The Display Order Of The Fm Radio Memories
MEMORY OPERATION FM Radio memory DRearranging the display order of the FM Radio memories You can move the entered FM Radio memories to rearrange their display order in the selected FM Radio memory group� [MENU] > MEMORY > FM Radio Memory 1�... - Page 42 For example, if you are receiving in the AM mode on one band and scanning on the other band, you may hear noise due to voltage fluctuations when switching frequencies because the 2 receiving circuits share the antenna on the IC-R15� However, this is not a receiver malfunction�...
-
Page 43: Section 4 Scan Operation
SCAN OPERATION Scan Type Starting or canceling the scan Scanning is a versatile function that can automatically L Set the VFO mode or memory mode before starting search for signals� A scan makes it easier to locate the scan� stations to contact or listen to, or to skip unwanted 1�... -
Page 44: About Scans
SCAN OPERATION About Scans D[DIAL] operation during a scan DReceiving mode during a scan • Rotate [DIAL] to change the scan direction during a scan� • The VFO scan uses the selected receiving mode� • When the scan is paused, rotate [DIAL] to resume the •... -
Page 45: Vfo Scan
When a signal is received during a VFO scan, the Repeatedly scans the entire band� frequency is automatically stored into an Auto Memory Write channel group (Auto MW CH 000 ~ 199)� IC-R15 IC-R15 frequency frequency ([MENU] > MEMORY > Memory CH > Auto MW CH) -
Page 46: Dentering Program Scan Edges
SCAN OPERATION VFO Scan DEntering Program Scan Edges You can enter the upper and lower frequency edges for a Program scan� Each Program Scan range has its tuning step and operating mode setting� You can enter up to 25 Program Scan ranges (Program Scan Edge) on the MENU screen�... -
Page 47: Dabout The Program Link Scan
SCAN OPERATION VFO Scan DAbout the Program Link Scan DSetting the Program Link function This item sets the Link function for 2 or more [MENU] > SET > Scan > Program Link Program Scan ranges to sequentially scan during a 1�... -
Page 48: Memory Scan
SCAN OPERATION Memory scan DSetting the Group Link The Memory scan searches signals on the preregistered memory channels� You can sequentially scan the memory groups that are set to Link on the MENU screen� ALL: L In the default setting, all groups are set to Link� Repeatedly scans all memory channels�... -
Page 49: Scan Skip Settings
SCAN OPERATION Scan skip settings DStoring the skip frequencies DSetting the skip channel You can skip unnecessary frequencies during a scan� You can set or clear a Skip Channel setting� While a scan is paused, and if you want to skip the The channels that are set as a Skip channel are frequency, you can store it into the Skip channels skipped during a scan�... -
Page 50: Dtemporary Skip Function
SCAN OPERATION Scan skip settings DTemporary skip function This function temporarily skips unwanted frequencies (or memory channels) during a scan for the set period of time or condition, without changing the Skip Channel setting� 1� While a scan is paused, push [SKIP]� 2�... - Page 51 Section FM RADIO OPERATION Basic operation ���������������������������������������������������������������������������������������5-2 D Description �������������������������������������������������������������������������������������������������5-2 D Turning ON the FM Radio ��������������������������������������������������������������������������5-2 D Selecting the FM Radio mode ��������������������������������������������������������������������5-2 D Searching for an FM Radio signal ��������������������������������������������������������������5-3 D Using the Attenuator function ���������������������������������������������������������������������5-3 D Selecting the group in the Memory mode ���������������������������������������������������5-4 D SKIP Select mode setting ���������������������������������������������������������������������������5-5 D Setting a squelch level �������������������������������������������������������������������������������5-6 D Using the Monitor function ��������������������������������������������������������������������������5-6...
-
Page 52: Section 5 Fm Radio Operation
FM RADIO OPERATION Basic operation DSelecting the FM Radio mode DDescription You can listen to FM Radio broadcasts� While using the Dualwatch function, you can still listen 1� In the FM Radio mode, push [MR] to toggle to the FM Radio only on the A band� between the Tuning or the Memory modes�... -
Page 53: Dsearching For An Fm Radio Signal
FM RADIO OPERATION Basic operation DSearching for an FM Radio signal DUsing the Attenuator function While in the Tuning mode, hold down D-pad() to The Attenuator prevents a desired signal from start searching for a broadcast signal� becoming distorted when a very strong FM Radio signal is near the frequency, or when a very strong electric field, such as from a broadcasting station, is near your location�... -
Page 54: Dselecting The Group In The Memory Mode
FM RADIO OPERATION FM Radio memory DSelecting the group in the Memory mode Up to 50 FM Radio Memory channels can be assigned to each group for easy memory management� If you change the group, other area channels can be selected�... -
Page 55: Dskip Select Mode Setting
FM RADIO OPERATION Basic operation DSKIP Select mode setting You can set memories as skip channels� The selected memories are not displayed in the Memory mode� In the SKIP Select mode, you can select memory channels set as skip channels by rotating [DIAL], making it easy to set and cancel SKIP�... -
Page 56: Dsetting A Squelch Level
FM RADIO OPERATION Basic operation DSetting a squelch level DUsing the Monitor function The squelch enables the audio to be heard only while The Monitor function is used to listen to weak signals receiving a signal that is stronger than the set level� without changing the squelch setting�... - Page 57 Section 6 RECORDER FUNCTION Recording audio �������������������������������������������������������������������������������������6-2 NOTE: See the Basic manual Playing back a recorded audio file����������������������������������������������������������6-3 Section 6 for details on how to insert or remove a microSD card Deleting an audio folder/file ��������������������������������������������������������������������6-4 and precautions� D Deleting an audio folder �����������������������������������������������������������������������������6-4 D Deleting an audio file ����������������������������������������������������������������������������������6-5 Viewing audio file information �����������������������������������������������������������������6-6 Playing back the recorded audio on a PC ����������������������������������������������6-7...
-
Page 58: Recording Audio
RECORDER FUNCTION Recording audio You can record the received audio on the MAIN and SUB bands� NOTE: • You must insert a microSD card into the receiver before recording audio� • The recording function is continuously ON, even if the receiver is turned OFF, and then ON again�... - Page 59 RECORDER FUNCTION Playing back a recorded audio file NOTE: Insert the microSD card that contains the recorded audio file into the receiver’s slot� [MENU] > RECORD > Play Files The VOICE PLAYER screen description 1� Push [MENU]. The number of the file being played back/ 2�...
-
Page 60: Deleting An Audio Folder/File
RECORDER FUNCTION Deleting an audio folder/file NOTE: A deleted audio file can NOT be recovered� DDeleting an audio folder NOTE: All audio files in the folder are deleted� [MENU] > RECORD > Play Files 1� Push [MENU]. TIP: To delete all folders 2�... -
Page 61: Ddeleting An Audio File
RECORDER FUNCTION Deleting an audio folder/file DDeleting an audio file [MENU] > RECORD > Play Files 1� Push [MENU]. TIP: To delete all files 2� Select “RECORD�” Select “Delete All” in step 7� 3� Select “Play Files�” L If “Display File” is set to “A only” or “B only,” only displayed files are deleted�... -
Page 62: Viewing Audio File Information
RECORDER FUNCTION Viewing audio file information The recorded audio file contains the received frequency, mode, date, and so on� [MENU] > RECORD > Play Files TIP: To view the folder information Push [QUICK] in step 4, and then select “Folder 1�... -
Page 63: Playing Back The Recorded Audio On A
Double-Click screen� • The microSD card are directly accessed from the PC� L See the instruction manual of your player for 7� Double-click the ‘IC-R15’ folder� operation details� L The audio file may not play back, depending on the player�... -
Page 64: Record Items
RECORDER FUNCTION RECORD items <<REC Start>> RX REC Condition (Default: Squelch Auto) [MENU] > RECORD > <<REC Start>> [MENU] > RECORD > Recorder Set > RX REC Condition After selecting “<<REC Start>>,” the recording starts. Selects whether or not the squelch status affects the •... - Page 65 Section SET MODE Selecting an item ������������������������������������������������������������������������������������7-2 D MENU screen operation �����������������������������������������������������������������������������7-2 D SET mode description ��������������������������������������������������������������������������������7-3 Scan �������������������������������������������������������������������������������������������������������7-4 Function ��������������������������������������������������������������������������������������������������7-6 Display ����������������������������������������������������������������������������������������������������7-9 Sounds �������������������������������������������������������������������������������������������������7-12 Time Set �����������������������������������������������������������������������������������������������7-13 SD Card ������������������������������������������������������������������������������������������������7-14 Bluetooth Set ����������������������������������������������������������������������������������������7-15 Others ���������������������������������������������������������������������������������������������������7-15...
-
Page 66: Section 7 Set Mode
SET MODE Selecting an item You can open the MENU screen by pushing [MENU]� TIP: The MENU screen is constructed in a tree You can use the MENU screen to set infrequently structure� You may go to the next tree level or go changed values or function settings�... -
Page 67: Dset Mode Description
SET MODE Selecting an item DSET mode description Example: Set “Auto Power OFF” to “30 min�” TIP: To return to the default setting 1� Push [QUICK] in step 5� [MENU] > SET > Function > Auto Power OFF 2� Select “Default�” 1�... -
Page 68: Scan
SET MODE NOTE: The default settings shown below are for the USA version� The default settings may differ, depending on your receiver version� Scan Pause Timer (Default: 10sec) Program Skip (Default: ON) [MENU] > SET > Scan > Pause Timer [MENU] >... - Page 69 SET MODE Scan Auto MW SCAN Memory Clear (Default: Display Dialog) [MENU] > SET > Scan > Auto MW SCAN Memory Clear Selects whether or not to delete Auto Memory Write channel (Auto MW CH) contents when the Auto Memory Write scan starts� •...
-
Page 70: Function
SET MODE Function Auto Power OFF Monitor (Default: OFF) (Default: Push) [MENU] > SET > Function > Auto Power OFF [MENU] > SET > Function > Monitor Selects whether or not to automatically turn OFF the Selects an option for the [SQL] Monitor function� receiver after inactivity for this set period of time�... - Page 71 Icom standard address� “B0” is the default [MENU] > SET > Function > USB Connect address of the IC-R15� When 2 or more IC-R15 are Selects the mode when connecting the receiver to a simultaneously controlled by a PC, set a different address for each receiver between 02 and DF (hexadecimal)�...
- Page 72 SET MODE Function Heterodyne (Default: Normal) [MENU] > SET > Function > Heterodyne Selects the 1st Local Oscillator frequency� Depending on a combination of the 2 operating frequencies in the Dualwatch mode, the receiver might generate a spurious signal on a specific receive frequency�...
-
Page 73: Display
SET MODE Display Backlight Dim Screen (Default: Auto (DC IN:ON)) (Default: ON) [MENU] > SET > Display > Backlight [MENU] > SET > Display > Dim Screen Selects an option for the receiver backlight� Selects whether or not to automatically reduce the •... - Page 74 [MENU] > SET > Display > Opening Message Selects whether or not to display the opening message at power ON� When you set this item to “ON,” the Icom logo and the model are displayed� Battery Level (Power ON) (Default: ON) [MENU] >...
- Page 75 SET MODE When you set the system language of the receiver to Display Japanese, the receiver has the capability to display both English and Japanese characters� HOWEVER, System Language (Default: English) if you select Japanese, all menu items throughout the receiver system will be displayed in only Japanese [MENU] >...
-
Page 76: Sounds
SET MODE Sounds Volume Select Scan Stop Beep (Default: All) (Default: OFF) [MENU] > SET > Sounds > Volume Select [MENU] > SET > Sounds > Scan Stop Beep Select whether or not to adjust the audio output level Turns the Scan Stop Beep ON or OFF� independently, according to the operating status�... -
Page 77: Time Set
SET MODE Time Set DATE [MENU] > SET > Time Set > Date/Time > DATE Manually set the date to between 2020/01/01 and 2099/12/31� L The day of the week is automatically set� TIME [MENU] > SET > Time Set > Date/Time > TIME Manually set the time that is displayed at the top of the screen�... -
Page 78: Sd Card
SET MODE SD Card Load Setting Firmware Update [MENU] > SET > SD Card > Load Setting [MENU] > SET > SD Card > Firmware Update Selects the saved data file to load� Displays the Firmware Update mode� Save Setting Format [MENU] >... -
Page 79: Bluetooth Set
SET MODE Bluetooth Set Others Bluetooth Battery (Default: OFF) [MENU] > SET > Bluetooth Set > Bluetooth [MENU] > SET > Others > Information > Voltage Turns the Bluetooth function ON or OFF� Displays the voltage of the battery pack and external power source�... - Page 80 Section OTHER FUNCTIONS Favorite channel mode ................8-2 NOTE: See the Basic manual D Setting Favorite channels ................8-2 Section 6 for details on how to D Entering the Favorite mode ................8-2 insert or remove a microSD card and precautions. Tone squelch operation ................8-3 D Tone squelch frequency setting ..............8-3 Duplex operation ..................8-4 D Frequency offset ..................8-4...
-
Page 81: Section 8 Other Functions
OTHER FUNCTIONS Favorite channel mode You can quickly recall often-used channels by setting them as Favorite channels. DSetting Favorite channels DEntering the Favorite mode 1. In the memory mode, select a channel you want to 1. In the memory mode, push [QUICK]. add to Favorites. -
Page 82: Tone Squelch Operation
OTHER FUNCTIONS Tone squelch operation The tone squelch opens only when you receive a signal that includes a matching subaudible tone or DTCS code in the FM or FM narrow (FM-N) mode. Also, the reversed tone squelch function mutes the squelch when a signal including a matching subaudible tone or DTCS code. -
Page 83: Duplex Operation
You need to set the Duplex direction and frequency offset to • “D–” or “D+” is displayed. receive communications as shown above. When the receive frequency of IC-R15 is set to 156.250 MHz, set it to “DUP+.” 6. Hold down [SQL]. -
Page 84: Weather Channel Operation (For Only The Usa Version)
OTHER FUNCTIONS Weather channel operation (For only the USA version) DWeather Alert function There are 10 weather channels for monitoring the National Oceanographic and Atmospheric NOAA broadcast stations transmit weather alert tones Administration (NOAA) weather broadcasts. before important weather announcements. L The Weather channel and the Weather Alert function are When the Weather Alert function is turned ON, the not usable in Simple mode. -
Page 85: Screen Capture Function
OTHER FUNCTIONS Screen Capture function DViewing the captured screen You can capture the receiver display onto a microSD card. Most of the screens used in this manual are [MENU] > SET > SD Card > Screen Capture View captured using this function. However, some displays cannot be captured. -
Page 86: Setting The Opening Picture
Step 1. Saving a picture on the microSD card (PC) 4. Select a picture to display. 1. Copy a picture file into the “OpeningPicture” folder (“IC-R15” > “OpeningPicture”) on the microSD card. L See page 2-5 for details. 2. Insert the microSD card into the receiver. -
Page 87: Cloning
IC-R15 to copy onto the sub receiver’s microSD card using a PC. -
Page 88: Resetting
OTHER FUNCTIONS Resetting DAll Reset Occasionally, erroneous information may be displayed. This may be caused by static electricity or NOTE: An All reset clears all data and returns all by other factors. settings to the factory defaults. Memory channel If this problem occurs, turn OFF the receiver. After contents, setting status, and so on will all be cleared, waiting a few seconds, turn ON the receiver again. - Page 89 Section UPDATING THE FIRMWARE General ....................9-2 NOTE: See the Basic manual D About updating the firmware ..............9-2 Section 6 for details on how to D Checking the firmware version ..............9-2 insert or remove a microSD card D Preparation ....................9-3 and precautions. Updating the firmware ................9-4...
- Page 90 Updating the firmware adds new [MENU] > SET > Others > Information > Version functions and/or improves performance parameters. 1. Push [MENU]. You can download the latest firmware from the Icom 2. Select “Others” in the “SET” menu. website. 3. Select “Information.”...
- Page 91 5. After the download is complete, click “Open file.” L Download steps may differ depending on the PC settings. Click Click 2. Enter “IC-R15” into the Search box, and then click [Search]. 1 Enter 2 Click 3. Click the desired firmware file link.
- Page 92 Icom distributor for repair. This type of repair is out of warranty, even if the receiver warranty period is still valid.
- Page 93 Section OPTIONS Option list....................10-2 10-1...
- Page 94 OPTIONS Option list You can find information for these options on the Icom website. https://www.icomjapan.com/support/ L Some options may not be available, depending on the receiver version. Batteries/Charger BC-223 battery charger The shape may be different, depending on the charger version.
- Page 95 How the World Communicates A7777-2EX 1-1-32 Kamiminami, Hirano-ku, Osaka 547-0003, Japan © 2024 Icom Inc. Mar. 2024...
Need help?
Do you have a question about the IC-R15 and is the answer not in the manual?
Questions and answers