Table of Contents
Advertisement
Quick Links
BASIC MANUAL
COMMUNICATIONS RECEIVER
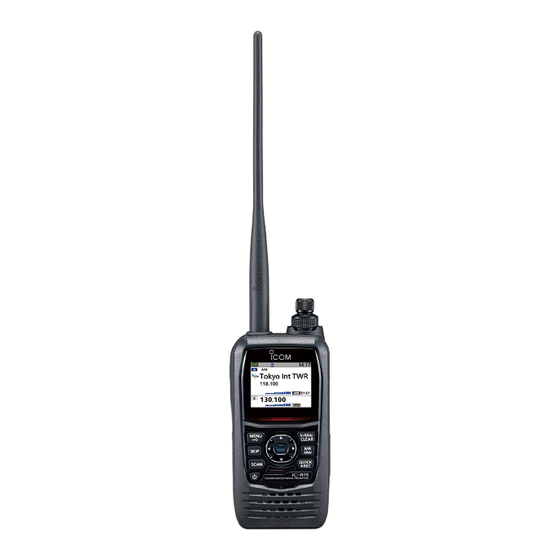
|R15
This device complies with part 15 of the FCC
Rules. Operation is subject to the condition that
this device does not cause harmful interference.
WARNING: MODIFICATION OF THIS DEVICE
TO RECEIVE CELLULAR RADIOTELEPHONE
SERVICE SIGNALS IS PROHIBITED UNDER
FCC RULES AND FEDERAL LAW.
Advertisement
Table of Contents

Subscribe to Our Youtube Channel
Related Manuals for Icom IC-R15


Summary of Contents for Icom IC-R15
- Page 1 BASIC MANUAL COMMUNICATIONS RECEIVER |R15 This device complies with part 15 of the FCC Rules. Operation is subject to the condition that this device does not cause harmful interference. WARNING: MODIFICATION OF THIS DEVICE TO RECEIVE CELLULAR RADIOTELEPHONE SERVICE SIGNALS IS PROHIBITED UNDER FCC RULES AND FEDERAL LAW.
-
Page 2: Features
Recommended for optimum use. No risk of personal injury, fire or electric NOTE shock. Icom is not responsible for the destruction, damage to, or performance of any Icom or non-Icom equipment, if the malfunction is because of: • Force majeure, including, but not limited to, fires, earthquakes, storms, floods, lightning, other natural disasters, disturbances, riots, war, or radioactive contamination. -
Page 3: Precautions
If the surface becomes dusty or dirty, wipe it clean with a soft, dry cloth. R WARNING! NEVER use or charge Icom CAUTION: DO NOT place or leave the battery packs with non-Icom receivers receiver in direct sunlight or in areas with or non-Icom chargers. -
Page 4: Battery Cautions
Icom dealer or distributor. R DANGER! NEVER leave the battery CAUTION: DO NOT use the battery pack pack in places with temperatures above out of the specified temperature range 60˚C (140˚F). -
Page 5: Charging Cautions
CAUTION: DO NOT charge the battery pack outside of the specified temperature range: 15˚C ~ 40˚C (59˚F ~ 104˚F). Icom recommends charging the pack at 25˚C (77˚F). The pack may heat up or rupture if charged out of the specified temperature range. -
Page 6: Fcc Information
Radio Equipment by Icom Inc., could void your authority Directive, 2014/53/EU, and the restriction to operate this device under FCC of the use of certain hazardous substances regulations. -
Page 7: Recommendation
Contact your Icom distributor or your dealer for advice. ■ Operating notes The IC-R15 may receive its own oscillated ■ Trademarks frequency, resulting in no reception or only noise reception, on some frequencies. Icom and the Icom logo are registered... -
Page 8: Important Notes
D Noise signals while charging guide from the Icom website: https://www.icomjapan.com/support/ You may hear some noises caused by Enter “IC-R15” into the Search box on the signals generated in the charging circuit. site. Be sure to turn OFF the receiver before... -
Page 9: Table Of Contents
■ Lock function ........ 17 D Time Setting .........vii ■ AF Filter function ......17 ■ About the IC-R15 manuals ....vii MEMORY OPERATION ������������������� 18 PREPARATION ���������������������������������� 1 ■ Selecting a Memory channel ..18 ■ Viewing the Memory channel ■... - Page 10 ■ Table of contents OTHER FUNCTIONS ����������������������� 27 ■ Bluetooth operation ....27 ® ■ Turning ON the Bluetooth ® function ........27 ■ Connecting to a Bluetooth ® device .......... 28 ■ Disconnecting a Bluetooth ® device .......... 29 ■...
-
Page 11: Preparation
PREPARATION ■ Attaching the supplied accessories ï Battery pack Battery pack NOTE: (Supplied) • BE CAREFUL! Do not break your finger nail. • Even when the receiver is OFF, a small current still flows in the receiver. Remove the battery pack or case from the receiver when not using it for a long time. -
Page 12: Charging The Battery Pack
PREPARATION ■ Charging the battery pack Charging time: Approximately 4 hours with 5V/1A input Power adapter or external battery Supplied USB cable (User supplied) (Type-C/Type-A) To the [USB] To a USB port Turn OFF L See the Advanced manual about the optional battery packs and chargers. NOTE: •... -
Page 13: Inserting A Microsd Card
PREPARATION ■ Inserting a microSD card Refer to page 23 for the usable microSD cards. Turn OFF the receiver. Pull down the [microSD] slot cover on the side panel. With the terminals facing the front, insert the card into the slot until it locks in place and makes a ‘click’... -
Page 14: Saving The Setting Data Onto A Microsd Card
PREPARATION ■ Saving the setting data onto a microSD card You can save the Memory channels, MENU screen item settings, repeater lists, and so on onto a microSD card. Saving settings onto a card lets you easily restore the receiver to its previous settings, even if you perform an All Reset. -
Page 15: D Saving The Setting Data
PREPARATION ï Saving the setting data [MENU] > SET > SD Card > Save Setting Push [MENU]. Select “SD Card” in the “SET” menu. Select “Save Setting.” Select “<<New File>>.” • The FILE NAME screen is displayed. L The file name is automatically set in the following format: Set YYYYMMDD_XX (YYYY: Year, MM: month, DD: day, XX: serial number). -
Page 16: Panel Description
PANEL DESCRIPTION IC-R15 ■ Front, top, and side panels Function 15 * Display (p. 8) 2 * 16 * Speaker *Close the covers firmly when not in use. 1 SQUELCH KEY [SQL] z While pushing, rotate [DIAL] to adjust the squelch level. (p. 14) z Push or hold down to turn the Monitor function ON or OFF. - Page 17 PANEL DESCRIPTION 7 POWER KEY [ ] z Hold down for 1 second to turn the receiver ON or OFF. (p. 3) z When “Screen Capture [PWR] Key” is set to “ON,” push to capture the receiver screen onto a microSD card. ([MENU] >...
-
Page 18: Function Display
PANEL DESCRIPTION ■ Function display 2 3 4 5 6 7 8 10 11 12 26 13 14 25 15 24 16 17 Single band display 23 18 19... - Page 19 PANEL DESCRIPTION 11 VSC/FM RADIO ATTENUATOR ICONS • VSC: Displayed when the Voice Squelch Control function is ON. • ATT: Displayed when the attenuator is ON in the FM Radio mode. 12 CLOCK DISPLAY 13 RECORD ICONS (p. 24) • Displayed while recording.
-
Page 20: Basic Operation
BASIC OPERATION ■ MENU screen You can open the MENU screen by pushing [MENU]. You can use the MENU screen to set infrequently changed values or function settings. See the appendix for the MENU item list. For details of each item, see the Advanced manual. TIP: The MENU screen is constructed in a tree structure. -
Page 21: D Selecting A Menu Item
BASIC OPERATION D Selecting a Menu item Example: Set “Auto Power OFF” to “30 min.” [MENU] > SET > Time Set > Auto Power OFF Push [MENU]. Select “SET.” Select “Function.” Select “Auto Power OFF.” Select “30min.” • Sets the option, then goes back to a tree level. (The FUNCTION screen is displayed.) L To exit the MENU screen, push [MENU]. -
Page 22: Quick Menu Window
BASIC OPERATION ■ Quick Menu window You can open the Quick Menu window by pushing [QUICK]. In the window, the selectable items may differ, depending on the receive mode or function. The items listed below are examples. [QUICK] VFO mode Memory mode Weather CH mode* Select Band... -
Page 23: Dualwatch Operation
BASIC OPERATION ■ Dualwatch operation The Dualwatch function simultaneously monitors 2 frequencies. The IC-R15 has 2 independent receiver circuits, A and B bands. You can set different frequencies or receive modes in each band. L When the Dualwatch function is ON, the audio output may be interrupted when the frequency is switched while scanning, or by other factors. -
Page 24: Setting A Squelch Level
BASIC OPERATION ■ Setting a squelch level Noise squelch enables the audio to be heard only while receiving signals that are stronger than the set level. A higher level blocks weak signals, and receives only stronger signals. A lower level receives weaker signals. L Throughout this document, “Noise squelch”... -
Page 25: Receiving
BASIC OPERATION ■ Receiving D Selecting the Frequency Selecting mode VFO mode Rotate [DIAL] to set an operating frequency. L In the VFO mode, is displayed. Memory mode Select a Memory channel where an operating frequency and other parameters are saved. L In the Memory mode, and the Memory Channel number are displayed. -
Page 26: D Selecting The Receive Band
BASIC OPERATION ■ Receiving D Selecting the receive band Push [V/MHz] to select the VFO mode. Push [QUICK]. Select “Select Band.” Select the receive band. • Sets the receive band, then returns to the Standby screen. L In the VFO mode, you can also change the band by pushing D-pad(). -
Page 27: Attenuator
BASIC OPERATION ■ Attenuator The Attenuator prevents a desired signal from becoming distorted when a powerful signal is near the frequency, or when a powerful electric field, such as from a broadcasting station, is near your location. L These settings can be separately set in A band and B band. -
Page 28: Memory Operation
MEMORY OPERATION ■ Selecting a Memory channel In the Memory mode, you can select the Memory channels by rotating [DIAL]. L The memory contents on the screen may differ, depending to the presetting. Push [MR] to enter the Memory mode. L For only the USA version, pushing [MR] alternately selects the Memory and Weather Channel modes. -
Page 29: D About The Memory Channel Contents
MEMORY OPERATION D About the Memory channel contents (Example) MEMORY Memory CH (No Category) Group 00 Airband Marine VHF Group 99 Auto MW CH SKIP CH <<Add Category>> FM Radio Memory A: Area 1 B: Area 2 (Blank) -
Page 30: Entering Memory Channels
MEMORY OPERATION ■ Entering Memory channels The receiver has a total of 2,000 Memory channels to save often-used frequencies. In the Memory mode, you can quickly select the saved memories. This section describes the basic channel content entry. Example: Entering 146.030 MHz/FM mode into Channel 02 in Group 06 (No Category). Hold down [MW] for 1 second. -
Page 31: Scanning
SCANNING L See the Advanced manual for more details on the scanning. ■ Scan Type Scanning is a versatile function that can automatically search for signals. A scan makes it easier to locate stations to contact or listen to, or to skip unwanted channels or frequencies. D VFO scan The VFO scan searches for signals within the specified frequency range. -
Page 32: Starting Or Canceling The Scan
SCANNING ■ Starting or canceling the scan L Set the VFO mode or memory mode before starting the scan. Push [SCAN]. • Opens the Scan Type Select window. L If you hold down [SCAN] for 1 second, the last selected scan starts. Select a scan type. -
Page 33: Recording And Playing Back
• When reading or writing data is impossible, the card’s lifetime has ended. In this case, purchase a new one. We recommend you make a backup file of the important data onto your PC. • Icom will not be responsible for any damage caused by data corruption of a card. -
Page 34: Recording
RECORDING AND PLAYING BACK ■ Recording NOTE: Once a voice recording starts, the Recording function will stay turned ON until you stop recording, even if you turn OFF the receiver. D Starting recording z Hold down [●REC] for 1 second. •... -
Page 35: Playing A Recorded Audio
RECORDING AND PLAYING BACK ■ Playing a recorded audio [MENU] > RECORD > Play Files Push [MENU]. Select “Play Files” in the “RECORD” menu. Select the folder that contains the file you want to play. L The folder is named YYYYMMDD (Y: year, M: month, D: day). Select the file that you want to play. -
Page 36: D Removing While The Receiver Is On
RECORDING AND PLAYING BACK ■ Removing the microSD card D Removing while the receiver is ON [MENU] > SET > SD Card > Unmount Push [MENU]. Select “SD Card” in the “SET” menu. Select “Unmount.” • The confirmation dialog is displayed. Select “YES.”... -
Page 37: Other Functions
OTHER FUNCTIONS ■ Bluetooth operation ® The receiver has a built-in Bluetooth unit and you can connect to Bluetooth devices. When you connect a Bluetooth device to the receiver, you can wirelessly use it. Refer to the Advanced manual for more details on the Bluetooth function. L Only 1 Bluetooth device can be paired. -
Page 38: Connecting To A Bluetooth
OTHER FUNCTIONS ■ Connecting to a Bluetooth device ® Step 1. Selecting the pairing mode of the device. See the instruction manual of the device to select the pairing mode. Step 2. Searching for the device (Receiver) [MENU] > SET > Bluetooth Set > <<Pairing>> Push [MENU]. -
Page 39: Disconnecting A Bluetooth ® Device
OTHER FUNCTIONS ■ Disconnecting a Bluetooth device ® You can disconnect a paired Bluetooth device if it is not being used. [MENU] > SET > Bluetooth Set > Bluetooth Push [MENU]. Select “Bluetooth Set” in the “SET” menu. Select “Bluetooth.” Select “OFF”. -
Page 40: Using The Automatic Noise Limiter (Anl)
OTHER FUNCTIONS ■ Using the Automatic Noise Limiter (ANL) The Automatic Noise Limiter function reduces noise components while receiving. L The function is usable in the AM and AM-N modes. [QUICK] > ANL ■ Using the Voice Squelch Control (VSC) The Voice Squelch Control function opens the squelch or stops a scan only when voice components are detected in the signal. -
Page 41: Maintenance
MAINTENANCE ■ Resetting Occasionally, erroneous information is displayed when, for example, first applying power. This may be caused externally by static electricity or by other factors. If this problem occurs, perform a Partial reset or an All reset. BE CAREFUL! An All reset clears all programming and returns all settings to the factory defaults. -
Page 42: Troubleshooting
The following chart is designed to help you correct problems that are not equipment malfunctions. If you are unable to locate the cause of a problem or solve it through the use of this chart, contact your nearest Icom Dealer or Service Center. L “AM” indicates the PDF type Advanced Manual. - Page 43 MAINTENANCE A Program Scan does not start. z The VFO mode is not selected. → Push [V/MHz] to select the VFO mode. (p. 15) z The same frequencies are entered into the scan edges. → Enter different frequencies into the scan edges. (AM) A Memory Scan does not start.
-
Page 44: Simple Mode
SIMPLE MODE ■ About the Simple mode In the Simple mode, you can receive, scan, and listen to the FM radio by selecting from favorite channels, Categories/Groups, and so on. L The memory contents on the screen may differ, depending to the presetting. D Using the Simple mode [MENU] >... -
Page 45: Receiving
SIMPLE MODE ■ Receiving D Selecting from the Favorite channel [MENU] > SIMPLE MODE > Favorite Push [MENU]. Select “SIMPLE MODE.” Select “Favorite” in the “RECEIVE” menu. • The receiver displays “Favorite Select Mode” and displayed. Rotate [DIAL] to select a channel from Favorites. L You can add Favorite channels from the Quick Menu. -
Page 46: Listening To The Fm Radio
SIMPLE MODE ■ Listening to the FM Radio D Selecting from the Radio Memory [MENU] > SIMPLE MODE > FM Radio > FM Radio Memory Push [MENU]. Select “SIMPLE MODE.” Select “FM Radio” in the “RECEIVE” menu. Select “FM Radio Memory.” Select a group. -
Page 47: Scanning
SIMPLE MODE ■ Scanning You can search for signals from Favorite channels, Categories/Groups, or bands. [MENU] > SIMPLE MODE > <<Scan>> Push [MENU]. Select “SIMPLE MODE.” Select “<<Scan>>” in the “RECEIVE” menu. Select a Scan type. • or “BND” blinks and the scan starts. L When receiving a signal, the scan is paused and the S-meter displays the received signal strength. -
Page 48: Specifications
SPECIFICATIONS D General • Frequency coverage: [A band], [B band] 108.000000 ~ 500.000000 MHz [BC band (FM Radio)] EUR version 76.000000 ~ 108.000000 MHz USA version 88.000000 ~ 108.000000 MHz • Receive modes: FM/FM-N/WFM* /AM/AM-N • Operating temperature range: –20°C ~ +60°C, –4°F ~ +140°F •... -
Page 49: D Receiver
SPECIFICATIONS D Receiver • Receive system: Double superheterodyne • Intermediate frequencies: [A band] 1st 58.050 MHz, 2nd 0.450 MHz [B band] 1st 57.150 MHz, 2nd 0.450 MHz • Sensitivity for all versions: Squelch Frequency range Sensitivity Mode Sensitivity (MHz) (dBμ) (dBμ) 108.000 ~ 142.000 0 or less... -
Page 50: Menu Screen Items
MENU SCREEN ITEMS When pushing [MENU], the following MENU items are displayed. Refer to the Advanced manual for each menu item’s details. SIMPLE MODE SET > Scan Favorite Pause Timer Category/Group Resume Timer (No Category) Temporary Skip Timer Category name Program Skip (Example: Airband) Program Scan Edge... - Page 51 MENU SCREEN ITEMS SET > Display SET > Bluetooth Set Backlight Bluetooth Backlight Timer <<Pairing>> Brightness Headset Set Dim Screen AF Output Dim Timer Auto Disconnect Brightness (Dim) Bluetooth Device Information RX Backlight (Except Radio) Initialize Bluetooth Device Scroll Speed SET >...
-
Page 52: Index
INDEX INDEX 1 MHz tuning �������������������������������������� 16 Lock function �������������������������������������� 17 LOCK key ��������������������������������������������� 6 A band ������������������������������������������������ 13 Accessories ������������������������������������������vi AM ������������������������������������������������������ 15 MAIN band������������������������������������������ 13 AM-N �������������������������������������������������� 15 Memory channel Attenuator ��������������������������������������������� 8 Entering ������������������������������������������ 20 Attenuator (ATT) ��������������������������������� 17 Selecting ����������������������������������������... - Page 53 INDEX Save Setting ����������������������������������������� 5 SCAN key ��������������������������������������������� 6 Scan starting or canceling ������������������ 22 Screen Capture ������������������������������������ 7 Simple mode��������������������������������������� 34 Single band display ������������������������ 8, 13 SKIP key ����������������������������������������������� 6 S meter ������������������������������������������������� 9 Speaker jack ����������������������������������������� 7 Specifications �������������������������������������...
-
Page 54: About The Licenses
ABOUT THE LICENSES mbed TLS “Contribution” shall mean any work of authorship, including the original version of the Work and any modifications or additions to that Work or Derivative Works thereof, that is Apache License intentionally submitted to Licensor for inclusion in the Work by the copyright owner or by an individual or Legal Entity Version 2.0, January 2004 authorized to submit on behalf of the copyright owner. http://www.apache.org/licenses/ For the purposes of this definition, “submitted” means any TERMS AND CONDITIONS FOR USE, REPRODUCTION,... - Page 55 ABOUT THE LICENSES (d) I f the Work includes a “NOTICE” text file as part of 8. L imitation of Liability. In no event and under no legal its distribution, then any Derivative Works that You theory, whether in tort (including negligence), contract, distribute must include a readable copy of the attribution or otherwise, unless required by applicable law (such notices contained within such NOTICE file, excluding as deliberate and grossly negligent acts) or agreed those notices that do not pertain to any part of the to in writing, shall any Contributor be liable to You Derivative Works, in at least one of the following for damages, including any direct, indirect, special, places: within a NOTICE text file distributed as part...
- Page 56 How the World Communicates A7777H-1EX 1-1-32 Kamiminami, Hirano-ku, Printed in Japan Osaka 547-0003, Japan © 2024 Icom Inc. Feb. 2024...
Need help?
Do you have a question about the IC-R15 and is the answer not in the manual?
Questions and answers