
Related Manuals for Advantech PPC-415W


Summary of Contents for Advantech PPC-415W
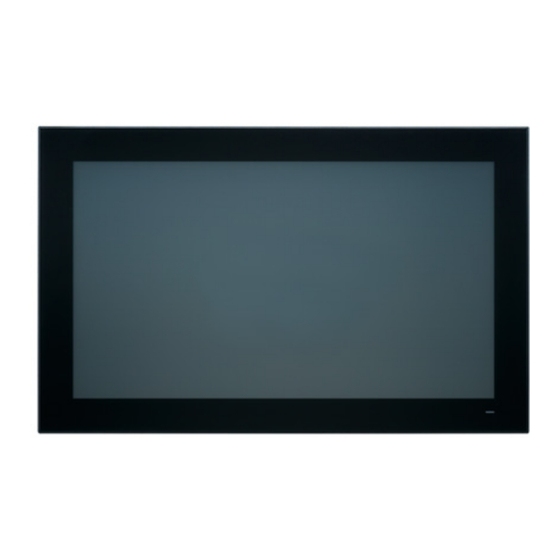
- Page 1 User Manual PPC-415W PPC-421W 15.6”/21.5” Panel PC with TFT ® LCD and Intel Core™ i Processor...
- Page 2 The documentation and the software included with this product are copyrighted 2023 by Advantech Co., Ltd. All rights are reserved. Advantech Co., Ltd. reserves the right to improve the products described in this manual at any time without notice. No part of this manual may be reproduced, copied, translated, or transmitted in any form or by any means without the prior written permission of Advantech Co., Ltd.
- Page 3 This product has passed the CE test for environmental specifications when shielded cables are used for external wiring. We recommend the use of shielded cables. This type of cable is available from Advantech. Contact your local supplier for ordering information.
- Page 4 The equipment has been exposed to moisture. L'appareil a été exposé à l'humidité. The equipment is malfunctioning or does not function according to the user manual. L'appareil est défectueux ou ne fonctionne pas conformément aux instructions. PPC-415W/421W User Manual...
- Page 5 704-1:1982, le niveau de pression acoustique à la position de l'opérateur ne dépasse pas 70 dB (A). The PPC-415W/421W products are intended to be supplied by a UL-certified power supply (Adapter: FSP150-ABAN2) suitable for use at a TMA of 40 °C (104 °F) min., with output rated 19V...
- Page 6 Battery Information Batteries, battery packs, and accumulators should not be disposed of as unsorted household waste. Please use the public collection system to return, recycle, or treat them in compliance with local regulations. PPC-415W/421W User Manual...
-
Page 7: Table Of Contents
General Information ......1 Introduction ....................2 Specifications .................... 2 Table 1.1: Specifications ............. 2 Dimensions ....................4 Figure 1.1 PPC-415W Dimensions..........4 Figure 1.2 PPC-421W Dimensions..........4 Chapter System Installation & Setup ....5 Quick Installation Guide ................6 Figure 2.1 Front Panel ..............6 Figure 2.2 Side View.............. - Page 8 Table 3.7: Touch Power Select ..........27 3.2.6 Power Button Connection ............27 Table 3.8: Power Button Connection......... 27 3.2.7 LVDS SW1 and Jumper Setting ..........28 Table 3.9: PPC-415W (EAMB-7709)......... 28 Chapter Software Configuration ....29 Driver Installation ..................30 BIOS Setup Utility ................... 30 4.2.1...
-
Page 9: Chapter 1 General Information
Chapter General Information Introduction Specifications Dimensions... -
Page 10: Introduction
Introduction Designed for high-performance computing 13th gen applications, PPC-415W/421W with a FHD provides a superior human-machine interface and reliability, with multi- touch screen, rich I/O and aluminum alloy front bezel. The inclusion of PCIe/PCI slot for fieldbus or proprietary card expansion increases the system’s compatibility for diverse applications. - Page 11 558.4x 349.8 x 63.8 mm (21.9 x 13.7 x 2.5 in) x 10.6 x 2.3 in) Weight 5.4kg (11.9 lb) 7.67kg (16.9lb) * Test conditions of power consumption for PPC-415W-xD5: Test condition Test Configuration Test System Power Consumption (W) Memory: 8G DDR5 SSD: 64G 2.5”SATAIII...
-
Page 12: Dimensions
Figure 1.1 PPC-415W Dimensions Figure 1.2 PPC-421W Dimensions Note! Both PPC-415W and PPC-421W support VESA 100 x 100 mm or 75 x 75 mm. For mounting, use M4 screws at an 8 mm max. depth and suit- able mounting apparatus to avoid injury. -
Page 13: Chapter 2 System Installation & Setup
Chapter System Installation & Setup Quick Installation Guide Installation Procedures Memory Installation HDD Installation M.2 Installation Wireless LAN Installation COM/GPIO Installation TPM Installation Expansion Card Installation AT/ATX Switch Grounding Installation ... -
Page 14: Quick Installation Guide
Figure 2.1 Front Panel Power status indicator - Off (S5): orange; On (S0): blue Figure 2.2 Side View 2 x Antenna holes 12 x Panel Mount Bracket holes 2 x RS-232 (optional) 1 x CPU cooler 2 x Speakers PPC-415W/421W User Manual... -
Page 15: I/O Interfaces
F: 1 x DP G: 2 x COM RS-232 H: 1 x DC inlet and AT/ATX switch I: 1 x Isolated RS-422/485 J: 1 x Power button K: 1 x Grounding screw L: 2 x RS-232 (right side, optional) PPC-415W/421W User Manual... -
Page 16: Installation Procedures
Connect the female end of the power cable to the DC input socket of the panel Connect the male end of the power cable to the power outlet. Figure 2.4 Connecting the Power Cable 2.2.2 Keyboard and Mouse Connect the keyboard and mouse to the I/O ports of the panel PC. PPC-415W/421W User Manual... -
Page 17: Activate Power
Customers must purchases the items separately. Memory Card Installation The following instructions are provided using the PPC-415W for reference: Remove the screws circled in Figure 2.5. Push the tabs circled in red in Figures 2.6 to open the rear cover (Figure 2.7). - Page 18 Attach the CPU heat sink and reinforcement plate after the grease is applied. Figure 2.8 Figure 2.10 Figure 2.9 Note! The CPU cooler pad surface is isolated via anodization treatment to avoid static electricity (excluding the CPU contact side). PPC-415W/421W User Manual...
-
Page 19: Hdd/Ssd Installation
(eight screws if installing two SSDs) (see Figure 2.12 for reference). Replace the SSD bracket and tighten screws to affix in place. Connect the SSD cable to the main board (Figure 2.13). Figure 2.11 Figure 2.12 Figure 2.13 PPC-415W/421W User Manual... -
Page 20: For Ppc-415W
Figure 2.14 to retrieve the reinforcement plate. Figure 2.14 Using four screws from the accessory box, attach the SSD bracket with SSD onto the reinforcement plate (Figure 2.15). Figure 2.15 Figure 2.16 PPC-415W/421W User Manual... - Page 21 Replace the SSD bracket and reinforcement plate and use screws to affix it in place. Connect the SSD cable to the main board (Figure 2.17). Figure 2.17 PPC-415W/421W User Manual...
-
Page 22: Installation
M.2 Installation The following instructions are provided using the PPC-415W model for reference: Follow the procedures in Section 2.3 to open the rear cover and remove the reinforcement plate. To install a 22X80mm size M.2 card, insert the M.2 card into the correct main board slot, and affix it in place using one M3x5L screws provided in the acces- sory box (see fig. -
Page 23: Wireless Lan Card Installation
Wi-Fi module (model name: PPC-WLAN-D2). Insert the wireless LAN card into the appropriate main board slot. Connect the cables of the wireless LAN card to the antenna holder. Note the installation direction of the cable end and nut/washer. PPC-415W/421W User Manual... - Page 24 (see Fig. 2.22) for the antenna connectors. Then replace the rear cover and secure in place using screws. Finally, attach the antennas to the two antenna connectors located at the top of the panel (see Fig. 2.23). PPC-415W/421W User Manual...
-
Page 25: Com/Gpio Installation
Figure 2.28 are fixed). Connect the COM4 cable to CN17 and the COM5 cable to CN18 as shown in Figure 2.28. Then replace the reinforcing plate and the rear cover. (If the COM5 cable is connected to CN23, COM5 will support GPIO.) Figure 2.22 PPC-415W/421W User Manual... -
Page 26: Riser Card Installation
An expansion PCI riser card can be easily installed as shown in Figures 2.34 and 2.35. Note! The maximum dimensions supported for expansion cards is 175 x 106.7 mm/6.88 x 4.2 in. Figure 2.23 Figure 2.24 Figure 2.26 Figure 2.25 PPC-415W/421W User Manual... -
Page 27: Grounding Installation
Connect the grounding cable to the grounding screw. Tighten the screw to secure the connection. Figure 2.27 Figure 2.28 Note! A grounding cable is not provided with the product. Customers will need to purchase this cable separately. PPC-415W/421W User Manual... -
Page 28: Cabinet Installation And Grounding
Install the PPC system into the cabinet. Figure 2.29 Cabinet Installation Step A: Connect the cabinet to the earth/ground. Step B: Embed null PPC system into the cabinet without any I/O cable and power. PPC-415W/421W User Manual... - Page 29 AWG/0.75mm2 and connecting to earth of building. Ensure that the voltage of the power source is correct before connecting the equipment to a power outlet. By means of a power cord connected to a socket- outlet with earthing connection. PPC-415W/421W User Manual...
-
Page 30: Mount Bracket Installation
Put the machine into the carbinet, and prepare the hook. Install the hook into the hole to hold the machine as shown above Screw Secure the machine by fastening the screws PPC-415W PPC-421W Figure 2.31 Hook Installation PPC-415W/421W User Manual... -
Page 31: Jumper Configuration
Chapter Jumper Configuration Jumpers & Connectors External COM Pin Definitions... -
Page 32: Jumpers & Connectors
Resistance Touch Power Select CN17 Internal COM 4 CN18 Internal COM 5 CN23 GPIO CN20 Pin9 power selection (COM 1 and COM 2) ATX/AT Select CN25 Power button connection Resolution setting JP1, JP2 Backlight enable level, Brightness PWM level PPC-415W/421W User Manual... -
Page 33: External Com Ports And Pin Definitions
COM1/COM2 Pin 9 is set as “RI” by default. This setting can be changed to 5V or 12V output using a jumper. Table 3.2: External COM Ports and Pin Definitions COM1/COM2 COM4/COM5 GPIO GPIO4 GPIO0 GPIO5 GPIO1 GPIO6 GPIO2 GPIO7 RI or 5V/12V output GPIO3 PPC-415W/421W User Manual... -
Page 34: Com1/Com2 Pin9 Power Select
(configurable via the BIOS Setup Utility). Table 3.4: COM3 COM3 1pin 2pin 3pin 4pin 5pin RS422 RS485 3.2.3 RTC Select Table 3.5: RTC Select JCMOS1 Function 1-2 pin CLR RTC Register 2-3 pin Normal (Default*) 3-4 pin CLR CMOS PPC-415W/421W User Manual... -
Page 35: Atx/At Select
Note: A jumper needs to be connected to resistive screen JP3 and removed from capacitive screen JP3. 3.2.6 Power Button Connection Table 3.8: Power Button Connection CN25 Function Power button Can be used as an external extension cord switch PPC-415W/421W User Manual... -
Page 36: Lvds Sw1 And Jumper Setting
3.2.7 LVDS SW1 and Jumper Setting Table 3.9: PPC-415W (EAMB-7709) Resolution 1920 x 1080 SW1=1100, i.e. 1,2=on, 3,4=off Backlight enable level JP1(2-3), +3.3V Brightness PWM level JP2(2-3), +3.3V PPC-415W/421W User Manual... -
Page 37: Software Configuration
Chapter Software Configuration Driver Installation BIOS Setup Utility... -
Page 38: Driver Installation
Driver Installation Before installing software on the panel PC, the corresponding drivers must be installed for full functionality. All drivers can be downloaded from the Advantech website: http://www.advantech.com BIOS Setup Utility 4.2.1 Entering Main BIOS Setup You can enter BIOS setup utility by pressing "Delete". -
Page 39: Cpu Configuration
4.2.2 CPU Configuration CPU Configuration This item allows users to view the CPU model and frequency. Intel Virtualization Technology This item allows users to enable or disable Intel Virtualization Technology. When PPC-415W/421W User Manual... -
Page 40: Com3 Mode Selection (Rs422/Rs485)
VMM can utilize additional hardware capabilities provided by Vander- pool Technology. 4.2.3 COM3 Mode Selection (RS422/RS485) Select NCT6126D Super IO Configuration in the Advanced tab. Select Serial Port 3 Configuration option setting (RS422/RS485). PPC-415W/421W User Manual... -
Page 41: Hardware Monitor
If COM3 mode is set as RS485, the RS485 Auto Flow control option can be Enabled or Disabled. 4.2.4 Hardware Monitor PPC-415W/421W User Manual... -
Page 42: Usb Configuration
EC Hardware Monitor This page displays all information about system Temperature/Voltage/Current. 4.2.5 USB Configuration PPC-415W/421W User Manual... - Page 43 XHCI Hand-off This is a workaround of 0Secs without XHCI hand-off support. The XHCI owner- ship change should be claimed by XHCI driver. USB Mass Storage Driver Support Enable/Disable USB Mass Storage Driver Support. PPC-415W/421W User Manual...
-
Page 44: Sata Configuration
4.2.6 SATA configuration Check SATA information. PPC-415W/421W User Manual... -
Page 45: Deep Sleep
4.2.7 Deep Sleep Select PCH-IO Configuration option in the Chipset tab. PPC-415W/421W User Manual... -
Page 46: Wake-On-Lan
Set the Deep Sleep by option to Enabled/Disabled for ERP. 4.2.8 Wake-on-LAN Select PCH-IO Configuration option in the Chipset tab. PPC-415W/421W User Manual... -
Page 47: Storage Raid Configuration (Vmd Setup)
Set the Wake On By option to Enabled. 4.2.9 Storage RAID Configuration (VMD Setup) Please refer to the below configuration instructions: Select Chipset → System Agent(SA)Configuration. PPC-415W/421W User Manual... - Page 48 Select VMD setup menu. Enable VMD controller and Enable VMD Global Mapping and Map this Root Port under VMD setting [Enable]. PPC-415W/421W User Manual...
- Page 49 Press F4 to save and then exit. Press del to go to BIOS, and select Advanced→ Intel (R) Rapid Storage Technology. Select Create RAID Volume. PPC-415W/421W User Manual...
- Page 50 Define volume level. Select RAID Level, which can be RAID0 or RAID1 (similar steps) PPC-415W/421W User Manual...
- Page 51 Select RAID0 and select Select Disks: [X]. Select Create Volume. PPC-415W/421W User Manual...
- Page 52 RAID grouping completed. Click Delete to remove RAID. PPC-415W/421W User Manual...
-
Page 53: Security
Select Security Setup from the Setup main BIOS setup menu. All Security Setup options, such as password protection and virus protection are described in this sec- tion. To access the sub menu for the following items, select the item and press <Enter>: Administrator Password Set Administrator’s password. PPC-415W/421W User Manual... -
Page 54: Boot
This means the default boot selec- tion is not automatically started by the firmware. Bootup NumLock State Select the keyboard NumLock state. Quiet Boot Enables or disables Quiet Boot option. Boot Option #1 Boot Option #2. PPC-415W/421W User Manual... -
Page 55: Save & Exit
This item allows users to restore/load default values for all setup options. Save as User Defaults This item allows users to save all current settings as user defaults. Restore User Defaults This item allows users to restore all setup options to the user default values. PPC-415W/421W User Manual... - Page 56 PPC-415W/421W User Manual...
-
Page 57: Pci/Pci-E
Appendix PCI/PCI-E... -
Page 58: Pci/Pci-E
The default is PCIe x 4 slot and the optional 989KB01001E PCIe x 1 to PCI slot is shown below. Note! The PPC-415W panel PCs support riser cards with maximum dimension of 192 x 107 mm. The PPC-421W panel PCs support riser cards with maximum dimension of 200.0*111 mm. - Page 59 UNO-137 V2 User Manual...
- Page 60 No part of this publication may be reproduced in any form or by any means, such as electronically, by photocopying, recording, or otherwise, without prior written permission from the publisher. All brand and product names are trademarks or registered trademarks of their respective companies. © Advantech Co., Ltd. 2023...
Need help?
Do you have a question about the PPC-415W and is the answer not in the manual?
Questions and answers