
Related Manuals for Advantech PPC-3210SW


Summary of Contents for Advantech PPC-3210SW
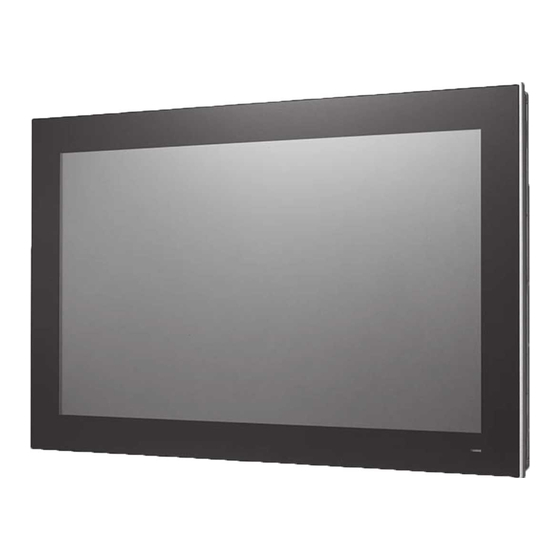
- Page 1 User Manual PPC-3100S/3120S/3150S/ 3210SW Intel® Celeron® N2930 Panel PC with 10.4''/12.1''/15''/21.5" Color TFT LCD Display...
- Page 2 No part of this manual may be reproduced, copied, translated, or transmitted in any form or by any means without the prior written permission of Advantech Co., Ltd. The information provided in this manual is intended to be accurate and reliable.
- Page 3 This product has passed the CE test for environmental specifications when shielded cables are used for external wiring. We recommend using shielded cables. Such cables is available from Advantech. Please contact your local supplier for ordering information. This product has passed the CE test for environmental specifications. Test conditions for passing included the equipment being operated within an industrial enclosure.
- Page 4 In compliance with IEC 704-1:1982 specifications, the sound pressure level at the operator’s position does not exceed 70 dB (A). DISCLAIMER: These instructions are provided according to IEC 704-1. Advantech disclaims all responsibility for the accuracy of any statements contained herein.
- Page 5 Safety Precaution - Static Electricity Follow the simple precautions below to protect yourself from harm and the products from damage. To avoid electrical shock, always disconnect the power from the PC chassis before manual handling. Do not touch any components on the CPU card or other cards while the equipment is powered on.
- Page 6 Revision Date Version Description/Change May 2016 Initial Feb 2017 PPC-3150S specifications added April 2017 PPC-3100S-PBE specifications added August 2017 PPC-3210SW specifications added PPC-3100S/3120S/3150S/3210SW User Manual...
-
Page 7: Table Of Contents
Figure 1.4 Projected capacitive model panel underside ....4 Dimensions ....................4 Figure 1.5 PPC-3100S dimensions ..........4 Figure 1.6 PPC-3120S dimensions ..........4 Figure 1.7 PPC-3150S dimensions ..........5 Figure 1.8 PPC-3210SW dimensions .......... 5 Specifications .................... 5 1.7.1 Specifications Comparison ............5 Ordering Information ................. 7... - Page 8 Figure 2.26PPC-3100S cutout dimensions ........ 22 Figure 2.27PPC-3120S cutout dimensions ........ 23 Figure 2.28PPC-3150S cutout dimensions ........ 23 Figure 2.29 PPC-3210SW cutout dimensions ......24 Figure 2.30Hook brackets for panel mounting......24 Figure 2.31Hook brackets location ..........25 Figure 2.32Fasten the hook bracket........... 25 Figure 2.33Panel mount rear view..........
- Page 9 Appendix C E-Eye Function ........53 E-Eye Function..................54 Table C.1: E-Eye Monitoring Function List......... 54 Appendix D Watchdog Timer Programming Example..........55 Watchdog Timer Programming Example ..........56 PPC-3100S/3120S/3150S/3210SW...
- Page 10 PPC-3100S/3120S/3150S/3210SW User Manual...
-
Page 11: Chapter 1 General Information
Chapter General Information This chapter provides general information regarding PPC-3100S/ 3120S/3150S/3210SW. Introduction Specifications Dimensions... -
Page 12: Introduction
Introduction Advantech’s PPC-3100S/3120S/3150S/3210SW is a fanless ultra-slim panel PC equipped with an industrial-grade TFT LCD and low-power Intel® Celeron® N2930, 1.86 GHz processor. PPC-3100S/3120S/3150S/3210SW provides high-performance computing in a compact embedded system. Designed for high durability, PPC-3100S/3120S/3150S/3210SW features a true-flat 5-wire resistive or projected capacitive touchscreen, IP65-rated front panel, and die cast aluminum alloy enclosure. -
Page 13: Rear Panel
Rear Panel The PPC-3100S/3120S/3150S/3210SW rear panel features four VESA mounting (75 x 75 mm) holes and an E-Eye LED display located below the side of product label (Figure 1.2). Figure 1.2 PPC-3XX0S rear panel Panel Underside The system I/O located at the panel underside (Figures 1.3 and 1.4) are listed below. ... -
Page 14: Dimensions
Figure 1.4 Projected capacitive model panel underside Dimensions Figure 1.5 PPC-3100S dimensions Figure 1.6 PPC-3120S dimensions PPC-3100S/3120S/3150S/3210SW User Manual... -
Page 15: Specifications
Figure 1.7 PPC-3150S dimensions Figure 1.8 PPC-3210SW dimensions Specifications 1.7.1 Specifications Comparison PPC-3100S- PPC-3100S- PPC-3120S PPC-3150S PPC-3210SW LCD Size 10.4” 10.4” 12.1” 15'' 21.5" Display Type TFT LCD TFT LCD TFT LCD TFT LCD TFT LCD Resolution 800 x 600... - Page 16 Backlight 30,000 hrs 30,000 hrs 30,000 hrs 50,000 hrs 50,000 hrs Lifetime Projected capac- Projected capac- Touchscreen 5-wire resistive itive 5-point 5-wire resistive 5-wire resistive itive 10-point Type multi-touch multi-touch Resolution 4096 x 4096 2048 x 2048 4096 x 4096 2048 x 2048 2048 x 2048 Light...
-
Page 17: Ordering Information
Part Number Description Image PPC-3100S-RAE PPC-3100S-PBE Panel PC with Intel® Celeron® N2930 PPC-3120S-RAE processor PPC-3150S-RAE PPC-3210SW-PAE PPC-3100S-HDDE Bracket for 2.5" SSD/HDD installation Power adapter 100 ~ 240 V , 90 W, 96PSA-A90W19OT-1 19V with PFC PPC-WLAN-B1E Wi-Fi module with antenna... - Page 18 PPC-3100S/3120S/3150S/3210SW User Manual...
-
Page 19: Chapter 2 System Installation And Setup
Chapter System Installation and Setup Quick System Tour Memory Card Installation HDD Installation mSATA Installation Wireless LAN Card Installation Mounting the System... -
Page 20: Quick System Tour
Quick System Tour Before setting up the panel PC, take a moment to identify the locations of the device controls, drives, connectors, and ports (as shown in Figure 2.3). When placed upright, the PPC-3100S/3120S/3150S/3210SW front panel should appear as shown in Figure 2.1. Figure 2.1 Panel PC front view Figure 2.2 Panel PC rear view PPC-3100S/3120S/3150S/3210SW User Manual... -
Page 21: Installation Procedures
Figure 2.3 Panel PC underside with I/O A: Power button E: 2 x Gigabit Ethernet ports B: DC In F: 1 x USB 3.0 and 1 x USB 2.0 C: COM1(RS-232) G: 1 x USB 2.0 (N/A for projected capacitive models) D: COM2(RS-232/422/485) H: E-Eye display Installation Procedures... - Page 22 Figure 2.5 Disconnect E-Eye display cable from the main board Insert the memory card into the corresponding slot on the main board (see the area marked in red in Figure 2.6). Then place the memory thermal pad provided in the accessory box on top of the memory card (Figure 2.7). Figure 2.6 Memory card installation PPC-3100S/3120S/3150S/3210SW User Manual...
-
Page 23: Hdd Installation
Thermal pad Figure 2.7 Thermal pad placed on the memory card Warning! Ensure that the thermal pad (provided in the accessory box) is placed on top of the memory card, as shown in Figure 2.7. 2.2.2 HDD Installation Remove the four retention screws on the HDD bracket (Figures 2.8 and 2.9). Figure 2.8 Retention screws on HDD bracket PPC-3100S/3120S/3150S/3210SW... - Page 24 Figure 2.9 HDD module bracket Connect the SATA cable provided in the accessory box to the SATA HDD mod- ule (Figure 2.10). Figure 2.10 SATA cable connected to SATA HDD PPC-3100S/3120S/3150S/3210SW User Manual...
- Page 25 Using the four screws provided in the accessory box, affix the SATA HDD mod- ule to the HDD bracket (Figure 2.11). Figure 2.11 Secure SATA HDD with screws Affix the SATA HDD bracket to the main board. Tie the SATA power cable in place and then plug the cable into the corresponding connector on the mother- board (Figure 2.12).
-
Page 26: Msata Installation
2.2.3 mSATA Installation Insert the mSATA card into the socket. Secure the card in place using two screws provided in the accessory box (Figure 2.13). Figure 2.13 mSATA module installation 2.2.4 Wireless LAN Card Installation 2.2.4.1 Full-Size Mini PCIe Installation Insert the full-size mini PCIe card into the socket. - Page 27 2.2.4.2 Half-Size Mini PCIe Installation Retrieve the hexagonal screw provided in the accessory box. Align the screw with the notch on the PCB and secure in place (Figure 2.15). Figure 2.15 Hexagonal screw location Insert the half-size mini PCIe card into the socket at a 45-degree angle. Secure the card in place using a screw provided in the accessory box.
- Page 28 Connect the antenna cables. Fix the cables on the brackets while noting the cable routing (Figures 2.17 and 2.18). Figure 2.17 Full-size mini PCIe LAN antenna cables Figure 2.18 Half-size mini PCIe LAN antenna cables Remove the two plugs located at the top of the rear cover (Figure 2.19). Figure 2.19 Removing plugs for the antennae PPC-3100S/3120S/3150S/3210SW User Manual...
- Page 29 Connect the cable to the main board and secure the rear cover (Figure 2.20) Figure 2.20 Replacing the rear cover Install the external antennae (Figure 2.21). Figure 2.21 Location of external antennae PPC-3100S/3120S/3150S/3210SW...
-
Page 30: Mounting The System
Mounting the System Warning! When mounting the panel PC, more than one person should perform the installation to prevent accidental damage to the panel or personal injury. The panel PC supports various mounting options, as listed below. Wall mounting ... - Page 31 Insert four M4 screws into the holes on the panel PC and tighten them to secure the bracket to the rear panel. Figure 2.23 Screw locations on the rear panel Warning! Ensure that the thread depth of the screws on the rear panel does not exceed 4 mm.
-
Page 32: Panel Mounting
Secure the panel PC in place by tightening screws in the wall mount bracket (Figure 2.25). Figure 2.25 Securing the panel PC 2.3.2 Panel Mounting To mount the flat bezel panel PC into a panel, follow the steps below. Cut out a panel corresponding to the size shown in Figures 2.26, 2.27, and 2.28. (unit: mm). - Page 33 Figure 2.27 PPC-3120S cutout dimensions CUTOUT Figure 2.28 PPC-3150S cutout dimensions PPC-3100S/3120S/3150S/3210SW...
- Page 34 550.00 CUTOUT Figure 2.29 PPC-3210SW cutout dimensions Install the panel PC in the cabinet and retrieve eight hook brackets from the accessory box (Figure 2.29). Figure 2.30 Hook brackets for panel mounting PPC-3100S/3120S/3150S/3210SW User Manual...
- Page 35 Insert the hook brackets into the holes following the direction of the arrows shown in Figure 2.30 and hang the panel PC. Figure 2.31 Hook brackets location Tighten the screws to affix the panel PC in place (Figure 2.31). Figure 2.32 Fasten the hook bracket Figure 2.33 Panel mount rear view PPC-3100S/3120S/3150S/3210SW...
-
Page 36: Arm Mounting
2.3.3 Arm Mounting PPC-3100S/3120S/3150S/3210SW can be mounted on a VESA-compliant arm mount with a 75 mm interface pad. To affix the panel PC to an arm mount, follow the steps below. Refer to the installation instruction of the mounting arm to correctly mount the arm onto the surface as a base. -
Page 37: Stand Mounting
2.3.4 Stand Mounting Before stand mounting, check that the product was shipped with the following items: To mount the panel PC onto the stand, follow the steps below Use four M4 x 8L screws to affix the VESA bracket to the panel PC. Users can choose between a 75 x 75 mm or 100 x 100 mm VESA mount according to their requirements. - Page 38 Use four M4 x 8L screws to secure the base plate to the mount stand (Figure 2.35). Figure 2.36 Securing the VESA mount base Use four M4 x 6L screws to secure the mount stand to the VESA mount bracket (Figure 2.36).
- Page 39 Use one M4 x 5L screw to secure the stand mount hinge cover (Figure 2.37). Figure 2.38 Securing the stand mount hinge cover Figure 2.39 Completed stand mount PPC-3100S/3120S/3150S/3210SW...
- Page 40 PPC-3100S/3120S/3150S/3210SW User Manual...
-
Page 41: Jumper Settings
Chapter Jumper Settings Motherboard Layout Jumpers and Connectors External COM Ports and Pin Definitions... -
Page 42: Motherboard Layout
Motherboard Layout A diagram of the motherboard layout showing the locations of the internal peripheral connectors is provided below (Figure 3.1). The internal peripheral connectors are accessible when the motherboard is outside of the chassis. Figure 3.1 Motherboard layout diagram Internal Jumpers and Connectors The internal jumpers and connectors on the motherboard, and their pinouts, are listed in the table below. -
Page 43: Lvds Power Select Jumper
3.2.1 LVDS Power Select Jumper Icon LVDS Power Select Jumper (1-2) (2-3) 3.3V Default* 3.2.2 LVDS PWM Power Select Jumper Icon LVDS PWM Power Select Jumper (1-2) (2-3) 3.3V Default* 3.2.3 LVDS Enable Power Select Jumper Icon LVDS Enable Power Select Jumper (1-2) (2-3) 3.3V... -
Page 44: Com1 Pin 9 Power Select
3.2.5 COM1 Pin 9 Power Select CN17 Icon COM1 Pin 9 Power Select (1-2) COM1 RI Default* (2-3) COM1 Pin 9 5V (4-5) COM1 Pin 9 12V 3.2.6 ATX/AT Select Icon ATX/AT Select (1-2) (2-3) Default* External COM Ports and Pin Definitions Figure 3.2 Location of COM1 and COM2 ports COM1: RS-232 COM1 Pin 9 is set as “RI”... - Page 45 Note! COM2 does not support Ring function. COM1 COM2 RS-232 RS-232 RS-422 RS-485 DATA- DATA+ Ring or 5V/12V output RING PPC-3100S/3120S/3150S/3210SW...
- Page 46 PPC-3100S/3120S/3150S/3210SW User Manual...
-
Page 47: Software Setup
Chapter Software Setup Driver Installation BIOS Setup Program... -
Page 48: Driver Installation
Driver Installation Before installing software on the panel PC, install the corresponding drivers to ensure full functionality. All drivers can be downloaded from the Advantech website http://www.advantech.com Note! Before installing Windows 8.x or Android OS, adjust the BIOS settings as explained in Section 4.2.5 “OS Selection”. Otherwise, OS installation failure will occur. -
Page 49: Entering Bios Setup
4.2.2 Entering BIOS Setup After powering on the system, press the <Del> button to access the BIOS Setup screen. After adjusting the settings, press <F4> to save and exit; otherwise, the settings will not be saved in the BIOS. 4.2.3 Adjustment of LCD Brightness Click on the “North Bridge”... - Page 50 Click on the “Intel IGD Configuration” option. Click on the “Brightness Manual Control” option to choose between six bright- ness levels. PPC-3100S/3120S/3150S/3210SW User Manual...
-
Page 51: Com2 Mode Selection (Rs232/Rs422/Rs485)
4.2.4 COM2 Mode Selection (RS232/RS422/RS485) Click on the “NCT5523D Super IO Configuration” option in the “Advanced” tab. Click on the “Serial Port 2 Configuration” option. PPC-3100S/3120S/3150S/3210SW... - Page 52 Click on the “Serial Port 2 Mode” option to set the COM2 operation mode as RS232, RS422, or RS485. If the COM2 mode is set as “RS485”, the “Auto Flow Control” option can be enabled or disabled. PPC-3100S/3120S/3150S/3210SW User Manual...
-
Page 53: Os Selection
If the COM2 mode is set as “RS485”, the “Serial Port2 Terminal” option can be enabled or disabled. 4.2.5 OS Selection Click on the “South Bridge” option in the “Chipset” tab. Click on the “OS Selection” option to configure the system OS settings Note! The default “OS Selection”... -
Page 54: Bios At And Atx Setup
4.2.6 BIOS AT and ATX Setup Click on the “South Bridge” option in the “Chipset” tab. Click on “Restore AC Power Loss” and set the “Power On” option to AT and the “Power Off” option to ATX. PPC-3100S/3120S/3150S/3210SW User Manual... -
Page 55: Wake-On-Lan
4.2.7 Wake-on-LAN Click on the “South Bridge” option in the “Chipset” tab. PPC-3100S/3120S/3150S/3210SW... -
Page 56: Sata Mode Selection
Set the “Wake on Function” option to Enabled. 4.2.8 SATA Mode Selection Click on the “IDE Configuration” option in the “Advanced” tab. PPC-3100S/3120S/3150S/3210SW User Manual... -
Page 57: Boot Options
Click “SATA Mode” to adjust the settings. 4.2.9 Boot Options Click on the “CSM Configuration” option in the “Advanced” tab. PPC-3100S/3120S/3150S/3210SW... - Page 58 Click on “Boot Option Filter” to adjust the settings. Note! The default Boot Option Filter setting is “Legacy only”. If this is changed to “UEFI only”, the system can only support Windows 7 (64 bit) or 8.x(64 bit) OS. If UEFI 32-bit OS is required, update the BIOS. PPC-3100S/3120S/3150S/3210SW User Manual...
-
Page 59: Bsmi Rohs
Appendix BSMI RoHS... -
Page 60: Bsmi Rohs
BSMI RoHS 設備名稱:電腦 型號 (型式) :PPC-3100S/3120S/3150S/3210SW Equipment name Type designation (Type) 限用物質及其化學符號 Restricted substances and its chemical symbols 多溴聯苯 六價鉻 多溴二苯醚 單元 Unit Polybromina 鎘 Hexavalent Polybrominate 鉛 Lead 汞 Mercury Cadmium chromium d diphenyl (Pb) (Hg) (Cd) biphenyls ethers (PBDE) (PBB) 液晶面板... -
Page 61: Appendix B China Rohs
Appendix China RoHS... -
Page 62: China Rohs
China RoHS Dear Customer, Thank you for choosing an Advantech product. In compliance with the China RoHS standard SJ/T11364, “Marking for the Restriction of the Use of Hazardous Sub- stances in Electrical and Electronic Products”, all hazardous substances present in the product are disclosed below. - Page 63 Appendix E-Eye Function...
- Page 64 E-Eye Function Table C.1: E-Eye Monitoring Function List Failure Error Item Function Checking/Repair Suggestion Code Description Check the power input Main board start- Check that no cable or system short Main board up error circuits have occurred Send the main board for repair Check the memory type is correct and verify installation Memory...
- Page 65 Appendix Watchdog Timer Programming Example...
- Page 66 Watchdog Timer Programming Example The watchdog timer is provided to ensure that standalone systems can always recover from catastrophic CPU failures and crashes. Such events may have been caused by external EMI or a software bug. If the CPU is malfunctioning, the watch- dog timer performs a hardware reset to return the system to a previous state.
- Page 67 ;----------------------------------------------------------------------------- ;Set WDT timeout value ;----------------------------------------------------------------------------- MOV DX, 2EH MOV AL, F1H OUT DX, AL MOV DX, 2FH MOV AL, 05H OUT DX, AL; set timeout value as 5s; 00 = timeout disabled ;----------------------------------------------- ; Exit the Extended Function Mode ;---------------------------------------------- MOV DX, 2EH MOV AL, AAH...
- Page 68 No part of this publication may be reproduced in any form or by any means, such as electronically, by photocopying, recording, or otherwise, without prior written permission from the publisher. All brand and product names are trademarks or registered trademarks of their respective companies. © Advantech Co., Ltd. 2017...
Need help?
Do you have a question about the PPC-3210SW and is the answer not in the manual?
Questions and answers