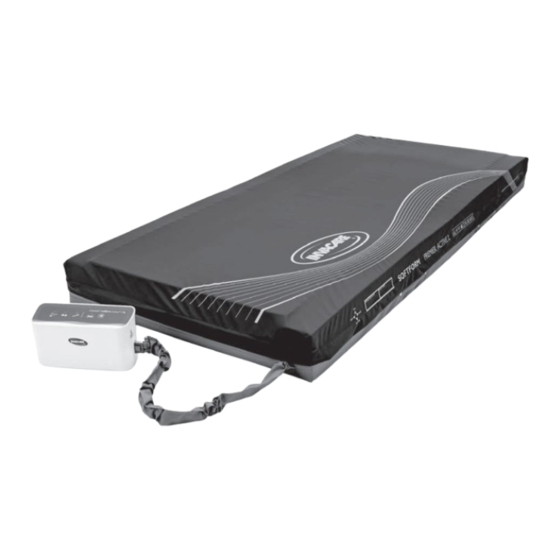
Invacare Softform Active 2 Rx Service Manual
Powered hybrid support surface
Hide thumbs
Also See for Softform Active 2 Rx:
- User manual (24 pages) ,
- Service manual (20 pages) ,
- User manual (160 pages)

Subscribe to Our Youtube Channel
Related Manuals for Invacare Softform Active 2 Rx


Summary of Contents for Invacare Softform Active 2 Rx
- Page 1 Invacare® Softform Active® 2 Rx en Powered Hybrid Support Surface Service Manual PROVIDER: Keep this manual. The procedures in this manual MUST be performed by a qualified technician.
-
Page 2: Table Of Contents
All rights reserved. Republication, duplication or modification in whole or in part is prohibited without prior written permission from Invacare. Trademarks are identified by ™ and ®. All trademarks are owned by or licensed to Invacare Corporation or its subsidiaries unless otherwise noted. -
Page 3: 1 General
Invacare® Softform Active® 2 Rx 1 General 1.3 Preliminary System Check 1.1 Introduction Before commencing any service procedure, the following preliminary verifications should be This document contains important information about assembly, completed to ensure the system fault or failure is not adjustment and advanced maintenance of the product. To due to a user oversight. ensure safety when handling the product, read this document 1. Confirm the mains cable is firmly attached and the system and the user manual carefully and follow the safety instructions. is connected to a working power source. 2. Make sure the handle is secured to the control unit. All Find the user manual on Invacare’s website or contact your three connectors should be firmly inserted. Invacare representative. See addresses at the end of this 3. Remove the mattress top cover. Ensure the document. cardiopulmonary resuscitation (CPR) label is firmly Invacare reserves the right to alter product specifications attached. without further notice. 4. Check that each air cell and side bolster is firmly attached Before reading this document, make sure you have the latest to the internal air tubes. version. You find the latest version as a PDF on the Invacare Once the preliminary system check is complete, proceed with website. the service and repair as outlined in the following procedures. -
Page 4: 2 Safety
— Additional manuals can be ordered from Invacare. See addresses at the end of this document. NOTICE! Replacement parts for this product family are only available as a kit. Always use the complete new kit when replacing a part. — Spare parts kits can be ordered from Invacare. Refer to your local Invacare website to access the electronic spare parts catalogue (ESPC). NOTICE! Refer to the user manual of this product for information on: — Technical Data — Product Components —... -
Page 5: 3 Digital Control Unit
Invacare® Softform Active® 2 Rx 3 Digital Control Unit International Electrotechnical Commission Standards 3.2 Circuit Board (PCB) Overview 3.1 Components' Overview User's Interface Fig. 3-3 Fig. Power switch connector Micro switch connector 6-pin user's interface connector Compressor connector Motor connector Fuses connector Top Housing User's interface circuit board (UIPCB) Power (on/off) switch Compressor Mains socket Bottom housing Circuit board (PCB) Air tube connector Motor ... -
Page 6: 4 Service | Digital Control Unit
4 Service | Digital Control Unit 4 Service | Digital Control Unit 4.1 Replacing the Front Housing Refers to spare parts kit SP1633237 NOTICE! Risk of damaging the PCB by electro-static discharge Handle PCBs only in Electrostatic Protected Areas PH1 Philips Key 14 mm Open-ended wrench 1. Switch off the control unit and disconnect from mains supply. 2. Turn the unit upside down. 3. Loosen and remove the four screws A. 4. Remove the bottom housing. 5. Loosen and remove the two screws B fixing the motor to the front housing. 6. Loosen and remove the three screws C fixing the compressor to the front housing. Fig. 4-3 60129676-D... - Page 7 Invacare® Softform Active® 2 Rx 7. Loosen and remove the four screws D fixing the PCB to the front housing. 8. Unplug all wires. Fig. 4-4 9. Unplug the four wires - brown E, black F, red Gand blue H - connected to the fuse holders I, located on the front housing's bottom right side. NOTICE! Risk of malfunction or damage to the Control Unit Ensure the brown E, black F, r ed G and blue H wires are plugged back into their original positions. 10. Using the indicated wrench, loosen and remove the fuse holders I from the front housing. 11. Remove the digital control's label from the front housing. 12. Loosen and remove the seven screws J from the front housing. 13. Remove the User's interface from the front housing. Discard the defective front housing. 14. Place the User's interface in the new front housing. Position and tighten the provided screws. 15. Place the unit with the Invacare logo facing forward and install the new digital control's stick-on label as illustrated.
-
Page 8: Replacing The Mains Cable Socket
4 Service | Digital Control Unit 4.2 Replacing the Mains Cable Socket Refers to spare parts kit SP1633237 NOTICE! Risk of damaging the PCB by electro-static discharge Handle PCBs only in Electrostatic Protected Areas PH1 Philips Key 1. Switch off the control unit and disconnect from mains supply. 2. Remove the bottom housing (see 4.1 Replacing the Front Housing, page 6, step 4). 3. Unplug the brown A and blue B wires from the defective mains socket. NOTICE! Risk of malfunction or damage to the Control Unit Ensure the brown A and blue B wires are plugged back into their original positions. 4. Plug the brown A and blue B wires to the new mains socket C, ensuring they are installed in the original position. Slide the socket into its slit. 5. Reinstall the bottom housing. 4.3 Replacing the User Interface Refers to spare parts kit SP1633237 NOTICE! -
Page 9: Replacing The Compressor
Invacare® Softform Active® 2 Rx 4. Unplug wires A, silicone tube B, and wires C from the UIPCB. 5. Loosen and remove the seven screws fixing the interface label to the front housing (see 4.1 Replacing the Front Housing, page 6, step 12). 6. Remove the non-functioning UIPCB from the housing. 7. Install the new User's interface, which includes a new - already attached - UIPCB, on the front housing. 8. Position and tighten the provided screws. 9. Plug wires A, silicone tube B, and wires C into the new UIPCB. 10. Reinstall the bottom housing (see 4.1 Replacing the Front Housing, page 6). 11. Place the unit with the Invacare logo facing forward and install the new digital control's stick-on label as illustrated. 4.4 Replacing the Compressor... -
Page 10: Replacing The Pcb
4 Service | Digital Control Unit 4. Carefully unplug the silicone tube B and cut the cable tie C using the wire clippers. 5. Unplug the compressor wire D from the PCB. 6. Remove the non-functioning compressor from the housing and install the new one. 7. Position and tighten the provided screws 8. Plug the silicone tube to the compressor. 9. Plug the mains wire to the PCB. 10. Secure the wires with the provided cable ties. 11. Cut the excess cable tie length. 12. Reinstall the bottom housing. 4.5 Replacing the PCB Refers to spare parts kits: SP1633122 (240V) / SP1633116 (110V) NOTICE!. Risk of damaging the PCB by electro-static discharge Handle PCBs only in Electrostatic Protected Areas PH1 Philips Key 1. - Page 11 Invacare® Softform Active® 2 Rx 5. Unplug the black and green wires D from the microswitch. 6. Loosen and remove the four screws fixing the P CB to the front housing. 7. Unplug the yellow motor wire E from the PCB. 8. Slide the PCB from under the microswitch and remove it from the housing. Unplug the five remaining wires from the PCB. Discard the non-functioning PCB. 9. Connect the five cables to the new PCB, in their original position: g reen and black power switch wire F, green and F G H black micro switch wire G, 6-pin user interface wire H, red compressor wires I and red and black fuse holder wire J. 10. Install the new PCB on the front housing, ensuring the yellow motor wire E goes under it. 11. Install the provided screws and tighten them. 12. Plug the yellow motor wire to its original position. 13. Plug the microswitch wires (see step 5). 14. Place the longer silicone tube (the one with the T-valve) counterclockwise around the motor.
- Page 12 4 Service | Digital Control Unit 15. Pick the longer tube connected to the CPR connector , put it around the motor, clockwise, and plug it back to the connector, threading it under the microswitch wires D. 16. Install the CPR connector in its place, making sure the longer silicone tube is underneath. 17. Slide the T-valve underneath the microswitch, connect the wider tube to the compressor and the thinner one to the user interface, making sure it goes under all the other tubes. 18. Reinstall the bottom housing. 60129676-D...
-
Page 13: Replacing The Cpr Connector
Invacare® Softform Active® 2 Rx 4.6 Replacing the CPR Connector Refers to spare parts kit SP1633238 NOTICE! Risk of damaging the PCB by electro-static discharge Handle PCBs only in Electrostatic Protected Areas PH1 Philips Key 1. Switch off the control unit and disconnect from mains supply. 2. Remove the bottom housing (see 4.1 Replacing the Front Housing, page 6, step 4). 3. Unplug both silicone tubes A from the connector. 4. Discard the defective connector. 5. Reinstall the silicone tubes to the new connector and slide it into the slit. Ensure no tube is kinked or clamped. 6. Reinstall the bottom housing. 4.7 Replacing the Tubing Set Refers to spare parts kit SP1633112 NOTICE! Risk of damaging the PCB by electro-static discharge... -
Page 14: Replacing The Motor
4 Service | Digital Control Unit 4.8 Replacing the Motor Refers to spare parts kit SP1633126 (240V) / SP1633120 (110V) NOTICE! Risk of damaging the PCB by electro-static discharge Handle PCBs only in Electrostatic Protected Areas PH1 Philips Key 1. Switch off the control unit and disconnect from mains supply. 2. Remove the bottom housing (see 4.1 Replacing the Front Housing, page 6, step 4). 3. Unplug the three silicone tubes A connected to the motor. 4. Unplug the black B and green C wires from the microswitch. NOTICE! Risk of malfunction or damage to the Control Unit Ensure the black B and green C wires are plugged back into their original positions. -
Page 15: Replacing The Power Switch
Invacare® Softform Active® 2 Rx 4.9 Replacing the Power Switch Refers to spare parts kit SP1633123 (240V) / SP1633117 (110V) NOTICE! Risk of damaging the PCB by electro-static discharge Handle PCBs only in Electrostatic Protected Areas PH1 Philips Key 1. Switch off the control unit and disconnect from mains supply. 2. Remove the bottom housing (see 4.1 Replacing the Front Housing, page 6, step 4). 3. Unplug the red A, green B and two black C wires from the defective power switch. Discard it. NOTICE! Risk of malfunction or damage to the Control Unit Ensure the red A, green B and two black C wires are plugged back into their original positions. 4. Plug the red A, green B and two black C wires back to their original positions on the new power switch. -
Page 16: Replacing The Bottom Housing
4 Service | Digital Control Unit 4.10 Replacing the Bottom Housing Refers to spare parts kit SP1633246 (240V) / SP1634532 (110V) NOTICE! Risk of damaging the PCB by electro-static discharge Handle PCBs only in Electrostatic Protected Areas PH1 Philips Key 1. Switch off the control unit and disconnect from mains supply. 2. Remove the bottom housing (see 4.1 Replacing the Front Housing, page 6, step 4). 3. Ensure the serial number traceability by c arefully removing the serial label from the o ld bottom housing and placing it in the replacement one. Install the blue label on top ... -
Page 17: 5 Service | Mattress
Invacare® Softform Active® 2 Rx 5 Service | Mattress 5.1 Replacing the CPR Connector Refers to spare parts kit SP1633237 1. Switch off the control unit and disconnect from mains supply. 2. Open the zipper of the mattress and remove the top cover. 3. Remove the orange castellated foam insert. 4. Find the CPR connector at the mattress foot end. Unplug it at the tube's extremities A. 5. Slide the defective connector off its sleeve and replace it with the new one. 6. Plug the new connector onto the tube extremities. 7. Place the foam insert back on top of the mattress and close the mattress cover's zipper. 5.2 Replacing the Air Cell Set Refers to spare parts kit SP1627630 / SP1629718 / SP1629719 1. - Page 18 USA: Invacare New Zealand Invacare Australia Pty. Ltd. Invacare Corportation Ltd4 Westfield Place Unit 18/12 Stanton Road, Seven Hills One Invacare Way NSW 2147, Australia Mt Wellington Elyria, Ohio USA 1 060, New Zealand Phone: 1800 460 460 44035 Fax: 1800 814 367 800-333-6900 Phone: 0800 468 222 orders@invacare.com.au Fax: 0800 807 788 www.invacare.com www.invacare.com.au sales@invacare.co.nz www.invacare.co.nz Invacare UK Operations Limited Invacare Portugal, Lda Unit 4, Pencoed Technology Park, Pencoed Rua Estrada Velha 949 Bridgend CF35 5AQ 4465-784 Leça do Balio Portugal 60129676-D 2024-02-09 Making Life’s Experiences Possible®...
Need help?
Do you have a question about the Softform Active 2 Rx and is the answer not in the manual?
Questions and answers