Table of Contents
Advertisement
Quick Links
Advertisement
Table of Contents

Subscribe to Our Youtube Channel
Related Manuals for Digitus DN-95359


Summary of Contents for Digitus DN-95359
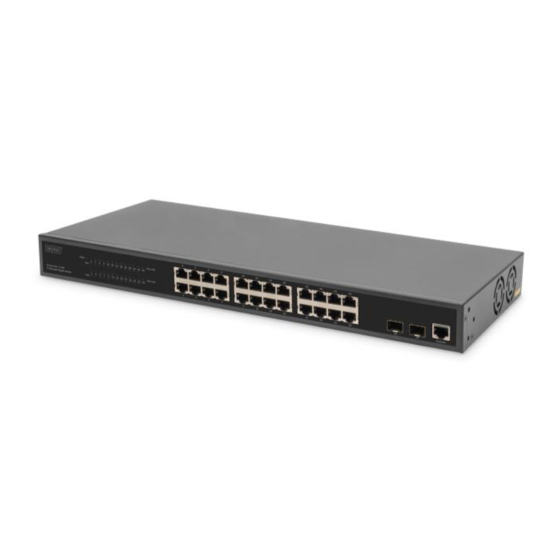
- Page 1 24 Port L2 Managed Gigabit Ethernet PoE Switch Web-Manual DN-95359...
-
Page 2: Table Of Contents
About guide ..............................2 Terminology ..............................2 Copyright and statement ..........................2 Product’s introduction .......................... 2 1.1. Front panel ............................2 1.2. Real panel ............................3 Hardware installation ..........................3 2.1. Open a seal ............................3 2.2. Switch installation ..........................3 2.2.1. -
Page 3: About Guide
About guide This guide provides instructions to install the Switch. Note: The model you have purchased may appear slightly different from the illustrations shown in the document. Refer to the Product Instruction and Technical Specification sections for detailed information about your switch, its components, network connections, and technical specifications. Terminology Note: indicates important information that helps a better use of the device. -
Page 4: Real Panel
1.2. Real panel Power input: Supports input voltages 100-240VAC, 50/60Hz. Switch: turn on the switch after inserting the power cord, “I” means to turn on, “O” means closing. Grounding: use specialized ground lead connect 2. Hardware installation This chapter provides unpacking and installation information for the switch. 2.1. -
Page 5: Desktop Or Shelf Installation
2.2.1. Desktop or Shelf Installation When installing the switch on a desktop or shelf, the rubber feet included with the device must be attached on the bottom at each corner of the device's base. Allow enough ventilation space between the device and the objects around it. 2.2.2. -
Page 6: Plugging In The Ac Power Cord
2.3. Plugging in the AC Power Cord You can connect AC power supply cord to switch back and the other side connect the power outlet. (Power outlet might as well grounding and support over voltage protection) Warning: Do not turn on the power switch before power cables are connected. Power surge may cause damage to the Switch. -
Page 7: Console Port Interface
2.4. Console Port Interface The smart switch has a monitor port (Console port). Rate 9600bps, standard RJ45 plug. Use a dedicated monitoring cable to lead the port to the PC serial port connection, as follows: The RJ45 connector used by the Console port is shown in the figure below, and the RJ45 plug corresponds to the RJ45 socket, from left to right numbered from 1 to 8. -
Page 8: Getting Started
3. Getting Started This chapter introduces the management interface of switch. 3.1 Using Web-based Management After a successful physical installation, you can configure the Switch, monitor the network status, and display statistics using a web browser. 3.1.1 Supported Web Browsers The embedded Web-based Management currently supports the following web browsers: ... -
Page 9: Web
Enter the IP address in the web browser NOTE: The switch's factory default IP address is 192.168.0.1 with a subnet mask of 255.255.255.0 When the following logon dialog box appears, enter the password then click OK. By default, the username is admin and the password is admin. Logon Dialog Box 3.2 WEB page elements WEB page is mainly composed of three parts: title page, navigation tree page and main page... -
Page 10: The Structure Of Navigation Tree
3.3 The structure of Navigation tree Navigation tree is located in the lower left of each page. Using the tree display nodes of the WEB page, users can easily find the page you want to manage the WEB. According to a different web page, functionality can be divided into different groups, each including one or more pages. -
Page 11: Entry Field
3.6 Entry Field Some pages of the most left column in the table have an entry field, through the field can access different rows in the table. When you choose a line for the filed, which lines the corresponding information is displayed in the first line, then only the line can be edited, the line also known as the activities line. -
Page 12: Web
4. WEB page introduction Switch WEB pages are organized into groups, each including one or more of the WEB pages. The following are introduced one by one on each page. 4.1. Login dialog Box WEB browsing session of the login page The logon dialog box will be displayed while the user login the web page at the first time. -
Page 13: System Configuration
4.3. System Configuration: (1)Basic information page It is the basic information of configuration page; users can configure the basic information for the switch. System Description display the description of the relevant parameters of system. System descriptor ID display system in the network identity management. The system version number is displayed the current software version number of switches. - Page 14 (2)Serial port information page It is a serial port configuration page; the page displays serial baud rate and other related information. When the host through the serial port terminals (such as Windows, HyperTerminal) to the management of switches, serial console on the COM port configuration must be consistent with this page information.
- Page 15 User’s management page (4)Connection Management: This page is used to configure HTTP, SNMP and Telnet security. Service Type Offers HTTP, SNMP and Telnet from the dropdown list Management State Offers Enable or Disable for this service type ACL group Gives the option to enter a pre-existing ACL group between 1 and 99 Security management page...
- Page 16 (5) SNTP Configuration This page is used to configure and display SNTP protocol. Server IP Address 1: One of the SNTP server address. Server IP Address 2: One of the SNTP server address. Server IP Address 3: One of the SNTP server address. Time Interval: Set the SNTP synchronization time interval in seconds.
- Page 17 (7)Configuration page It is profile configuration page. This page allows users to view the system's initial configuration. The initial configuration is actually the configuration file in the FLASH, when the configuration file does not exist in FLASH, the system starts using the default configuration. Delete key to delete the configuration file in the FLASH.
- Page 18 (9)File upload page Through this page a user can upload a configuration file and mapping files to the switch. Click the Browse button to select the upload configuration file or image file in the directory path on the PC. Click Upload button upload a configuration file or image file, configuration file extension must be *. cfg, image file must be provided by the manufacturer and the file name extension must be *.
-
Page 19: Port Configuration
4.4. Port Configuration (1)Port configuration / port -display page It is the port configuration / port -display page. Users can enable or disable the port to the page, set the port speed, or view all ports of the basic information. To set a specific port, users need to select the appropriate port name on port drop-down menu. - Page 20 (3)Flow control page Users can enable and disable each port’s send and receive flow control through this page. Flow control by sending the side of the drop-down on or off to open or close the sending side of flow control, flow control through the receiving side of the drop-down on or off to open or close the receiver-side flow control, while on and off also shows the port to send side and receiving-side flow control is turned on or off.
- Page 21 (5)Port speed limits page This page is used to configure the port‘s sending and receiving rate From the Port drop-down bar select the configure ports. Bandwidth control of the send data packets is used to configure and display the bandwidth control it, the range is 1-1024000, unit kbits, enter into force after the key press applications.
- Page 22 (7)Port Learning restrain page This page used to restrict the port can learn of the MAC address of the number, range is 0-8191. The default value is 8191, also is the maximum that the port is not configured the learning restrain Port Learning restrain page (8)Port Trunking configuration page This page allows the user to configure the port trunking.
- Page 23 Port Trunking configuration page (9)Port mirroring configuration page The page allows users to configure port mirroring. Port mirroring through the mirror port to monitor the data packets of being mirrored output port and the data packets of being mirrored input port. Mirroring Port can only choose one, being mirrored output port and being mirrored input port can select multiple.
-
Page 24: Mac Configuration
(10) DDM Information This page is used to display the DDM information of all ports with SFP or SFP+ optical modules inserted. DDM Information page 4.5. MAC Configuration (1)MAC Table: This page is used to display the MAC address table. Port Display the MAC address table of the Selected port. - Page 25 (2)MAC binding configuration page This page is used to achieve the port and MAC address binding. MAC entries on the page is used to enter the MAC address binding, VLAN ID entry is used to enter the MAC address of VLAN MAC binding configuration page (3)MAC binding automatic conversion page This page is used to achieve the port MAC address auto-binding.
- Page 26 (4)MAC filtering configuration page This page is used to configure the ports on the MAC address filtering. MAC entries on the page is used to enter the MAC address filtering. VLAN ID entry is used to enter the MAC address affiliated VLAN. MAC filtering configuration page (5)MAC filtering automatic conversion page This page is used to achieve the port MAC address auto-binding.
-
Page 27: Vlan Configuration
4.6. VLAN Configuration (1)VLAN information page This page is read-only page displays the current VLAN configuration information l, including the VID, state and port members. Select VLAN from the drop-down VID, shows the port information of the Port VLAN members. A port may not be a member of VLAN, which can be VLAN-tagged or untagged members. - Page 28 Static VLAN configuration page (3)VLAN port configuration page This page is used to configure the VLAN port configuration and display results. This page mainly consists of eight parts: port, mode, all current VLAN, port-owned VLAN, key "default VLAN =>"," tagged =>"," untagged =>" and "non-members" =. " Port is defined a designated port that will configure the VLAN Mode Access designated the VLAN mode as the ACCESS mode, under this mode, the port default VLAN is the untagged member of VLAN1, the port's default VLAN is 1.
-
Page 29: Snmp Configuration
VLAN port configuration page 4.7. SNMP Configuration (1)SNMP share body configuration page This page allows users to configure the switch common body's name and read and write access, a total of 8 entries can be configured By default, the switch there is a share name as named public, the common body is read-only access. -
Page 30: Acl Configuration
(2)TRAP target configuration page This page allows users to configure the workstation to receive TRAP messages as well as the IP address of TRAP protocol packets of some of the parameters. In the configuration entry, the name used to enter the TRAP name, IP address used to enter the target address, SNMP version used to select the version of the TRAP packet, if you set successful, it will show in the state to active. - Page 31 When users configure the rules, the source IP address must be in with a mask, the rule can match the collection of IP addresses. The address mask is use anti-code, if the rule were to match the IP address range 192.168.0.0 to 192.168.0.255, then the IP address can be 192.168.0.1, and its mask of 0.0.0.255.
- Page 32 (3)MAC IP ACL configuration page It is the MAC IP ACL configuration page. IP MAC group can be the IP packet source and destination MAC address and source and destination IP address control. IP Extended ACL configuration page (4)MAC ARP ACL configuration page It is the MAC ARP ACL configuration page.
- Page 33 (5)ACL information page The ACL information page displays the current ACL rules configured in all the information. ACL information page (6)ACL configuration information page This shows the ACL configuration information page, which displays all the rules and references configured in the current ACL. ACL application page for a port...
-
Page 34: Qos Configuration
4.9. QoS Configuration (1)QoS Apply Configuration Page This is a QoS Apply configuration page. QoS Apply configuration page (2)QoS Schedule Configuration Page This is a QoS Schedule configuration page. QoS Schedule configuration page... -
Page 35: Ip Basic Configuration
4.10. IP Basic Configuration (1)VLAN Interface Configuration Page Users can configure the VLAN interface through this page, delete VLAN interfaces, configure the interface IP address, remove the interface IP address, and view interface information. VLAN already exists can only be set when the interface can only be configured on the interface set interface address. - Page 36 ARP configuration and display page (3)Host Static Routing configuration page The user can through this page to add, delete static routing switch hosts. By default, the switch is not configured to host a static route, the user can configure the default route through this page, that is the purpose of address / subnet prefix is 0.0.0.0 / 0 routing Host static route configuration page...
-
Page 37: Dhcp Server
4.11. DHCP Server (1)DHCP Server Global & Interface Configuration This page is used to configure DHCP server, including global and interface configuration. Global DHCP Server: Enable or disable global DHCP server. Interface: Select the layer 3 VLAN interface to be configured. DHCP Listen: Enable or disable the DHCP listen feature of the specified interface. - Page 38 Address Pool configuration page (3)DHCP Server Address Information This page is used to display the IP address information being assigned or assigned to DHCP clients. DHCP Server Address information page...
-
Page 39: Aaa) Configuration
4.12. (AAA) configuration (1)TACACS+ Configuration: TACACS+ protocol is the latest generation of TACACS. It uses TCP to ensure reliable delivery. The separation of authentication, authorization and accounting is a fundamental component of the design of TACACS+. TACACS+ gives the option to enable TACACS+ TACACS+ Server IP Gives the option to specify a TACACS plus server IP address Authentication Type... - Page 40 7. Vendor-specific information, the users typically do not need to modify this field. 8. NAS ports, NAS port type, NAS type of service, these three values do not change in general. 9. Whether to on or off the roaming feature of Radius. Radius configuration page (3)802.1x Configuration Page Users can configure 802.1x related information on this page, including:...
- Page 41 802.1x configuration page (3)802.1x port configuration page The user through this page to configure the support 802.1x port mode and hosts of the largest, at the same time you can view each port 802.1x configuration. 802.1x port model includes four types: N / A State, Auto state, Force-authorized state and Force-unauthorized state.
- Page 42 (4)802.1x user authentication information page it is an 802.1x user authentication information page, the user can see through this page, under a certain port access for all users of the state information, 802.1x user authentication information page...
-
Page 43: Spanning Tree Protocol Configuration
4.13. Spanning Tree Protocol configuration (1)MSTP global configuration page Through this page, you can configure some MSTP related information, mainly including: Whether to enable MSTP. Configure the bridge priority. Devices with lower priority are more likely to be the root bridge. - Page 44 (2) MSTP port configuration page Through this page, user can configure some MSTP related information, mainly including: Select the port to be configured. Configure a port as a port fast port to enable the port from the blocking state to the forwarding state, bypassing the listening and learning states.
-
Page 45: Igmp Snooping Configuration
(3) MSTP configuration information page It is the MSTP configuration information page, through which you can view some MSTP related information MSTP Configuration Information page 4.14. IGMP SNOOPING configuration (1)IGMP SNOOPING configuration page It is the IGMP SNOOPING configuration page, through which you can start IGMP SNOOPING. GMP SNOOPING configuration page... -
Page 46: Gmrp Configuration
(2)IGMP SNOOPING information page It is the IGMP SNOOPING information page, which allows users to view some information about IGMP SNOOPING. IGMP SNOOPING Information page 4.15. GMRP configuration (1)GMRP Global Configuration Page Users can enable GMRP through this page. GMRP Global Configuration Page... - Page 47 (2)GMRP port configuration page You can use this page to enable the GMRP port and view the port information. GMRP Port Configuration Page (3)GMRP state machine page Users can view the GMRP state machine information through this page. GMRP state machine page...
-
Page 48: Eaps Configuration
4.16. EAPS configuration (1)EAPS configuration page Through this page, you can configure some EAPS related information, including: Select an EAPS ring number. Configure the operating node mode of an EAPS Domain. Configure Primary Port of EAPS Domain. ... -
Page 49: Rmon Configuration
(2) EAPS information page Through this page, users can view some EAPS related information. EAPS information page 4.17. RMON configuration (1)RMON statistics group configuration page You can use this page to configure the RMON statistics group. Select a port from the drop-down list to view/configure the RMON statistics group configuration for this port. - Page 50 (2)RMON history group configuration page You can configure the RMON history group through this page. Select a port from the drop-down list to view/configure the RMON history group configuration for this port. When not configured, the index number is 0, fill in the correct index number (range is 1 to 100), interval, request Buckets, the owner is optional, you can configure the RMON history group for the port.
- Page 51 RMON alarm group configuration page (4)RMON event group configuration page Users can create or modify RMON event groups through this page. Select a configured event group from the drop-down list to view/configure its information. Select New to create it. The index number range is from 1 to 60.
-
Page 52: Cluster Configuration
4.18. Cluster configuration (1) NDP configuration page You can use this page to configure NDP. The configurable information includes: selecting the port, enabling the NDP function of the port, enabling the global NDP function, the interval for sending NDP packets, and the aging time of the NDP packets on the receiving device. For port selection, you can select the port as required and enable the port NDP function. - Page 53 NTDP configuration page (3)Cluster Configuration Page Users can configure the cluster and view the cluster member table through this page. The information that can be set includes: enabling the cluster function, configuring the management VLAN, the address pool of the cluster, the interval for sending handshake packets, the effective retention time of the device, the name of the cluster, the way to join the cluster, and deleting the cluster.
-
Page 54: Erps Configuration
Cluster Configuration Page 4.19. ERPS configuration (1)ERPS Configuration This page is use to create, configure or delete ERPS domain and ring. ERPS Domain create or delete ERPS domain, domain id range is in 1-8 ERPS Domain Status Created or not created ERPS Domain Node Role interconnection or none-interconnection ERPS Ring... - Page 55 ERPS predefined configuration page (2)ERPS information page This is the ERPS information page, and the selected ring number displays the configuration and status information of the associated ERPS ring. RPS information page...
-
Page 56: Lldp Global Configuration
4.20. LLDP Global Configuration (1)LLDP Global Configuration This page is use to configure LLDP global parameters. LLDP Global Enable or disable the global LLDP, default is disabled Hold-multiplier Set the hold-multiplier, default is 4 Reinit-delay Set the Reinit-delay, default is 2 seconds Tx-delay Set the tx-delay, default is 2 seconds Tx-interval... - Page 57 (2)LLDP Ports Configuration This page is use to configure LLDP ports' parameters. Port Select the port to be configured LLDP Status Enable or disable the LLDP of the configured port, default is enabled Admin Status Set the admin status of the configured port, four statuses are disable, Tx, Rx and TxRx, default is TxRx Manage IP Set the management IP address of the configured port, use to...
-
Page 58: Log Management
(3)LLDP Neighbor This page is use to display all the LLDP neighbor information. LLDP Neighbor Page 4.21. log management (1) Log information page Users can enable and view various log information through this page. Log Information Page Critical: output critical level information. Debugging: Outputs debug level debugging information. -
Page 59: Poe Port Configuration
4.22. PoE port configuration (1)PoE port Configuration Page It is the PoE port configuration / PoE-display page. Users can enable or disable the port's PoE function to the page, or view all ports of PoE information. Information can be seen in the following tables: Status:...
Need help?
Do you have a question about the DN-95359 and is the answer not in the manual?
Questions and answers