Table of Contents
Advertisement
Quick Links
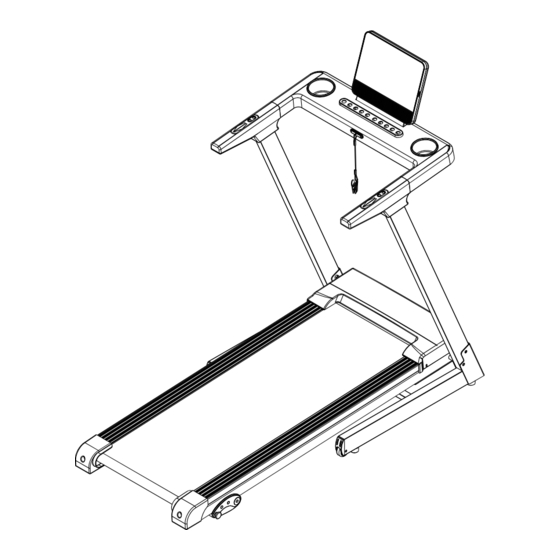
Delta 1.0 Treadmill
Product may vary slightly from the item pictured due to model upgrades.
Read all instructions carefully before using this product.
Retain this owner's manual for future reference.
NOTE:
This manual should not be used to guide your purchasing decision. Your product, and the contents inside its carton, may vary
from what is listed in this manual. This manual may also be subject to updates or changes. Updated manuals are available
through our website at
www.lifespanfitness.com.au
USER MANUAL
Find the
Digital Manual
Online
Advertisement
Table of Contents

Related Manuals for LifeSpan Delta 1.0


Summary of Contents for LifeSpan Delta 1.0
- Page 1 Delta 1.0 Treadmill USER MANUAL Find the Digital Manual Online Product may vary slightly from the item pictured due to model upgrades. Read all instructions carefully before using this product. Retain this owner’s manual for future reference. NOTE: This manual should not be used to guide your purchasing decision. Your product, and the contents inside its carton, may vary from what is listed in this manual.
-
Page 2: Table Of Contents
TABLE OF CONTENTS Important Safety Instructions ....... 03 II. Important Electrical Information ......05 III. -
Page 3: Important Safety Instructions
I. IMPORTANT SAFETY INSTRUCTIONS WARNING: Read all instructions before using this treadmill. It is important your treadmill receives regular maintenance to prolong its useful life. Failing to regularly maintain your treadmill may void your warranty. DANGER To reduce the risk of electric shock disconnect your treadmill from the electrical outlet prior to cleaning and/or service work. - Page 4 11) Never drop or insert any object into any openings. 12) The treadmill is intended for in-home use only and not suitable for long time running. 13) To disconnect, turn all controls to the off position, remove the safety key, and then remove the plug from the outlet.
-
Page 5: Important Electrical Information
II. IMPORTANT ELECTRICAL INFORMATION WARNING! 1) NEVER use a ground fault circuit interrupt (GFCI) wall outlet with this treadmill. Route the power cord away from any moving part of the treadmill including the elevation mechanism and transport wheels. 2) NEVER operate treadmill on Generator or UPS power supply. 3) NEVER remove any cover without first disconnecting AC power. -
Page 6: Important Operating Instructions
III. IMPORTANT OPERATING INSTRUCTIONS 1) Insert the power plug into the socket directly. 2) The constant running time is less than 2 hours. Be sure to read the entire manual before operating your machine. 3) Understand that changes in speed and incline do not occur immediately. Set your desired speed on the computer console and release the adjustment key. -
Page 7: Assembly Instructions
IV. ASSEMBLY INSTRUCTIONS The following figure shows the scatter diagram of the parts installed in the whole machine table. Open the packaging box, and you can remove the following parts from the box. PARTS LIST Description Part No. Specs Qty. Part No. - Page 8 V. ASSEMBLY INSTRUCTIONS STEP 1 1. Open the package and remove the contents. Lay the machine on flat ground and check all parts are there. STEP 2 1. Hold the upright post and use an Allen wrench (12) to secure Allen head screw (54) and an internal serrated locking washer (64) to pass through the base and the right upright post, and lightly lock it on the base.
- Page 9 STEP 3 Caution: Be careful not to clamp of any wires. Hold the upright post with one hand to avoid injury from the console falling. 1. Use an Allen wrench (12) and lightly lock the column with an Allen head screw (51) and an internal serrated locking washer (64), then secure the other side, and tighten the bolts.
- Page 10 STEP 5 1. Place the safety lock (49) on the console. You can now plug in the power cord and turn on the treadmill. | ASSEMBLY INSTRUCTIONS...
-
Page 11: Folding And Unfolding
VI. FOLDING AND UNFOLDING FOLDING INSTRUCTION 1. Hold the machine in position A with both hands and push it up slightly, until you hear the sound of the air pressure rod sleeve against the air pressure rod B. Note: The wire rope assembly needs to be unplugged when folding. -
Page 12: Operation Guide
VII. OPERATION GUIDE 1. DISPLAY WINDOW DESCRIPTION: A. "DIS" window: Displays the numerical value of the distance. B. "CAL" window: Displays the numerical value of calories. C. "TIME" window: Displays the numerical value of time. D. "PULSE" window: Displays the value of heart rate. E. - Page 13 3. PROGRAM AND START-UP INSTRUCTIONS 1. Program description A. Normal mode B. Three countdown modes: Time countdown, Distance countdown and Calorie countdown. C. 15 setting procedures: P01~P15 D. FAT measuring function 2. Start-up instructions Place the safety lock on the switch position of the safety lock on the panel, the console will be fully displayed, and a buzzer will sound.
- Page 14 5. PROGRAM MODE 1. In standby mode, press the "PROG" key to select the "P01 (P01-P15)" mode. The window will display " P01-P15" for 1 second. After this, the "time" window will flash [30:00], and the time icon will illuminate, with a setting range of 5:00-99:00.
- Page 15 Body Fat Index Control (Table 2) Body fat index (BMI) Obesity degree FAT<19 Thin 19>FAT≤25 Normal 25>FAT≤29 Overweight >30 Obese Special note: This data is only used as exercise reference, not as medical data. 7. SAFETY KEY In any situation requiring an immediate stop, the treadmill should be urgently halted by removing the safety lock. When the treadmill stops abruptly, the buzzer will emit a "BIBIBI"...
- Page 16 11. PROGRAM CHART Each program divides the motion time into 20 segments (Time/20), each segment has a corresponding speed (KPH), and the running time of each program segment is evenly distributed. TIME INTERVAL= setting time/20 PROG TIME 12 13 14 15 16 17 18 19 20 SPEED SPEED...
-
Page 17: Maintenance Instructions
VIII. MAINTENANCE INSTRUCTIONS To ensure optimal maintenance and extend the service life of your electric treadmill, consider the following recommendations: 1. After continuous use for 1.5 hours, it is advisable to turn off the power supply and allow the machine to rest for 10 minutes before resuming use. - Page 18 Lubricating Oil for Running Belt and Electric Running: Lubricating oil is pre-coated between the treadboard and running belt to enhance the electric treadmill’s lifespan and performance. Regular application of lubricating oil is necessary. Follow these recommendations: • Regularly inspect the board surface, and if damaged, contact our customer service centre.
-
Page 19: Exploded Diagram
IX. EXPLODED DIAGRAM EXPLOSIVE DIAGRAM |... -
Page 20: Parts List
X. COMPLETE PARTS LIST Name Specification Qty. Name Specification Qty. Main frame assembly Torque type hexagon nuts Keyboard Base frame assembly Safety lock Column assembly Hexagon socket head cap M6*16 6# Allen key screws Electronic watch frame Hexagon socket button head M8*16 screws Φ5... - Page 21 Hexagon socket counter- Transportation wheel M8*35 sunk head screw Hexagon socket button Roller guard M8*42 head screws Standard power cord Hexagon socket head cap M8*65 screws Power switch Motor lower cover Hexagon socket counter- M6*40 sunk head screw Safety lock base Armrest upper cover Cross recessed pan head 2.9*8...
-
Page 22: Exercise Guide
XI. EXERCISE GUIDE PLEASE NOTE: Before beginning any exercise program, consult your physician. This is important especially if you are over the age of 45 or individuals with pre-existing health problems. The pulse sensors are not medical devices. Various factors, including the user’s movement, may affect the accuracy of heart rate readings. - Page 23 COOL DOWN Finish each workout with a light jog or walk for at least 1 minute. Then complete 5 to 10 minutes of stretching to cool down. This will increase the flexibility of your muscles and will help prevent post- exercise problems.
-
Page 24: Troubleshooting
XII. TROUBLESHOOTING Error Code Description Solution 1. Check if the connection between the power socket plug and the motor is loose. Hardware error includes 2. Replace the controller. 1. The possible reason is that the current ex- ceeds the rated load, so the system can protect itself and restart. - Page 25 1. Check whether the display wire and the controller are loose or fallen off. 2. Check whether the controller is Error in communication between electron- damaged. ic watch and lower control itself 3. Check whether the electronic watch is damaged. 4.
-
Page 26: Warranty
Any claim against this warranty must be made through your original place of purchase. Proof of purchase is required before a warranty claim may be processed. If you have purchased this product from the Official Lifespan Fitness website, please visit https://lifespanfitness.com.au/warranty-form For support outside of warranty, if you wish to purchase replacement parts or request a repair or service, please visit https://lifespanfitness.com.au/warranty-form and fill in our Repair/Service... -
Page 27: Hand Pulse Technology
XIV. HAND PULSE TECHNOLOGY This product comes equipped with hand pulse sensors which are used to pick up tiny EKG/ECG signals that run through the body when your heart beats. These electrical EKG/ECG signals are very small and must be amplified 1000 times to make the signal viable for the computer to display your pulse. To ensure proper operation: •... - Page 28 WWW.L IF ESPAN F ITNE S S . COM . A U...
Need help?
Do you have a question about the Delta 1.0 and is the answer not in the manual?
Questions and answers