
Related Manuals for Cisco Room Kit EQX


Summary of Contents for Cisco Room Kit EQX
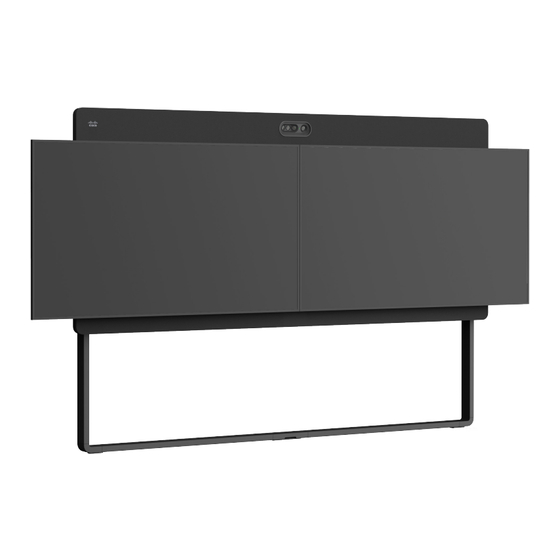
- Page 1 Cisco Room Kit EQX Installation guide, wall-stand option Wall mount Floor stand Wall stand D15519.02 | 2024 JANUARY | Cisco Room Kit EQX Installation Guide Copyright © 2024 Cisco Systems, Inc. All rights reserved.
- Page 2 For more information, read the Cisco Room Kit EQX datasheet, which is available online. The Cisco Room Kit EQX system is designed to make your video conferencing room more versatile and flexible also for local meetings. D15519.02 | 2024 JANUARY | Cisco Room Kit EQX Installation Guide...
-
Page 3: Table Of Contents
BEFORE YOU START THE INSTALLATION ..3 before you start the installation. They are available online. Due to the size and mass of the Room Kit EQX system, it PACKAGING ............4 During the installation you need both the Installation guide must be installed according to our installation instructions by (this guide) and the Wiring Diagram. -
Page 4: Packaging
If you have ordered Cisco Table Microphone Pro (maximum 3), they are shipped in separate boxes on the pallet. If you have ordered the Cisco Table Microphone (maximum 3), they are shipped in Accessory kit 2. -
Page 5: Screws And Tools
The installer must bring the number and type of screws required to safely fasten the wall stand frame to the wall (step D15519.02 | 2024 JANUARY | Cisco Room Kit EQX Installation Guide Copyright © 2024 Cisco Systems, Inc. All rights reserved. -
Page 6: Assemble The Lower Bar And Carrier Beam
(center)) lower bar (sides) sliding nut (M6x12, Hex 4 mm) (M6x8, Hex 4 mm) D15519.02 | 2024 JANUARY | Cisco Room Kit EQX Installation Guide Copyright © 2024 Cisco Systems, Inc. All rights reserved. - Page 7 1.1. Assemble the lower bar Slide side parts onto the center part and fasten with 4 screws each. (M6x12, Hex 4 mm) ×2 D15519.02 | 2024 JANUARY | Cisco Room Kit EQX Installation Guide Copyright © 2024 Cisco Systems, Inc. All rights reserved.
- Page 8 Flip the bar and fasten the two wall brackets with 1 screw each. (M6x8, Hex 4 mm) ×2 for each bracket D15519.02 | 2024 JANUARY | Cisco Room Kit EQX Installation Guide Copyright © 2024 Cisco Systems, Inc. All rights reserved.
- Page 9 1.3. Assemble the carrier beam Connect the carrier beam parts together using the joining bracket and 8 screws (M6x12, Hex 4 mm) D15519.02 | 2024 JANUARY | Cisco Room Kit EQX Installation Guide Copyright © 2024 Cisco Systems, Inc. All rights reserved.
- Page 10 The position depends on your wall, so you may have to adjust the bracket position when fastening the stand to the wall in step for each bracket for each bracket D15519.02 | 2024 JANUARY | Cisco Room Kit EQX Installation Guide Copyright © 2024 Cisco Systems, Inc. All rights reserved.
-
Page 11: Assemble The Wall Stand Frame
Wall stand frame parts vertical leg (Box: A) bottom frame (side) bottom frame joining bracket vertical leg top (M6x12, Hex 4 mm) D15519.02 | 2024 JANUARY | Cisco Room Kit EQX Installation Guide Copyright © 2024 Cisco Systems, Inc. All rights reserved. - Page 12 , then fasten the top parts with 4 (M6x12, Hex 4 mm) screws each (M6x12, Hex 4 mm) ×2 ×2 D15519.02 | 2024 JANUARY | Cisco Room Kit EQX Installation Guide Copyright © 2024 Cisco Systems, Inc. All rights reserved.
- Page 13 Fasten the bar that you assembled in step 1.1 to the frame with 2 screws on each side. (M6x12, Hex 4 mm) ×2 D15519.02 | 2024 JANUARY | Cisco Room Kit EQX Installation Guide Copyright © 2024 Cisco Systems, Inc. All rights reserved.
- Page 14 (M6x12, Hex 4 mm) Check the key holes to avoid placing the beam upside down. D15519.02 | 2024 JANUARY | Cisco Room Kit EQX Installation Guide Copyright © 2024 Cisco Systems, Inc. All rights reserved.
-
Page 15: Fasten The Frame To The Wall
10 mm (0.4 in) 50 mm (2.0 in) 64 mm (2.5 in) Maximum weight allowed per screen is 50 kg (110 lb). D15519.02 | 2024 JANUARY | Cisco Room Kit EQX Installation Guide Copyright © 2024 Cisco Systems, Inc. All rights reserved. -
Page 16: Mount The Modules
(Box: C1, C2) (Box: A) (M6x8, Hex 4 mm) (Box: A) (M6x8, Hex 4 mm) (Box: Center kit) D15519.02 | 2024 JANUARY | Cisco Room Kit EQX Installation Guide Copyright © 2024 Cisco Systems, Inc. All rights reserved. - Page 17 Keyholes for the center module Screw with large head, for hanging the module on the beam. Rear view of center module D15519.02 | 2024 JANUARY | Cisco Room Kit EQX Installation Guide Copyright © 2024 Cisco Systems, Inc. All rights reserved.
- Page 18 2. Hang the large screw heads at the back of the module onto the beam keyholes. D15519.02 | 2024 JANUARY | Cisco Room Kit EQX Installation Guide Copyright © 2024 Cisco Systems, Inc. All rights reserved.
- Page 19 Keyholes for the right side module Screw with large head, for hanging the module on the beam. Rear view of side module D15519.02 | 2024 JANUARY | Cisco Room Kit EQX Installation Guide Copyright © 2024 Cisco Systems, Inc. All rights reserved.
- Page 20 NOT on the side toward the center module. D15519.02 | 2024 JANUARY | Cisco Room Kit EQX Installation Guide Copyright © 2024 Cisco Systems, Inc. All rights reserved.
- Page 21 The screws enter the (M6x8, Hex 4 mm) (M6x8, Hex 4 mm) nuts that you added in step 4.1. ×2 ×2 ×2 ×2 D15519.02 | 2024 JANUARY | Cisco Room Kit EQX Installation Guide Copyright © 2024 Cisco Systems, Inc. All rights reserved.
- Page 22 3. Fasten the modules to the bar with 6 screws in total. (M6x8, Hex 4 mm) ×2 ×2 D15519.02 | 2024 JANUARY | Cisco Room Kit EQX Installation Guide Copyright © 2024 Cisco Systems, Inc. All rights reserved.
-
Page 23: Insert The Codec And Amplifier
Wing nuts Wing nuts Codec and amplifier codec amplifier (Box: Codec) (Box: Amplifier) ×4 ×4 D15519.02 | 2024 JANUARY | Cisco Room Kit EQX Installation Guide Copyright © 2024 Cisco Systems, Inc. All rights reserved. -
Page 24: About Cabling
The 3 nylon cable ties are for securing the (Box: Center kit) camera cables in step 12.3. D15519.02 | 2024 JANUARY | Cisco Room Kit EQX Installation Guide Copyright © 2024 Cisco Systems, Inc. All rights reserved. - Page 25 Keep the cables away from the bass to avoid rattling noise. Use the supplied velcro straps. D15519.02 | 2024 JANUARY | Cisco Room Kit EQX Installation Guide Copyright © 2024 Cisco Systems, Inc. All rights reserved.
-
Page 26: Mount The Power Strip And Psus
6.4) From wall socket outlet (in step PSU, 24 V (Box: Acc 1) (M4x8, Torx T20) Downward (Box: Center kit) D15519.02 | 2024 JANUARY | Cisco Room Kit EQX Installation Guide Copyright © 2024 Cisco Systems, Inc. All rights reserved. - Page 27 2. The 24 V PSU (the largest one) has a power switch. Switch it to ON. To 24 V PSU To 12 V PSU D15519.02 | 2024 JANUARY | Cisco Room Kit EQX Installation Guide Copyright © 2024 Cisco Systems, Inc. All rights reserved.
- Page 28 6.4. Connect the codec power cable Connect the power cable between the codec and the power strip, E2. To power strip D15519.02 | 2024 JANUARY | Cisco Room Kit EQX Installation Guide Copyright © 2024 Cisco Systems, Inc. All rights reserved.
-
Page 29: Attach The Rating Label
Attach the self-adhesive rating label here. The label shows that the Room Kit EQX system complies with country compliance regulations. D15519.02 | 2024 JANUARY | Cisco Room Kit EQX Installation Guide Copyright © 2024 Cisco Systems, Inc. All rights reserved. -
Page 30: Mount The Loudspeakers
To right loudspeakers (M4x10, Torx T20) and bass (Box: Center kit) bass (Box: Bass) (M4x8, Torx T20) (Box: Center kit) D15519.02 | 2024 JANUARY | Cisco Room Kit EQX Installation Guide Copyright © 2024 Cisco Systems, Inc. All rights reserved. - Page 31 If they do, they may cause rattling noise. 3. Fasten each loudspeaker with two screws (M4x10, Torx T20) ×6 D15519.02 | 2024 JANUARY | Cisco Room Kit EQX Installation Guide Copyright © 2024 Cisco Systems, Inc. All rights reserved.
- Page 32 (M4x8, Torx T20) Make sure that no cables are touching the bass. If they do, they may cause rattling noise. D15519.02 | 2024 JANUARY | Cisco Room Kit EQX Installation Guide Copyright © 2024 Cisco Systems, Inc. All rights reserved.
-
Page 33: Mount The Fan Module
Make sure the cables (F1, F2) comes through the slot at front without being pinched. Fan duct top (Box: Center kit) Fan duct bottom (Box: Center kit) (M4x8, Torx T20) (Box: Center kit) D15519.02 | 2024 JANUARY | Cisco Room Kit EQX Installation Guide Copyright © 2024 Cisco Systems, Inc. All rights reserved. - Page 34 3. Tighten the two wing nuts. nuts, and then push it into the groove. Wing nuts Wing nuts ×2 ×2 D15519.02 | 2024 JANUARY | Cisco Room Kit EQX Installation Guide Copyright © 2024 Cisco Systems, Inc. All rights reserved.
- Page 35 Guide the fan cables (F1, F2) as shown in the illustration, and connect them to the amplifier. The two fans are equal. To fan module D15519.02 | 2024 JANUARY | Cisco Room Kit EQX Installation Guide Copyright © 2024 Cisco Systems, Inc. All rights reserved.
-
Page 36: Mount The Top Brackets
(M4x8, Torx T20) for each bracket Top brackets (Box: Center kit) top bracket (M4x8, Torx T20) D15519.02 | 2024 JANUARY | Cisco Room Kit EQX Installation Guide Copyright © 2024 Cisco Systems, Inc. All rights reserved. -
Page 37: Mount The Antenna Brackets
(Box: Acc 2) Bluetooth antenna bracket with antenna cable Wi-Fi antenna bracket Wi-Fi antenna bracket with two antenna cables (M4x8, Torx T20) D15519.02 | 2024 JANUARY | Cisco Room Kit EQX Installation Guide Copyright © 2024 Cisco Systems, Inc. All rights reserved. - Page 38 For more details, see the full wiring diagram that were shipped with the system. It’s also available online. To vertical Wi-Fi antenna To horizontal Wi-Fi antenna To Bluetooth antenna D15519.02 | 2024 JANUARY | Cisco Room Kit EQX Installation Guide Copyright © 2024 Cisco Systems, Inc. All rights reserved.
-
Page 39: Insert The Camera
10°, which is the required tilt angle for this product. Flip the hinges back when done. D15519.02 | 2024 JANUARY | Cisco Room Kit EQX Installation Guide Copyright © 2024 Cisco Systems, Inc. All rights reserved. - Page 40 5. To avoid accidentally pulling out the camera cables, secure them to the fixing points under the camera bracket with the supplied nylon cable ties. D15519.02 | 2024 JANUARY | Cisco Room Kit EQX Installation Guide Copyright © 2024 Cisco Systems, Inc. All rights reserved.
- Page 41 Connect the video (C1) and camera control (C2) cables to the codec • Connect the power cable (C3) to the amplifier. D15519.02 | 2024 JANUARY | Cisco Room Kit EQX Installation Guide Copyright © 2024 Cisco Systems, Inc. All rights reserved.
-
Page 42: Attach The Antennas
11: one to the left of the camera, and two to the right of the camera. The three whip antennas are equal. Antennas (Box: Acc 2) antennas D15519.02 | 2024 JANUARY | Cisco Room Kit EQX Installation Guide Copyright © 2024 Cisco Systems, Inc. All rights reserved. -
Page 43: Connect Screen Cables
Don’t connect them to the wall socket yet. • The cables will be connected to the screens in step D15519.02 | 2024 JANUARY | Cisco Room Kit EQX Installation Guide Copyright © 2024 Cisco Systems, Inc. All rights reserved. -
Page 44: Connect Power And Network Cables
Connect the cable to the power strip (E3). Use the regular cable routes when leading the cable toward the network wall socket. Don’t connect it to the wall socket yet. D15519.02 | 2024 JANUARY | Cisco Room Kit EQX Installation Guide Copyright © 2024 Cisco Systems, Inc. All rights reserved. -
Page 45: Connect The Microphones
Box: Acc 2) Toward (0..3)x Table Microphone Pro table (Box: Table Mic Pro) You may have microphones from a 3 party vendor. D15519.02 | 2024 JANUARY | Cisco Room Kit EQX Installation Guide Copyright © 2024 Cisco Systems, Inc. All rights reserved. - Page 46 (X1). Also connect the switch to power (X2). • Connect the microphones to the switch (MD1..3). Toward Toward table switch D15519.02 | 2024 JANUARY | Cisco Room Kit EQX Installation Guide Copyright © 2024 Cisco Systems, Inc. All rights reserved.
-
Page 47: Connect The Room Navigator And Presentation Cables
Use the regular cable routes when leading the cables E5 or E6 toward the table. Room Navigator E5 or E6 Room Navigator (Box: Navigator) Toward table D15519.02 | 2024 JANUARY | Cisco Room Kit EQX Installation Guide Copyright © 2024 Cisco Systems, Inc. All rights reserved. -
Page 48: Mount The Top Covers
Also, make sure not to interfere with the antenna cables. Covers (Box: A) top cover (left and right) top cover (center) D15519.02 | 2024 JANUARY | Cisco Room Kit EQX Installation Guide Copyright © 2024 Cisco Systems, Inc. All rights reserved. -
Page 49: Mount The Speaker Grille
×2 top panel (left and right) top panel (center) deco ring (M4x10, Torx T20) (M6x8, Hex 4 mm) (Plastic washer) D15519.02 | 2024 JANUARY | Cisco Room Kit EQX Installation Guide Copyright © 2024 Cisco Systems, Inc. All rights reserved. - Page 50 Screw through the washers and into the pegs. Take care to place the stiffeners correctly. This flap points away from the grille. ×13 D15519.02 | 2024 JANUARY | Cisco Room Kit EQX Installation Guide Copyright © 2024 Cisco Systems, Inc. All rights reserved.
- Page 51 (Plastic washer) on top. b. Place the washers on the pegs. c. Screw through the washers and into the pegs. ×15 D15519.02 | 2024 JANUARY | Cisco Room Kit EQX Installation Guide Copyright © 2024 Cisco Systems, Inc. All rights reserved.
- Page 52 (next step) will align well too. Rubber gaskets 3. Fasten the grille with four screws (M6x8, Hex 4 mm) ×4 D15519.02 | 2024 JANUARY | Cisco Room Kit EQX Installation Guide Copyright © 2024 Cisco Systems, Inc. All rights reserved.
- Page 53 19.3. Insert the deco ring Place the deco ring around the camera. The ring provides a neat transition between the grille and camera. D15519.02 | 2024 JANUARY | Cisco Room Kit EQX Installation Guide Copyright © 2024 Cisco Systems, Inc. All rights reserved.
-
Page 54: Mount The Bottom Grille
×2 bottom panel bottom panel (left and right) (center) (M4x10, Torx T20) (M6x8, Hex 4 mm) (Plastic washer) D15519.02 | 2024 JANUARY | Cisco Room Kit EQX Installation Guide Copyright © 2024 Cisco Systems, Inc. All rights reserved. - Page 55 Screw through the washers and into the pegs. Take care to place the stiffeners correctly. This flap points away from the grille. ×13 D15519.02 | 2024 JANUARY | Cisco Room Kit EQX Installation Guide Copyright © 2024 Cisco Systems, Inc. All rights reserved.
- Page 56 Place the washers on the pegs. c. Screw through the washers and into the pegs. ×13 D15519.02 | 2024 JANUARY | Cisco Room Kit EQX Installation Guide Copyright © 2024 Cisco Systems, Inc. All rights reserved.
- Page 57 2. Observe the holes that the grille will hang in, and rubber gaskets it will rest on. Holes 4. Fasten the grille with four screws (M6x8, Hex 4 mm) Rubber gaskets ×2 D15519.02 | 2024 JANUARY | Cisco Room Kit EQX Installation Guide Copyright © 2024 Cisco Systems, Inc. All rights reserved.
-
Page 58: Mount The Side Panels
(Box: D) 2. Fasten each panel with two screws (M4x10, Torx T20) side panels ×2 (M4x10, Torx T20) for each panel D15519.02 | 2024 JANUARY | Cisco Room Kit EQX Installation Guide Copyright © 2024 Cisco Systems, Inc. All rights reserved. -
Page 59: Prepare The Left Screen
If neither of the screws and spacers fit your screen, the installer must provide the required hardware. D15519.02 | 2024 JANUARY | Cisco Room Kit EQX Installation Guide Copyright © 2024 Cisco Systems, Inc. All rights reserved. - Page 60 Notches show the fixing position for 400 mm, 500 mm, and 600 mm distances. Example: If the interface holes are 600 mm apart, extend the brace to the notch marked with 600. D15519.02 | 2024 JANUARY | Cisco Room Kit EQX Installation Guide Copyright © 2024 Cisco Systems, Inc. All rights reserved.
- Page 61 4. If the brace is not extended to its full length, add velcro tight between and around the two (M5x6) brace parts to avoid metal touching metal. This prevents rattling noise. D15519.02 | 2024 JANUARY | Cisco Room Kit EQX Installation Guide Copyright © 2024 Cisco Systems, Inc. All rights reserved.
-
Page 62: Adjust The Vesa Rail Position
This locks the interface arms in structure. Then, try again. popped-in mode. Interface arms in pop-out mode D15519.02 | 2024 JANUARY | Cisco Room Kit EQX Installation Guide Copyright © 2024 Cisco Systems, Inc. All rights reserved. - Page 63 The interface arms hooks into the groove on top of the rail. System center line D15519.02 | 2024 JANUARY | Cisco Room Kit EQX Installation Guide Copyright © 2024 Cisco Systems, Inc. All rights reserved.
- Page 64 B-1 mm Screen bracket stopper for the left screen 4. Tighten the screw to fasten the stopper in its new position. D15519.02 | 2024 JANUARY | Cisco Room Kit EQX Installation Guide Copyright © 2024 Cisco Systems, Inc. All rights reserved.
- Page 65 If the screen was too high, If the screen was too high, move the rail down move the rail down D15519.02 | 2024 JANUARY | Cisco Room Kit EQX Installation Guide Copyright © 2024 Cisco Systems, Inc. All rights reserved.
-
Page 66: Mount The Left Screen
You will fine-adjust the height and depth of both screens in step 26. The interface arms hooks into the groove on top of the rail. D15519.02 | 2024 JANUARY | Cisco Room Kit EQX Installation Guide Copyright © 2024 Cisco Systems, Inc. All rights reserved. -
Page 67: Mount The Right Screen
If neither of the screws and spacers fit your screen, the installer must provide the required hardware. D15519.02 | 2024 JANUARY | Cisco Room Kit EQX Installation Guide Copyright © 2024 Cisco Systems, Inc. All rights reserved. - Page 68 You will fine-adjust the height and depth of both screens in step 26. The interface arms hooks into the groove on top of the rail. D15519.02 | 2024 JANUARY | Cisco Room Kit EQX Installation Guide Copyright © 2024 Cisco Systems, Inc. All rights reserved.
-
Page 69: Fine-Adjust The Screens
Do not adjust the height past these minimum and maximum lines. Do not adjust the depth past these minimum and maximum lines D15519.02 | 2024 JANUARY | Cisco Room Kit EQX Installation Guide Copyright © 2024 Cisco Systems, Inc. All rights reserved. -
Page 70: Attach The Stand Covers
Click the clips onto the stand. The stand covers will snap to these clips (in step 27.2). Make sure that the cables are below the clips. D15519.02 | 2024 JANUARY | Cisco Room Kit EQX Installation Guide Copyright © 2024 Cisco Systems, Inc. All rights reserved. - Page 71 If you don’t have cables to be routed forward, let the opening face backwards. D15519.02 | 2024 JANUARY | Cisco Room Kit EQX Installation Guide Copyright © 2024 Cisco Systems, Inc. All rights reserved.
-
Page 72: Finish-Up
You will have to factory reset the codec and run the set-up wizard again to fix the issues. D15519.02 | 2024 JANUARY | Cisco Room Kit EQX Installation Guide Copyright © 2024 Cisco Systems, Inc. All rights reserved. - Page 73 Cisco and the Cisco logo are trademarks or registered trademarks THE SOFTWARE LICENSE AND LIMITED WARRANTY FOR THE of Cisco and/or its affiliates in the U.S. and other countries. To view ACCOMPANYING PRODUCT ARE SET FORTH IN THE INFORMATION IN NO EVENT SHALL CISCO OR ITS SUPPLIERS BE LIABLE FOR ANY a list of Cisco trademarks, go to this URL: www.cisco.com/go/...
Need help?
Do you have a question about the Room Kit EQX and is the answer not in the manual?
Questions and answers