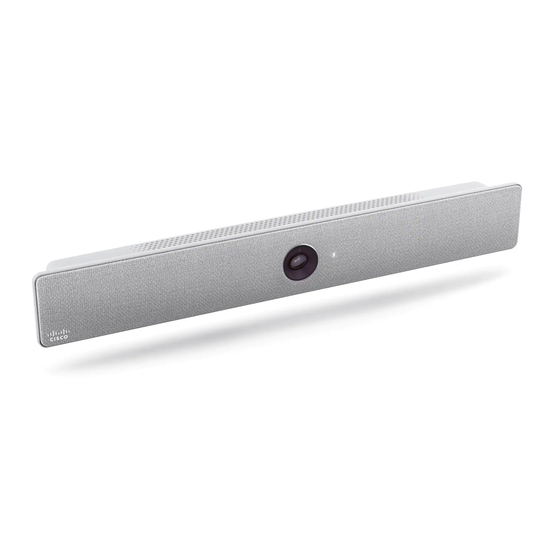
Cisco Webex Room Kit Installation Manual
Hide thumbs
Also See for Webex Room Kit:
- User manual (36 pages) ,
- Installation manual (17 pages) ,
- Quick reference manual (3 pages)

Related Manuals for Cisco Webex Room Kit


Summary of Contents for Cisco Webex Room Kit
-
Page 1: Installation Guide
Cisco Webex Room Kit Installation Guide Guide d’installation Installationshandbuch Guida per l’installazione Guía de instalación Manual de Instalação... -
Page 2: What's In The Box
What’s in the box Accessories (ordered separately) Composants fournis / Verpackungsinhalt / Contenuto della confezione / Descripción general de los pasos / Conteúdo da caixa • 2 × Table microphone • HDMI second monitor cable 1.5 m / 4.9 ft •... - Page 3 Steps overview Présentation des étapes / Überblick – Arbeitsschritte / Procedura generale / Descripción general de los pasos / Descrição geral dos passos 1. Determine mounting height for the mediabar and screen 1. Determinare l’altezza di montaggio per barra multimediale e schermo 2.
-
Page 4: Recommended Mounting Height
Wir empfehlen einen 50 bis 60 Zoll Bildschirm. Es Se recomienda utilizar una pantalla de 50-60 eignen sich jedoch auch Bildschirme mit bis zu Empfehlungen von Cisco zur Positionierung des pulgadas, pero las pantallas de hasta 70 pulgadas Para conocer nuestras recomendaciones sobre la 70 Zoll. - Page 5 2 a. Set up with screen mount Installation avec support pour écran / Installation mit Bildschirmhalterung / Installazione con il supporto dello schermo / Configuración con soporte de pantalla / Montagem com um suporte de ecrã Attach the screen mounts to the mediabar Fixez les supports d’écran à...
- Page 6 Mount the mediabar on top of the screen Installez mediabar au-dessus de l’écran / Anbringen der Medienleiste am oberen Bildschirmrand / Montare la barra multimediale sulla parte superiore dello schermo / Monte la barra multimedia en la parte superior de la pantalla / Montar a barra multimédia na parte superior do ecrã...
- Page 7 2 b. Wall mounting Fixation murale / Wandhalterung / Montaggio a parete / Montaje en pared / Montaje en pared Mount the wall mount bar Installez le support de montage mural / Anbringen der Wandhalterungsleiste / Installare la barra per il montaggio a parete / Monte la barra de montaje en pared / Montar a barra de montagem na parede 30 mm / 1.2 inch Due to the size and mass of this product, it is important...
- Page 8 Attach the wall mount brackets Place the mediabar on the wall mount Fixez les supports muraux / Befestigen der Wandhalter / Fissare le staffe per il montaggio a parete / Placez mediabar sur le support mural / Platzieren der Medienleiste an der Wandhalterung / Posizionare la Una los soportes de montaje en pared / Fixar os suportes de montagem na parede barra multimediale sul supporto a parete / Coloque la barra multimedia en el soporte de pared / Colocar a barra multimédia no suporte de parede...
- Page 9 3. Connect the mediabar to the screen, Touch controller, network, and power Connectez mediabar à l’écran, au contrôleur tactile Touch, au réseau et à l’alimentation / Verbinden der Medienleiste mit Bildschirm, Touch-Controller, Netzwerk und Strom / Connettere la barra multimediale a schermo, controller Touch, rete e alimentazione / Conecte la barra multimedia a la pantalla, Power (100-240 VAC, 50/60 Hz)
- Page 10 Alternative: Alternative: Connect Touch controller over network with PoE Connect Touch controller over network Connexion du contrôleur tactile Touch sur le réseau avec PoE / Connexion du contrôleur tactile Touch sur le réseau / Verbinden Verbinden des Touch-Controllers mit PoE über das Netzwerk / des Touch-Controllers über das Netzwerk / Connettere il controller Connettere il controller Touch tramite la rete con PoE / Conectar Touch tramite la rete / Conectar el controlador Touch a la red / Ligar...
-
Page 11: Connector Panel
4. Adjust the camera tilt angle to optimize the view Connector panel Ajustez l’inclinaison de la caméra / Anpassen des Neigungswinkels Panneau de connexion / Anschlussfeld / Pannello del connettore / der Kamera zur Optimierung der Anzeige / Regolare l’angolo di Panel conector / Painel de conectores inclinazione della videocamera per ottimizzare la visualizzazione / Ajuste el ángulo de inclinación de la cámara para optimizar la visión /... -
Page 12: Troubleshooting
Visit one of these websites to find out more about setup, management, and use of this product. Use the first link if your device is registered to the Cisco Webex service and the second link if the device is Solución de problemas / Solução de problemas registered to another service. - Page 13 Begriffs „Partner“ impliziert keine gesellschaftsrechtliche Beziehung zwischen Cisco und anderen Unternehmen. (1110R) Cisco e il logo Cisco sono marchi o marchi registrati di Cisco e/o dei relativi affiliati negli Stati Uniti e in altri paesi. Per visualizzare l’elenco di marchi Cisco, visitare il sito Web all’indirizzo: www.cisco.com/go/trademarks. I marchi commerciali di terze parti citati sono proprietà...
Need help?
Do you have a question about the Webex Room Kit and is the answer not in the manual?
Questions and answers