
Related Manuals for Maktek OMEGA LCD


Summary of Contents for Maktek OMEGA LCD
- Page 1 INSTALLATION AND SERVICE MANUAL EN ISO 9001:2015 EN ISO 14001:2015 Read carefully Keep for referance...
-
Page 2: Table Of Contents
CONTENTS Page 1. SAFETY 1.1 SYMBOL KEY 1.2 SAFETY PRECAUTIONS 1.3 GENERAL EXPLANATIONS 1.4 C.O.S.H.H 1.5 PREPARATION 1.5.1 Load Check 1.5.2 Boiler Location 1.5.3 Central Heating Installation 2. INTRODUCTION OF THE DEVICE 2.1 APPERANCE AND EXTERNAL DIMENSIONS 2.2 COMPONENTS OF THE BOILER 2.2.1 6-30 kW Models 2.2.2 32-40 kW Models 2.2.3 50-80 kW Models... - Page 3 3.8.1 Electricity Connection Precautions 3.8.2 Electricity Supply Connection 3.8.3 Electrical Connection Diagram 220V (Monophase) (6kW-12kW Models) 3.8.4 Electrical Connection Diagram 380V (3-phase) (15-40kW Models) 3.8.5 Electrical Connection Diagram 380V (3-phase) (50-60kW Models) 3.8.6 Electrical Connection Diagram 380V (3-phase) (80kW Model) 3.8.7 Electrical Connection Diagram 380V (3-Phase) (100 kW Model) 3.9 ROOM THERMOSTAT CONNECTION 3.10 ELECTRICITY CONNECTION PARAMETERS...
- Page 4 6.12 AUTOMATIC BY-PASS 7. TECHNICAL TABLE 8. MAINTENANCE 9. GUARANTEE CONDITIONS 10. EXPLODED VIEW (6-30 kW MODELS) 10.1 MAIN HEAT EXCHANGER GROUP DETAIL (6-30 kW MODELS) 10.2 HYDROLIC GROUP DETAIL (6-30 kW MODELS) 10.3 RELAY BOARD GROUP DETAIL (6-30 kW MODELS) 10.4 EXPLODED VIEW PARTS LIST (6-30 kW MODELS) 11.EXPLODED VIEW (32-40kW MODELS) 11.1 MAIN HEAT EXCHANGER GROUP DETAIL (32-40 kW MODELS)
-
Page 5: Safety
1. SAFETY 1.1 SYMBOL KEY This symbol expresses the risk of serious personel injury or death unless taking care of & warnings. This symbol expresses the risks which can cause minor injuries or harms to the environmet and goods. 1.2 SAFETY PRECAUTIONS Do not open the protective cover of the device. -
Page 6: General Explanations
Note: Maktek Omega LCD boiler is manufactured in 3 different specs for variety of user demands such as; heating and domestic hot water (combi), only heating and heating + external how water boiler model. -
Page 7: Introduction Of The Device
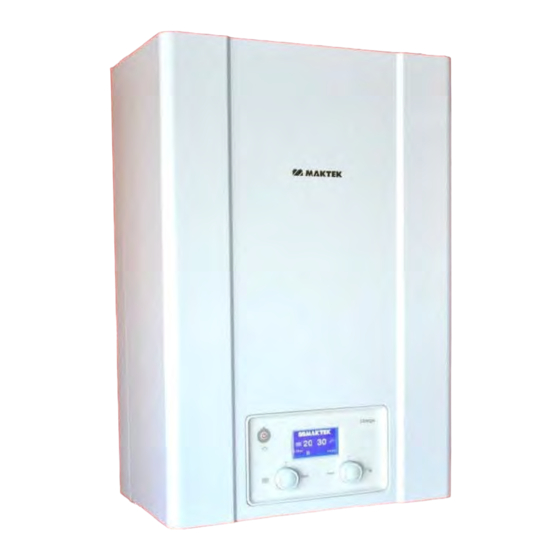
2. INTRODUCTION OF THE DEVICE 2.1 APPERANCE AND EXTERNAL DIMENSIONS Model 6-30 kW 32-40 kW 50-100 kW... -
Page 8: Components Of The Boiler
2.2 COMPONENTS OF THE BOILER 2.2.1 6-30 kW Models 1. Main heat exchanger 14. Automatic air vent 2. Heating elements 15. Expansion tank 3. 3-way valve actuator motor 16. Relay board 4. Flow manifold 17. Cooling fan for relay board 5. -
Page 9: Kw Models
2.2.2 32-40 kW Modeller 1. Main heat exchanger 2. Heating elements 3. 3 Way valve actuator motor 4. Flow manifold 5. Water pressure sensor 6. DHW temperature NTC sensor 7. Control panel and Maniboard 8. Circulation pump 9. Automatic air vent 10. -
Page 10: Kw Models
2.2.3 50-80 kW Models A DETAIL Main heat exchanger Heating elements Control panel and Mainboard Circulation pump Return manifold Automatic air vent 3 bar Safety valve Water pressure switch Relay board Cooling fan for relay board CH temperature NTC sensor Safety thermostat Limit thermostat RCD device... -
Page 11: 100 Kw Model
2.2.4 100 kW Model A DETAYI Main heat exchanger Heating elements Control panel and Mainboard Circulation pump Return manifold Automatic air vent 3 Bar Safety valve Water pressure sensor Relay board Contactor CH temperature NTC sensor Safety thermostat Limit thermostat RCD device Neutral terminal Phase terminals... -
Page 12: Operation Principle Of The Device
2.3 OPERATION PRINCIPLE OF THE DEVICE MAKTEK Omega LCD electric combi boiler provides central heating with the use of panel radiators or underfloor heating pipes. The primary heating circuit water is heated in the main heat exchanger with the heating elements. The hot water circulates the installation with the help of the circulation pump, delivering hot water to the radiators or underfloor heating pipes. -
Page 13: Main Features Of The Boiler
2.4 MAIN FEATURES OF THE BOILER • MAKTEK Omega electric combi boiler uses ONLY electricity as fuel. • Electricity as fuel for heating has no emissions and %100 environment friendly. • There is no heat loss in electric heating. Unlike combustion systems with fossil fuels, there is no chimney therefore no heat loss from the chimney with hot fumes. -
Page 14: Mounting And Installation
3.MOUNTING AND INSTALLATION 3.1 UNPACKING Open the box as seen in the above sketch. Place the box on the ground, arrows on the box pointing to the ground. Cut the cords or remove the staples, fold the lids of the box on each side and turn the box upside down. -
Page 15: Wall Mounting
A: 150 mm C:400 mm B: 300 mm D:450 mm 3.4 WALL MOUNTING • Place the mounting plate parallel to the floor. (Check with spirit level). • Mark the holes on the wall. • Drill on the marked spots and insert the wall plugs. -
Page 16: Heating And Hot Water System Installation Connections
3.5 HEATING AND HOT WATER SYSTEM INSTALLATION CONNECTIONS • At DHW function, please make sure that the pressure of the city water network on cold water inlet side is not more than 6 Bars. If the network pressure is more than 6 Bars, a pressure regulator must be added. -
Page 17: Circulation Pump Information
Filling valve Return water inlet G 3/4 Heating water outlet G 3/4 3 bar Safety valve discharge Domestic hot water outlet G 1/2 Cold water inlet G 1/2 3.6 CIRCULATION PUMP INFORMATION 3.6.1 Energy Efficient Pump Indicator Lights (Leds) • Signal display •... - Page 18 Operating button Press Select control mode • Select pump curve (I, II, III) within the control mode Press and hold • Activate the pump venting function (press for 3 seconds) • Activate manual restart (press for 5 seconds) • Lock/unlock button (press for 8 seconds) Control modes and functions Variable differential Recommended for two-pipe heating systems with radi-...
- Page 19 Constant speed (I, II, III) Recommended for systems with fixed system resistance requiring a constant volume flow. The pump runs in three prescribed fixed speed stages (I, II, III). Q/m³/ h...
-
Page 21: 3-Speed Circulation Pump
3.6.2 3-Speed Circulation Pump MAKTEK Omega LCD Boiler can also be supplied with a 3-speed circulation pump. You can choose the required pump speed according to the resistance of your installation. You can use the below diagram for deciding the pump speed. -
Page 22: Boiler Installation Diagrams
3.7 BOILER INSTALLATION DIAGRAMS 3.7.1 With DHW (Plate Heat Exchanger) -
Page 23: Only Heating
3.7.2 Only Heating... -
Page 24: Installation With Hot Water Cylinder
3.7.3 Installation With Hot Water Cylinder... -
Page 25: Electric Connection
3.8 ELECTRIC CONNECTION The electricity connection of the boiler must be made by a quailified electrician. Improper electric connections made by unqualified people may cause failure of critical components of the boiler and will invalidate the warranty. DANGER ! Electric Shock Risk ... - Page 26 50-100kW Circuit Breaker Blue *In 50-100kW models, the RCD device is mounted inside the boiler. The connection between the RCD and the main circuit braker should be made with a suitable dimension cable (see table for electricty connection parameters) and according to the diagram above. The cable connections are clearly marked on the cables to be connected to the RCD device.
-
Page 27: Electrical Connection Diagram 220V (Monophase) (6Kw-12Kw Models)
3.8.3 Electrical Connection Diagram 220V (Monophase) (6kW-12kW Models) DHW temperature NTC sensor Water pressure switch (Optional) CH temperature NTC sensor Float water level sensor Electronic water flow sensor Room thermostat (Optional) Software Ambiant temperature probe (Optional) Interface Wi-fi Module (Optional) Water pressure sensor LCD Backlight Set Glass Fuse... -
Page 28: Electrical Connection Diagram 380V (3-Phase) (15-40Kw Models)
3.8.4 Electrical Connection Diagram 380V (3-phase) (15-40kW Models) CH temperature NTC sensor DHW temperature NTC sensor Electronic water flow sensor Water pressure switch (Optional) Float water level sensor Room thermostat (Optional) Ambient temperature probe (Optional) Software Interface Wi-fi Module (Optional) Water pressure sensor LCD Backlight Set Glass fuse... -
Page 29: Electrical Connection Diagram 380V (3-Phase) (50-60Kw Models)
3.8.5 Electrical Connection Diagram 380V (3-phase) (50-60kW Models) DHW temperature NTC sensor CH temperature NTC Sensor Water pressure switch (Optional) Electronic water flow sensor Float water level sensor Room thermostat (Optional) Ambiant temperature probe (Optional) Software Interface Wi-fi Module (Optional) Water pressure sensor LCD Backlight Set Glass fuse... -
Page 30: Electrical Connection Diagram 380V (3-Phase) (80Kw Model)
3.8.6 Electrical Connection Diagram 380V (3-phase) (80kW Model) DHW temperature NTC sensor CH tewmperature NTC sensor Water pressure switch (Optional) Electronic water flow sensor Float water level sensor Room thermostat (Optional) Ambiant temperature probe (Optional) Softweare Wi-fi Module (Optional) Interface Water pressure sensor LCD Backlight Set Glass fuse... -
Page 31: Electrical Connection Diagram 380V (3-Phase) (100 Kw Model)
3.8.7 Electrical Connection Diagram 380V (3-Phase) (100 kW Model) DHW temperature NTC Sensor CH temperature NTC Sensor SWater pressure switch (Optional) Float water level sensor Electronic water flow sensor Room thermostat (Optional) Ambient temperature sensor (Optional) Wi-fi Module (Optional) Water pressure sensor LCD Backlight Set Glass fuse Earth connection... -
Page 32: Room Thermostat Connection
3.9 ROOM THERMOSTAT CONNECTION An electric terminal is left outside the control panel plastic box so that the control panel is not opened while connecting an optional room thermostat. You can see this terminal in the below picture. Remove the jumper cable and connect the room thermostat volt free cables. -
Page 33: Commissioning
4. COMMISSIONING 4.1 FILLING WATER TO THE SYSTEM a) Make sure that the automatic air vent valve on the circulation pump is loose. b) Turn on the filling valve and fill water until the pressure reaches 1.5 bars on the LCD screen. -
Page 34: Starting Up
4.2 STARTING UP First time operation of the boiler must be done by authorised service personel in order to validate the guarantee of the boiler and to ensure the boiler runs efficiently and safely for many years. Authorized service personnel will check all requirements in the startup request form, which must be filled by the installer before the service comes to validate the boiler for first time operation. -
Page 35: User Instructions
5. USER INSTRUCTIONS 5.1 CONTROL PANEL Omega Reset Mode 1111 All functions required to run the boiler is done via two adjustment knobs and and on/off button on the control panel. All operation parameters and adjustments can be followed on the LCD screen. - Page 36 D. LCD SCREEN All operation parameters are shown with icons on the LCD screen. The definitions of the icons are explained below. a) Error Icon: Shows that there is an ongoing failure. b) Ambient Temperature Operation Curve: Shows the automatic operation curve when the ambient temperature probe is connected.
- Page 37 i) Operation Indicators: • Room Thermostat Icon: In boiler where a room thermostat is connected (optional equipment) this icon indicates that the room reached the adjusted temperature and boiler operation is stopped by the room thermostat. NOTE: In case of a room thermostat failure, this icon will be shown on the LCD screen constantly and the boiler will not start.
-
Page 38: Operation Instructions
5.2 OPERATION INSTRUCTIONS 5.2.1 TURNING ON THE BOILER Omega Reset Mode 1111 Press the ON/OFF (home) button to turn on the boiler. Adjust the central heating and domestic hot water temperatures shown on the LCD screen to your desired values and the boiler will operate according to your adjustments. -
Page 39: System Settings
Inside this menu, you can select the desired operation mode by turning P2 knob. When you complete your selection, you can press on P1 to return to the main menu or press the home (on/off) button to return to operation screen. Summer mode only Boiler only works in CH Standart operation... -
Page 40: Date - Time Setting
5.2.3.1 Date - Time Setting Select the Date -Time setting menu with P1 knob. Turn P1 to scroll through units, turn P2 knob to ajdust the desired values for selected units. When the adjustment is complete scroll to back icon and press P1 to return to system settings menu. CAUTION! Date-Time setting must be made accurately in order to be able to use the weekly timer function. -
Page 41: Weather Compensation
5.2.3.4 Weather Compensation MAKTEK Omega LCD boiler has a automatic operation feature with weather compensation when an optional ambient temperature probe is connected. When this probe is installed to your boiler by an authorized service, ambient temperature icon, ambient temperature value and weather compensation coefficient curve icon will be shown on the LCD screen. - Page 42 Radiator Ambient Temperature Heating Curve Coefficient Outside Temperature Underfloor Heating ___.__ Ambient Temperature -0,2 -0,4 -0,6 -0,8 -1,2 -1,4 -1,6 -1,8 -2 Heating Curve Coefficient -1 O Outside Temperature...
-
Page 43: Weekly Timer
5.2.4 WEEKLY TIMER Maktek Omega LCD boiler's weekly timer function enables you to set automatic operation time intervals for each day of the week seperately. Press P1 knob to enter the main menu and scroll to the Week Timer menu to select wtih P1. -
Page 44: Error Codes And Troubleshooting
5.3 ERROR CODES AND TROUBLESHOOTING Solution Reason Error Code Explanation • Disconnected sensor cable Check the cable and socket CH Temperature • NTC sensor failure Replace the NTC sensor Sensor Error • Mainboard failure Replace the mainboard •... -
Page 45: Safety System Of The Device
6. SAFETY SYSTEM OF THE DEVICE MAKTEK Omega LCD Electric Combi Boiler has the following safety features in order to ensure the highest level of safety and highest technology. 6.1 RCD DEVICE (SHORT CIRCUIT RELAY) In case of short circuit, the relay shuts off the electricity connection and prevents any possibility of electruction, protecting human health and safety. -
Page 46: Frost Protection
6.7 DOMESTIC HOT WATER NTC SENSOR In Maktek Omega LCD boiler, temperature control is done with precise NTC sensors. When a sensor failure occurs in hot water system, H2 warning code appears on LCD screen. 6.8 CENTRAL HEATING NTC SENSOR When a sensor failure occurs in central heating system.H1 warning code appears on the LCD... -
Page 47: Technical Table
7. TECHNICAL TABLE... -
Page 48: Maintenance
8. MAINTENANCE We recommend that the following controls are made by authorised service once a year. 1- Check for leaks in the water circuit and, if necessary, replace the joints to ensure water tightness. 2- Check the status of the device visually. 3- Check the safety system of the heating system if it is working properly. - Page 49 11- Boilers that are kept inappropriately, as showroom items for a long time. 12- Unavailability of the documents that the authorized service issues after the first operation.The user must keep these documents at all times. 13- Boilers with damaged or modified serial numbers. 14- When the temperature of the water drops below 0°C there is a risk of freezing and the system water must be drained if the electrical connection of the device is not connected.
-
Page 50: Exploded View (6-30 Kw Models)
10. EXPLODED VIEW (6-30 kW MODELS) Below drawing belongs to 24kW model. • 6-10 kW models have a single heating element. • 12-15 kW models have 2 heating elements. The manufacturer reserves the right to make changes to the parts and design of the boiler. -
Page 51: Main Heat Exchanger Group Detail (6-30 Kw Models)
10.1 MAIN HEAT EXCHANGER GROUP DETAIL (6-30 kW MODELS) -
Page 52: Hydrolic Group Detail (6-30 Kw Models)
10.2 HYDROLIC GROUP DETAIL (6-30 kW MODELS) -
Page 53: Relay Board Group Detail (6-30 Kw Models)
10.3 RELAY BOARD GROUP DETAIL (6-30 kW MODELS) -
Page 54: Exploded View Parts List (6-30 Kw Models)
10.4 EXPLODED VIEW PARTS LIST (6-30 kW MODELS) 40. Plate heat exchanger o-ring 1. Control panel 41. 3/4" connector clips 2. LCD screen glass 42. Return manifold 3/4" connector 3. Control knobs 43. Return manifold 1/2" connector 4. Mainboard 44. 1/2" connector clips 5. -
Page 55: Exploded View (32-40Kw Models)
11. EXPLODED VIEW (32-40kW MODELS) The manufacturer reserves the right to make changes to the parts and design of the boiler. -
Page 56: Main Heat Exchanger Group Detail (32-40 Kw Models)
11.1 MAIN HEAT EXCHANGER GROUP DETAIL (32-40 kW MODELS) -
Page 57: Hydrolic Group (32-40 Kw Models)
11.2 HYDROLIC GROUP (32-40 kW MODELS) -
Page 58: Relay Board Group Detail (32-40 Kw Models)
11.3 RELAY BOARD GROUP DETAIL (32-40 kW MODELS) -
Page 59: Exploded View Parts List (32-40 Kw Models)
11.4 EXPLODED VIEW PARTS LIST (32-40 kW MODELS) 42. Plate heat exchanger o-ring 1. Control knobs 43. 3/4" connector clips 2. Control panel 44. Return manifold 3/4" connector 3. LCD screen glass 45. Return manifold 1/2" connector 4. Mainboard 46. 1/2" connector clips 5. -
Page 60: Exploded View (50-80 Kw Models)
12. EXPLODED VIEW (50-80 kW MODELS) The manufacturer reserves the right to make changes to the parts and design of the boiler. -
Page 61: Main Heat Exchanger Group Detail (50-80 Kw Models)
12.1 MAIN HEAT EXCHANGER GROUP DETAIL (50-80 kW MODELS) -
Page 62: Relay Board Group Detail(50-80 Kw Models)
12.2 RELAY BOARD GROUP DETAIL(50-80 kW MODELS) -
Page 63: Exploded View Parts List (50-80 Kw Models)
12.3 EXPLODED VIEW PARTS LIST (50-80 kW MODELS) 1. Control knobs 31. Heating element gasket 2. Control panel 32. 3/4" gasket 3. LCD screen glass 33. Main heat exchanger 4. Mainboard 34. Manuel air vent 5. Control panel rear cover 35. -
Page 64: Exploded View (100 Kw Model)
13. EXPLODED VIEW (100 kW MODEL) The manufacturer reserves the right to make changes to the parts and design of the boiler. -
Page 65: Main Heat Exchanger Group Detail (100 Kw Model)
13.1 MAIN HEAT EXCHANGER GROUP DETAIL (100 kW MODEL) -
Page 66: Relay Board Group Detail (100 Kw Model)
13.2 RELAY BOARD GROUP DETAIL (100 kW MODEL) -
Page 67: Exploded View Parts List (100 Kw Model)
13.3 EXPLODED VIEW PARTS LIST (100 kW MODEL) 1. Control knobs 31. 3/4" gasket 2. Control panel 32. Copper flow pipe 3. LCD screen glass 33. Copper return pipe 4. Mainboard 34. Water pressure sensor 5. Control panel rear cover 35. -
Page 68: Ecomissioning
14. DECOMISSIONING - Use the on/off button to switch off the boiler. - Disconnect the boiler from the power grid. - Close the water inlet valve and all valves of the installation. - Drain the water inside the boiler by turning the safety valve knob. The water will be discharged from the drain tube. -
Page 69: Erp Product Information
16.1 ERP PRODUCT INFORMATION (In accordance with EU regulation no. 813/2013, 814/2013) - Page 70 10013 Street. No. 14 A.O.S.B. Çiğli - IZMIR / TURKEY Customer care: sales@maktek.com.tr Customer Hot Line: +902323280365 www.maktek.com.tr...
Need help?
Do you have a question about the OMEGA LCD and is the answer not in the manual?
Questions and answers